UpCloud uses a prepaid system where you can add balance to your account by making a payment at any time. Your services are then deducted from this balance on an hourly basis. Below are explained our two methods for adding balance to your UpCloud account using a credit card or PayPal.
The credit cards we currently support are listed in our accepted payment methods. We also have quick instructions for adding balance using PayPal, if you prefer paying with PayPal.
Note that at UpCloud, VAT in the EU is paid when adding balance to your account according to the rules of your country. VAT does not apply to users from outside the EU. Business users registered for VAT should add their valid VAT identification number to their UpCloud account billing details to exclude VAT in the payments.

Automated payment
Automated recurring credit card payments are an easy way to set up carefree payments and avoid running low on funds. Unlike normal monthly subscriptions that simply charge once every 30 days, the UpCloud recurring payments look after your account balance, and only schedule payments when needed based on your usage and the limits you have set.
Therefore, we recommend using recurring payments for reliable, hands-free management of your account balance.
To configure the automated payments, log into your UpCloud Control Panel. Go to the Billing section in your Account and see the tab for Automated payment.
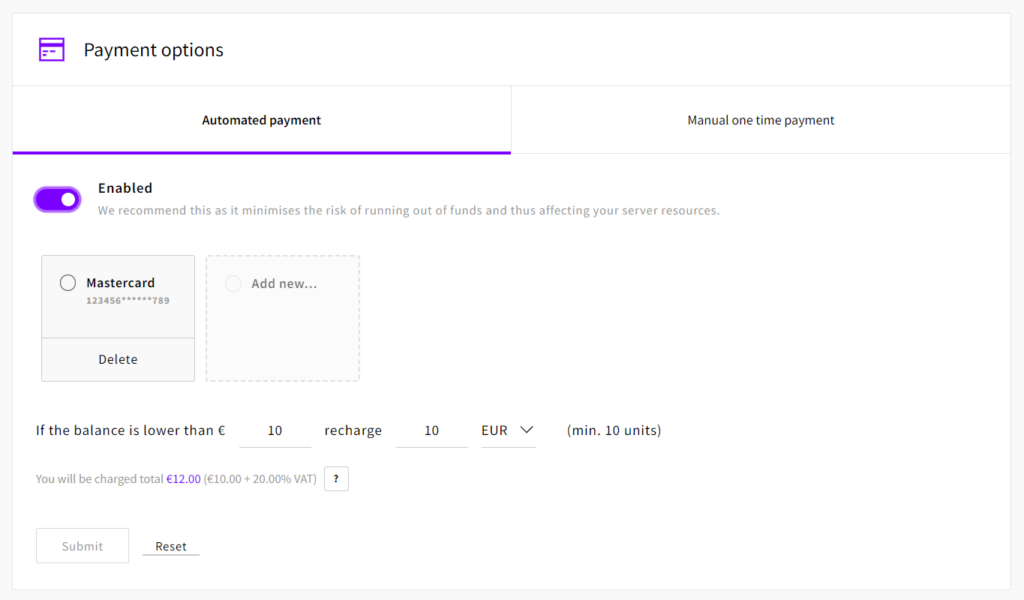
Enter the following information:
- Click the toggle to Enable the automation
- Choose a previously entered credit card or add a new one
- Enter the balance limit that defines when new payments should be made
- Enter the amount you wish to add when your account balance goes below the limit you set in the previous field and select your preferred currency.
- Finally, click the Submit button to confirm.
With automated payments, you will never have to worry about forgetting to top up your account balance. Depending on your current account balance and the limit you selected, you might not be billed immediately. But rest assured your servers will run uninterrupted providing 100% uptime for your web applications and services.
Manual one time payment
When you decide during or after your trial that you wish to continue using your UpCloud services, you can upgrade your account to receive full access to all of our features by making a one-time payment.
Making a manual payment and adding to your account balance is easy. First, log into your UpCloud Control Panel. Go to the Billing section in your Account and click the tab for Manual one time payment.
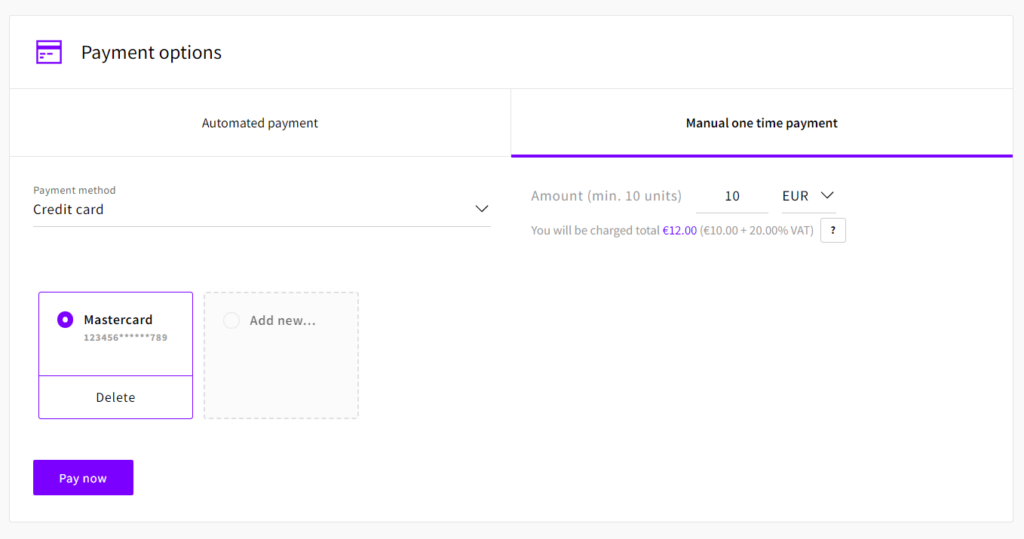
Then select from the options below.
- Select Credit card as the payment method
- Choose the amount you wish to add, the minimum is 10 EUR
- Select your preferred currency
- Choose a previously saved credit card or add a new one
- Press Pay now to proceed
- Then click OK to confirm the payment
Once the payment is completed, your account balance is updated to reflect the amount you paid. Also if this payment was your first time adding balance to your UpCloud account, your account will then also have been upgraded for full access.
Managing credit cards
You can add and remove credit cards saved to your account as needed. Log into your UpCloud control panel and go to the Billing section under your Account. Then in the Payment options, you’ll see your currently saved cards and the option to add a new card.
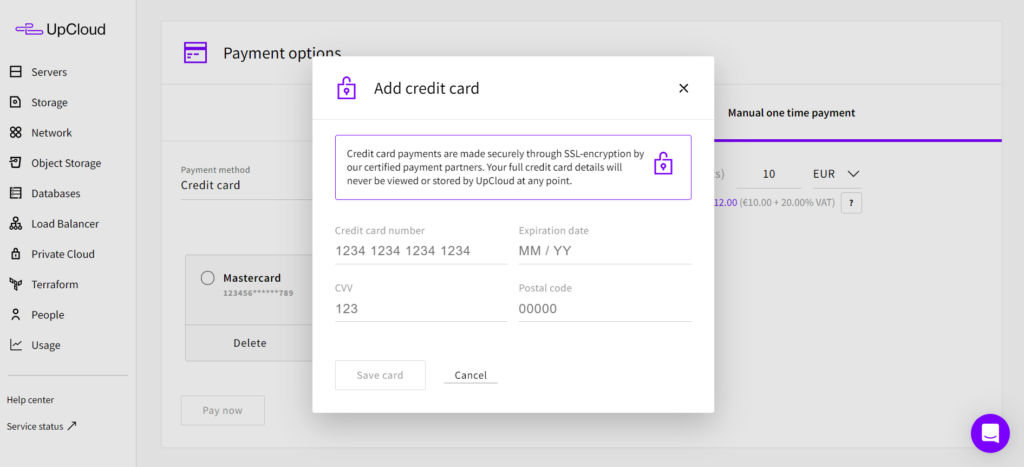
When you click to add a new credit card, you will be presented with the new credit card form.
Complete the form by filling in your credit card details.
- Enter your credit card details as they appear on your card including the expiration date and the security code
- Fill in the postcode that the card is registered to
- Then click the Save card button to confirm.
Your credit card information is safely stored with our payment service provider Braintree Payments and is listed under the payment methods. You can freely delete any saved card details if you wish through the controls on the Billing page.
Choice in currencies
Payments made in other currencies than the default currency, EUR, will be converted according to the daily currency exchange rates.
Mark Ernst / Cyntax
After going back and forth with UpCloud support regarding this issue, I finally figured it out by trailing logs in my browsers as well as Pi-hole.
https://github.com/ory/hydra/issues/3703#issuecomment-1965962421
https://developers.google.com/privacy-sandbox/3pcd/chips
https://medium.com/miro-engineering/the-end-of-third-party-cookies-and-its-impact-on-miro-apps-and-integrations-ee73358cda1e
“Chrome has started the deprecation of third party cookies since the last month. This is a serious issue.”
In Firefox, if you enter “about:config” and accept the “risk” you should enter “network.cookie.cookieBehavior” into your search bar and change the (default) 5 (Reject All) to 0 (Allow all). You can change this back after you’ve done your automatic payment application.
In Chrome, if you enter “chrome://flags/#third-party-storage-partitioning” in the URL bar you have to Disable this setting. Nothing more. Again, if you’re not happy with it being off, turn it back on after you’re done.