
Custom server images
Custom images are a useful tool for creating new servers with the same base configuration. It is also useful if you just need to set up a server similar to what you already have and wish to skip the hassle of configuring a new server from scratch.
Imaging a server creates a new storage disk that is a 1:1 copy of the base server’s storage. The custom image can then be used to deploy new servers with the same features and settings.
Before imaging
Before imaging a server, you should check through your server to make sure everything is working as expected. For servers running CentOS 6.7 or older and Ubuntu 12.04 or older, you should rename the current MAC address reference file to avoid extra reboots.
sudo mv /etc/udev/rules.d/70-persistent-net.rules /etc/udev/rules.d/70-persistent-net.rules.oldThe system will generate a new file again on the next reboot.
Other servers with OSs different to those mentioned above, such as any newer Linux distribution or Windows Servers, do not need any special preparations for imaging.
Creating custom image
Note that the source storage cannot be in use during imaging.
To start imaging a server, log in to your UpCloud Control Panel and shut down the server.
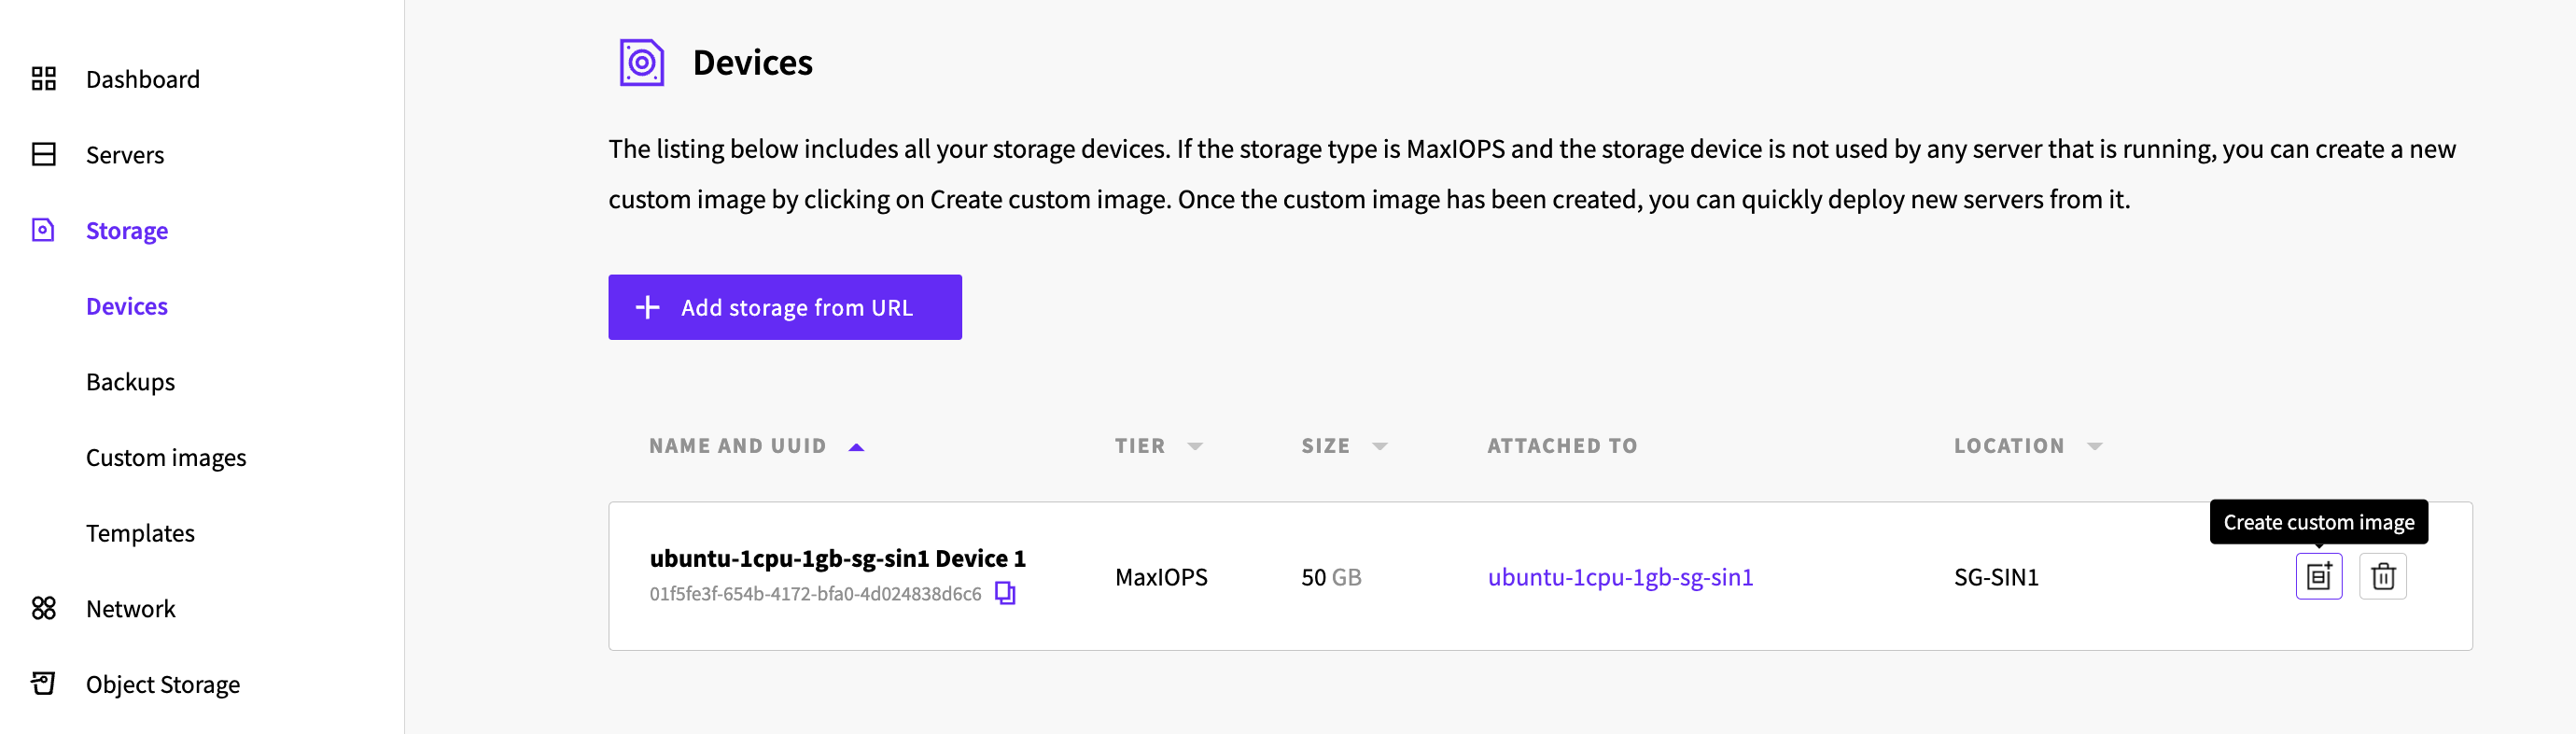
Go to your Storage list and find the system device of the server you wish to image. The Attached to column indicates which server each storage belongs to.
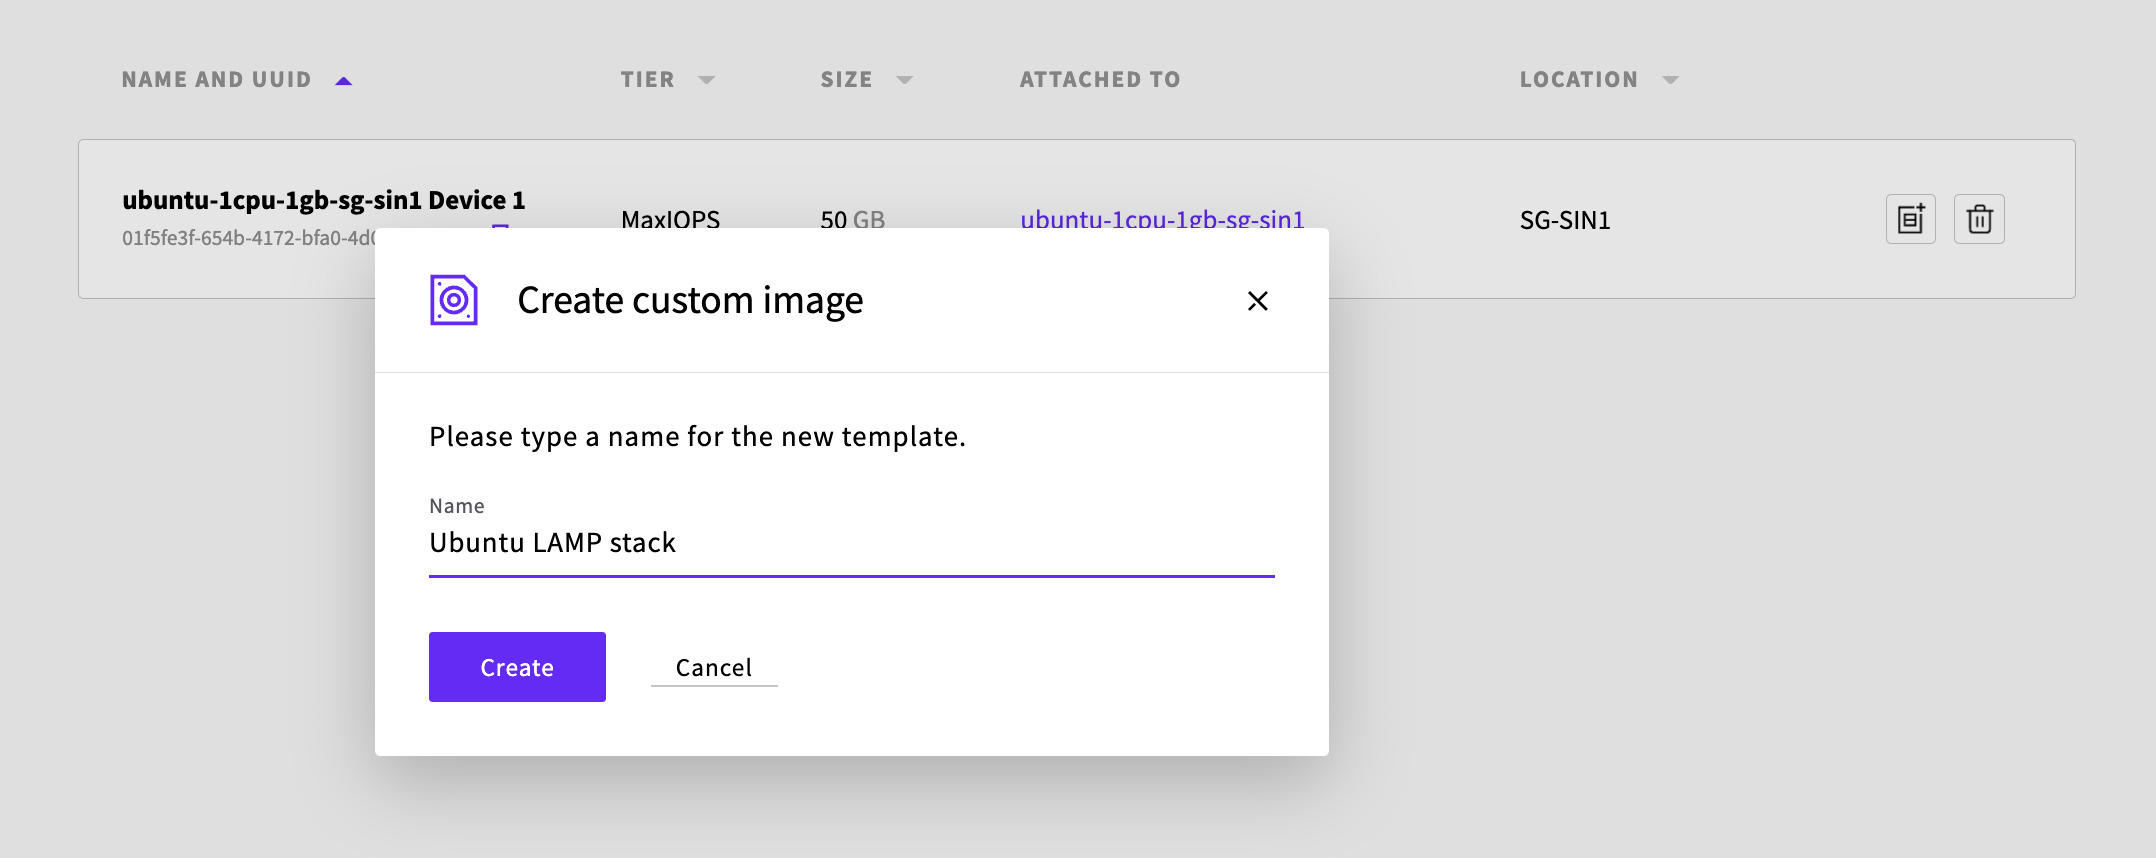
Click the Create custom image button on the storage device you want to copy into a new image. Then give the custom image a name and click the Create button.
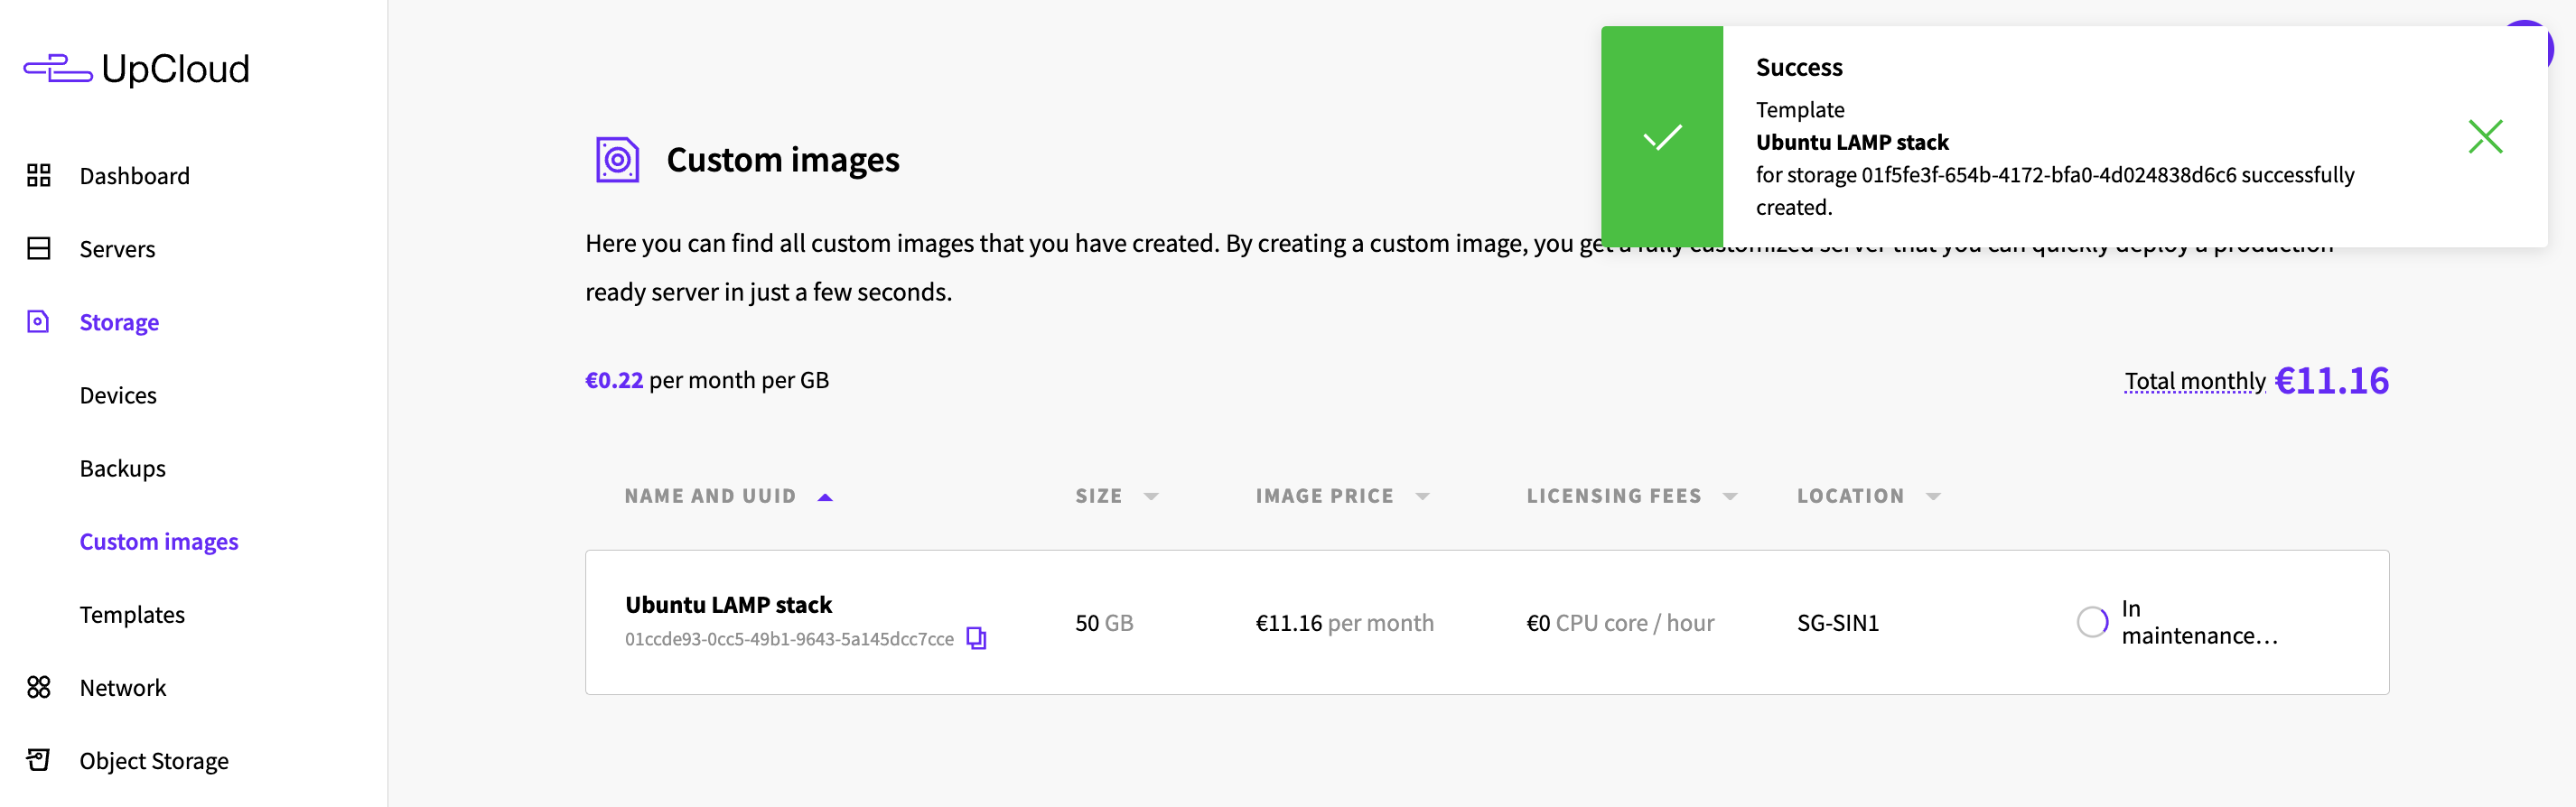
The process of image creation is quick but will vary depending on the size of the storage device. Once finished, you’ll get a notification and the origin server can be started up again.
Deploying custom image
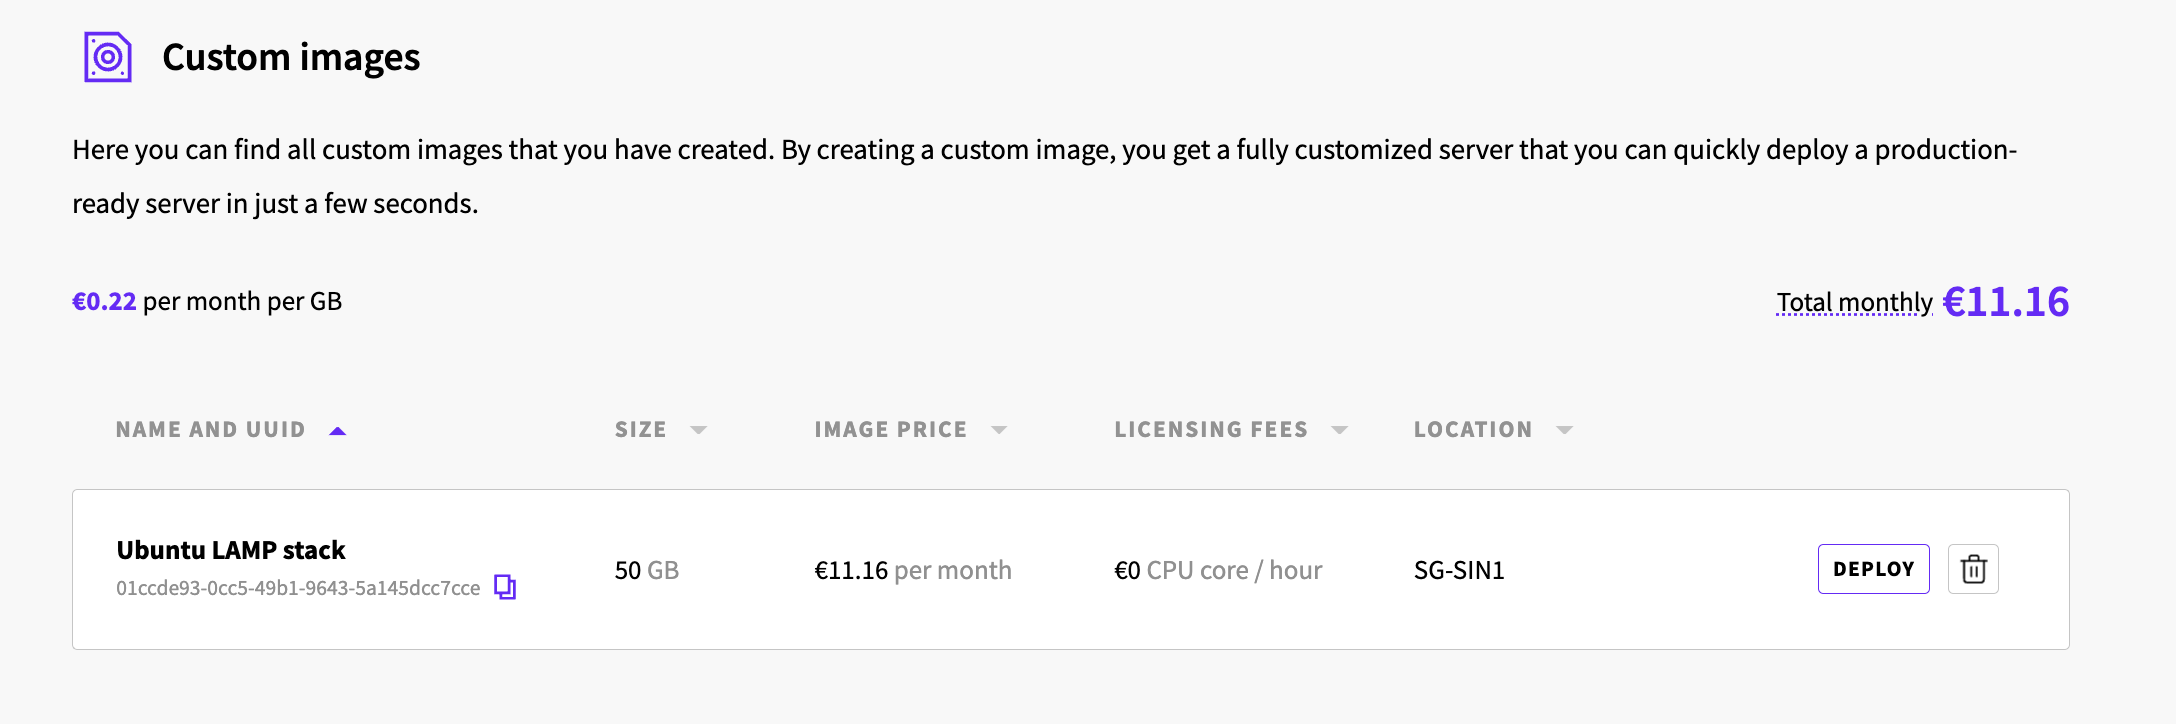
You can find your custom images in your UpCloud Control Panel under the Storage section. The custom images can be deployed straight from the list or you can find the images in the operating system selection on the deployment page.
Deploy a new server using a custom image by clicking the Deploy button.
This will open a new server deployment page with the custom image and associated location preselected.
Pick the server configuration and give your new custom server a hostname, then click the Deploy button when ready.