Sharing work between multiple members of a group is a true and tested method for improving efficiency. However, rarely is it this quick and easy to accomplish by simply configuring Load Balancer!
Managed Load Balancer empowers you to effortlessly build resilience and increase application throughput with simple yet flexible configuration. In this tutorial, we’ll introduce you to the features and options that can help you make the most of your cloud infrastructure.
Prerequisites
The Managed Load Balancer works as the network-level frontend of your application or website by directing connections to your backend servers. As such, to test out the capabilities of the Load Balancer, you will need at least 2 Cloud Servers in the same zone that are connected to the same SDN Private network.
If you are new to the world of software-defined networking, you might want to begin with our tutorial for configuring SDN Private networks. Once all set up on the backend, adding a Load Balancer is just plug-and-play.
Creating Load Balancer
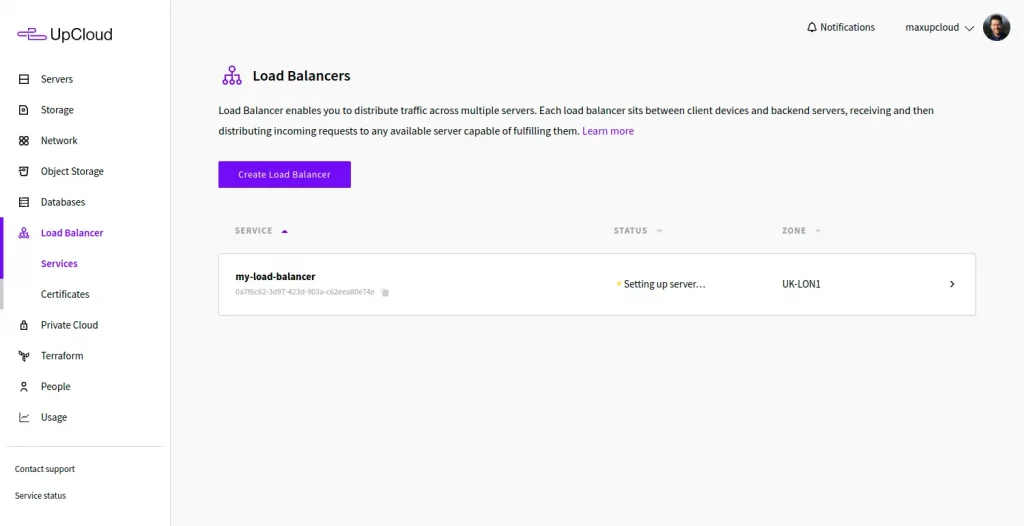
The Managed Load Balancer works on the network level redirecting traffic to the backend Cloud Servers. At this time, the Load Balancer needs to be within the same data centre as the intended backend servers. If you already have Cloud Servers up and running, you can begin by heading over to your UpCloud Control Panel and the Load Balancer section.
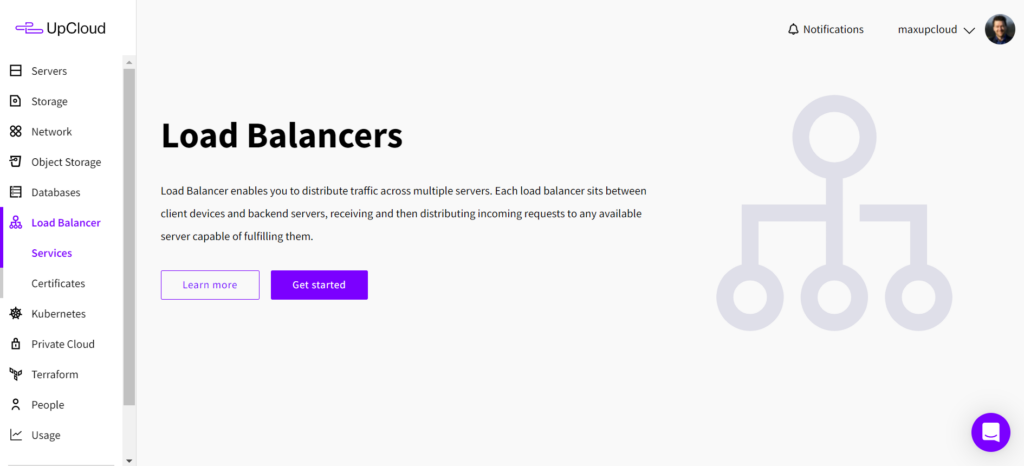
Click the Get started button to open the new Load Balancer configuration page.
You will then be greeted by the first of the three-part configuration wizard.
1. Configuration
In the first part, you have the following selections to make:
- Location is the data centre in which the Load Balancer will be created. Choose the same location as your backend Cloud Servers.
- Plan allows you to pick the session capacity and number of nodes employed by the Load Balancer.
- Service name asks you to set a unique name for your Load Balancer service
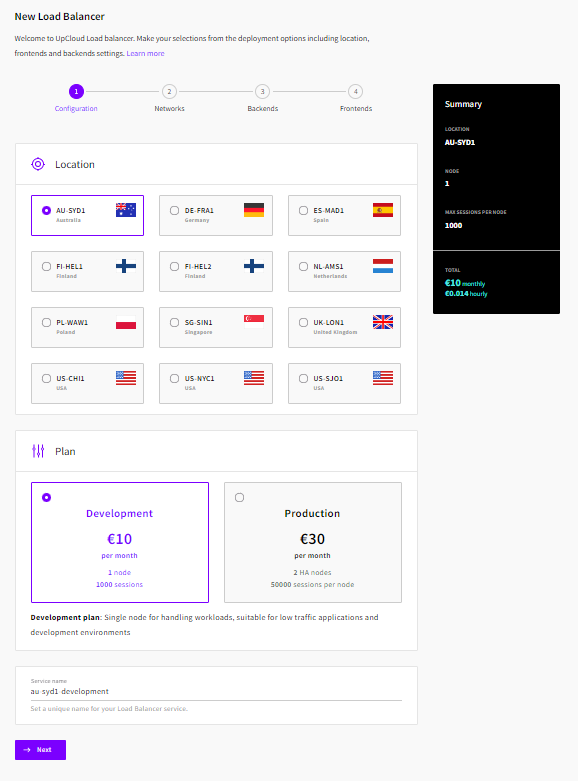
Once you’ve made your selections, click the Next button to proceed.
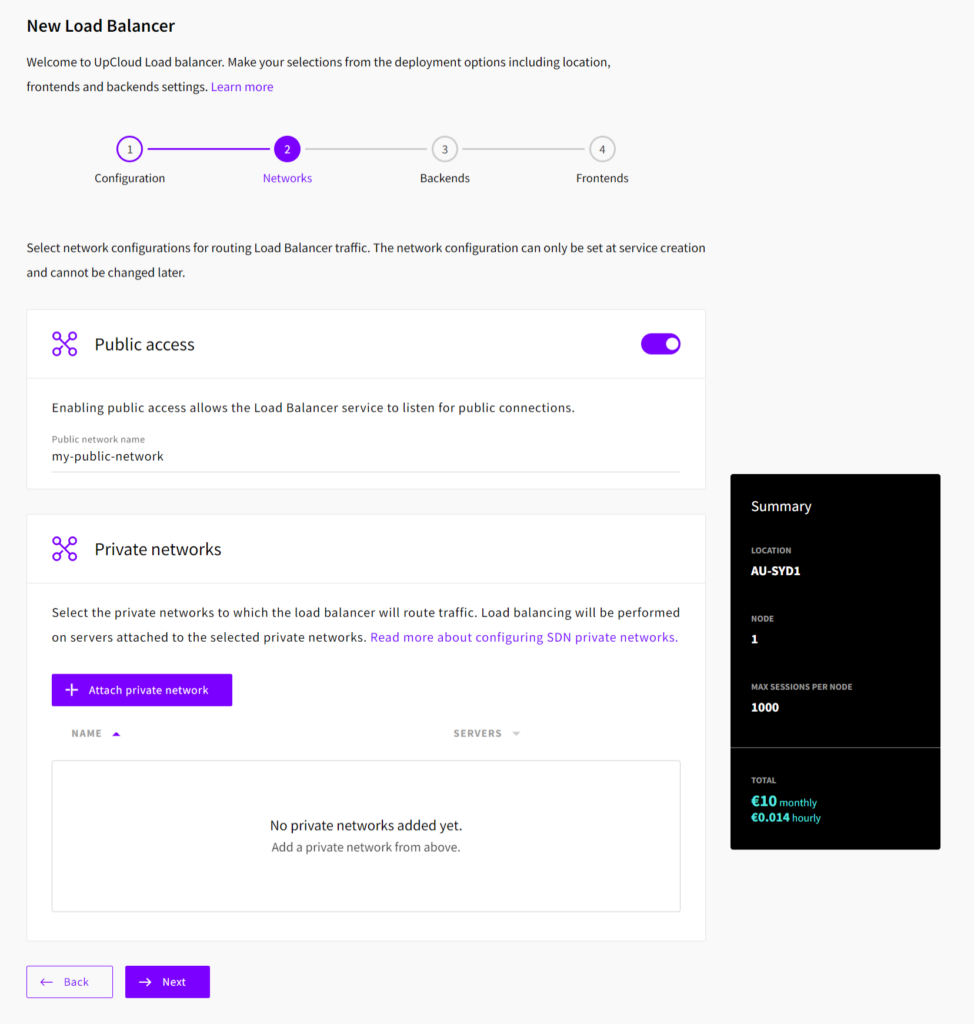
2. Networks
Note that the network configuration can only be set at service creation and cannot be changed later.
- Public access when enabled allows the Load Balancer to listen for public connections. Disable this setting if you plan to use the Load Balancer internally only.
- Private networks allow you to attach one or more SDN Private Networks with any number of Cloud Servers to load balance between.
When set, click the Next button to continue to the next step.
3. Backends
Next up, you will be asked to set up your load-balancing backends. This consists of selecting the appropriate SDN Private network and adding at least one backend with attached Cloud Servers.
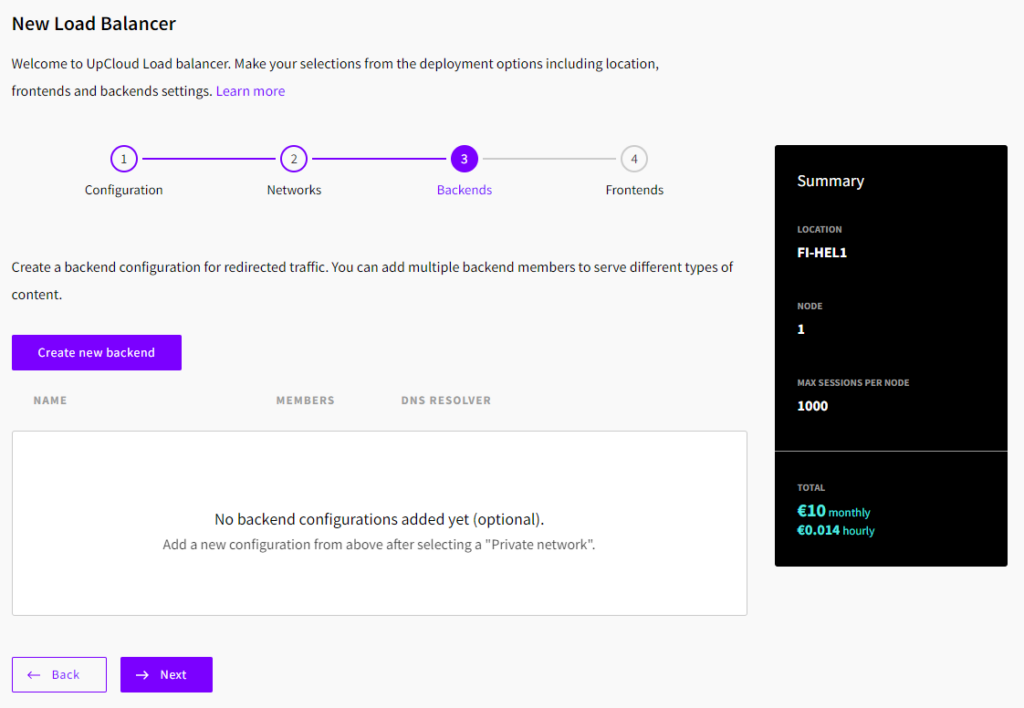
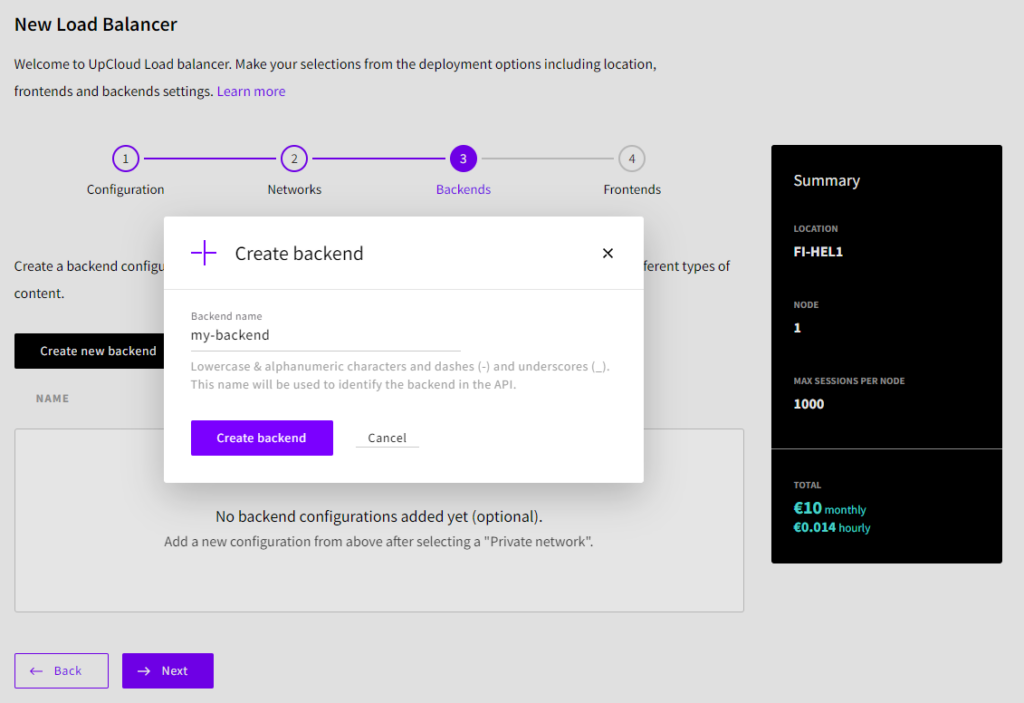
- Backends can be created by clicking the Create new backend button.
- Choose a Backend name and click the Create backend button.
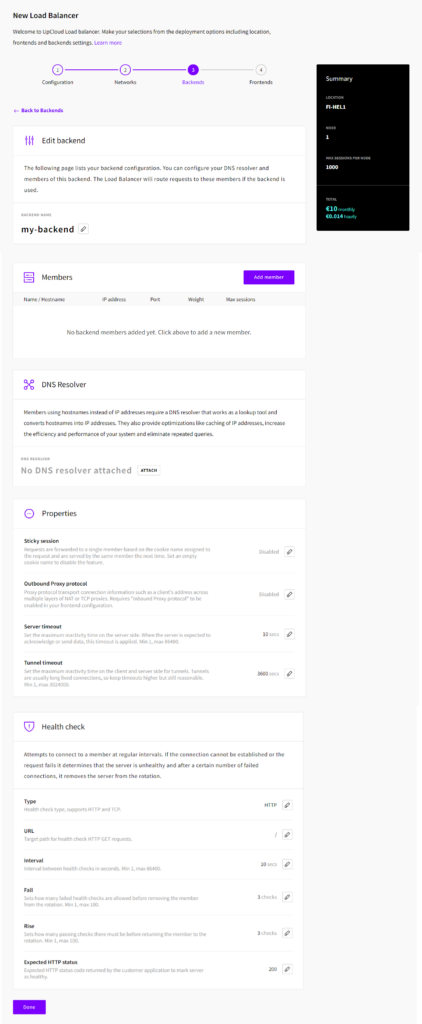
- Then click the Edit button to access the backend configuration.
- Click the Add member button to attach Cloud Servers.
- Note that you can have multiple backends with any number of attached backend servers allowing many possibilities in service configurations.
- DNS Resolver allows you to use hostnames instead of IP addresses by adding a DNS resolver if you have one configured. This is optional.
- Properties give you access to the most commonly customised features to fine-tune your Load Balancer. Adjust the properties as needed or leave them to their default values.
- Health check is part of the core functionality of the Load Balancer which keeps track of the availability of your backend servers. Set the monitoring according to the type of your backend service to allow the Load Balancer to maintain an accurate list of available backend servers.
Once you’ve configured your backend, click the Done button to save the changes. You can then repeat the steps to include multiple backends as needed.
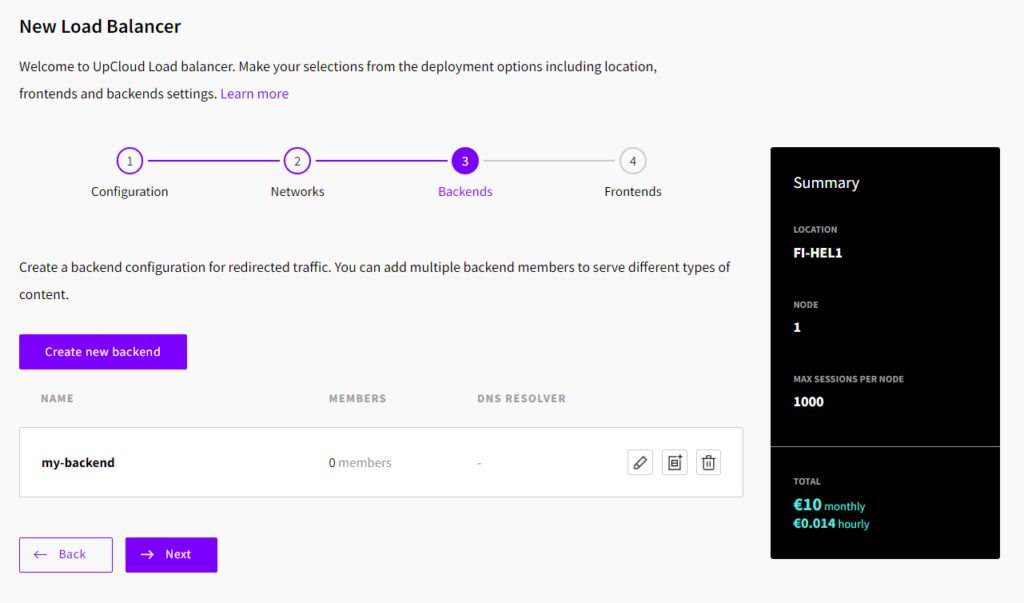
When done, click the Next button again to continue to the last section.
4. Frontends
In the final part of the Load Balancer configuration, you can select the load balancing algorithm as well as create the frontend configurations to manage incoming connections.
The Algorithm determines the method according to which the traffic is distributed between your backends servers.
Managed Load Balancer currently supports round-robin only. Other algorithm options will be added later. Round-robin uses each backend server evenly in rotation.
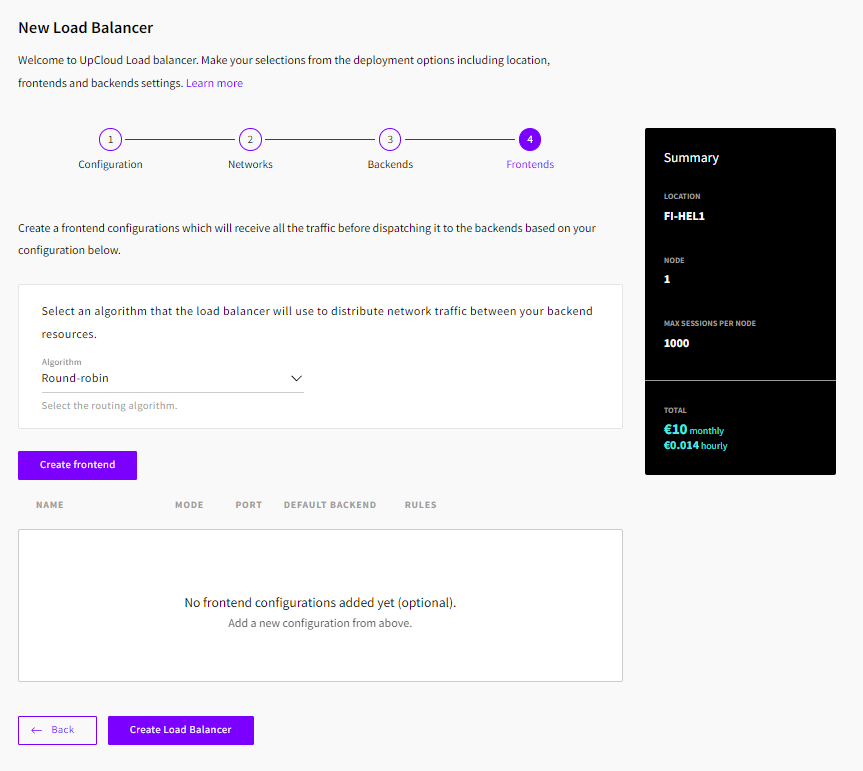
Frontends declare the port numbers and traffic modes your Load Balancer will listen for.
- Create a new one by clicking the Add Frontend button

- Select between HTTP(S) and TCP modes
- Enter the port number
- Choose the default backend
- Include an SSL certificate bundle or add a new one.
- Select any private networks you want the frontend to listen to internally.
With the frontend configuration ready, click the Create frontend button to save the settings. Then repeat the steps to create additional frontends as needed.

After you have configured the required frontends, click the Create Load Balancer button to confirm.
Then just sit back and we take care of the setup in the background.
Load Balancer settings
Once you’ve created your first Load Balancer, you can take a look at the management panel. It provides you with much the same configuration options to further customise your Load Balancer as in the creation step.
Below we’ve outlined what each of the tabs at your Load Balancer can help you with.
Overview
The first tab includes, most importantly, the domain name the Load Balancer will respond to. Additionally, you have the configuration details and the option to resize the service.
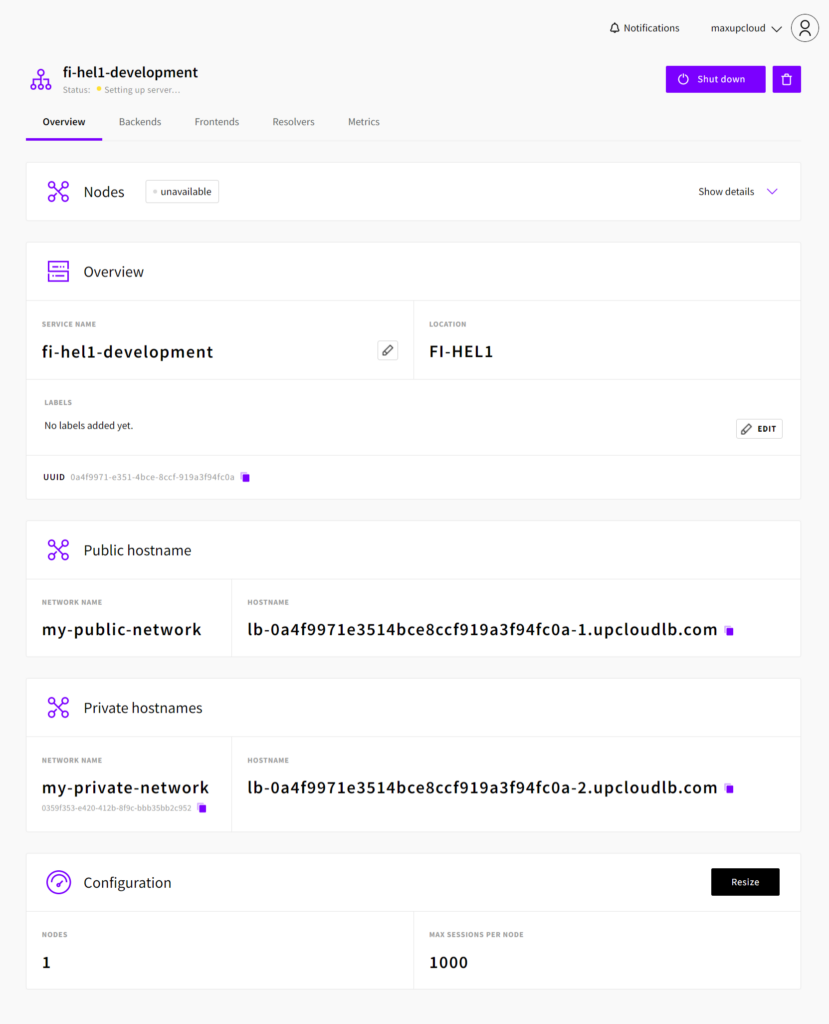
If you configured the front and backends with live services, you can already test the connectivity by simply using the Load Balancer domain. However, for a more human-readable domain, you should create a CNAME record for your own domain to direct traffic to the Load Balancer.
This would be done with your domain name registrar. Have a look at our explanatory guide on DNS systems if you are unfamiliar with how to go about getting this done.
Backends
Besides configuring backends during Load Balancer creation, here you have the same options for managing the backends of your Load Balancer. Create or modify backends to scale your services by adding or removing backend nodes.
Frontends
This section allows you to make changes to your frontend configuration. Add or remove frontends, set which backends each redirects to or create load-balancing rules for more control over the flow of traffic to your application or website.
You can also add or change the SSL certificates used for your Load Balancer and enable secure access.
Resolvers
DNS resolvers are used to look up the IP addresses of the member servers by their host names. Using a DNS resolver can also allow you to further optimise your Load Balancer by caching IP addresses, increase the efficiency and performance of your system, and eliminate repeated queries.
Metrics
In this section, you can view the metrics of your Load Balancer for both backends and frontends. The metrics view is refreshed automatically once per minute.
Use this view to watch for session rates, traffic amount, and backend response times to keep track of your Load Balancer health or troubleshoot connectivity issues.
Managing SSL certificates
Besides creating and managing Load Balancers, you also have the option to set up certificate management by creating SSL certificate bundles. The certificate bundles can then be easily applied to your Load Balancer frontends to enable HTTPS.
You can find detailed instructions on how to obtain dynamic SSL certificates using the certificate manager or how to upload your own certificates in our SSL Certificate tutorial.
Summary
Managed Load Balancer makes it quick and easy to distribute your website traffic or application workload across a scaling cluster. Combined with the built-in certificate management, it can save you time and money that would be better spent developing your services.
Stephen Owens
I really like the no nonsense approach to getting the information we need out without a bunch of confusing references.