UpCloud CDN is in closed beta. To request access, contact Customer Support. Features shown in this guide may change before general availability.
How to add a custom domain to UpCloud CDN
Beta notice
Every UpCloud CDN serves your content from a default hostname such as mysite.b-cdn.net. You can serve your site's images, stylesheets, and scripts from your own domain instead, such as cdn.example.com. Your site's links then use your own domain rather than the CDN's. If you later move your files to another CDN or back to your own server, you point the hostname somewhere else instead of changing every link on your site. To set this up, you add the domain to the CDN as a custom hostname, point it at the CDN with a DNS record, and set up an SSL certificate for it. This guide walks you through those steps.
To serve a website that is already live, such as www.example.com, through the CDN, follow How to serve an existing website through UpCloud CDN instead.
Before you start
You need:
- An UpCloud CDN. To create one, see How to get started with UpCloud CDN.
- Access to your domain's DNS records at your DNS provider.
digandcurlon your computer for the checks in this guide.
This guide uses cdn.example.com for the custom hostname and mysite.b-cdn.net for the CDN's default hostname. Replace them with your own.
Add the hostname to the CDN
In the Control Panel, open CDN in the left-hand menu and select your CDN.
On the Overview tab, enter your hostname in the Hostnames section and select Add hostname.
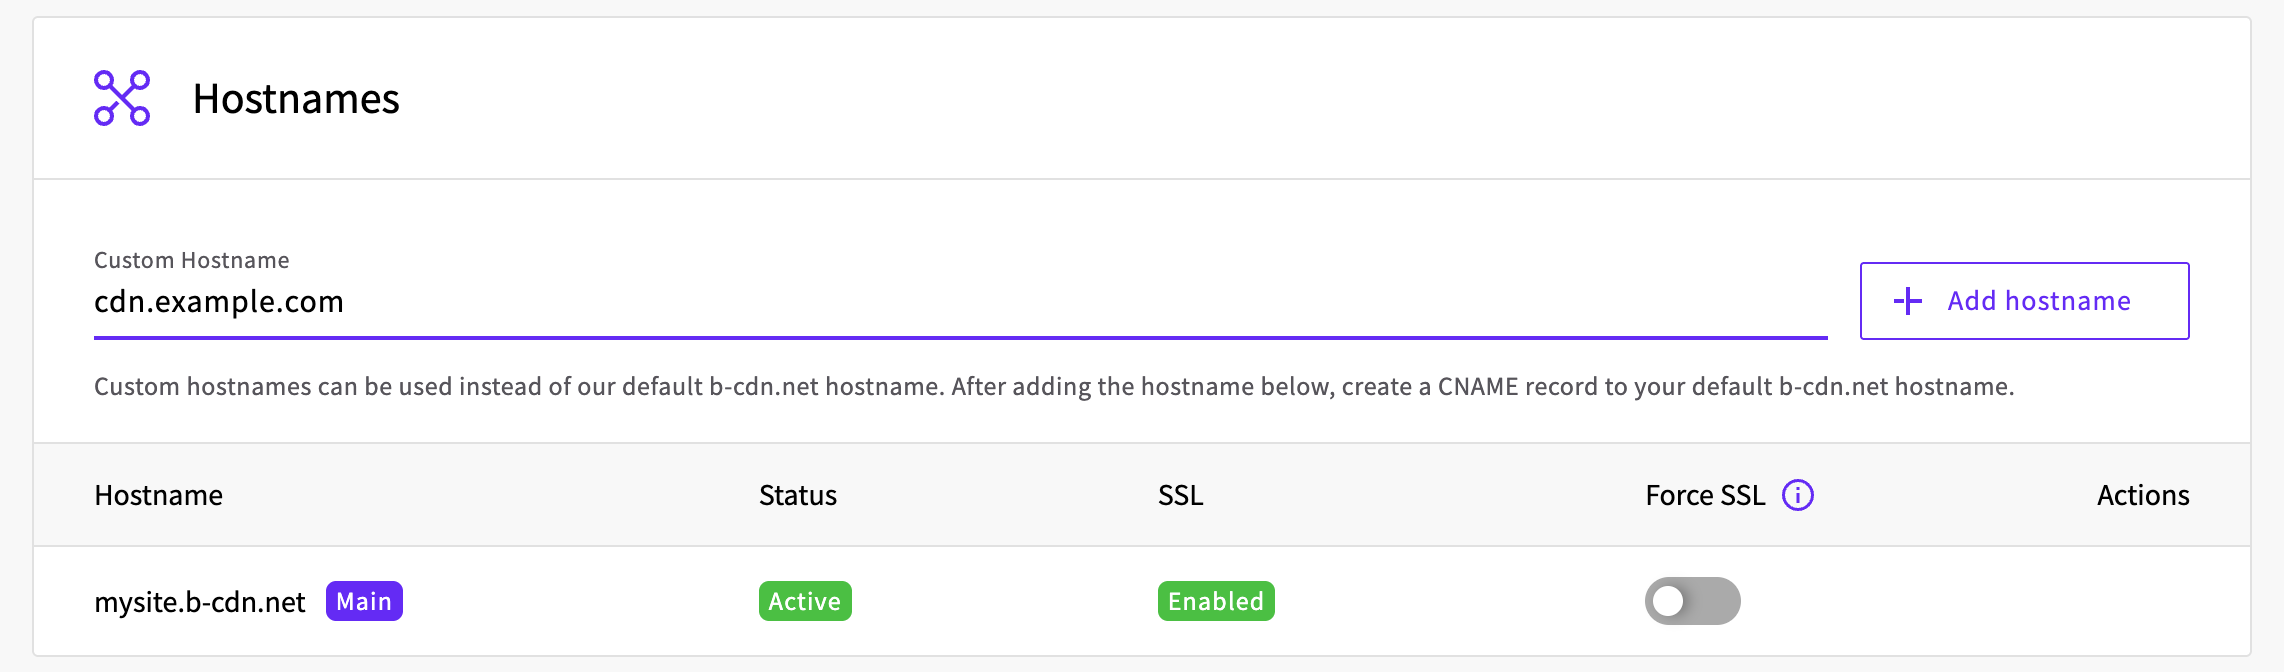
The Set up CNAME DNS record dialog opens and shows the record to create. Keep it open while you create the record.
The hostname is now in the list with the status CNAME missing, which it keeps until the CDN finds the record.
Create the DNS record
At your DNS provider, create a CNAME record with the name and target from the dialog:
| Type | Name | Target |
|---|---|---|
CNAME | cdn.example.com | mysite.b-cdn.net |
Some DNS providers expect the name without your domain, in which case you enter only cdn. For a root domain, create the CNAME-flattened, ALIAS, or ANAME record that your provider offers, with the same target.
Cloudflare: set the record to DNS only
If your domain's DNS is at Cloudflare, turn off the proxy (orange cloud) on the record. With the proxy on, the hostname resolves to Cloudflare's addresses instead of the CDN, so the CDN can't verify it.
To check that the record is visible, look it up with dig:
dig +short cdn.example.com CNAMEIf the record is visible, the answer is your CDN's default hostname:
Output
mysite.b-cdn.net.If the answer is empty, the record isn't visible yet, so run the command again until it shows the hostname. For a root domain, the answer stays empty because your DNS provider answers with the CDN's addresses instead, so go straight to Verify the hostname.
Verify the hostname
Select Verify CNAME in the dialog. Once the CDN finds the record, the dialog shows CNAME verified, and the hostname's status changes to Active.
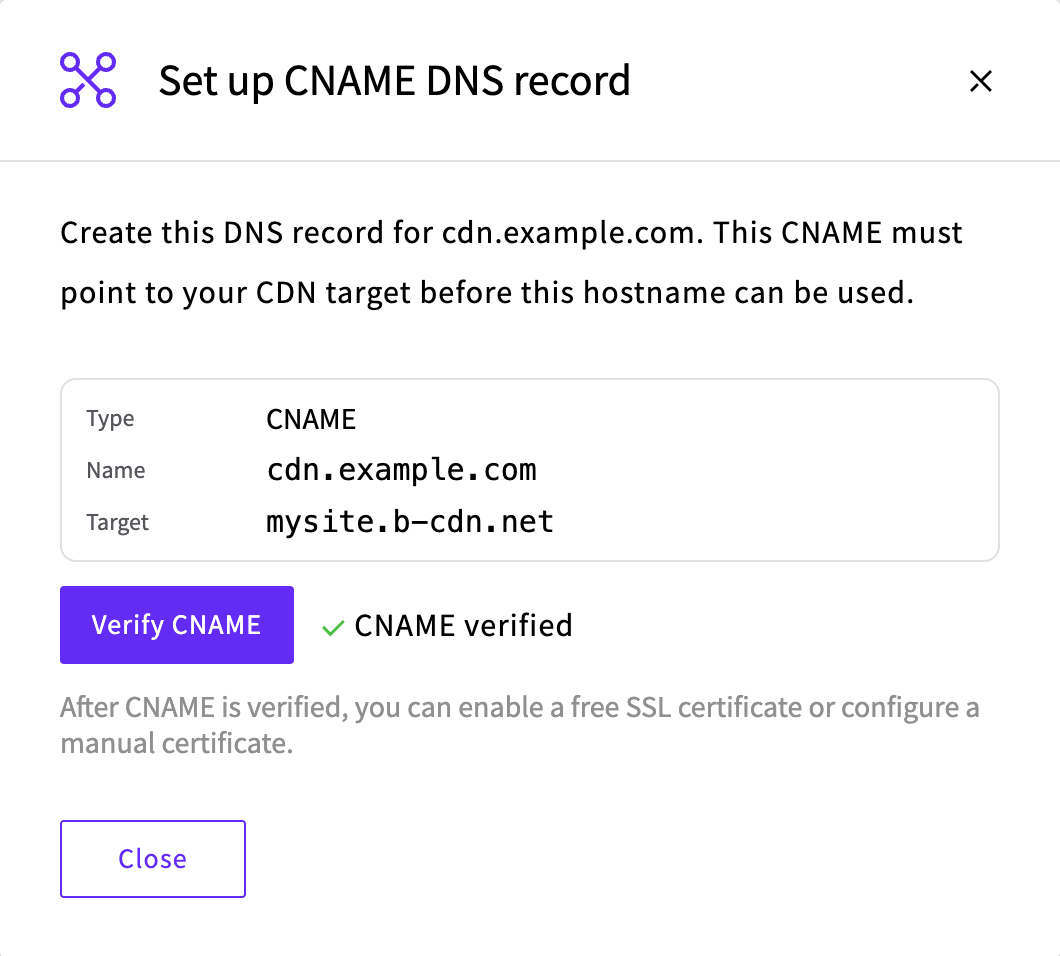
If the dialog shows CNAME record not found, the record isn't visible yet or doesn't match the dialog. Check it with dig as above, and then select Verify CNAME again. You can also close the dialog and come back later: the hostname's row has its own Verify CNAME button, and the Control Panel checks the record again each time you open the CDN.
Set up SSL
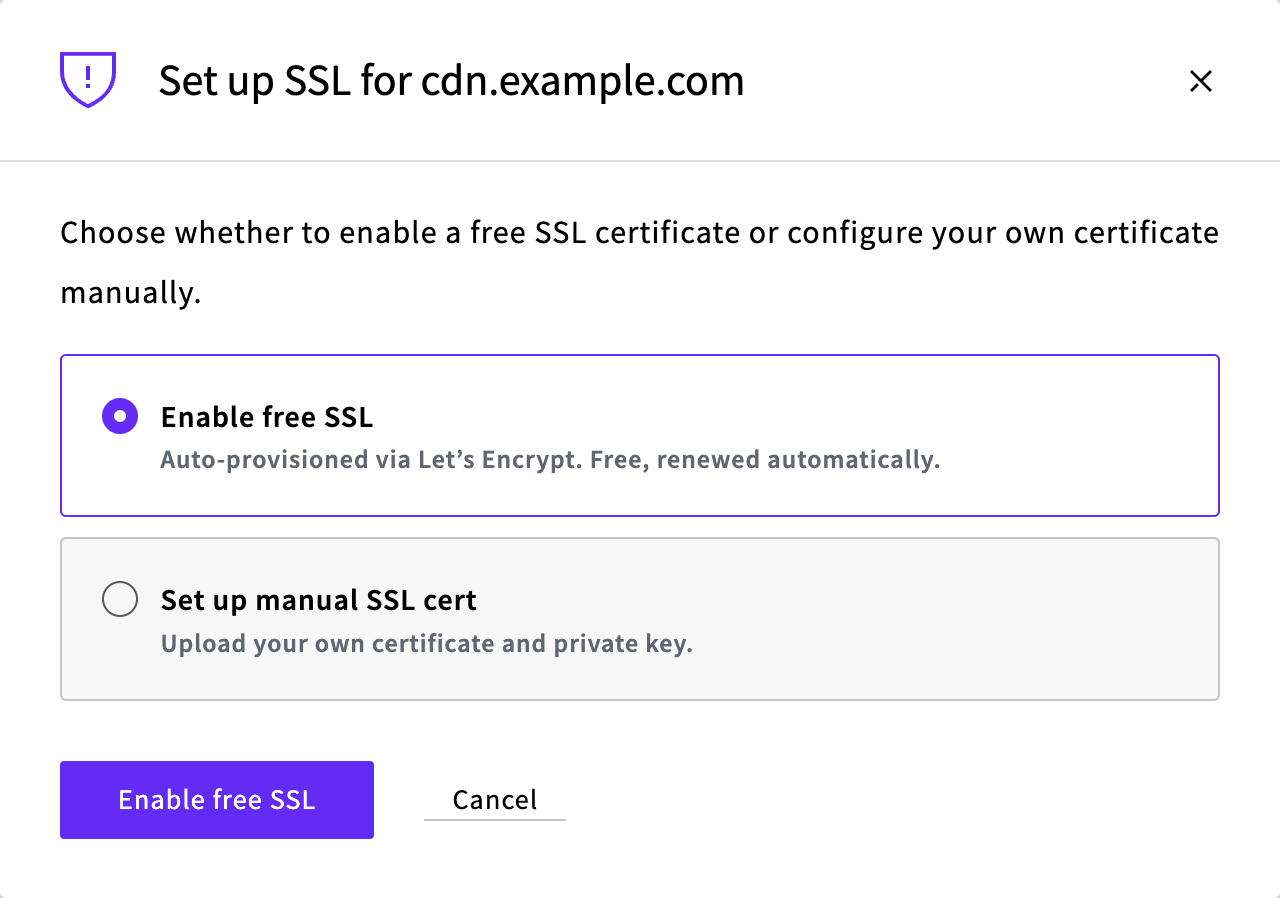
Until the hostname has a certificate of its own, HTTPS requests to it get the CDN's default certificate for *.b-cdn.net, and browsers show a certificate warning. Once the hostname is Active, select Set up SSL in its row and choose how to get a certificate.
Free certificate
Enable free SSL gets a certificate from Let's Encrypt and renews it automatically, which makes it the right choice for most sites. Select Enable free SSL. The SSL column shows Provisioning while the certificate is being issued, and then Enabled.
CAA records
If your domain has CAA records, they must allow Let's Encrypt to issue certificates, or enabling free SSL fails with an error. To check, run dig +short example.com CAA with your domain. If it returns nothing, your domain has no CAA records, so there's nothing to change. If it returns records and none of them contain letsencrypt.org, add a CAA record with the value 0 issue "letsencrypt.org" alongside the existing ones, and then select Set up SSL again.
Your own certificate
If you need a certificate from another certificate authority, select Set up manual SSL cert instead:
- In Certificate, paste your PEM-encoded certificate followed by its intermediate certificates, or select Upload from file. If you use Certbot, this is the
fullchain.pemfile. Many clients, such ascurlon Linux and Python, reject a certificate that comes without its intermediate certificates. - In Private key, paste or upload the private key that belongs to the certificate, without a passphrase. With a key that doesn't match the certificate, HTTPS connections to the hostname fail.
- Select Upload certificate. The SSL column shows
Enabledonce the upload finishes.
Unlike a free certificate, your own certificate isn't renewed automatically, so replace it before it expires. To replace it, delete the hostname as described in Remove a custom hostname, add it again, and upload the new certificate. HTTPS on the hostname is interrupted until the new certificate is in place, so plan the replacement for a quiet time.
Redirect HTTP to HTTPS
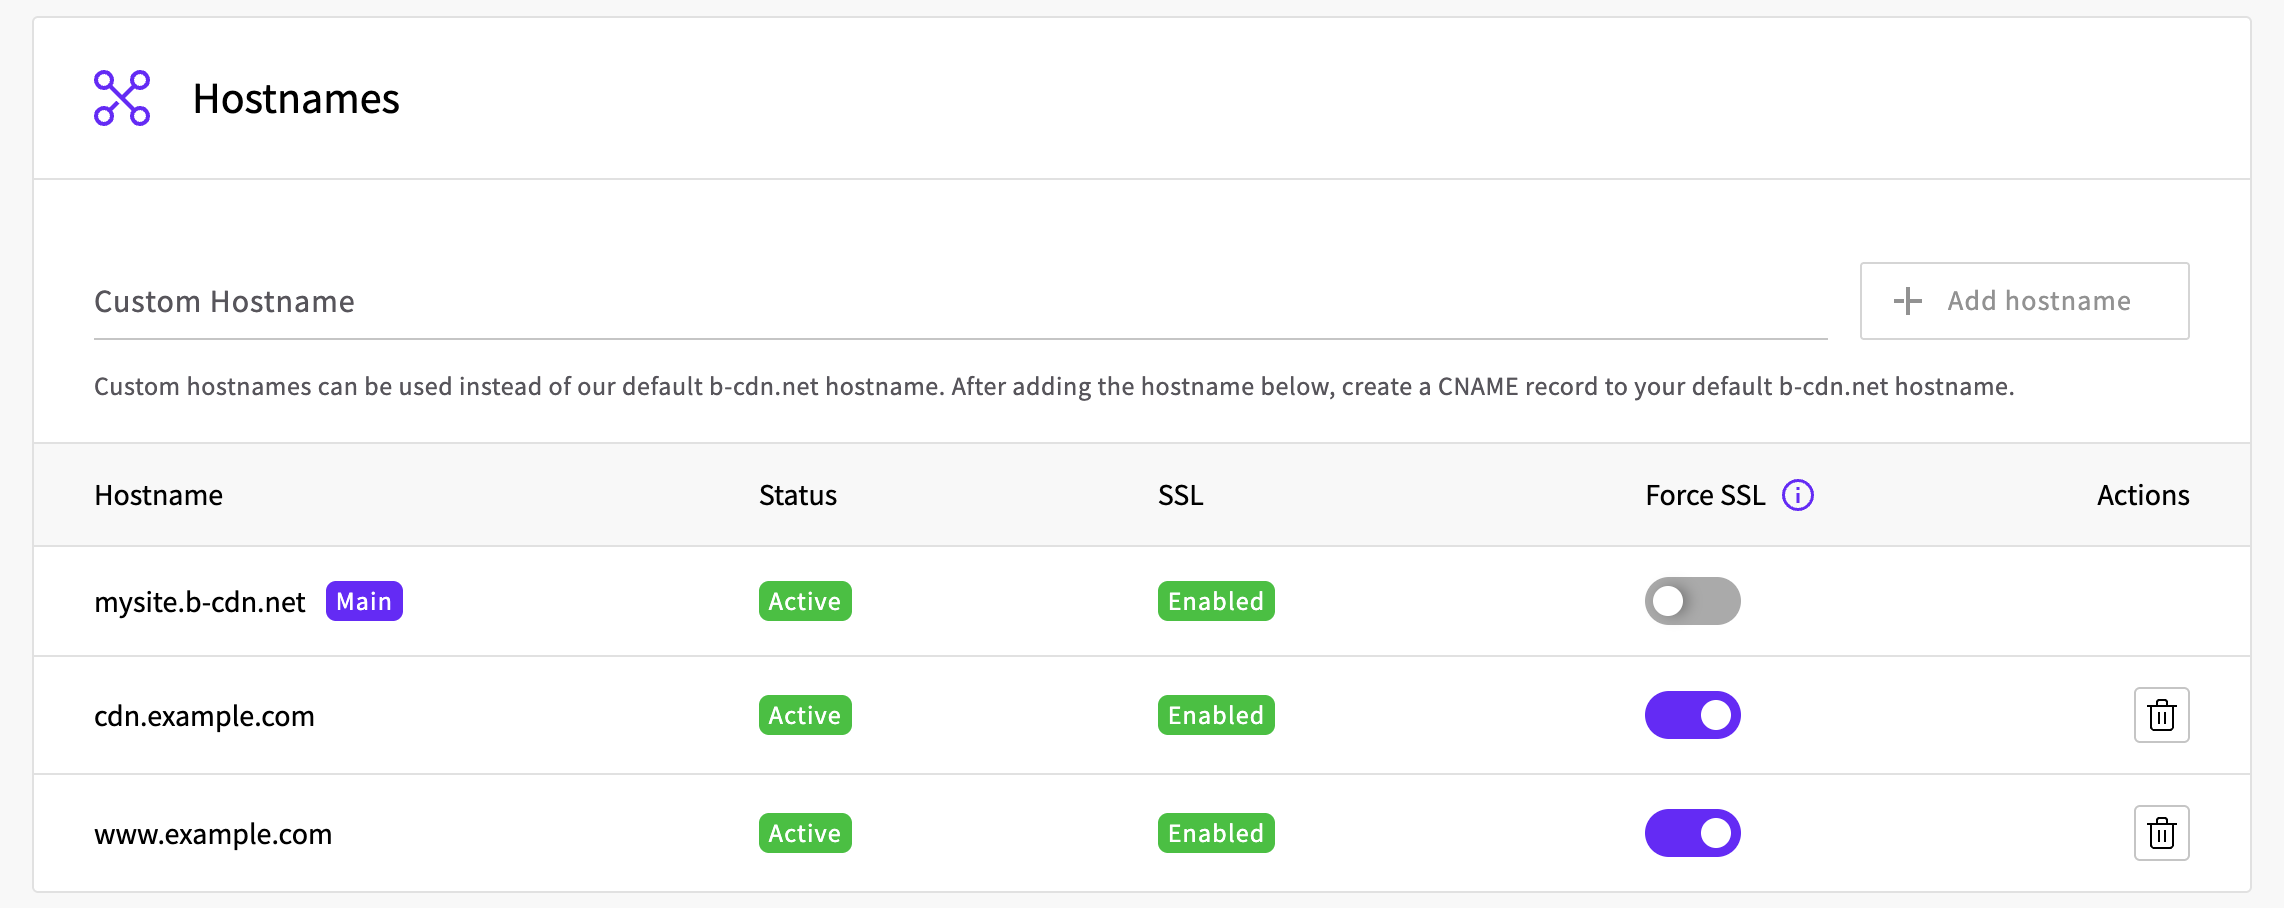
Once the SSL column shows Enabled, turn on Force SSL in the hostname's row. The CDN then answers plain HTTP requests for that hostname with a 301 redirect to HTTPS. Force SSL is set for each hostname separately, so turning it on for your custom hostname doesn't change the default b-cdn.net hostname.
Check the hostname
Request a file from your site through the custom hostname, replacing the path with one of your own files:
curl -sSI https://cdn.example.com/css/site.cssA response without a certificate error shows that the certificate is in place, and the cdn-cache header shows that the response came from the CDN:
Output
HTTP/2 200
content-type: text/css
...
cache-control: public, max-age=600
...
cdn-cache: HIT
...
If curl reports the following error instead, the edge locations aren't serving the hostname's certificate yet, so run the command again:
Output
curl: (60) SSL: no alternative certificate subject name matches target host name 'cdn.example.com'
...
To check the HTTP redirect, request the same file over HTTP:
curl -sSI http://cdn.example.com/css/site.cssOutput
HTTP/1.1 301 Moved Permanently
...
Location: https://cdn.example.com/css/site.css
...
Once the hostname works, update your site to load its images, stylesheets, and scripts from cdn.example.com. Where you change this depends on your site, such as its templates or a setting in your content management system.
Remove a custom hostname
Select the trash can icon in the hostname's row, and then select Delete to confirm. Then delete the DNS record or point it somewhere else, because while it still points at the CDN, visitors get an error page from the CDN.
Troubleshooting
"This hostname cannot be added to this CDN distribution". The CDN doesn't accept this hostname. Check the spelling. If it is your own domain and is still rejected, contact support.
"This hostname is already registered with another CDN zone or service". The hostname is already added to another CDN. If it's on one of your other CDNs, delete it there first. Otherwise, contact support.
"Enter a valid hostname".
Enter the hostname only, without https:// or a path. Wildcard hostnames such as *.example.com are not supported.
The hostname stays at CNAME missing.
Look the record up with dig as described in Create the DNS record. The record must point exactly at your CDN's default hostname. Common causes are a typo in the name or target, a Cloudflare proxy that is still on, and a root domain at a DNS provider that has no CNAME flattening, ALIAS, or ANAME records.
Enabling free SSL fails with an error. Check your domain's CAA records as described in Free certificate.
Browsers show a certificate for *.b-cdn.net.
The hostname doesn't have a certificate of its own yet. Select Set up SSL in its row. If the SSL column already shows Enabled, the edge locations aren't serving the certificate yet, so check again in a moment. To see which certificate the CDN serves for the hostname, run:
echo | openssl s_client -connect cdn.example.com:443 -servername cdn.example.com 2>/dev/null | openssl x509 -noout -subject -issuerOutput
subject=CN = cdn.example.com
issuer=C = US, O = Let's Encrypt, CN = YE2
Some clients report "unable to get local issuer certificate". Your own certificate was uploaded without its intermediate certificates. Delete the hostname, add it again, and upload the certificate followed by its intermediate certificates.
HTTPS connections fail after you upload your own certificate. The private key doesn't belong to the certificate. Delete the hostname, add it again, and upload the certificate with its matching key.
Visitors get 508 Loop Detected.
The CDN's origin leads back to the CDN, either because the origin URL uses a hostname that now points at the CDN, or because your server redirects the CDN to such a hostname. Point the origin at your server's IP address over HTTPS, as described in How to serve an existing website through UpCloud CDN.
The CDN serves a different site from your server.
Your server picks which site to serve by the hostname that the CDN sends. With Forward Host header on, the CDN sends the hostname that visitors use, such as cdn.example.com. With it off, the CDN sends the hostname in Host header, or the hostname or IP address from the origin URL when Host header is empty. Add cdn.example.com to your site's configuration on the server, or turn off Forward Host header and enter your site's hostname in Host header, so that the CDN sends that name for every request.