
How to configure network peering
This guide walks through creating a network peering in the UpCloud Control Panel. For an overview of network peering and the list of supported regions, see Network Peering.
Create network peering
Follow the steps below to enable network peering on UpCloud:
- Log in to your UpCloud account and navigate to Network -> Peering -> “Create network peering”.
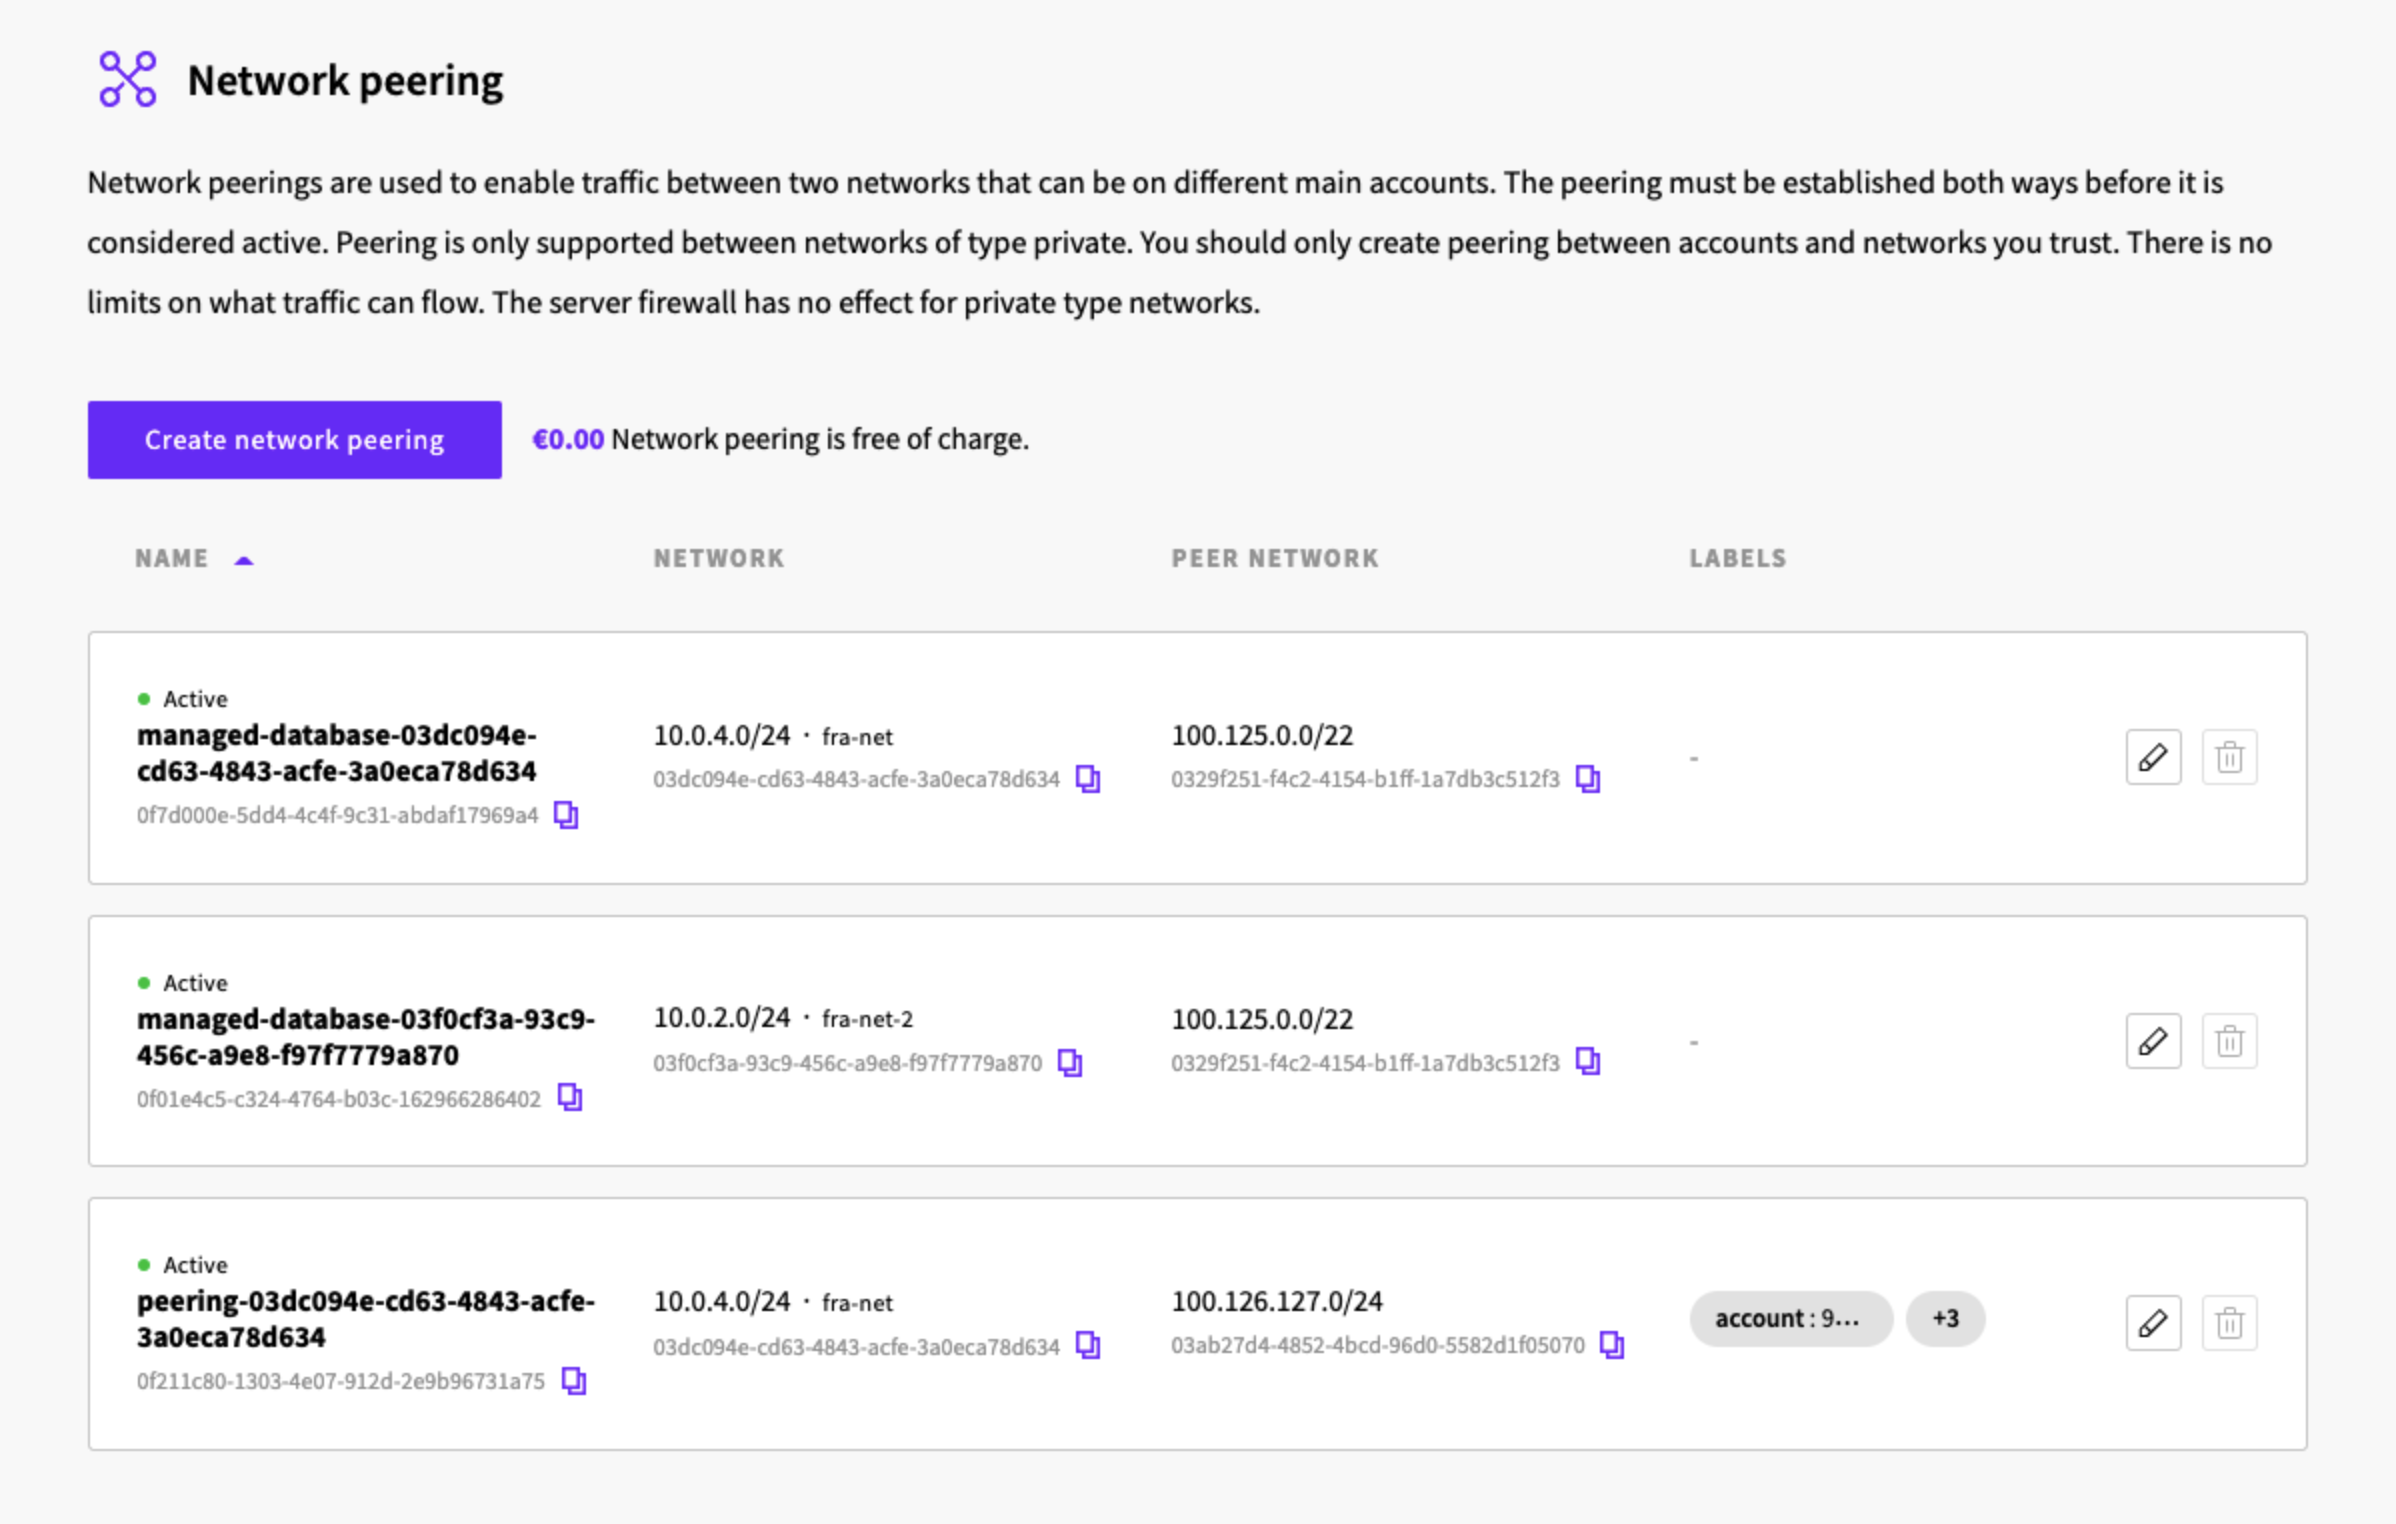
- In the "Create network peering" form, enter the following details:
Peering name: Enter a descriptive name for your peering connection.
Peering network region: Select a region where your networks are located.
Private network: Select one of your networks you want to create a peering with.
Private network or UUID: Select either another of your networks to create a two-way peering automatically or provide the UUID of the target network from external UpCloud account.
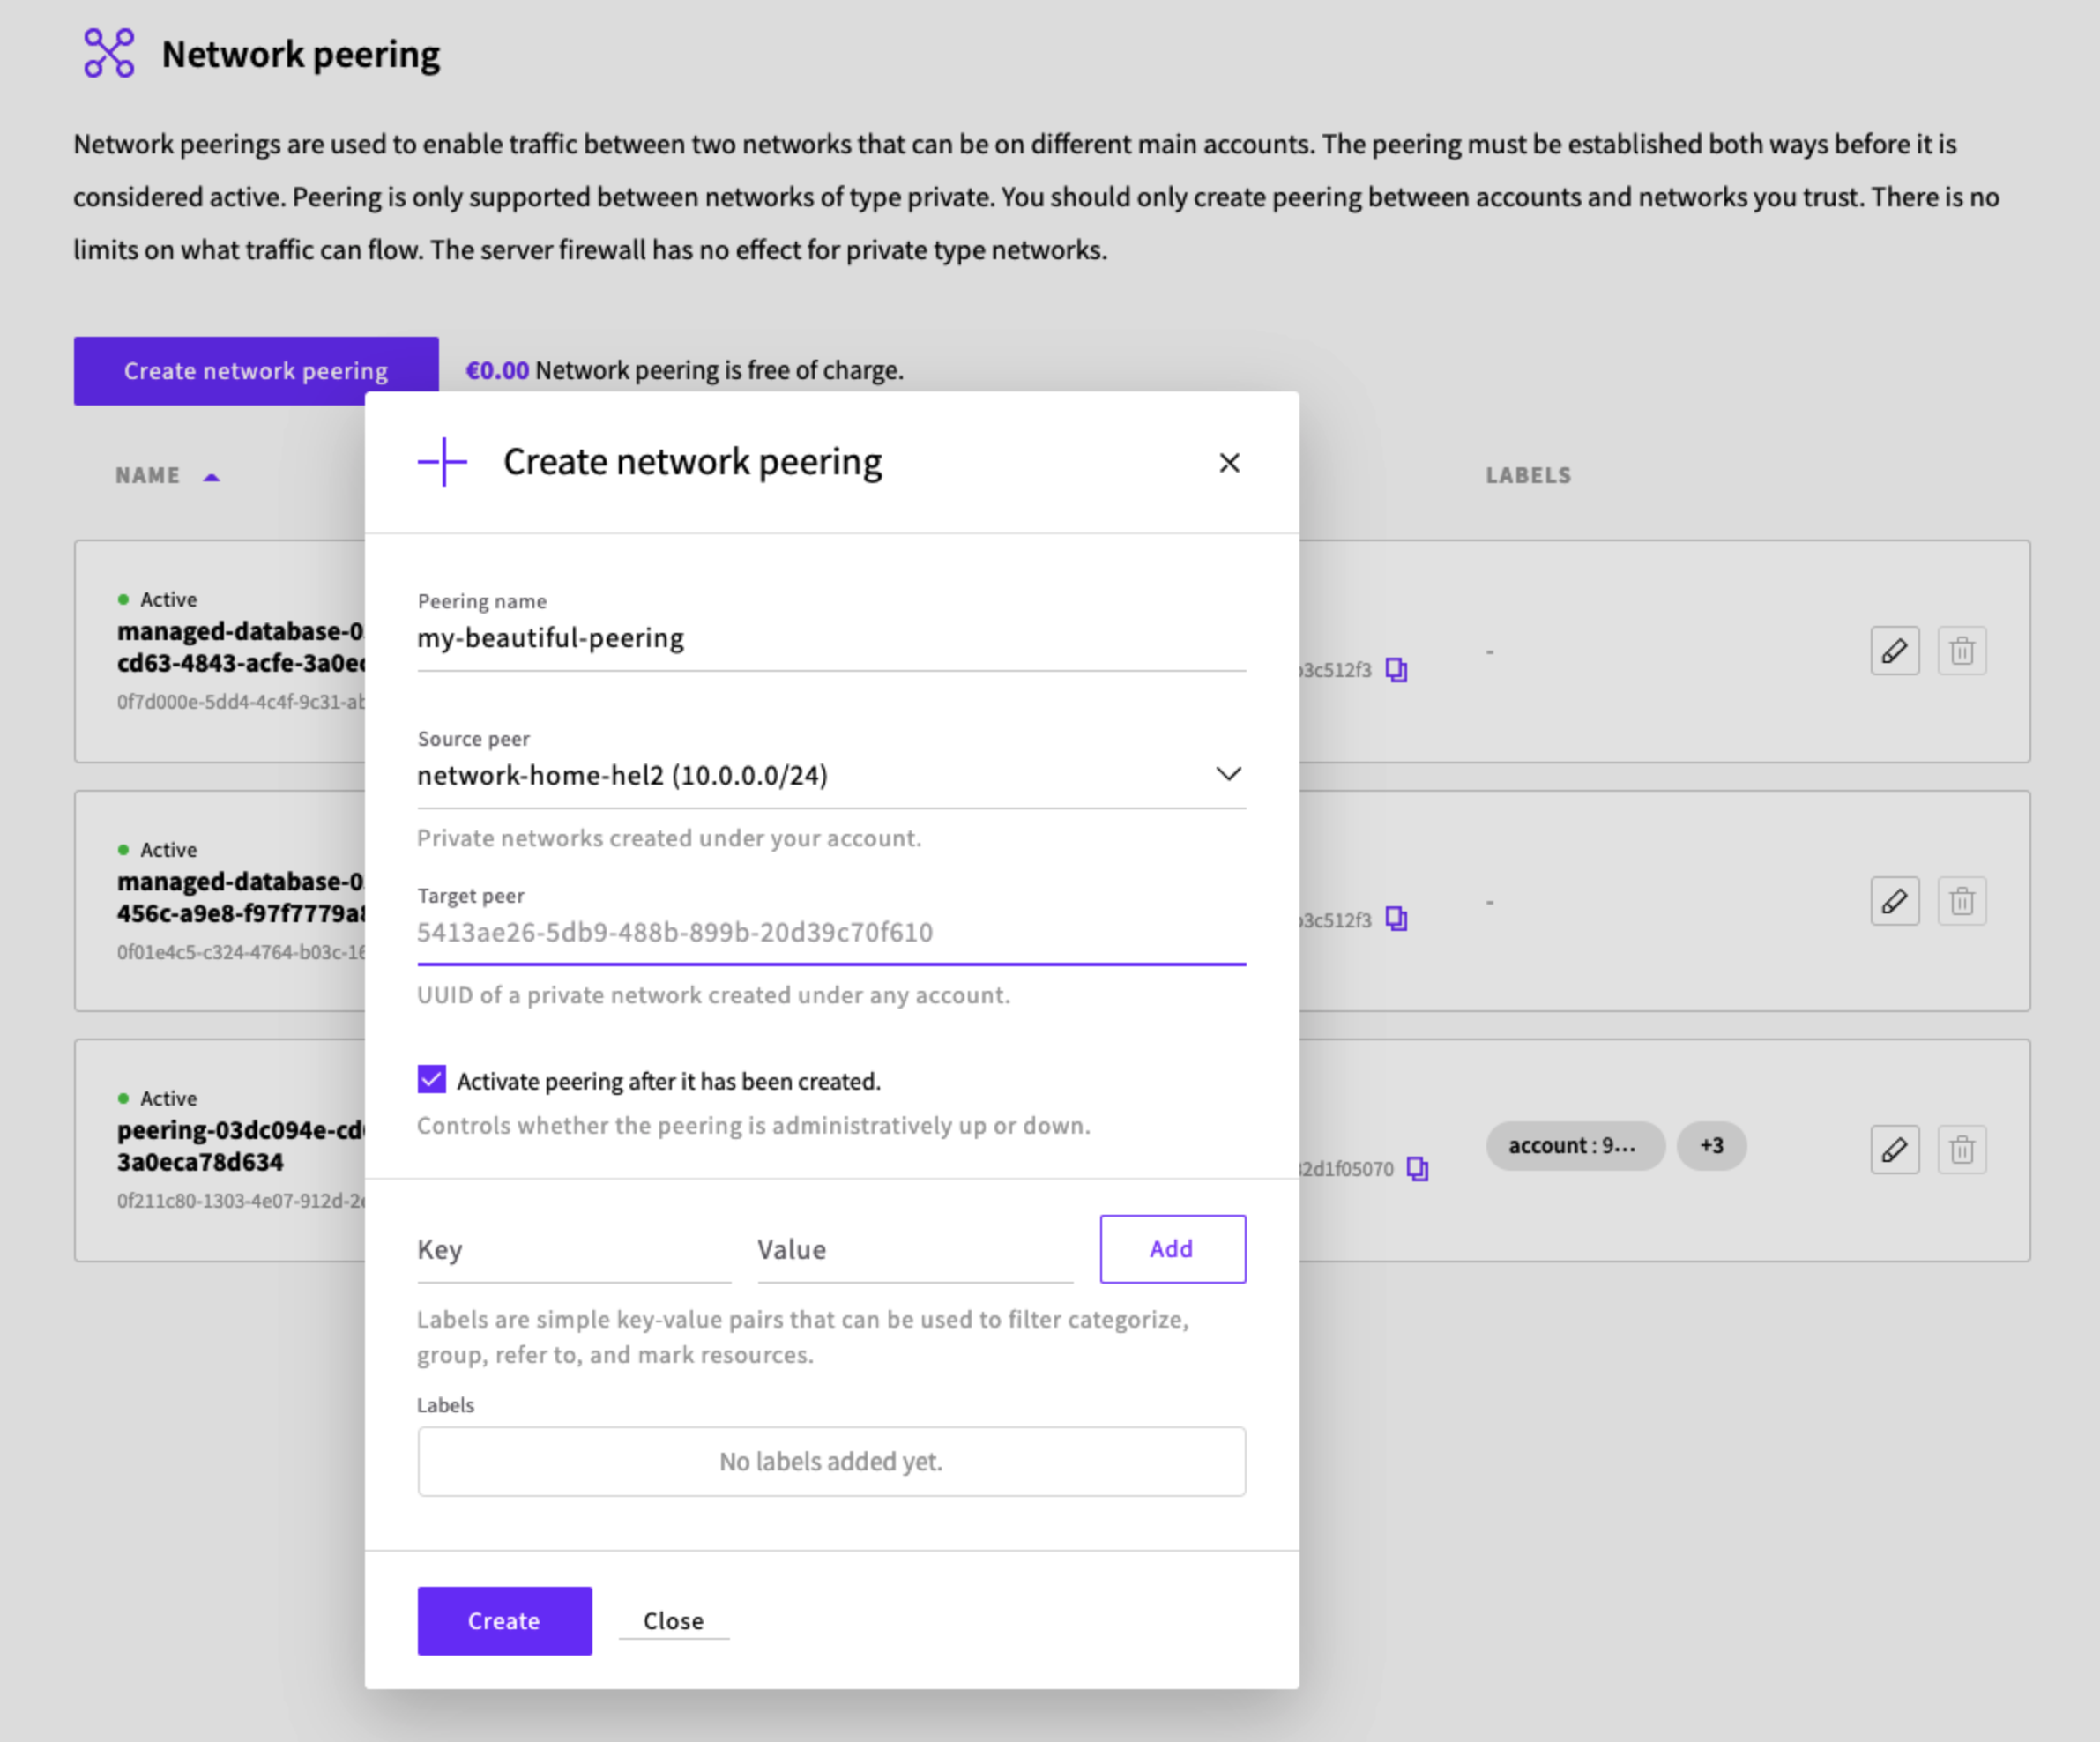
Note: The private network selected for the peering must be connected to an SDN Router. If any of your networks is not attached to a router, one will be created for you automatically.
- Click on the "Create" button to initiate the peering process.
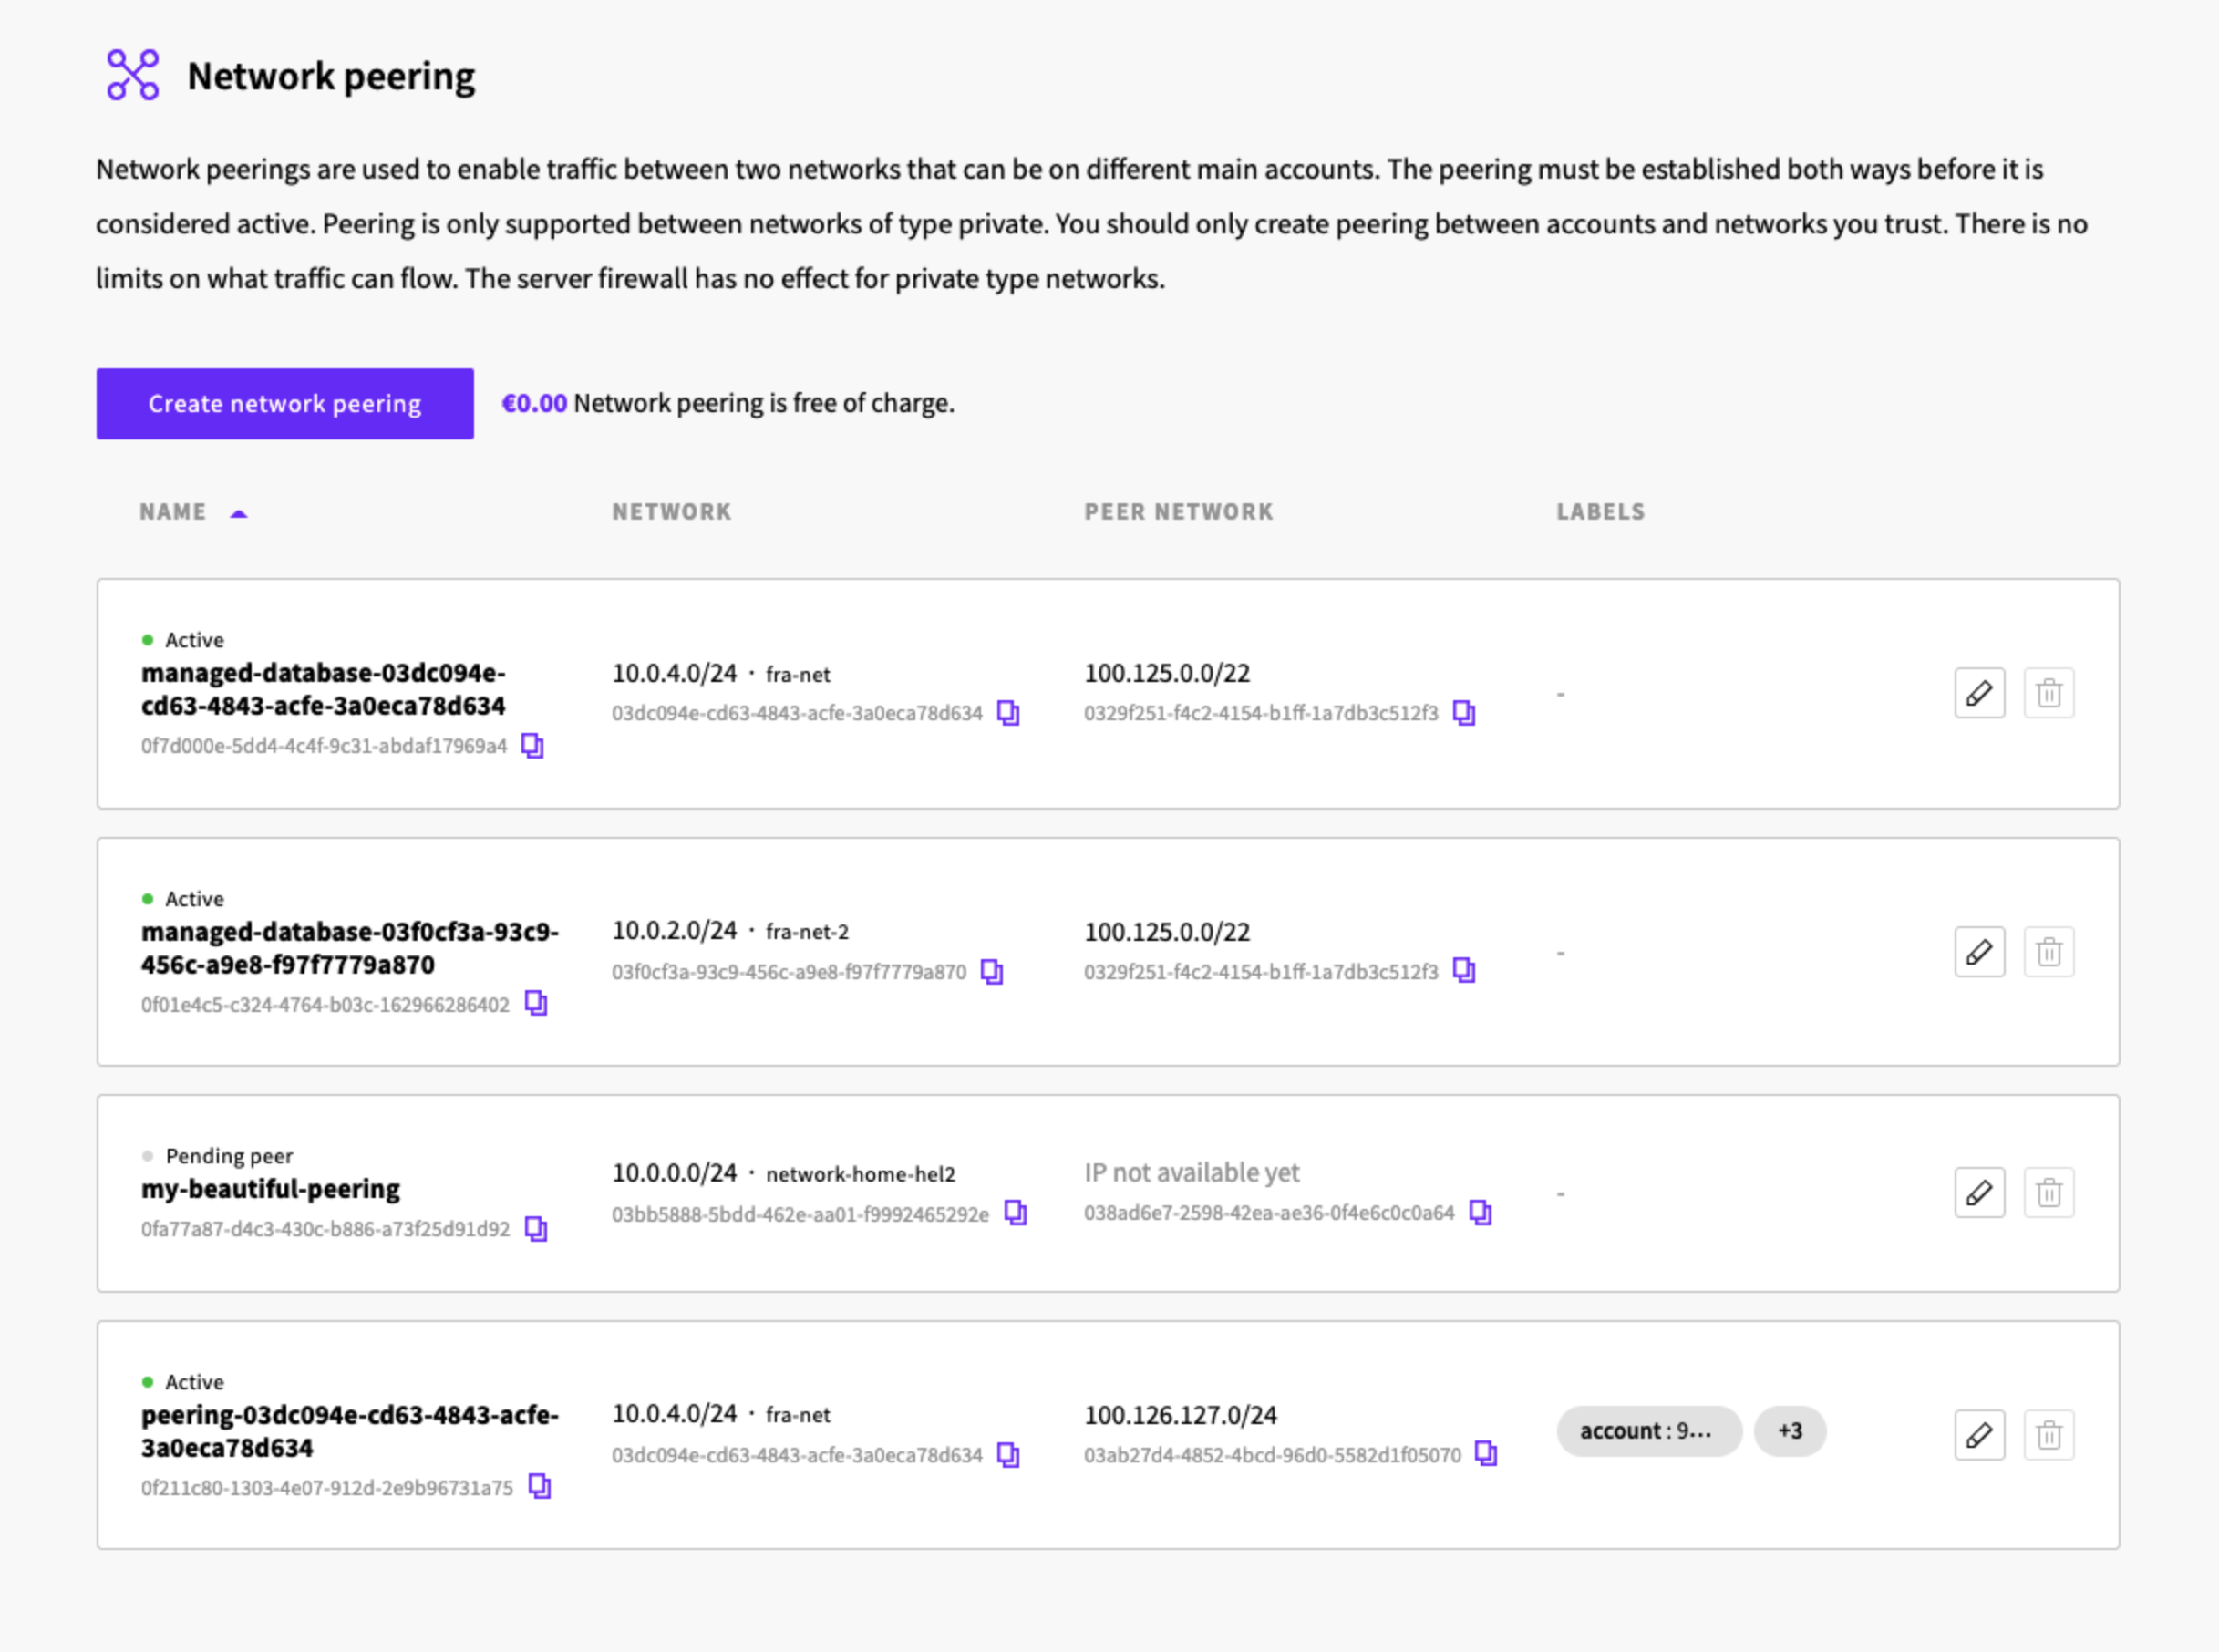
When the peering is created between two networks in the same account, one peering will be created for each of the networks for two-way peering.
For external account network peering read the following section for further instructions.
External account peering
After creating the peering request, your peering will be in the "Pending peer" status. This means that the peering now needs to be created from the other side, i.e., from the target network to your network.
Once the peering is created on both sides, it becomes active, and traffic can be shared between the peered networks.
Deleting network peering
To delete a peering connection, you first need to disable it. Ensure that you disable the peering before attempting to delete it.