
Connecting a private Linux server to the Internet using NAT Gateway
NAT Gateways play an important role in enabling servers with private IP addresses to communicate with the wider Internet.
They act as intermediaries between private networks and the public Internet, providing a secure way for devices to access external resources without the need for individual public IP addresses.
In this guide, we will create a Linux server that is connected only to a private network, with no direct Internet access. Our goal is to enable the server to communicate with the Internet by implementing a NAT gateway.
A load balancer is optional but highly useful because it allows you to connect to your server easily. Alternatives to this method are to connect over a public IPv6 address, a VPN, the web console in the control panel, or a bastion server, also known as a jump host.
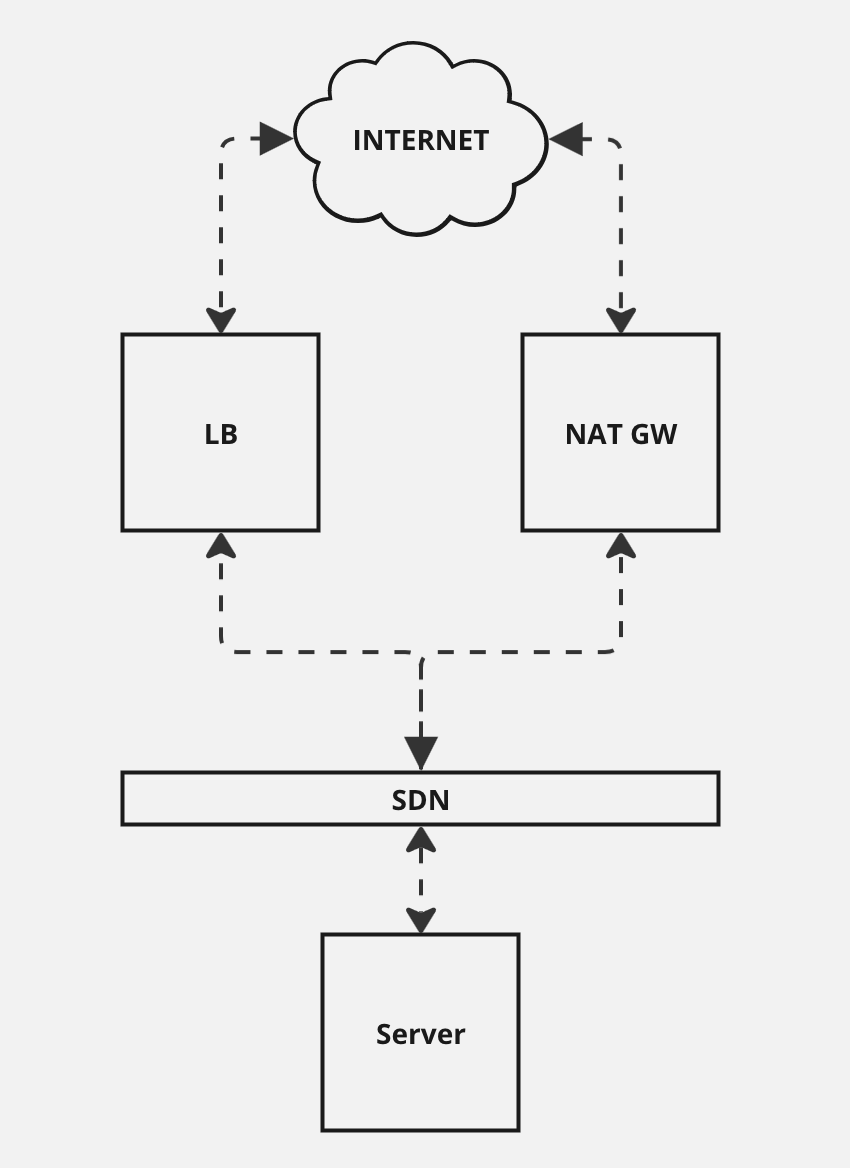
The architectural diagram below illustrates the setup we will be implementing.
Create the SDN and Router
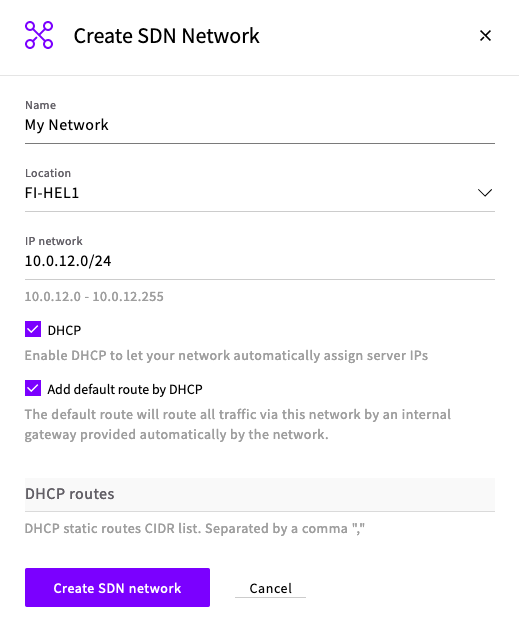
On the UpCloud dashboard under Network > Private networks create a new software-defined network (SDN). Ensure that you have selected Add default route by DHCP because it will be necessary for the NAT Gateway later.

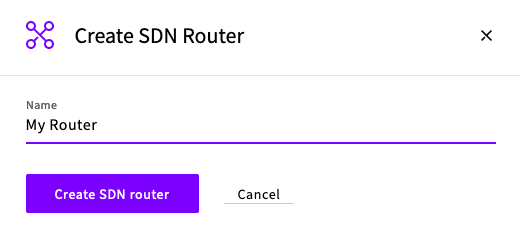
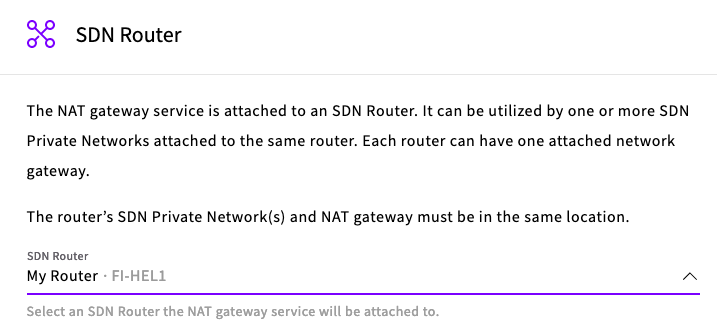
Then on the UpCloud dashboard under Network > Routers create a new SDN Router.
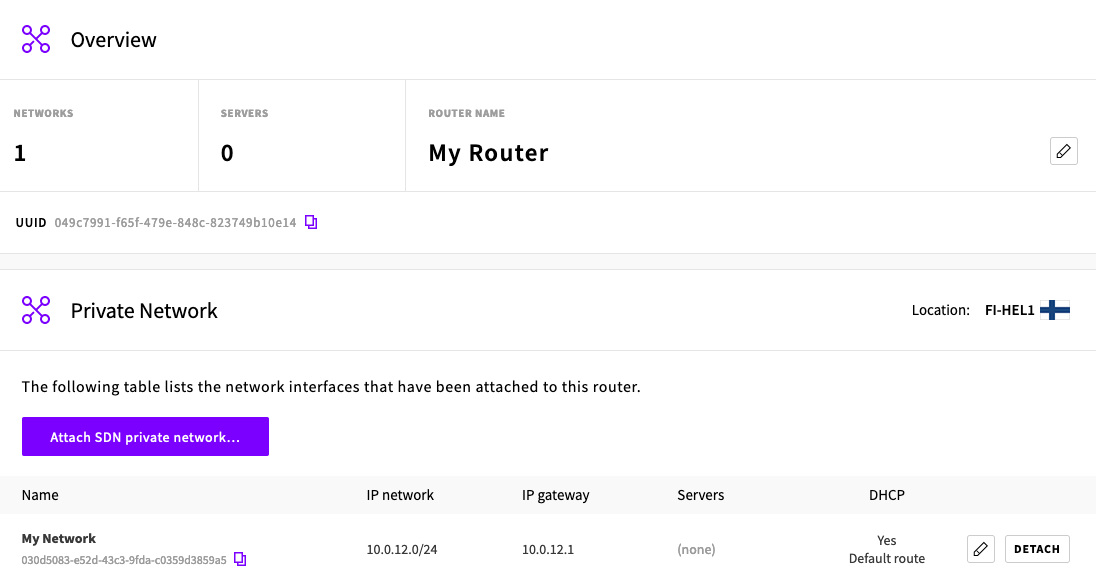
Select your new router. Select the Location of your SDN and then attach your SDN to your Router.
You should now see your SDN attached to your Router.
Create a NAT Gateway
Once both the router and SDN are created and connected. On the UpCloud dashboard under Network > NAT Gateways create a new NAT Gateway.
Select your SDN Router in the zone your SDN is located.
Select your plan, either Development or Production, and your Service name, then click Create NAT Gateway.
Wait for your NAT Gateway to finish its setup and enter a Running state (this may take a few minutes).
Create your Server
In the same zone as your SDN. Create a new server with only a private SDN connection. It is optional to have a Utility network. The SDN settings can be left on their defaults
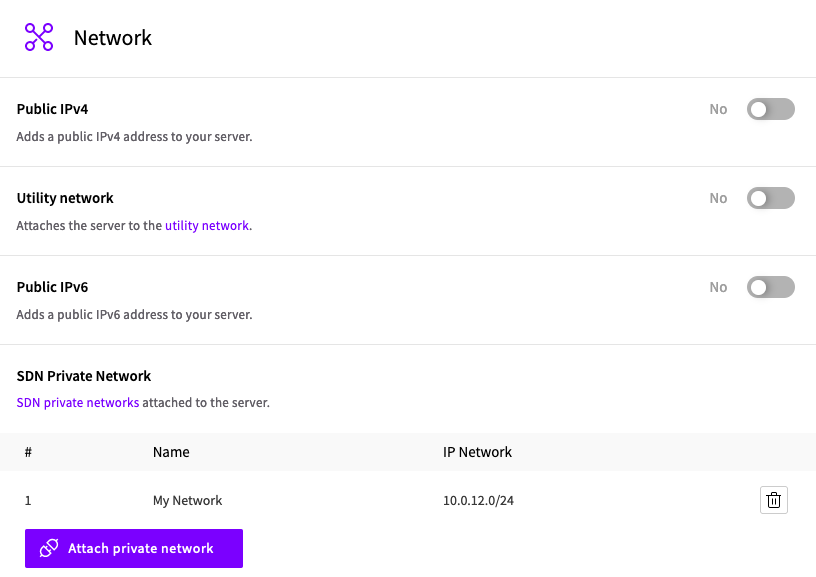
Note: Adding a public IPv4 address to your Linux server WILL cause routing issues due to a conflict between multiple default routes (SDN + public IPv4).
Choose your Login method and optionally add an initialization script to allow you to login with a password.
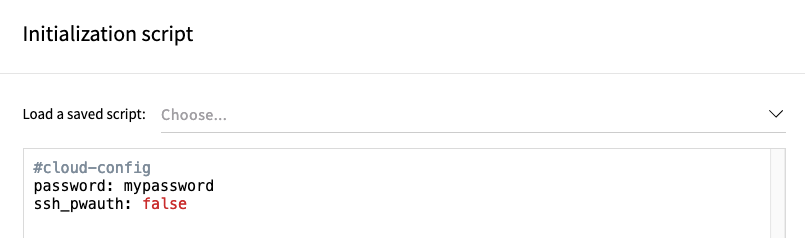
Note: If you want to SSH login with a password then change cloud-init’s ssh_pwauth to true. Initialization scripts do not work with Windows servers.
Create your Load Balancer
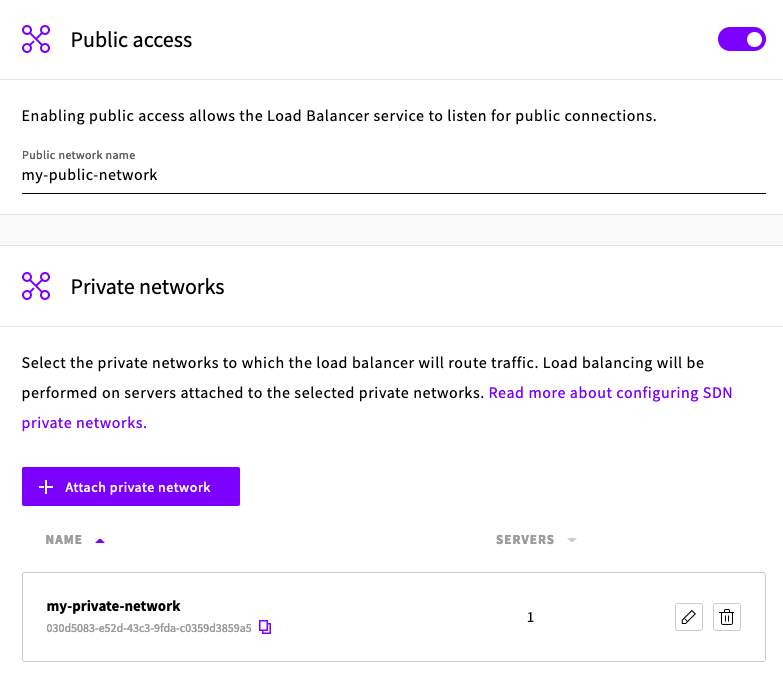
Create a Load Balancer in the same zone as your SDN.
Enable Public access (for SSH) and attach your SDN network.
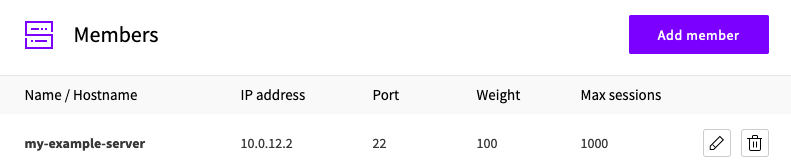
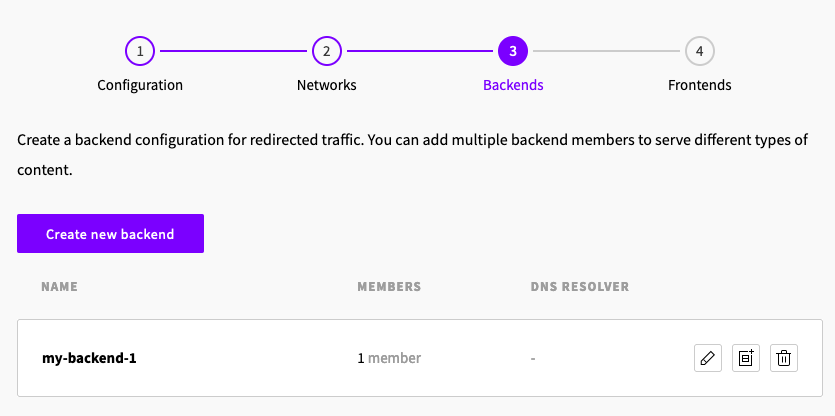
Create your backend and add your server as a member.
Enable the TCP health check.
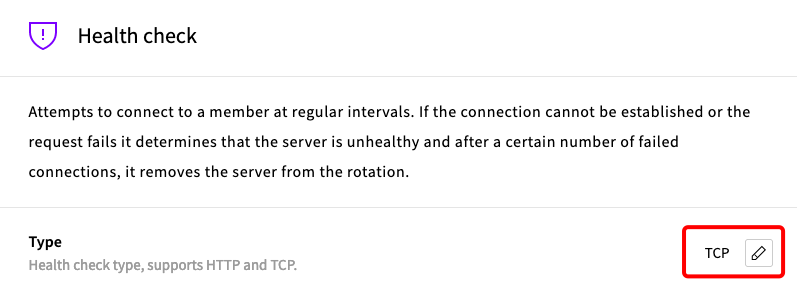
Leave all other properties at their default values and click Create. You should now have your backend created with your member.
Create a new TCP frontend that listens on SSH port 22 with the default backend of your server.
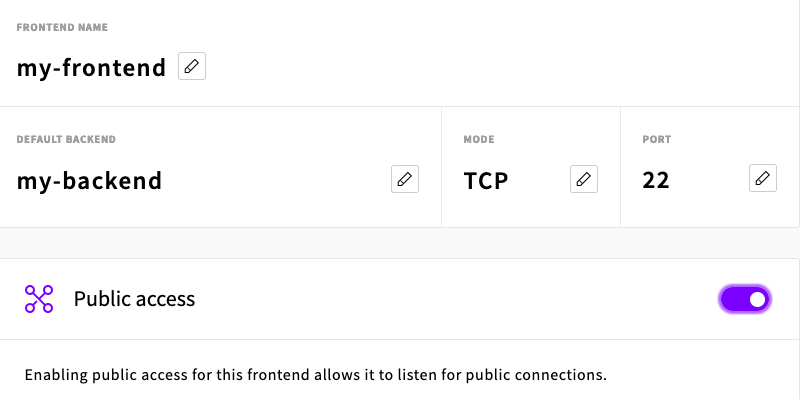
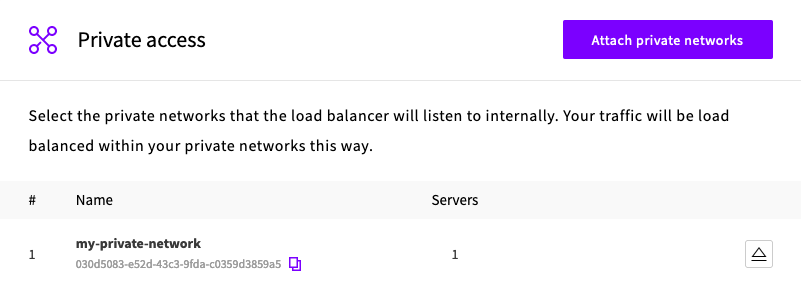
Attach your SDN to Private access if you want to listen internally.
Leave all other settings default and click Create.
Create the Load Balancer. Wait for the Load Balancer to enter a Running state.
Connect to your Server
You can now connect to your server over SSH. On the dashboard go to Load Balancers > Services and select your load balancer. Find your Public hostname on the Overview > Public hostname section and use it to connect.

ssh [email protected]
The authenticity of host 'lb-0a453da97d604876af28d646c7be4b0f-1.upcloudlb.com (185.26.50.202)' can't be established.
ED25519 key fingerprint is SHA256:XXXXXX.
This key is not known by any other names
Are you sure you want to continue connecting (yes/no/[fingerprint])? yes
Unfortunately, we are not done yet. Since we do not have a public IP on this server we must configure our nameservers. This method depends on your operating system.
For Ubuntu 22.04 which uses netplan, we can edit the netplan config file; an alternative is to change the file /etc/systemd/resolved.conf with your desired DNS and FallbackDNS.
nano /etc/netplan/50-cloud-init.yaml # File: /etc/netplan/50-cloud-init.yaml
# ...
network:
version: 2
ethernets:
eth0:
dhcp4: true
match:
macaddress: fa:2b:17:16:ca:05
set-name: eth0
nameservers: # Add
addresses: # Add
- 94.237.127.9 # Add
- 94.237.40.9 # AddTest your new changes with:
netplan tryIf there are no errors and you are asked if you want to keep these settings press Enter. Then save these changes with:
netplan applyView your changes.
resolvectlTest that you can ping a domain. If DNS resolution works then you have successfully finished setting up your server.
NAT Gateways for Private Cloud
NAT Gateways can be used in Private Clouds but only if deployed via the API.
Validation error: zone
Message: You have no permission to access this zone or the zone is not public.
The NAT gateway attaches to SDN routers and SDN routes allow networks from both parent and child zones. All private clouds are essentially, from a network infrastructure perspective, child zones of their parent zone, e.g. the parent_zone attribute from our API documentation.
If we have created a Router and a private cloud (us-exa1) SDN is attached to it. In this instance us-exa1 is the child zone of the public cloud us-nyc1, therefore you must to create the NAT gateway with the public cloud zone us-nyc1.
JSON body request example:
{
  "name": "my-example-nat-gateway",
  "zone": "us-nyc1",
…