
Converting a server IP address to a floating IP address
When you need to make an existing server IP address transferable between servers, you can convert it to a floating IP. This process allows you to retain your current IP address while gaining the flexibility to move it between servers for high availability, maintenance, or failover scenarios. The steps below show how to convert the IP and reattach it to the same server, but once converted, the floating IP can be attached to any server in the same zone.
Before making changes to your network configuration, it's always a good idea to take a backup.
1. Shut down your server
First, shut down the server. You can do this from within the server itself, or via the Control Panel by navigating to your server and clicking the power button to initiate a shutdown.
2. Change the IP release policy
Go to the server's Network tab and find the IP address you want to convert. Click the Edit button next to the IP address, and change the release policy from "Delete" to "Keep".
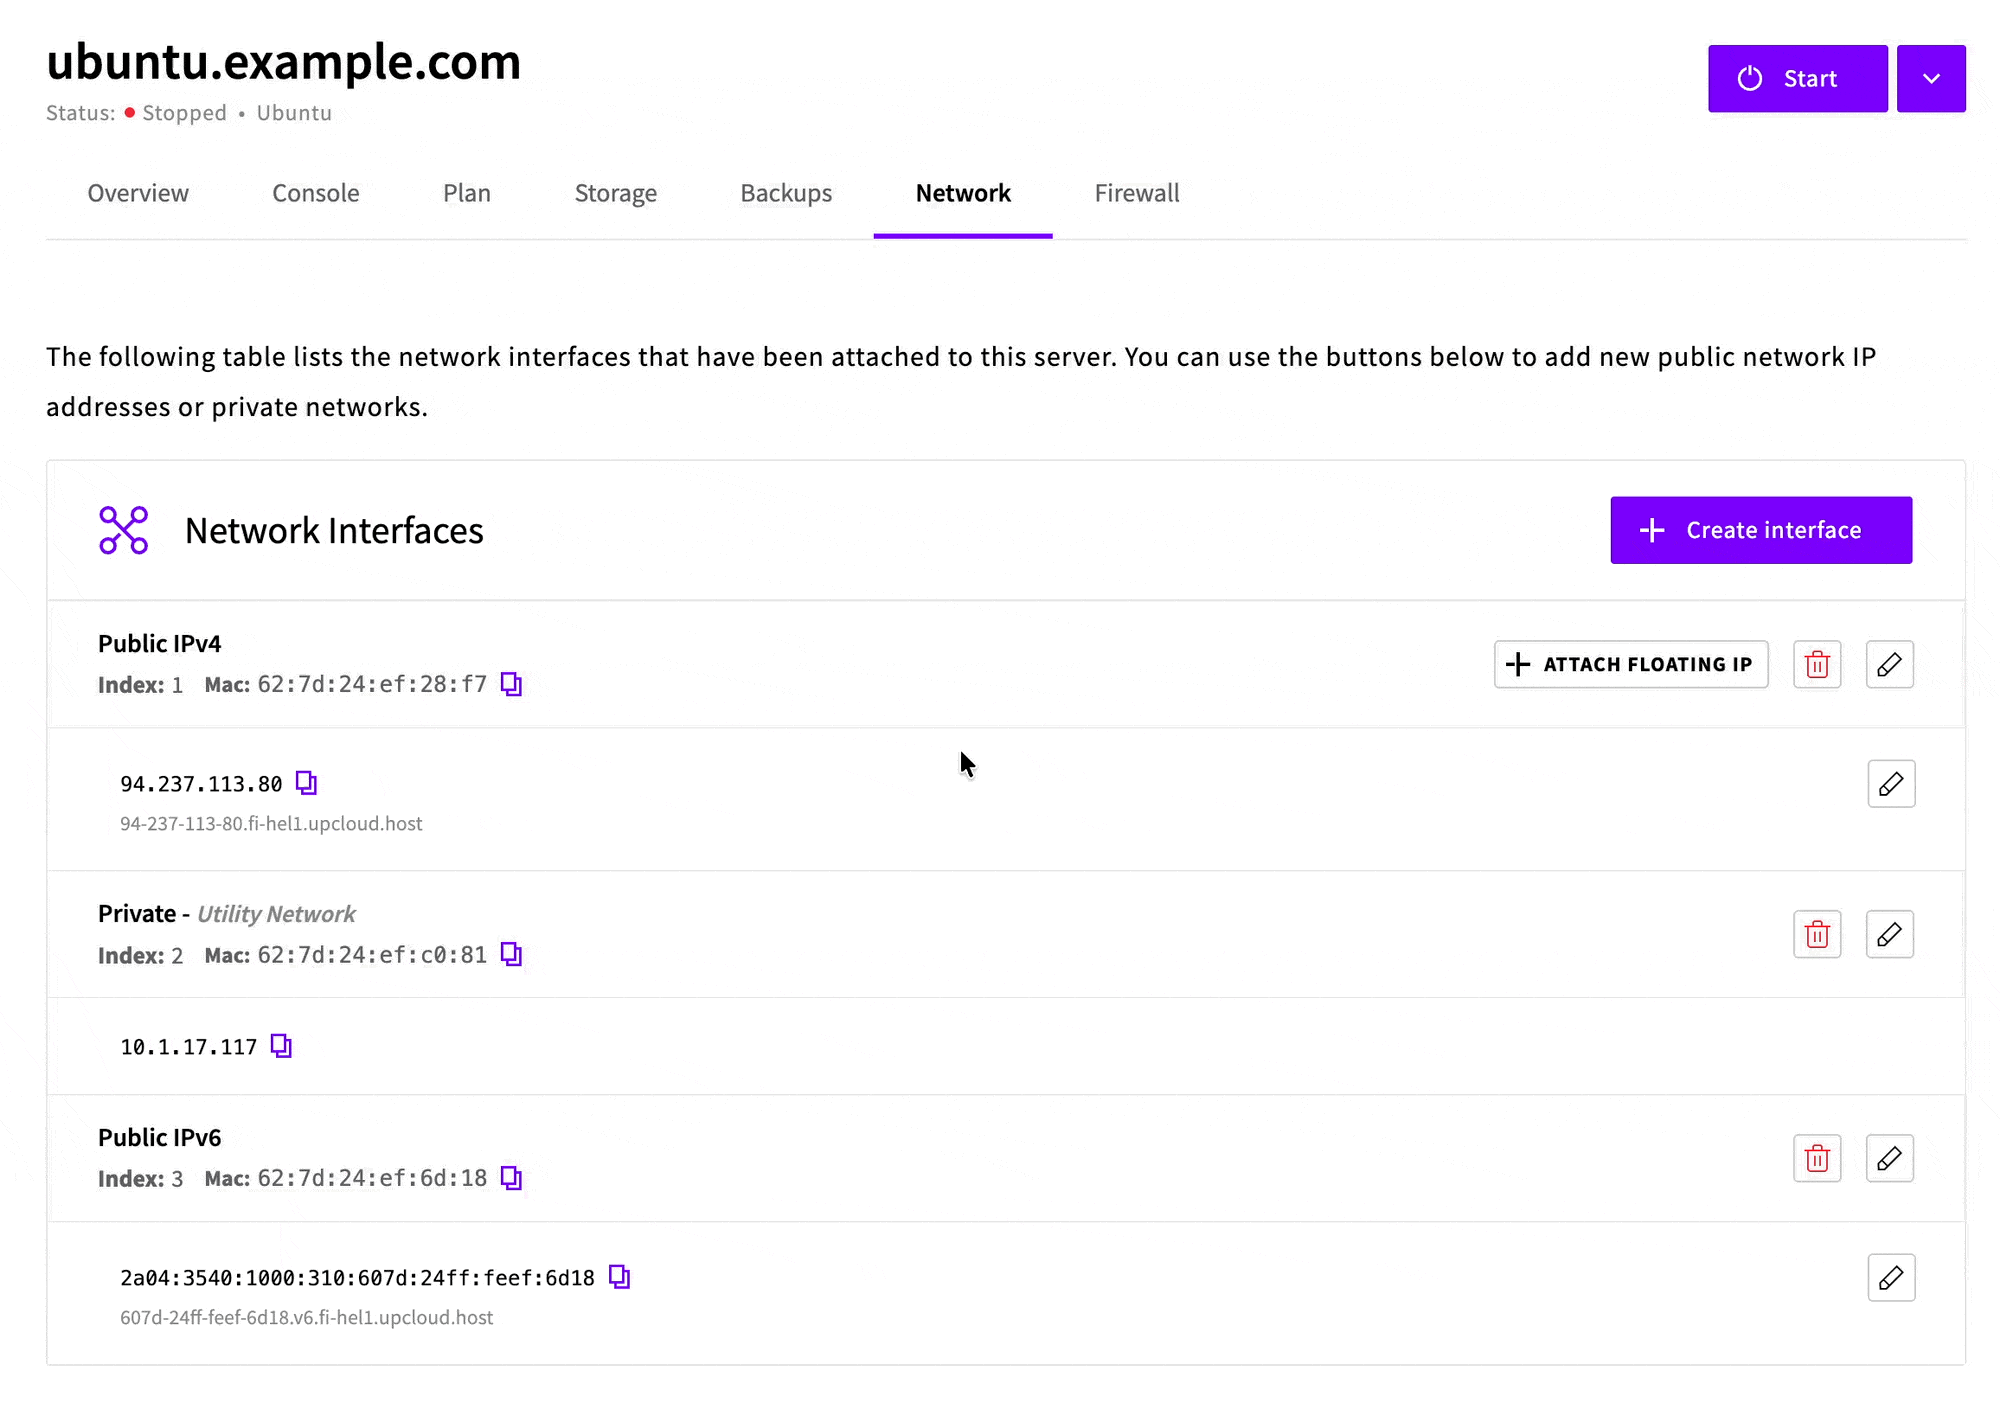
This prevents the IP address from being deleted when you detach it from the network interface.
3. Convert to floating IP
Before deleting the interface, note down the interface index number of the network interface that currently has this IP address. You'll need this in step 4.
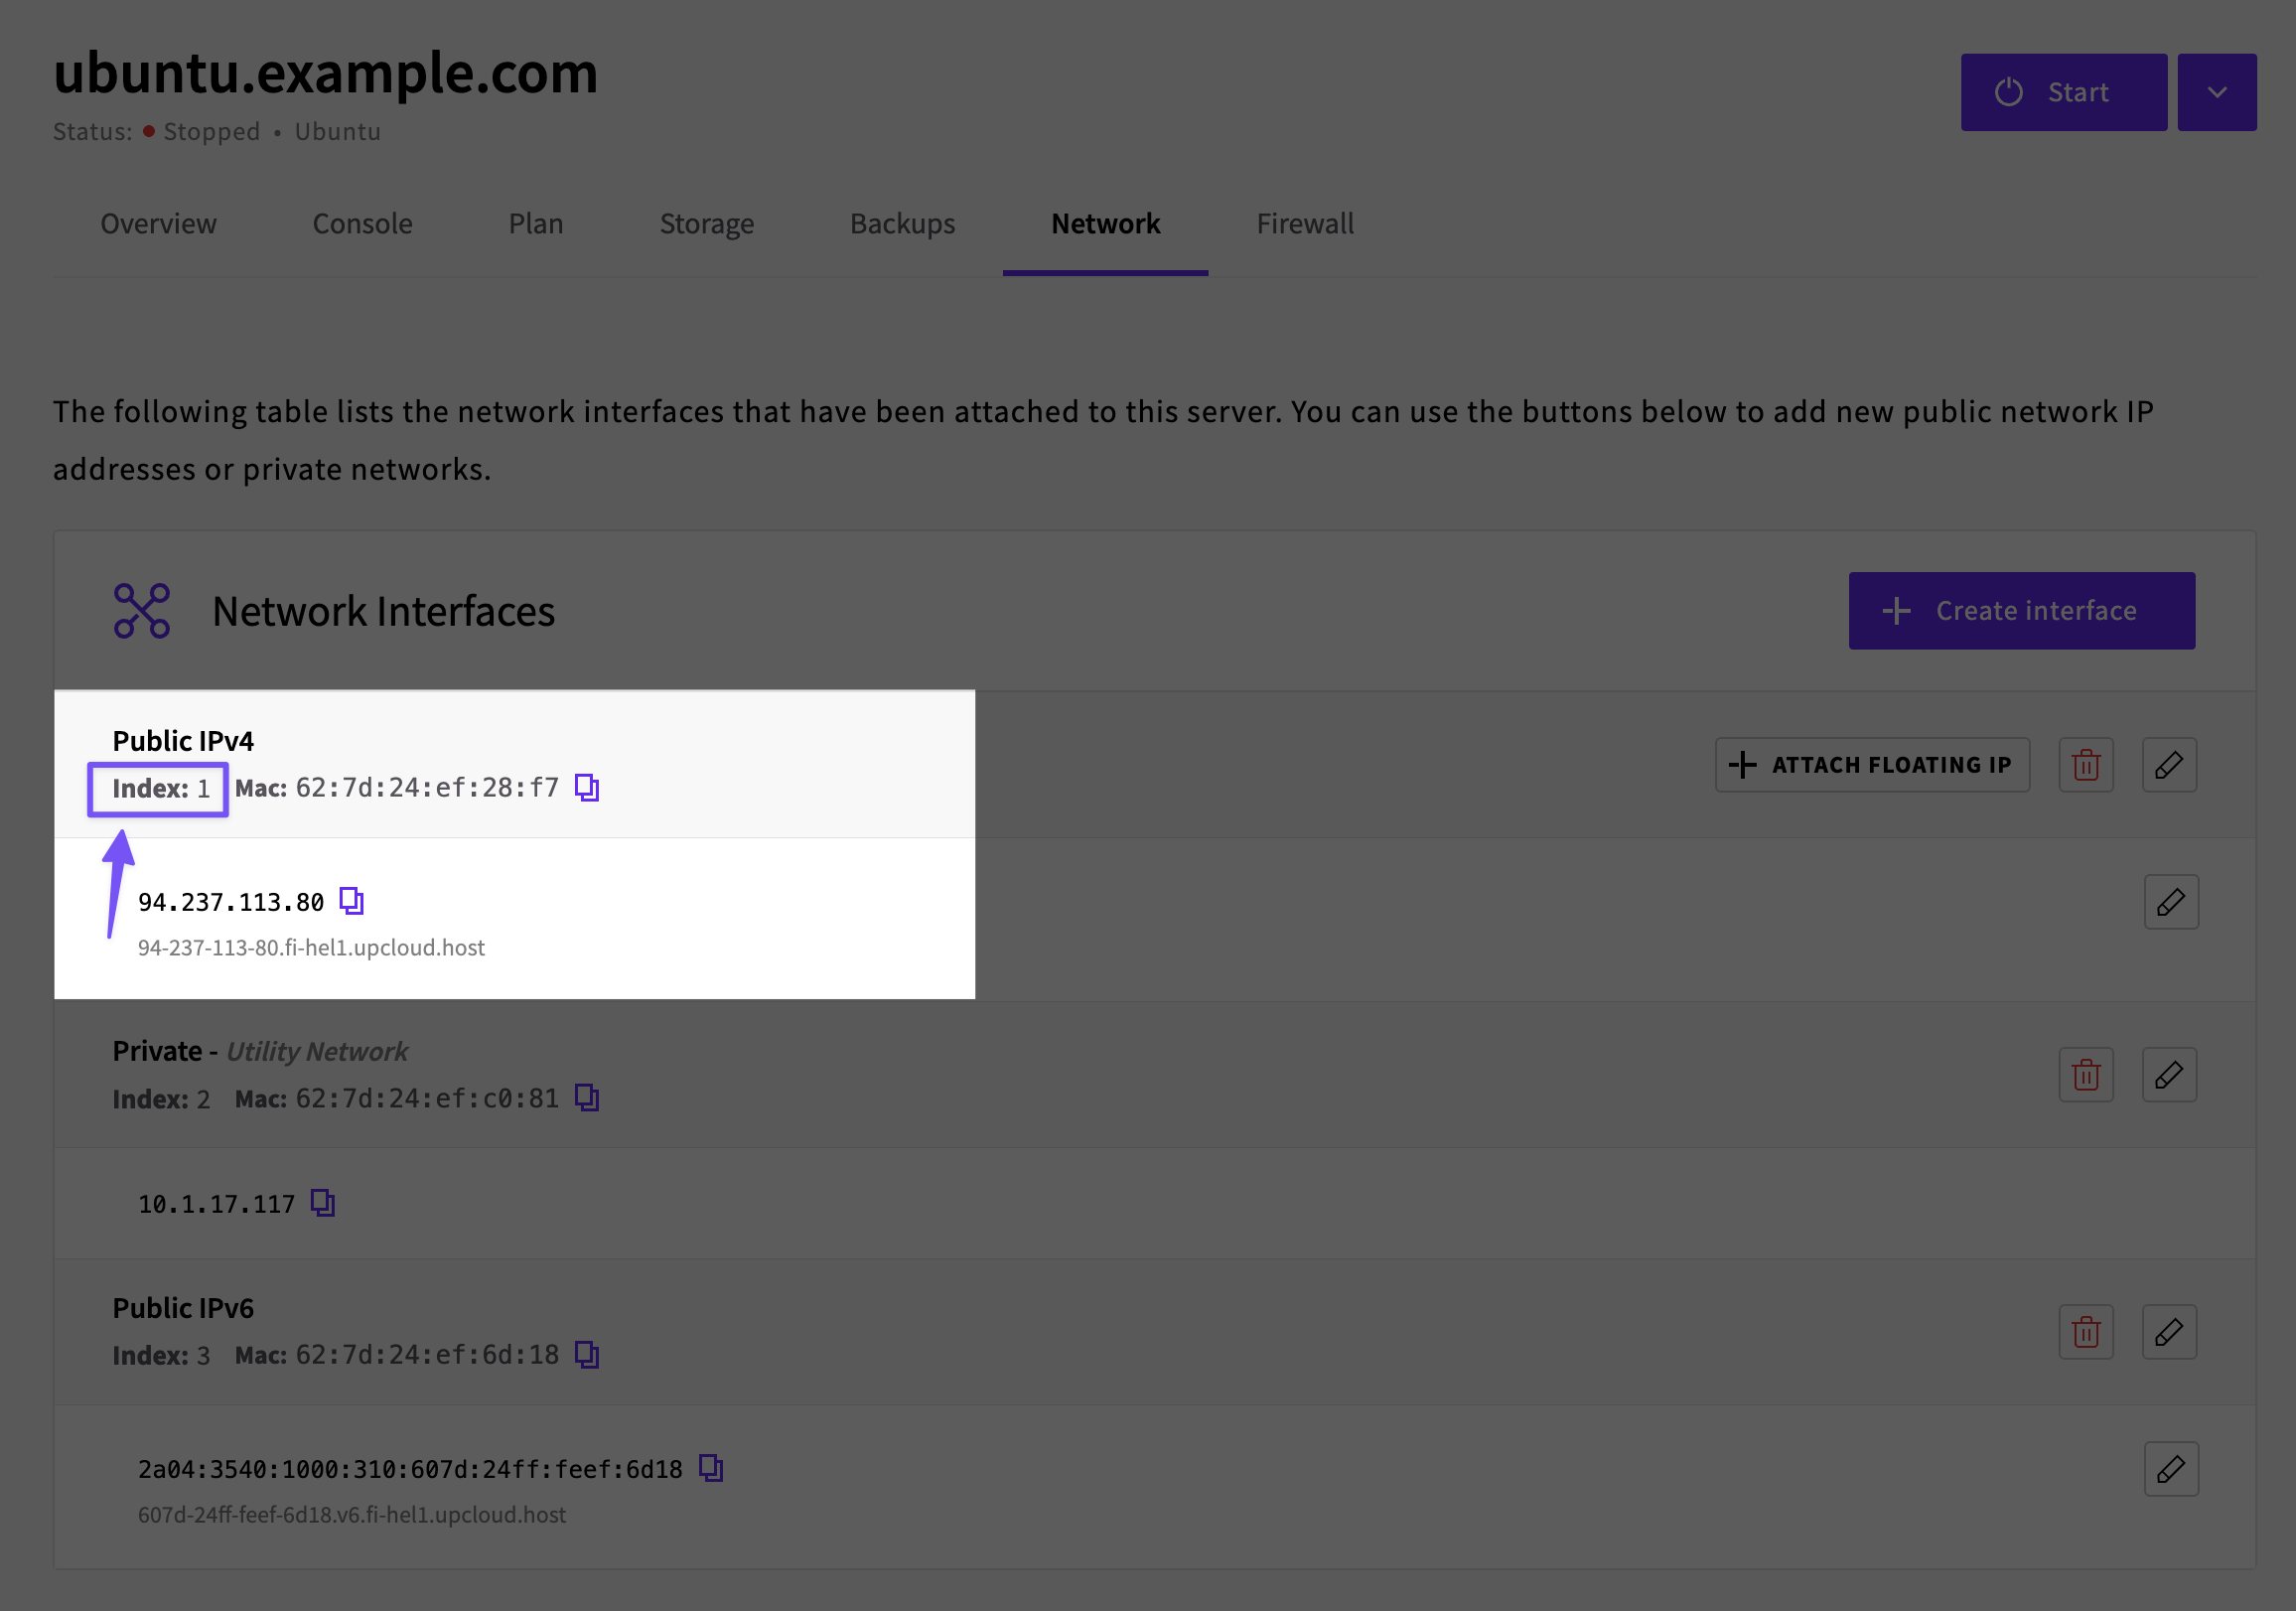
Delete the network interface where this IP address is attached.
When the deletion prompt appears, check that the Release policy is set to "Keep (Detached Floating IP)" - this confirms the IP will be converted to a floating IP rather than deleted.

Click Delete to proceed.
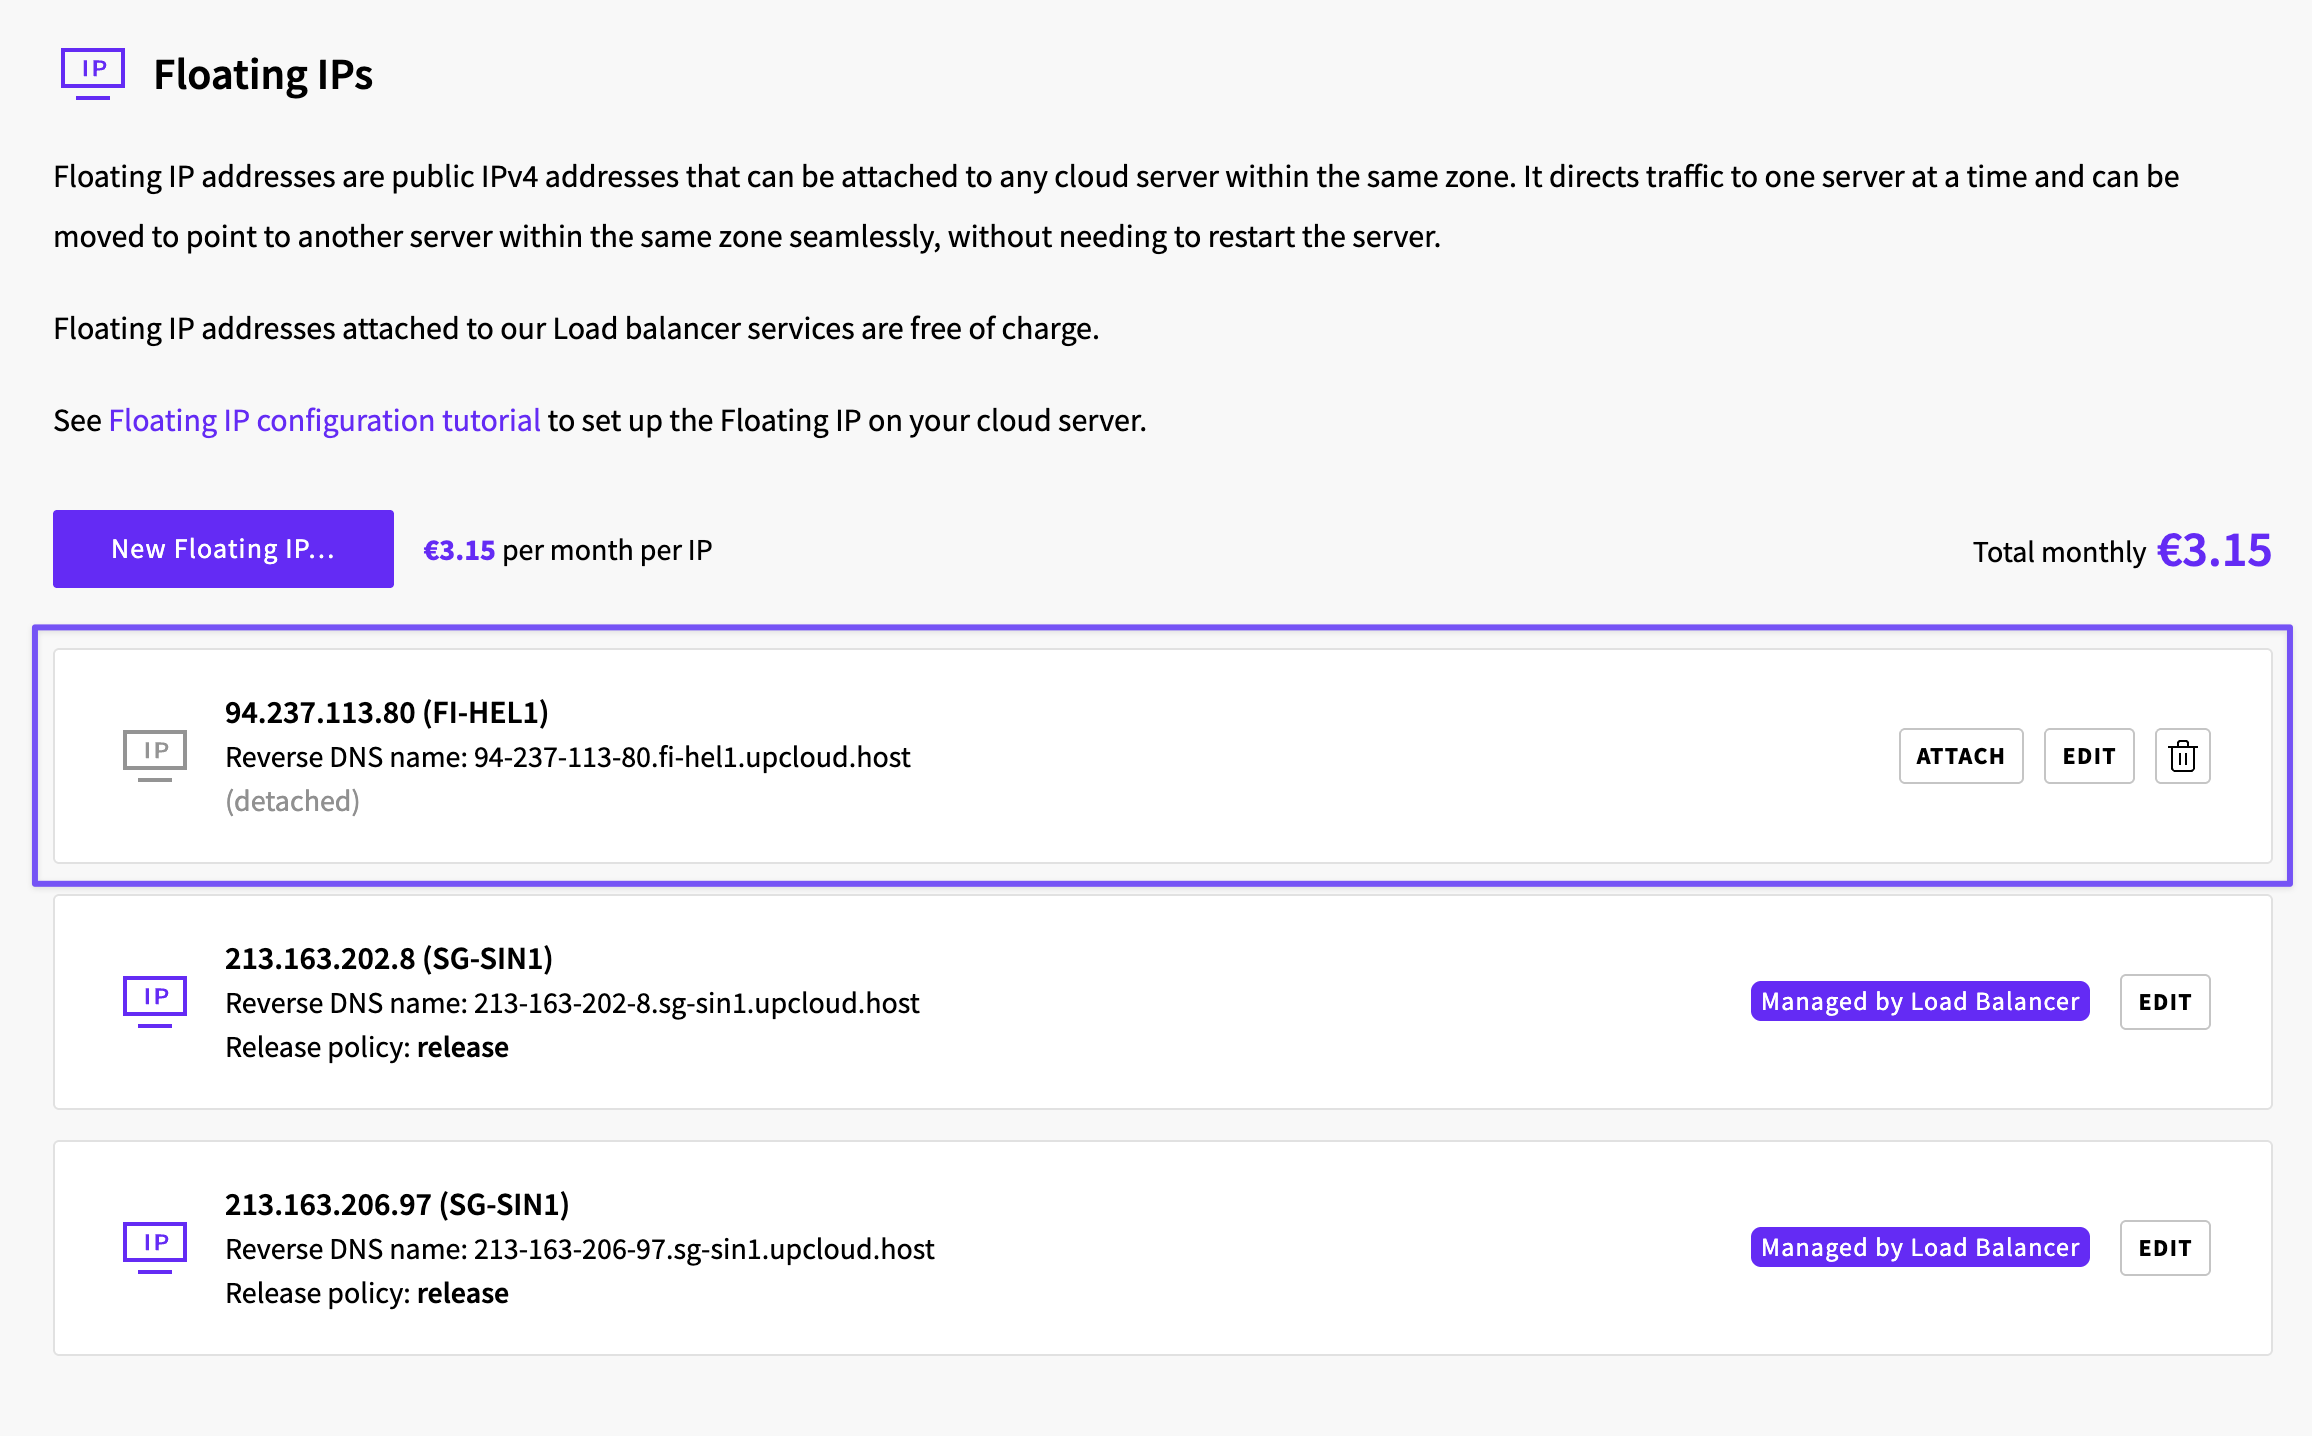
After deleting the interface, your IP address is now a floating IP. You can view it in the Floating IP addresses section under the Network menu, where it will be shown as "(detached)".
At this point, you have two options: reattach the floating IP to the same server (continue with steps 4-5 below), or attach it to a different server entirely. If attaching to a different server, you'll need to configure the floating IP at the operating system level on that server - see our guides for CentOS, Debian, Ubuntu, or Windows.
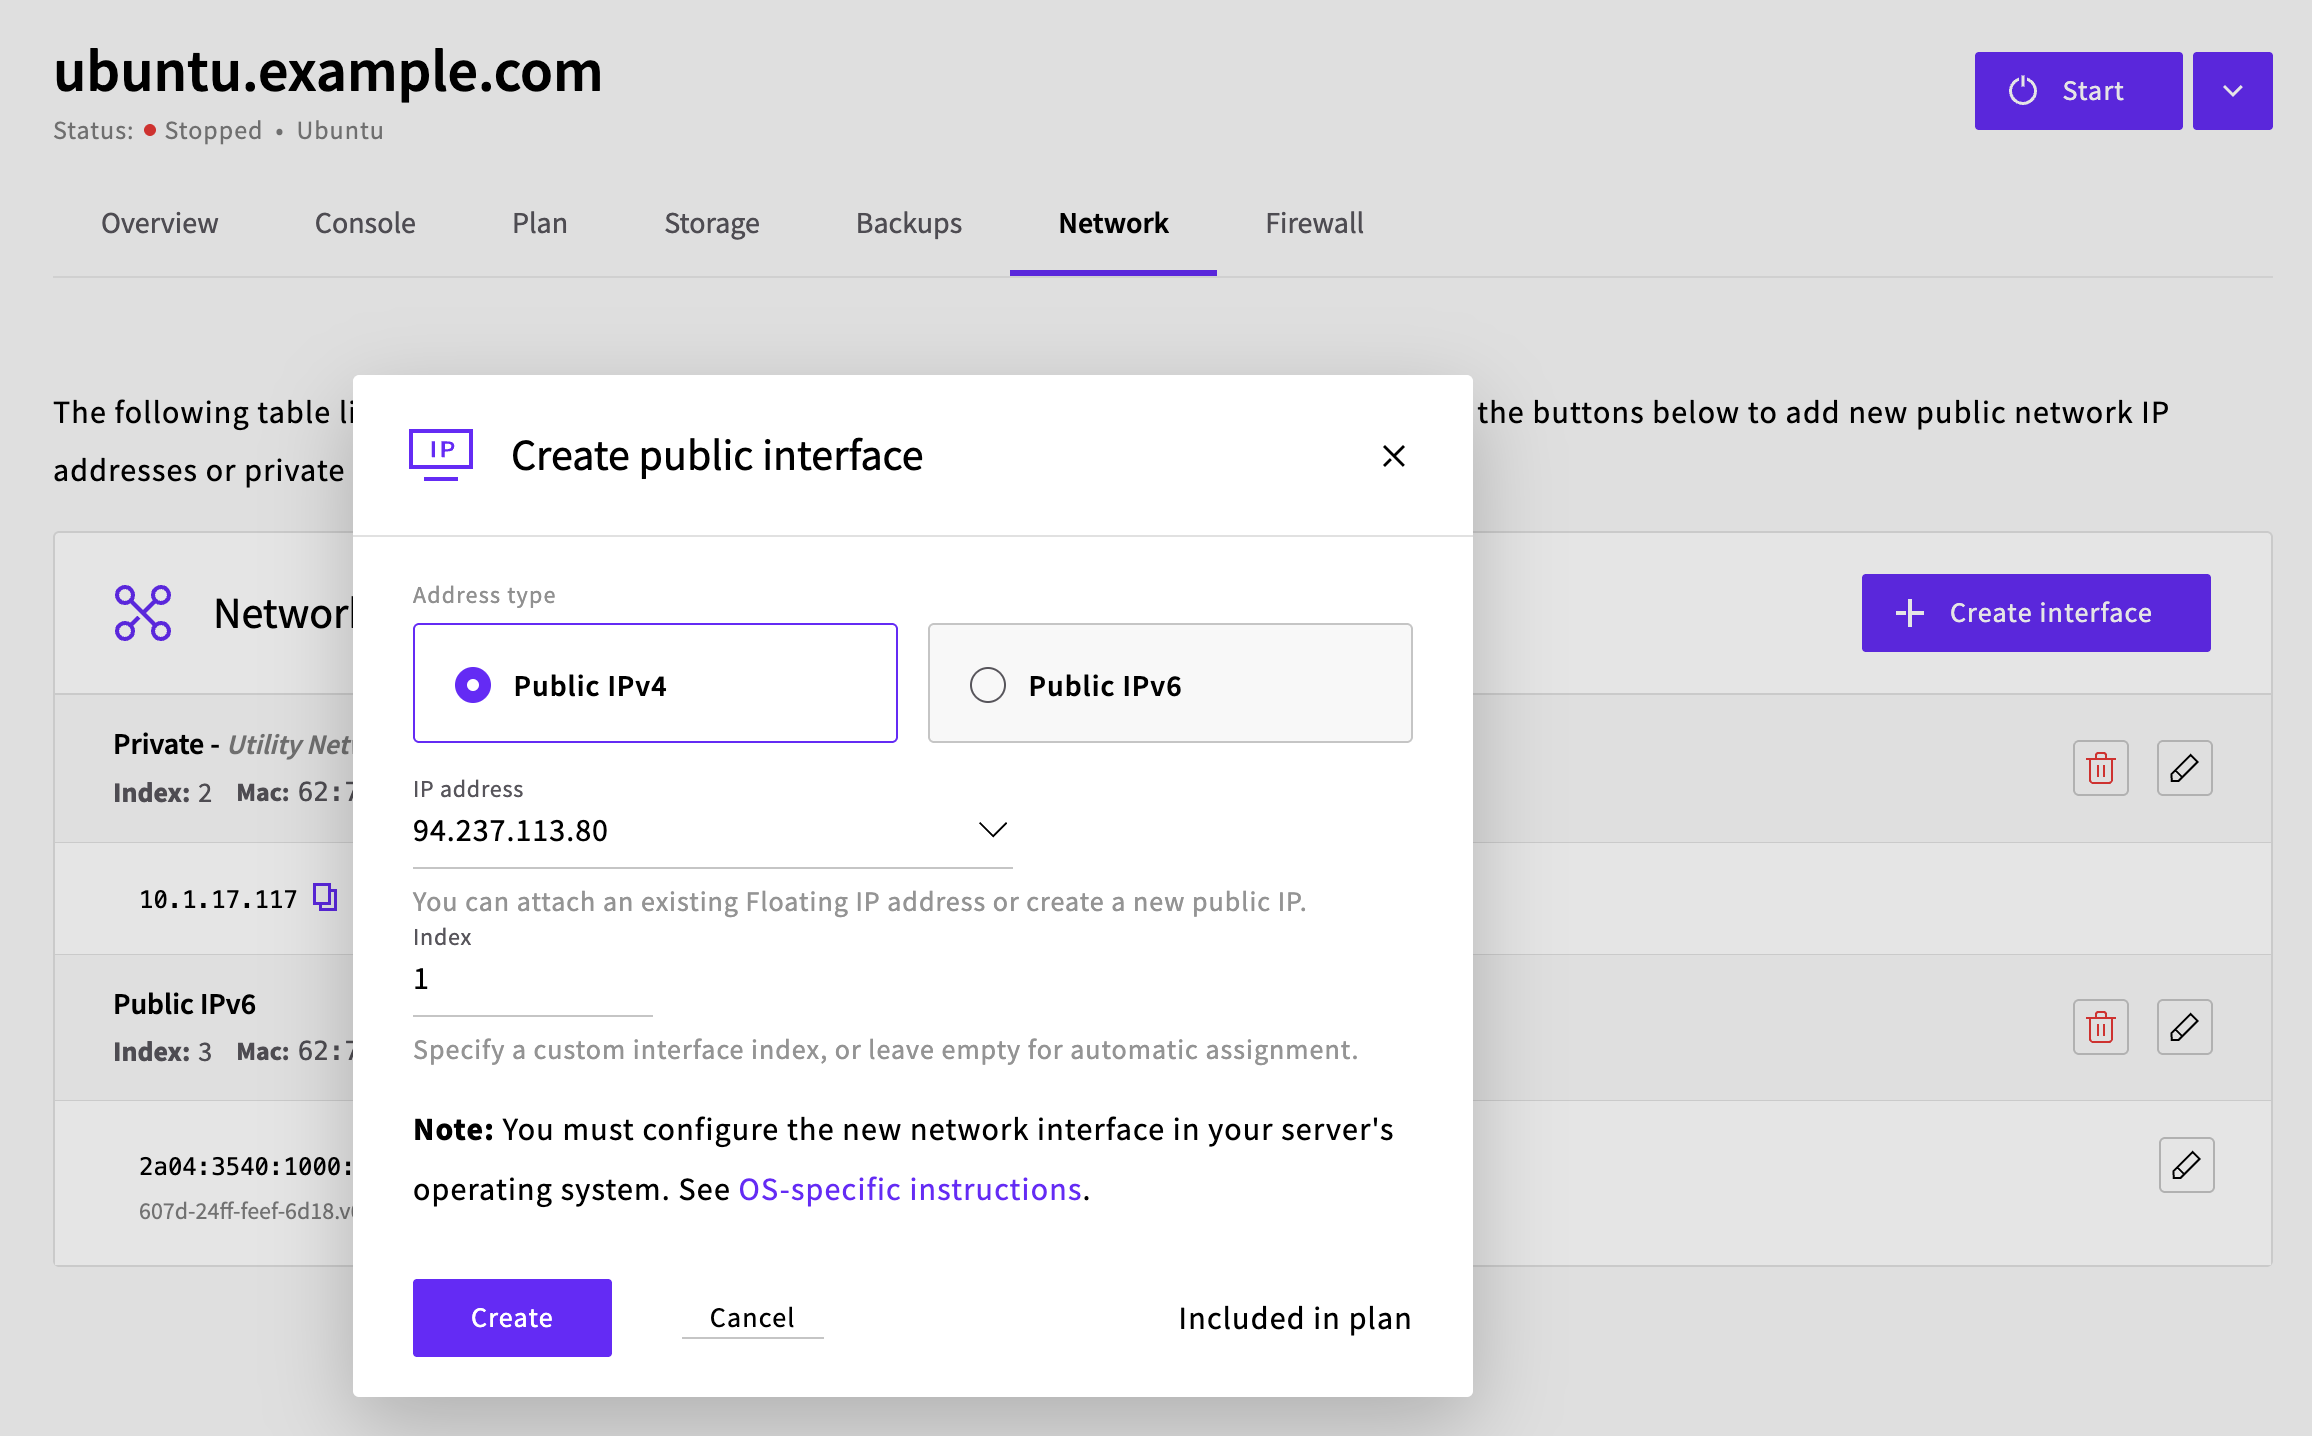
4. Recreate the interface
Create a new public IPv4 interface on your server.
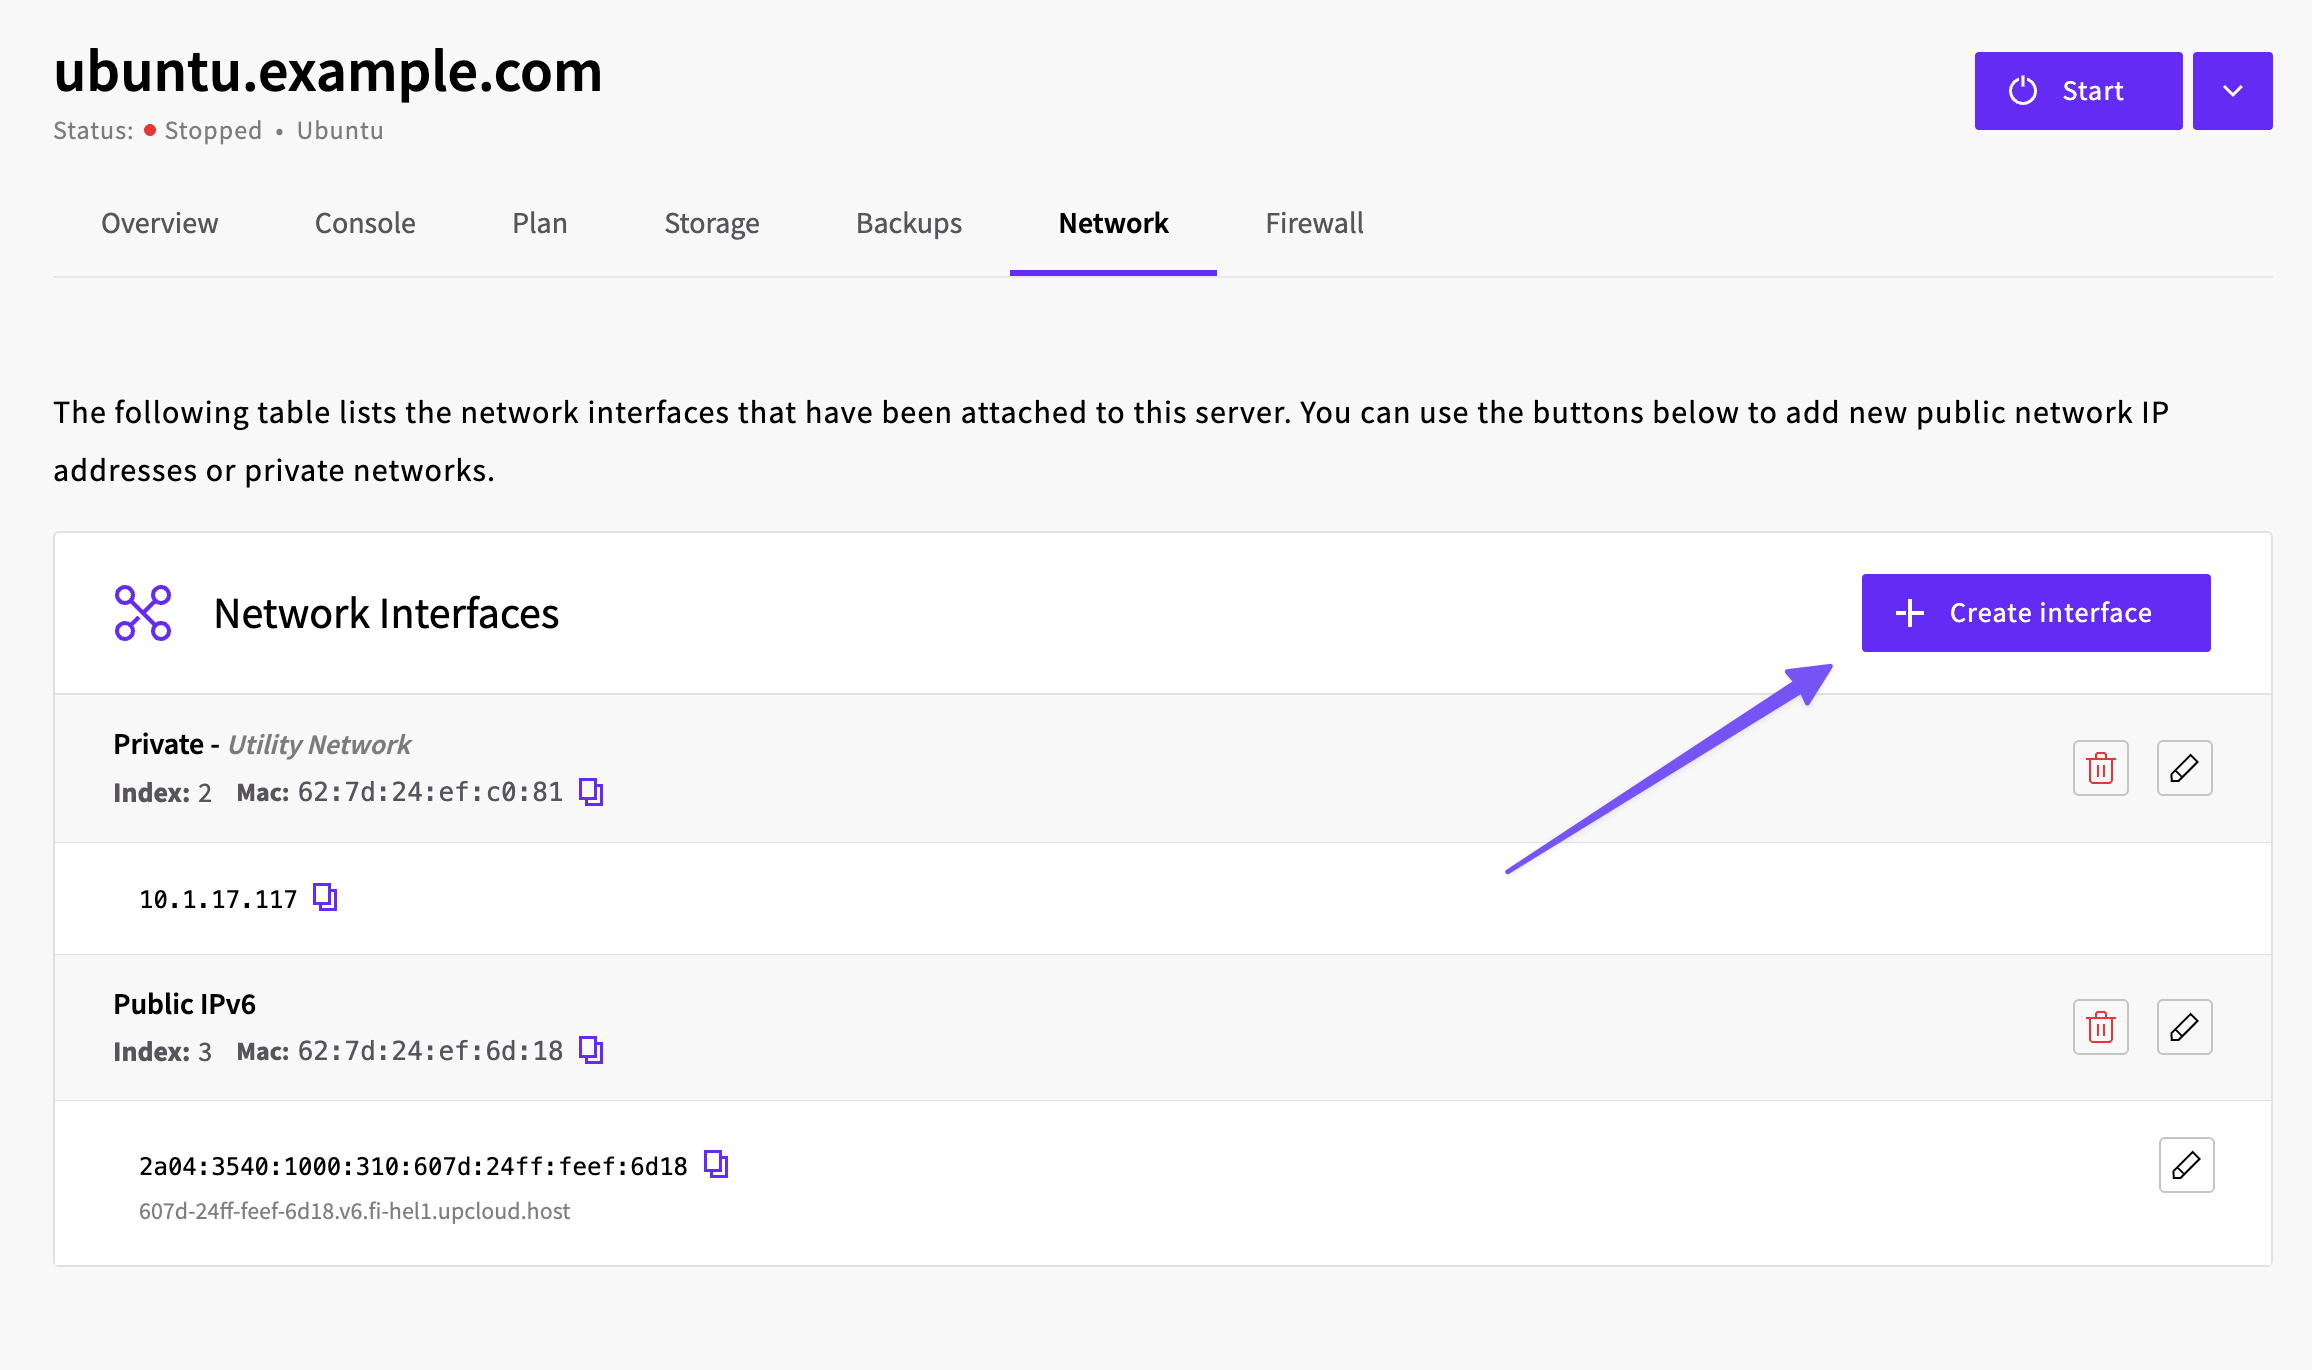
Important: When creating the new interface, use the exact same interface index number you noted in step 3.
Once the interface is created, select your floating IP from the IP address dropdown and click Create to attach it to the new interface.
Once attached, the floating IP will no longer appear in the Floating IPs list (it only shows detached floating IPs), but you can verify it's attached by checking your server's Network tab.
5. Start your server
Power on your server through the Control Panel. Your server should now boot with the same IP address, but it's now configured as a floating IP that can be transferred between servers.
Next steps
Now that your IP address is configured as a floating IP, you can transfer it between servers at any time. See our guide on managing floating IP addresses for more information on transferring floating IPs.
If you need to configure the floating IP on additional servers for failover scenarios, refer to our operating system-specific guides for CentOS, Debian, Ubuntu, or Windows.