
How to copy objects between Managed Object Storage instances on a schedule
If your backup or disaster recovery plan, or a compliance requirement, calls for a copy of your objects in a second region, you can keep one up to date with a scheduled copy. Managed Object Storage doesn't support S3 bucket replication, see S3 standard compatible. This guide describes how to set up a Cloud Server that copies new and changed objects from a bucket in one Managed Object Storage instance to a bucket in another, every five minutes. The copy runs over private connections and keeps the destination bucket equal to the source bucket, deletions included. After each successful run, it writes a marker object that records when the run started, so you can see how recent the copy is.
Turn on versioning on both buckets, as described below, so that overwritten and deleted objects stay available as earlier versions.
Before you start
You need:
- Two Managed Object Storage instances, for example one in
europe-2and one ineurope-1. The source instance has the bucket to copy. The destination instance has a bucket for the copy and a separate bucket for the marker. - A user for each instance. The source user needs
s3:GetObject,s3:ListBucketands3:GetBucketLocationon the source bucket. The destination user needs full access to the destination bucket and the marker bucket. To turn on versioning on the source bucket and to copy objects back, you also need a source instance user with full access to the source bucket. You can create users and policies in the Control Panel, on the instance's Users and Policies tabs, see Getting started with Managed Object Storage, or with the API, see How to create a user for an Object Storage instance using the API and How to apply user access policies using the API. - An SDN Private Network with a router attached, in the location where the copy runs, for example
de-fra1, and a Cloud Server on it. Object Storage instances can only be attached to a network that has a router. Run the commands in this guide as root on that server.
Attach the instances to the network before you create the server, so that the server gets the routes to the instances' private endpoints when it starts. If the server already exists, restart it after attaching the instances.
This guide covers the following operating systems, installed from the UpCloud templates:
- Ubuntu 22.04, 24.04, and 26.04
- Debian 12 and 13
- AlmaLinux 8, 9, and 10
- Rocky Linux 8, 9, and 10
- Fedora 42 and 43
Attach both instances to the network
Attach each Object Storage instance to the server's private network. Both instances can be attached to the same network, even when they're in different regions. The attachment takes a few minutes. Wait until the instance is running again before you create or restart the server.
In the Control Panel, open the Object Storage instance. On its Overview page, under Private access, click Attach private network.
Select the Network, then enter a Name for the attachment.
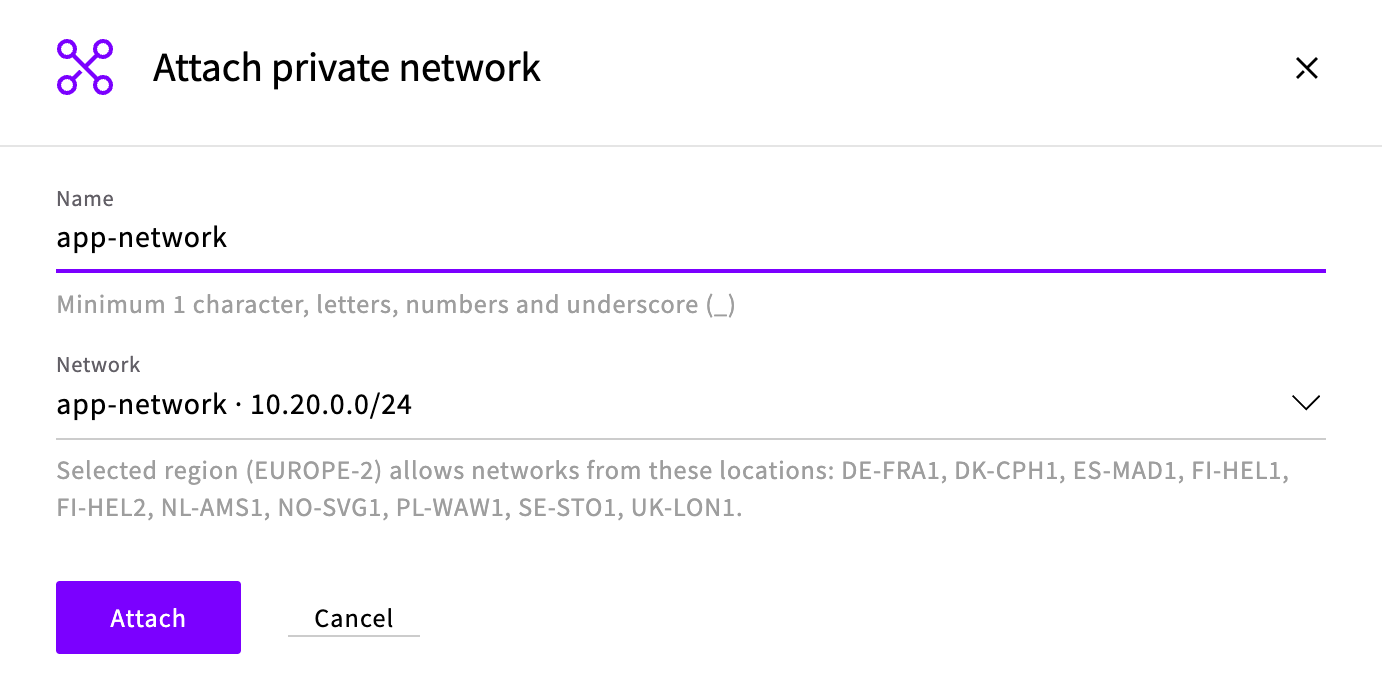
Click Attach. The instance's status shows Setting up network… until the attachment is ready, and then Running.
Repeat for the other instance.
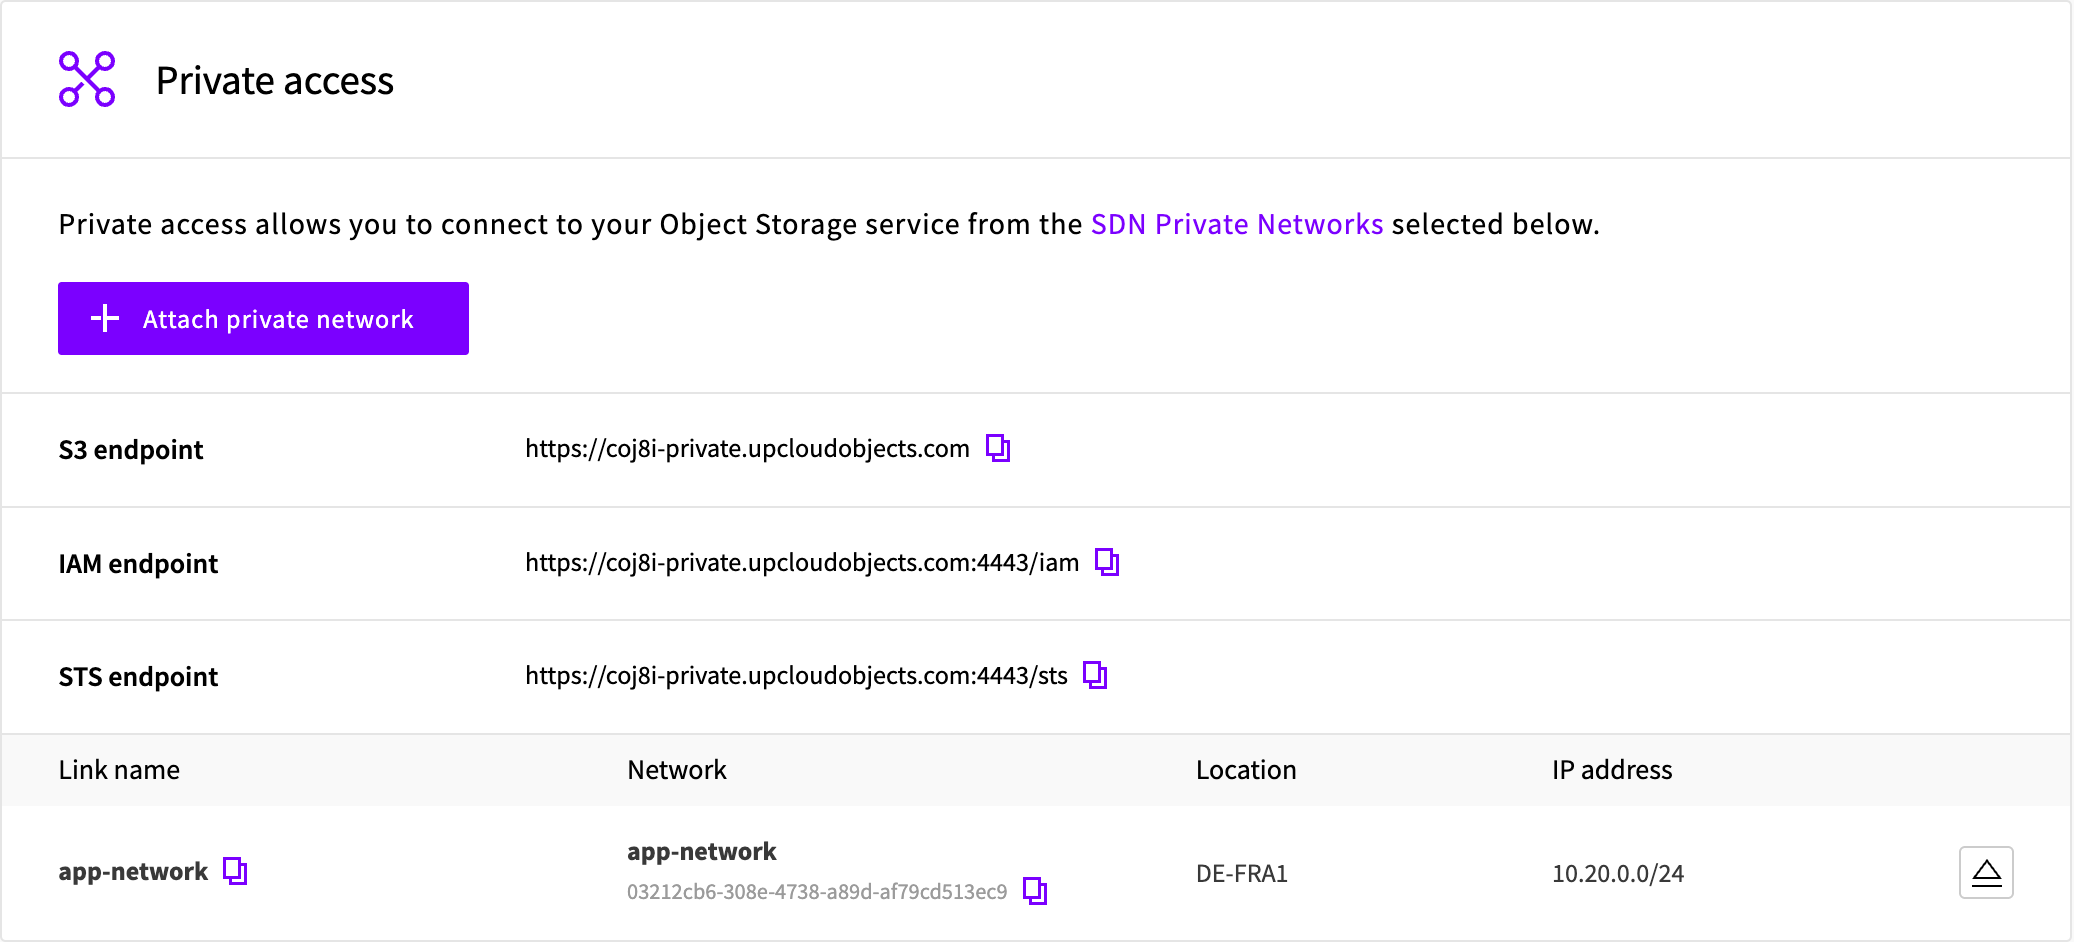
When the attachment is ready, Private access shows the instance's private endpoints and the attached network.
Install rclone
Install the current rclone release from the rclone project, and create the folder for its configuration file:
apt-get update && apt-get install -y curl
curl -fsSLo /tmp/rclone.deb https://downloads.rclone.org/rclone-current-linux-amd64.deb
apt-get install -y /tmp/rclone.deb
mkdir -p /root/.config/rcloneConfigure rclone
Save the following as /root/.config/rclone/rclone.conf, with each user's access keys and each instance's private endpoint. You can find the private endpoint in the Control Panel, on the instance's Overview page under Private access (the S3 endpoint), or in the instance's details from the API.
[src]
type = s3
provider = Other
access_key_id = <source-access-key>
secret_access_key = <source-secret-key>
endpoint = https://<source-private-endpoint>
region = <source-region>

[dst]
type = s3
provider = Other
access_key_id = <destination-access-key>
secret_access_key = <destination-secret-key>
endpoint = https://<destination-private-endpoint>
region = <destination-region>
Check that the server reaches both buckets. Each command lists the bucket's contents, or prints nothing for an empty bucket, without an error:
rclone lsf src:<source-bucket>
rclone lsf dst:<destination-bucket>
Turn on versioning
Turn on versioning on the destination bucket:
rclone backend versioning dst:<destination-bucket> EnabledThe source user can only read the source bucket, so turn on versioning on the source bucket with a user that has full access to it. See How to enable and manage S3 object versioning.
To remove earlier versions after a set number of days, see How to configure lifecycle policies.
Schedule the copy
Save the copy script as
/usr/local/bin/copy-objects:#!/bin/bash set -euo pipefail start=$(date -u +%FT%TZ) rclone sync src:<source-bucket> dst:<destination-bucket> --transfers 16 --checkers 16 --s3-no-check-bucket echo "$start" | rclone rcat dst:<status-bucket>/last-copySave the service as
/etc/systemd/system/copy-objects.service:[Unit] Description=Copy objects to the other Object Storage instance [Service] Type=oneshot ExecStart=/usr/local/bin/copy-objectsSave the timer as
/etc/systemd/system/copy-objects.timer:[Unit] Description=Run the object copy every 5 minutes [Timer] OnBootSec=2min OnUnitActiveSec=5min [Install] WantedBy=timers.targetMake the script executable and start the timer:
chmod 755 /usr/local/bin/copy-objects
systemctl daemon-reload
systemctl enable --now copy-objects.timer
Check the copy
The marker object holds the start time of the last successful run, and the timer shows when the next run starts:
rclone cat dst:<status-bucket>/last-copy
systemctl list-timers copy-objects.timer
If the marker is older than two intervals, the copy has stopped. To see why, run journalctl -u copy-objects.service.
Copy in the other direction
The copy runs in one direction only: each run makes the destination bucket match the source bucket. If you switch your application to the destination bucket, a later run deletes the objects it adds there and replaces the objects it changes with the source's copies. Before you switch, turn off the timer:
systemctl disable --now copy-objects.timerTo switch your application back to the source bucket, first copy the objects back from the destination bucket. The copy back makes the source bucket match the destination bucket. Objects that are only in the source bucket are deleted, and with versioning on they stay available as earlier versions.
The source user only reads the source bucket, so add a remote for the source instance user with full access to the source bucket. Add it to the end of /root/.config/rclone/rclone.conf:
[back]
type = s3
provider = Other
access_key_id = <source-writer-access-key>
secret_access_key = <source-writer-secret-key>
endpoint = https://<source-private-endpoint>
region = <source-region>
Copy back while your application isn't writing to the destination bucket, so that the source bucket gets all of its changes:
rclone sync dst:<destination-bucket> back:<source-bucket> --transfers 16 --checkers 16 --s3-no-check-bucketThen switch your application to the source bucket, and turn the timer back on to copy in the original direction again:
systemctl enable --now copy-objects.timer