
Decreasing storage size on CentOS 8/9, CentOS Stream 8/9, and Rocky Linux 8/9 Cloud Servers
In order to resize your server to a smaller plan, you must first decrease the size of the server’s storage device to match the new plan. This is quite straightforward with Debian/Ubuntu-based servers. However, newer versions of CentOS, such as CentOS 8/9, CentOS Stream 8/9, and Rocky Linux 8/9, use the XFS filesystem, which has a unique limitation – it can only be expanded and cannot be shrunk. Therefore, to decrease the size of a newer CentOS-based server's storage device, you must rely on third-party tools like GParted and Clonezilla.
The steps outlined below describe how to do this.
Before proceeding, we highly recommend you create a backup of your server. This will come in handy should anything go wrong.
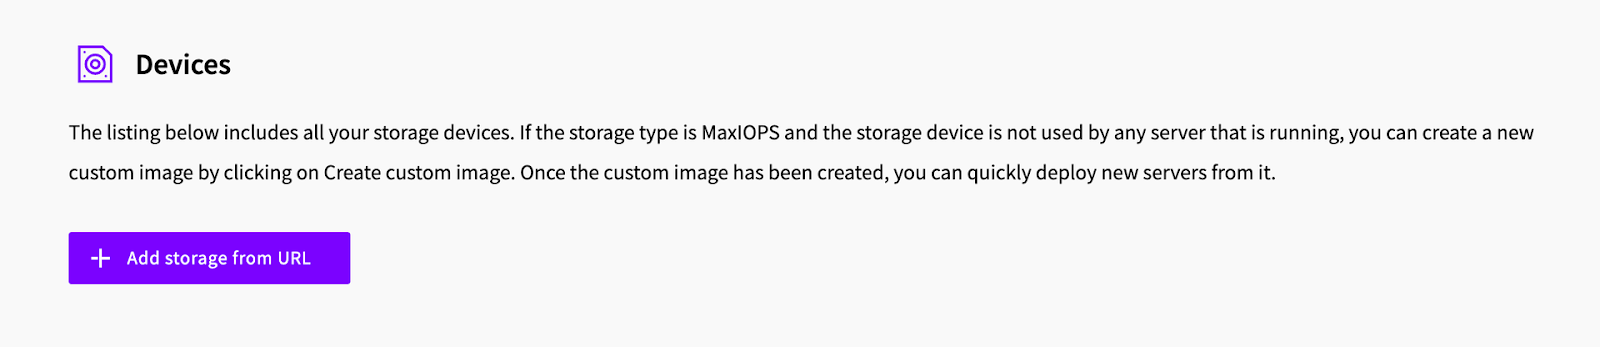
Since we’ll be using GParted and Clonezilla, the first step involves importing their bootable iso files. You can do this by heading over to the storage tab in the hub and clicking Add storage.
You can find the live CDs from their respective websites, or you can import them both directly using the URLs below:
# gparted
https://tools.g7bao.upcloudobjects.com/gparted-live-1.5.0-1-amd64.iso

# clonezilla
https://tools.g7bao.upcloudobjects.com/clonezilla-live-3.1.0-22-amd64.iso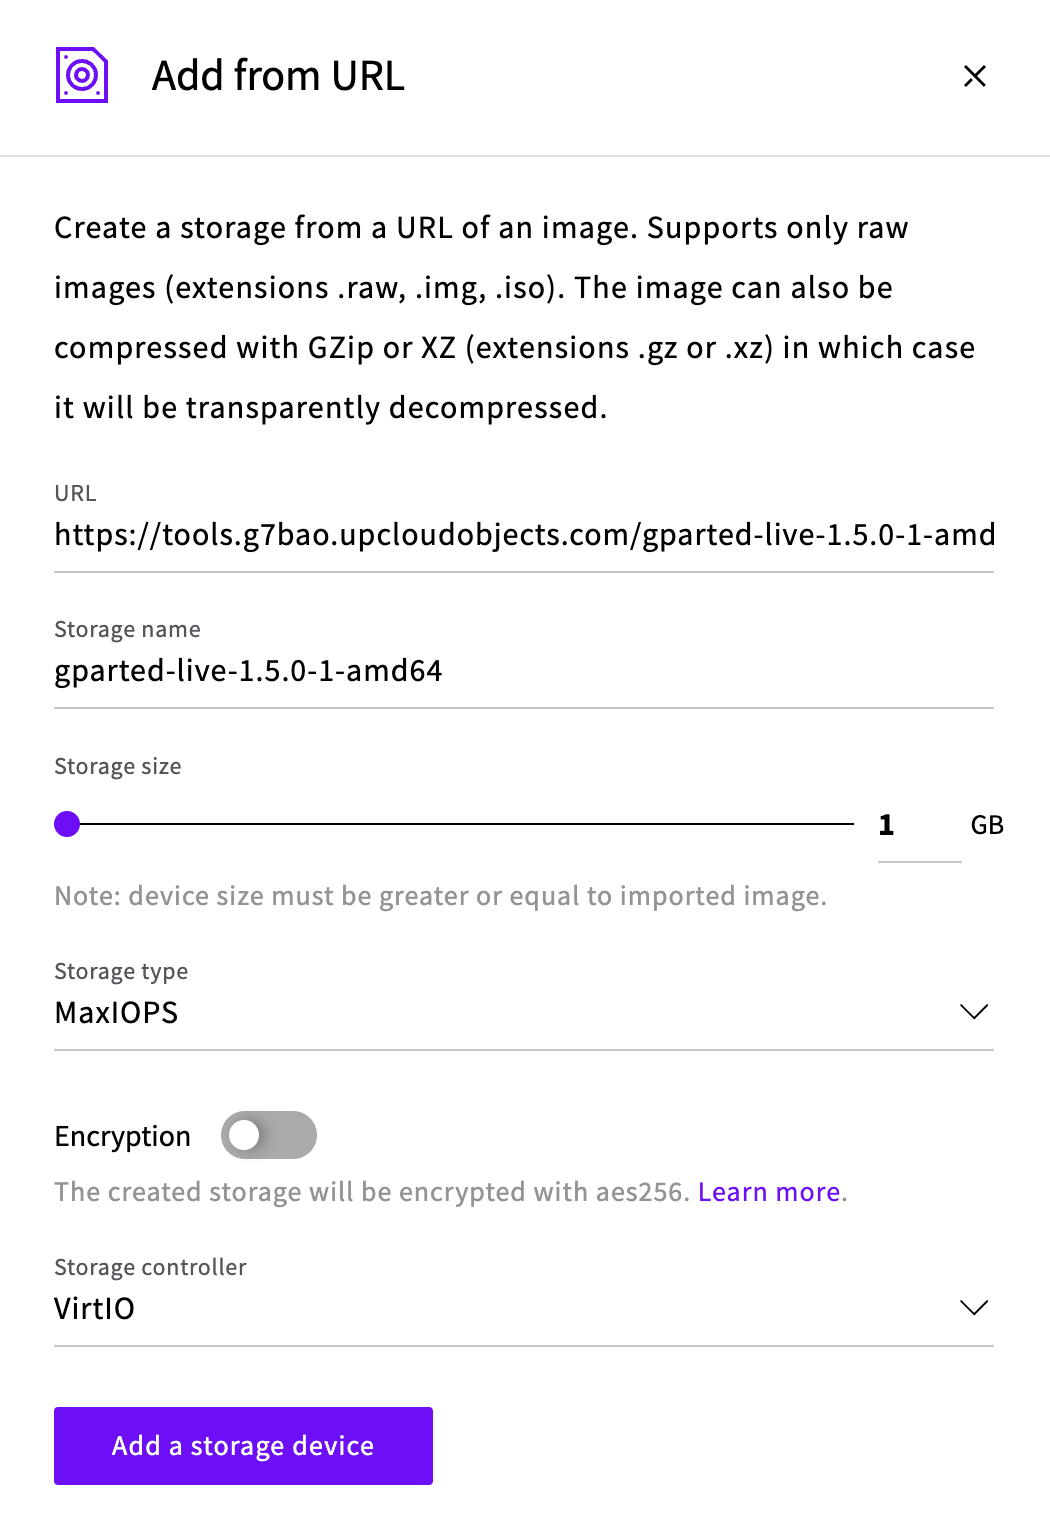
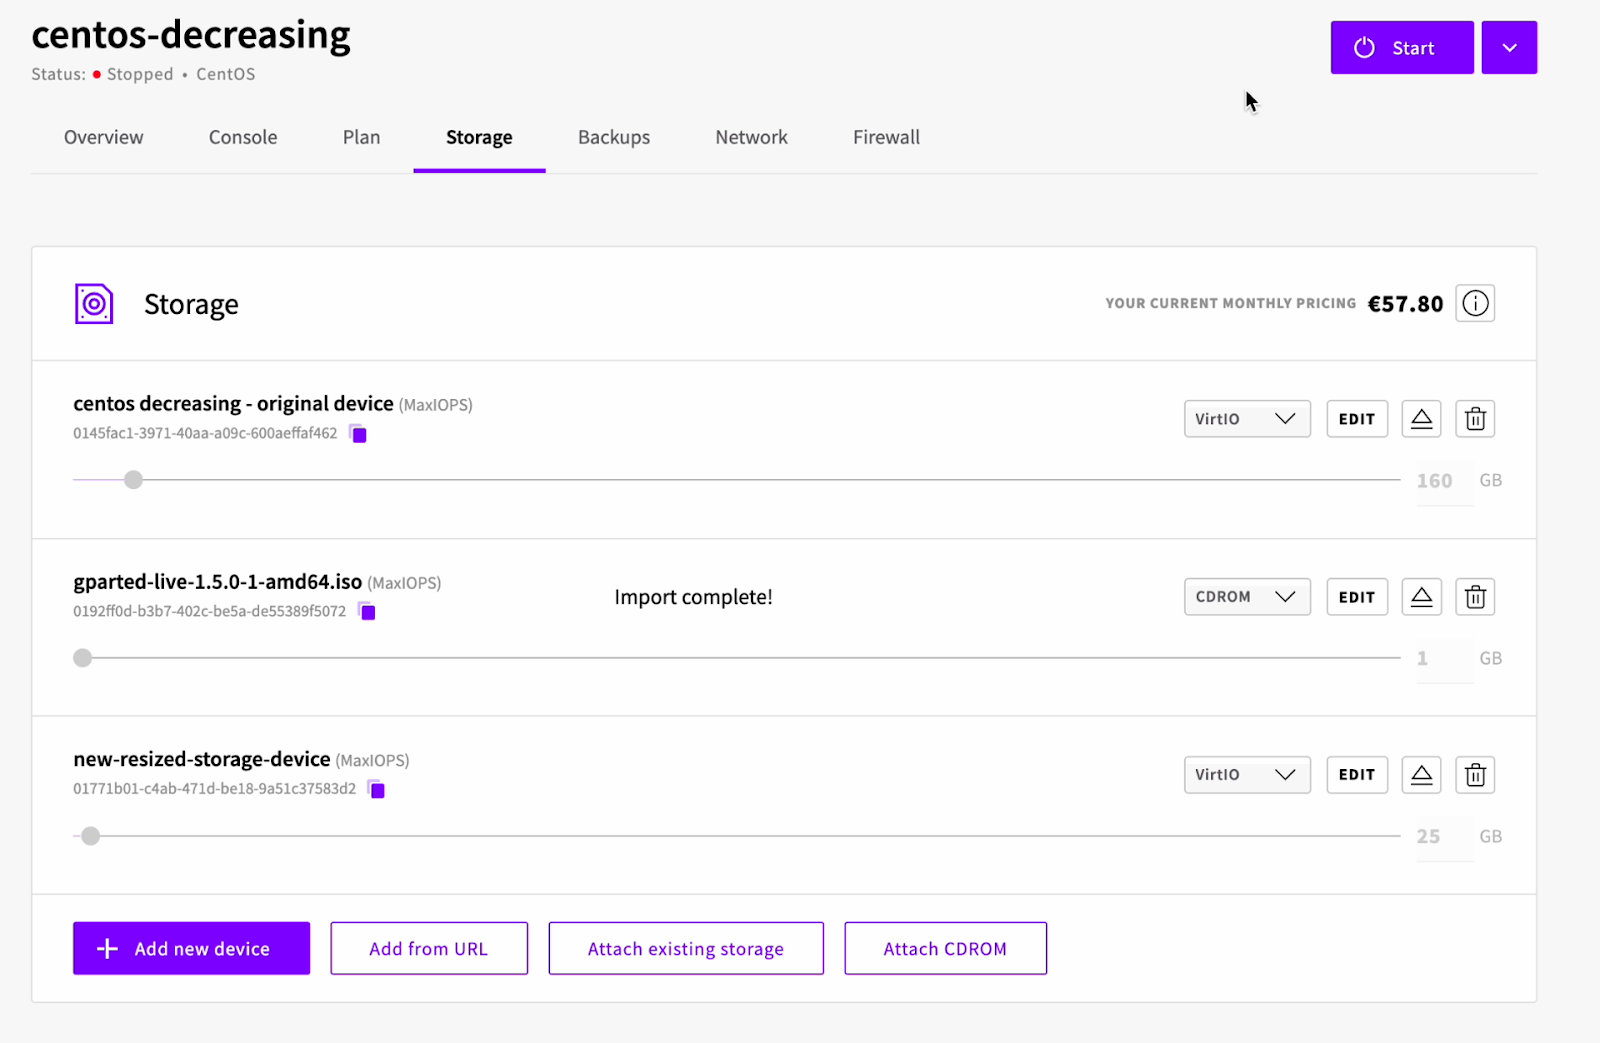
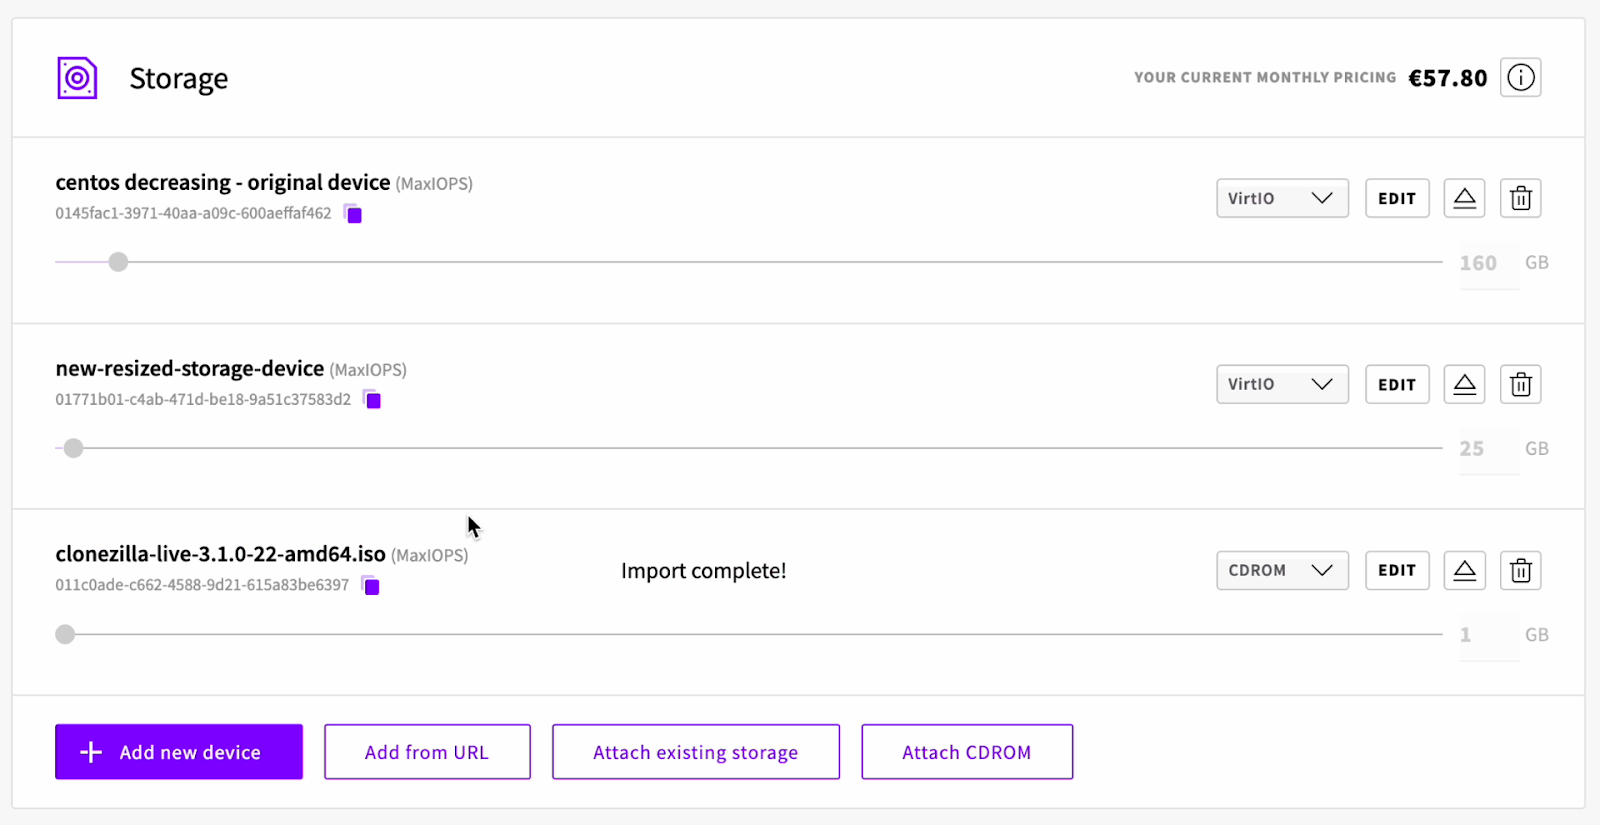
After the live CDs have been imported, head over to the storage tab of the server you wish to resize and attach a new, smaller disk. The size of the new disk should match that of the new plan you’re planning to resize to. For example, if you are currently on a plan with 160GB storage and wish to resize to a plan with 25GB storage, then the new disk should be 25 GB.
Additionally, attach the GParted live CD that you imported in the previous step. To do this, click the button that says "Attach existing storage", and then look for your GParted live CD. Make sure that the storage controller is set to CDROM.
At this point, you should now have a total of three storage devices attached to your server:
- the original storage device,
- the new smaller storage device, and
- the GParted live CD
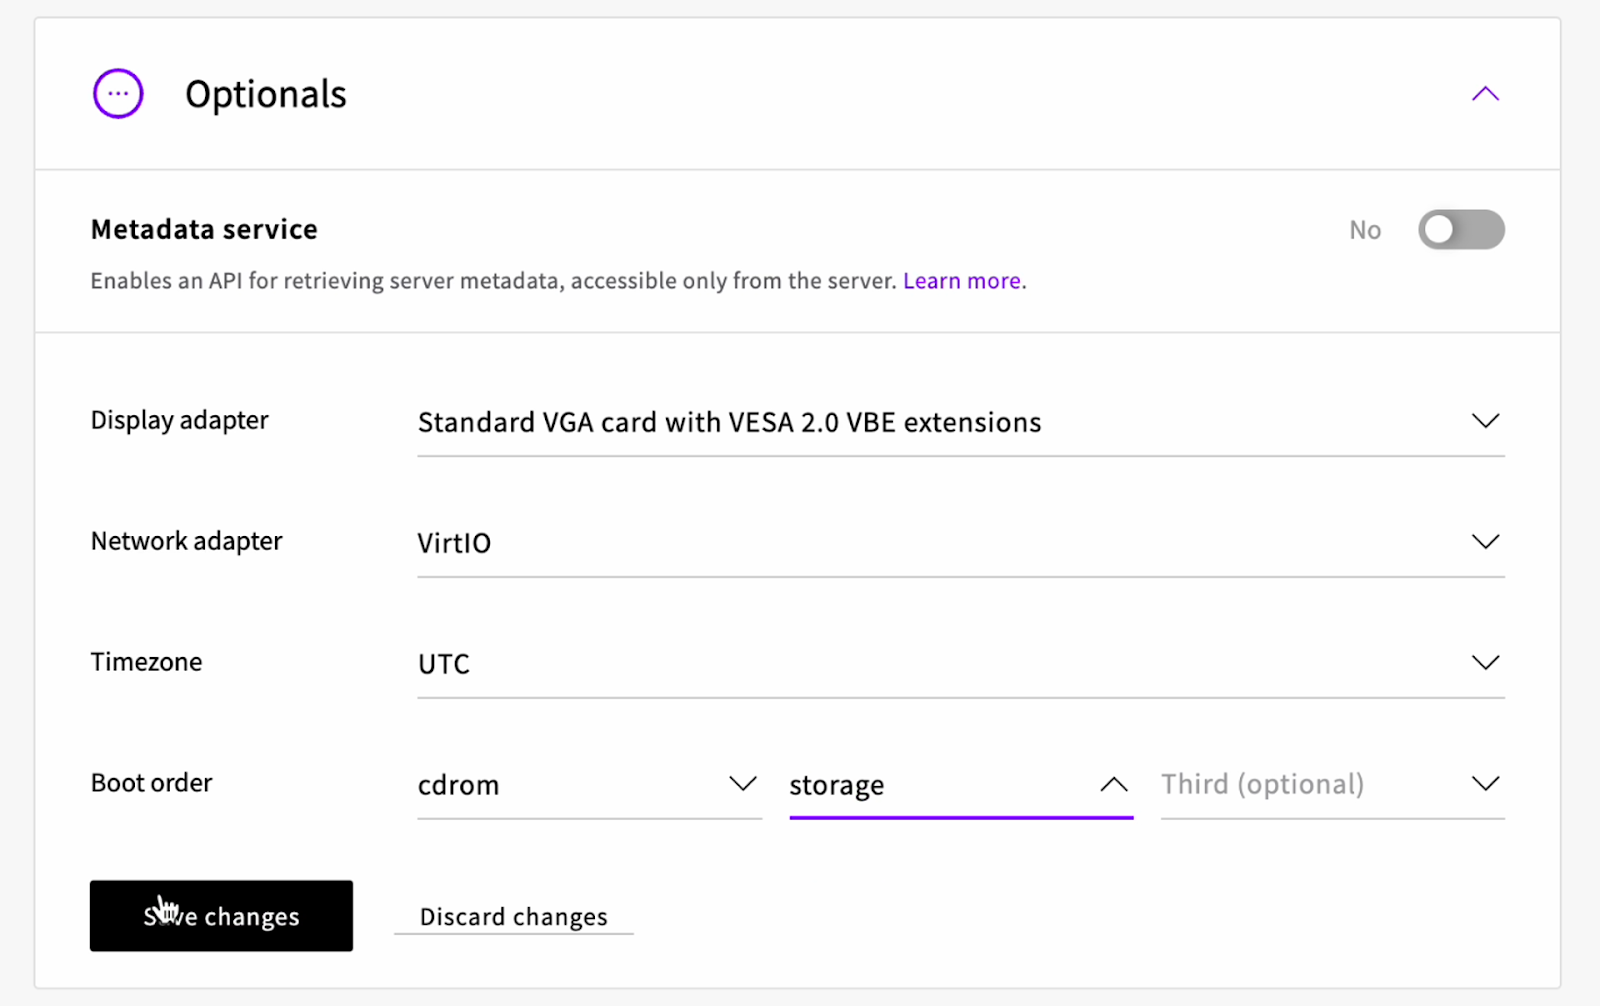
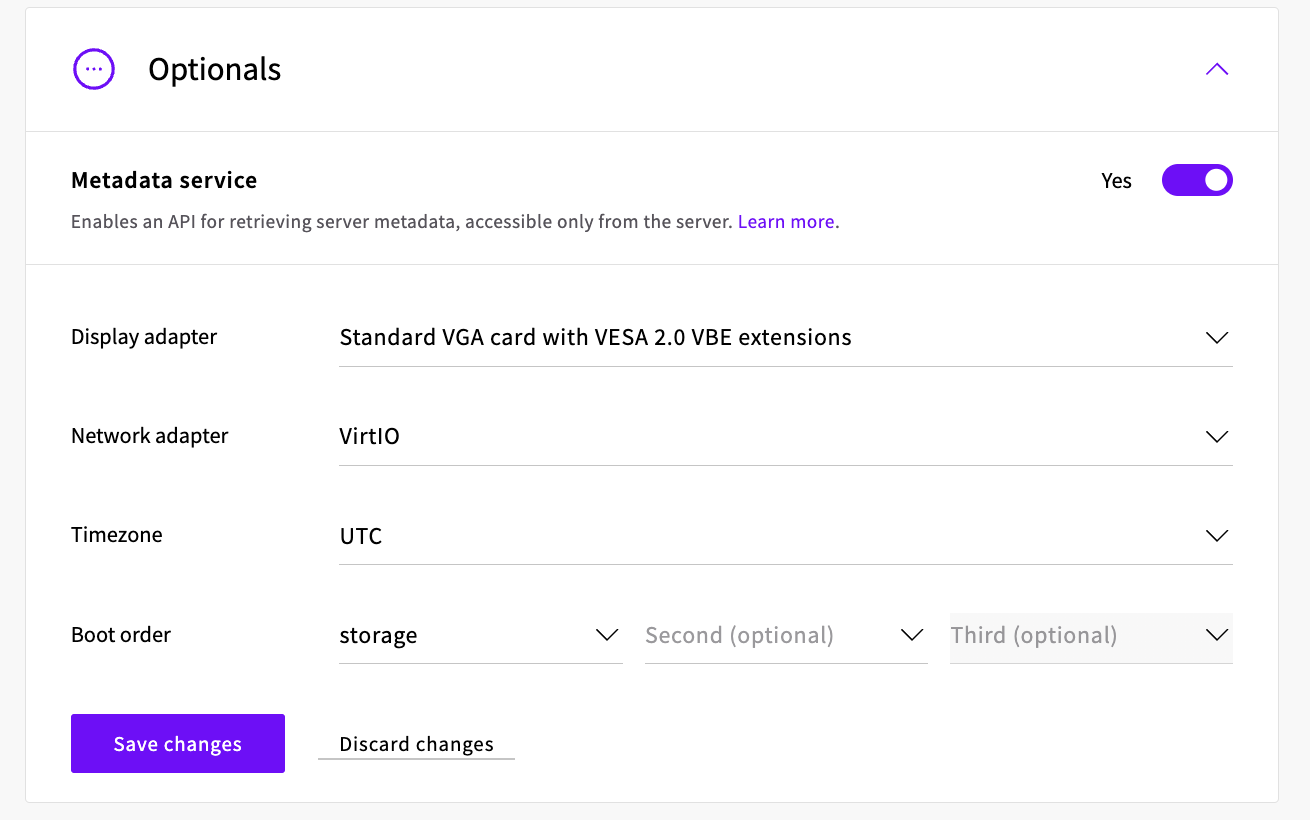
With the server still turned off, head over to the server’s Overview tab and scroll down to the Optionals section. Here you need to set the Boot order to "CDROM, STORAGE" as shown in the screenshot below. This will cause the server to boot into the GParted live CD. After setting the boot order, don’t forget to save the changes.
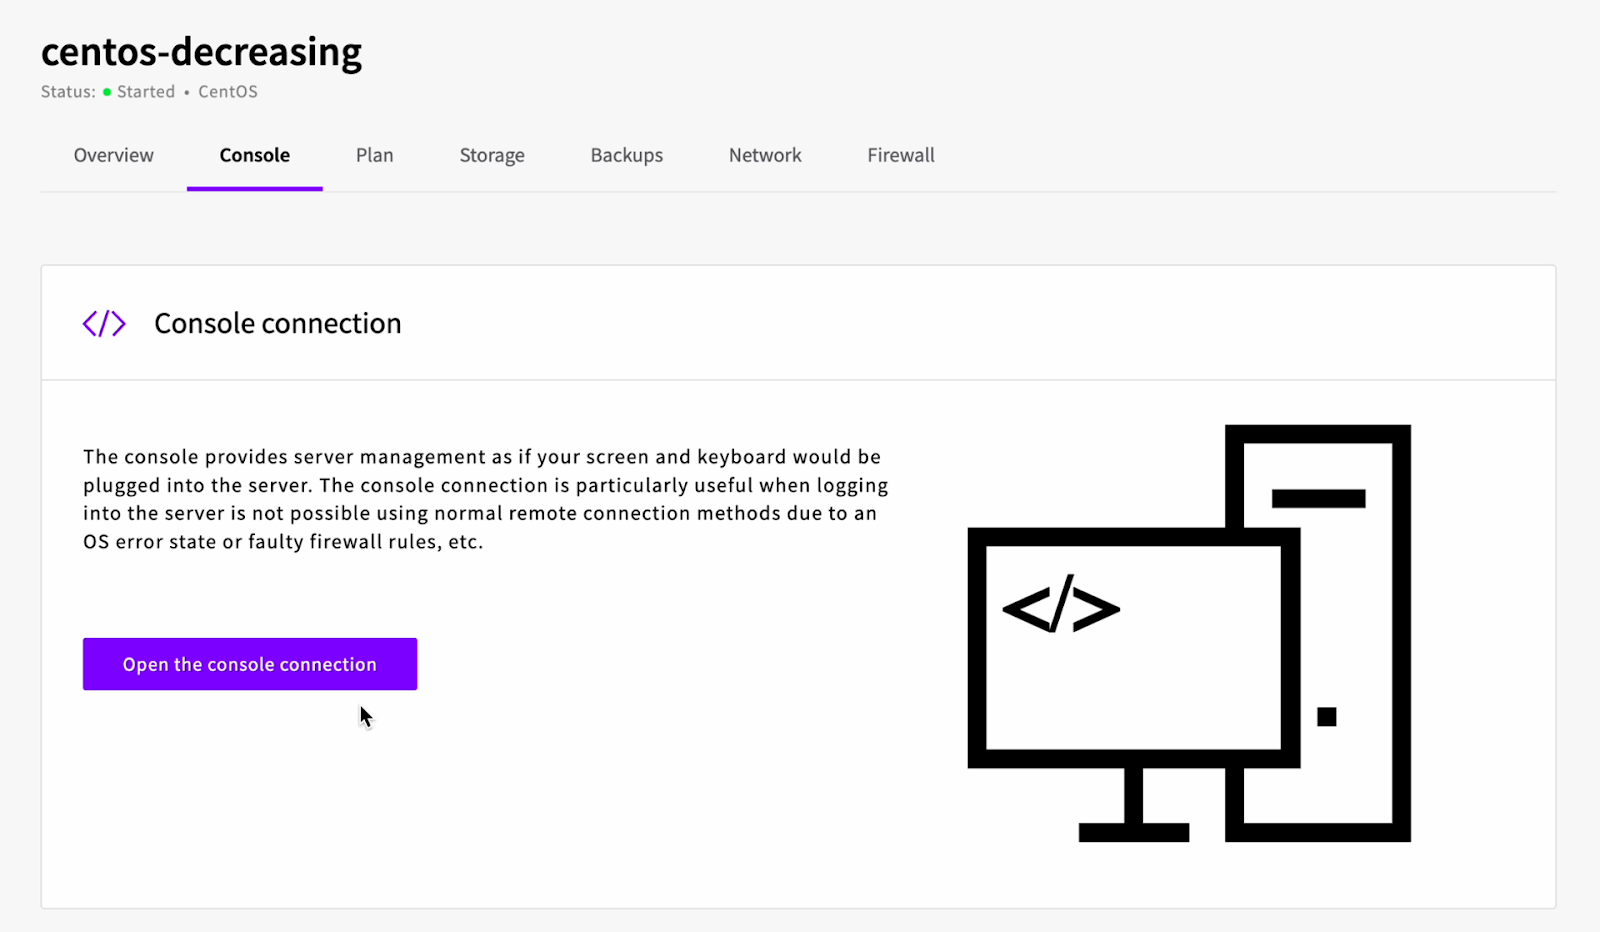
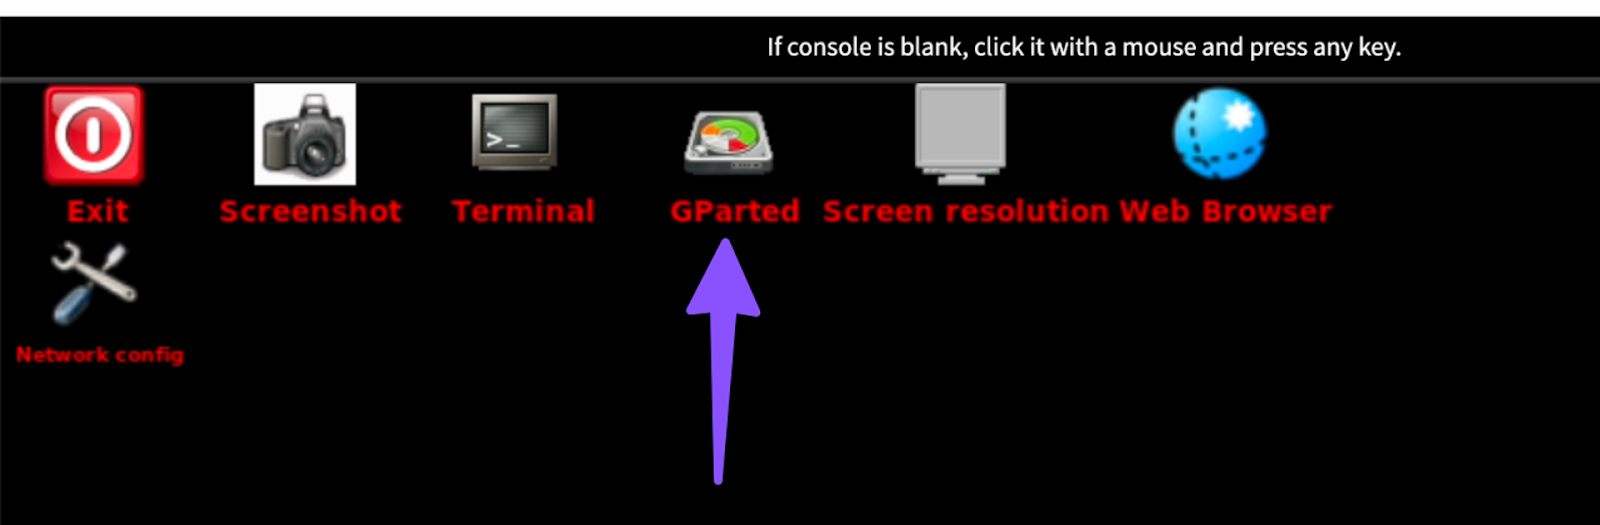
You can now start the server. Then, head over to the Console tab, and once the option to "Open the console connection" becomes available, click on it.
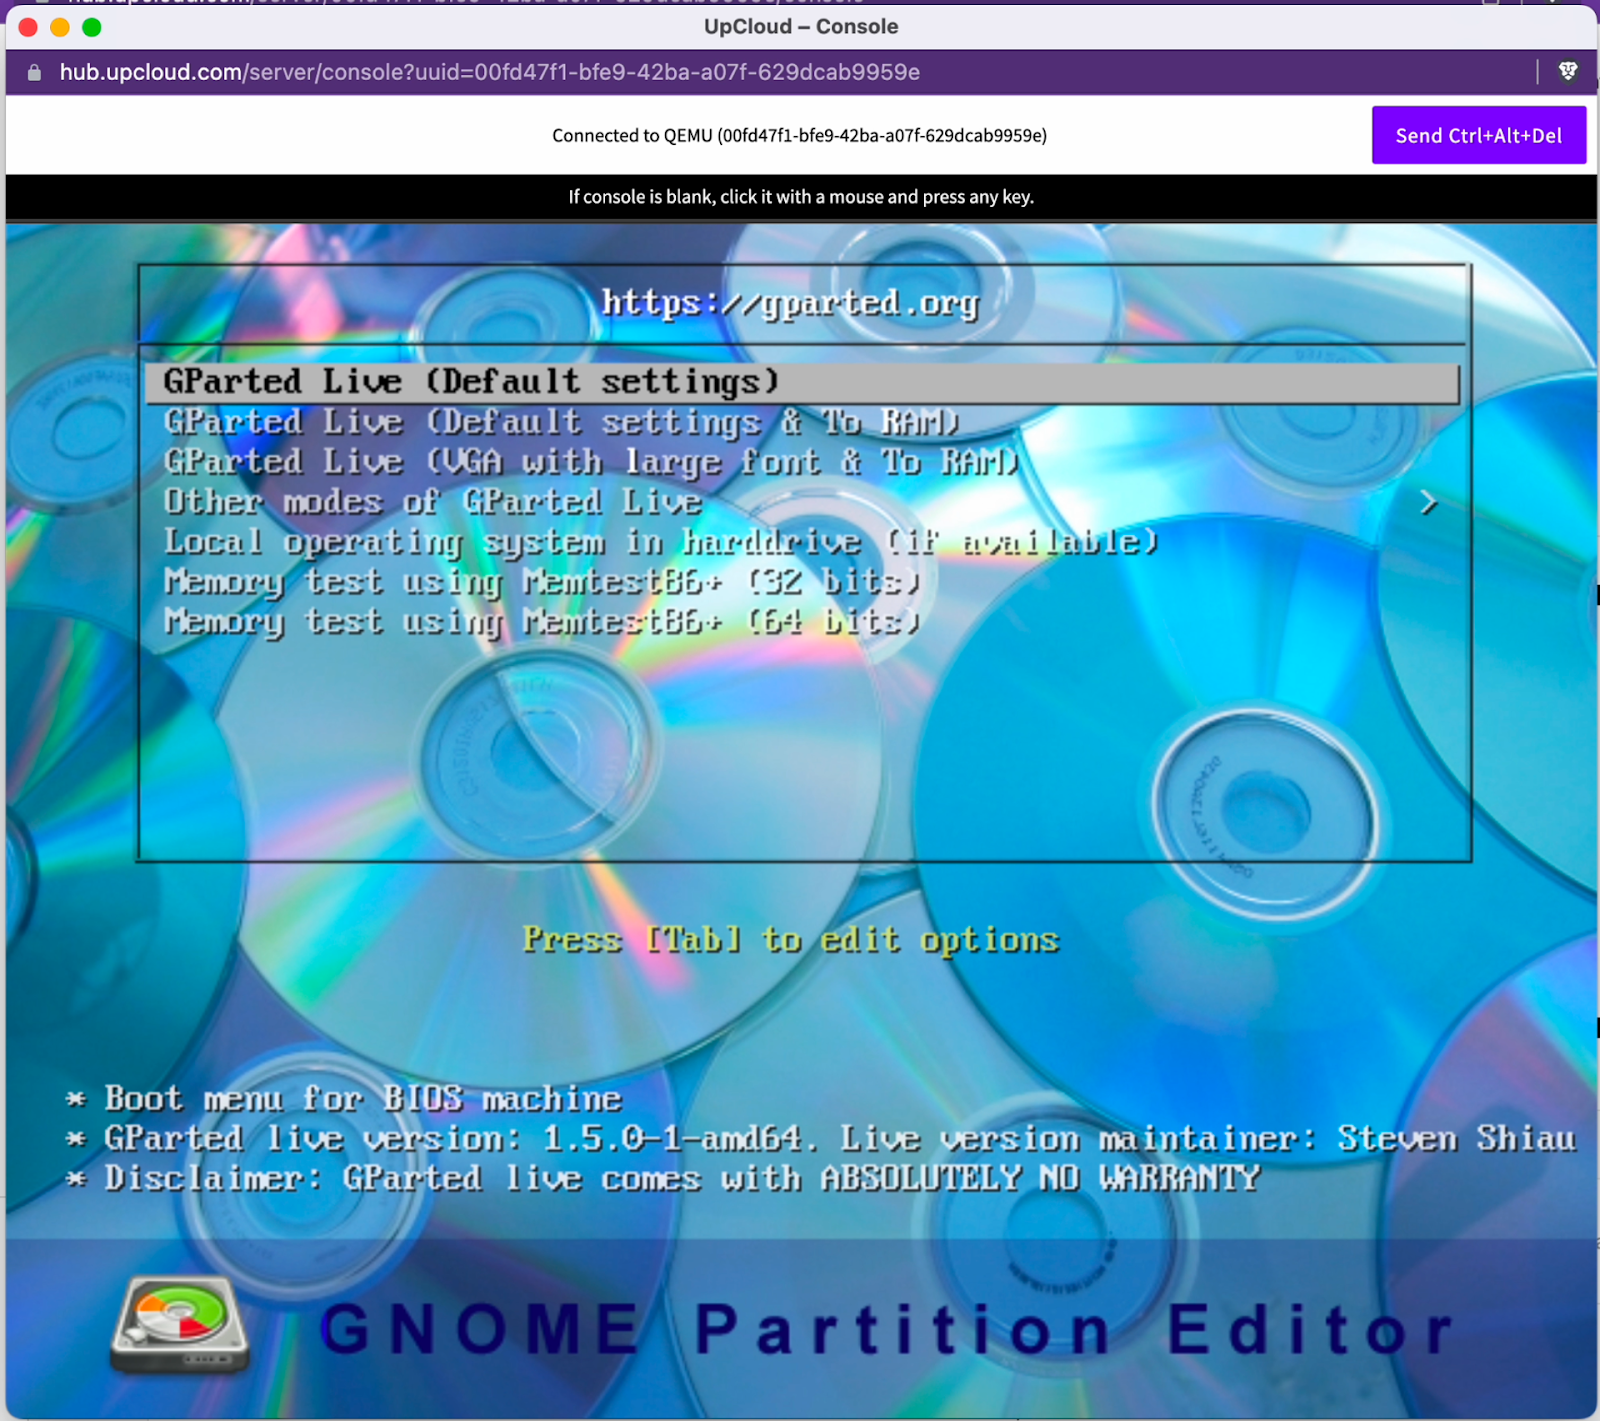
Select the first option in the GParted boot menu, and press enter.
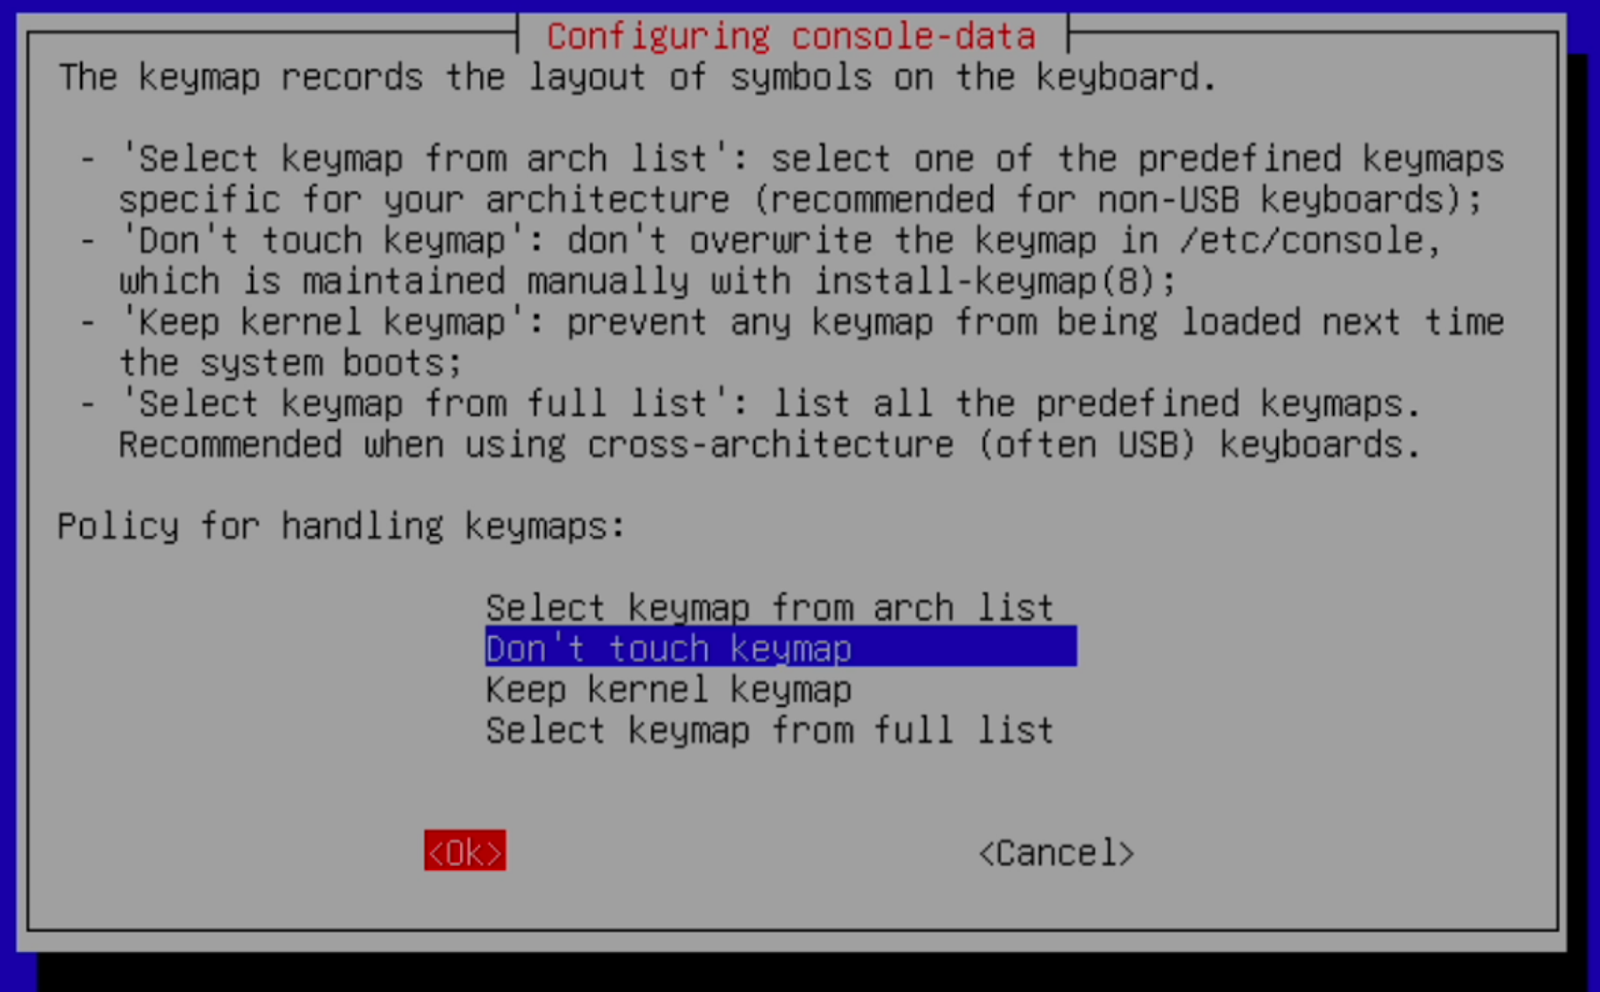
On the next screen, you’ll be asked how to handle keymaps. Leave this on its default setting, don’t change the keymap.
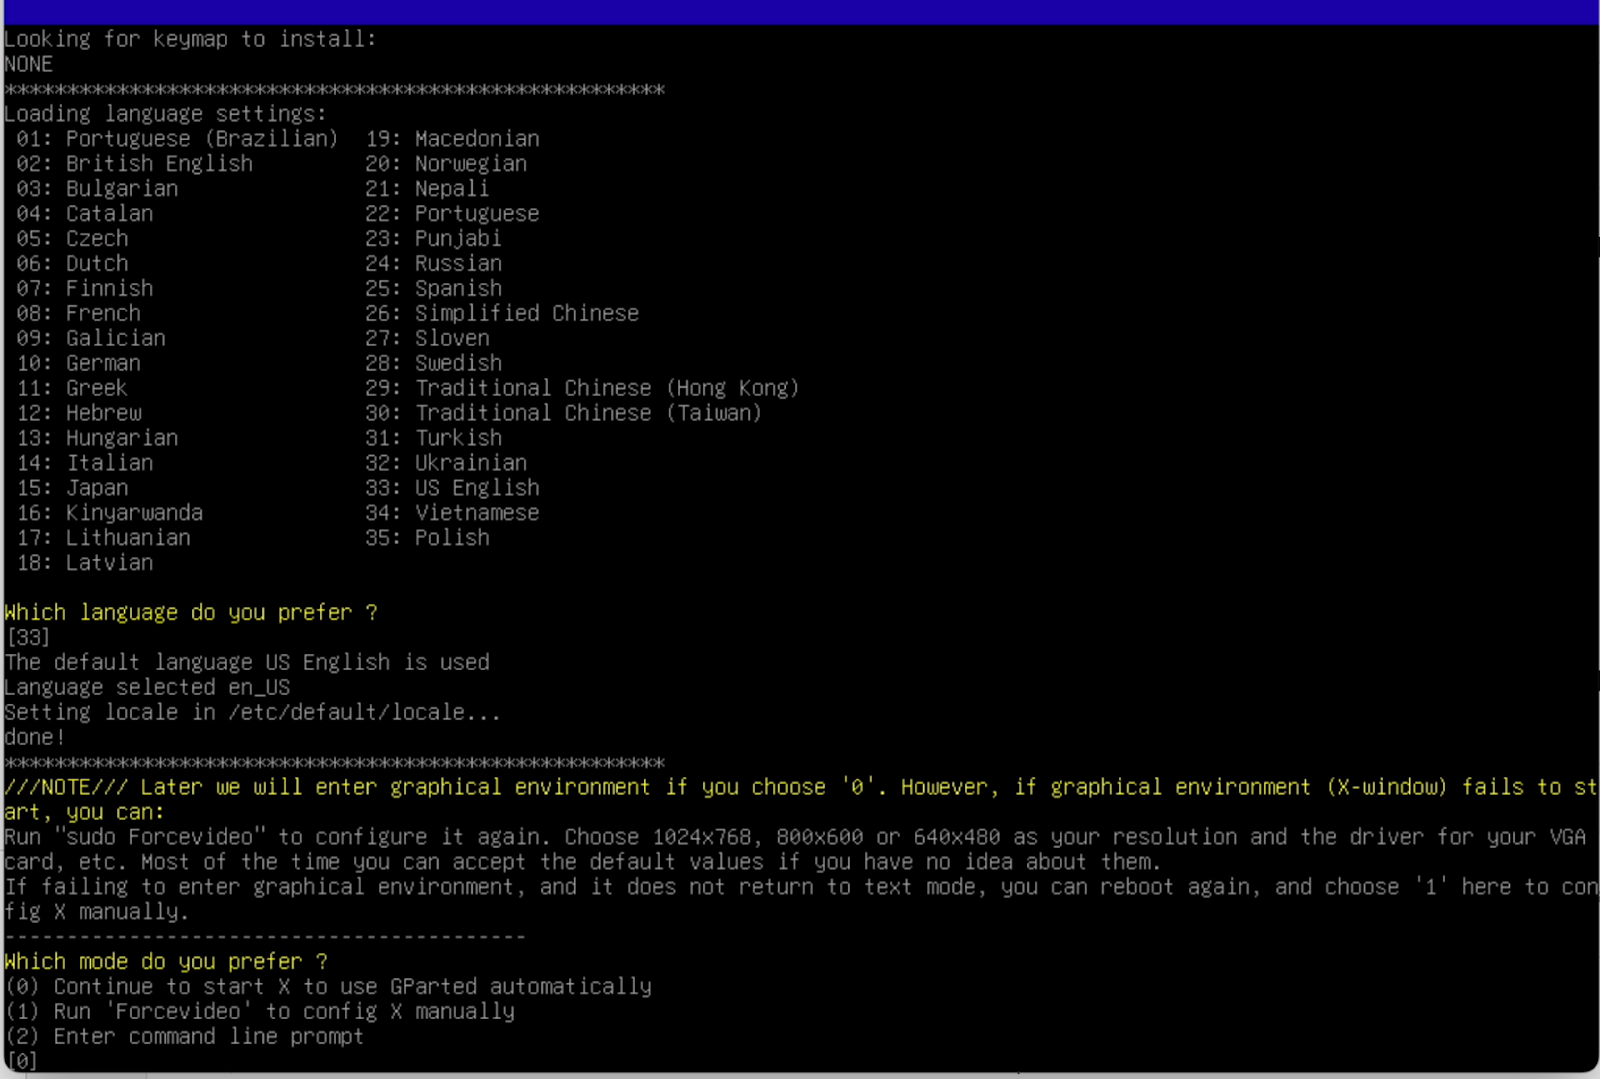
Next, you’ll be asked a series of questions. Just press enter for every question to accept the default values.
The server will eventually boot into a graphical environment and GParted will automatically start. If it doesn’t, just double-click the GParted icon.
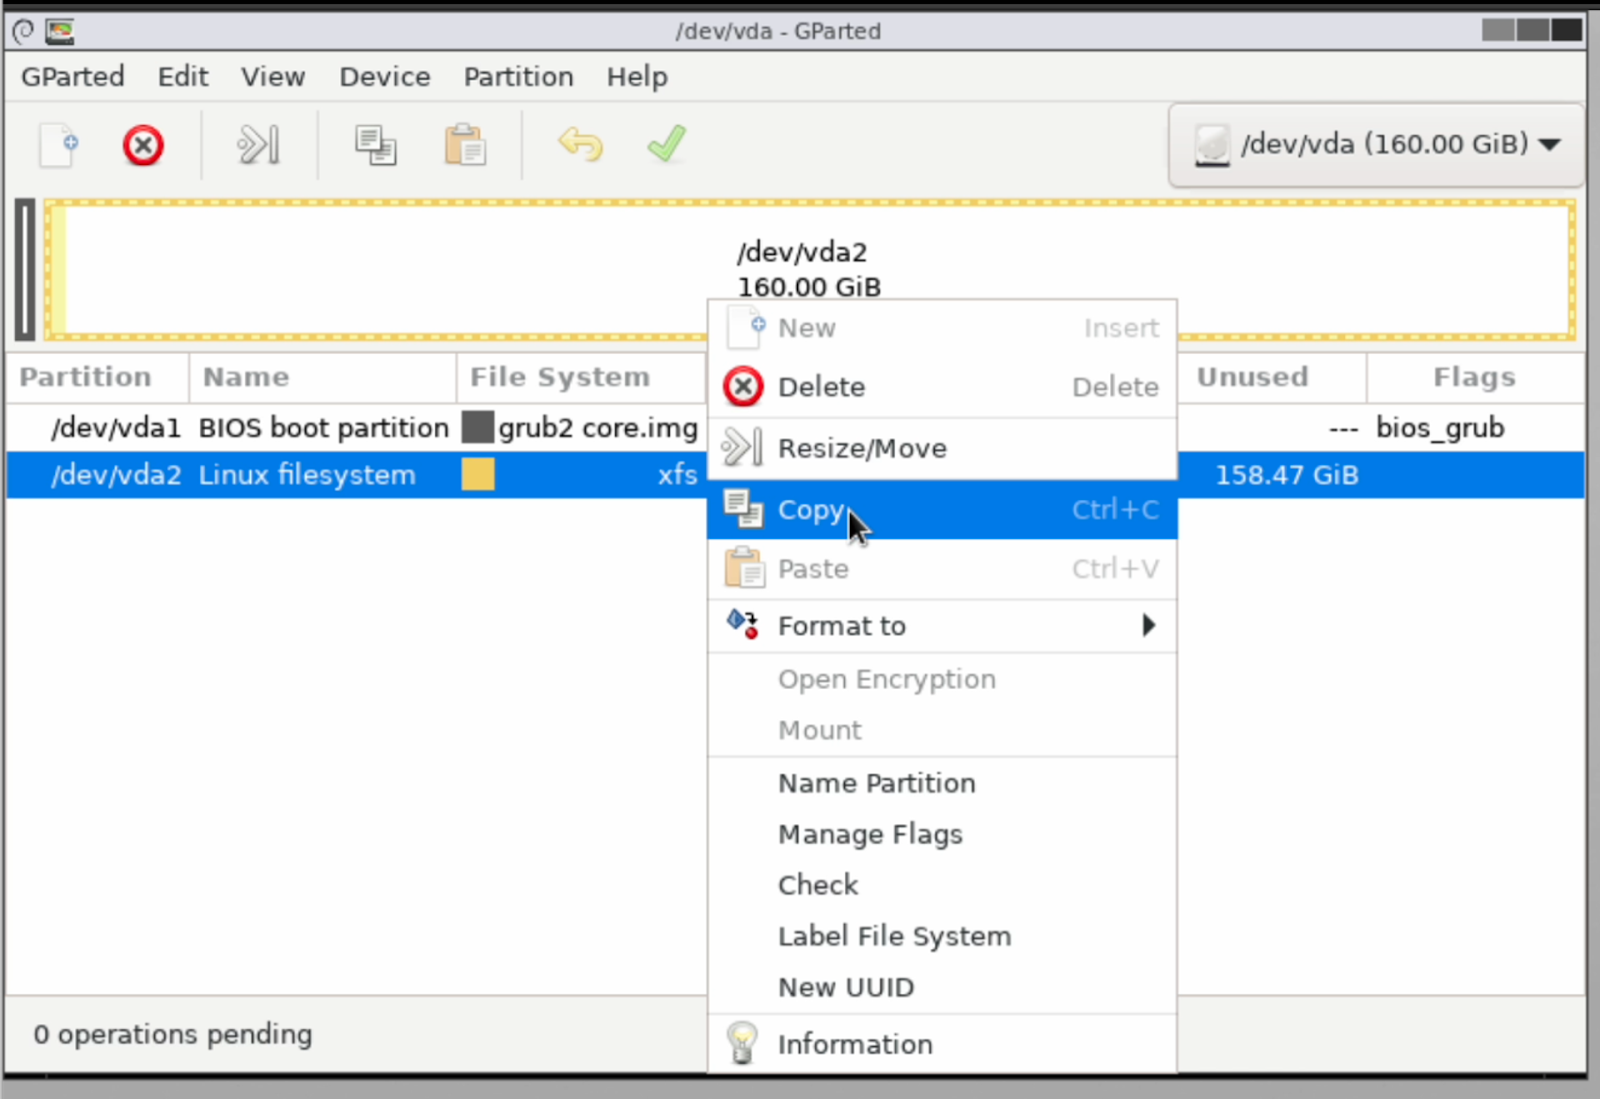
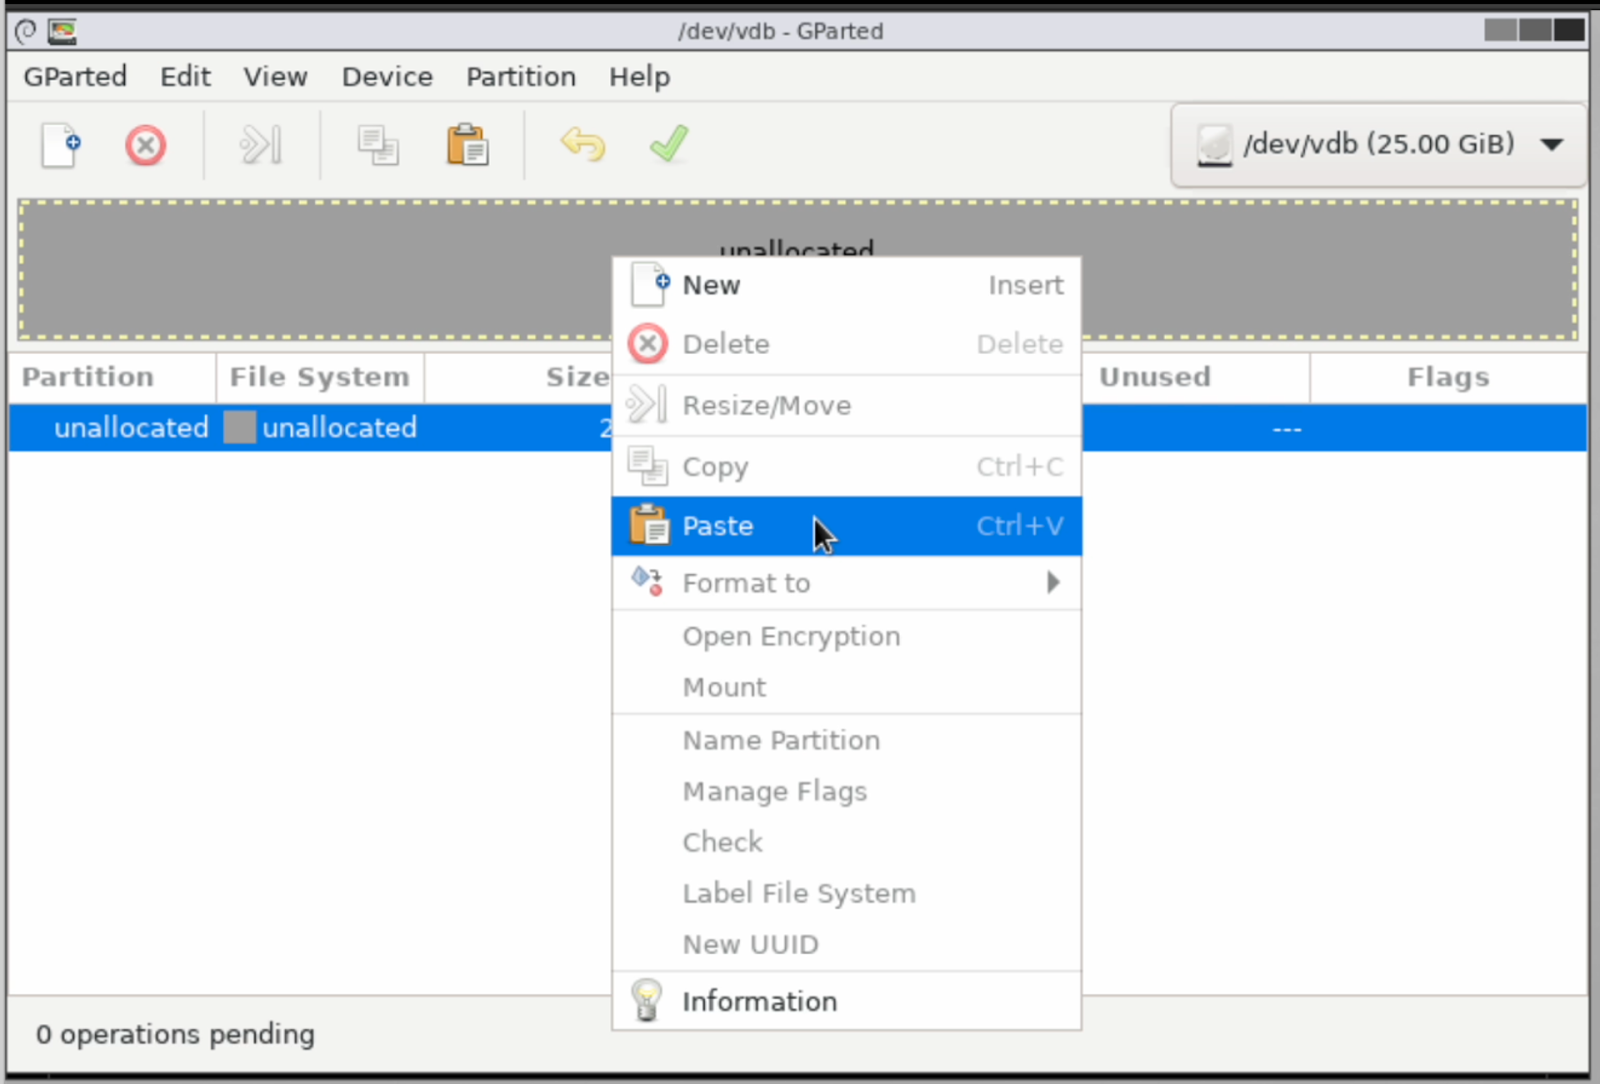
In GParted, right-click on the main partition on your larger disk and select Copy from the context menu that appears.
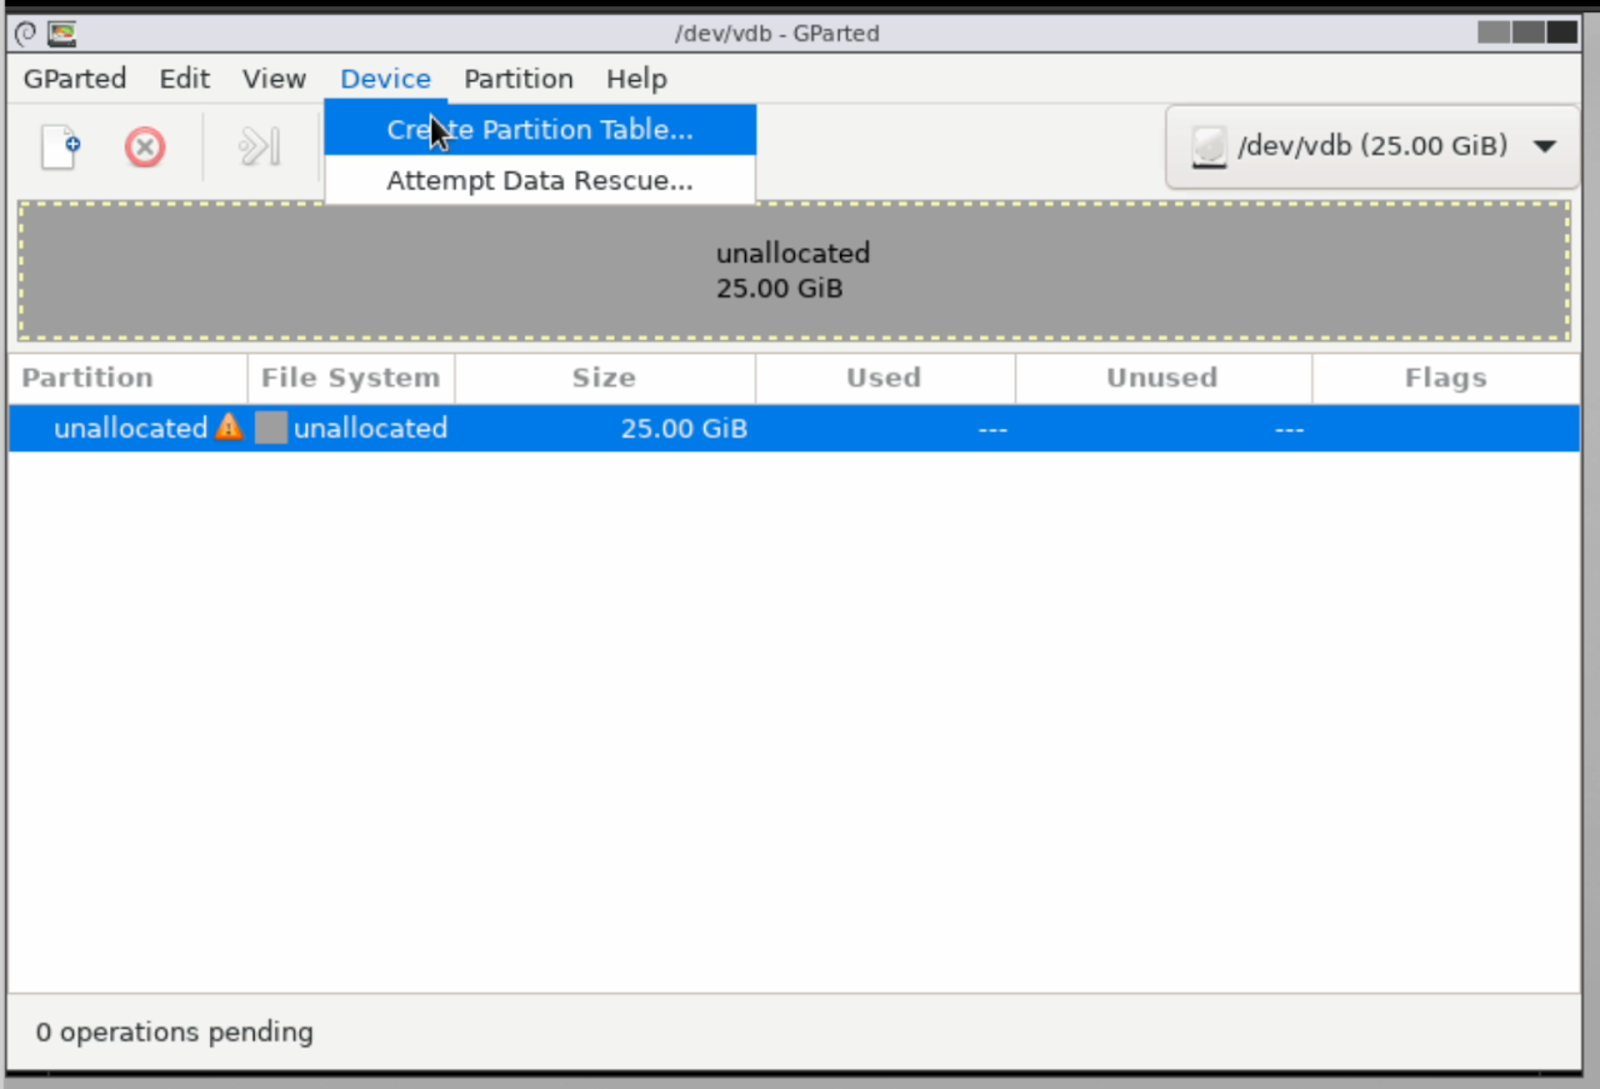
Then switch over to the smaller disk by clicking the dropdown menu in the upper right.

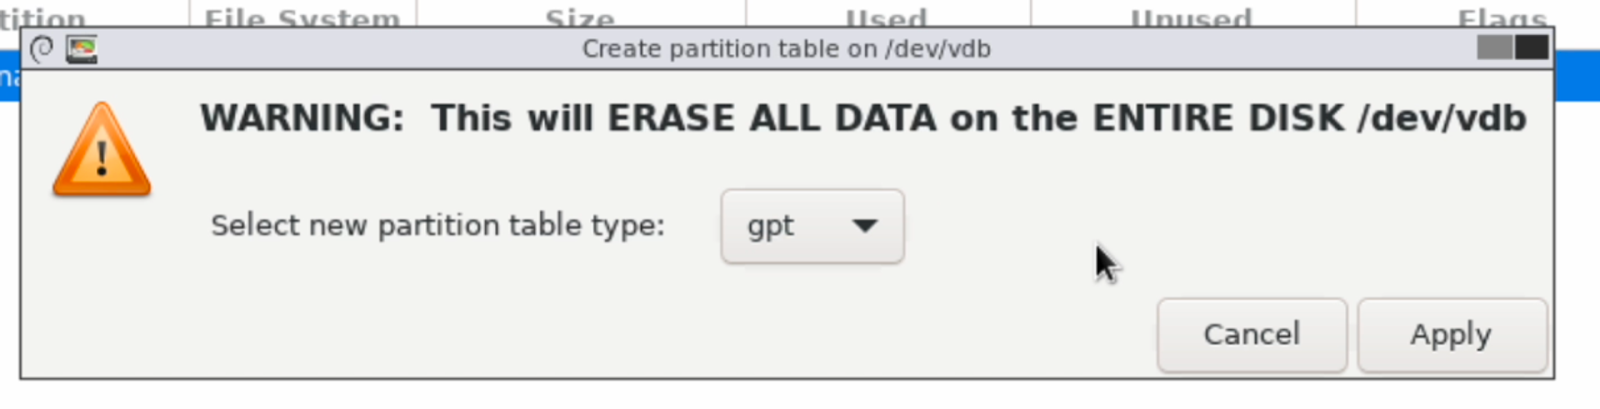
On the new smaller disk, from the menu bar, click Device > Create Partition Table, and set the new partition table type as gpt.
Now, right-click anywhere on the unallocated space and paste the partition that you copied earlier from the larger disk.
Drag the handles located on the right side of the partition to reduce its size to something slightly smaller than the actual disk size. For example, if the disk size is 25GB, resize the partition to about 20GB. This step is important because we need to provide some allowance for the boot partition. We will expand the space later to utilise the full dusk capacity. Press Paste when ready.

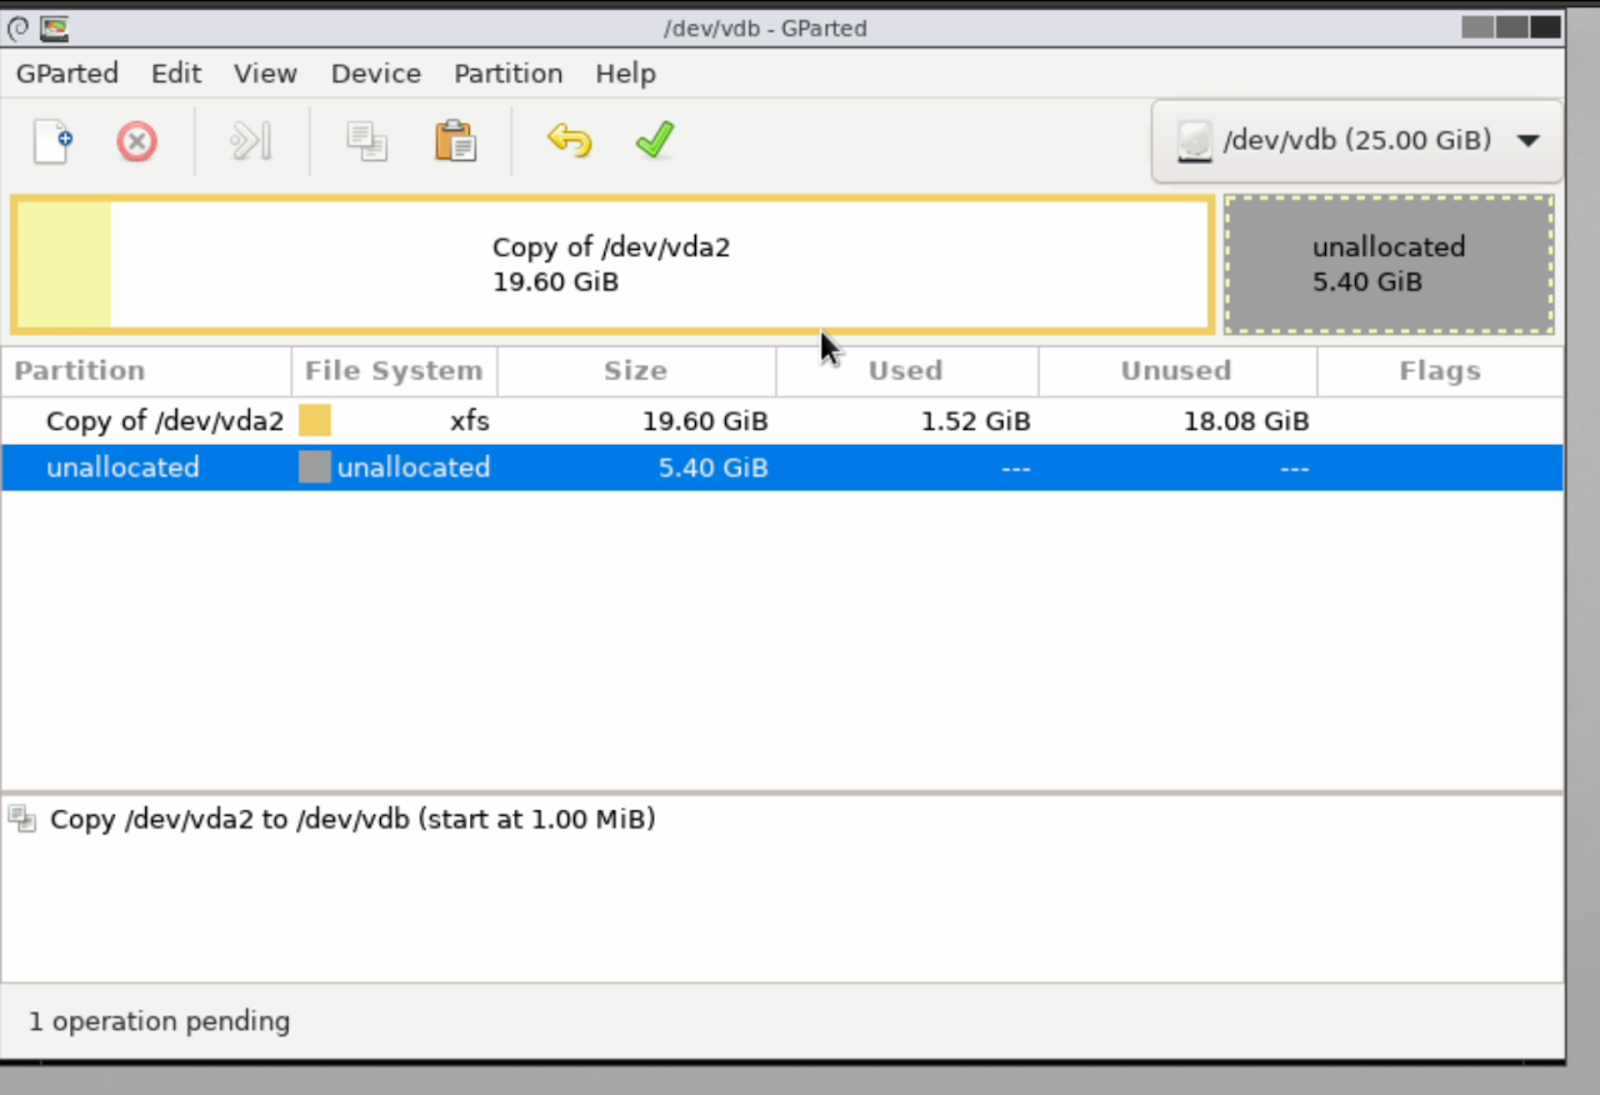
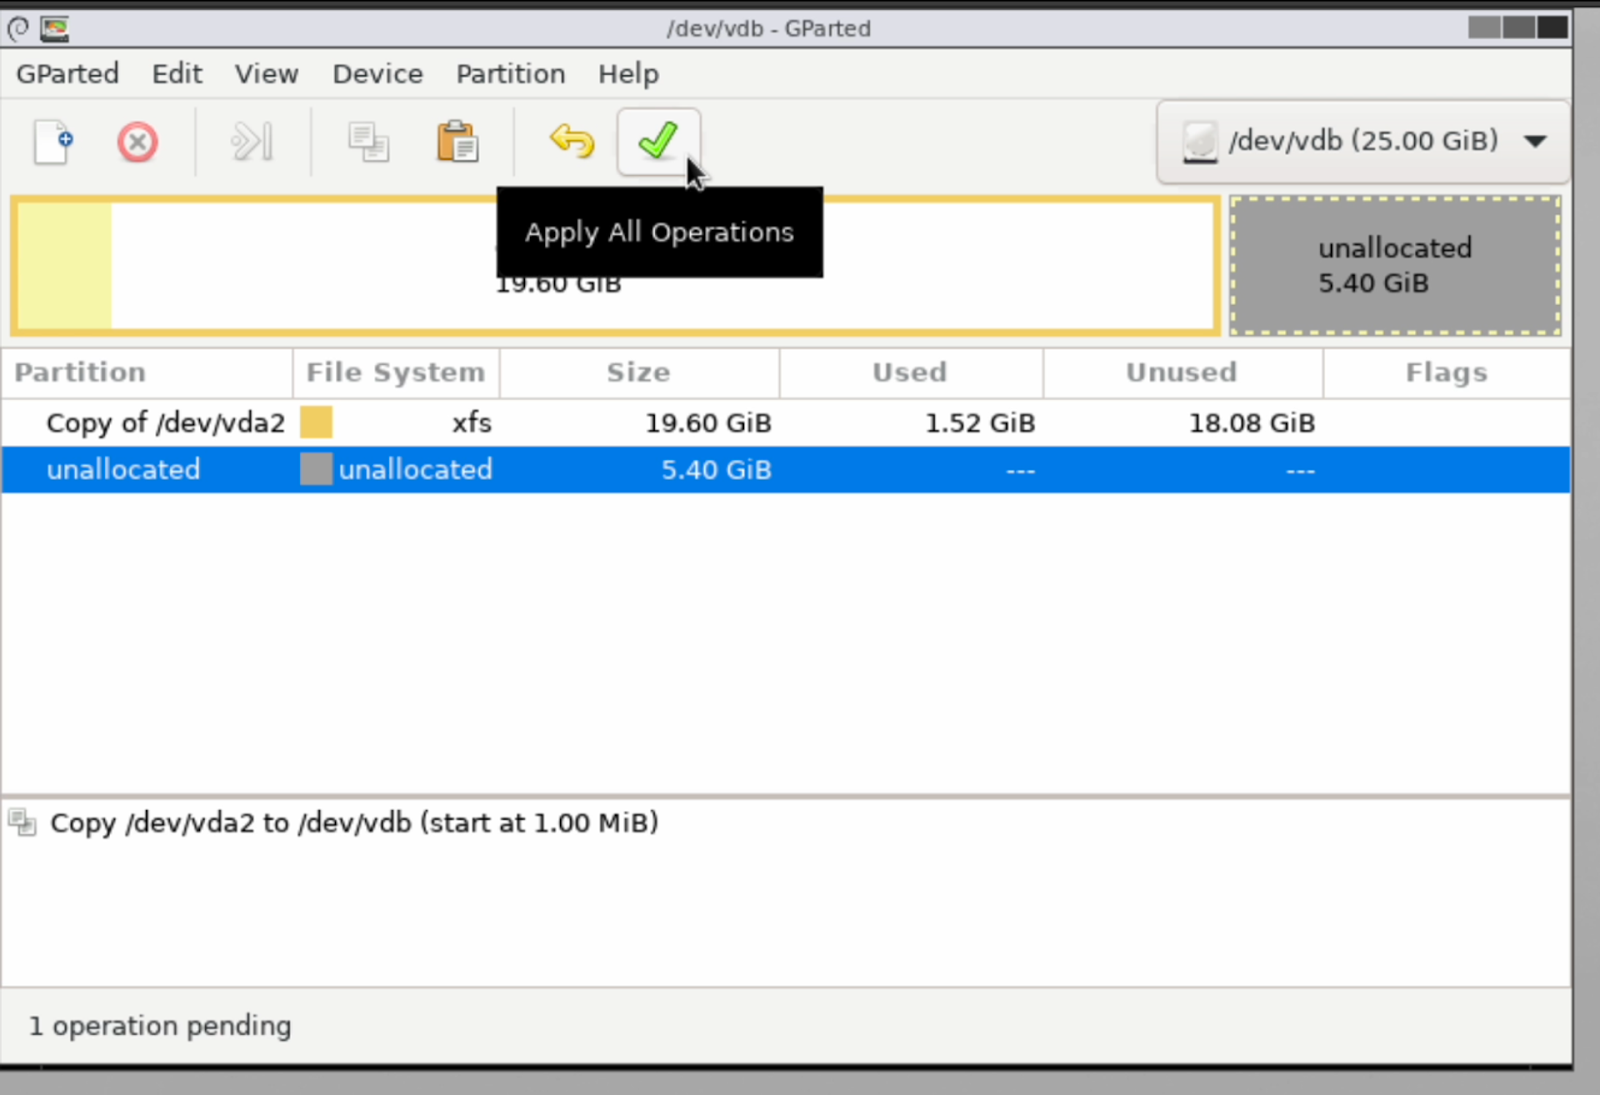
Apply the changes by clicking the green tick located in the toolbar, and wait for the operation to complete.
With the changes saved, return to the original (larger) disk. Here, you’ll need to right-click on the partition and select the ‘Delete’ option to unallocated the space on the disk.
Next, go back to the smaller disk. Copy its partition, then return to the larger disk. Here, you’ll find the space you just unallocated. Paste the copied partition into this newly available area.
Click the green tick to apply and save the changes.
You can refer to the video embedded below for a detailed walkthrough of the steps mentioned above
When the operation finishes, shut down the server by closing GParted and double-clicking the exit button.
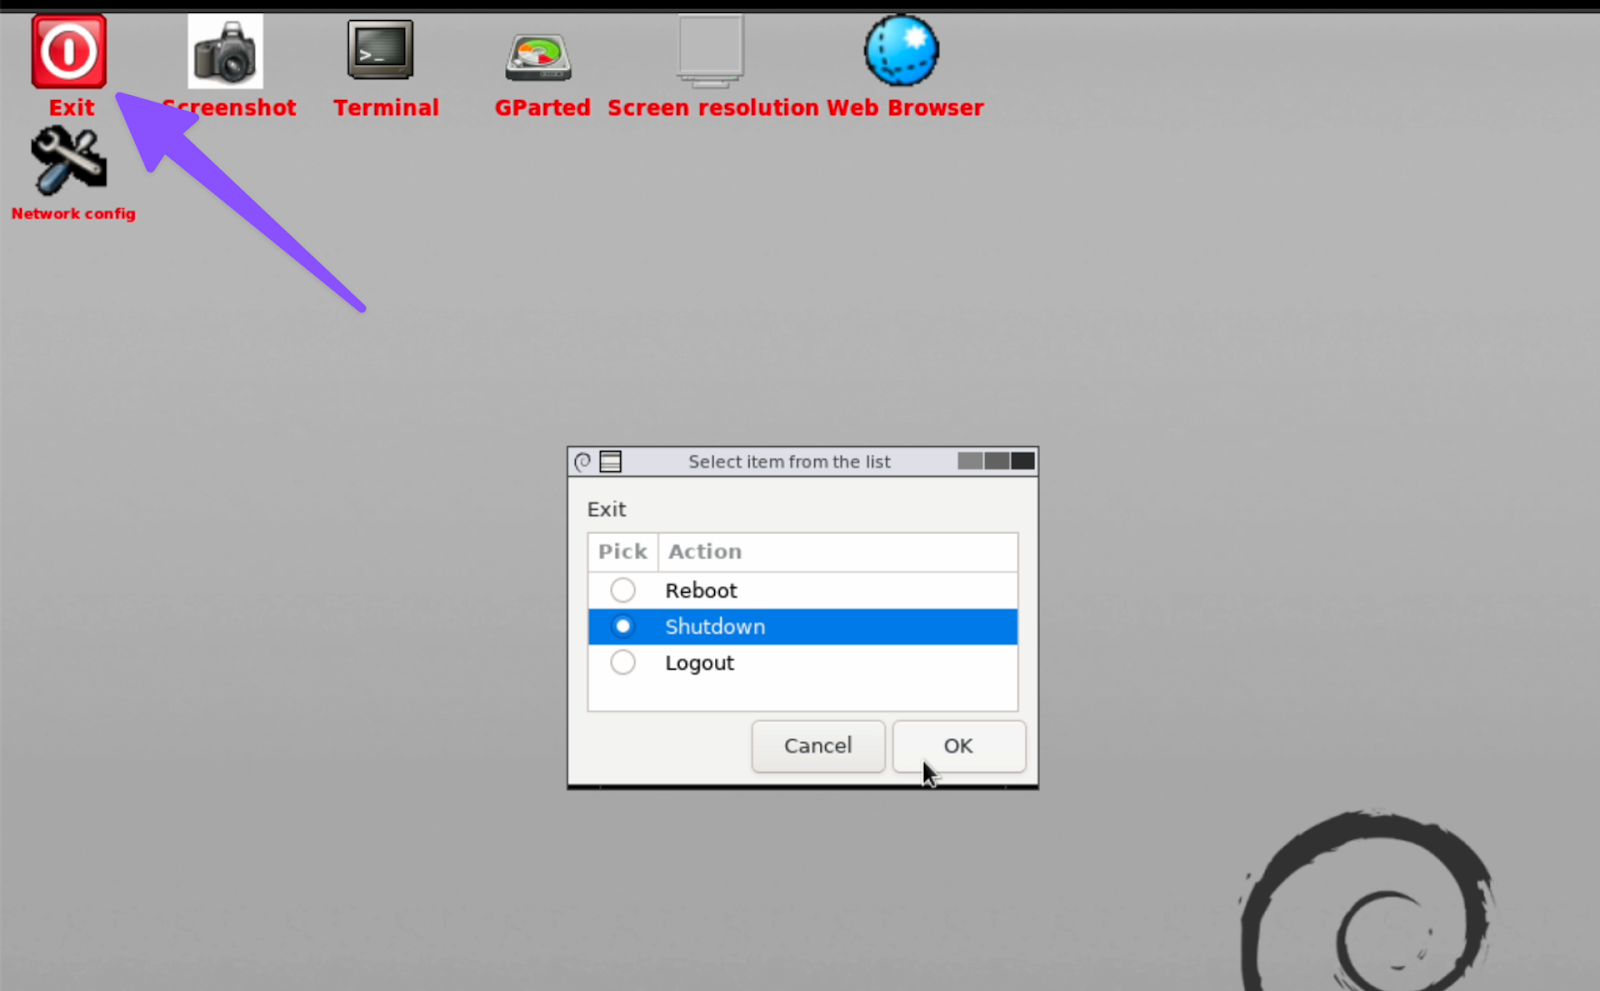
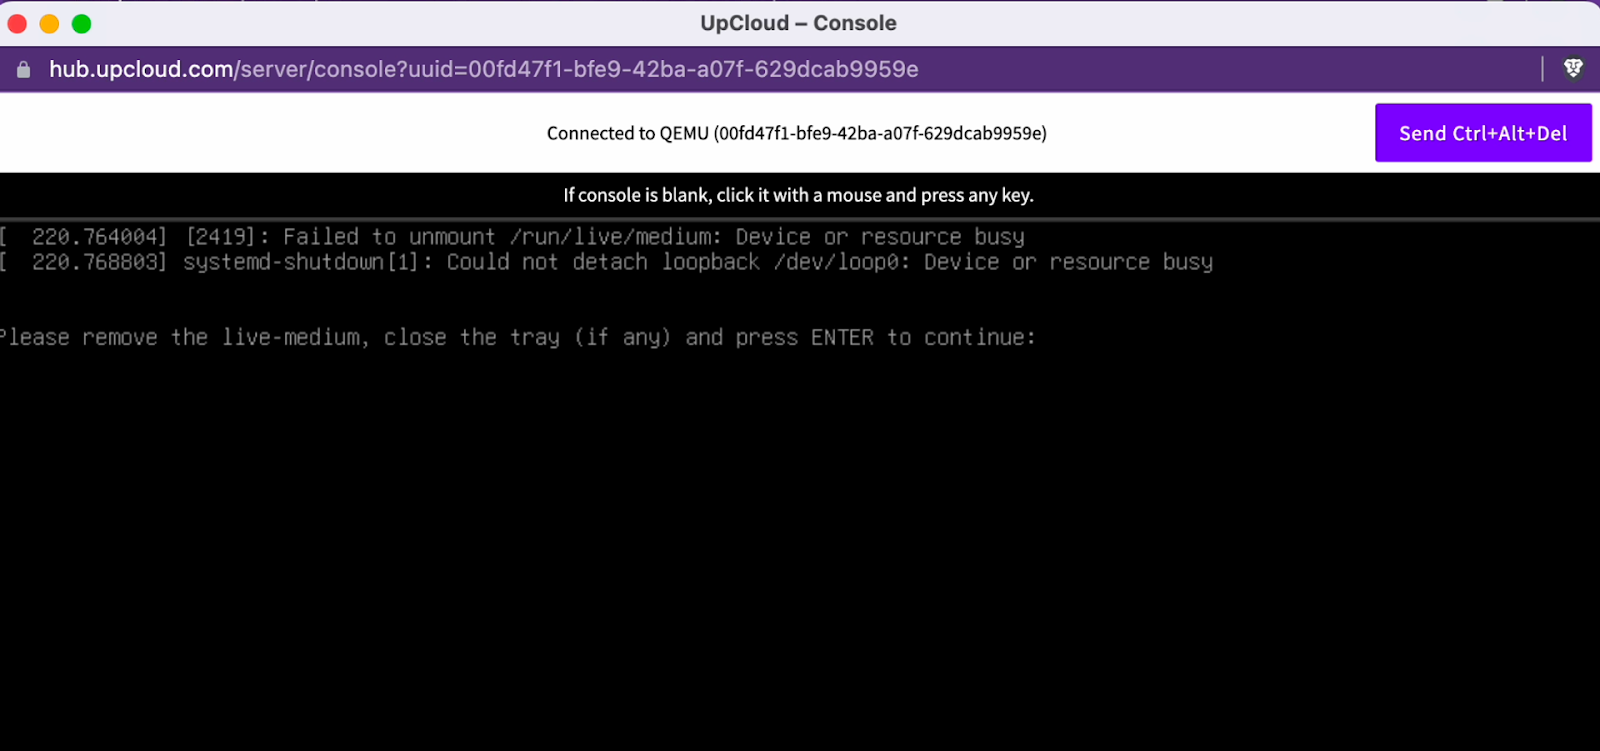
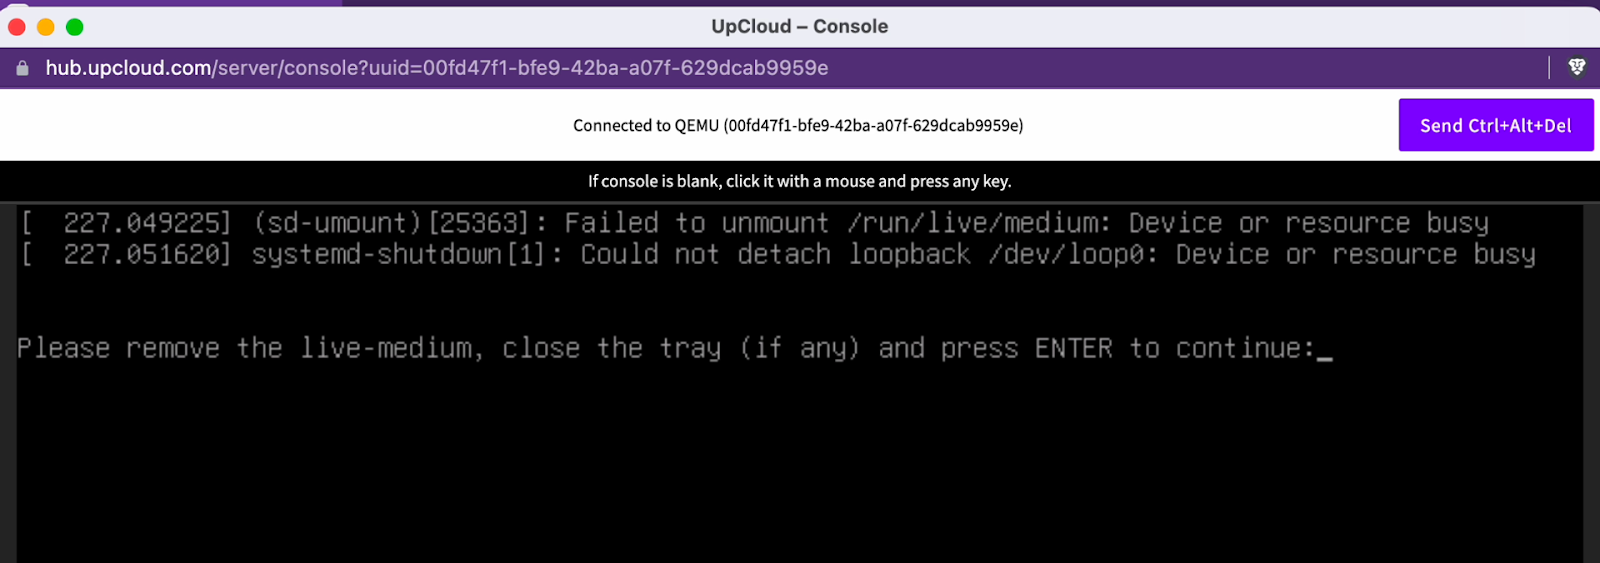
Press enter when you see a message telling you to remove the live medium. This step is very important. If done correctly, the server should enter a maintenance state and eventually turn off by itself.
With the server still turned off, go back to the storage tab and detach the GParted live CD.
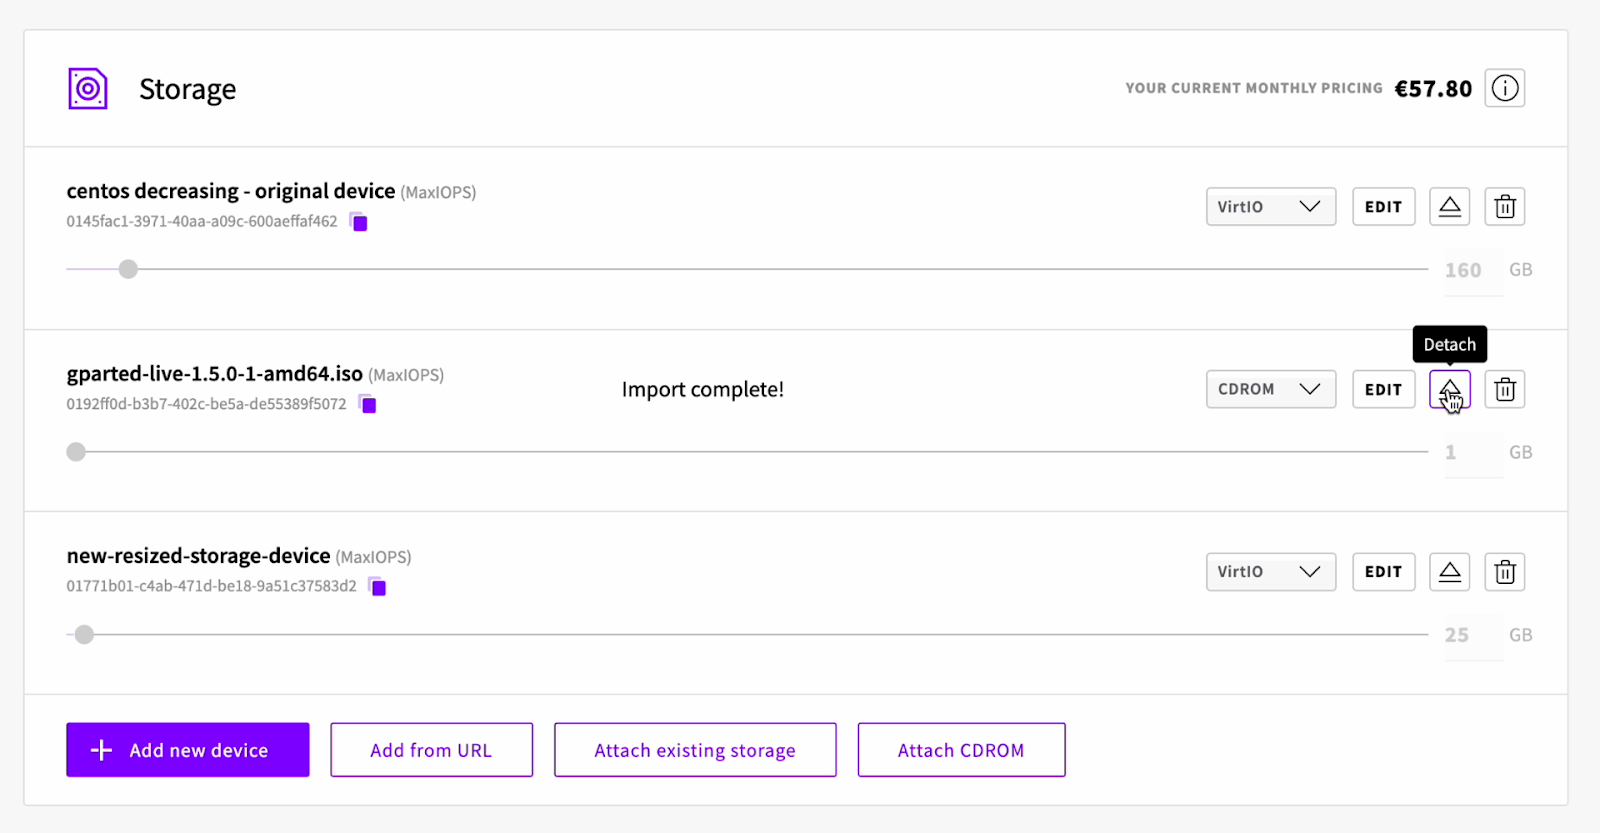
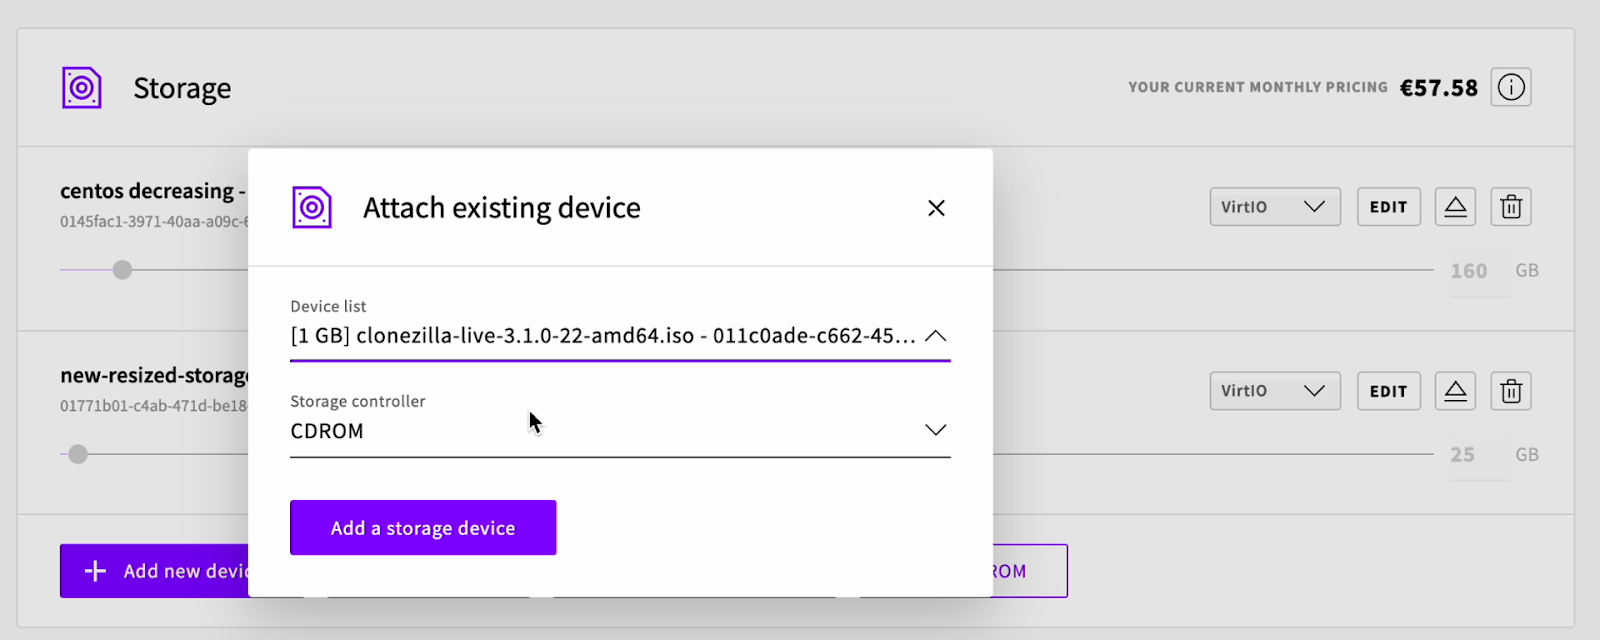
Then click "Attach existing storage", and select the Clonezilla live CD. Like before, make sure the storage controller is set to CDROM.
Again, at this point, you should have a total of three storage devices attached to your server:
- the original storage device,
- the new smaller storage device, and
- the Clonezilla live CD
Starting the server this time will boot you into the Clonezilla live CD boot menu (check the console tab).
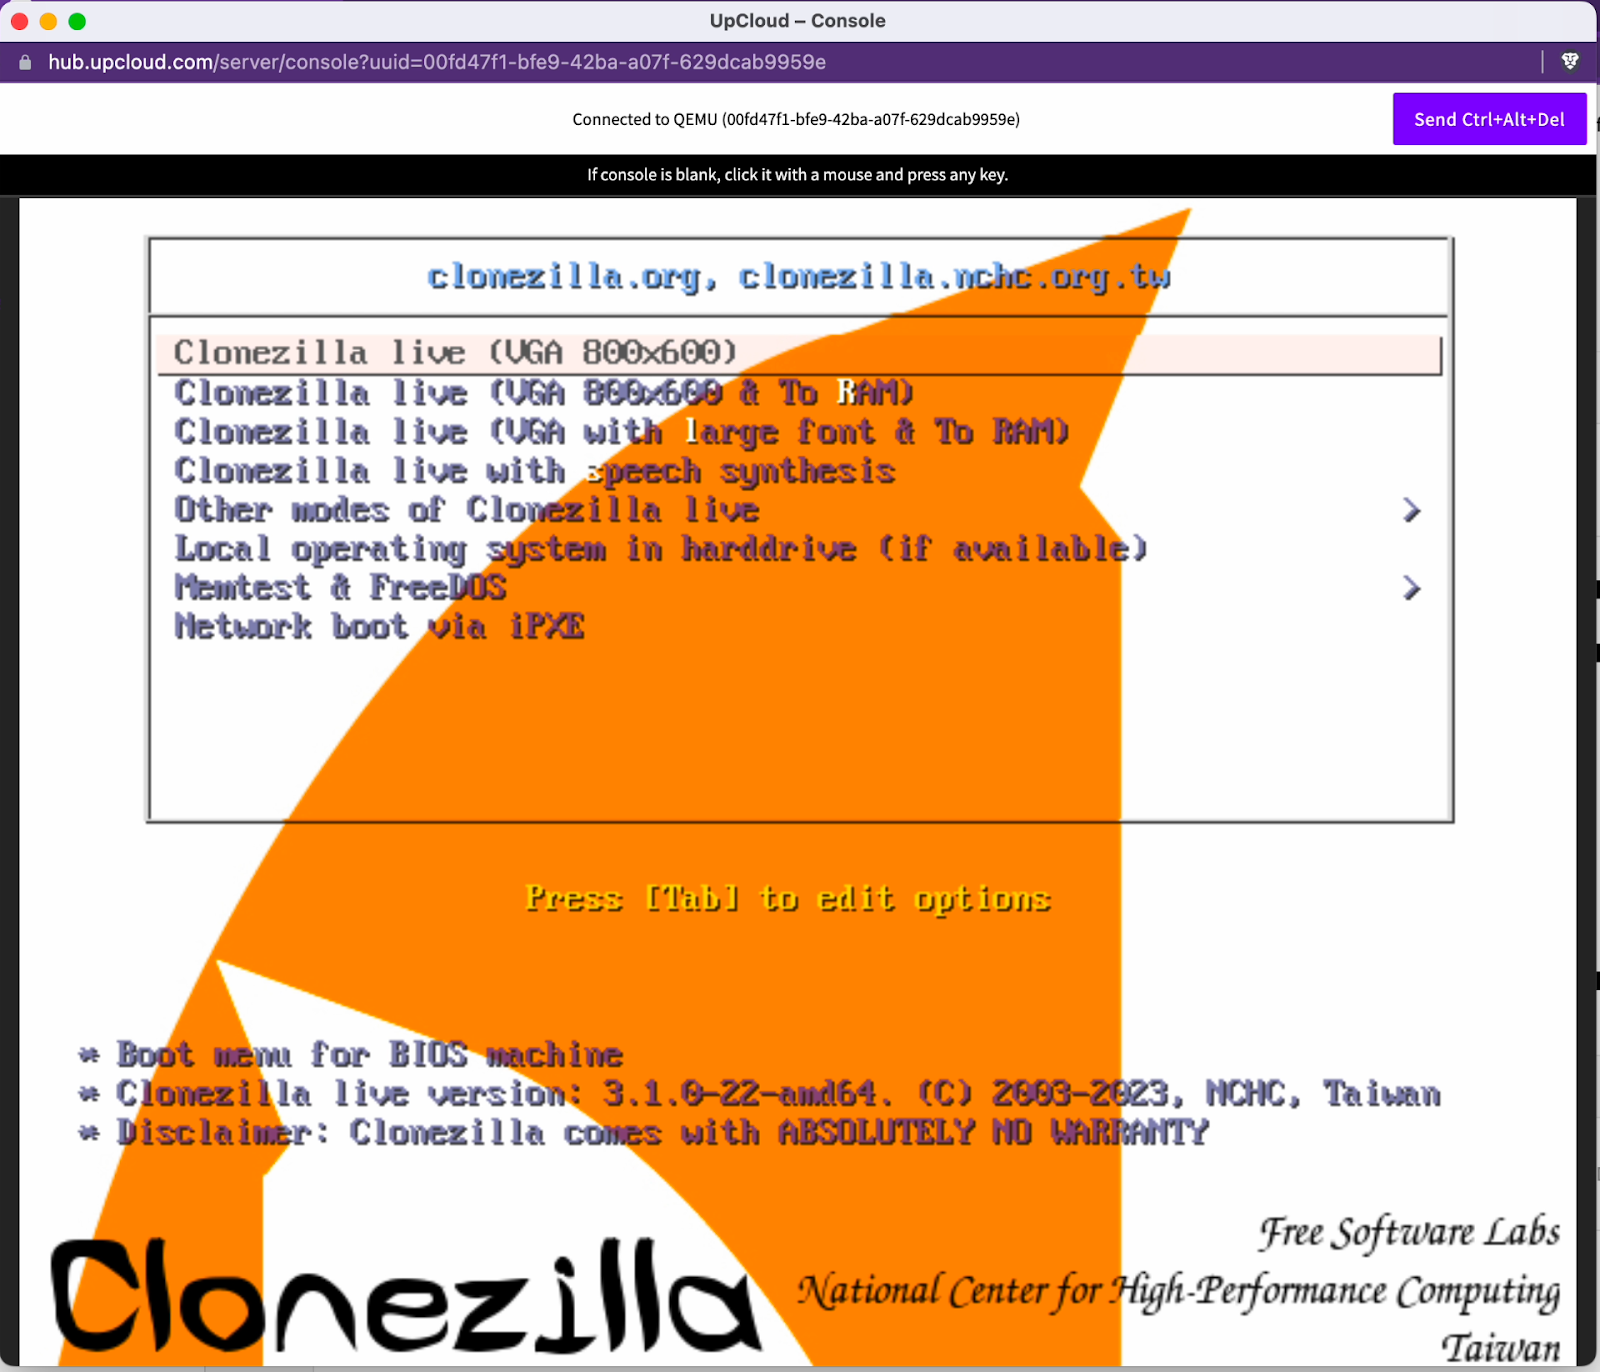
Select the first option and press enter. The screen might remain blank for a while, but give it some time.
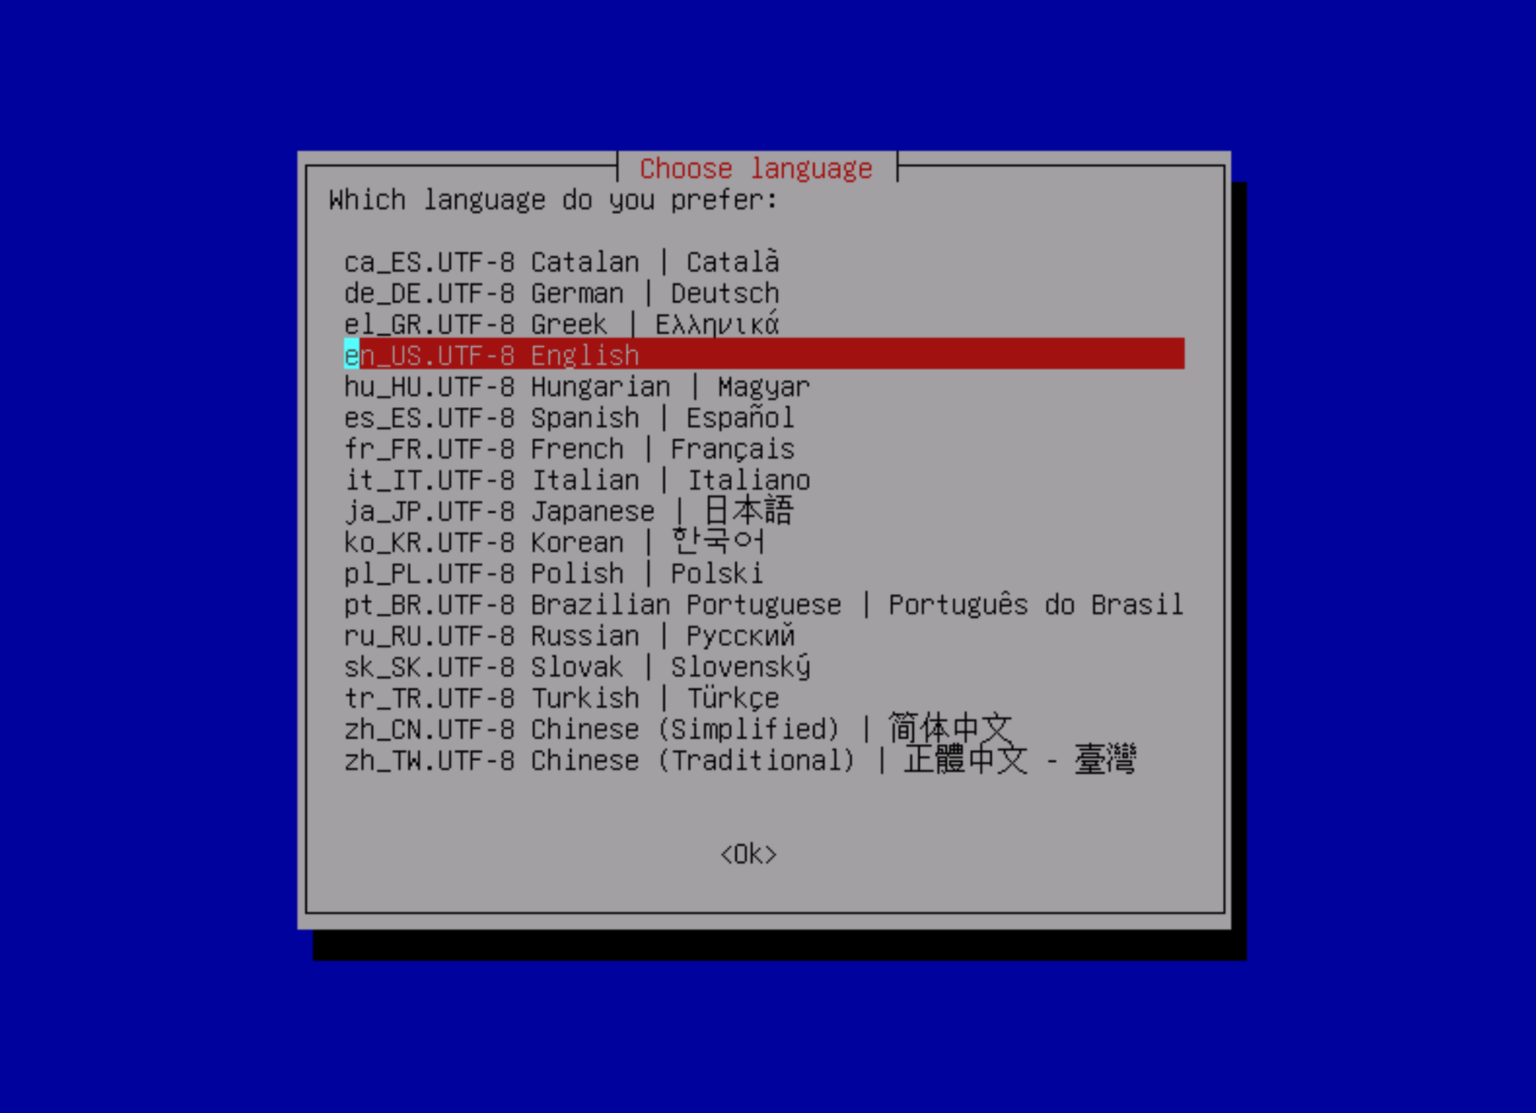
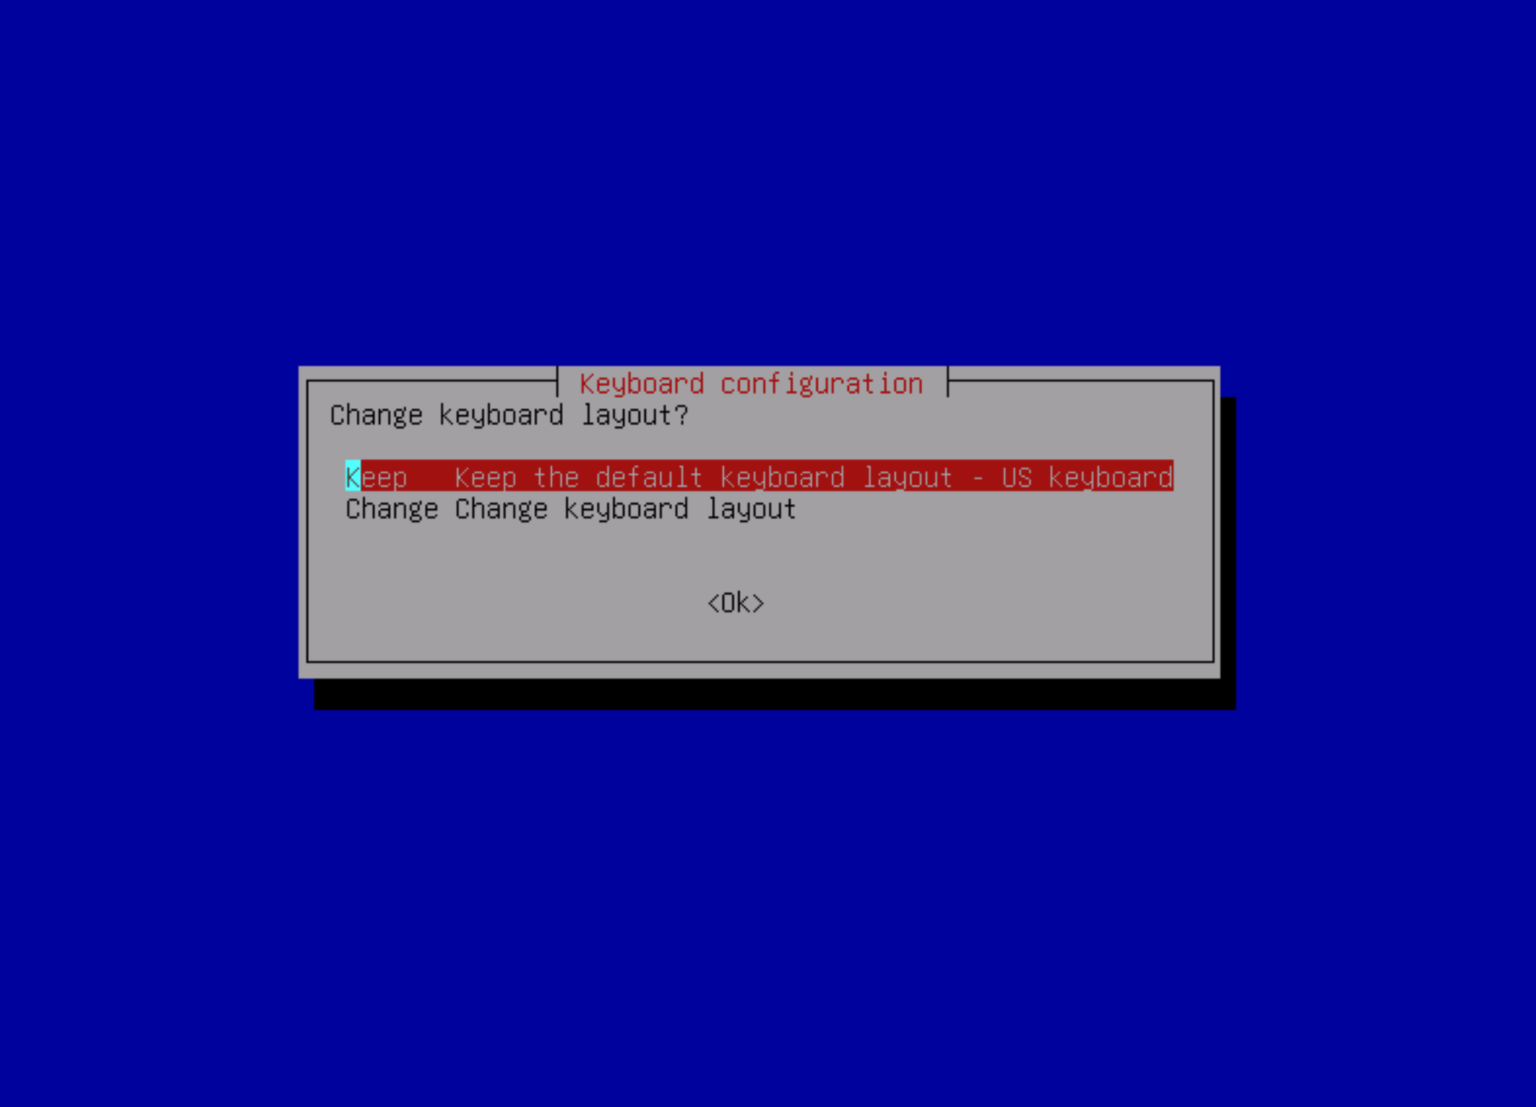
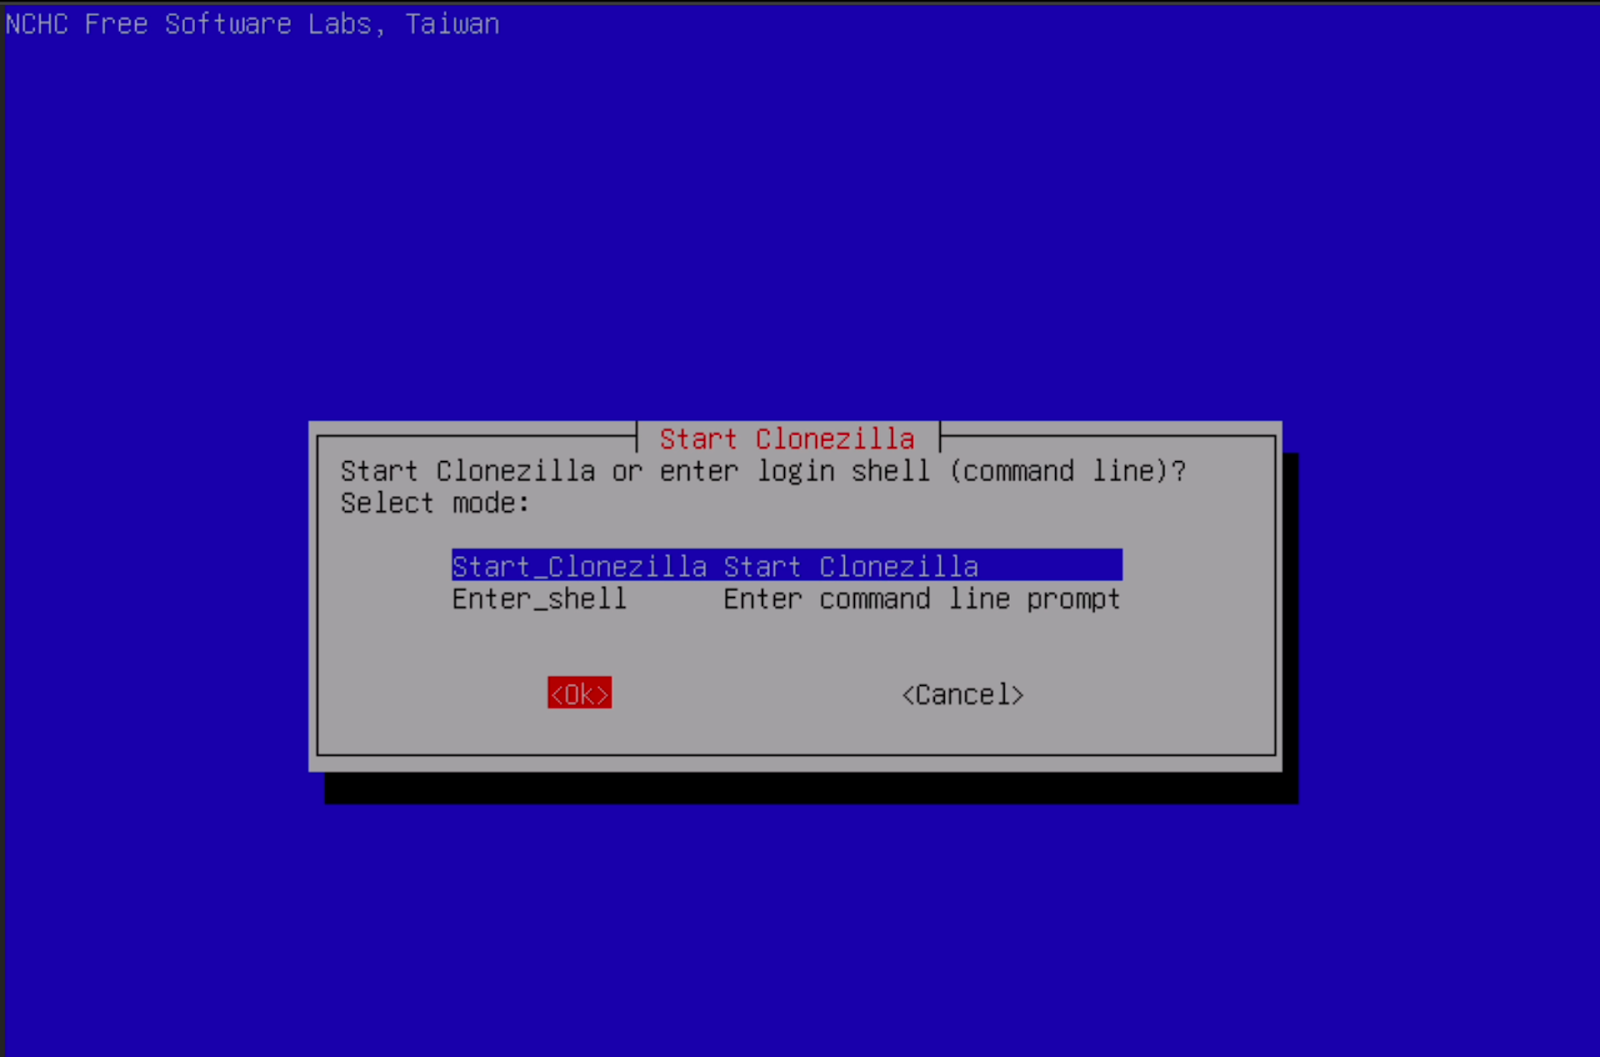
You’ll eventually see a language selection screen. You can leave the default options for the language and keymap configuration options. Eventually, you’ll see an option to start Clonezilla. Select ok, and click enter to begin.
Next, you’ll see an option to start Clonezilla. Select ok, and click enter to begin.
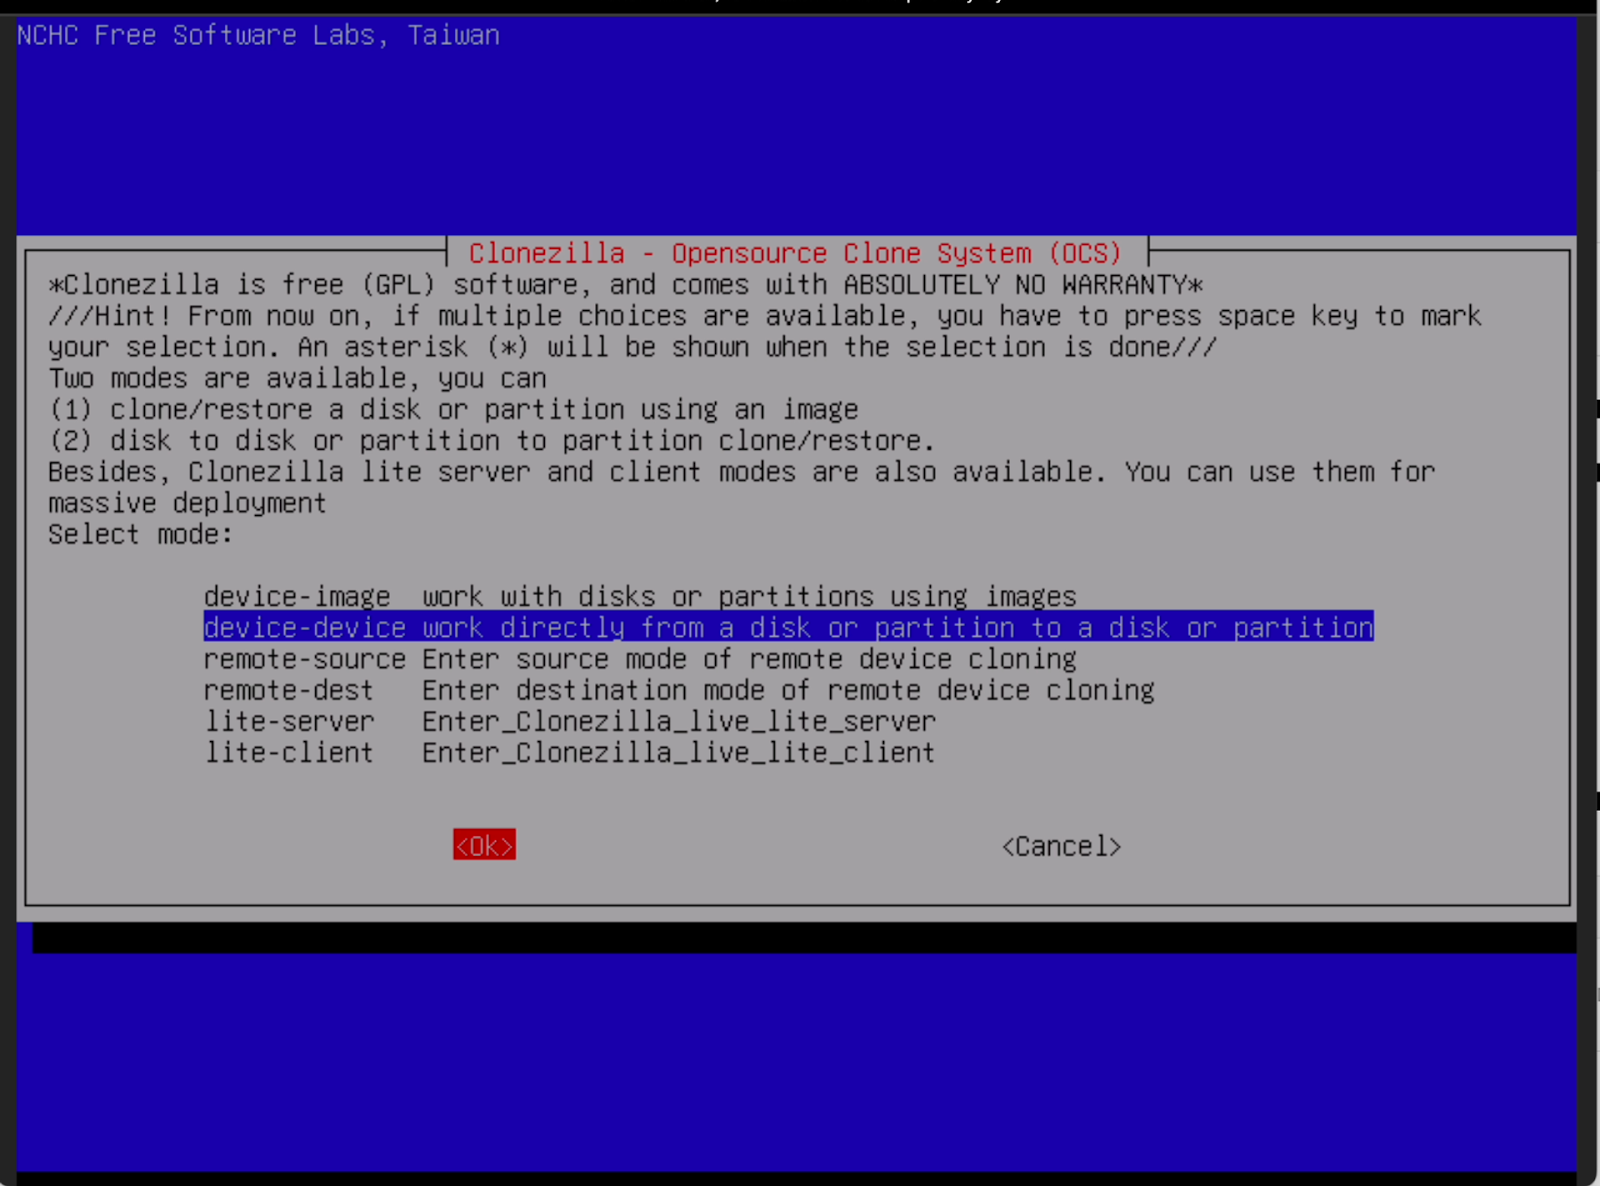
On the first menu, select the ‘device-device’ option (second in the list)
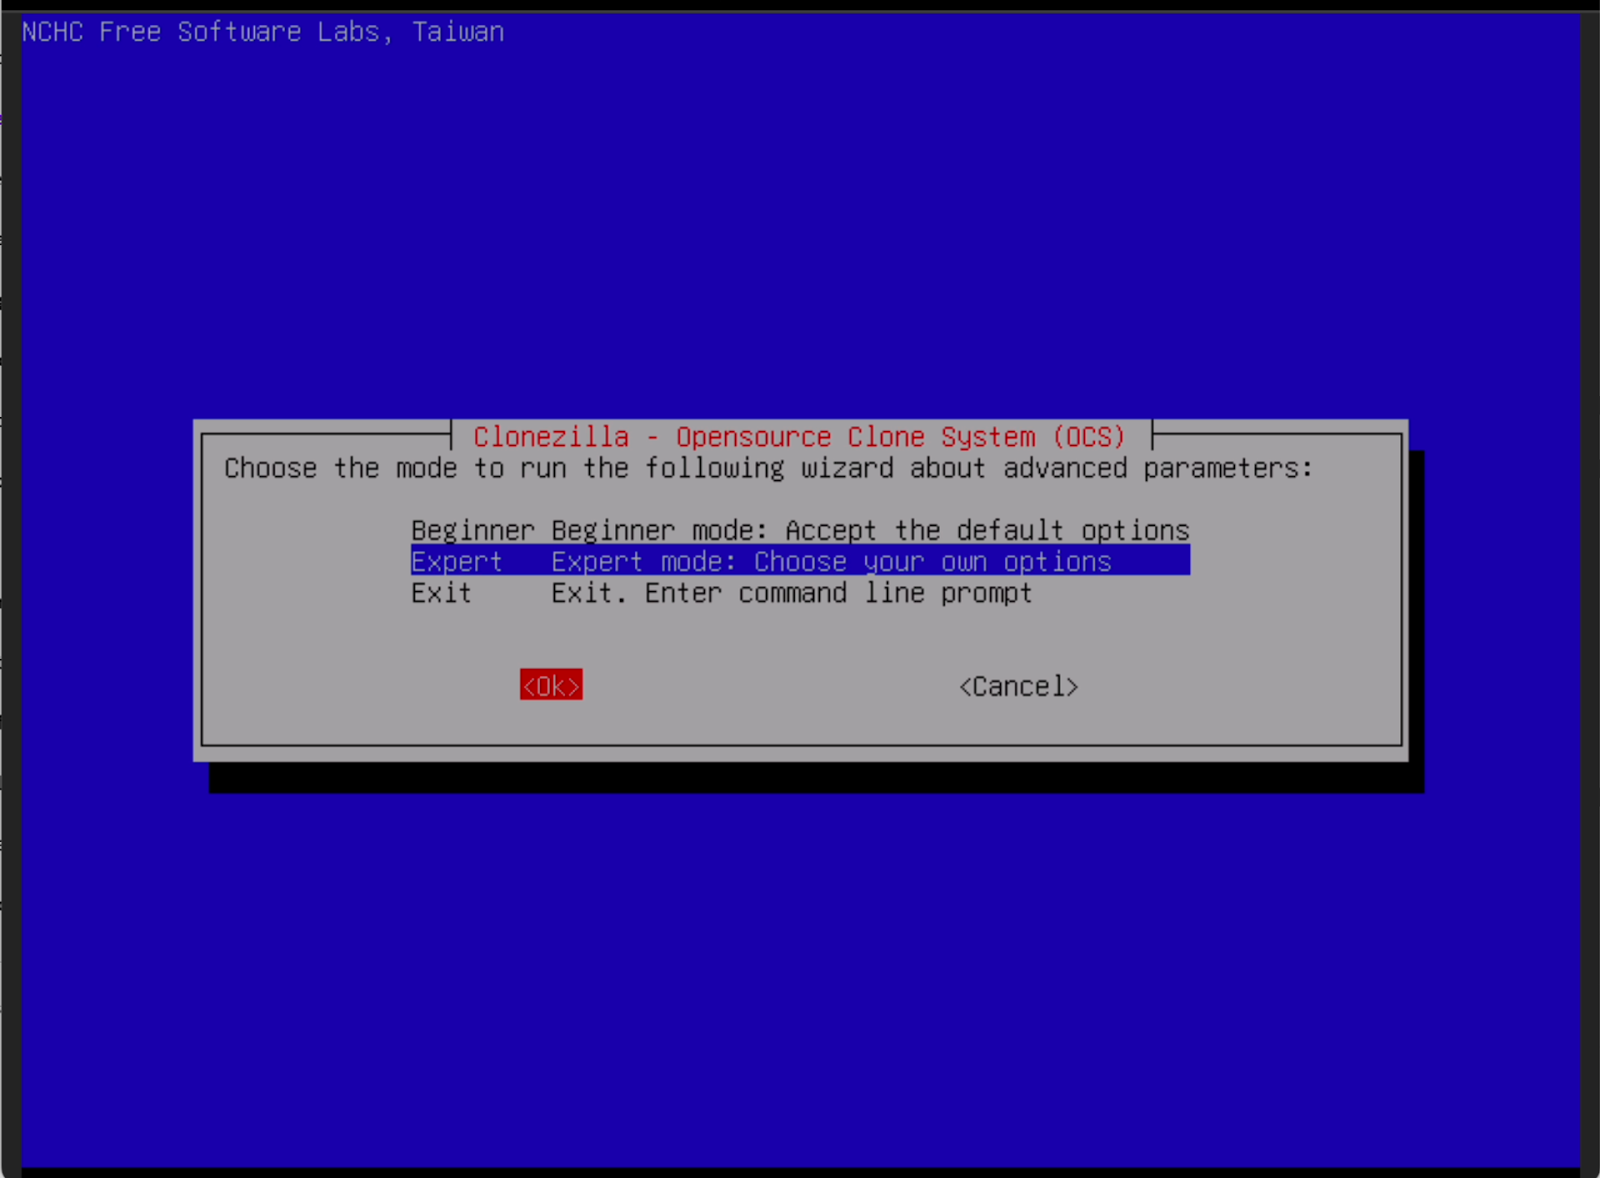
Next, select Expert mode.
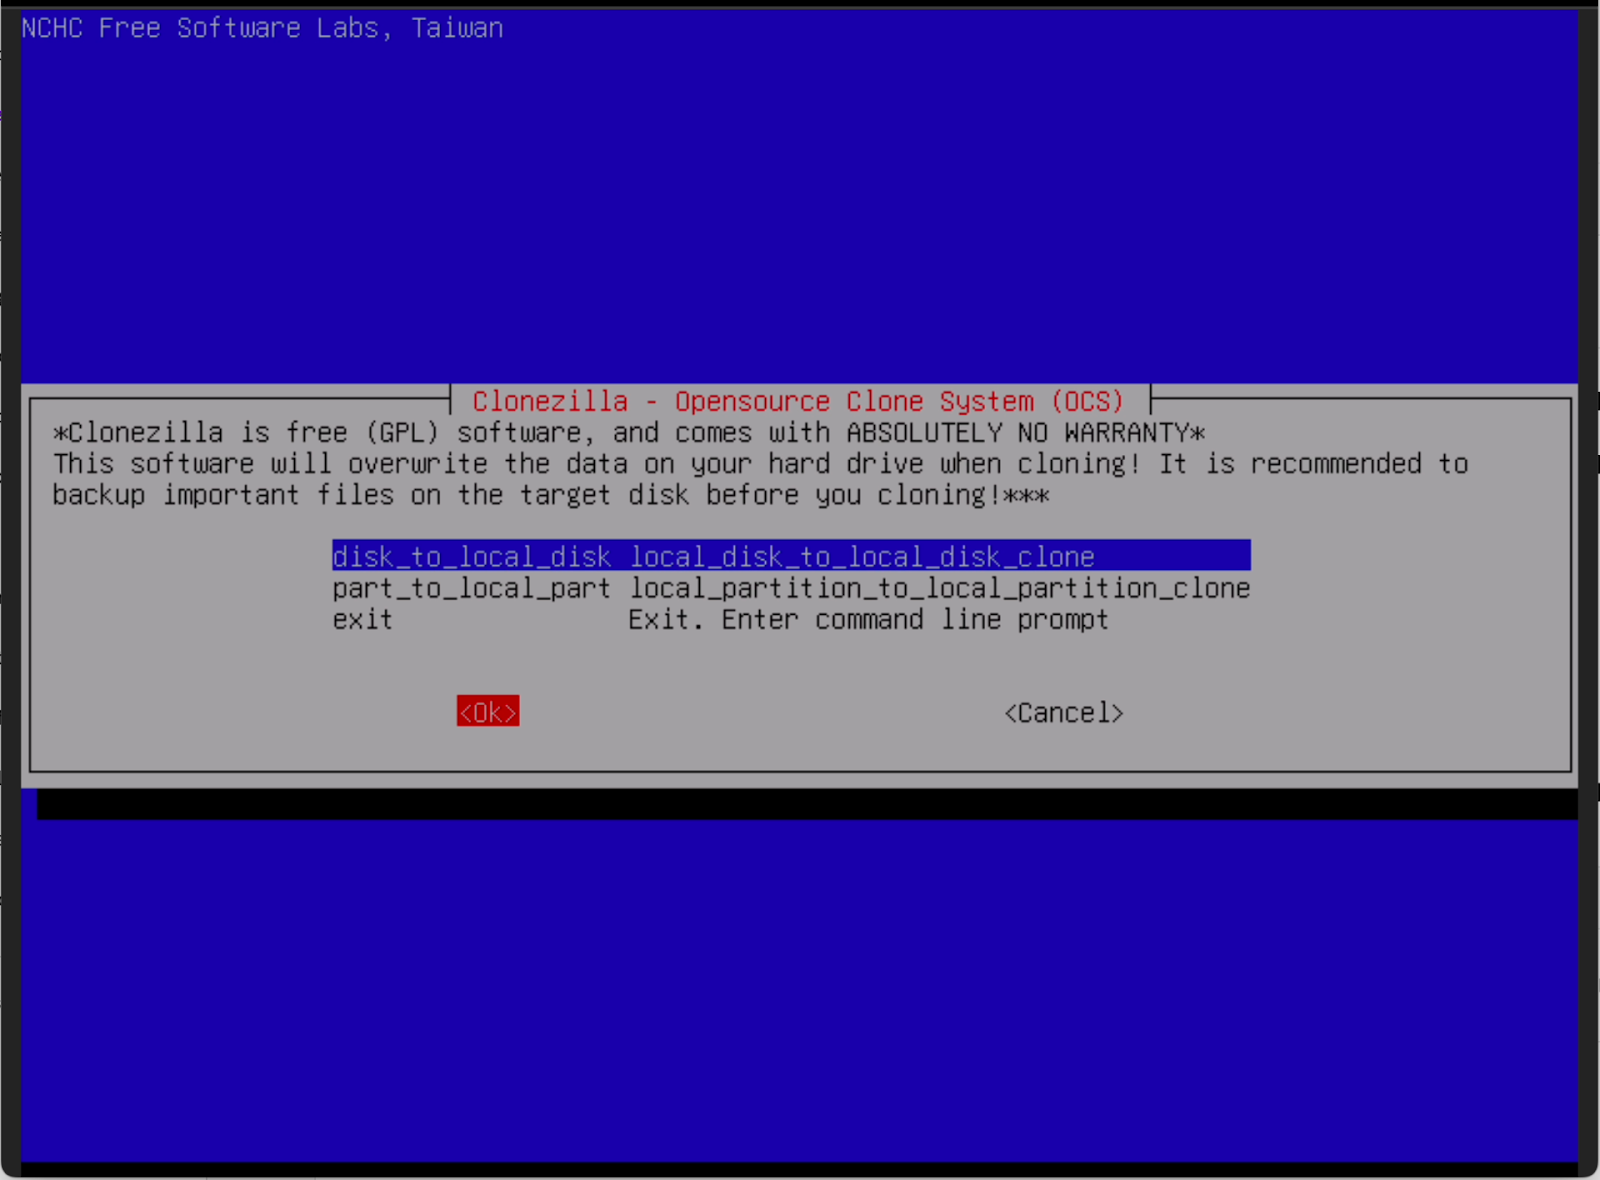
On the next page, choose the first option for disk-to-disk cloning.
Next, select the disk that will be the source of the cloning operation – in this case, the larger disk.
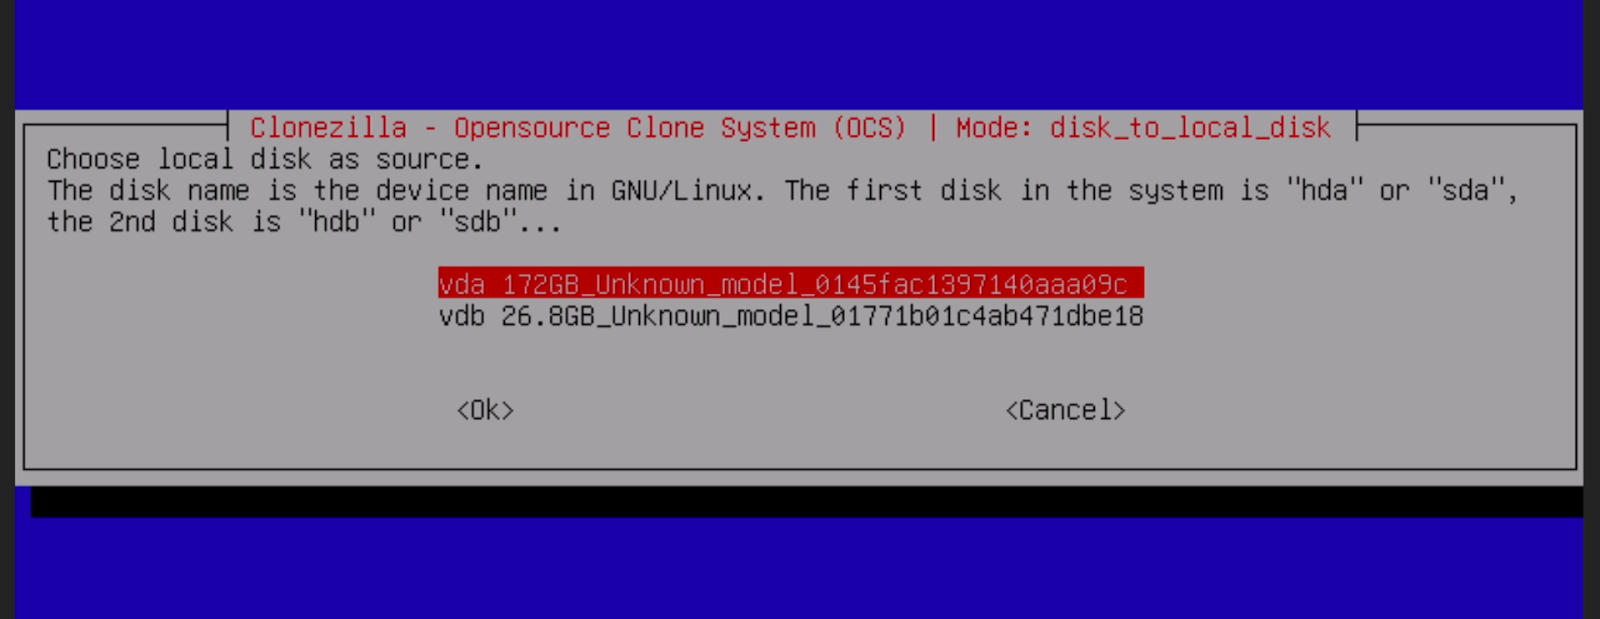
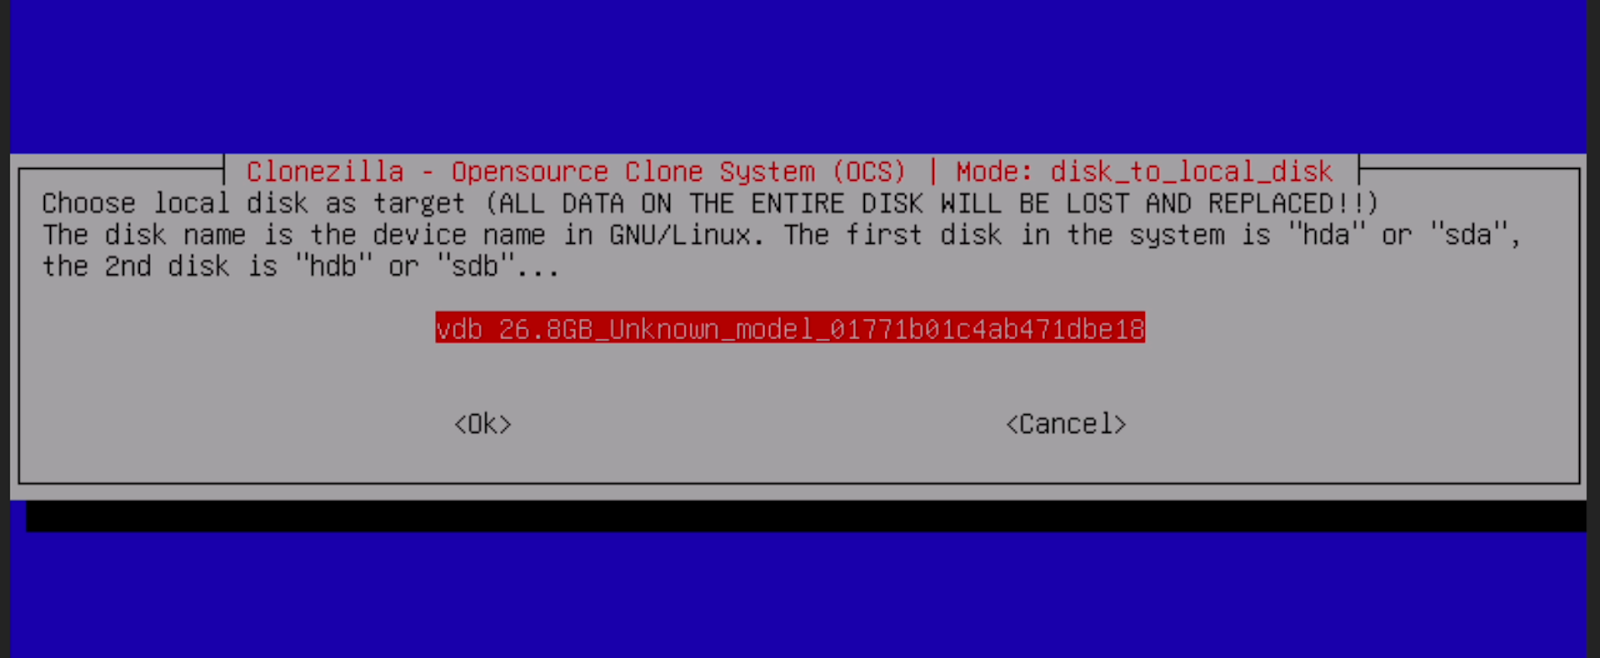
Then select the target of the clone operation, the smaller disk. It should be the only option on the list – unless you have other disks attached to your server.
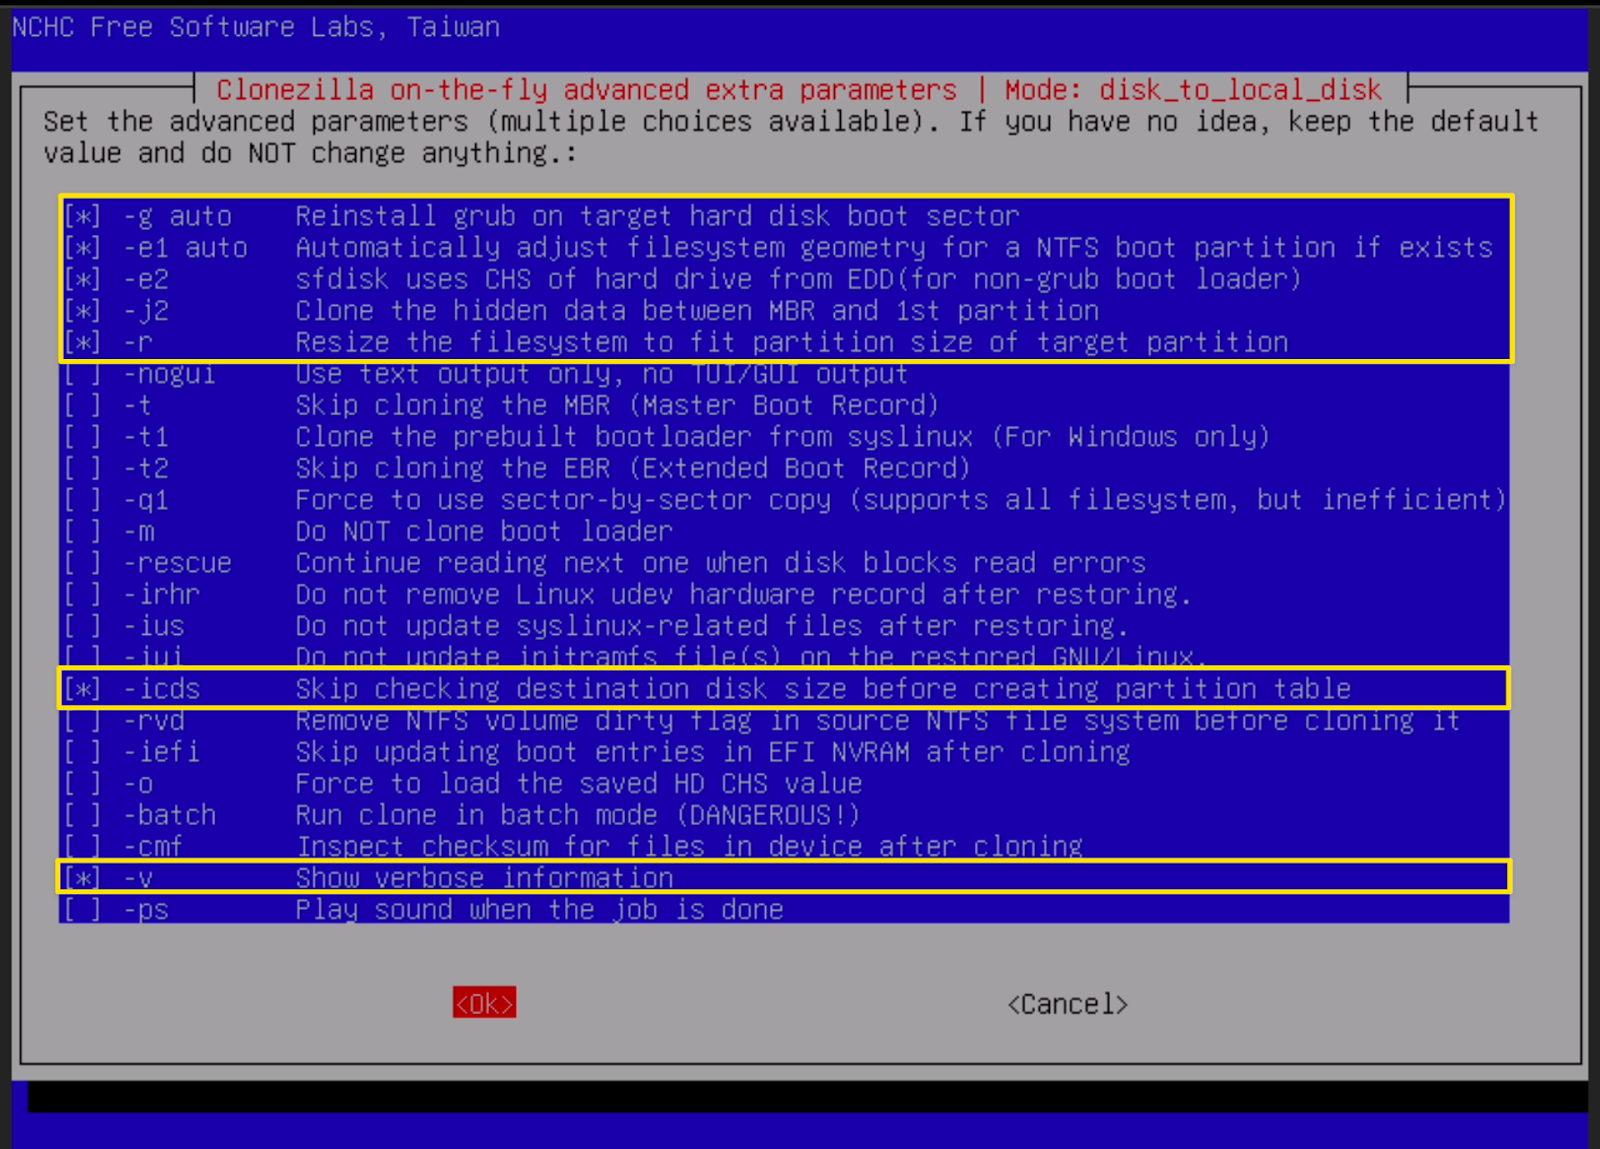
On the next page, the first five options will already be selected. However, there is one more important option that is required for our particular clone operation: icds. This option tells Clonezilla to ignore the disk size before creating the partition table. This is important because, by default, Clonezilla does not allow cloning from a larger disk to a smaller disk, so unless this option is selected, the operation will fail. The verbose (v) option is not necessary but is helpful as it displays textual output on the progress of the operation.
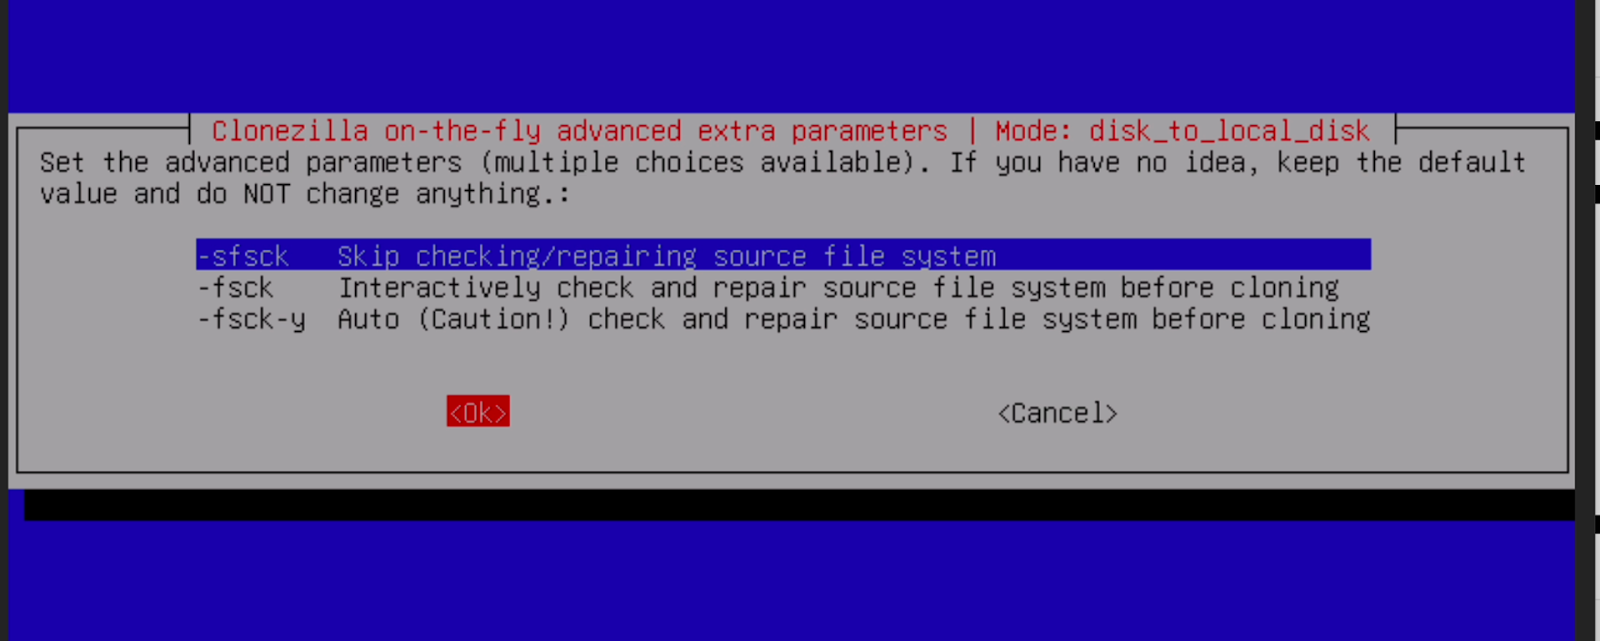
On the next menu, you can select the first option to skip the filesystem check. This is not needed unless you suspect the source disk has a filesystem issue.
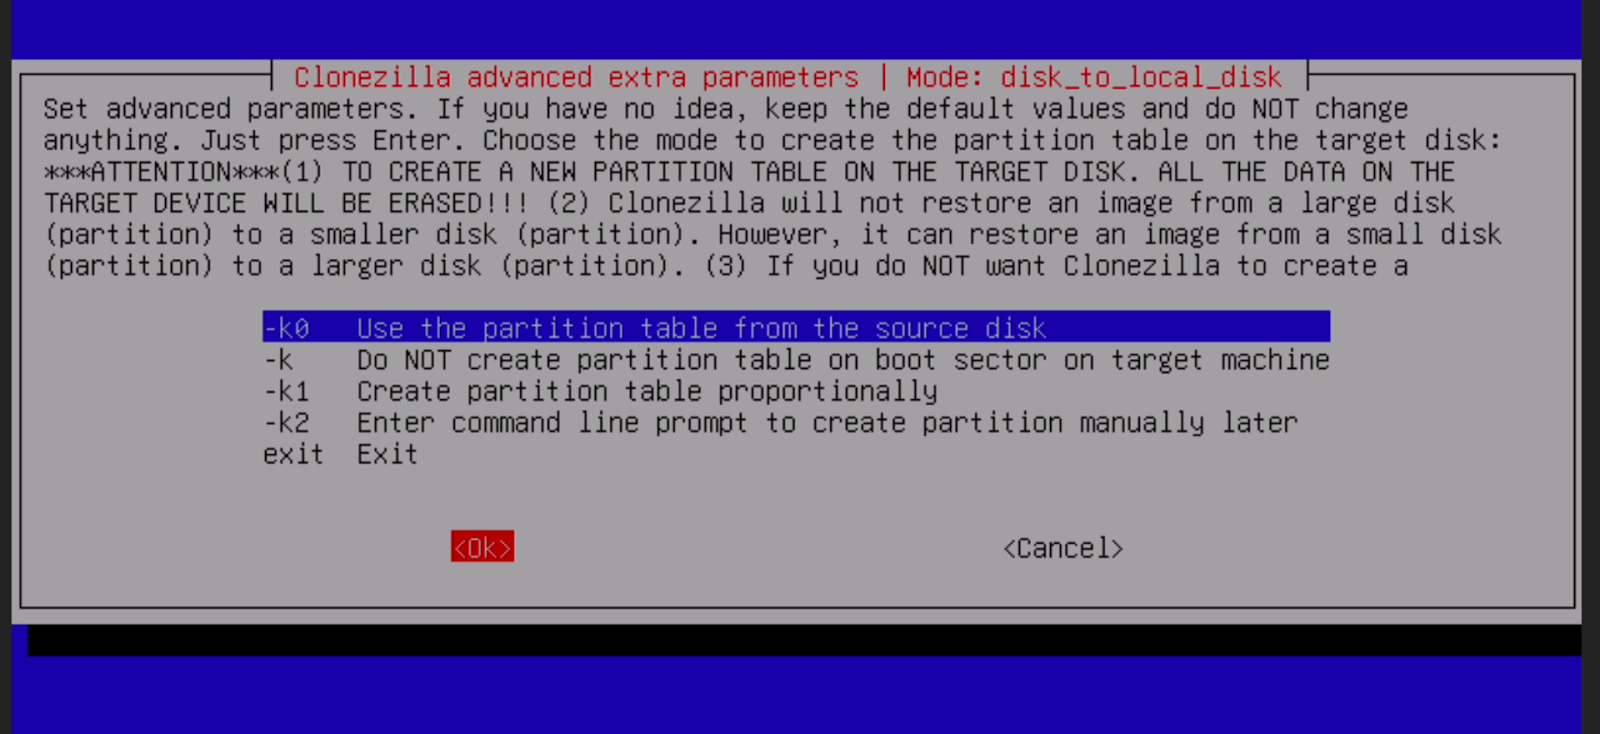
Next, select the first option to use the partition table from the source disk.
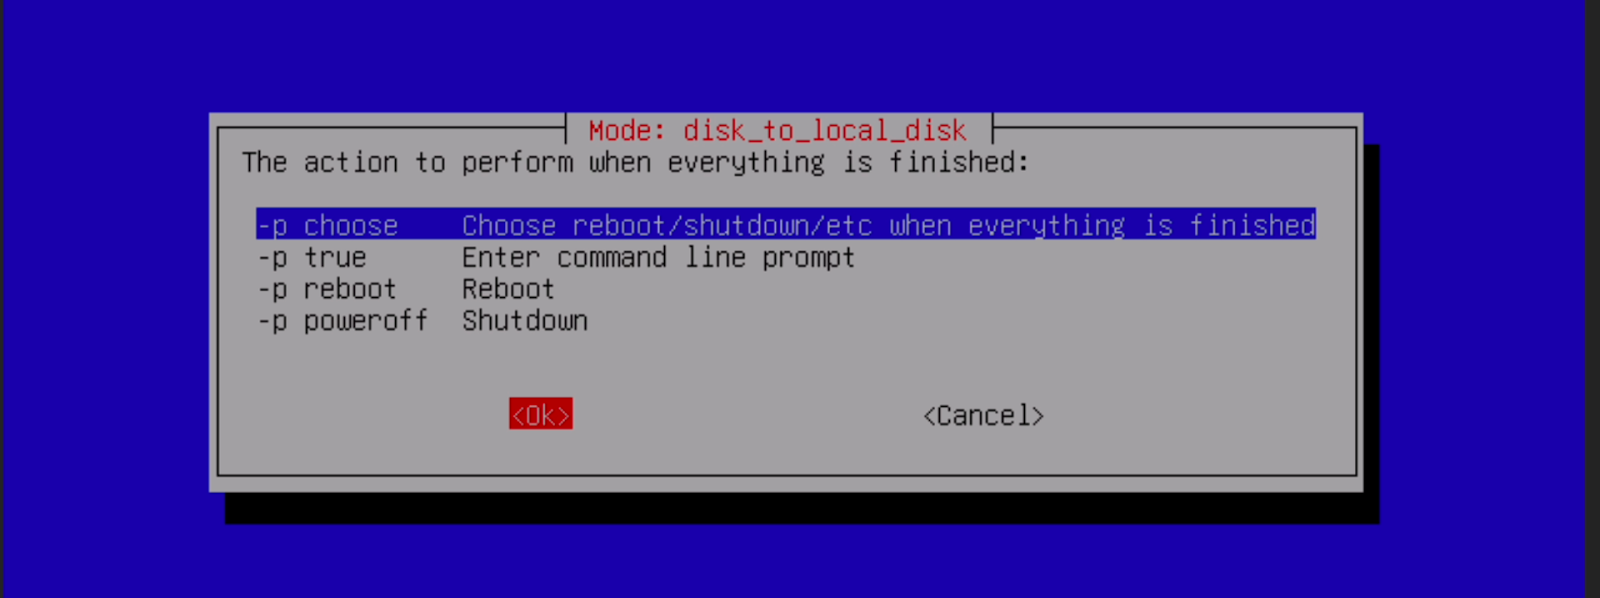
On the next screen, you can choose what action you want to take when the clone operation finishes. The choice you make here isn’t too important, but it helps to select the first option as it gives you as little more control than the other options. Plus, it lets you see what error messages or warnings were thrown during the clone operation, if any.
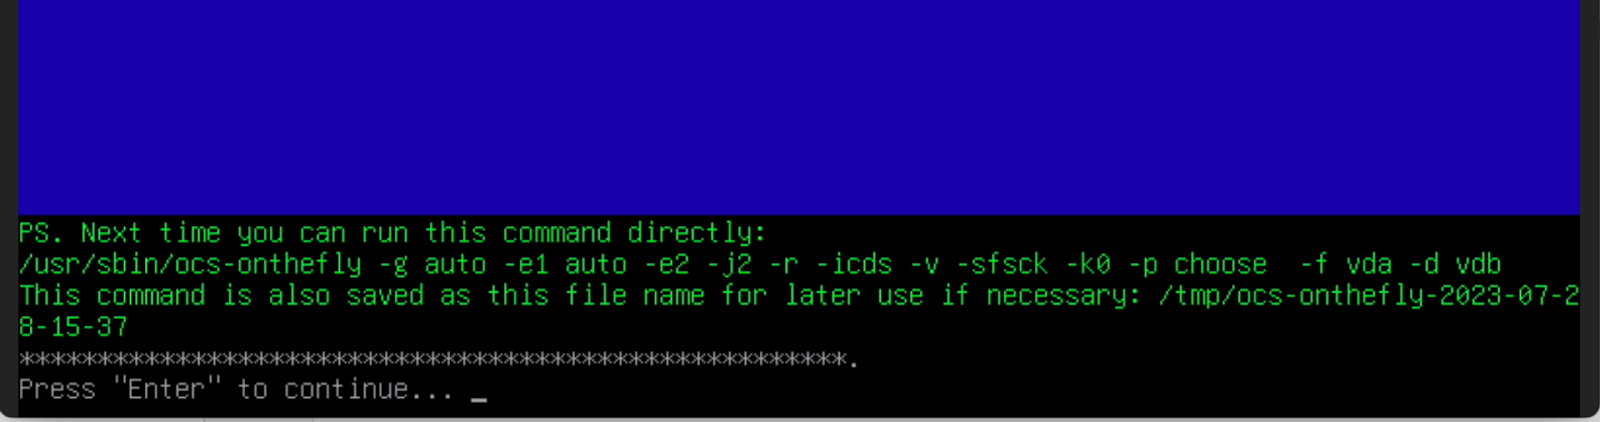
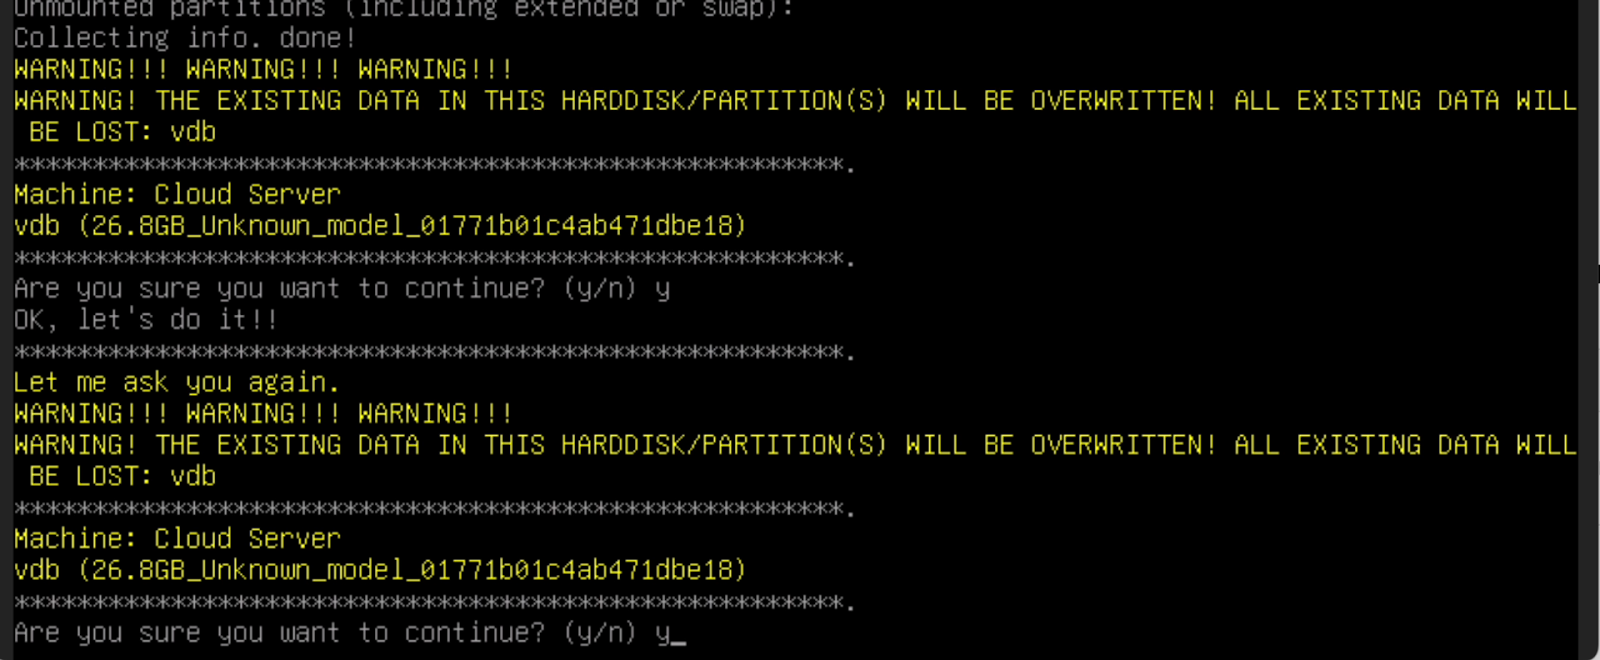
After making a choice and clicking ok, you’ll be prompted to press enter to continue. You’ll then get two more prompts warning you that all data on the smaller disk will be lost. Press y on both warnings to continue.
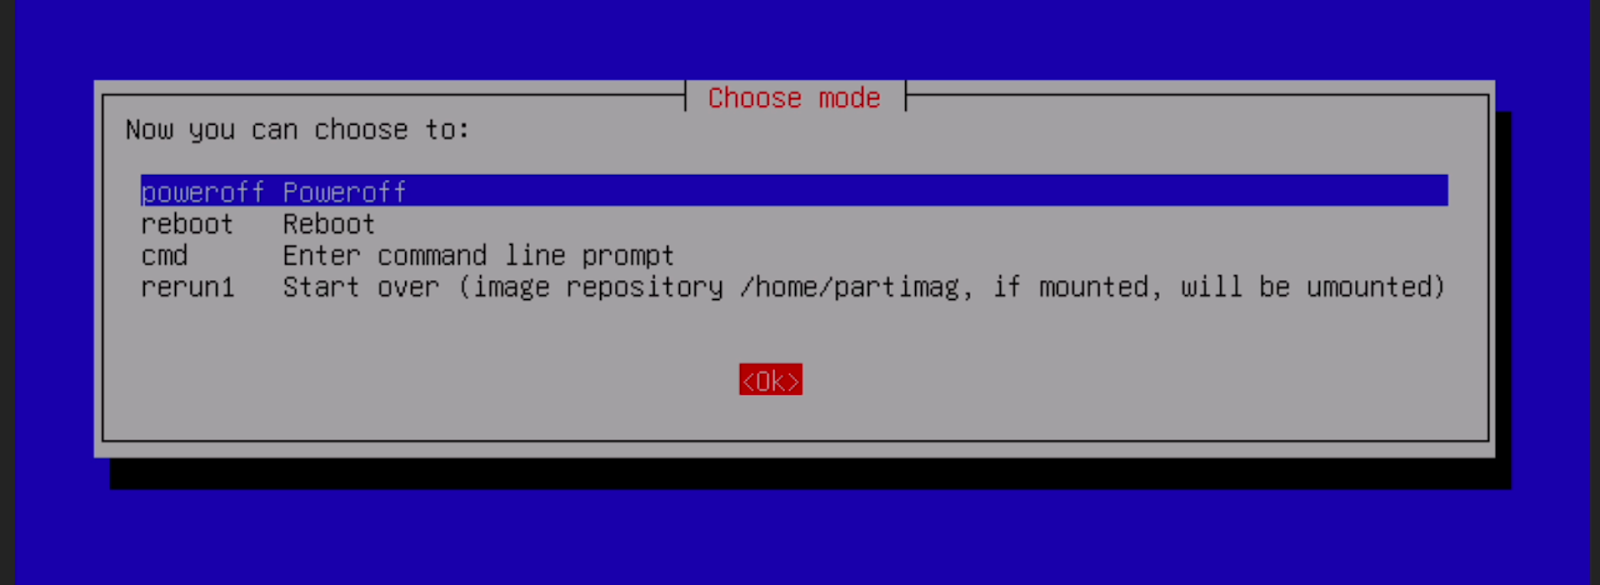
When the operation completes, you’ll be prompted a final time to press enter. From here you can select the poweroff option to turn the server off.
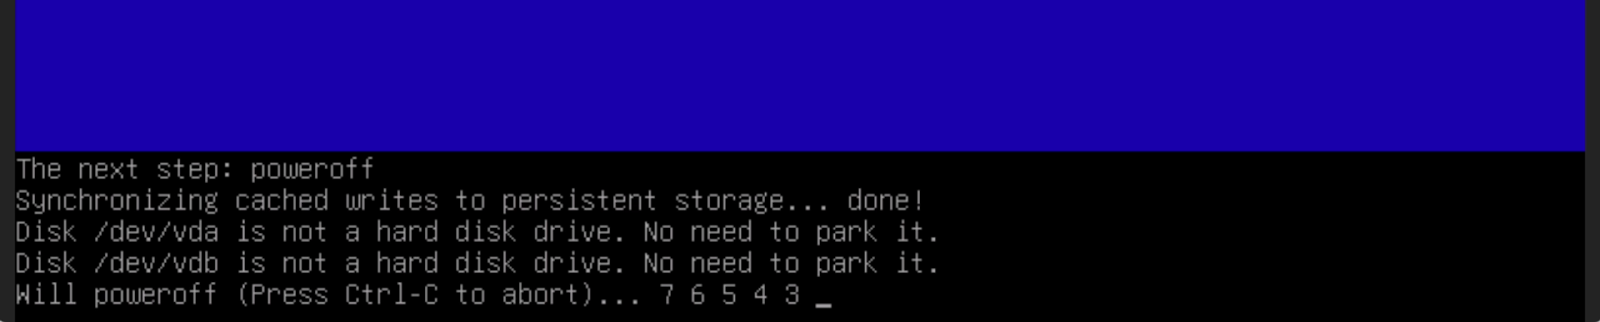
It is extremely important to let the server do a graceful shutdown. Wait for the countdown to reach 0, and then press enter when you see a message asking you to remove the live medium.
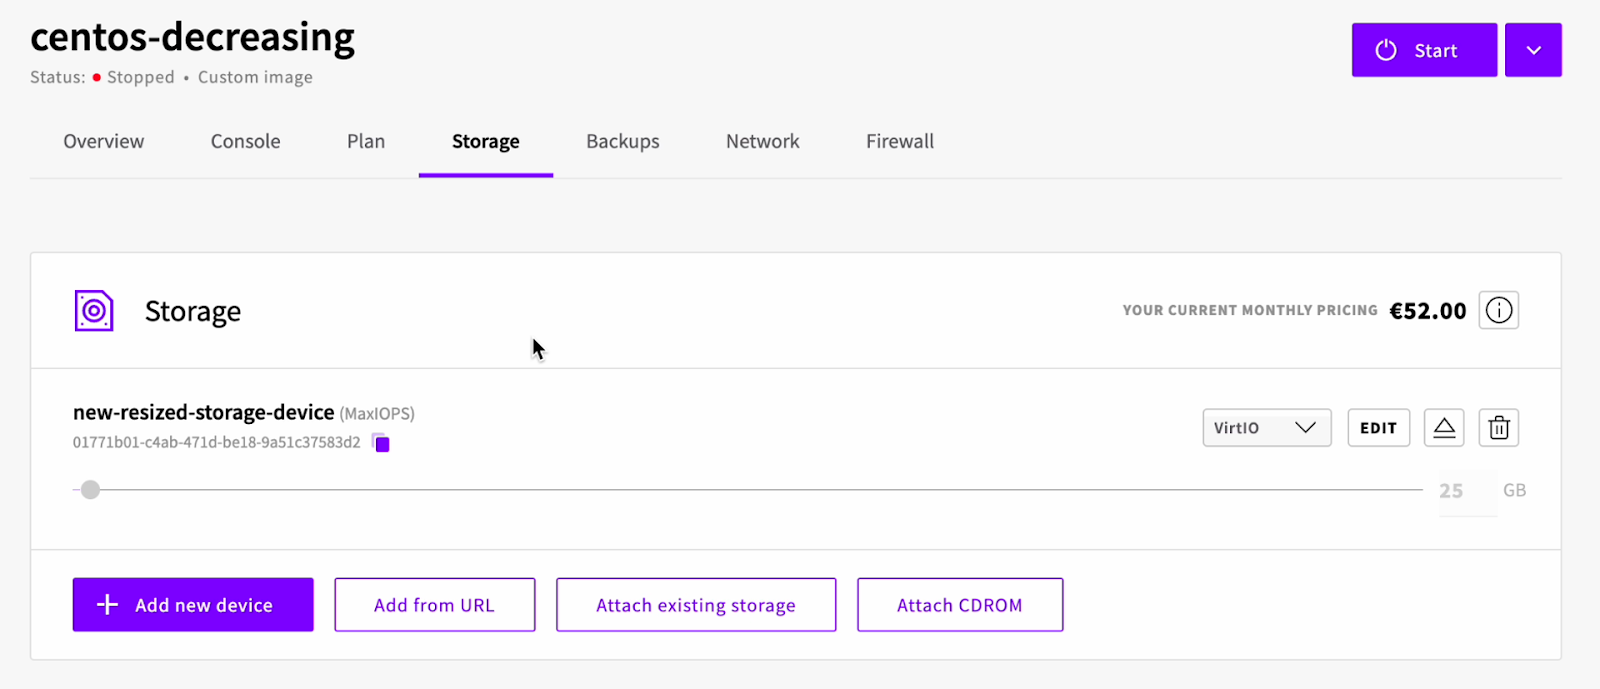
When the server has fully shut down, go to the storage tab and detach the original (larger disk) and the Clonezilla live CD. You should now be left with just a single smaller storage device.
You can now also revert the server’s boot order to its original configuration, and start the server.
If you recall, in one of the steps earlier, we created our partition with a size slightly smaller than the actual size of the disk (in order to make an allowance for the boot partition).
Now, we can proceed to enlarge that partition to take advantage of the entire disk space.
To do that simply run the following two commands on your server:
# Expand the /dev/vda2 partition to 100%
parted ---pretend-input-tty /dev/vda resizepart 2 100%

# Grow the filesystem to maximum
xfs_growfs -d /
The final step involves confirming that all of your data was copied successfully and is available on the new smaller disk.
Afterward, you can delete the old disk as well as the two live CDs that were created if you no longer need them. If all went well, don’t forget to also delete the backup you took earlier, although, it might be helpful to keep the backup around for a little longer in case you come to need it.
Now that you have successfully decreased the size of your server’s storage device, you should be able to resize your server to a smaller plan if that was your original intention.