Downsize Cloud Servers to Starter Plan
Are you looking to optimise your cloud resources and reduce costs? This comprehensive tutorial will guide you through the process of downsizing your UpCloud server from a higher-tier plan to a more cost-effective Starter option.
In this tutorial, we'll cover:
- Creating a backup of your current server configuration
- Verifying available space on your server
- Creating and cloning to a smaller storage device
- Detaching the original storage and attaching the new one
- Changing your server plan to a lower tier
- Verifying the successful downsize
Important notes
- This process involves working with your server's storage and configuration. Always ensure you have a recent backup before proceeding.
- Some steps may require server downtime, so plan accordingly.
- Familiarity with the UpCloud API or CLI may be helpful for certain steps.
Now, let's dive into the detailed steps to downsize your UpCloud server.
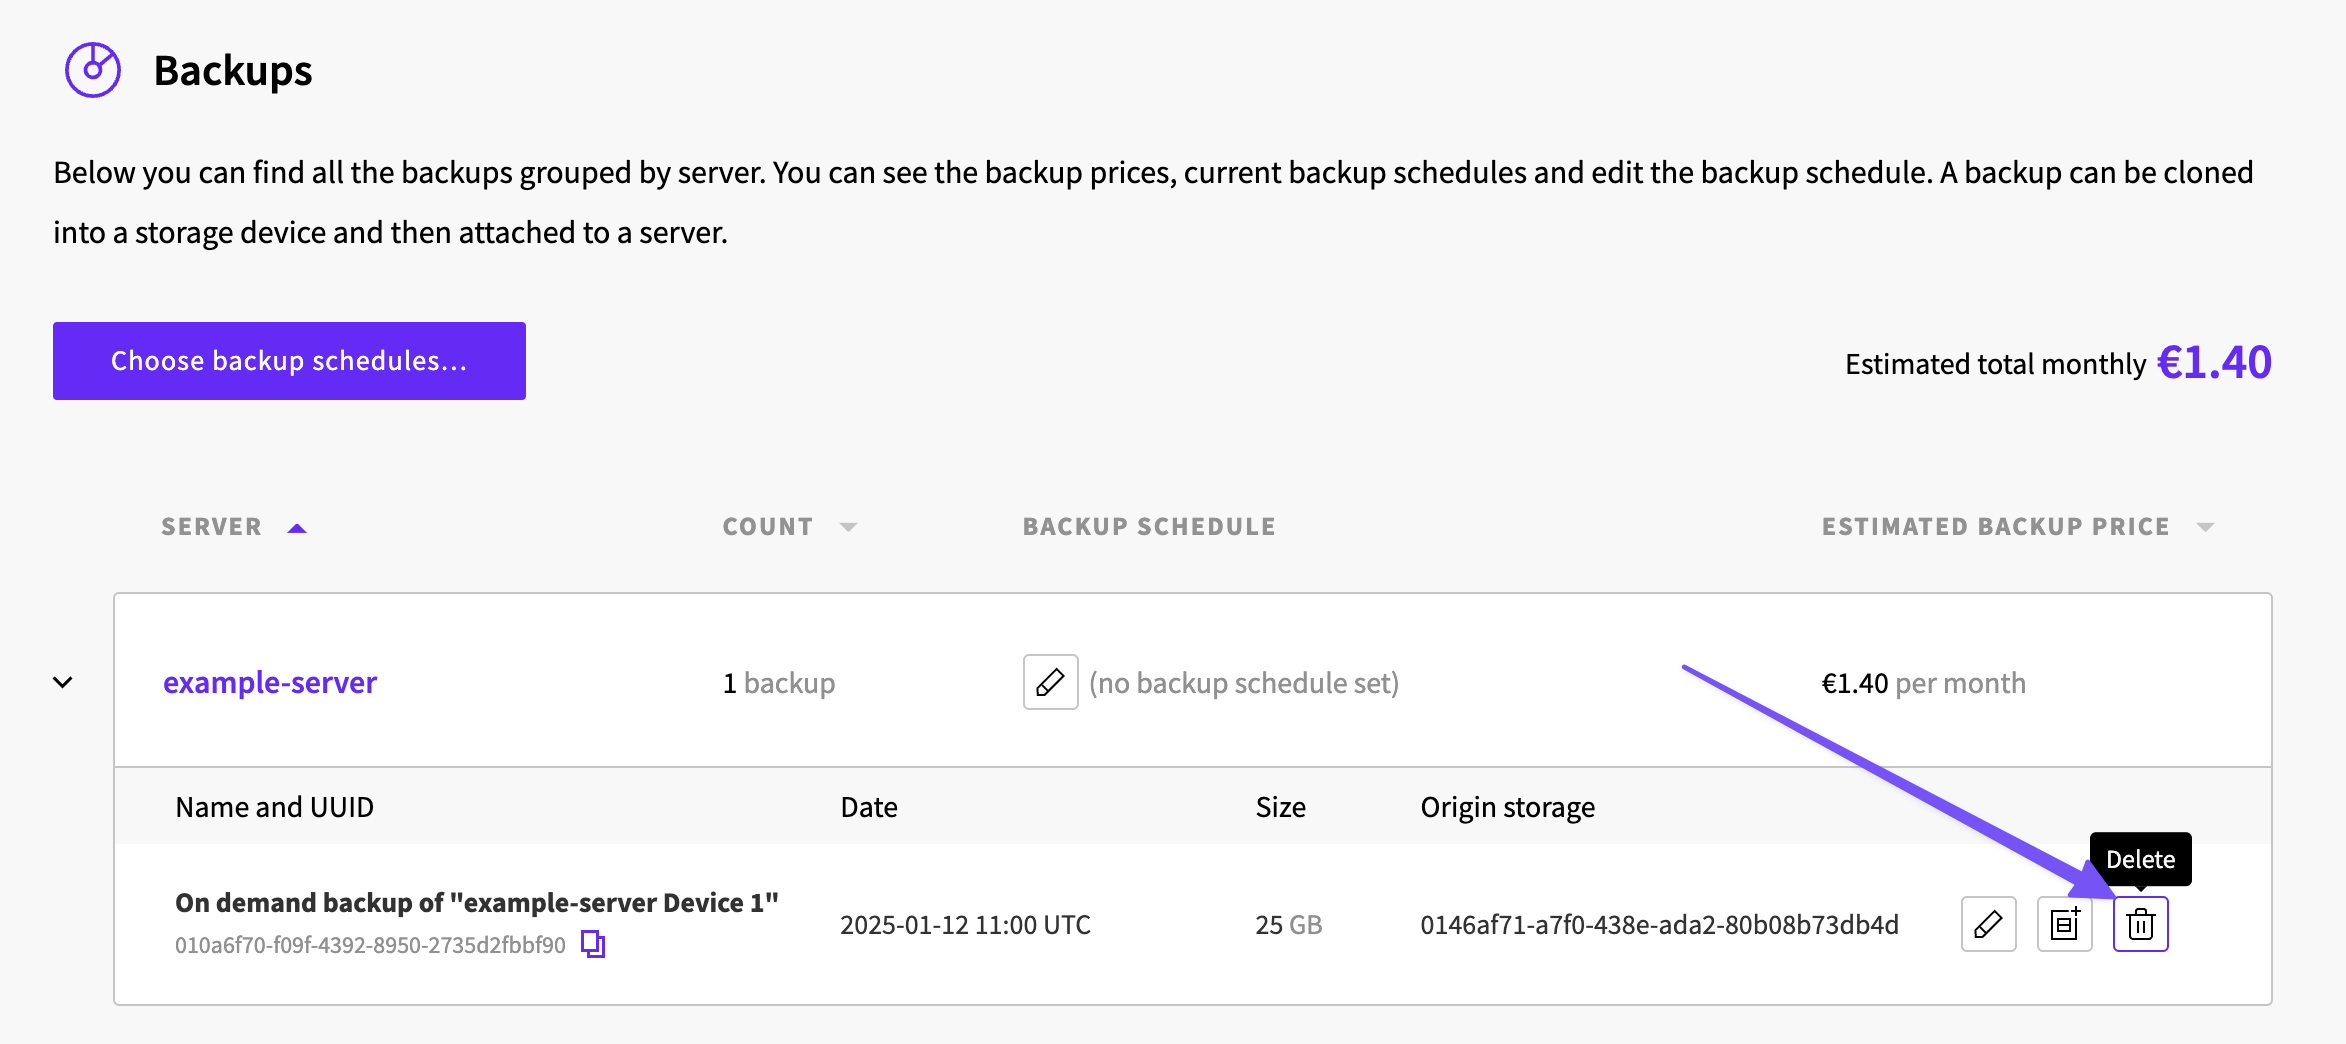
1. Creating a backup of your current server
Let's begin with creating a backup of your current server configuration. By creating an on-demand backup, we can restore our server to its initial state should something go wrong.
2. Verifying available space
Once the backup has finished, connect to the server you plan to downsize, then run the command df -h from within the server. This is to ensure you have enough space to fit all existing data on the smaller disk.
root@example-server:~# df -h
Filesystem      Size  Used Avail Use% Mounted on
tmpfs            85M  2.9M   83M   4% /run
/dev/vda2        25G  2.3G   22G  10% /     <----- # Used space
tmpfs           425M     0  425M   0% /dev/shm
tmpfs           5.0M     0  5.0M   0% /run/lock
tmpfs            85M   12K   85M   1% /run/user/0
When reviewing the output, locate the line where the "Mounted on" column shows / - this indicates your root partition. Check the corresponding "Used" column value (which shows 2.3G in this example) as this shows your current disk usage.
To avoid data loss, make sure that the new disk size you're downsizing to is larger than this used space value.
If verified, Shutdown the server.
3. Creating and cloning to a smaller storage device
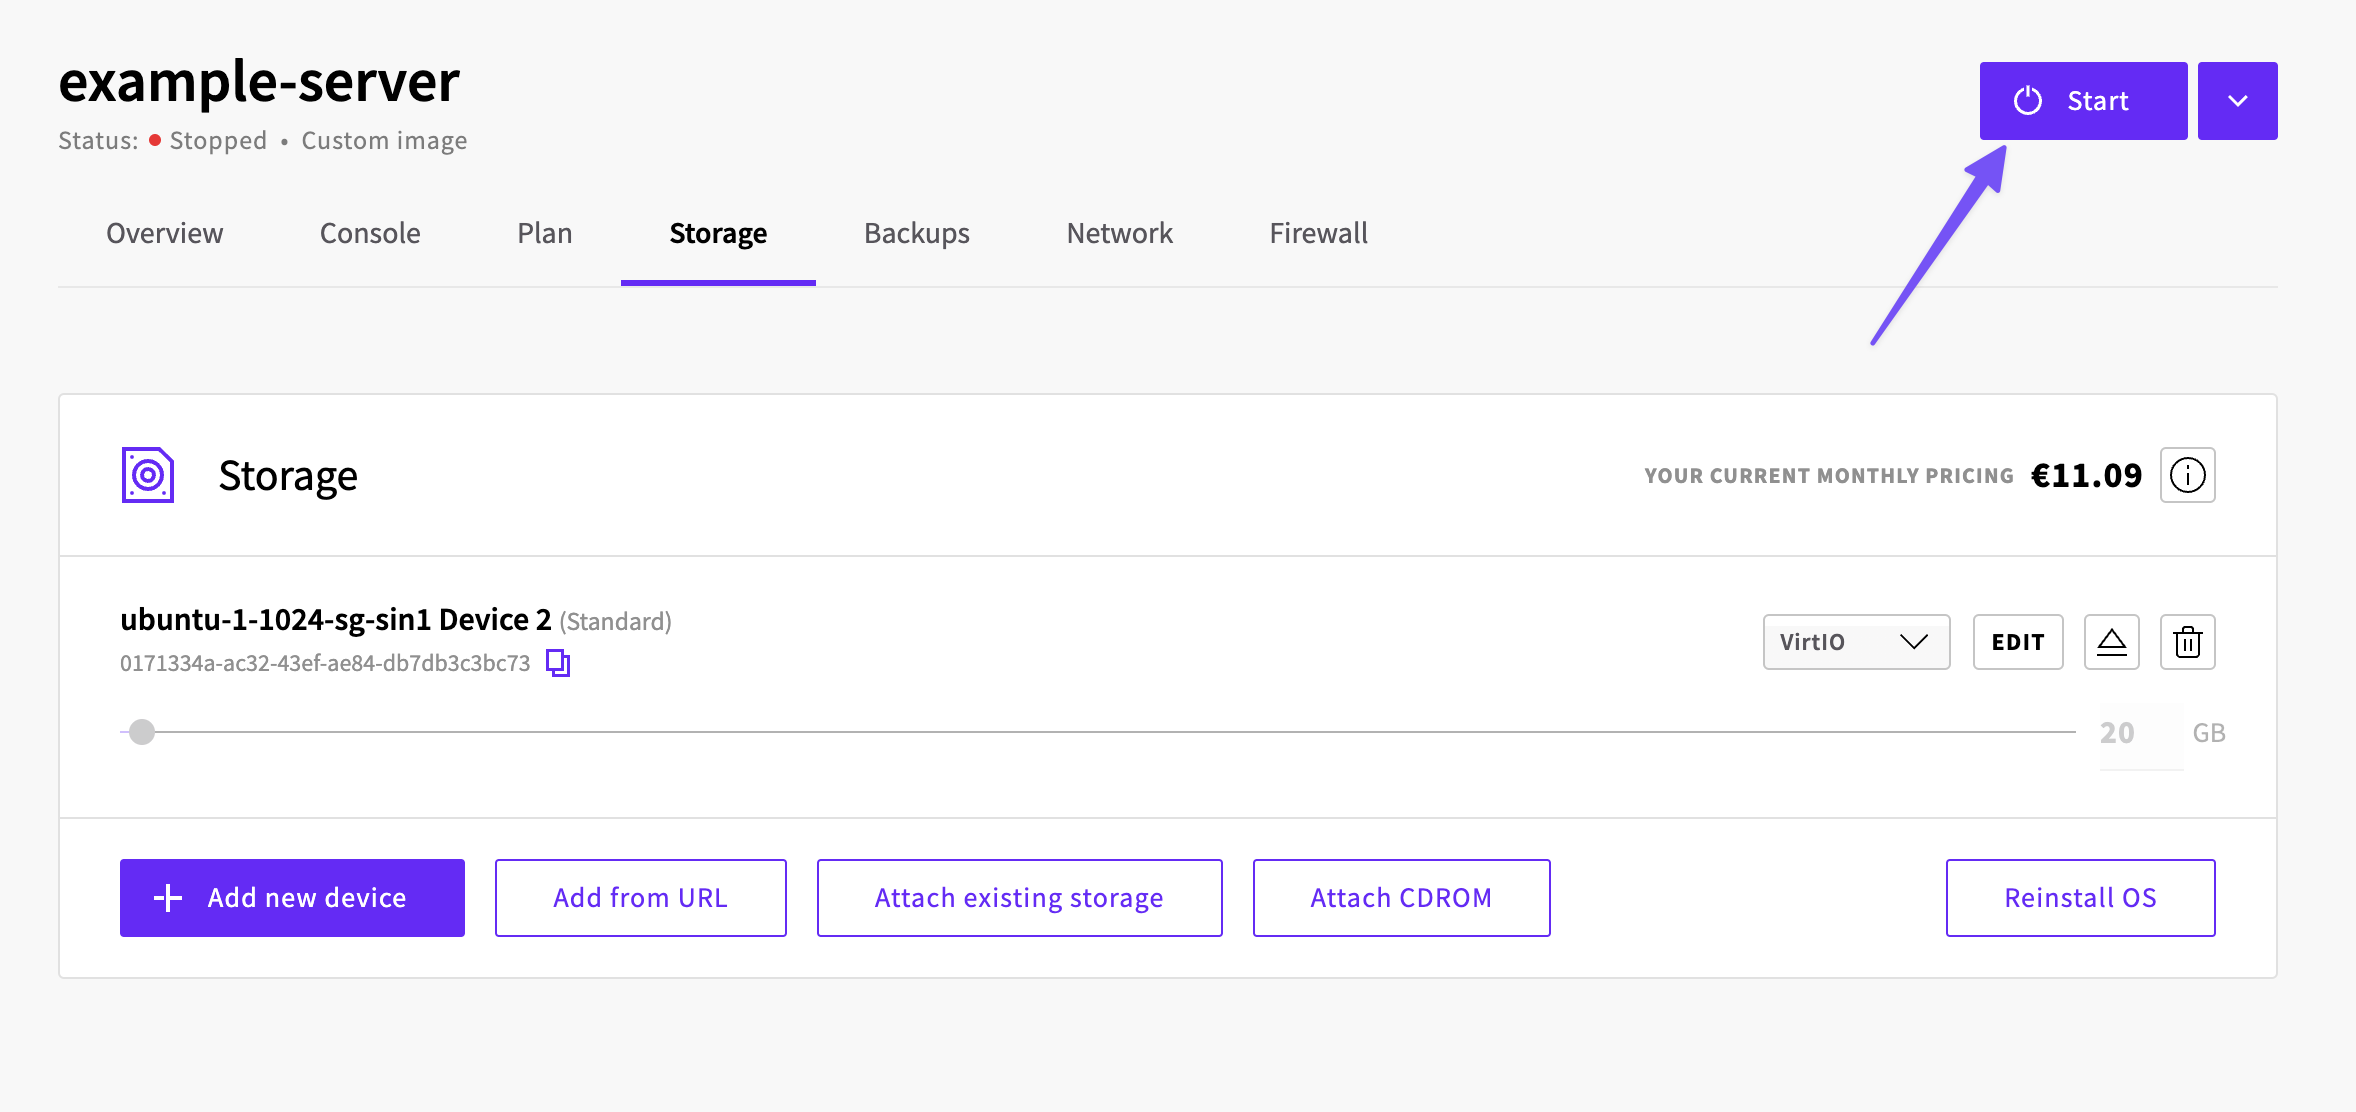
Navigate to the Storage tab of your server and add a new storage device. The size of the new device should match the size on the plan you are downsizing to. In this example, we will be downsizing to the 20GB Starter plan - so we'll add a new 20GB storage device.
Ensure that you select the Standard storage tier to match the storage type of the Starter plans. Enable encryption if required, and leave the Storage controller set to VirtIO.
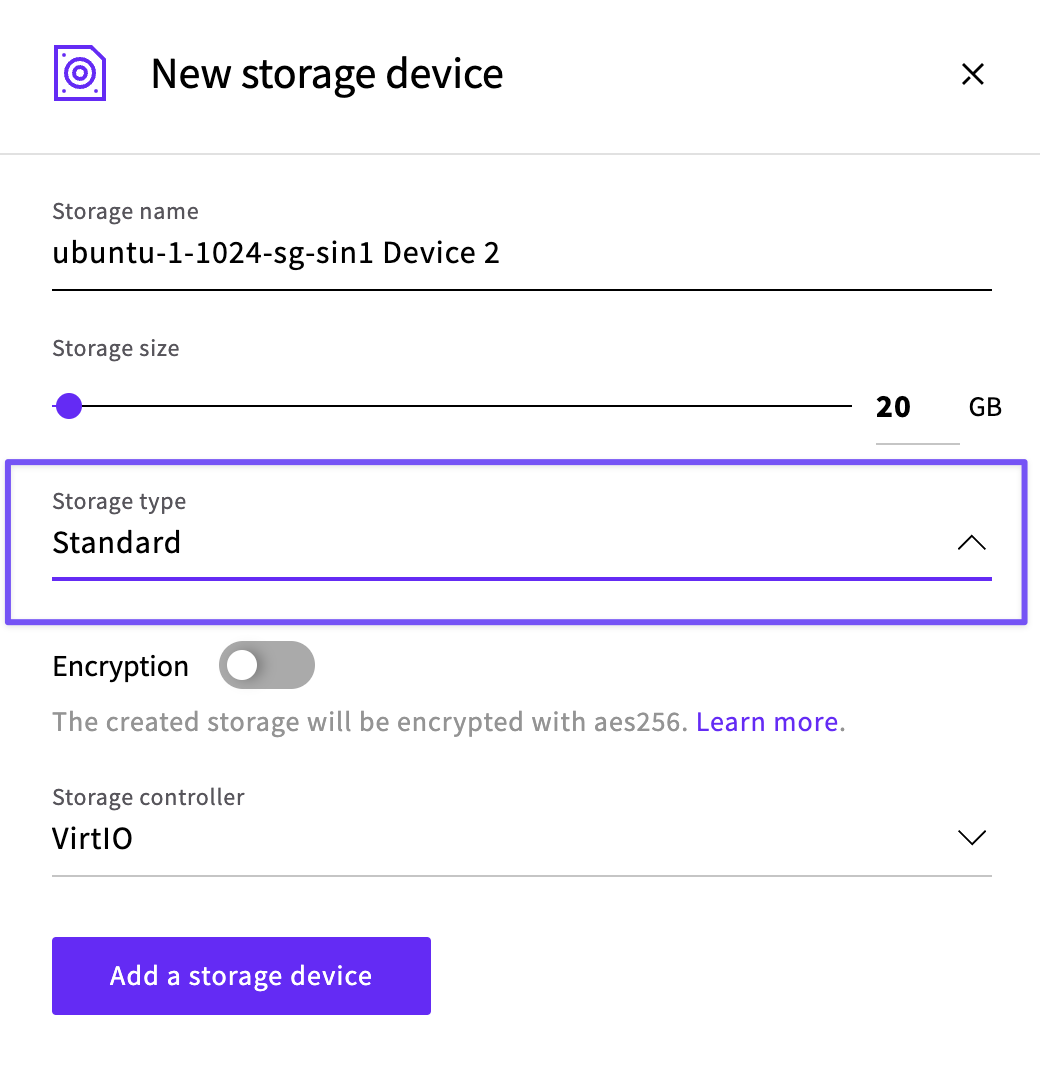
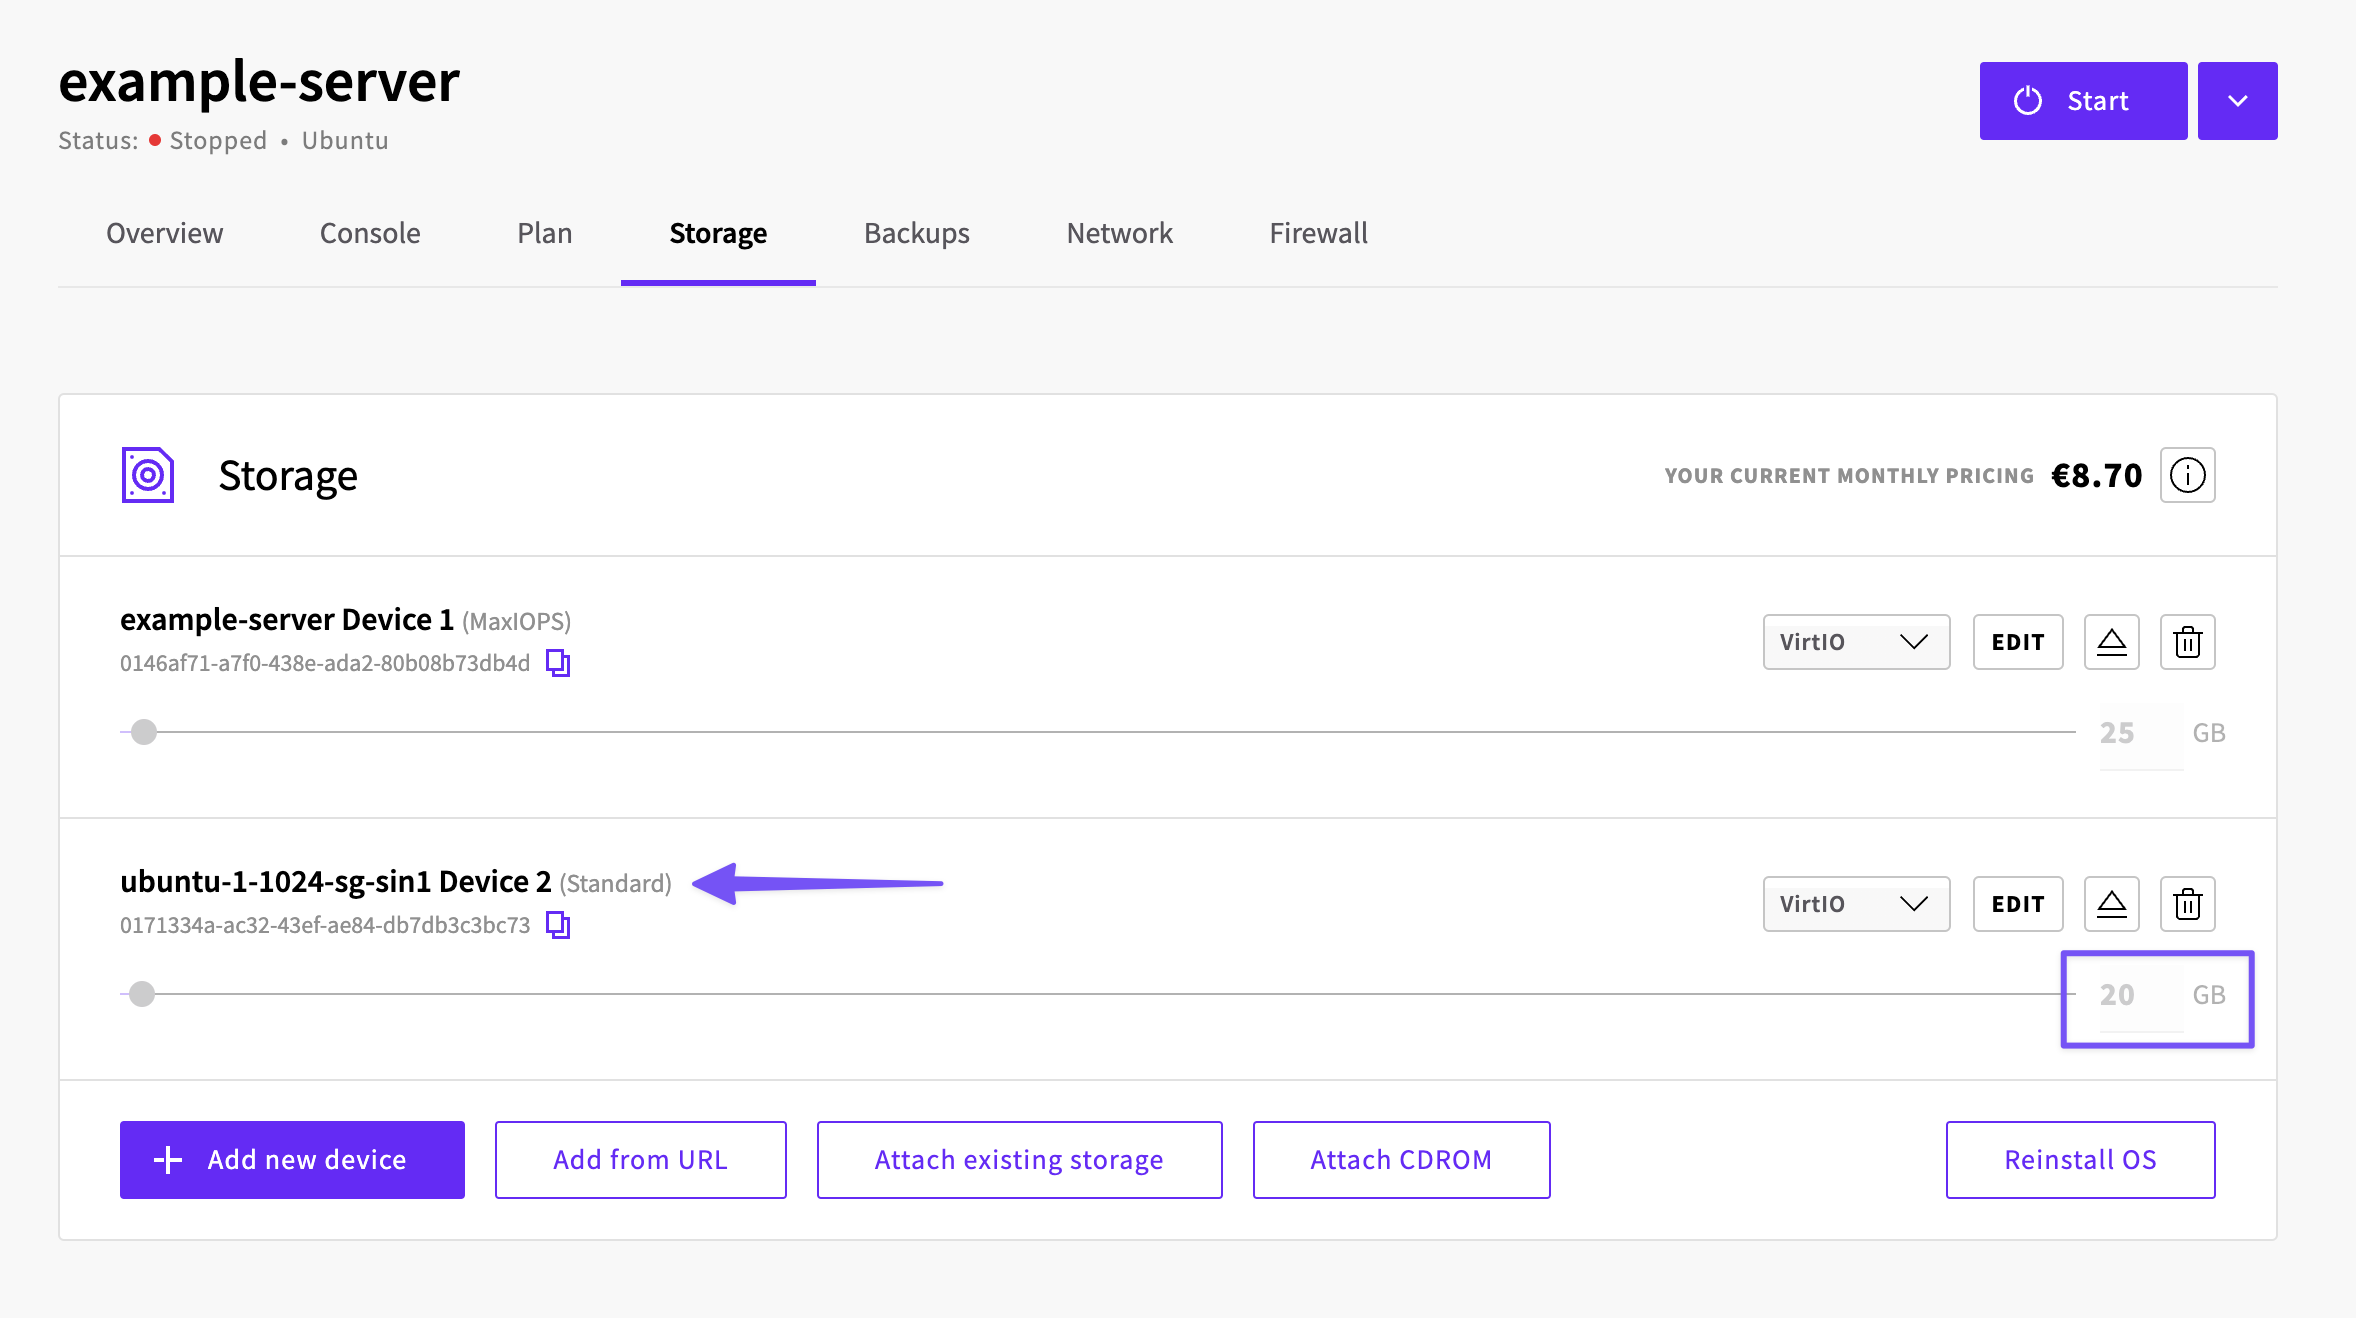
We can see that our new 20GB storage has been successfully created.
Next, start the server and move your data from the original storage device to the new 20GB storage device. The steps for this vary depending on your operating system, so please follow one of the appropriate guides below to complete the process:
- Decreasing storage size on Ubuntu and Debian Cloud Servers
- Decreasing storage size on CentOS 8/9, Stream, and Rocky Linux
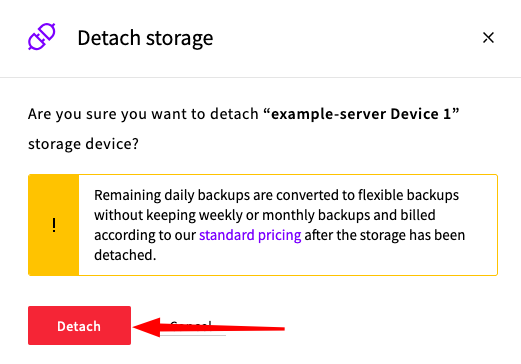
4. Detaching the original storage and attaching the new one
Once that is done, shutdown the server, and detach the original, larger storage.
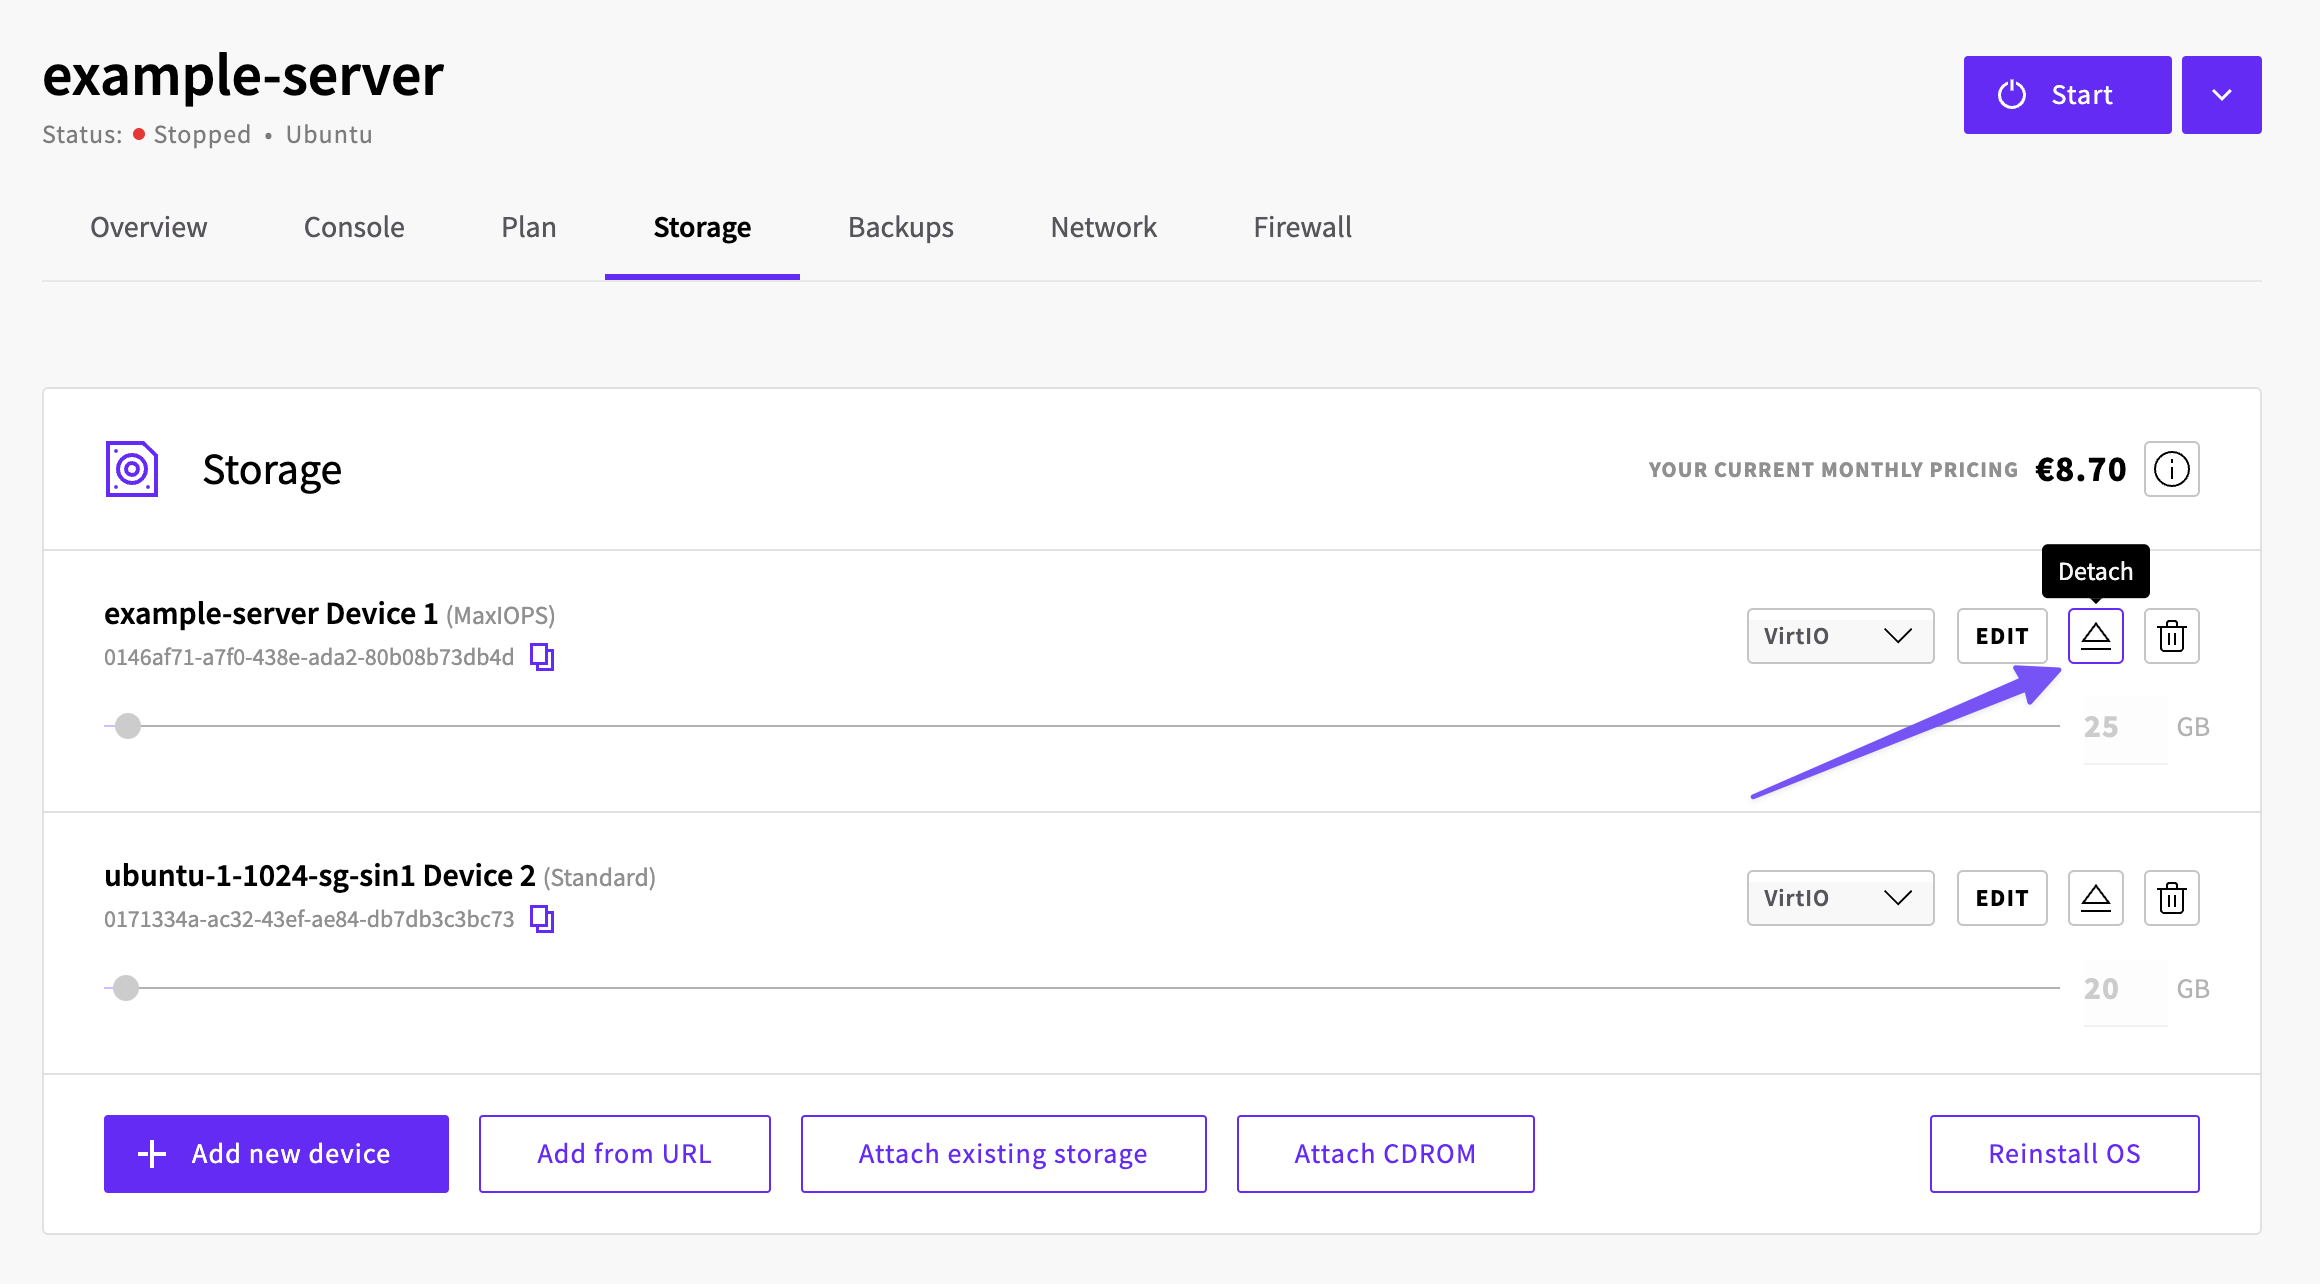
Note: When detaching the original storage and you have Simple backups enabled, a notification popup will appear. Click Detach.
5. Verifying the new storage
When only the smaller storage remains on the server, start the server to verify that you can still connect to the server from this smaller device. The server credentials remain the same.
Once you connect, run df -h to ensure the main partition looks correct.
root@example-server:~# df -h
Filesystem Size Used Avail Use% Mounted on
tmpfs 85M 2.9M 83M 4% /run
/dev/vda1 20G 2.3G 17G 13% / # Looks good!
tmpfs 425M 0 425M 0% /dev/shm
tmpfs 5.0M 0 5.0M 0% /run/lock
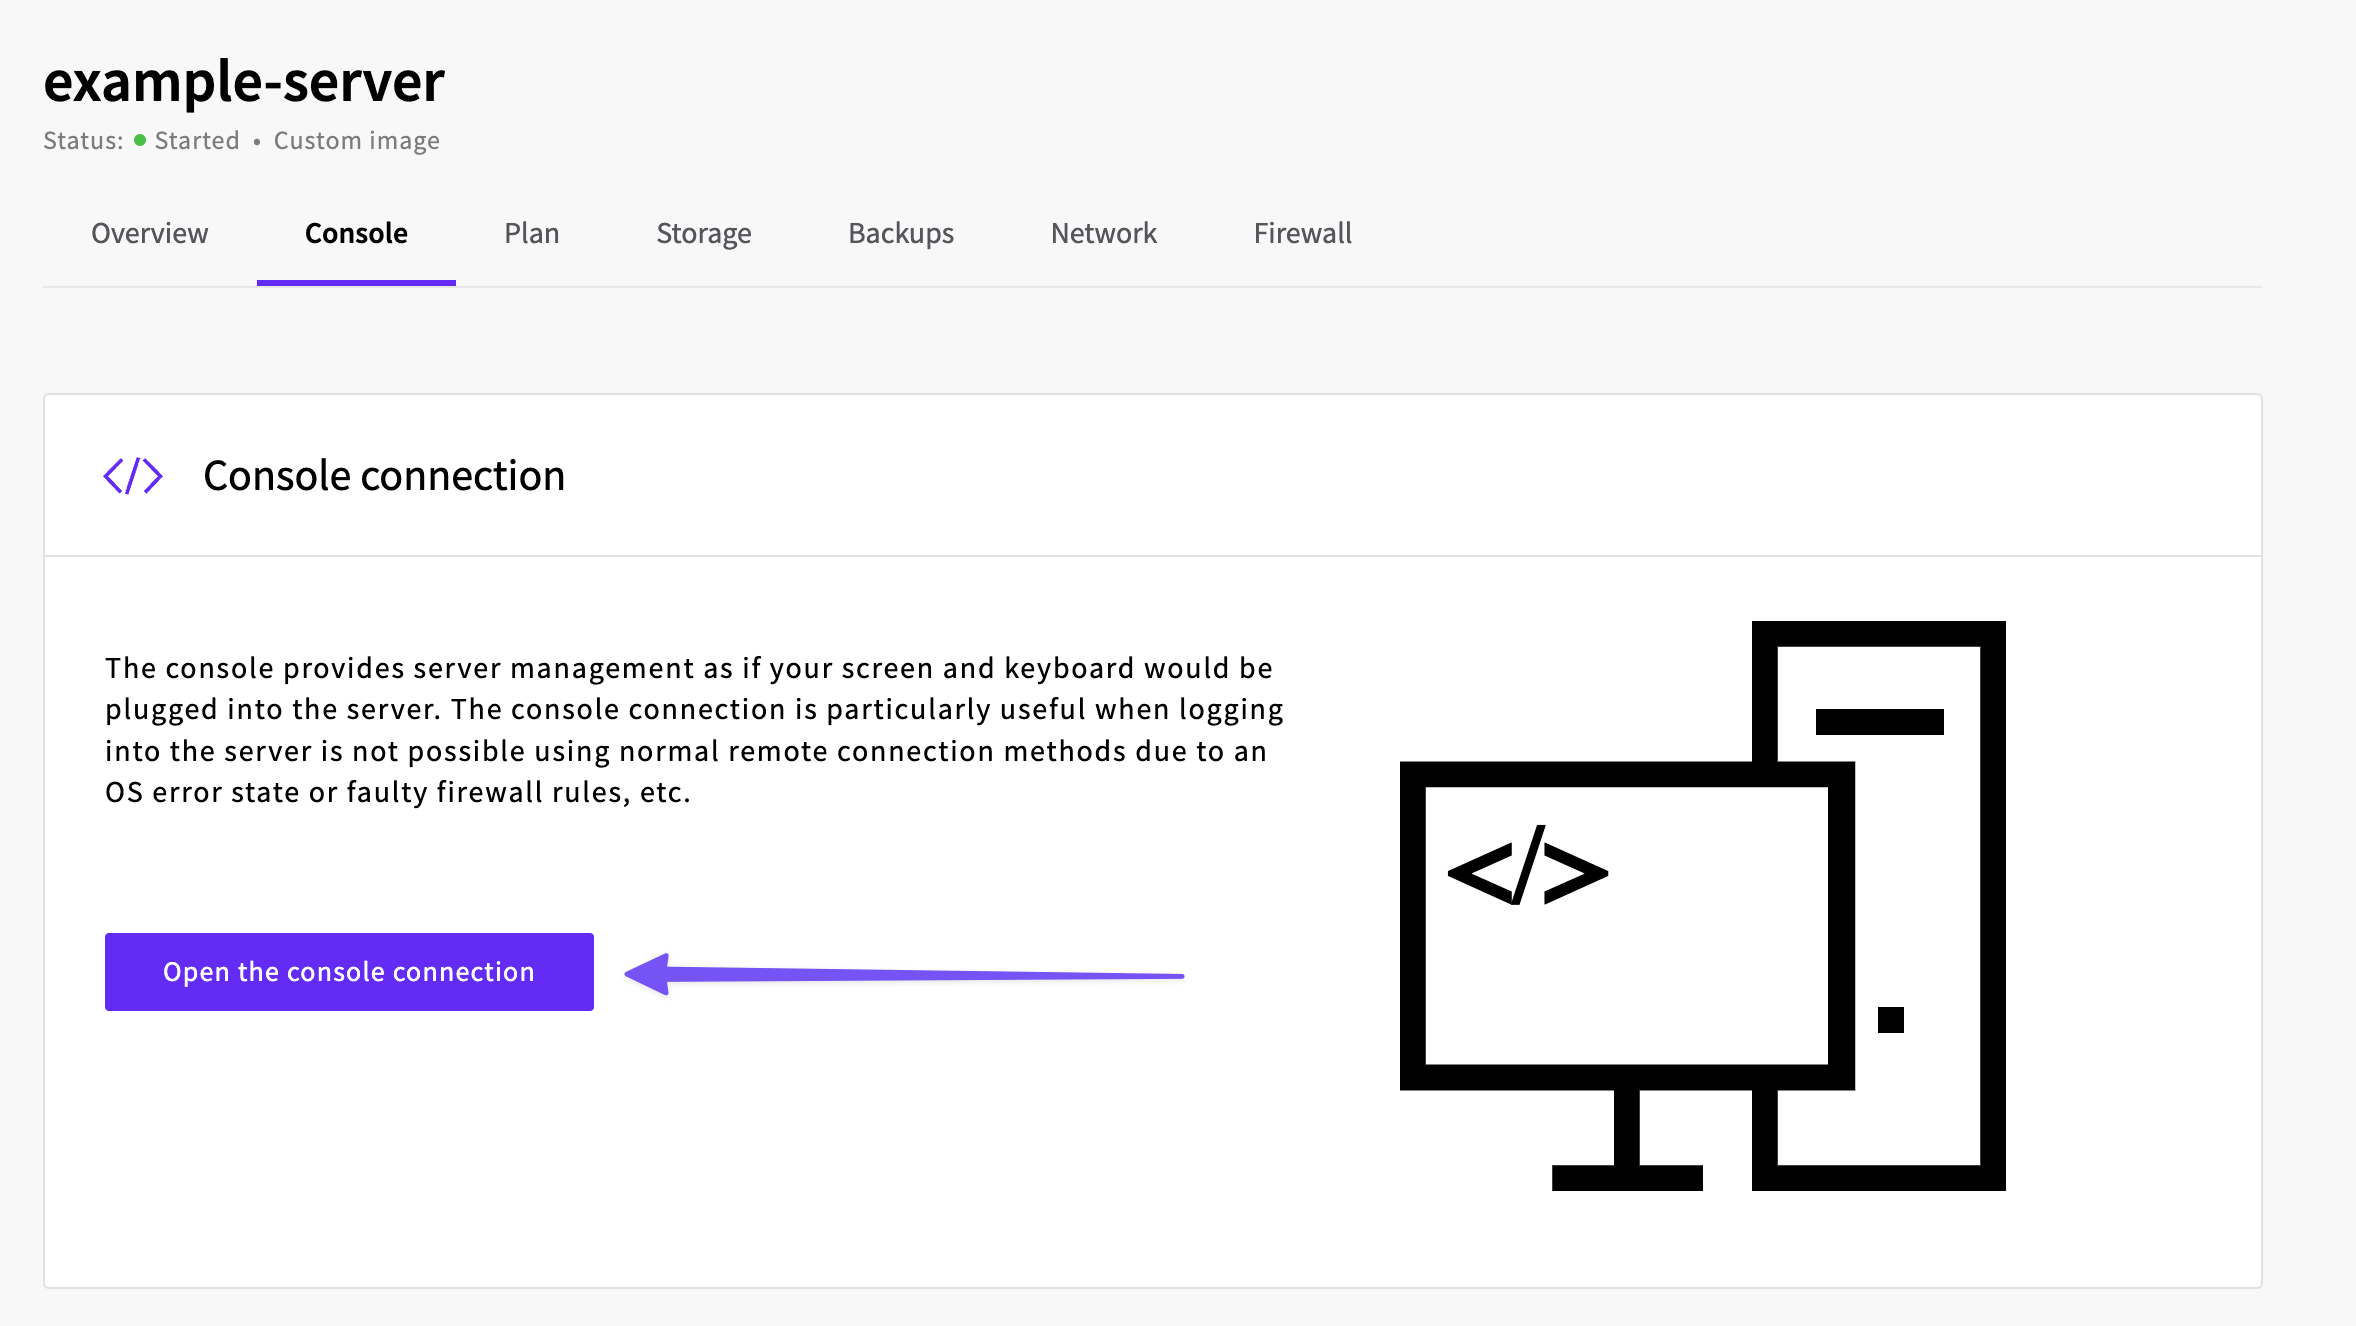
tmpfs 85M 12K 85M 1% /run/user/0If you cannot connect, open the web console connection to see if any errors appear on the screen.
If boot errors appear, please Shutdown the server and follow the decreasing storage tutorial again.
6. Changing your server plan to a lower tier
If everything functions as intended, we can go ahead and change our server plan to the lower tier we want. First, shutdown the server and navigate to the Plan tab. Then, select the new Starter plan.
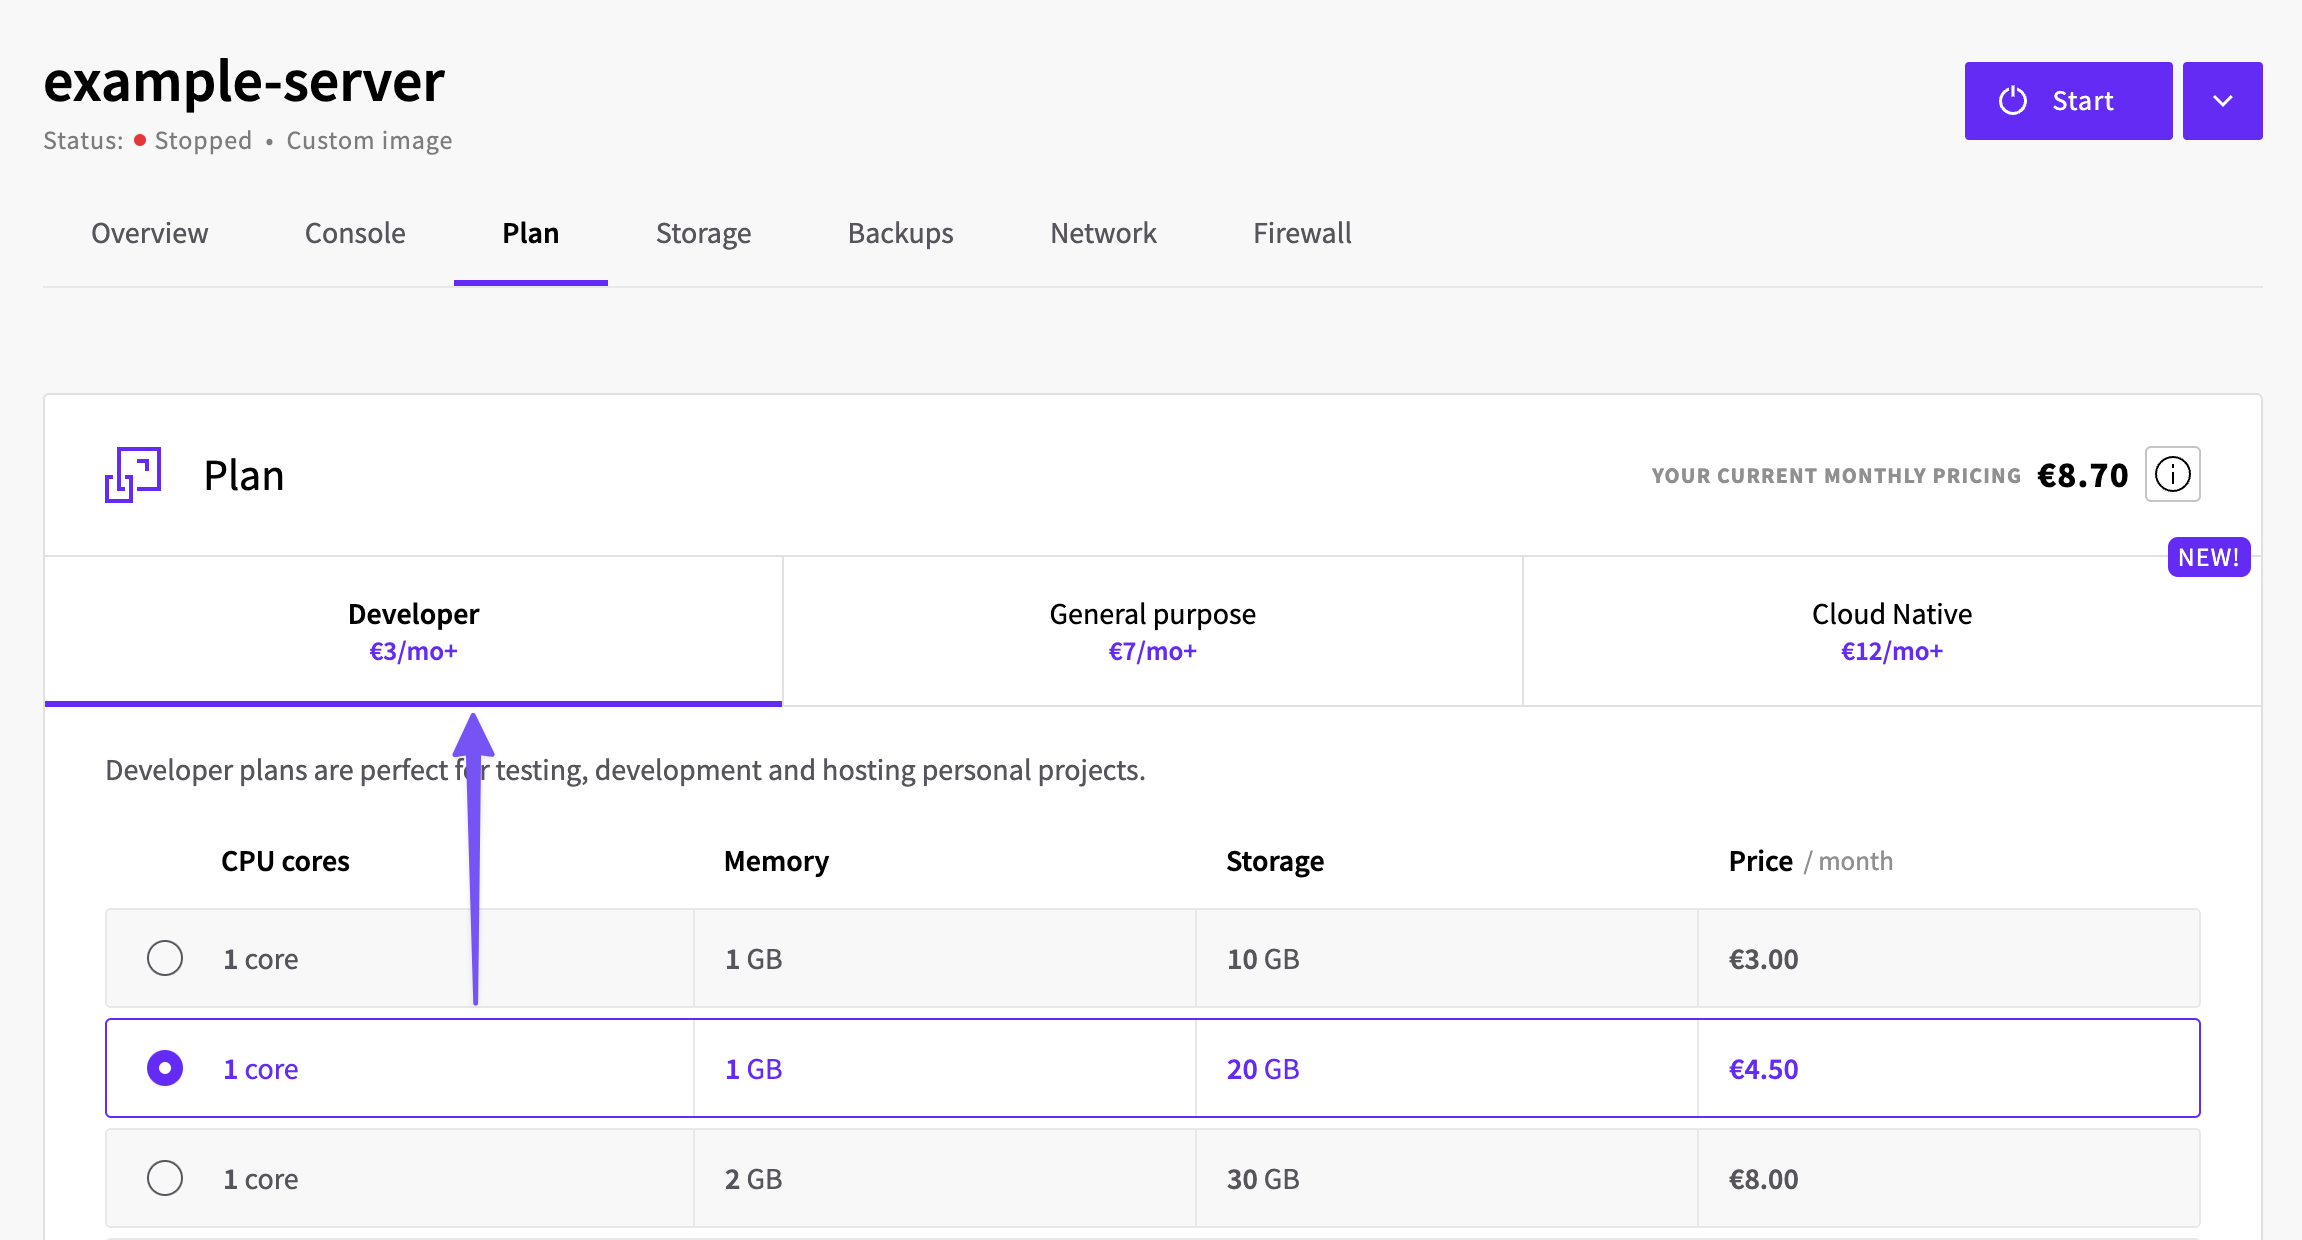
After that is done, click Save changes.
Note: This plan change must be done when the server is shutdown.
Your monthly price should now be brought down to a smaller amount.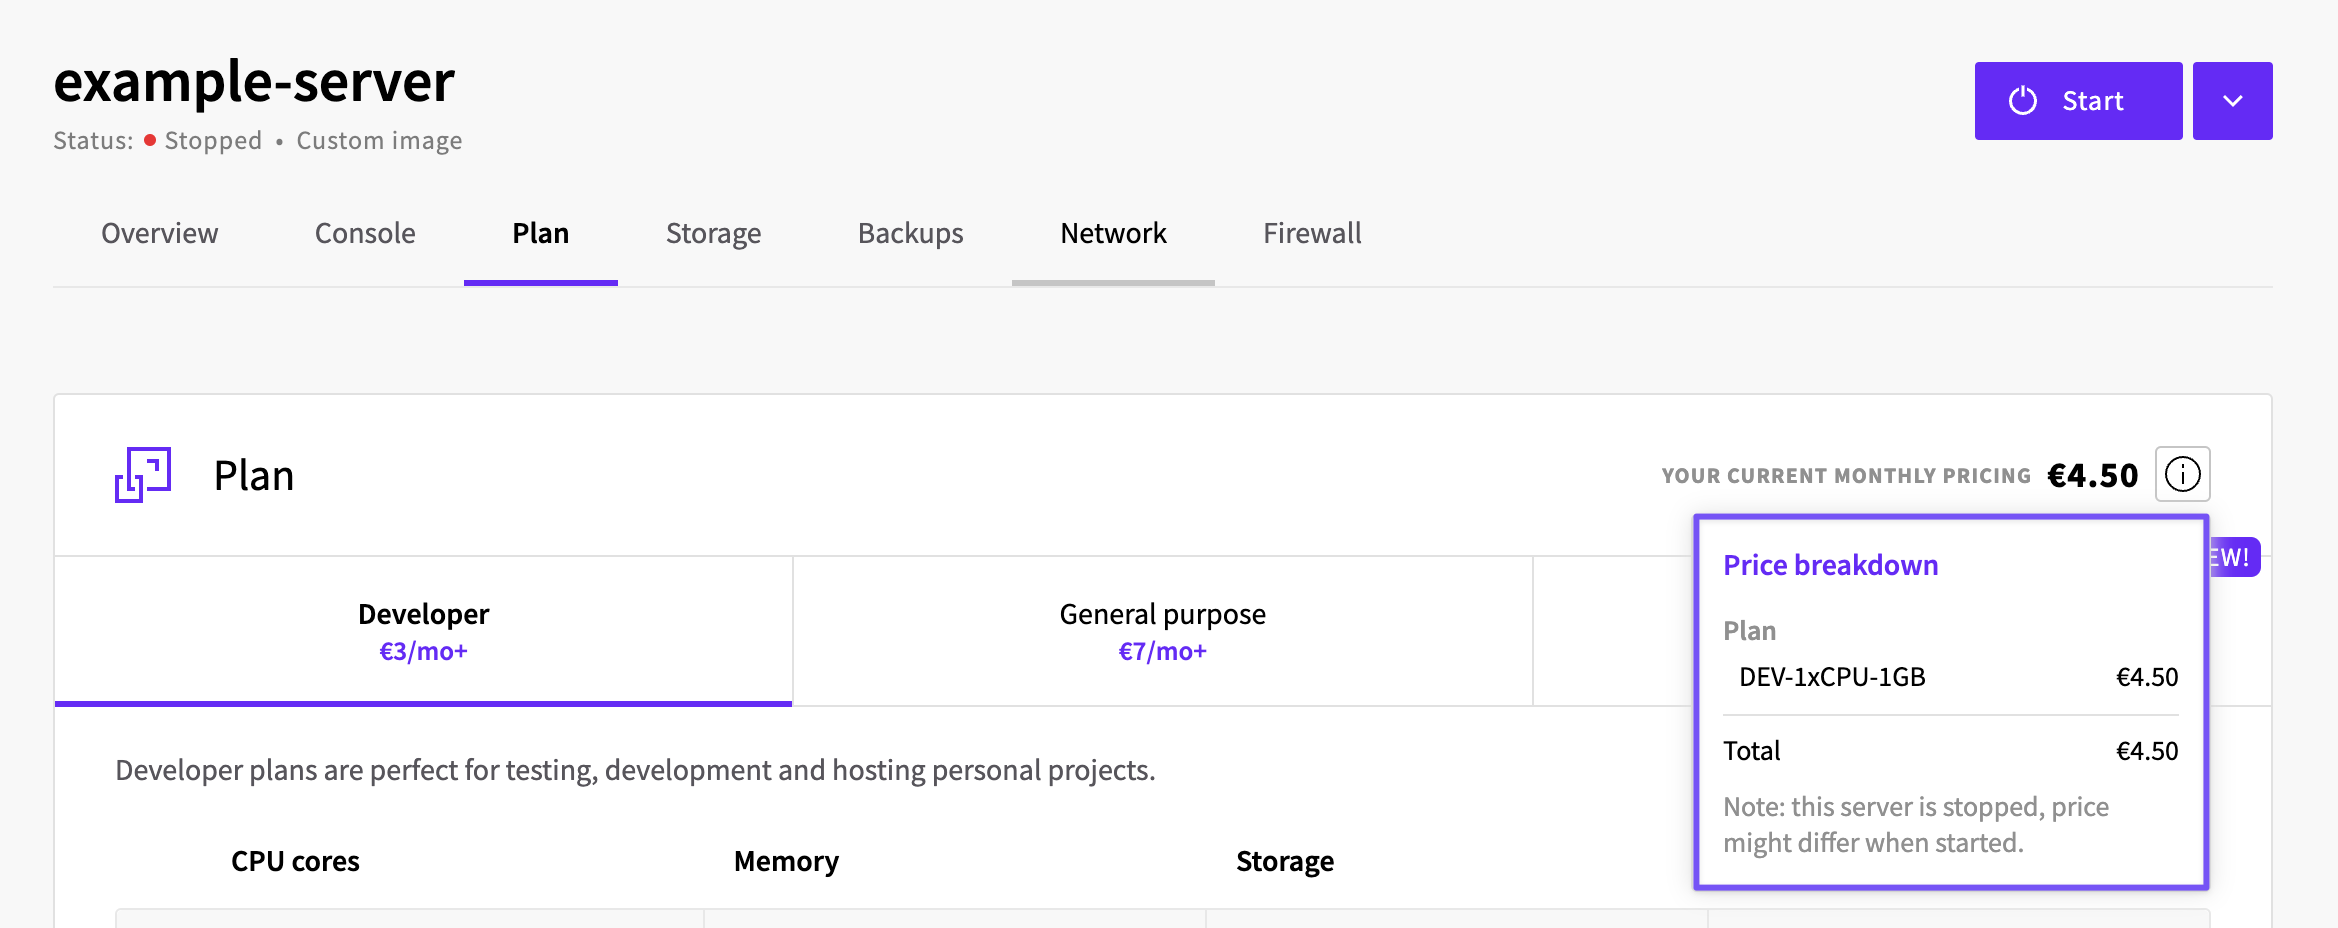
7. Verifying the successful downsize.
Then, if no other changes are needed, Start the server, and connect to verify that everything is working.
If you have any questions please contact our 24/7 Support team via Live Chat or email.
Optional steps
If everything works, you can remove the unnecessary resources. Do note that once resources are deleted they cannot be restored!
Delete the original larger storage on Storage > Devices
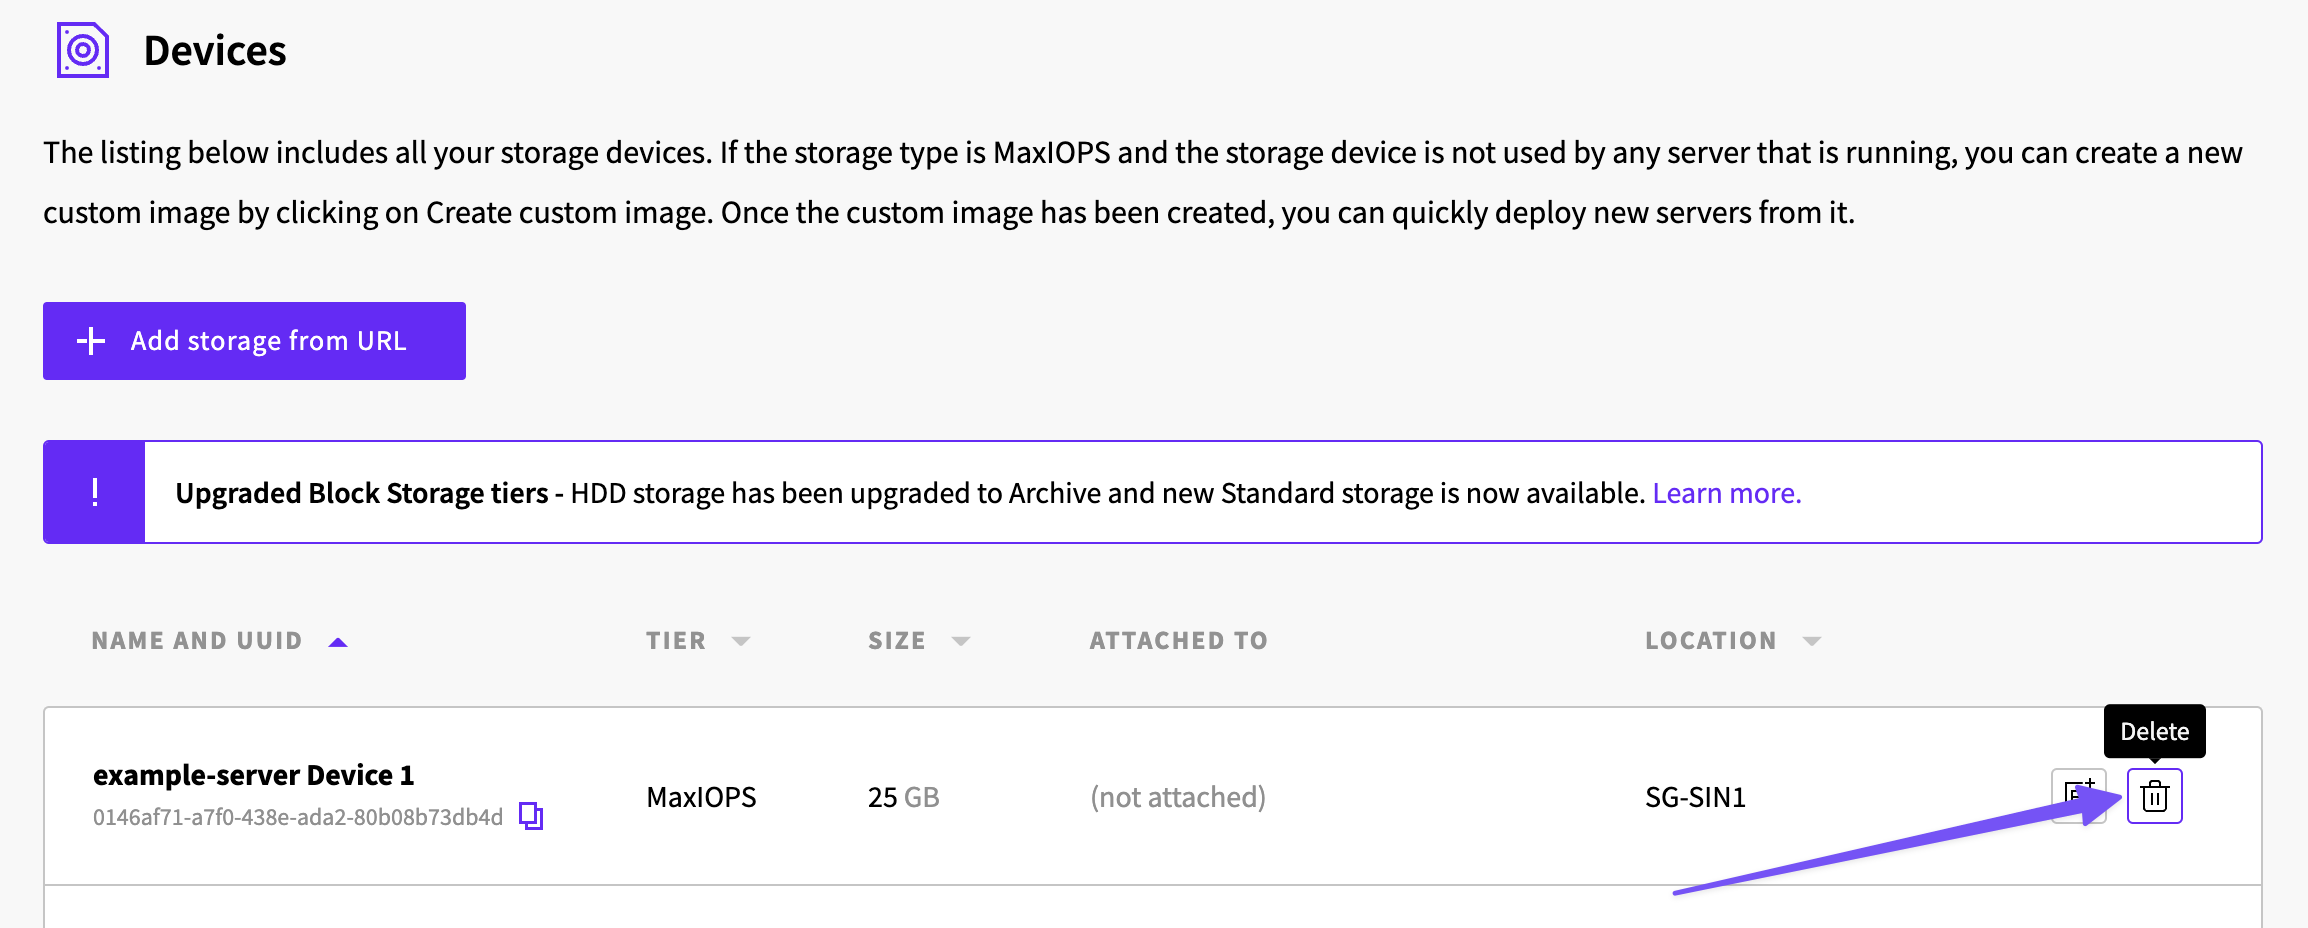
Delete any leftover backups on Storage > Backups.