
How to get started with UpCloud Managed Object Storage
If your projects or applications require managing large amounts of unstructured data, object storage is the solution. Unlike traditional block storage, which treats data as discrete blocks, object storage sees your information as comprehensive "objects" - such as images, audio, documents, and more. This architecture makes it well-suited for handling massive data sets.
While UpCloud's modern cloud computing provides the security and redundancy to safeguard your critical data, its real advantage lies in the S3-compatible and programmable interface, which gives you many options to connect your existing tools and leverage the power of UpCloud Managed Object Storage.
In this object storage tutorial, we'll walk you through our cloud storage setup so you can start managing your data more efficiently. Whether you're backing up terabytes of content or collaborating on vital project files, you’ll see how simple it is for your business to streamline data management.
Understanding Managed Object Storage
Managed Object Storage is a cloud-based data storage service that allows you to store and manage large amounts of unstructured data, such as documents, images, videos, and other digital assets, such as “objects” in virtual storage containers called “buckets.
We make it easy to create and manage objects directly through your UpCloud Control Panel or using any S3-compatible API tools. This flexibility gets you started quickly and easily while allowing your storage space to always match your business needs.
Key Features and Advantages of Managed Object Storage
Managed Object Storage is a powerful and flexible cloud storage solution that offers many benefits for businesses of all sizes.
S3-compatible interface: Easily integrate with your existing tools and code implementations, providing various options for working with the storage service.
Redundant and Secure Storage: All data is kept redundantly across multiple storage devices, and the service uses standard HTTPS encryption with SSL certificates to ensure the security of your files and information.
Competitive pricing: Affordable plans that scale based on your required storage capacity. There are no hidden fees or surprise bills at the end of the month.
Scalable storage solutions: To match your current requirements, Managed Object Storage starts from 250GB and scales up automatically in 250GB increments based on usage.
Zero-cost egress: On UpCloud, you'll never need to worry about paying for egress fees.
Seamless integration: Integrating the service with your applications is straightforward, as you connect using simple access and secret keys.
Easy content sharing: Enable public HTTPS access to specific buckets through the API, then share direct links to the content.
Managed Object Storage delivers a feature-rich and flexible cloud storage solution that combines robust capabilities, competitive pricing, and secure management of your business-critical data.
Creating a new Managed Object Storage instance
Begin by logging into your UpCloud Control Panel and going to the Object Storage section.
Click the “Create new Object Storage” button to get started.
Select your configuration options:
- Choose the region in which you want the storage to be deployed
- Configure the network settings as needed
- Enable/disable public access
- Set the network name for your public access
- Attach any private networks you want to use
- Name your Object Storage instance
Lastly, click the “Create Object Storage” button to launch the new storage instance.

The deployment will take a moment.
When the status shows "Ready", you are ready to start using the new Managed Object Storage instance.
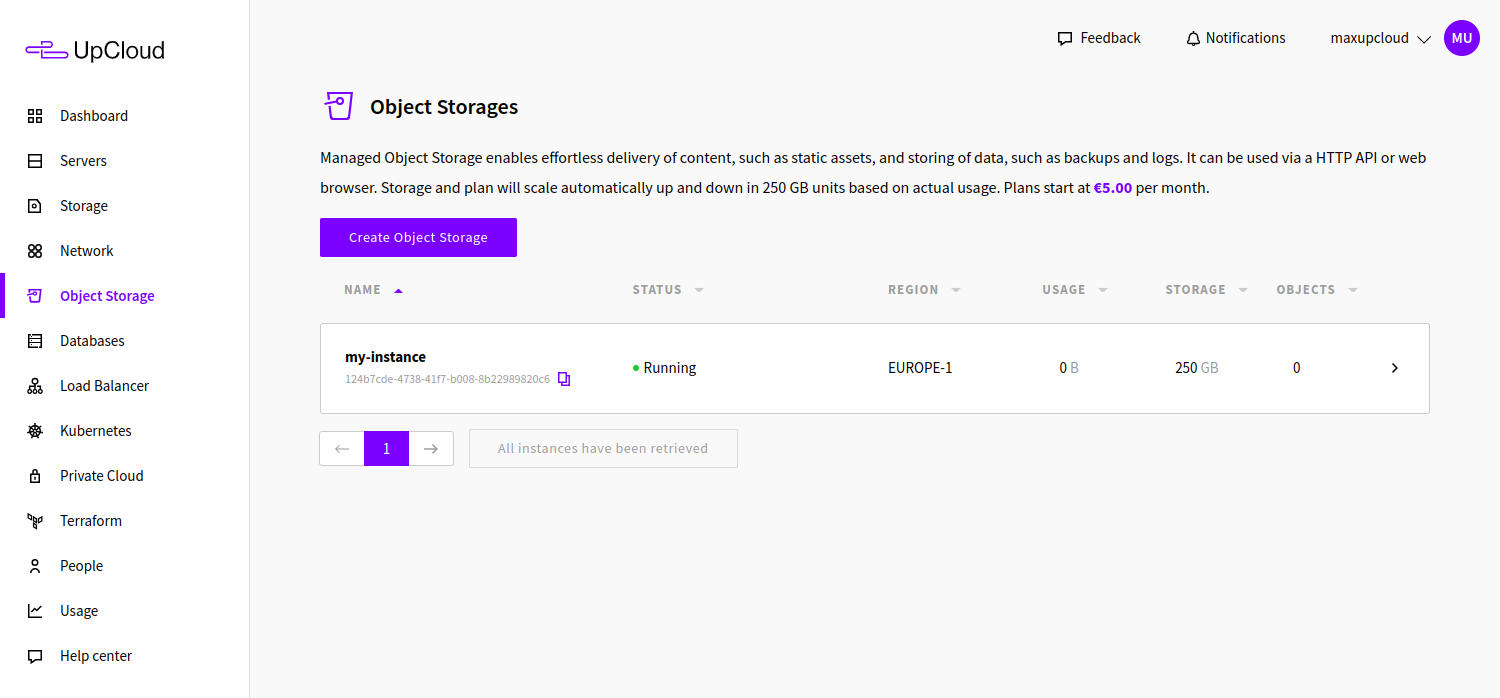
Follow the instructions below to proceed.
Creating and managing buckets
In Managed Object Storage, all files are organised in “buckets”. Before you can start adding files, you’ll need to create a bucket. This can be done via your UpCloud Control Panel or an S3 client. If you prefer the latter, jump to the next section to configure your S3 client access.
Creating a new bucket is quick and easy. In your UpCloud Control Panel, go to the Object Storage list and click the name of your instance to open the details view. Then select the "Buckets" tab at the top.
Click the “Create bucket” button to open the new bucket dialogue window.
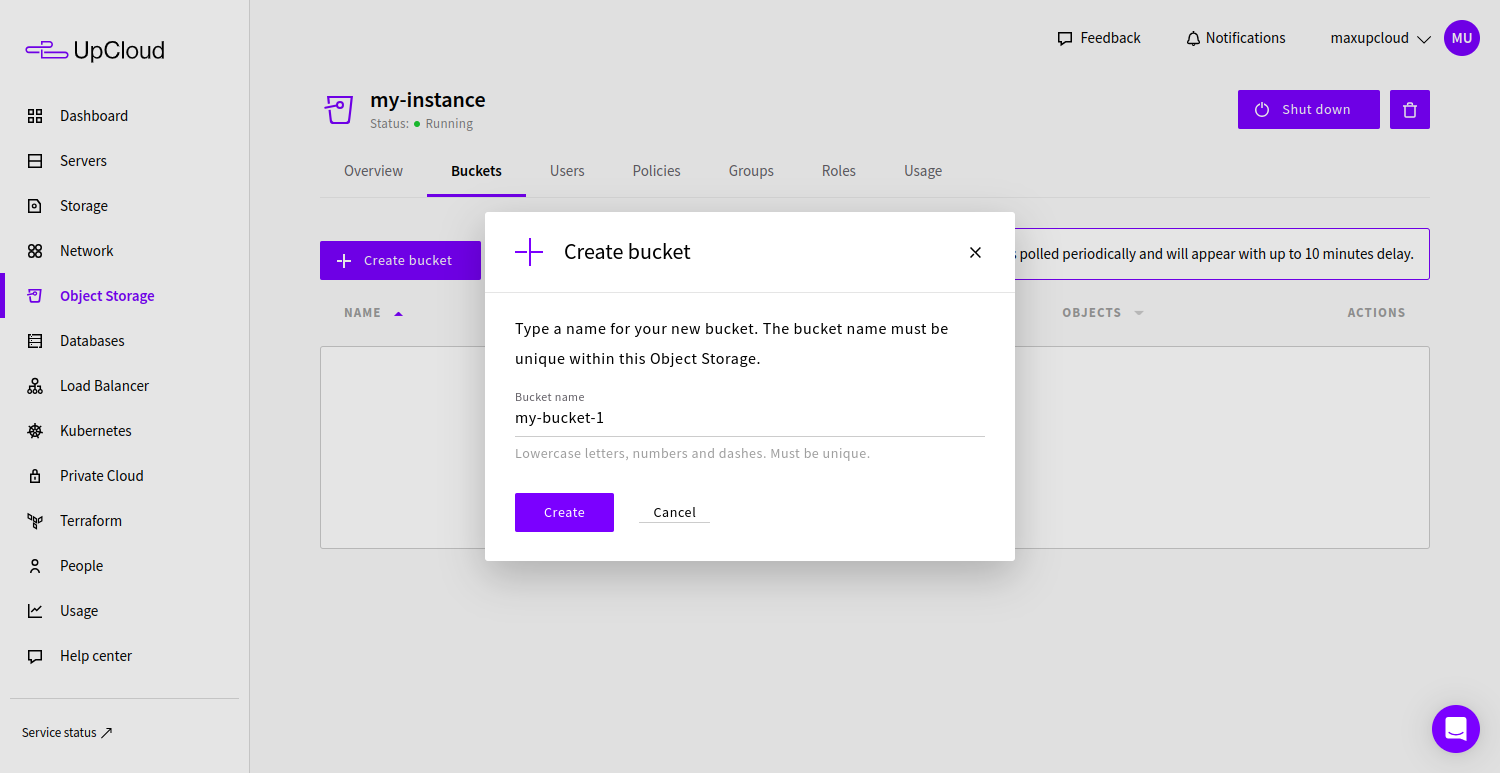
Name the bucket with the consideration that it will be used as a subdomain to your Object Storage address. The bucket name is specific to the particular Object Storage instance and needs to be unique only within the storage device.
Once created, the bucket will appear in your Object Storage on your UpCloud Control Panel.
That’s all you need to do to prepare your Object Storage to upload files. Continue to the next part to start adding files.
Connecting to the S3 API
Files in Object Storage are managed via S3 clients. To enable access, you must provide the client with your Object Storage instance's keys and endpoint details.
First, go to the "Users" section in your Object Storage details and click the "Add user" button.
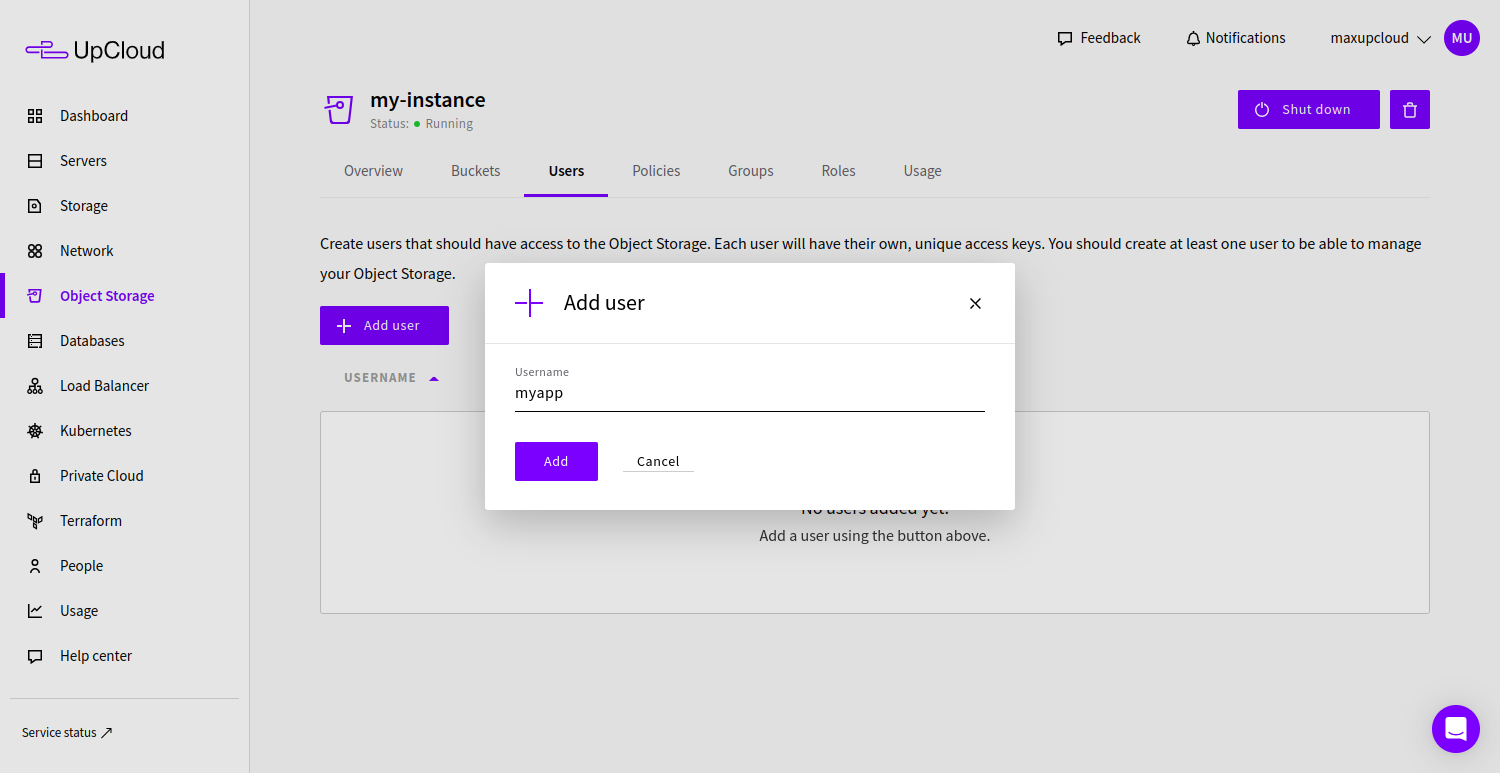
Name your user account and click the "Add" button.
Then, add the access policies you want to use. For testing purposes, you may wish to enable full access to both ECSS3 and IAM to be able to run all commands.
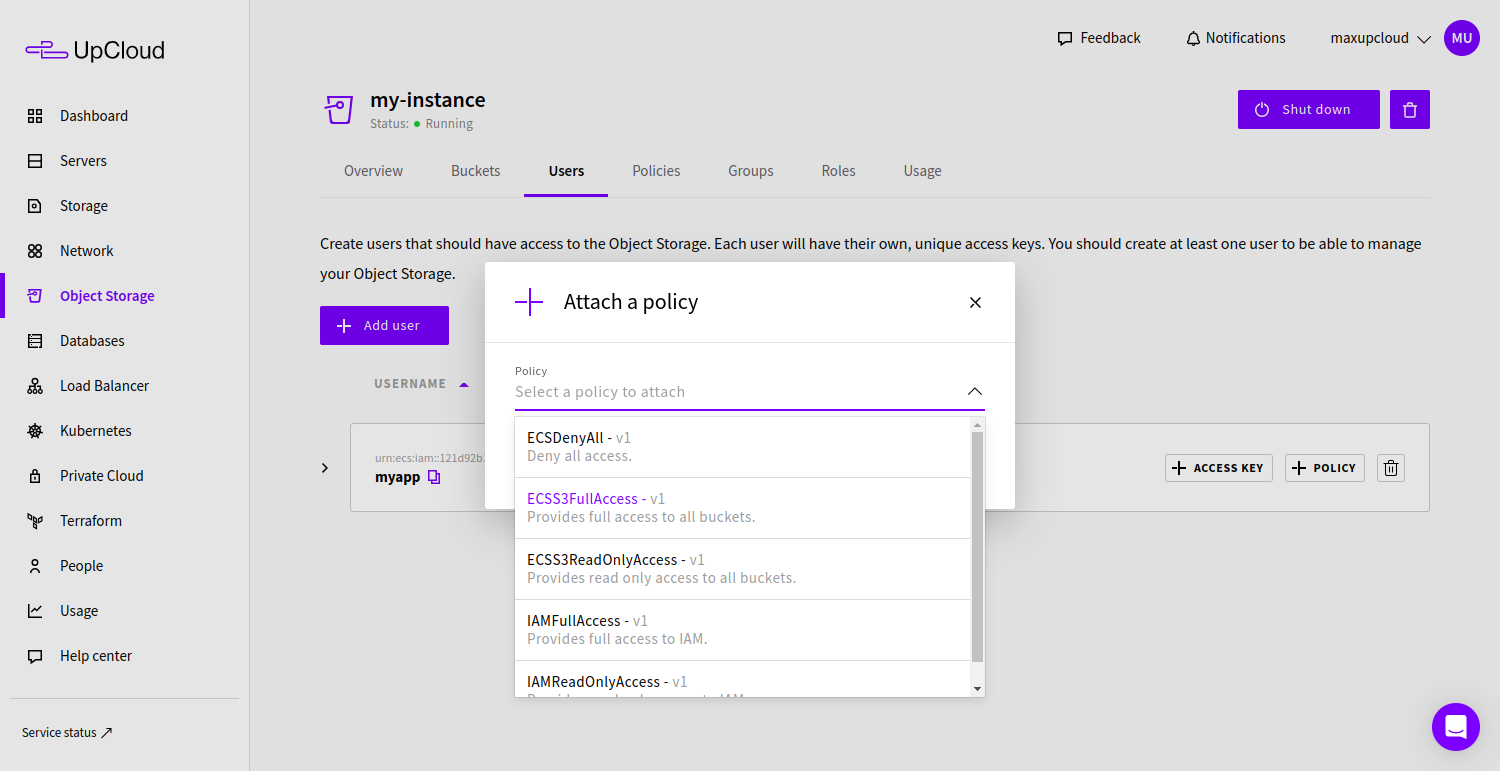
When all set, click the "Access key" button and download or save your keys.

Next, go to the Overview tab in the Object Storage details, scroll down to the AWS CLI connection guide and click to expand the guide section.
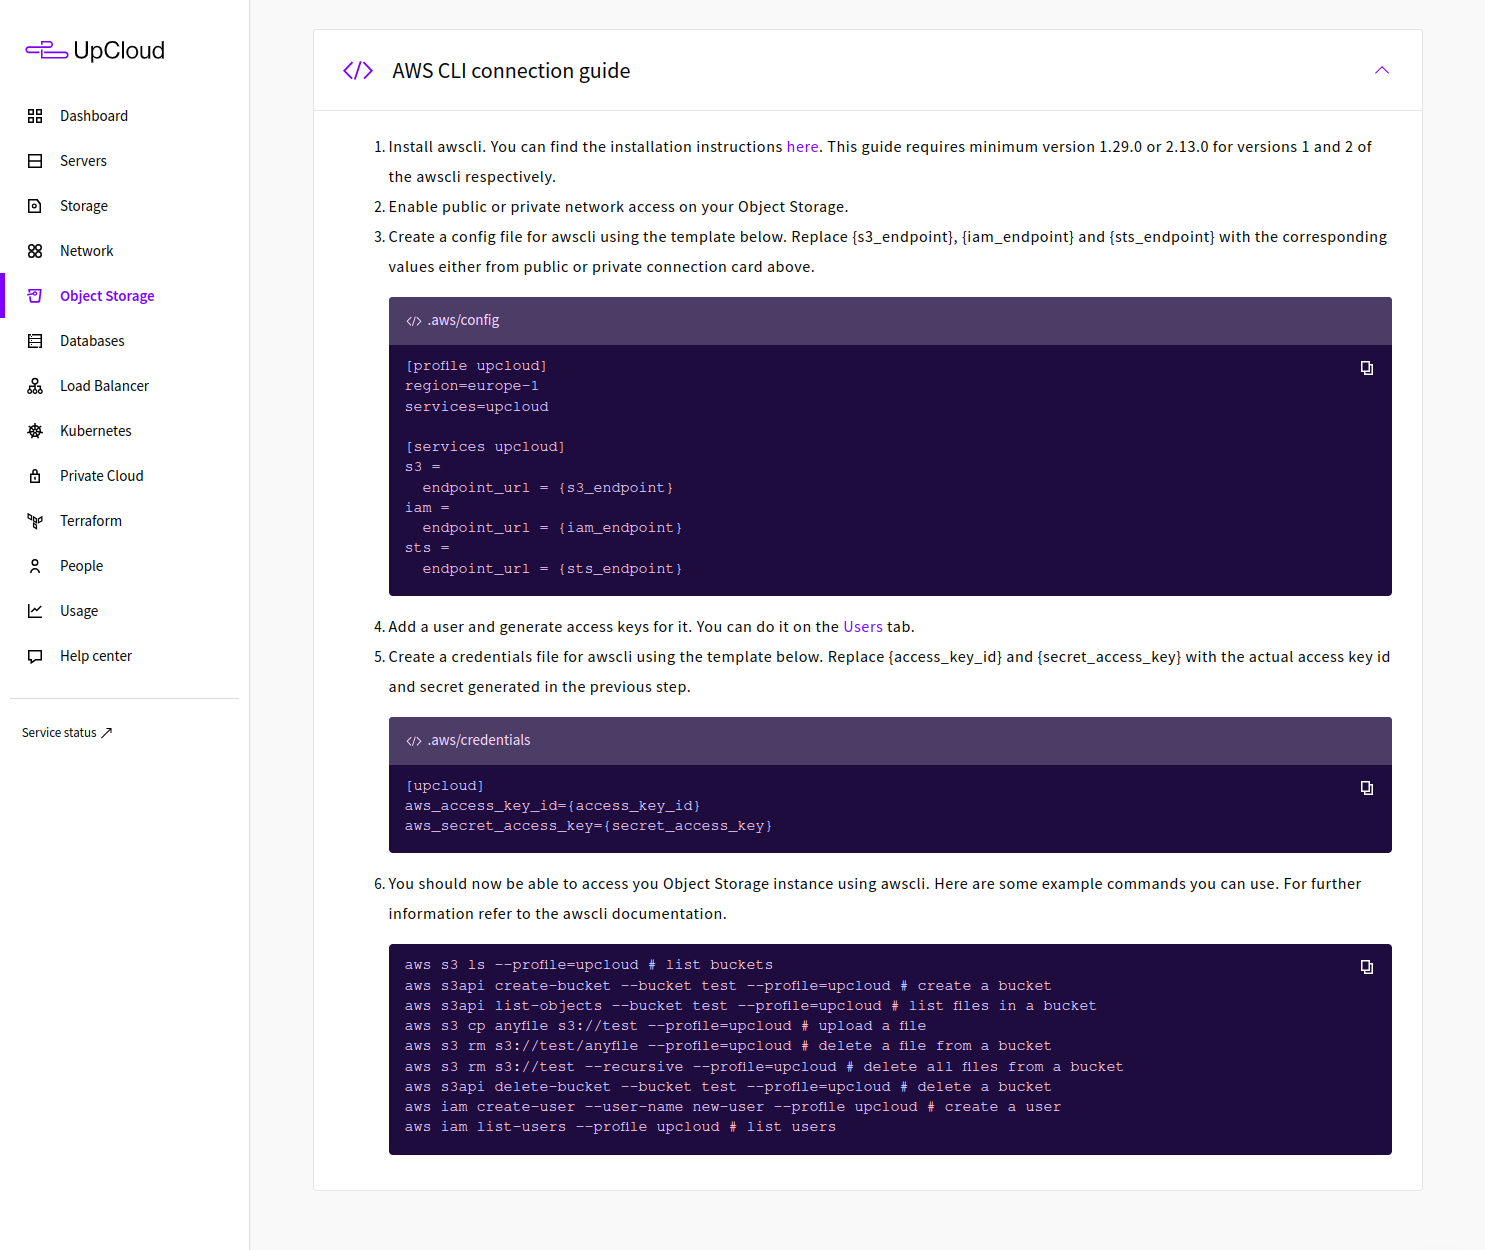
Follow the steps to install the aws command line client or another S3 client of your preference.
Make sure you've enabled network access, for example, using the Public access option.
Then, store the access and secret keys for your user with the following file and location if using the AWS CLI.
# .aws/credentials
[default]
aws_access_key_id={access_key_id}
aws_secret_access_key={secret_access_key}
And create a profile configuration for the same client.
# .aws/config
[default]
region=europe-1
services=upcloud

[services upcloud]
s3 =
  endpoint_url = {s3_endpoint}
iam =
  endpoint_url = {iam_endpoint}
sts =
  endpoint_url = {sts_endpoint}
The configuration and credential file examples can be copied by clicking the Copy link on the side and configuring your preferred S3 client.
When you've installed the AWS CLI and configured access to your Object Storage instance, test the connection by listing all buckets in the Object Storage instance with the following command.
aws s3 lsYou can find more detailed instructions in our guide to connecting to Object Storage instances.
Managing files in Object Storage
Once you have installed and configured an S3 client, you can begin accessing your Object Storage.
Before uploading files, you need to create a bucket to store them in.
aws s3api create-bucket --bucket my-bucketWith a bucket created, you can upload your first file using the command below.
aws s3 cp anyfile s3://my-bucketOnce the upload has finished, the file will appear on the list object in the bucket.
aws s3api list-objects --bucket my-bucketIf you wish to learn more, you can find further examples of Object Storage commands in this guide.
Conclusions
Congratulations! You should now have a good understanding of how Object Storage works. To continue in earnest, you should look below for examples of S3 clients you might wish to try out.
Command line tools
AWS Command Line Interface is primarily a unified tool for managing resources and services on AWS. However, the now industry-standard S3 object storage API allows you to control your Managed Object Storage contents on UpCloud, as shown in this guide.
S3cmd is another free, open-source command-line tool and client for uploading, retrieving, and managing data for any cloud storage service providers that use the S3 protocol. It works great with Managed Object Storage. It is best suited for power users familiar with command-line programs but is simple enough for beginners to learn quickly. It is also great for batch scripts and automated backup to S3, for example, by scheduling using cronjobs. Check out our guide to S3cmd and get started.
MinIO Client provides a modern alternative to UNIX commands like ls, cat, cp, mirror, diff, find, etc. It supports file systems and S3-compatible cloud storage services across the board. In addition to being available for download on Windows, macOS and Linux, MinIO is also available as a docker image.
File management clients
Here are two examples of Managed Object Storage compatible file management clients with visual user interfaces.
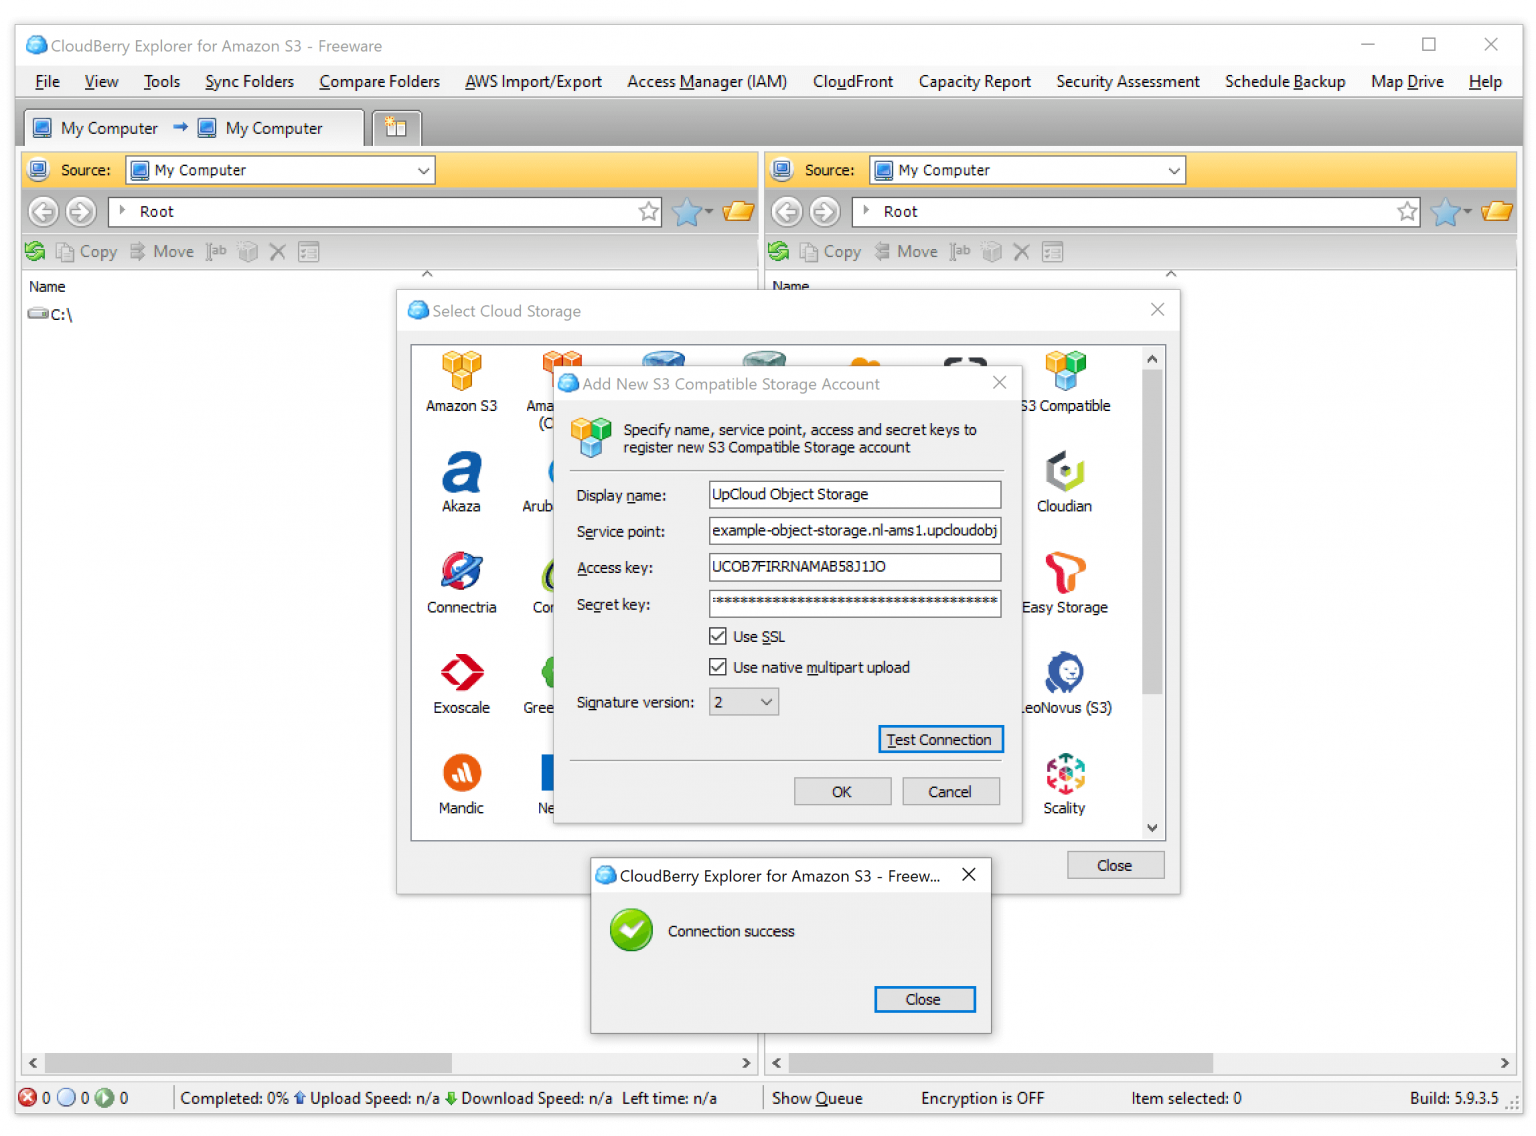
MSP360 Explorer provides a user interface for accessing, moving, and managing files across your local and cloud storage. Cloud file management software by MSP360™ is available in Freeware and PRO, both of which include clients for Windows and macOS.
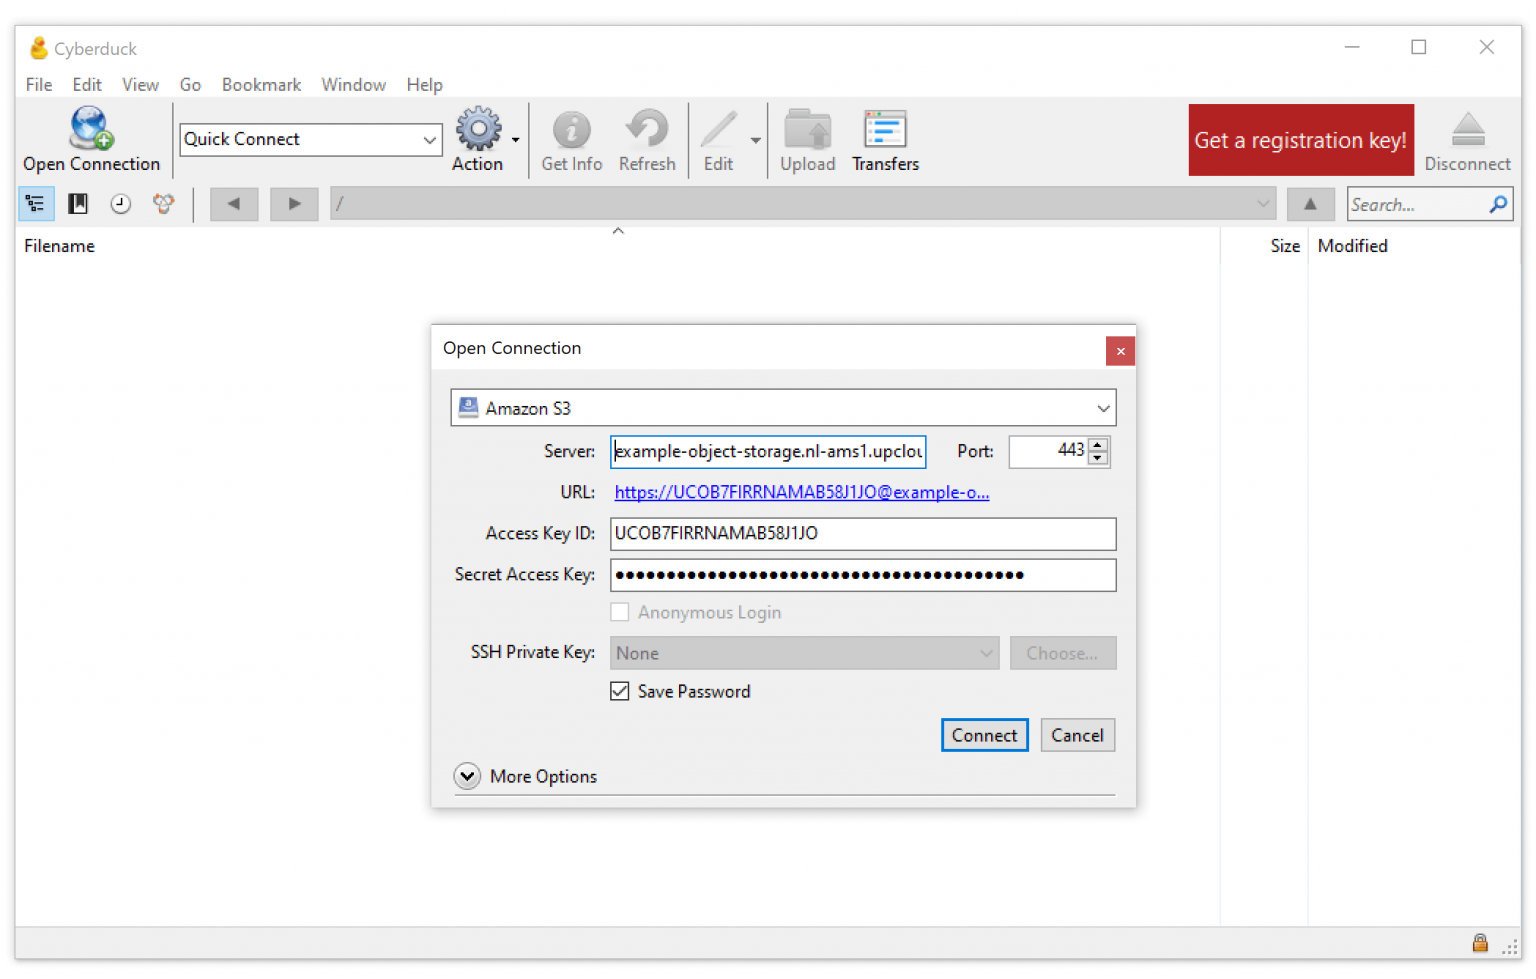
Cyberduck is a libre server and cloud storage browser for macOS and Windows. It supports S3-compliant object storage, FTP, SFTP, Dropbox, Google Drive, and more. Cyberduck is funded through donations, but the software itself is free to download and use.