UpCloud Managed Container Registry is in beta. Features shown in this guide may change before general availability.
How to get started with UpCloud Container Registry
Beta notice
What a container registry is
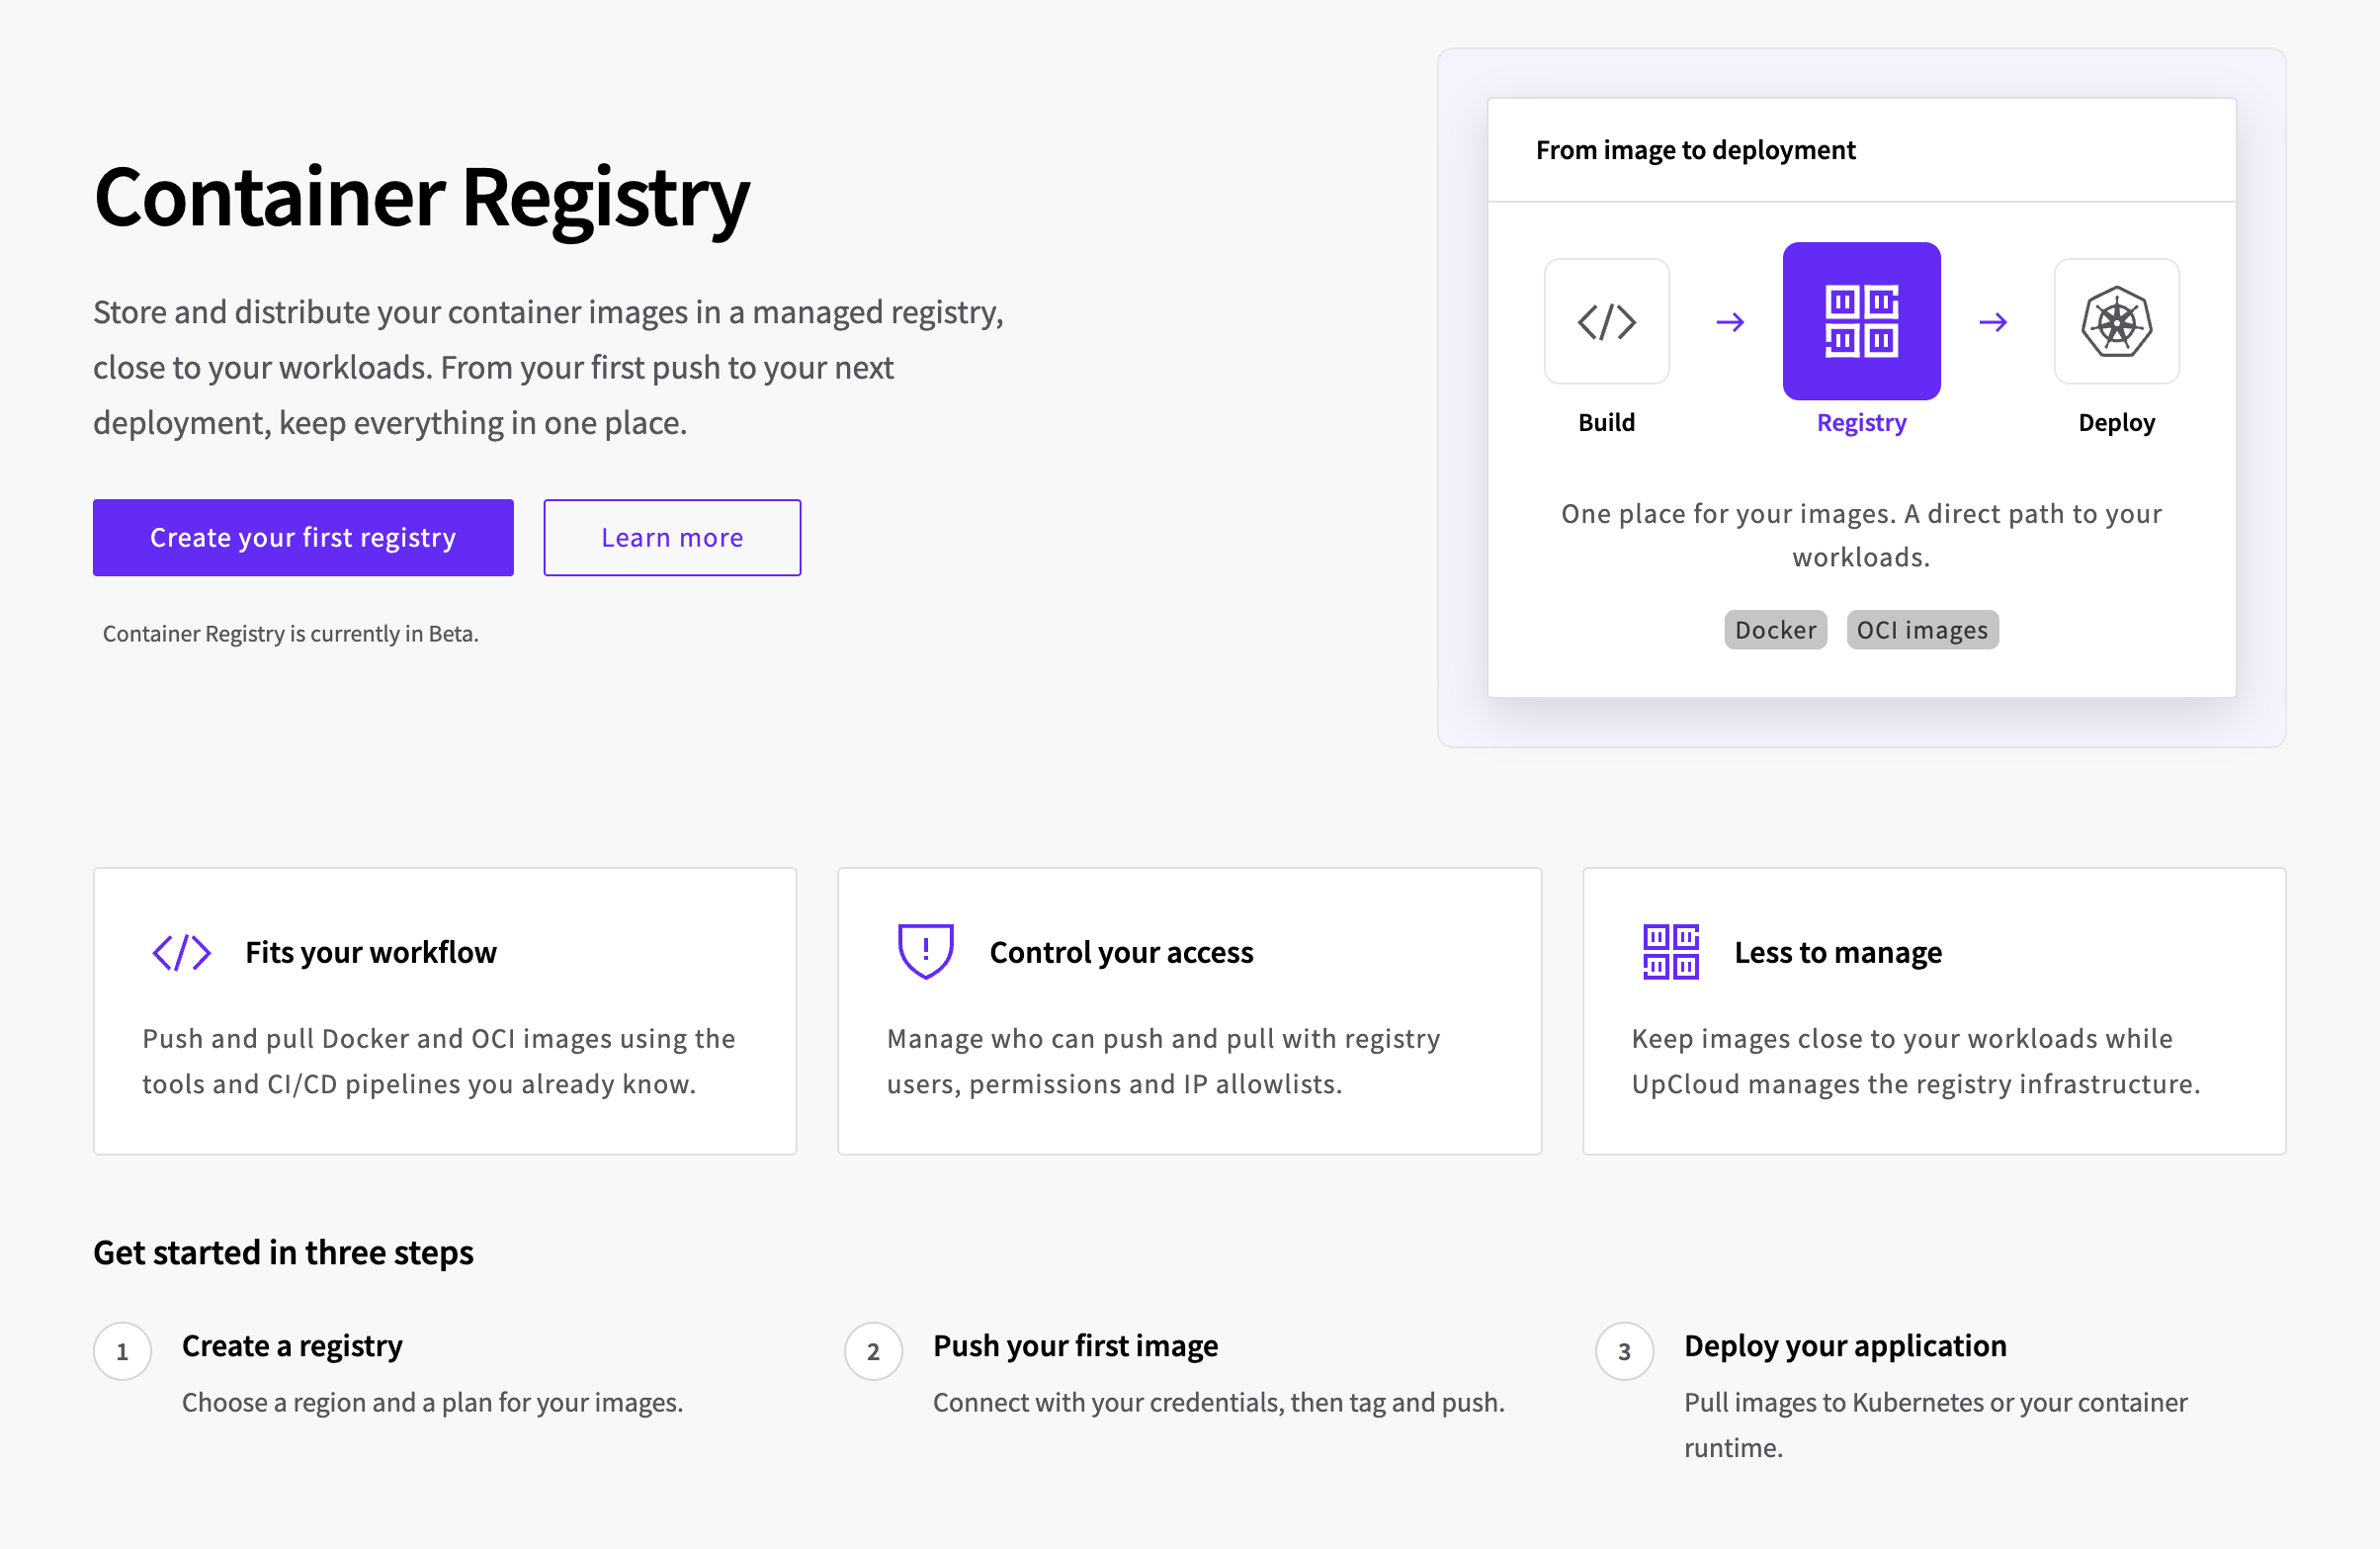
A container registry stores container images and serves them to the machines that run them. You build an image once, push it to the registry, and every server, Kubernetes node, or CI job that needs it pulls it from there.
UpCloud Managed Container Registry is a private, OCI-compliant registry maintained by UpCloud. It stores container images and other OCI artifacts, such as Helm charts, and works with the Docker CLI and any other tool that speaks the OCI distribution protocol.
Before you start
You need:
- An UpCloud account.
- Docker or another OCI-compatible client on the machine you push from.
- An image to push. If you don't have one, this guide builds a small example.
Create a registry
- In the Control Panel, open Container Registry in the left-hand menu and select Create your first registry, or New Container Registry if you already have one.
- Fill in the sections below and select Create registry at the bottom of the page.
Region
Choose the region where your images are stored. Pick the one closest to the servers and clusters that pull from the registry.
More regions are being added during the beta. Container Registry availability lists the current ones and their locations.
Plan
Choose Starter or Pro. Pro has more storage, repositories, webhooks, and IP allowlist entries, a higher request rate, and is the only plan that can connect to SDN Private Networks. Storage beyond the included amount is billed per GiB.
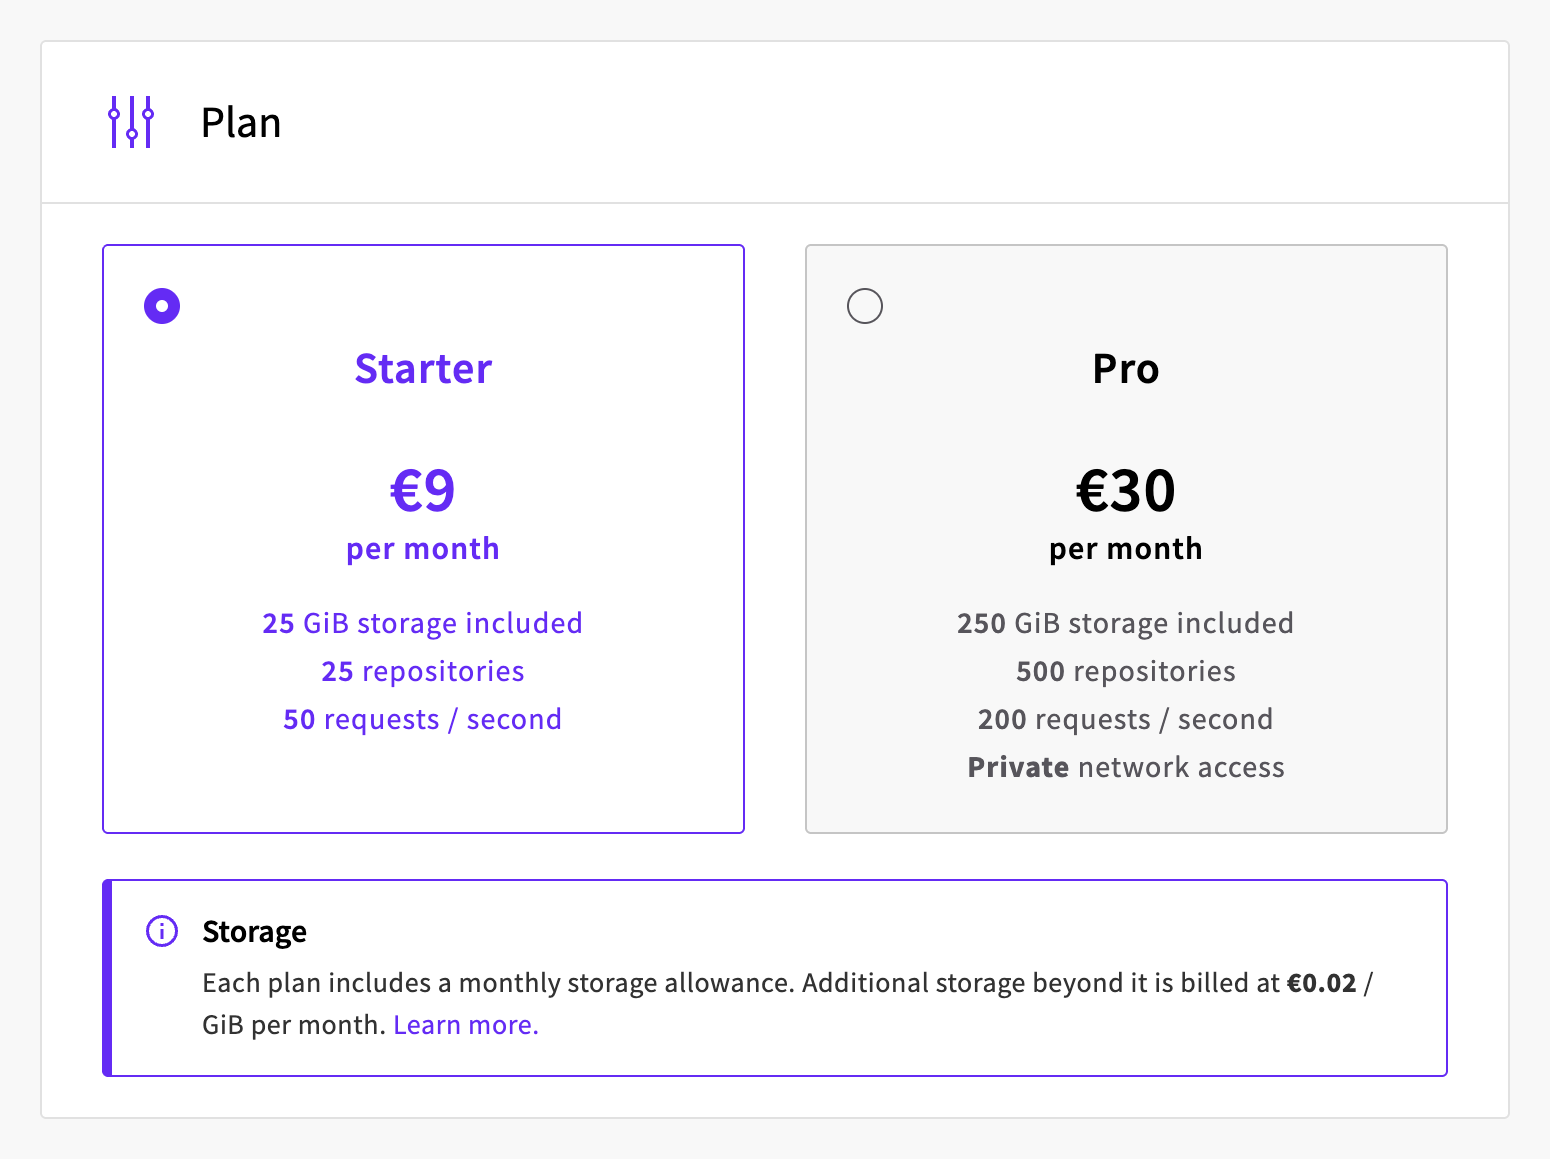
You can change the plan later from the registry's Settings tab. See Plans.
Private networks
On the Pro plan, you can attach SDN Private Networks here or later from the registry's Networks tab, as described in Private networks.
Name
Give the registry a Name. The name becomes part of the registry's hostname.
Wait until the registry's status changes to Running before you continue.
Registry endpoint
Open the registry to see its Overview tab. The Registry endpoint is the hostname you use in every Docker command. It's made of the registry name, the first part of its UUID, and upcloudcr.com:
my-registry-1b77d021.upcloudcr.com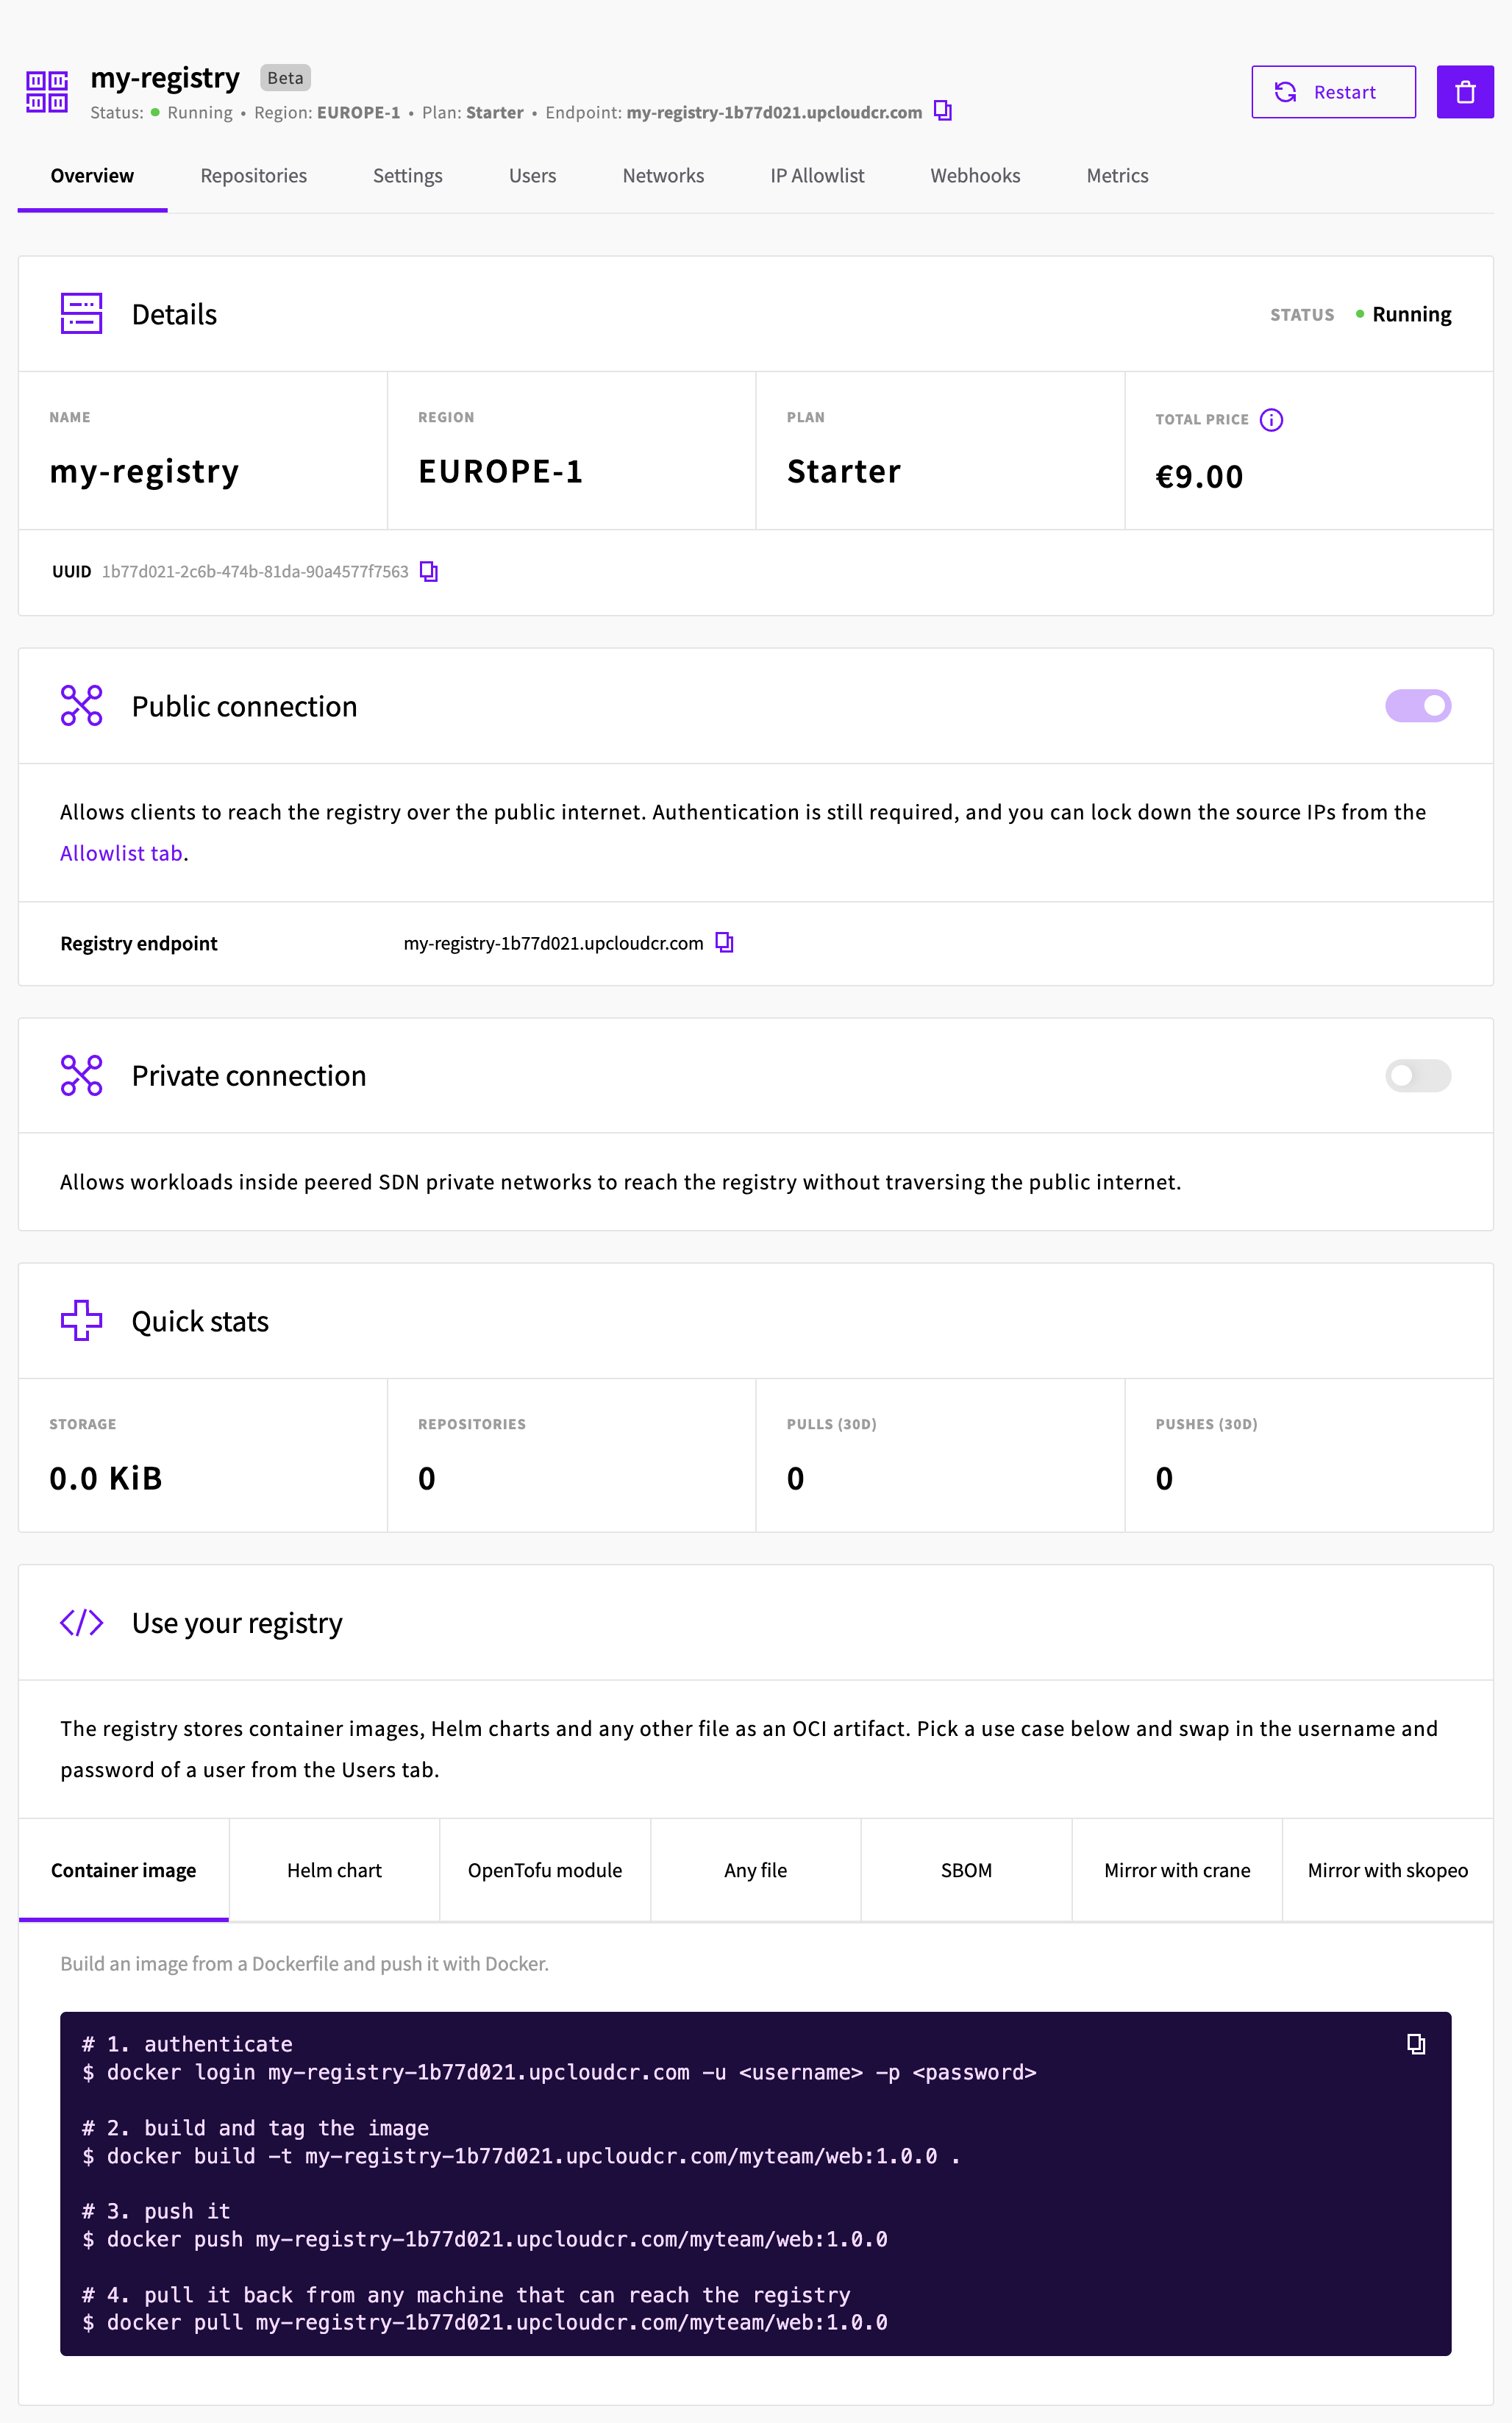
Right after the registry is created, the endpoint may not resolve in DNS yet.
Add a registry user
Registry users are separate from your UpCloud account users. Create a separate user for each person or system that needs access, so you can remove one without affecting the others.
Open the Users tab and select Add user.
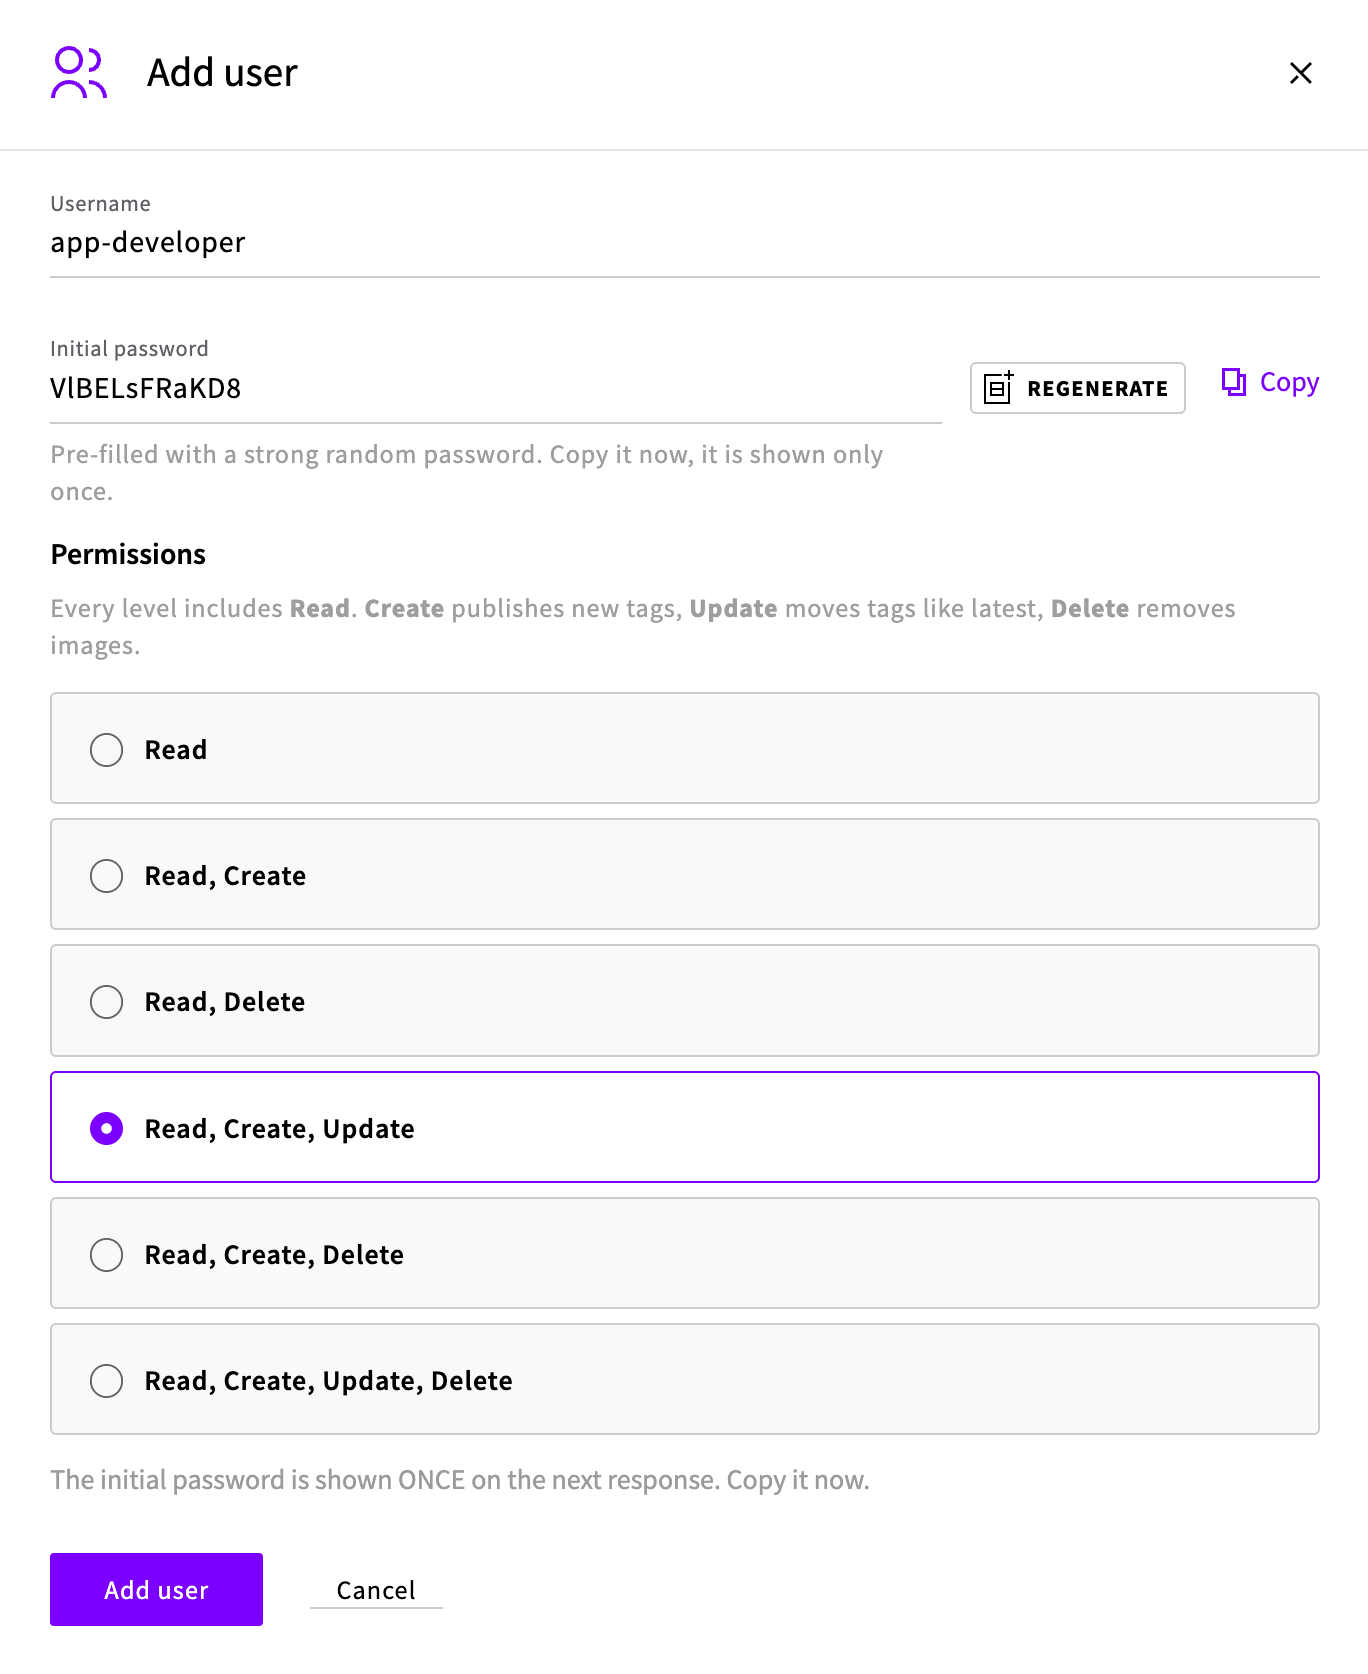
Enter a Username.
The Initial password field is pre-filled with a strong random password. Keep it, or select Regenerate for a new one.
Choose the Permissions. Every user can pull, and the other permissions add to that:
Permissions Use for Read Servers and Kubernetes clusters that run images. Read, Create CI pipelines that push a new tag for every build. Read, Create, Update Engineers, and pipelines that also move tags such as latest.The combinations with Delete also let the user delete tags and images. See Container Registry access control for what each permission allows.
Select Add user.
A User credentials dialog then shows the username, the password, and a ready-to-use docker login command. The password is shown only once, so copy it into your password manager or secret store before you close the dialog. If a password is ever lost, select View next to the user and then Rotate password to get a new one. The old password then stops working, so update any client that uses it.
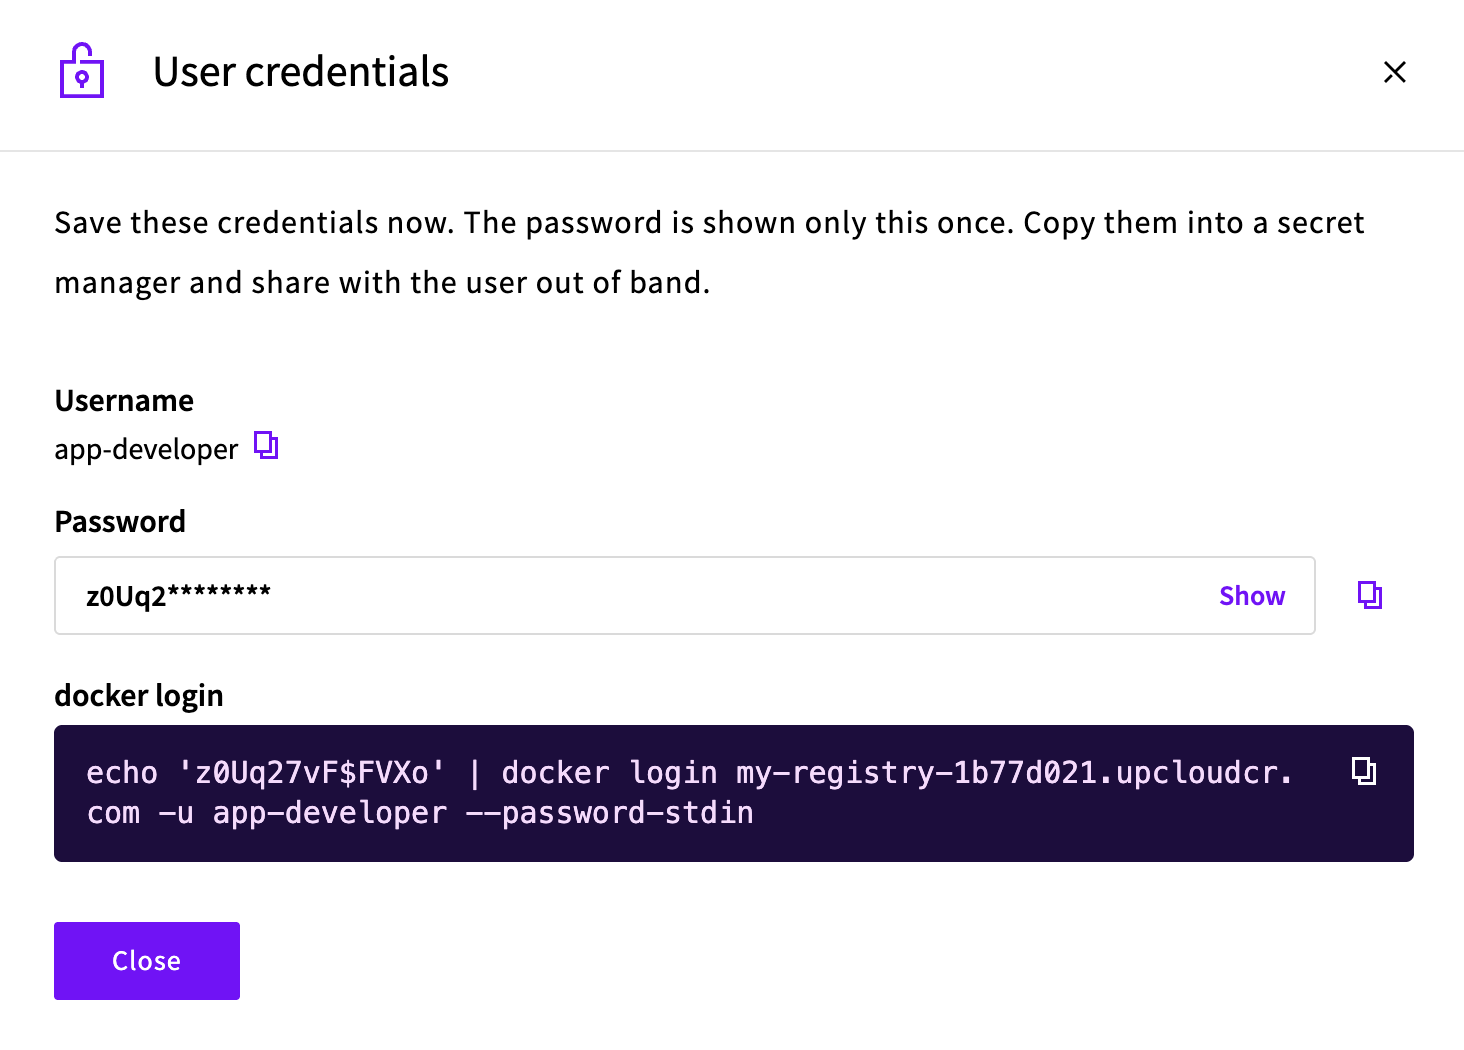
Each registry also has a built-in upadmin user, marked Primary, which is created with the registry and can't be deleted.
Log in to the registry
On the machine you push from, log in with the registry endpoint and the user you created:
docker login my-registry-1b77d021.upcloudcr.com -u app-developerEnter the password when prompted. Docker stores the credentials, so you only need to log in once per machine:
Output
Login SucceededTo log in from a script or CI job, pass the password on standard input instead:
echo "$REGISTRY_PASSWORD" | docker login my-registry-1b77d021.upcloudcr.com -u app-developer --password-stdinPush an image
To push an image, name it with the registry endpoint, a repository name, and a tag. Repositories are created automatically on the first push.
This example builds a small web server image that serves a single page. Create a directory with two files.
index.html:
<!doctype html>
<html>
  <head><title>Hello from UpCloud</title></head>
  <body>
    <h1>Hello from UpCloud Container Registry</h1>
    <p>This page is served by an image pulled from a private registry.</p>
  </body>
</html>Dockerfile:
FROM nginx:1.27-alpine
COPY index.html /usr/share/nginx/html/index.html
Build the image and push it to your registry:
docker buildx build --platform linux/amd64,linux/arm64 \
  -t my-registry-1b77d021.upcloudcr.com/demo/hello-upcloud:1.0 --push .
--platform builds the image for both linux/amd64, which Cloud Servers and Managed Kubernetes nodes run, and linux/arm64, which Apple silicon Macs run. The same tag then works on all of them.
Near the end of the output, a line shows the digest of the pushed image:
Output
=> => pushing manifest for my-registry-1b77d021.upcloudcr.com/demo/hello-upcloud:1.0@sha256:e1fc09333be0efed4bfccd72eddb33435b5042ec773839b61d312a169aa3502aThe image now appears on the registry's Repositories tab. Select the repository to see the tag and the start of the same digest:
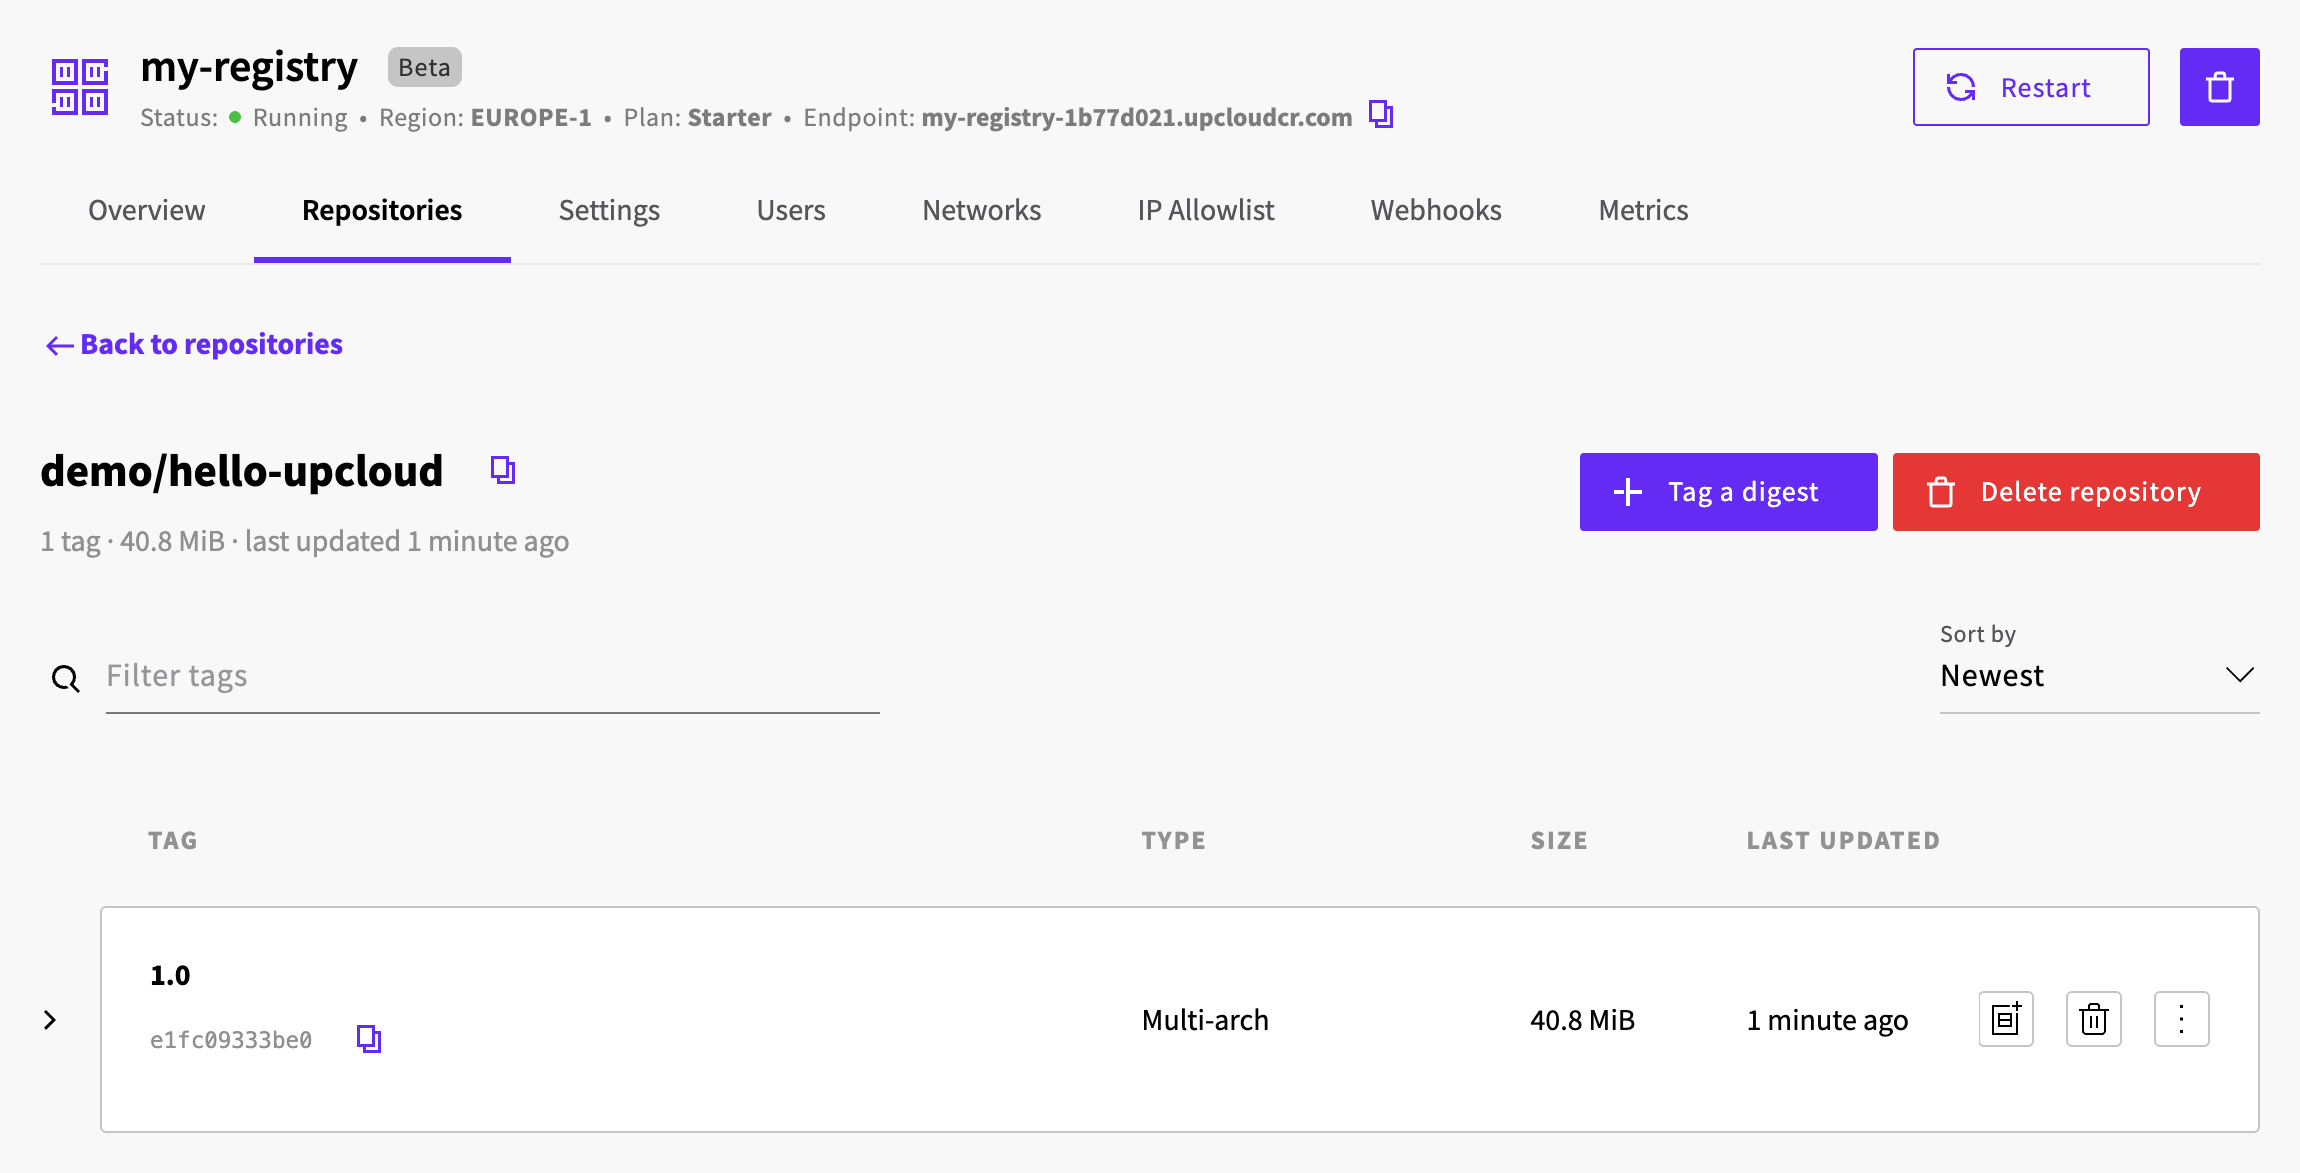
The part of the name between the endpoint and the tag, demo/hello-upcloud, is the repository. You can use a single name such as hello-upcloud or group repositories under a prefix such as demo/.
Pull and run an image
On any machine that is logged in to the registry with a user that can pull, pull the image and run it:
docker pull my-registry-1b77d021.upcloudcr.com/demo/hello-upcloud:1.0
docker run -d --name hello-upcloud -p 8080:80 my-registry-1b77d021.upcloudcr.com/demo/hello-upcloud:1.0
curl -s http://localhost:8080 | grep h1
Output
<h1>Hello from UpCloud Container Registry</h1>Deploy to Managed Kubernetes
Kubernetes pulls images from a private registry with an image pull secret that holds a registry user's credentials. Use a user with only the Read permission, so the cluster can pull images but never change them.
On the Users tab, add a user with the Read permission, for example
k8s-puller, and copy its password.Create an image pull secret in the namespace you deploy to:
kubectl create secret docker-registry upcloud-registry \ --docker-server=my-registry-1b77d021.upcloudcr.com \ --docker-username=k8s-puller \ --docker-password='<password>'Outputsecret/upcloud-registry createdKeep the single quotes around the password, so that characters such as
$are passed through unchanged.Reference the secret under
imagePullSecretsin the pod spec of your workloads.
For a complete deployment, pulls over a private network, and installing your app from a Helm chart stored in the registry, see How to use Container Registry with Managed Kubernetes.
Build and push from GitHub Actions
A CI pipeline can build your image and push it to the registry on every commit. This example uses GitHub Actions. Other CI systems run the same docker login and docker buildx build --push commands.
On the Users tab, add a user for the pipeline with the Read, Create permissions, for example
github-actions, and copy its password. The workflow below tags every build with the commit ID, so it only ever creates new tags. If your workflow also pushes a tag that already exists, such aslatest, choose Read, Create, Update instead.In your GitHub repository, open Settings → Secrets and variables → Actions and add two repository secrets:
REGISTRY_USERNAMEwith the username andREGISTRY_PASSWORDwith the password.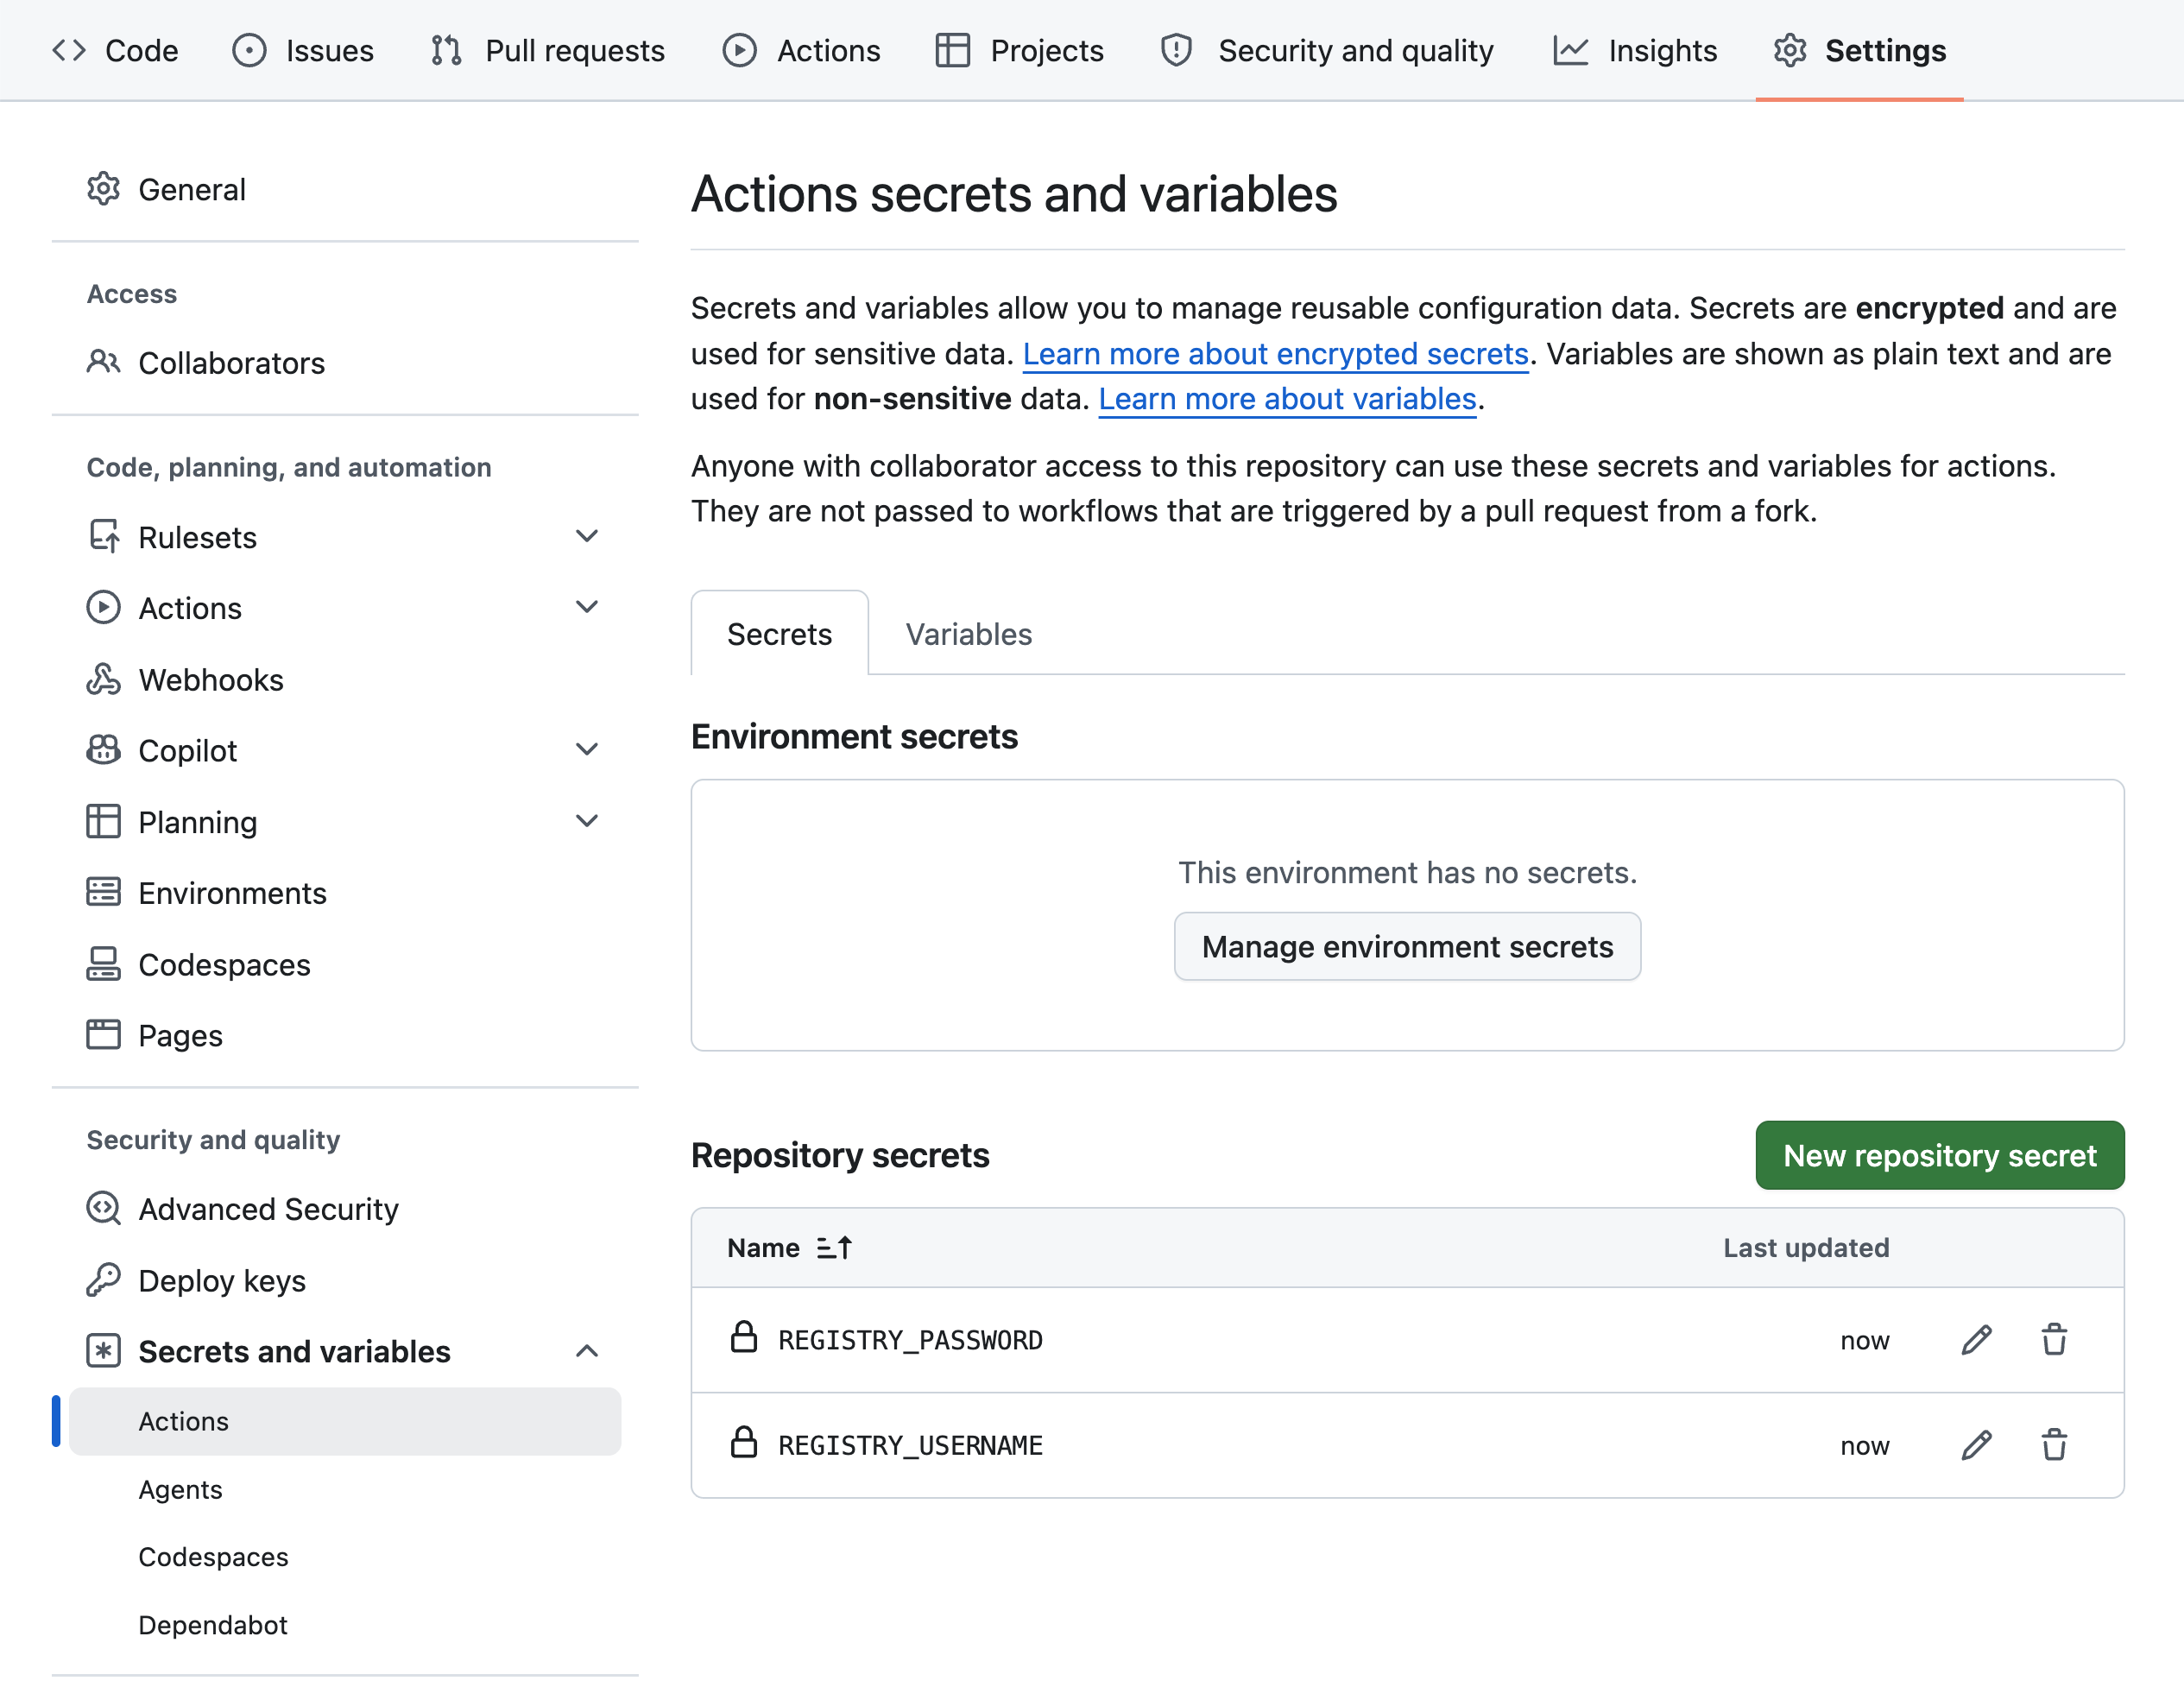
Add the
Dockerfileandindex.htmlfrom Push an image to the repository, and save the following workflow as.github/workflows/build.yml:name: Build and push on: push: branches: [main] workflow_dispatch: env: REGISTRY: my-registry-1b77d021.upcloudcr.com IMAGE: demo/hello-upcloud jobs: build: runs-on: ubuntu-latest steps: - uses: actions/checkout@v7 - uses: docker/setup-qemu-action@v4 - uses: docker/setup-buildx-action@v4 - uses: docker/login-action@v4 with: registry: ${{ env.REGISTRY }} username: ${{ secrets.REGISTRY_USERNAME }} password: ${{ secrets.REGISTRY_PASSWORD }} - uses: docker/build-push-action@v7 with: context: . platforms: linux/amd64,linux/arm64 push: true tags: ${{ env.REGISTRY }}/${{ env.IMAGE }}:${{ github.sha }}Commit and push to the
mainbranch. The workflow runs on the Actions tab of the repository.
When the run finishes, the new tag appears on the registry's Repositories tab.
Manage repositories and tags
The Repositories tab lists every repository in the registry. Select a repository to see its tags, with each tag's digest, size, and last update time. Expand a tag to see the platforms it was built for, such as linux/amd64 and linux/arm64.
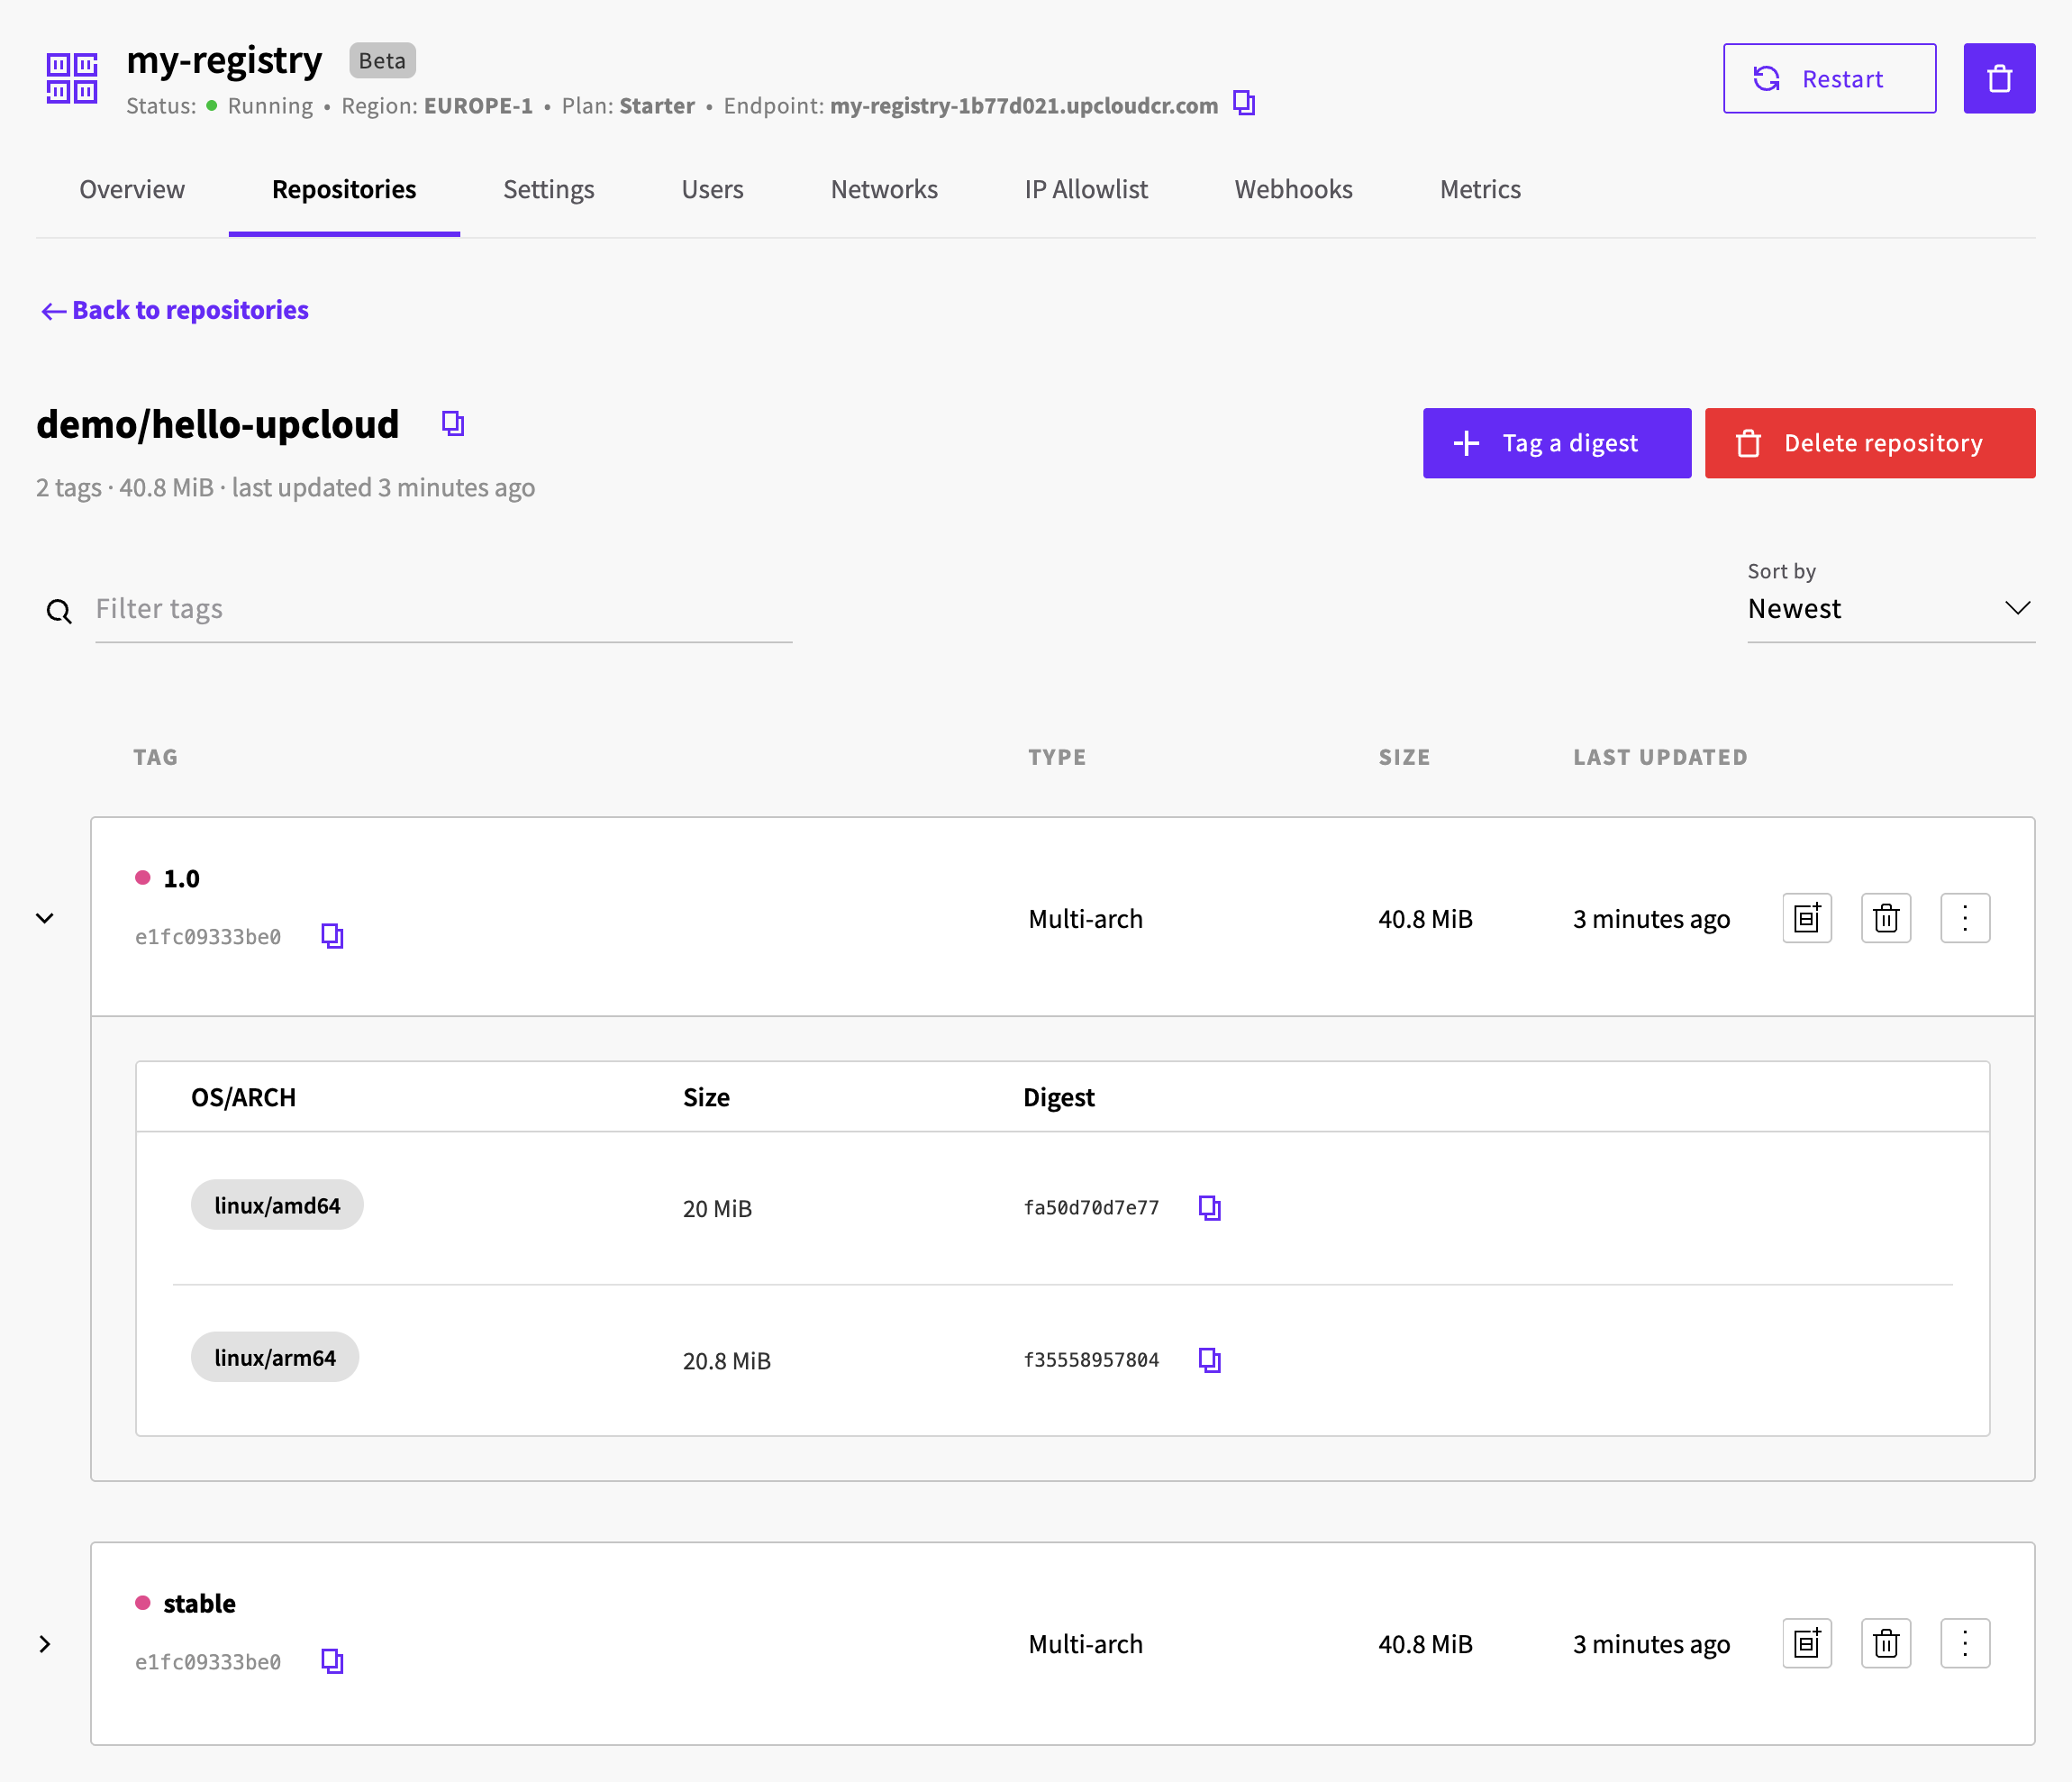
From the repository view, you can:
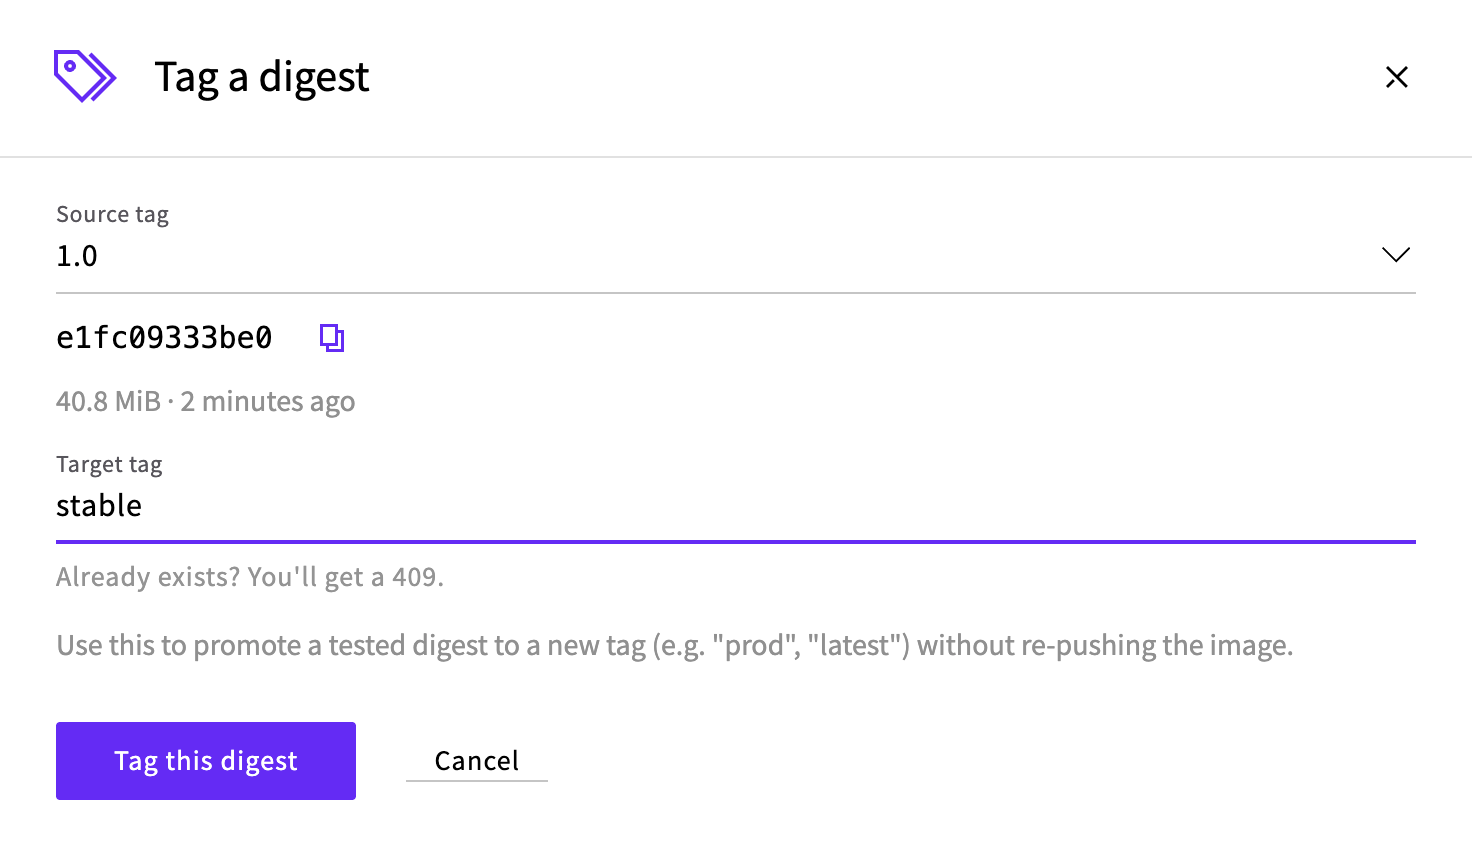
- Add a new tag to an existing image without pushing it again. Select Promote to… on a tag's row, or Tag a digest at the top, enter the Target tag, and select Tag this digest. For example, after testing
1.0, tag the same digest asstable. The target tag must not exist yet. To move an existing tag to a different image, delete the tag first. - Remove a single tag with Delete tag. The image stays available through its other tags.
- Remove the image and every tag that points to it with Delete image (all tags), the ⋮ button.
- Remove the repository and all of its tags with Delete repository. Type the repository name to confirm.
Deleting a tag, image, or repository can't be undone. Pulls of a deleted tag return not found, and the storage is reclaimed on the next garbage collection run.
Control access
IP allowlist
By default, the registry accepts connections from any IP address, and every request still needs a valid registry user. To accept connections only from your own networks, open the IP Allowlist tab, select Add CIDR, and enter an address range such as 192.0.2.0/24 with an optional description.
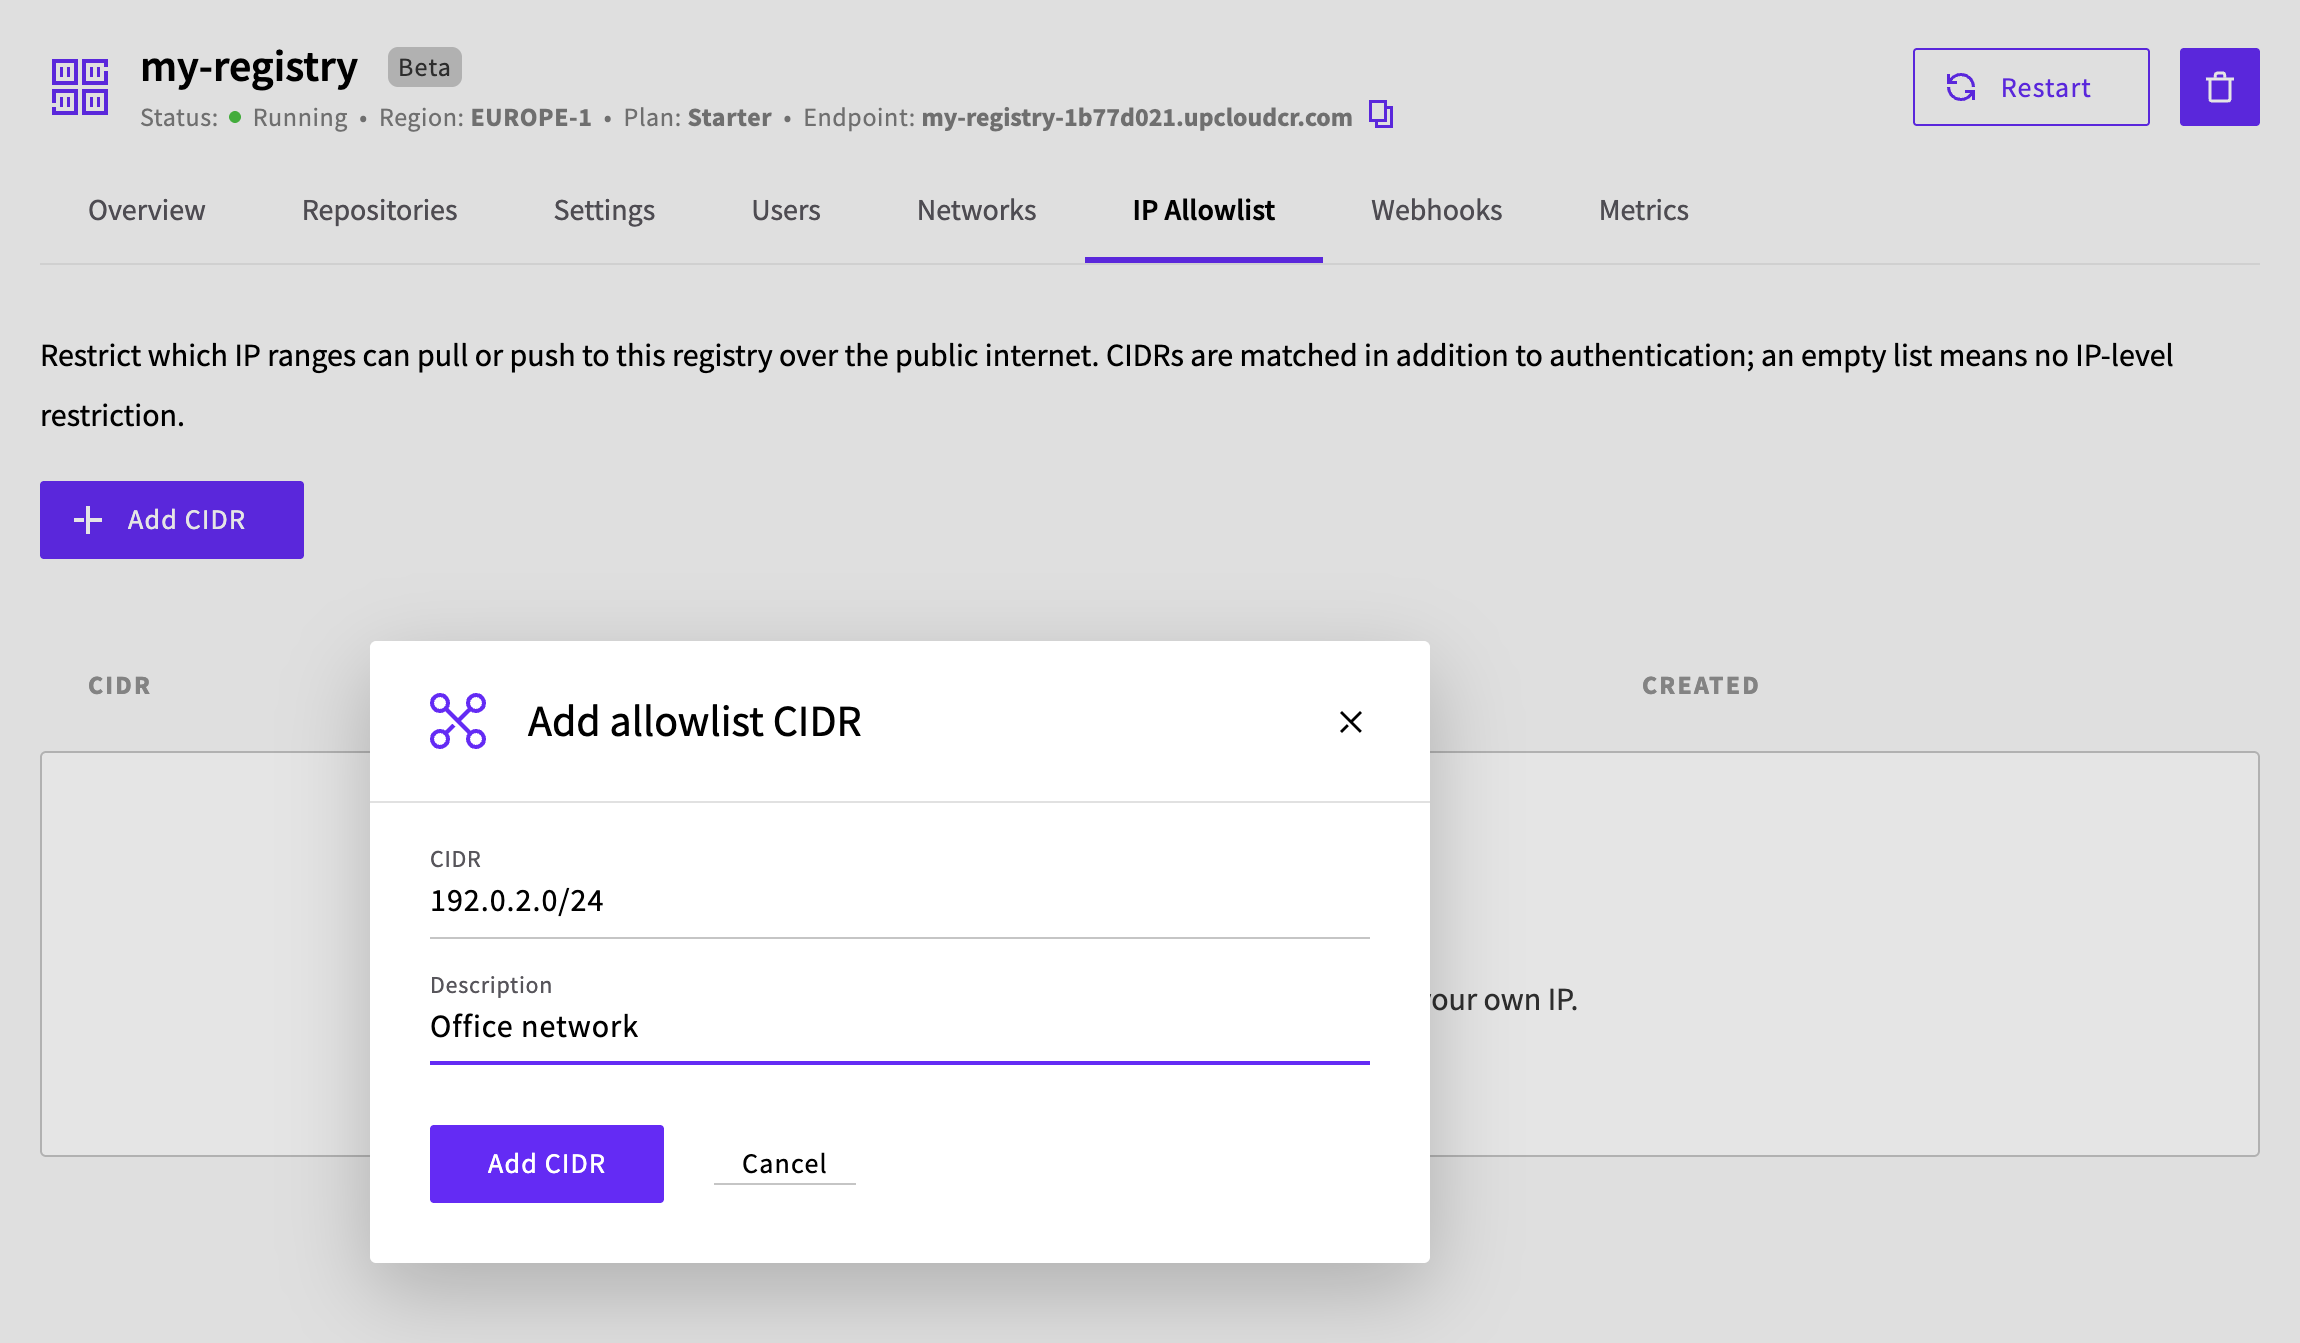
Requests from addresses outside the list are refused with 403 Forbidden, even with valid credentials, so add the addresses of every workstation, server, cluster, and CI runner that uses the registry.
Allow anonymous pulls
To publish images that anyone can pull without logging in, such as open-source releases, turn on Allow anonymous pulls on the Settings tab and confirm.
This makes every repository in the registry publicly pullable, and anyone can also list its repositories and their tags. Pushing still requires a registry user. If only some of your images should be public, create a separate registry for them.
Private networks
Attach an SDN Private Network so that servers and clusters in that network reach the registry without going over the public internet.
Pro plan only
Private networks are available on the Pro plan. To use them with a Starter registry, change its plan on the Settings tab first.
The network must be in one of the locations listed for the registry's region and have an SDN Router attached. See How to connect private networks using SDN Router.
Open the Networks tab and select Attach private network.
Pick the network and select Attach.
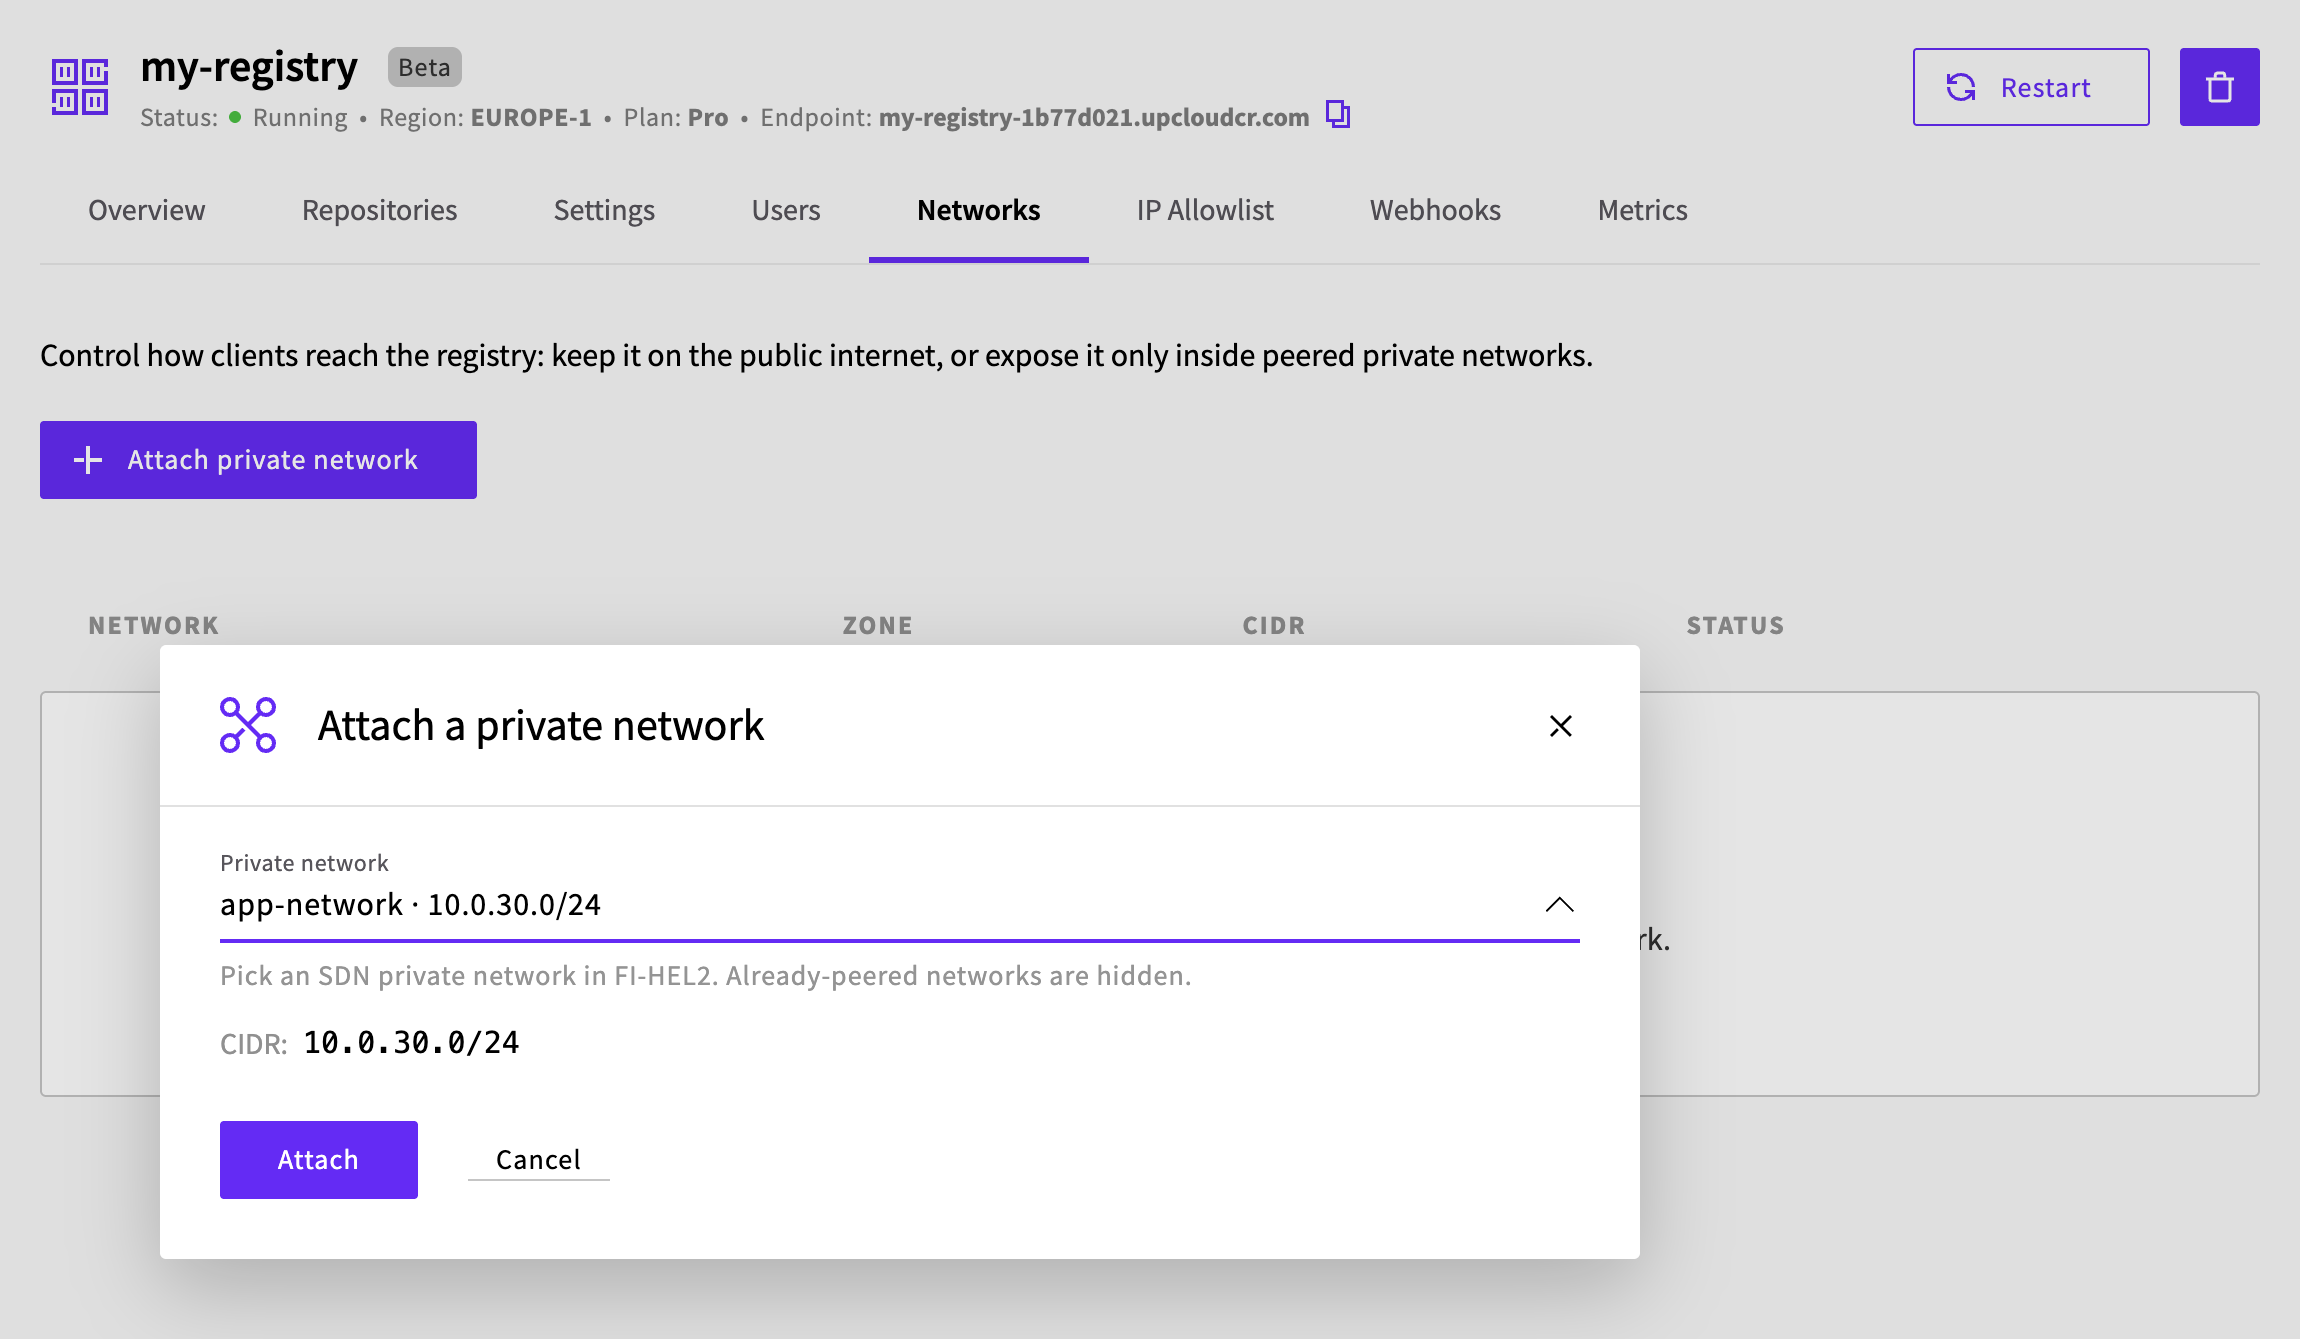
The network shows as Provisioning until it becomes Active. Meanwhile, the registry sets up its private endpoint, and its status at the top of the page shows Setting up private access. Wait until the status is back to Running before you use the private endpoint. To remove the network, select the detach button at the end of its row.
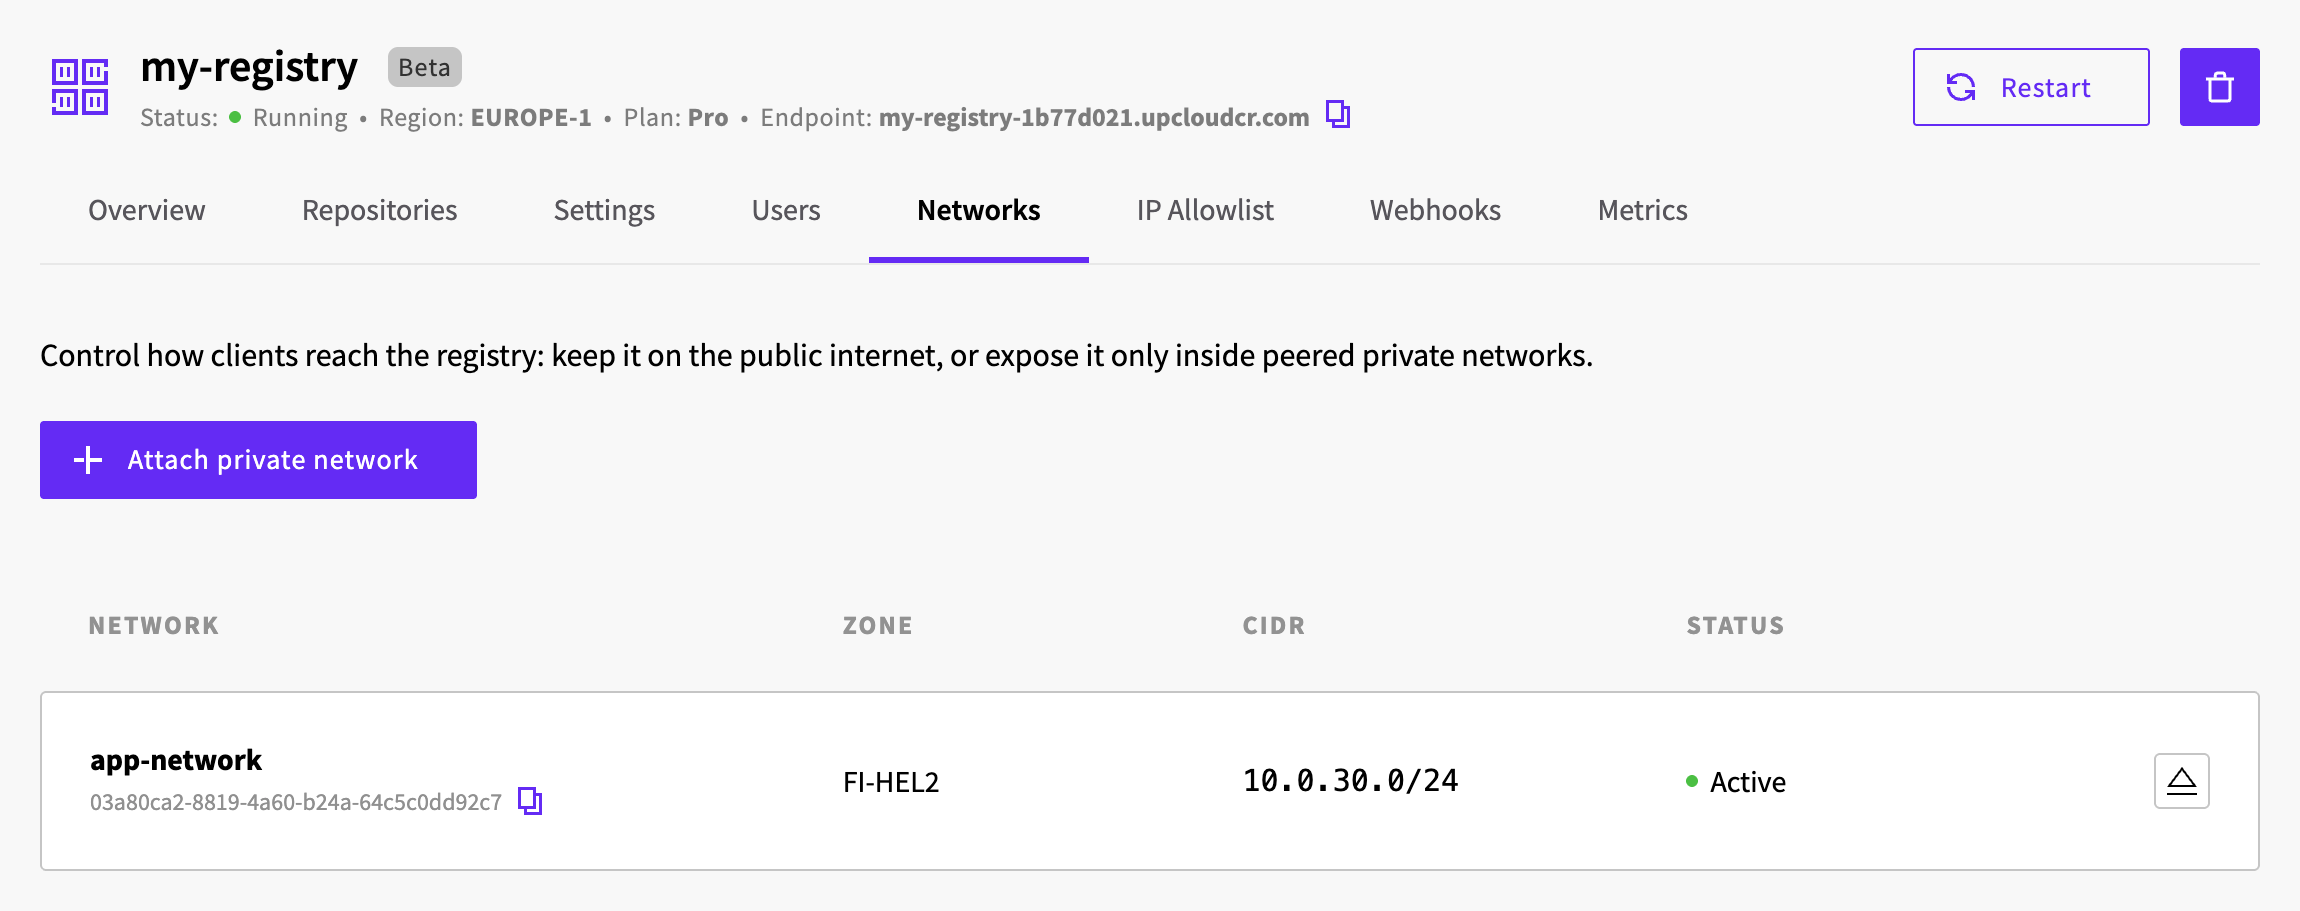
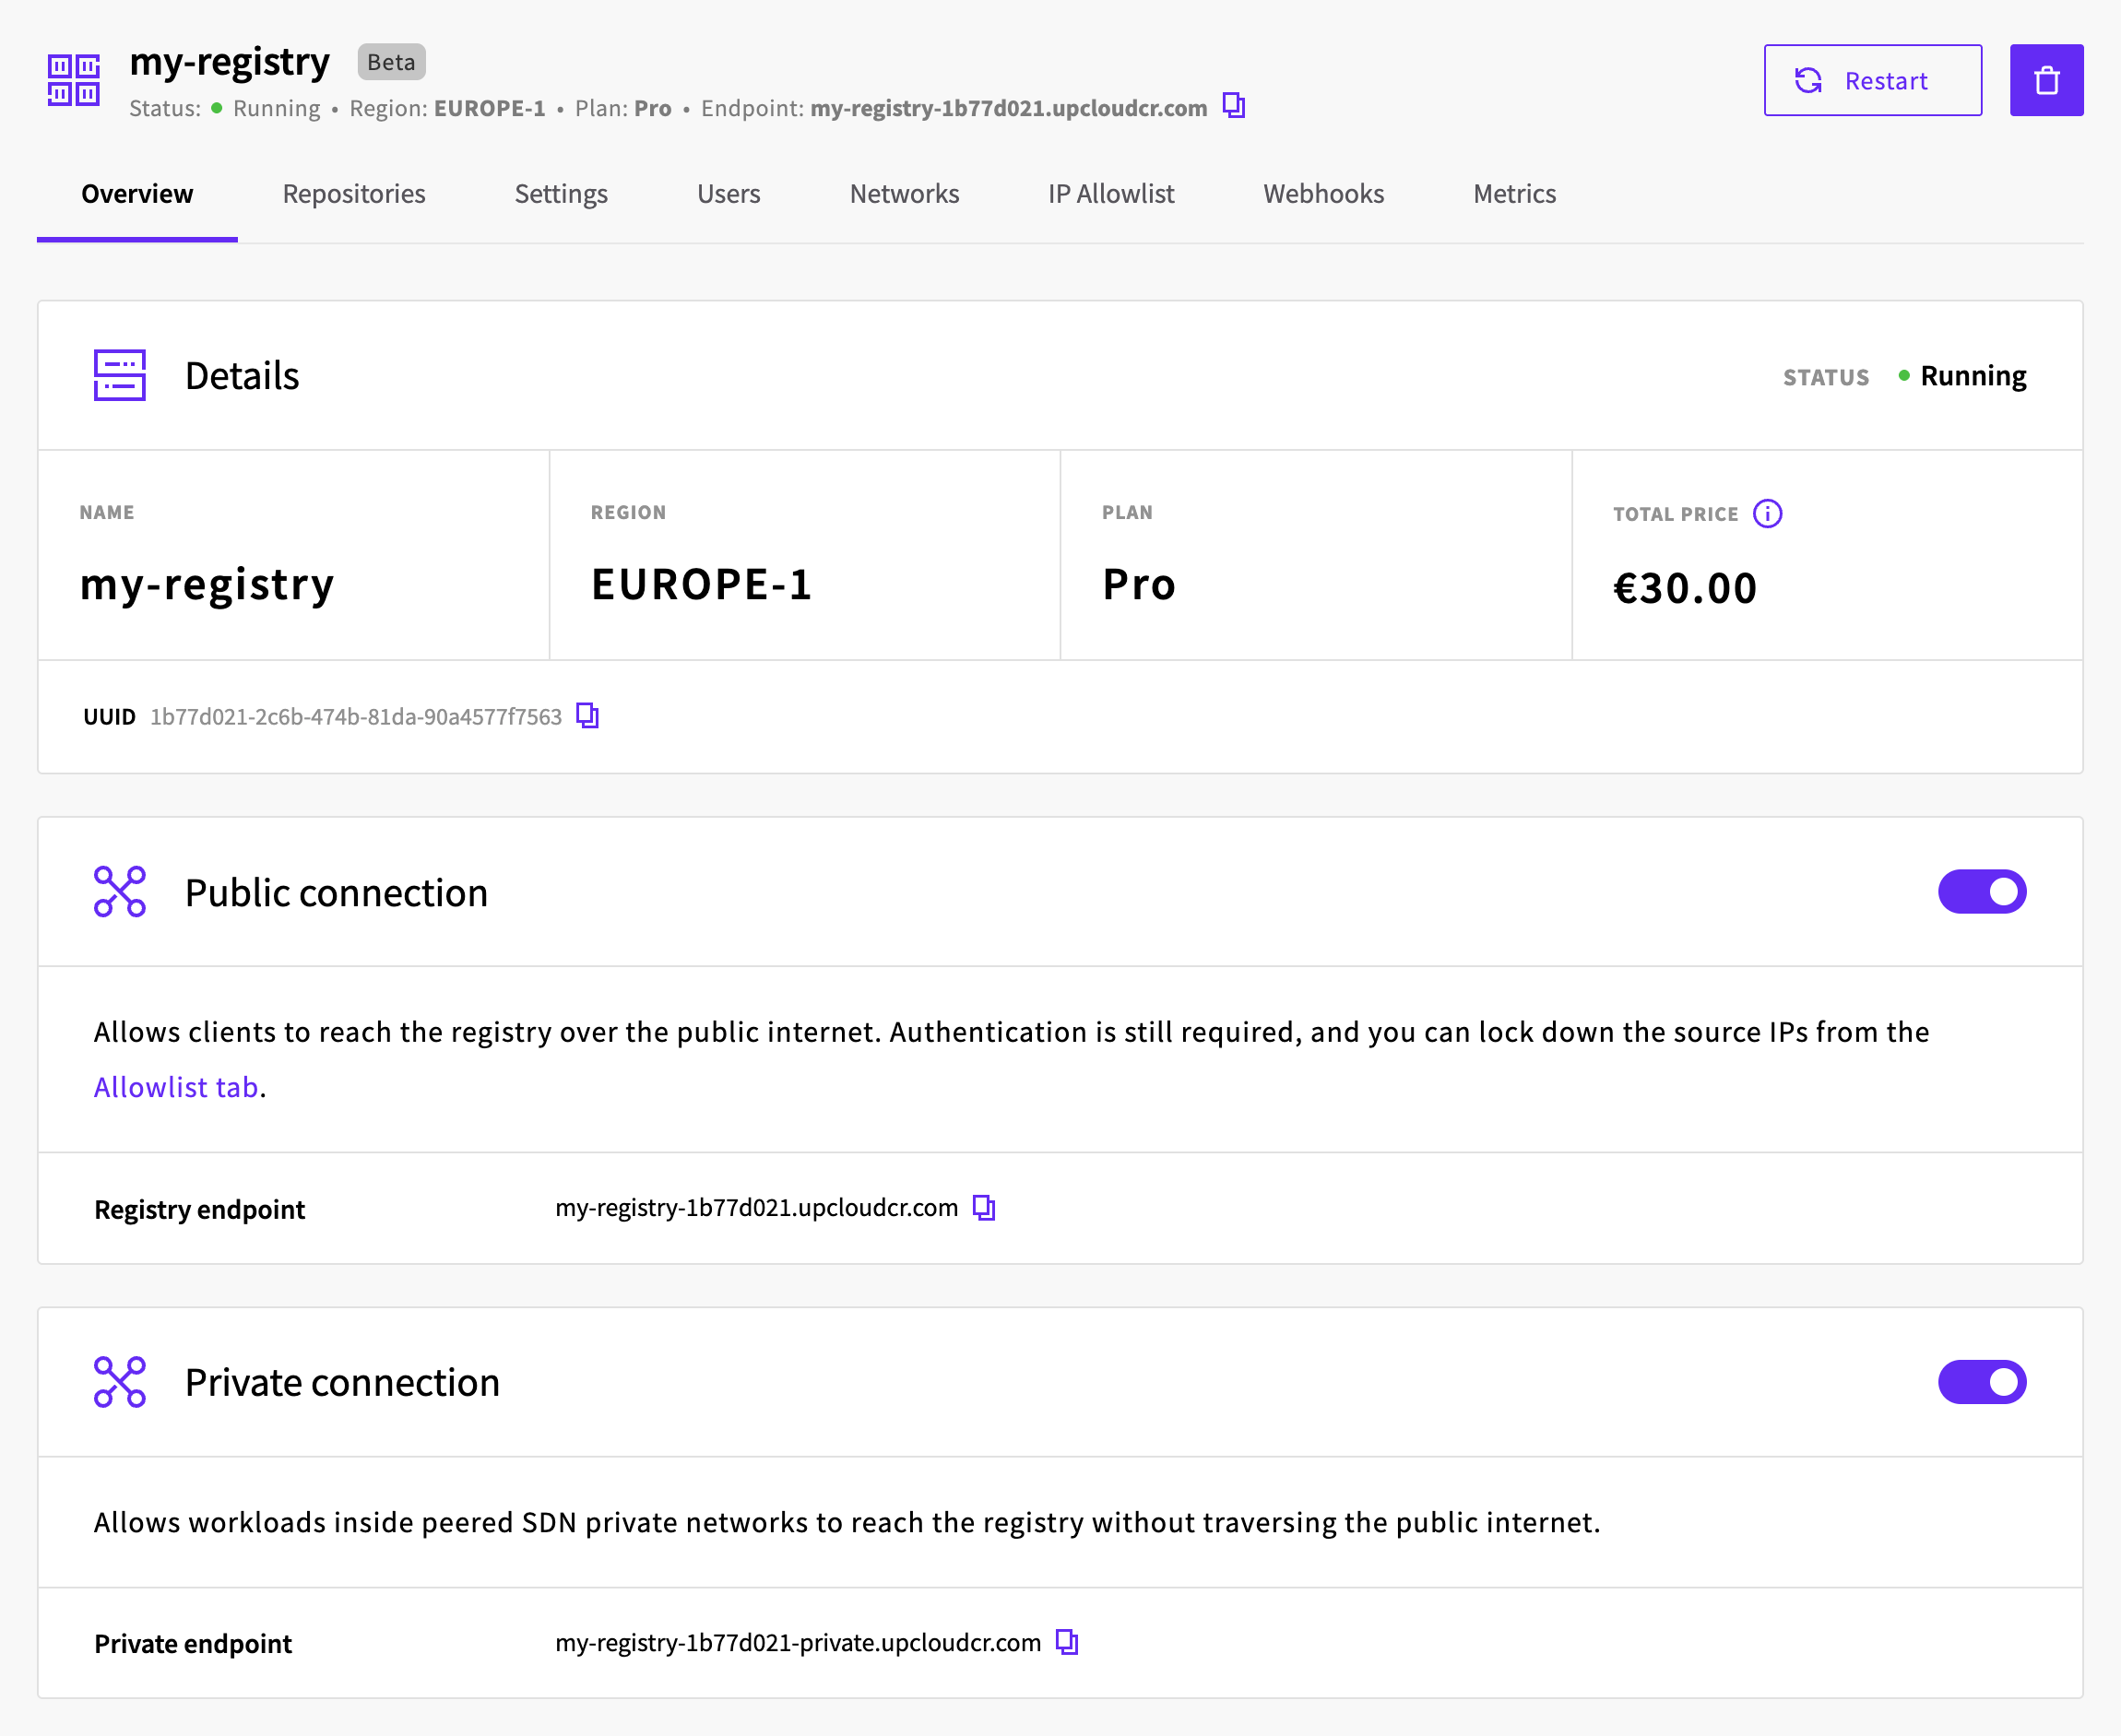
The registry then has a second endpoint, shown as Private endpoint on the Overview tab, with -private added to its name, such as my-registry-1b77d021-private.upcloudcr.com. Use it in image references on servers and clusters in that network. The public endpoint keeps working alongside the private one.
Credentials are matched by hostname, so clients log in to the private endpoint separately from the public one. To pull through the private endpoint from Managed Kubernetes, see How to use Container Registry with Managed Kubernetes.
To make the registry reachable only from attached private networks, turn off Public connection on the Overview tab. Once the change is applied, the public endpoint answers every request with 404 Not Found. Turn it back on the same way. The private connection can't be turned off while the public connection is off.
For more about the public and private endpoints, see Container Registry networking.
Webhooks
To send registry events to an HTTP endpoint you control, for example to start a deployment when an image is pushed, add a webhook from the Webhooks tab. See Container Registry webhooks for the events and the delivery format, and How to deploy automatically with Container Registry webhooks for a server that redeploys its app on every push.
Metrics
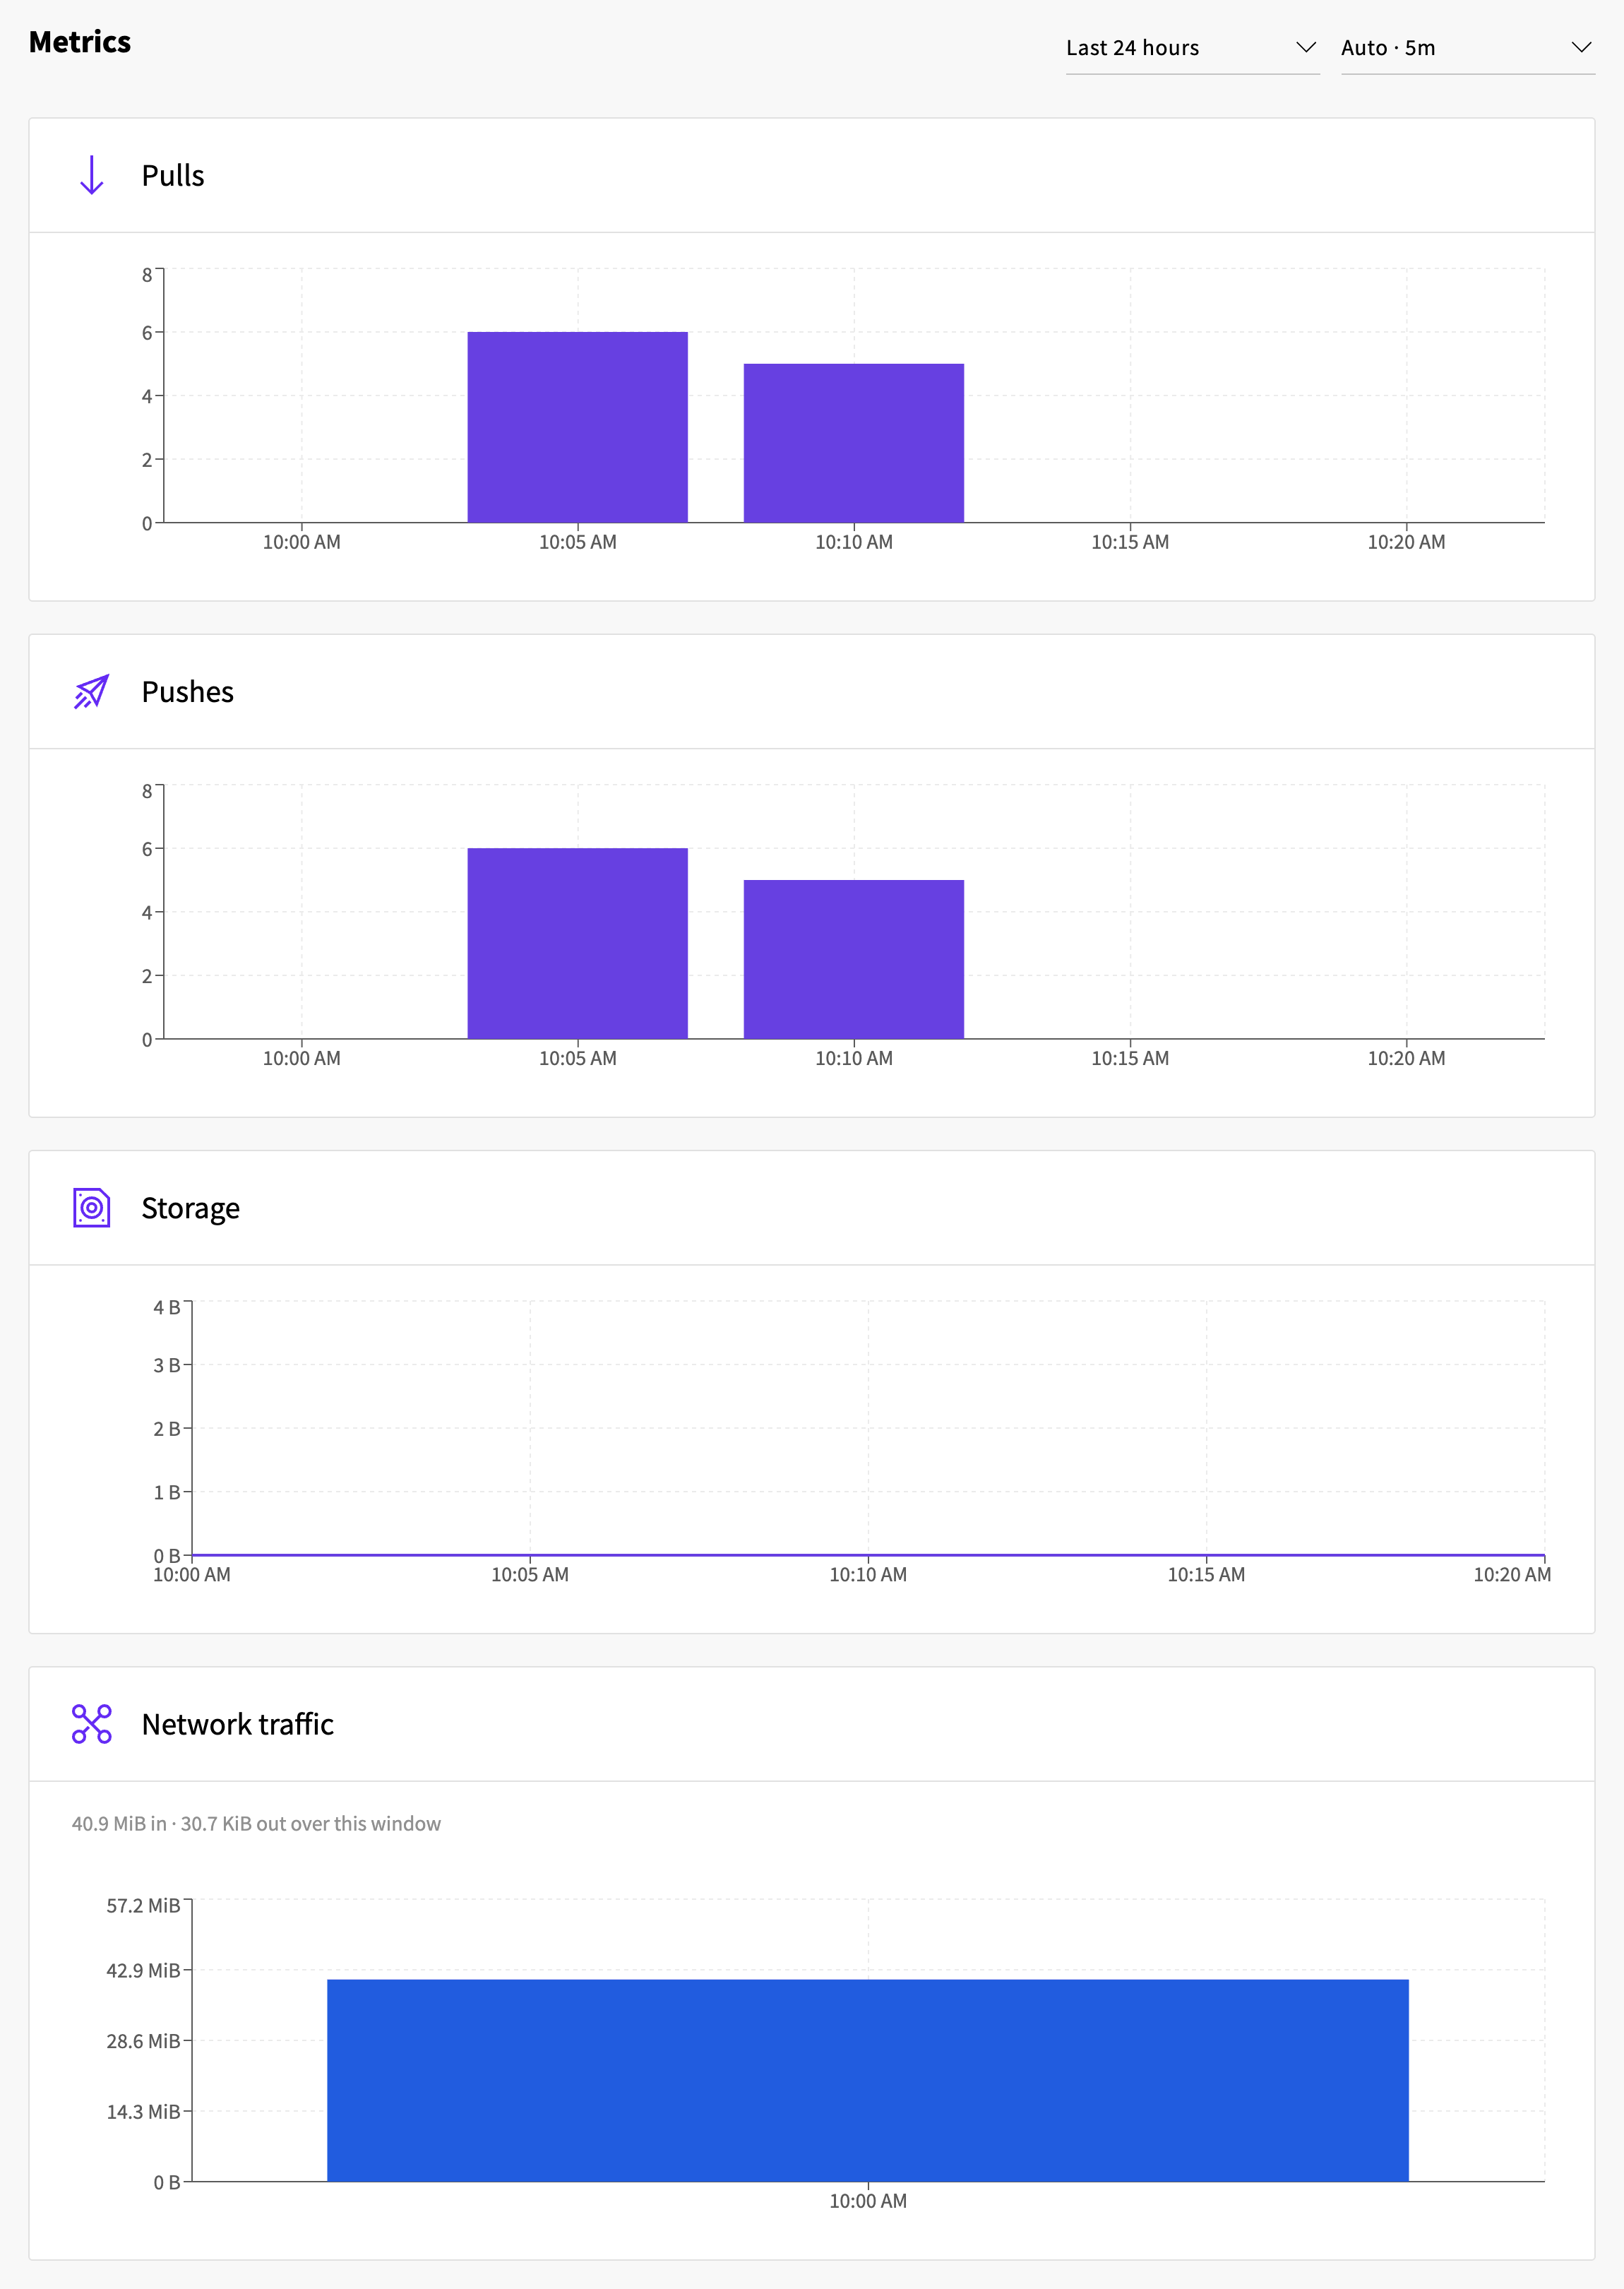
The Metrics tab shows pulls, pushes, storage, and network traffic over a selected time range of up to 90 days.
Change plan
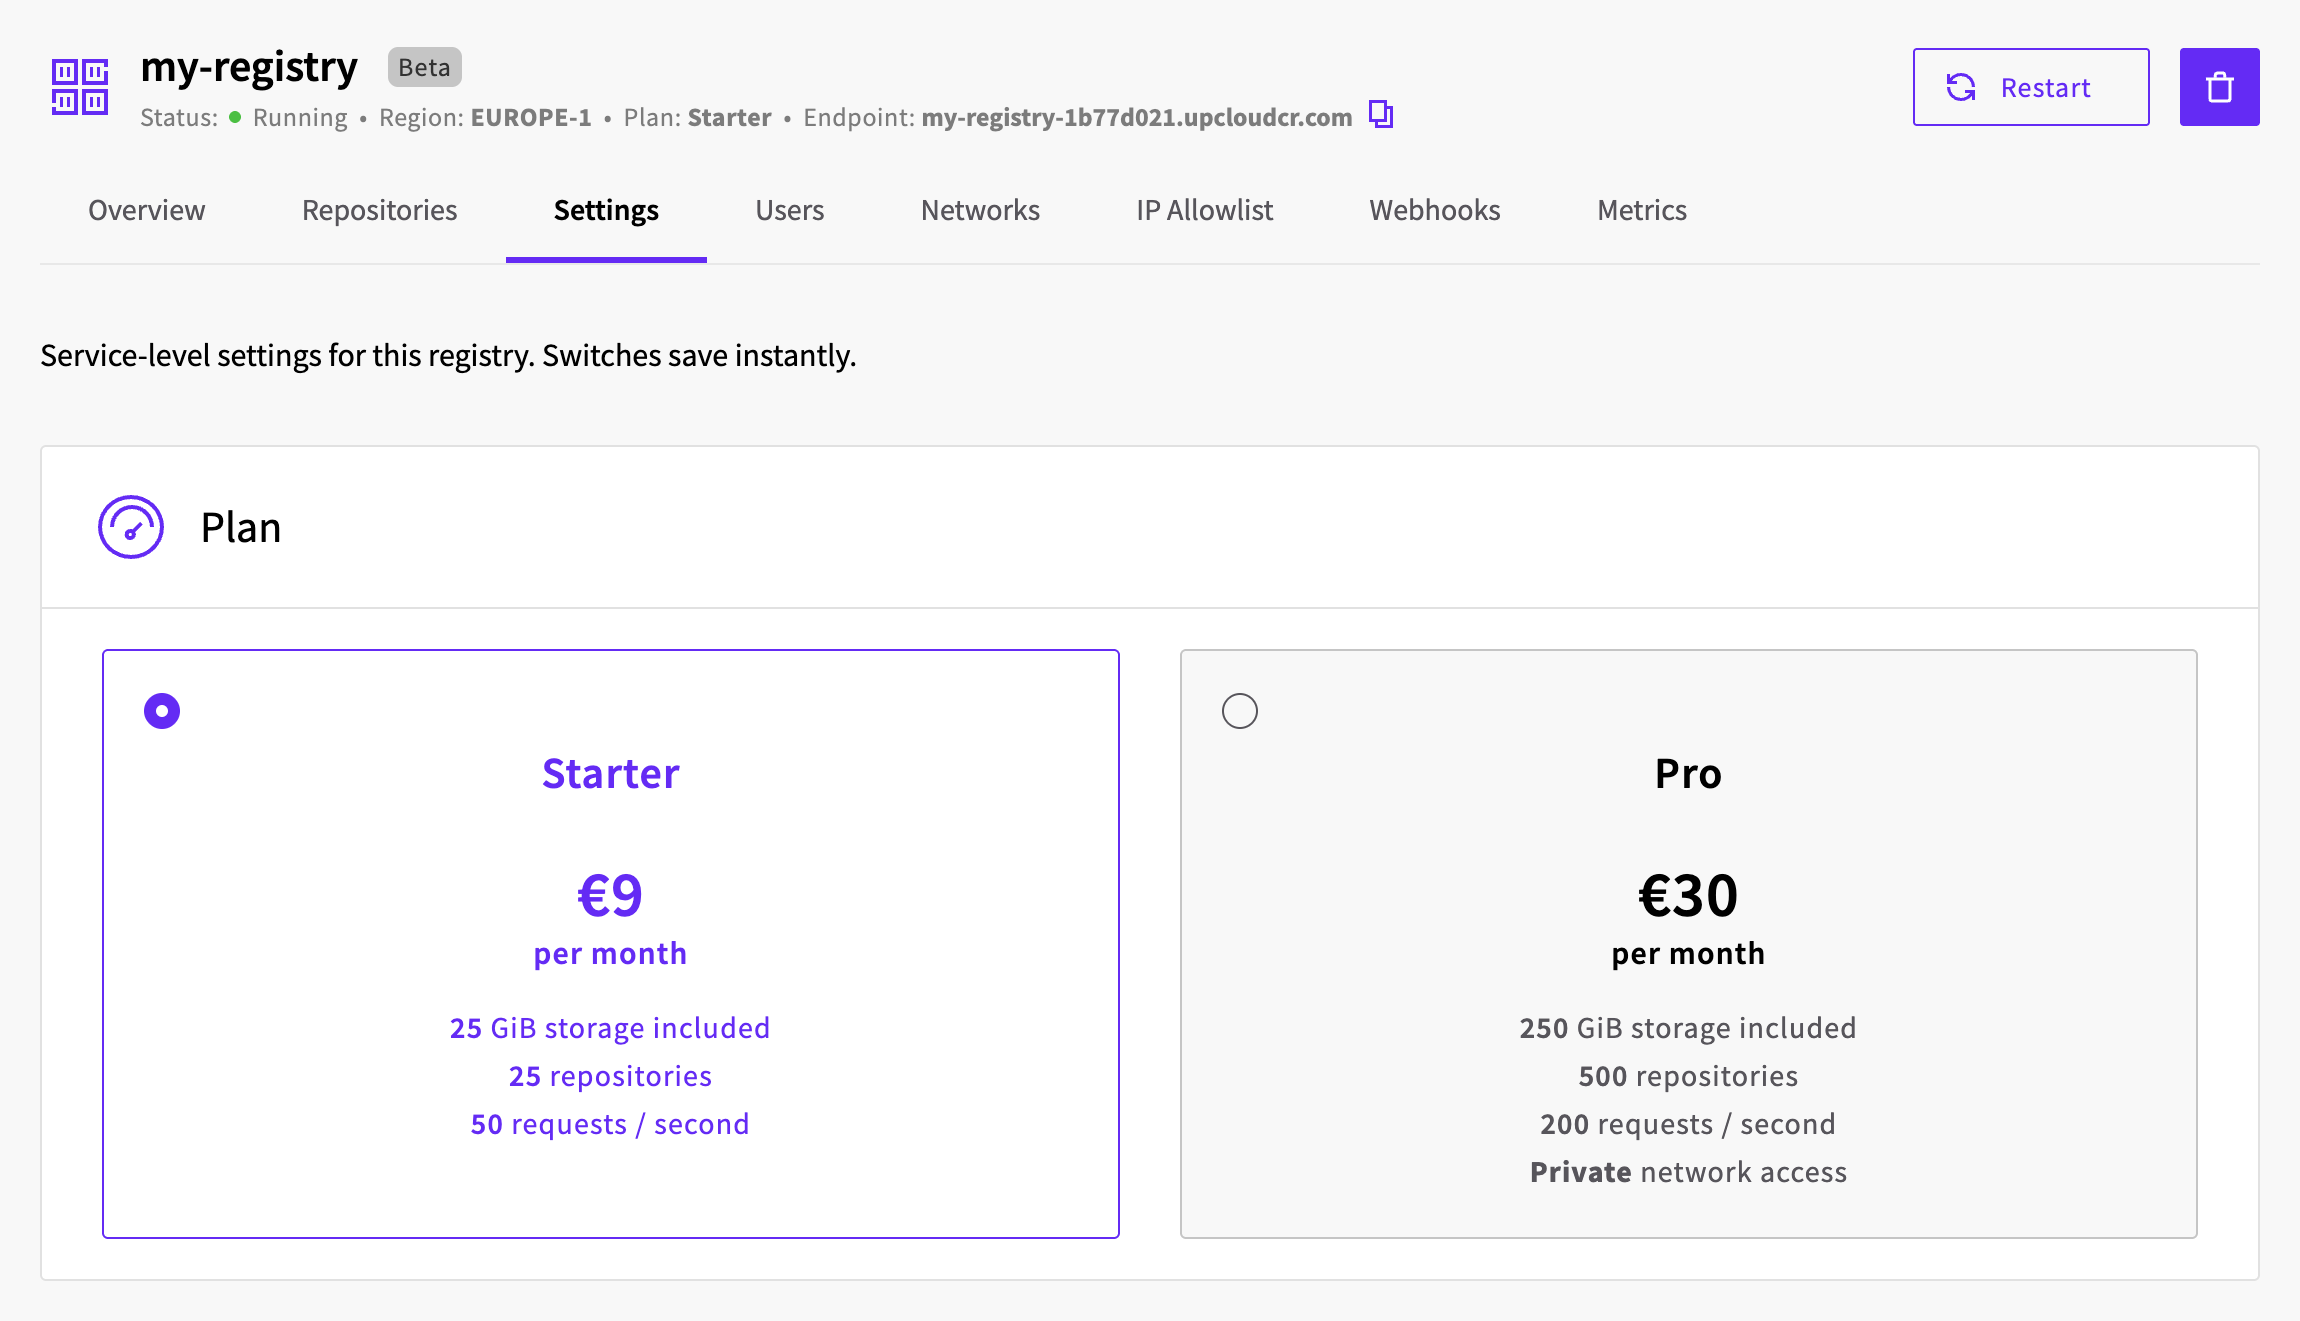
Open the Settings tab, select the other plan under Plan, and select Save. The Storage section on the same tab shows the included storage, the storage used, and any additional storage you are billed for.
To change from Pro to Starter, first detach all private networks on the Networks tab.
Delete a registry
Deleting a registry permanently deletes all of its images, users, and credentials, and its endpoint stops serving. Update any servers, clusters, or pipelines that pull from it first.
- Open the registry and select the delete button next to Restart at the top of the page.
- Type the registry name to confirm and select Delete forever.
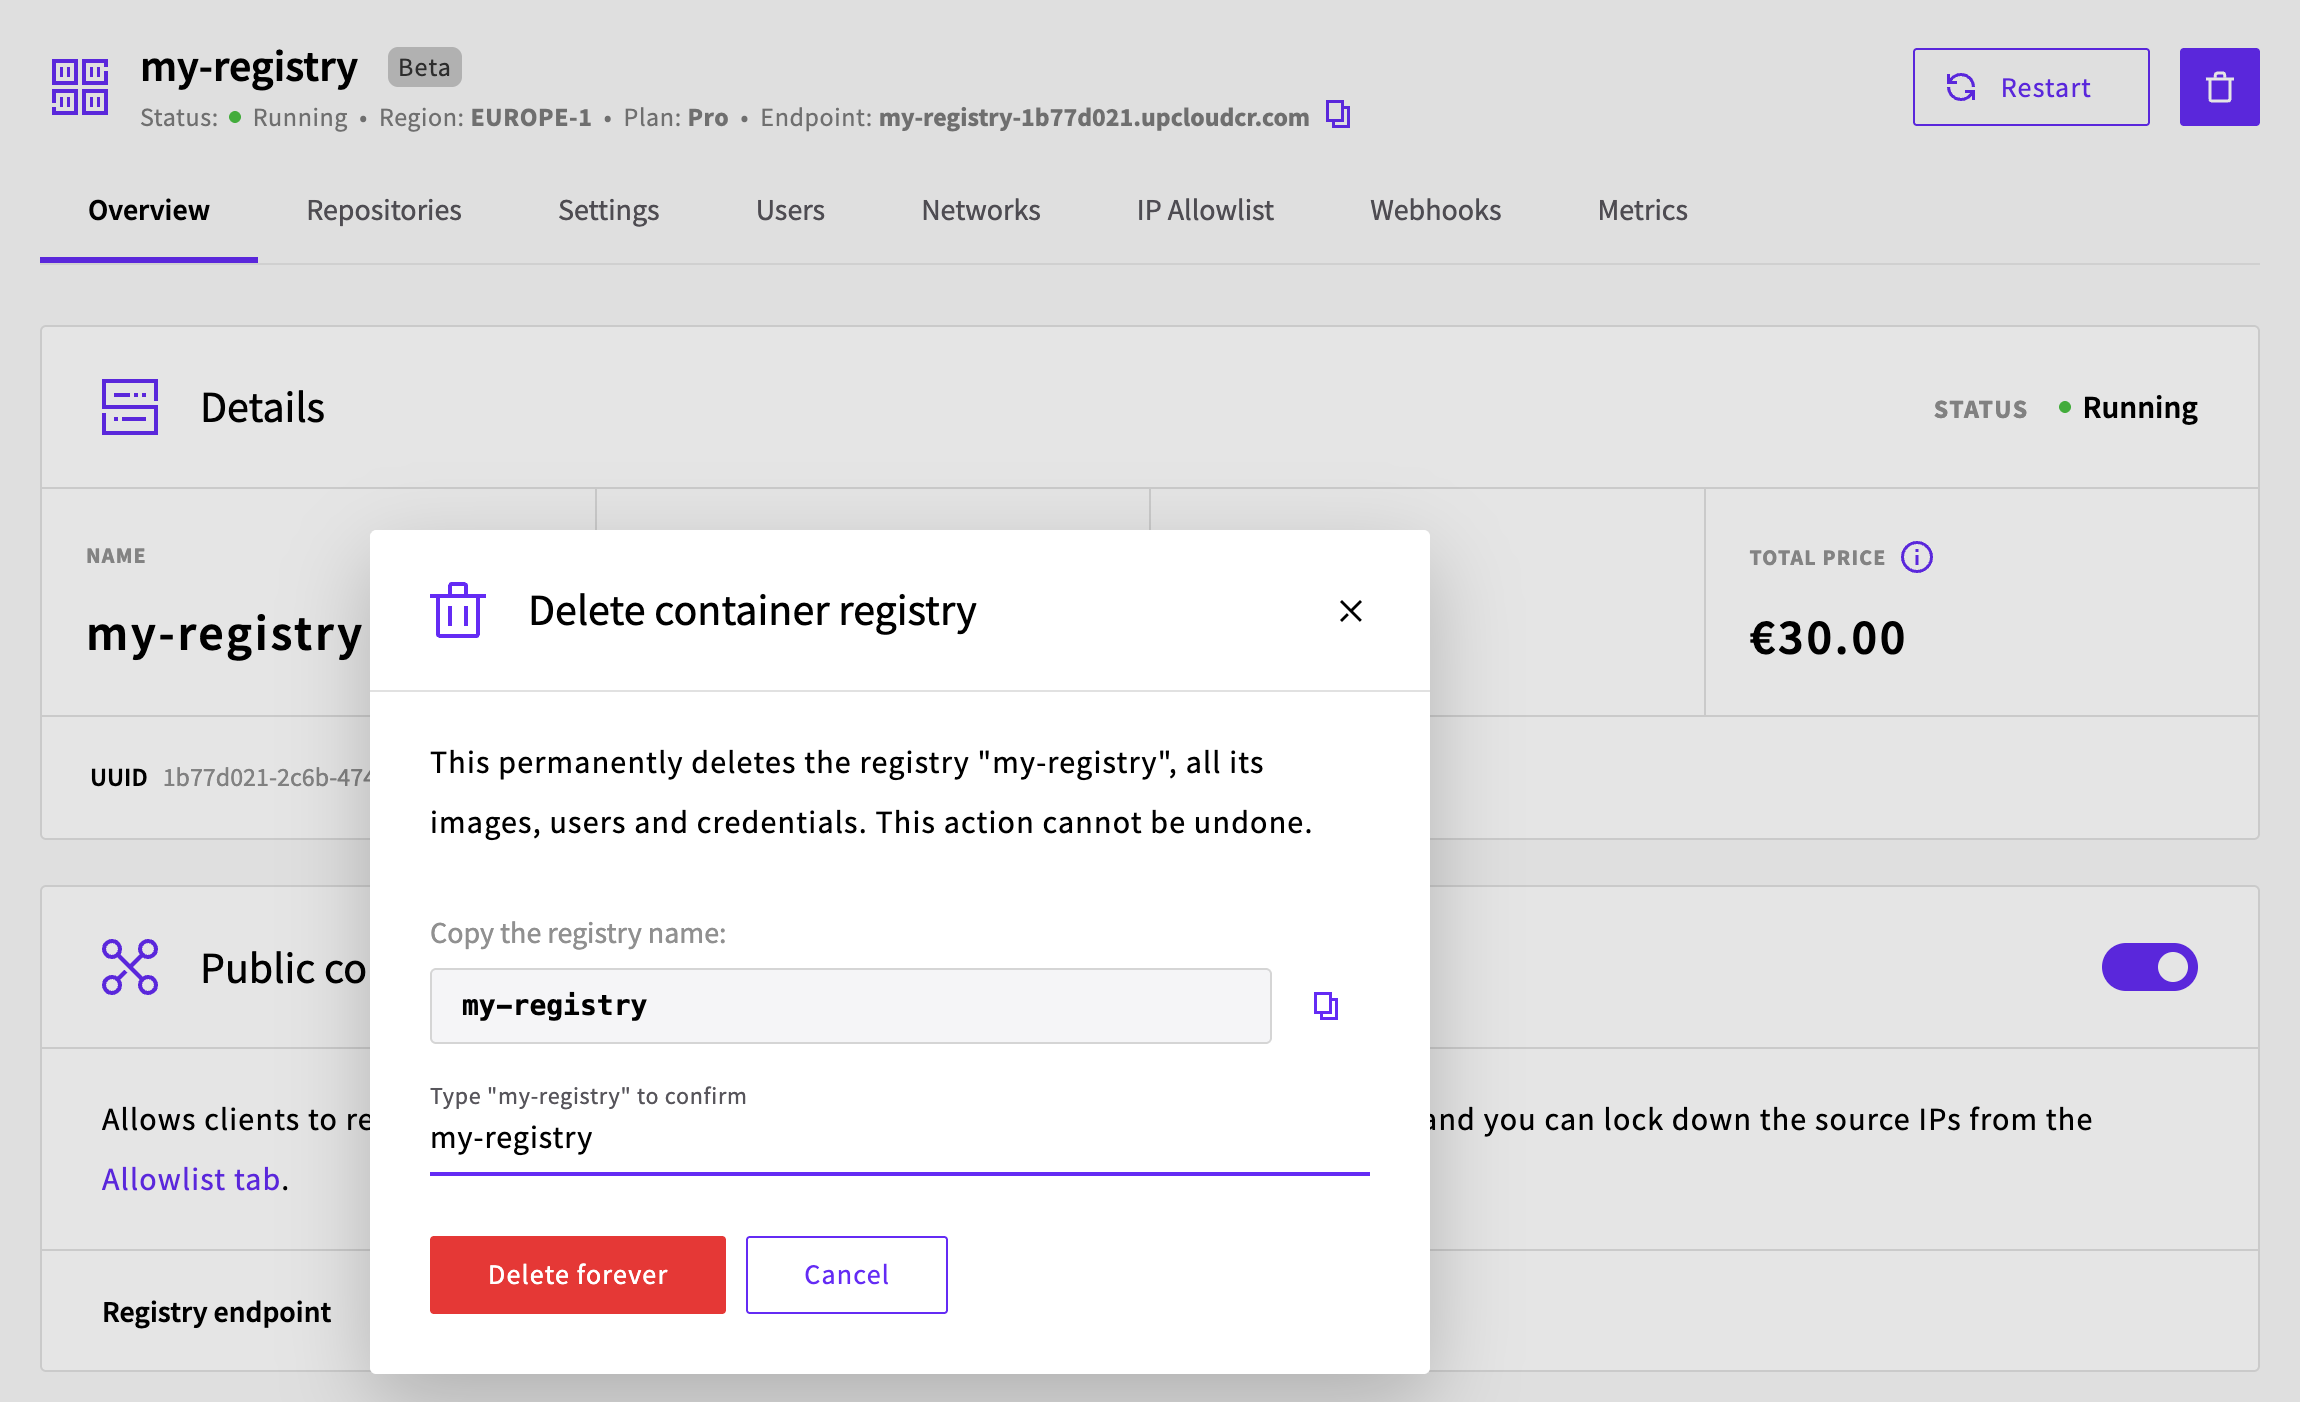
The registry shows as Deleting in the list until it's removed.
Troubleshooting
docker login fails with no such host.
The registry endpoint isn't in DNS yet. This happens right after you create the registry, and with the private endpoint while the registry's status shows Setting up private access. Wait until the status is Running and the name resolves, for example until nslookup returns an address for it, and try again.
unauthorized: authentication required or 401 Unauthorized.
The client isn't logged in, or the username or password is wrong. Run docker login with the registry endpoint again.
403 Forbidden with RBAC: access denied.
Your IP address isn't in the registry's IP allowlist. Add it on the IP Allowlist tab.
error from registry: too many requests when pushing a new repository.
The registry has reached the repository limit of its plan. Delete repositories you no longer need, or change to the Pro plan. Pushing new tags to existing repositories keeps working.
docker push fails with 500 Internal Server Error.
Run the same docker push command again. Layers that were already uploaded show as Already exists, and the push completes.
Push fails with denied: requested access to the resource is denied.
The registry user's permissions don't allow the push. Pushing a new tag or repository needs Create, and pushing a different image to a tag that already exists needs Update. Add a user with the permissions it needs.
Kubernetes pods stay in ImagePullBackOff with no basic auth credentials.
The pod has no image pull secret for the registry. Create a docker-registry secret in the pod's namespace and reference it under imagePullSecrets.
Kubernetes pods stay in ImagePullBackOff with not found.
The tag in the image reference doesn't exist in the registry. Check the tag on the Repositories tab, or push it.
Every request to the public endpoint returns 404 Not Found.
Public connection is turned off on the registry's Overview tab. Turn it on, or use the private endpoint from an attached network.
exec format error when a container starts.
The image was built for a different CPU architecture than the machine running it. Rebuild for linux/amd64, or build a multi-platform image with docker buildx.