
How to get started using the UpCloud API
This is a quick introduction to the UpCloud API. Will help you through the first steps of connecting to the API and automating your cloud servers using your favourite programming language. The programmable API is available at https://api.upcloud.com, which encompasses all of the functionality of the UpCloud control panel and then some. If you want to get started on your own, head straight to the full API documentation.
Creating an API token
The first step in getting started with our API is to create an API token. API tokens have configurable expiration dates, can be restricted to specific IP addresses, and can be revoked individually if compromised — without affecting other integrations or requiring a password change. For full details on creating and managing tokens, see our API Tokens guide.
You can create an API token in the UpCloud Control Panel under your account's API access settings. Token values begin with the prefix ucat_ and are shown only once at creation time, so copy and store the token securely.
Once issued, the token is passed in the Authorization header of each request as a bearer token:
Authorization: Bearer ucat_Your_API_TokenWe recommend creating a separate token for each application and external service you use, so individual tokens can be rotated or revoked without disrupting anything else. For stricter permission scoping, you can also create a token under a dedicated subaccount — see the subaccount setup instructions for how to create one.
If you prefer to authenticate with a subaccount's username and password via HTTP Basic authentication instead, see our getting started with UpCloud API using HTTP Basic authentication guide.
Running basic API requests
Once you have created your API token, let's try your first request. To quickly test the API, use a tool such as Postman (or any other API toolkit of your choice) to get started. The goal is to have the following dialogue working.
GET /1.3/accountHTTP/1.0 200 OK
{
"account" : {
"credits" : "10000",
"username" : "username"
}
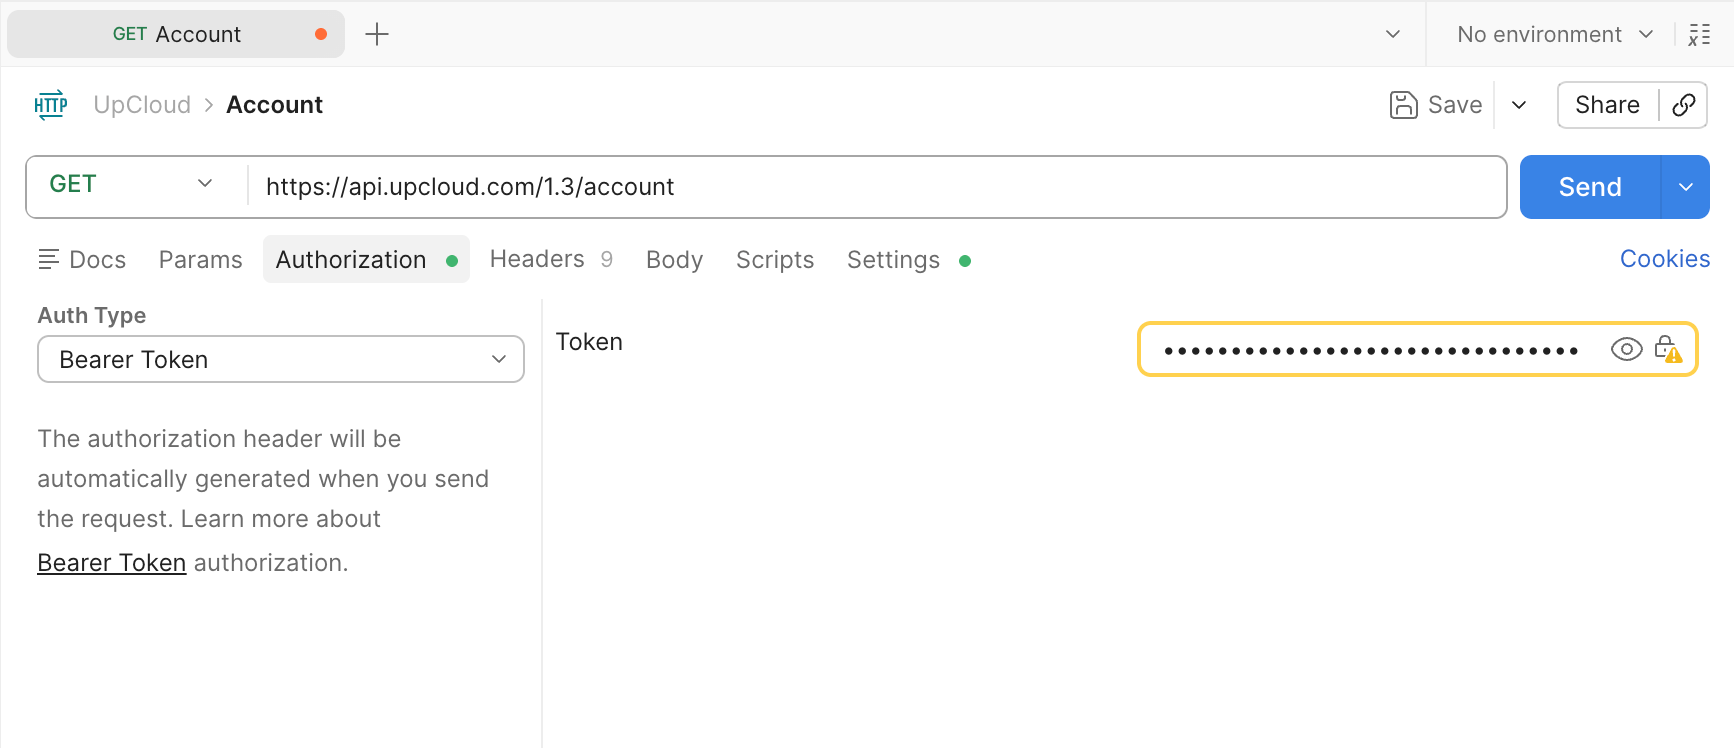
}Using a GET request, enter the API address https://api.upcloud.com with the API version number and the desired command to the request URL line, then select the Bearer Token auth type and paste your token value (including the ucat_ prefix). When you have filled in the request details, click the Send button to run the query.
The reply will be shown in the bottom half of the Postman window under the Body tab.
From the command line, the same request looks like this with curl:
curl -H "Authorization: Bearer ucat_Your_API_Token" https://api.upcloud.com/1.3/accountUsing a similar request by just replacing the query target from account to server you can get the full list of servers your API token is allowed to access.
GET /1.3/serverHTTP/1.0 200 OK
{
"servers": {
"server": [
{
"core_number": "1",
"hostname": "example.upcloud.com",
"license": 0,
"memory_amount": "1024",
"plan": "1xCPU-1GB",
"state": "started",
"tags": {
"tag": []
},
"title": "Example UpCloud server",
"uuid": "00e8051f-86af-468b-b932-4fe4ac6c7f08",
"zone": "fi-hel1"
}
]
}
}You should now be able to form similar requests to the ones above using the API. For example, GET /1.3/server/00e8051f-86af-468b-b932-4fe4ac6c7f08, will reply with full details of that specific host when you include the UUID of one of your servers in a query.
Using the API programmatically
The API can be accessed using any language that has proper HTTP libraries. The following snippet shows how you could take advantage of the UpCloud API using Python3.
import http.client

conn = http.client.HTTPSConnection("api.upcloud.com")
headers = {"Authorization": "Bearer ucat_Your_API_Token"}

conn.request("GET", "/1.3/account", None, headers)
res = conn.getresponse()
print( res.read().decode() )
For a bit more sensible approach, the example below shows how you could structure the code for a better approach. The BaseAPI forms a generic API (GET) request that is extended by the Account class to form the same API request as above. Adding additional GET requests would now be much easier.
import http.client

class BaseAPI:
    api = "api.upcloud.com"
    api_v = "1.3"
    token = "ucat_Your_API_Token"

    '''
    Performs a GET request to a given endpoint in UpCloud's API.
    '''
    def get(self, endpoint):
        conn = http.client.HTTPSConnection(self.api)
        url = "/" + self.api_v + endpoint
        headers = {
            "Authorization": "Bearer " + self.token,
            "Content-Type": "application/json"
        }
        conn.request("GET", url, None, headers)
        res = conn.getresponse()
        self.printresponse(res.read())

    '''
    Prints the response (bytes) as a string to the user
    '''
    def printresponse(self, res):
        data = res.decode(encoding="UTF-8")
        print(data)

class Account(BaseAPI):
    endpoint="/account"

    def do(self):
        self.get(self.endpoint)

if __name__ == "__main__":
    Account().do()
More about the UpCloud API
These are just a couple of the simplest examples of what the UpCloud API allows you to do. Now that you have got the hang of the API usage, continue on to deploying a new server with UpCloud API.