
How to host a static website on UpCloud Object Storage
UpCloud Managed Object Storage comes with a built-in feature that allows developers to serve static websites and single-page applications (SPA) directly from a bucket without needing to configure or maintain a web server. Simply upload your files, enable static hosting, and your site or app is live.
This guide walks you through uploading your site files, enabling static hosting, and optionally configuring a custom domain.
Prerequisites
Before you begin, you will need the following:
- An UpCloud account with a Managed Object Storage instance deployed.
- Your static website files (HTML, CSS, JavaScript, images, etc.) ready for upload - including an
index.htmlfile, as the entry point for your site. - (Optional) A custom domain name, in case you want to serve your site from your own domain or subdomain. If not, Object Storage will always generate a domain for you. This is especially useful to get started, if you’d prefer to look into getting a domain later.
Step 1: Create a bucket for your website
Log into your UpCloud Control Panel and navigate to your Managed Object Storage instance. If you don’t yet have an Object Storage instance, here’s how you can create one
Create a new bucket to store your website files. Make sure to give the bucket a descriptive name, for example:
websitefor a single siteexample-comif hosting multiple sites in separate buckets
For detailed instructions on creating buckets, see our guide on getting started with Managed Object Storage.
Step 2: Upload your website files
Upload all your static website files to the bucket. You can upload directly to the root of the bucket, or into a subdirectory such as public/. Using subdirectories lets you host multiple sites from a single bucket - each with its own directory and static website configuration. When you configure static hosting in the next step, you'll set the Bucket prefix to match your chosen directory.
- HTML files (including
index.htmlat the root of your chosen directory) - CSS stylesheets
- JavaScript files
- Images and other media assets
You can upload files using the UpCloud Control Panel or an S3-compatible client such as AWS CLI or s3cmd.
Using AWS CLI, you can upload an entire directory with:
aws s3 sync ./my-website s3://<bucket-name>To upload into a subdirectory instead:
aws s3 sync ./my-website s3://<bucket-name>/public/Using s3cmd you can also automatically sync your bucket with your local directory like this:
s3cmd sync --delete-removed path/to/dir/ s3://<bucket-name>/path/Make sure your directory structure is preserved, as the file paths in your bucket will correspond to the URL paths on your site.
Step 3: Enable static website hosting
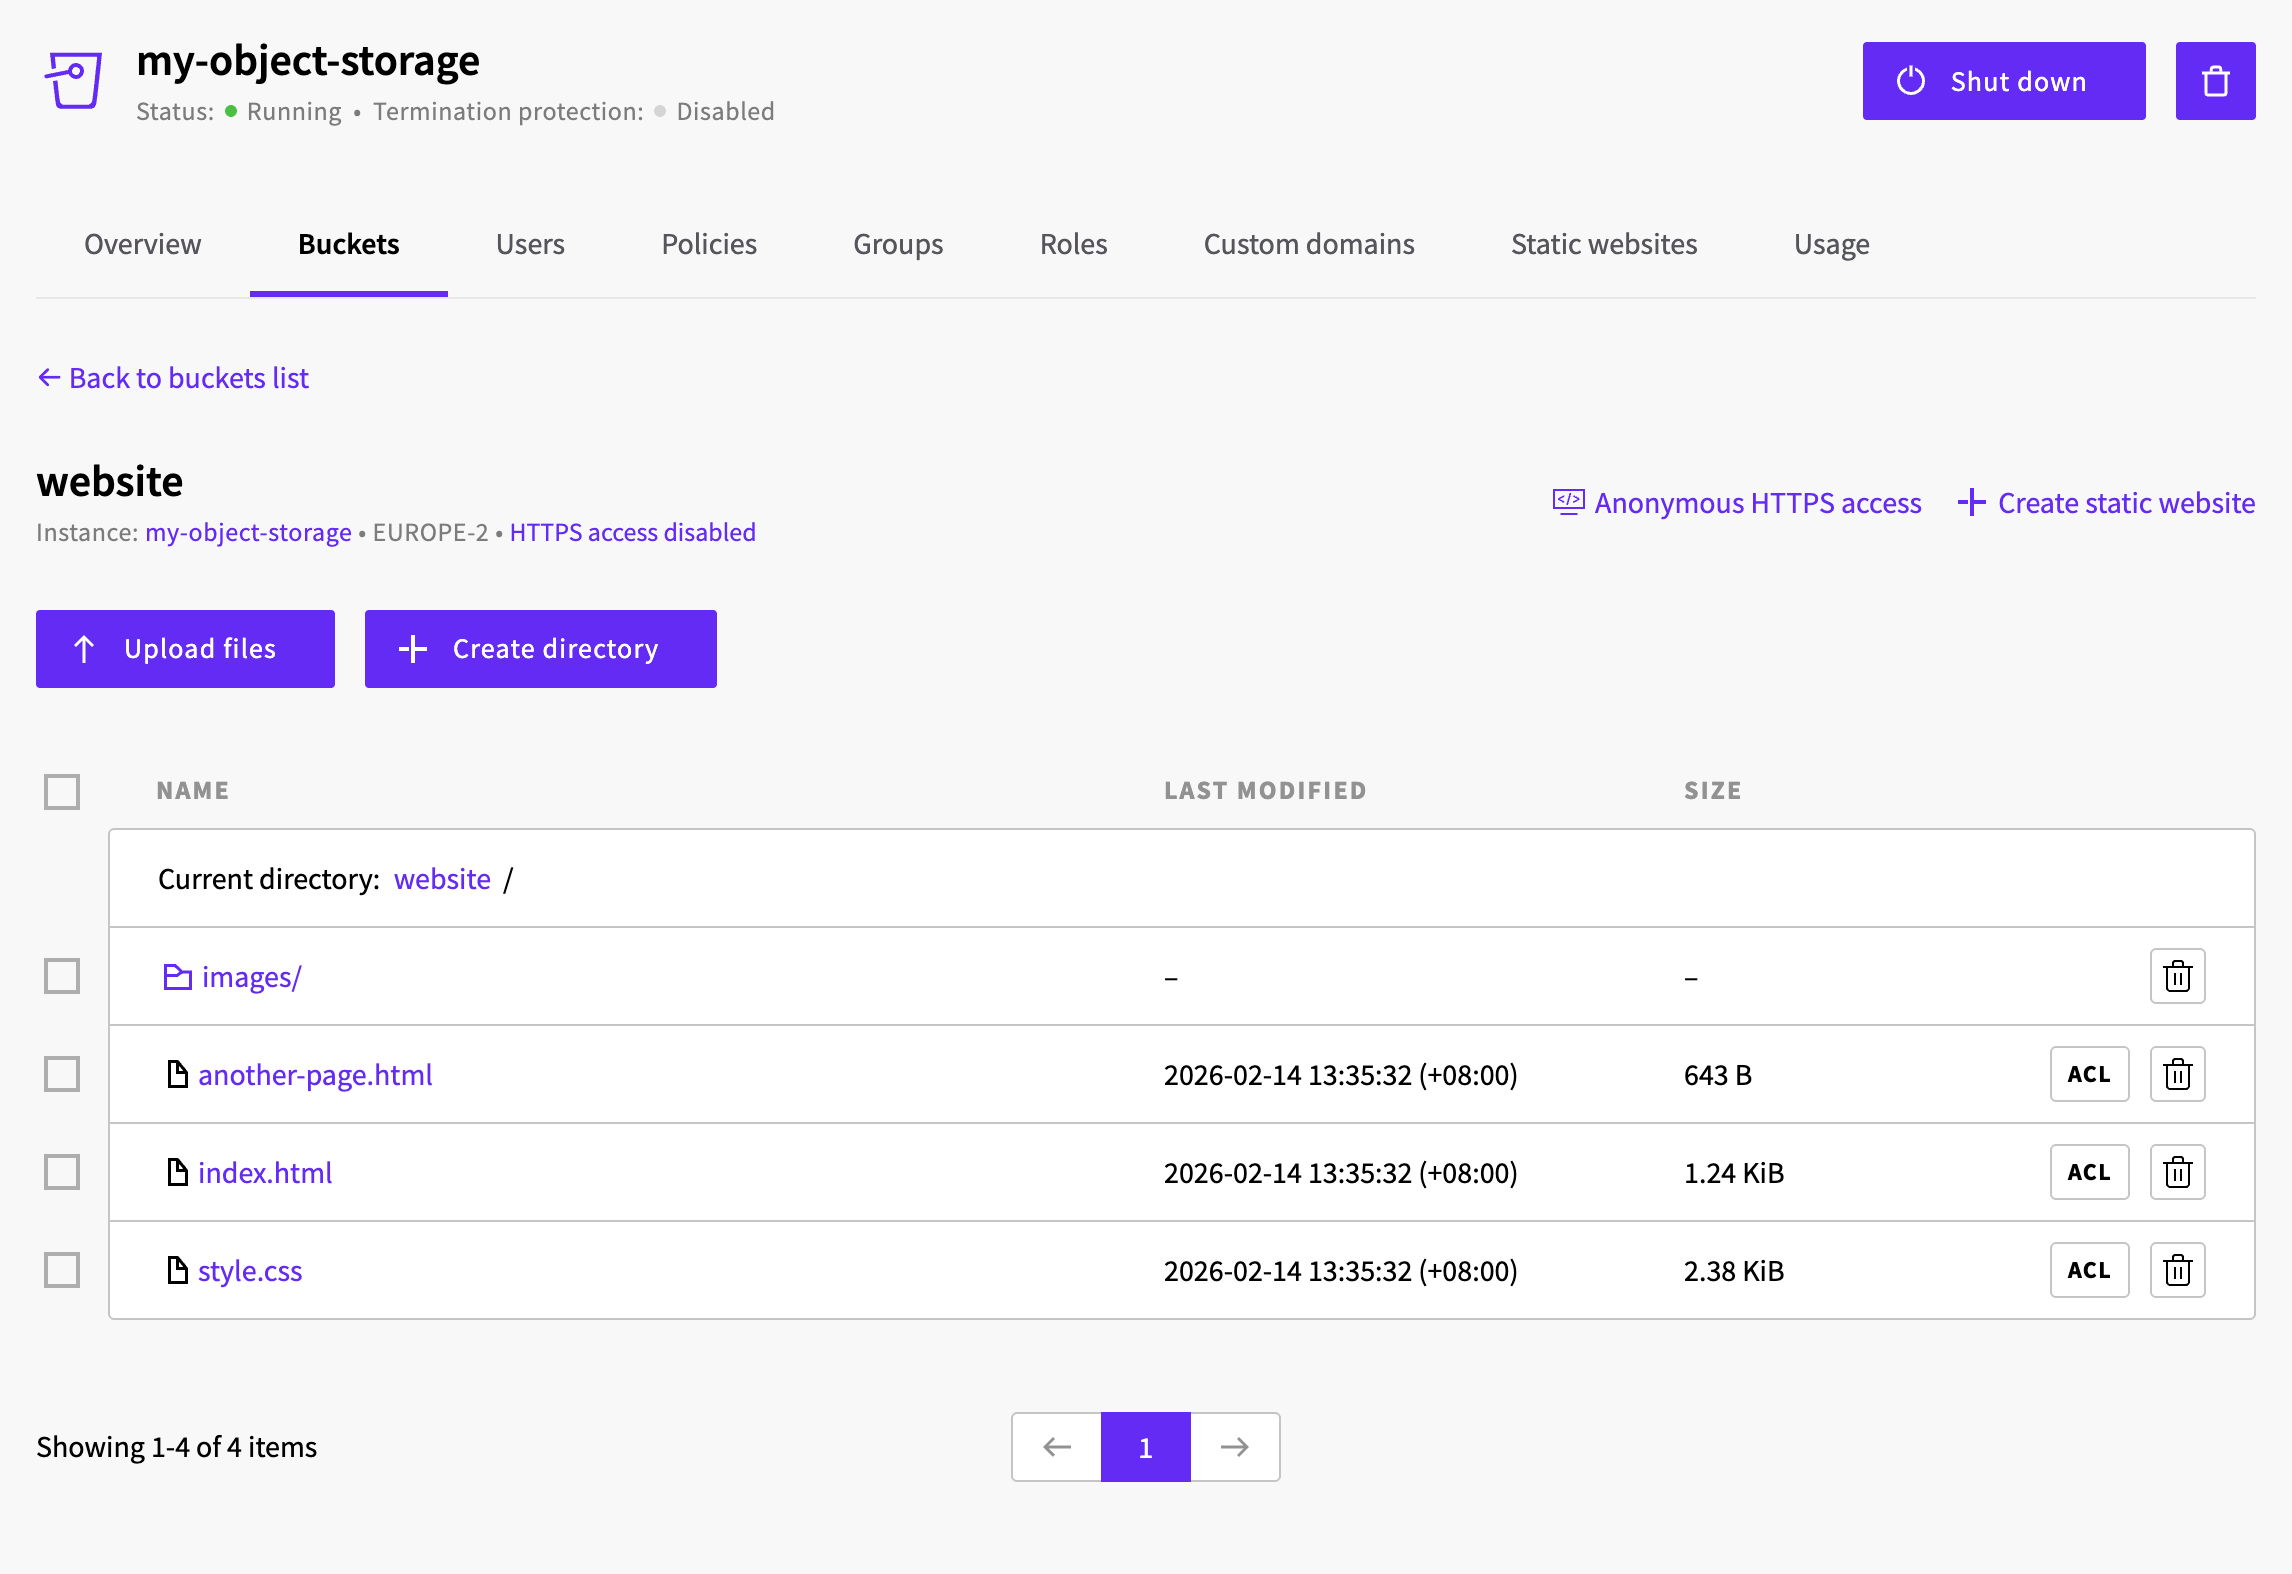
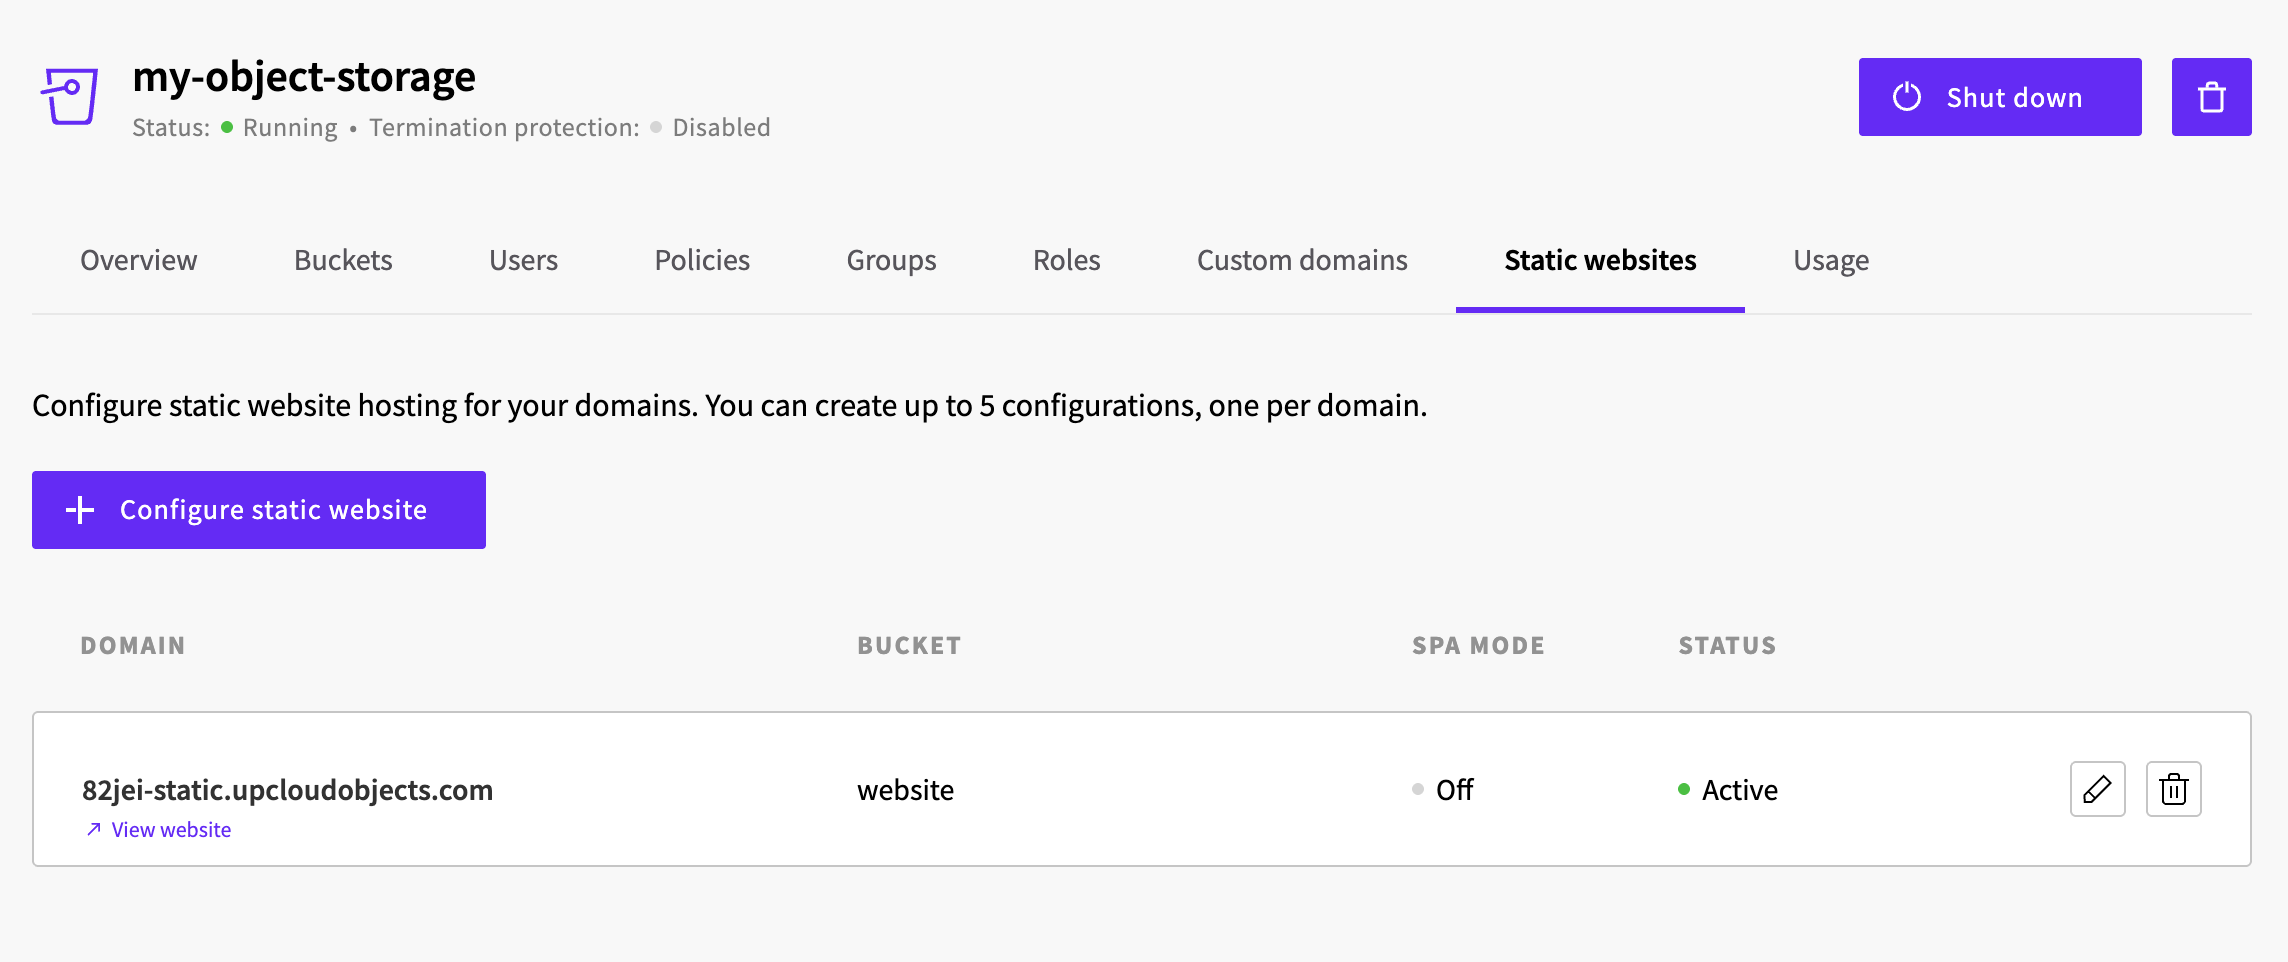
Within your Object Storage page, switch to the Static websites tab and click the + Configure static website button to begin.
Alternatively, you can navigate to the Buckets tab, open the bucket containing your site files, and click the + Create static website link in the top-right corner.
This opens the static website configuration form, which has several sections described below.
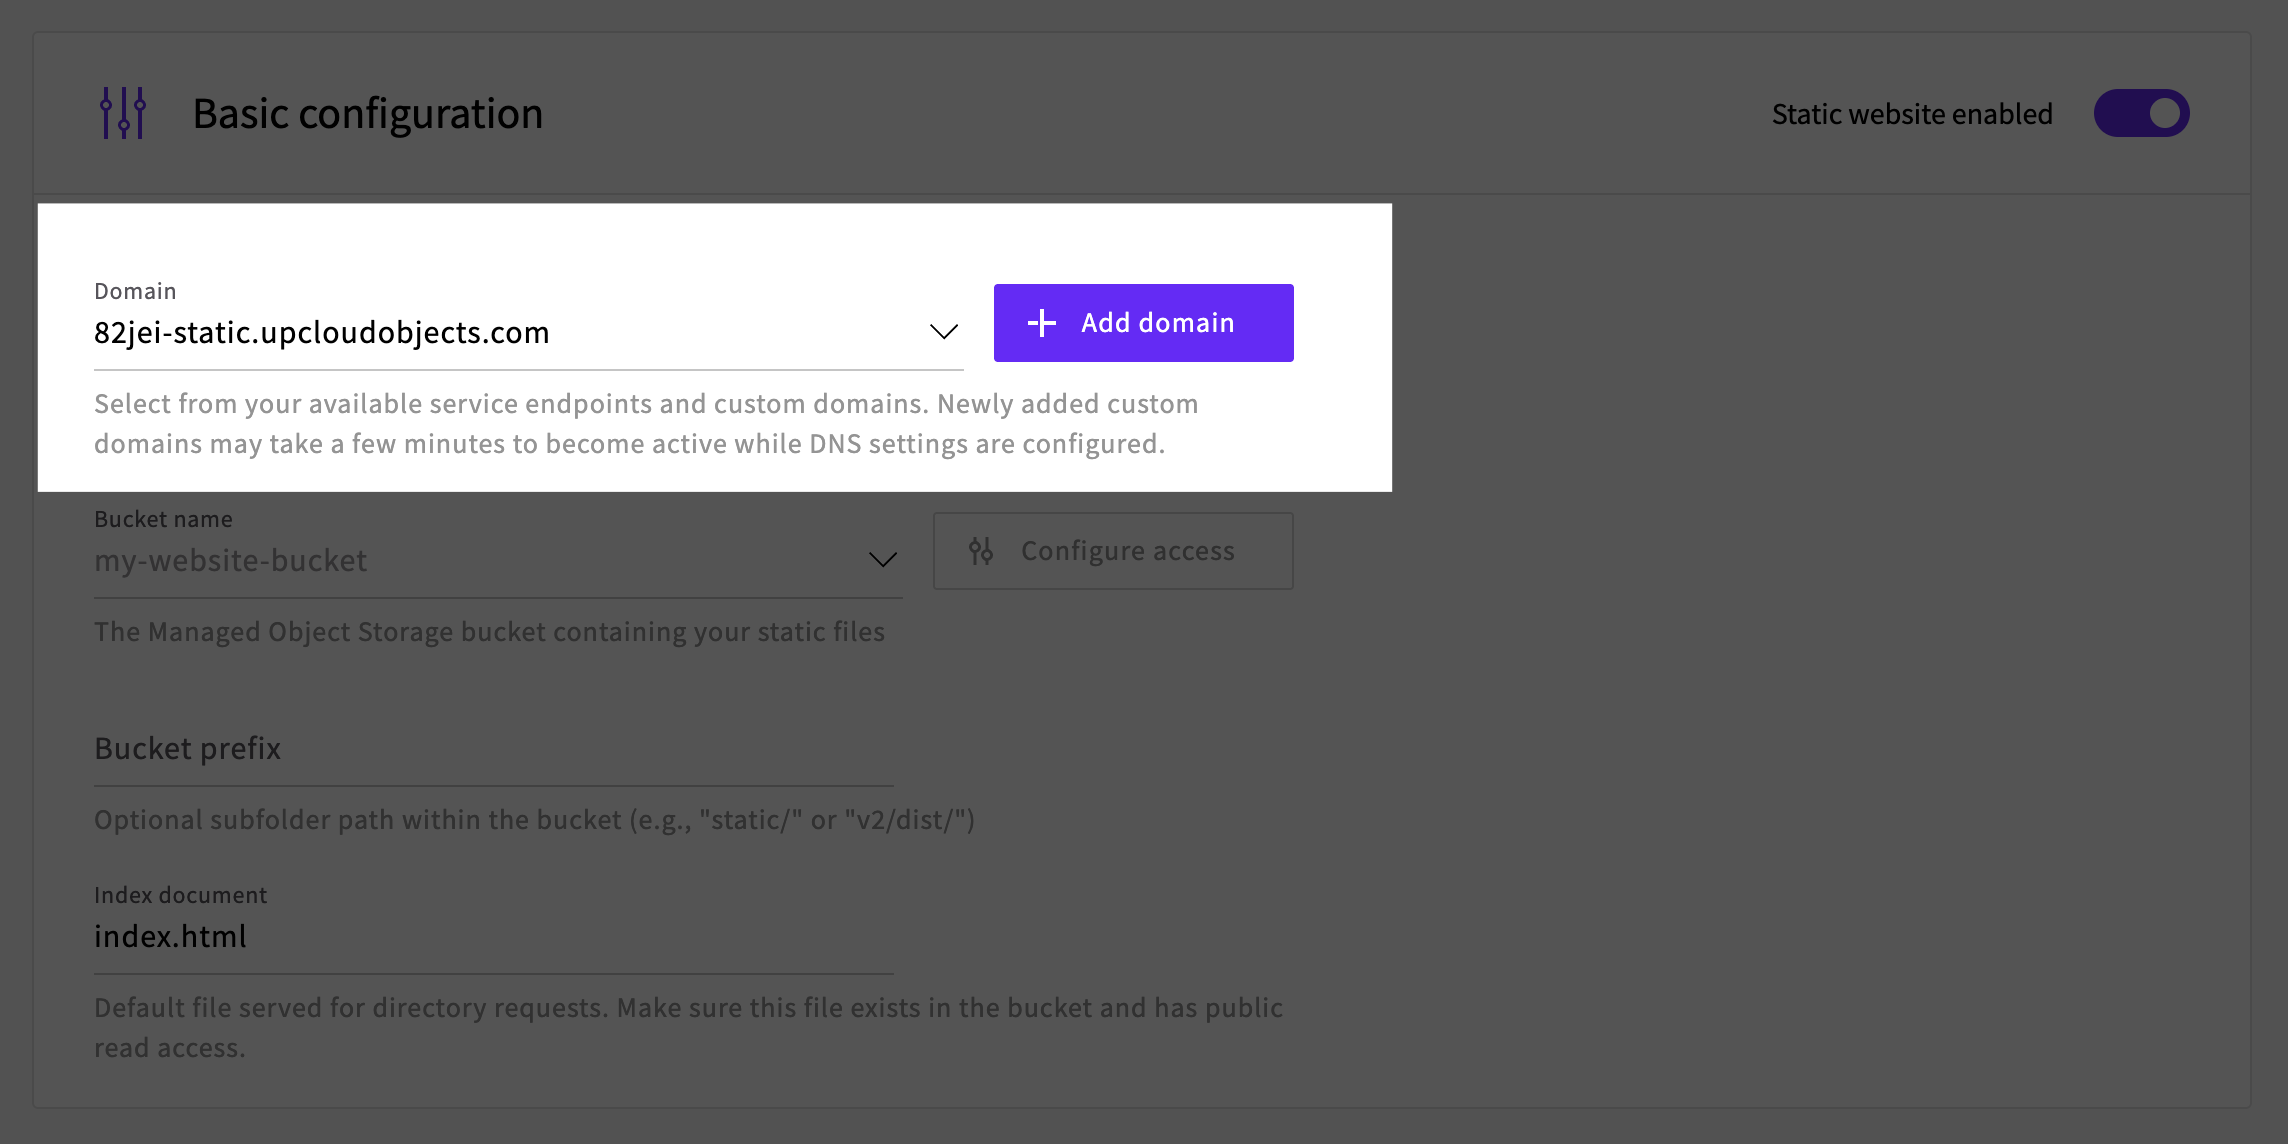
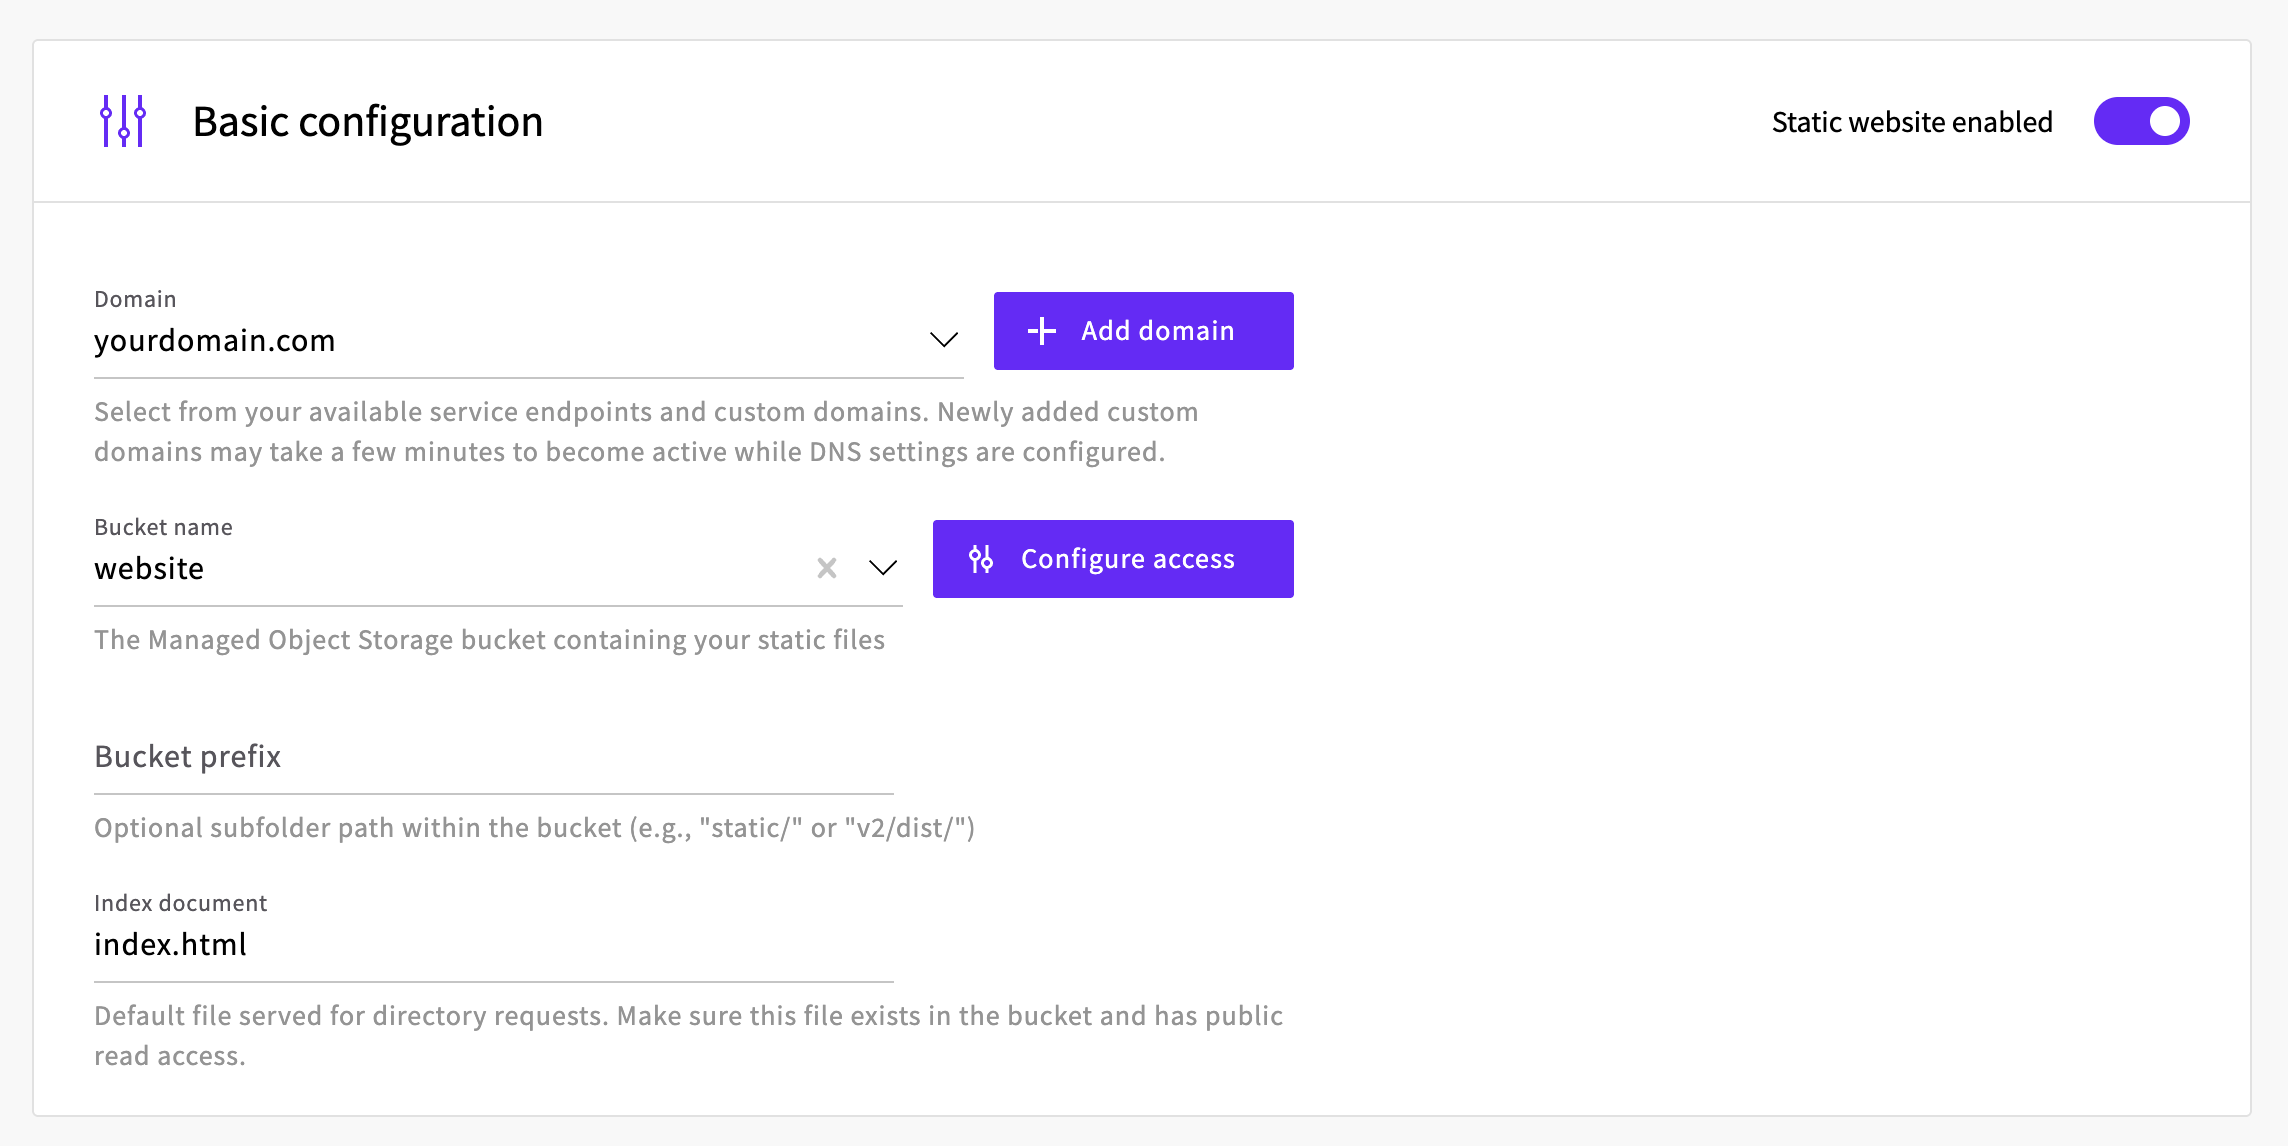
Domain
The first option to configure is the domain for your website. This is the URL that visitors will use to access your site. By default, the dropdown shows your Object Storage endpoint URL (e.g., 82jei-static.upcloudobjects.com). Select this to get started quickly, or see Step 5: Configure a custom domain to use your own domain instead.
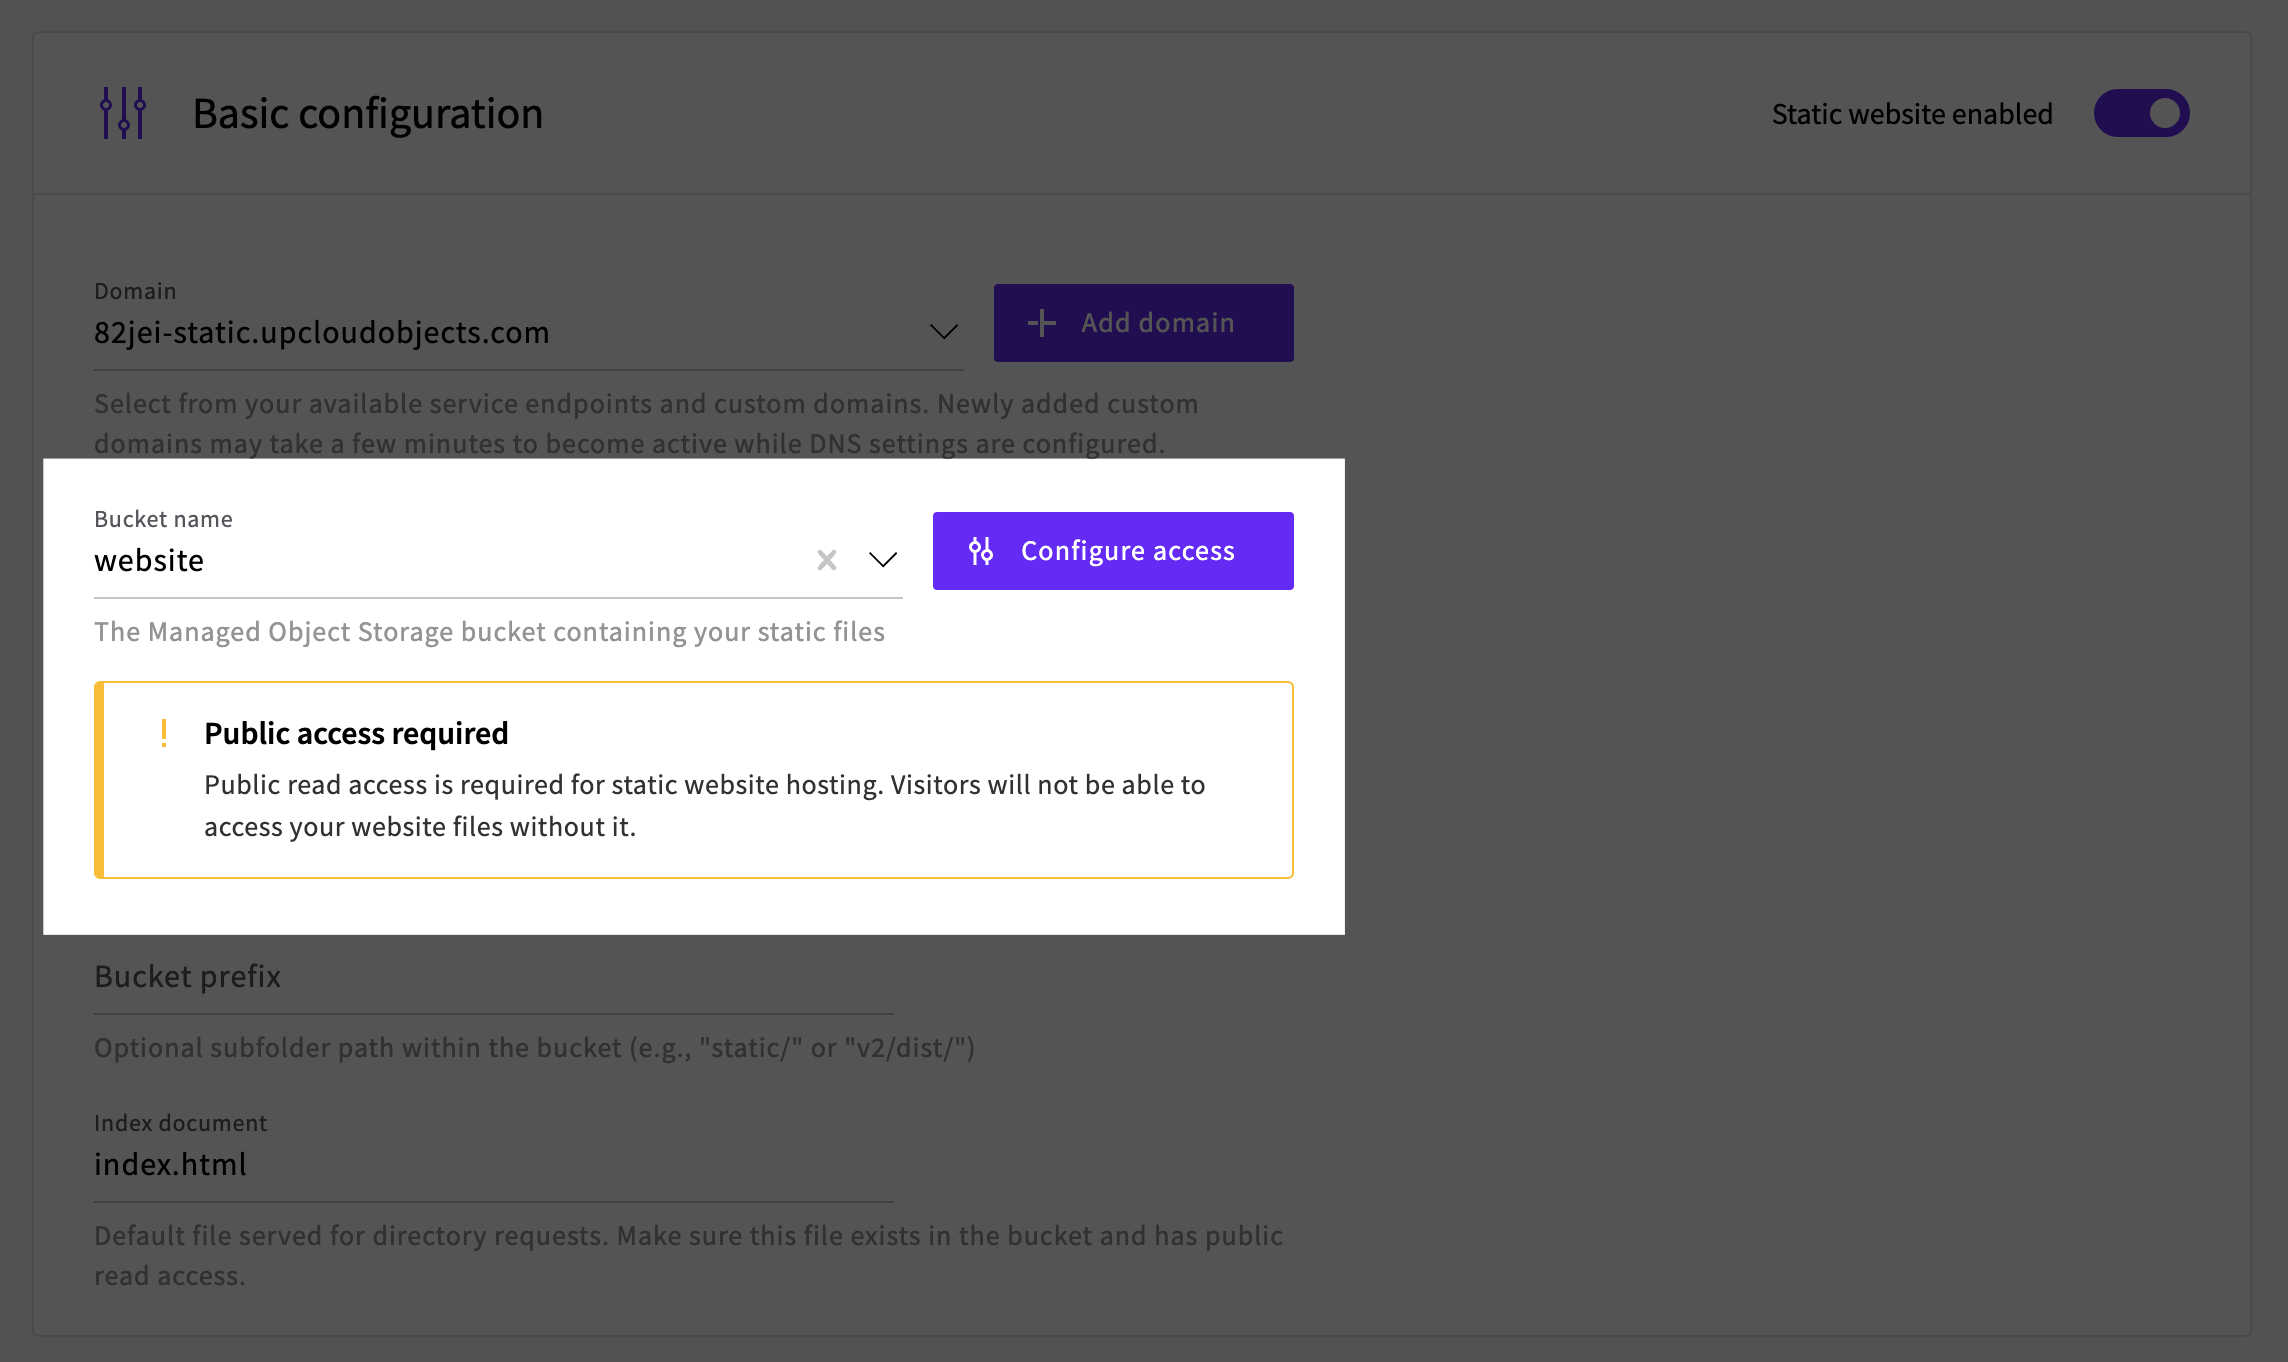
Bucket
Select the bucket where your website files are stored from the Bucket name dropdown. Buckets hosting a static site must have public read access enabled. If the selected bucket does not have public access enabled, you will see a Public access required warning.
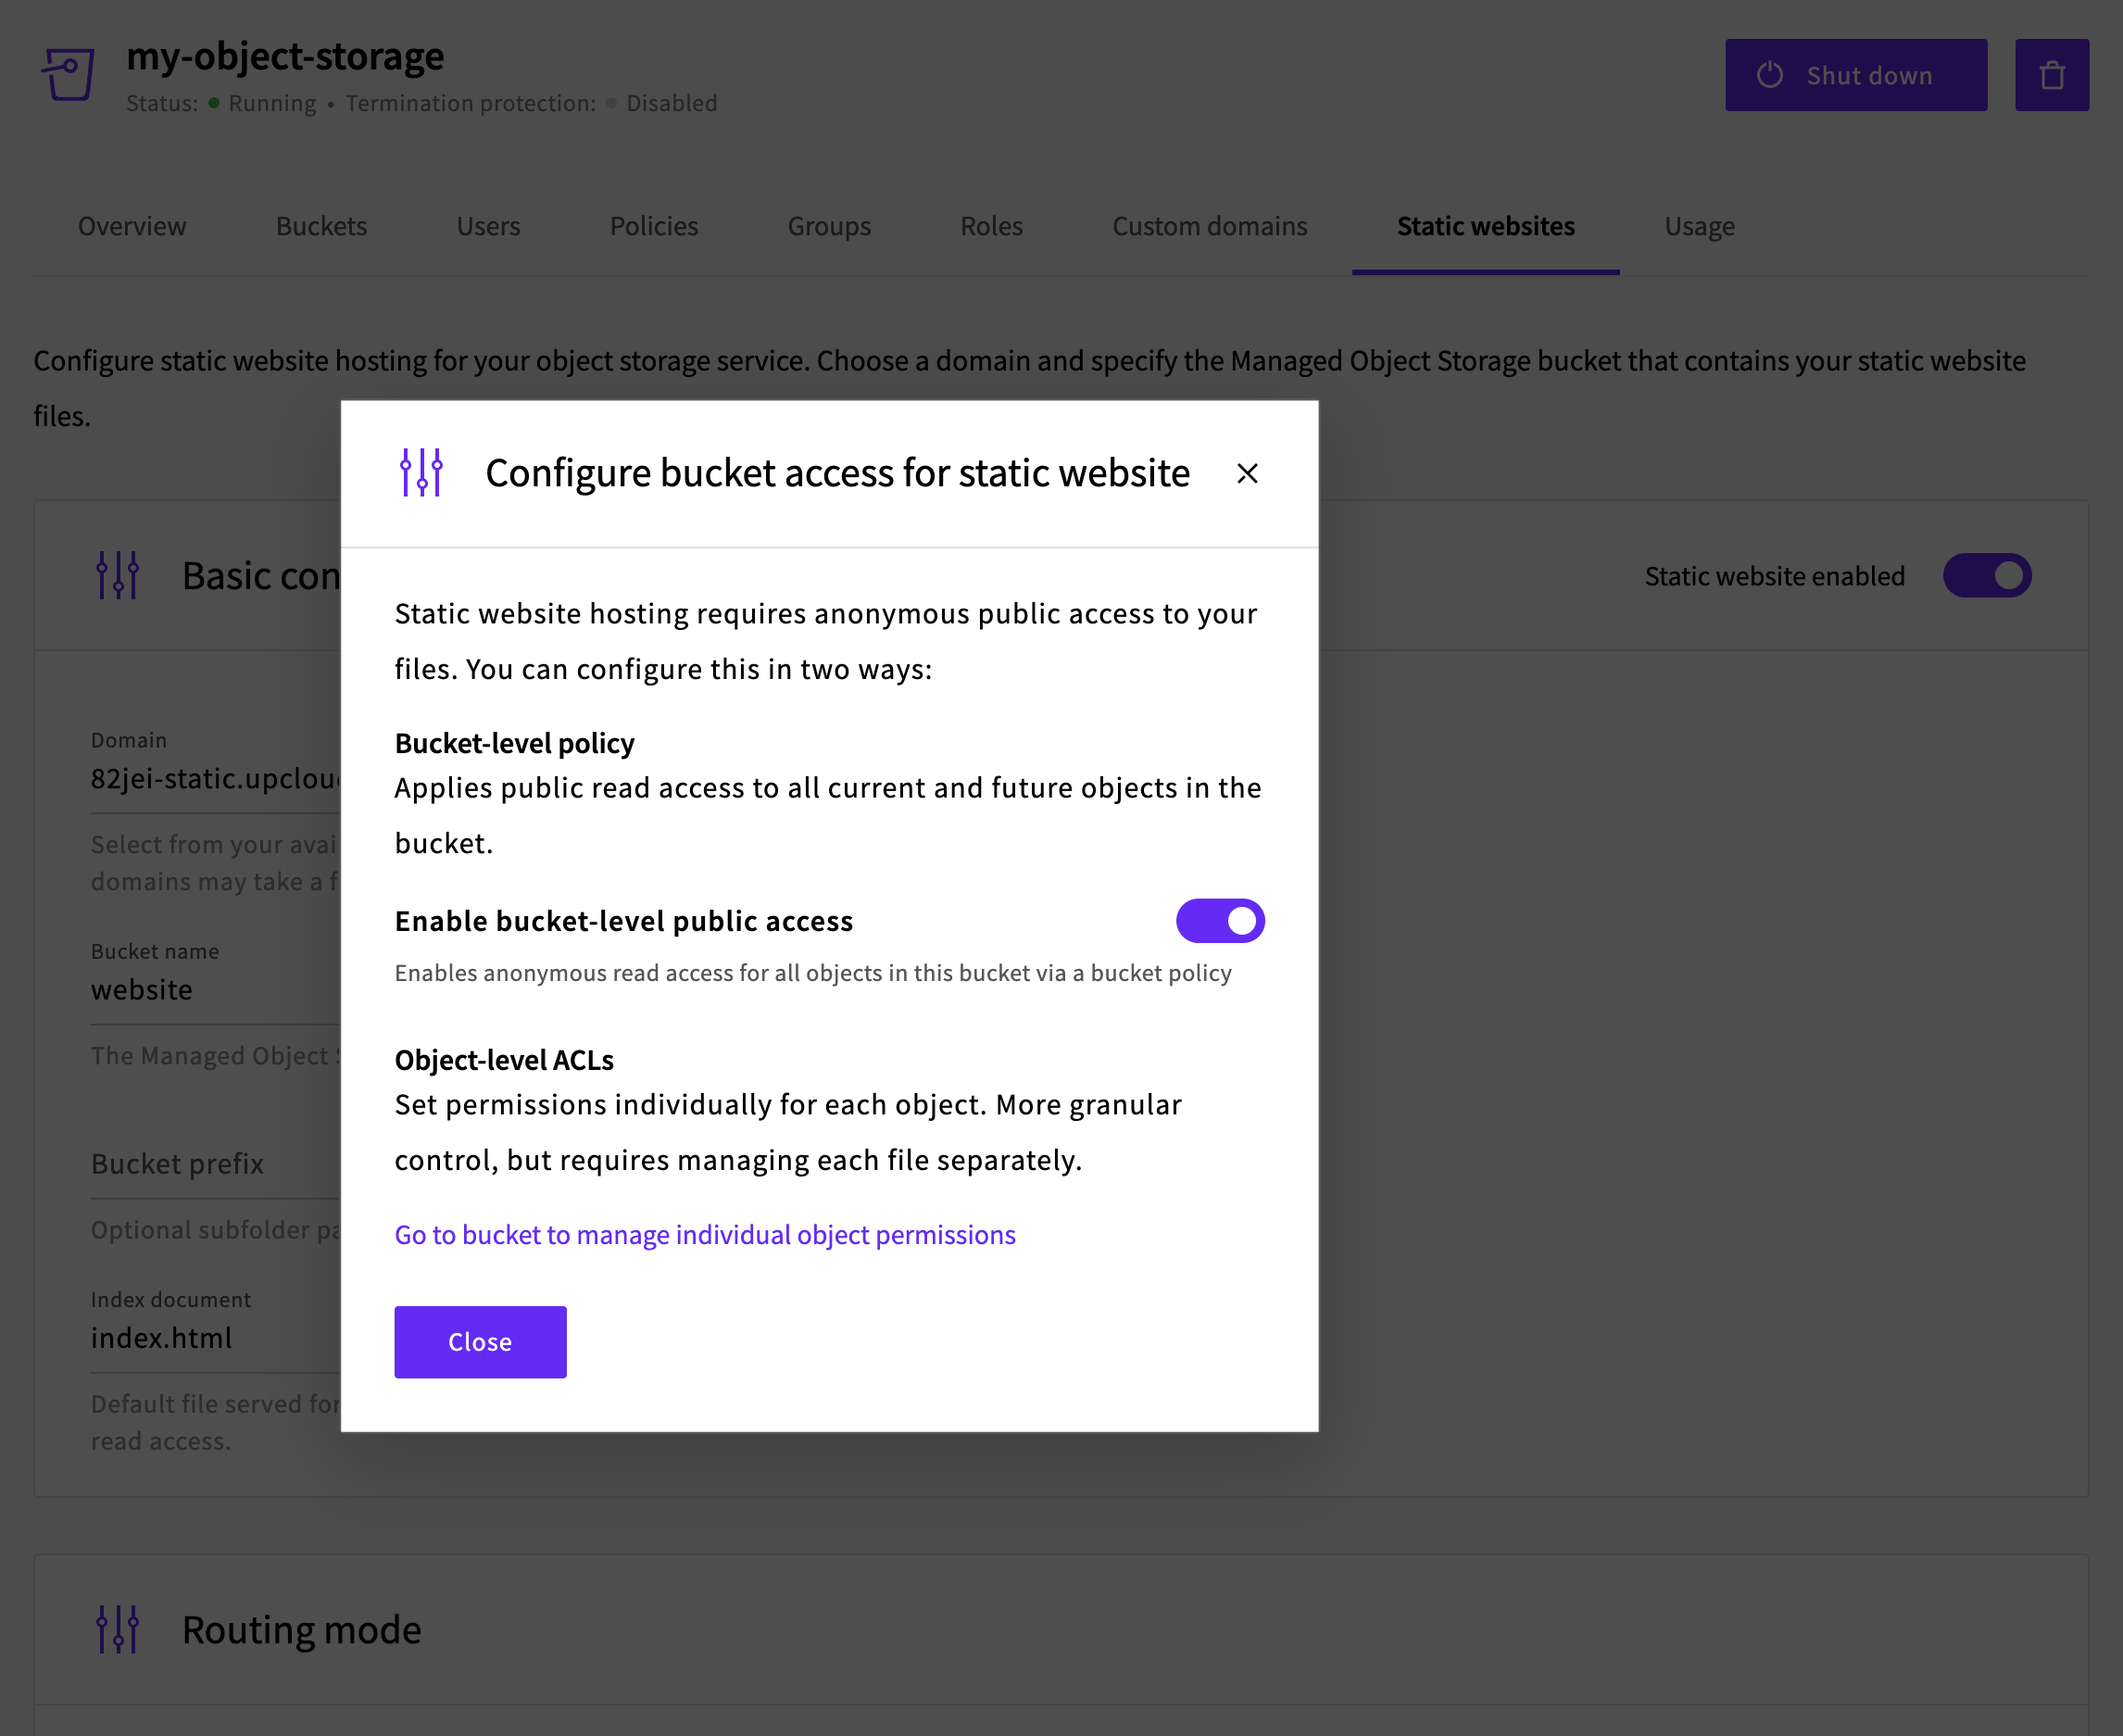
To enable public access, click the Configure access button. In the dialog that appears, you have two options:
- Bucket-level policy - Applies public read access to all current and future objects in the bucket. Toggle on Enable bucket-level public access to use this option. This is the recommended approach for static website hosting.
- Object-level ACLs - Sets permissions individually for each object, giving more granular control but requiring you to manage each file separately.
The Bucket prefix option is useful if your website files are not in the root of your bucket. For example, if your website files are in a subfolder called public, you would enter public/ as the prefix. You can also use nested prefixes like v2/dist/.
The Index document field specifies the default file served for directory requests. This is usually index.html, which is pre-filled. You can change this if your site uses a different filename as its entry point.
Routing mode
Choose how the server routes incoming requests to your content.
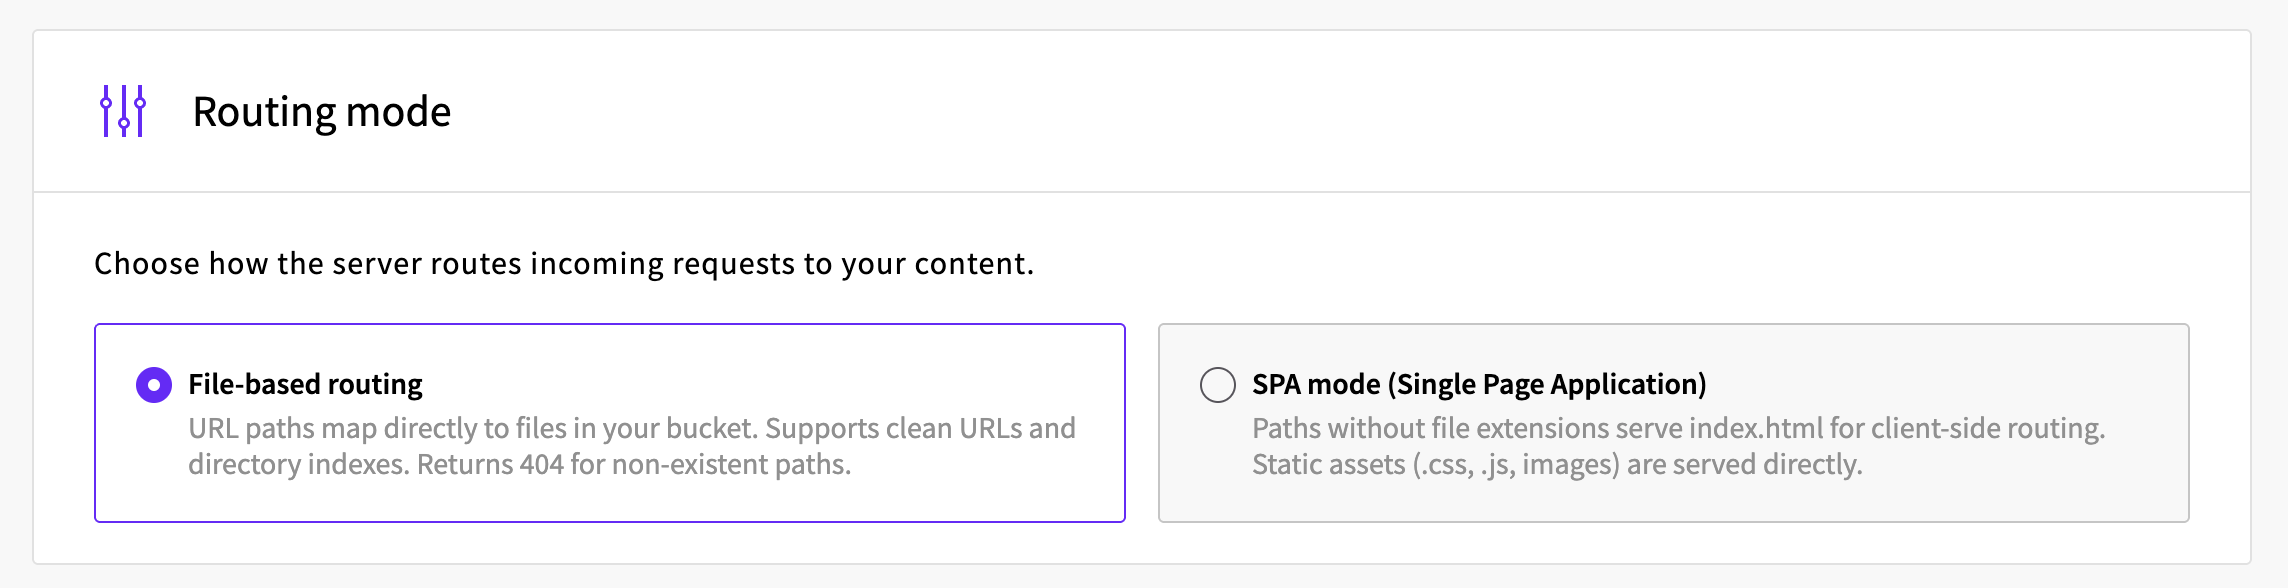
- File-based routing - URL paths map directly to files in your bucket. Supports clean URLs and directory indexes. Returns a 404 error for non-existent paths. This is the best option for multi-page static sites built with tools like Hugo, Jekyll, Gatsby, Astro, or Hexo.
- SPA mode (Single Page Application) - Paths without file extensions serve
index.htmlfor client-side routing, while static assets (.css,.js, images) are served directly. This is designed for single-page applications (SPA's) built with frameworks like React, Vue, or Angular.
For most static sites, select File-based routing.
Error pages (optional)
You can configure custom error pages for your site, such as a branded 404 "Not Found" page. Click + Add error page to open the configuration dialog.

Select the error type from the Match type dropdown. The available options are:
- 404 - Not Found
- 403 - Forbidden
- 500 - Internal Server Error
- 503 - Service Unavailable
- 4xx - All client errors (400-499)
- 5xx - All server errors (500-599)
- Custom code
Then enter the path to the HTML file in your bucket in the Error document field (e.g., errors/404.html or 404.html). Click Save to add the error page.
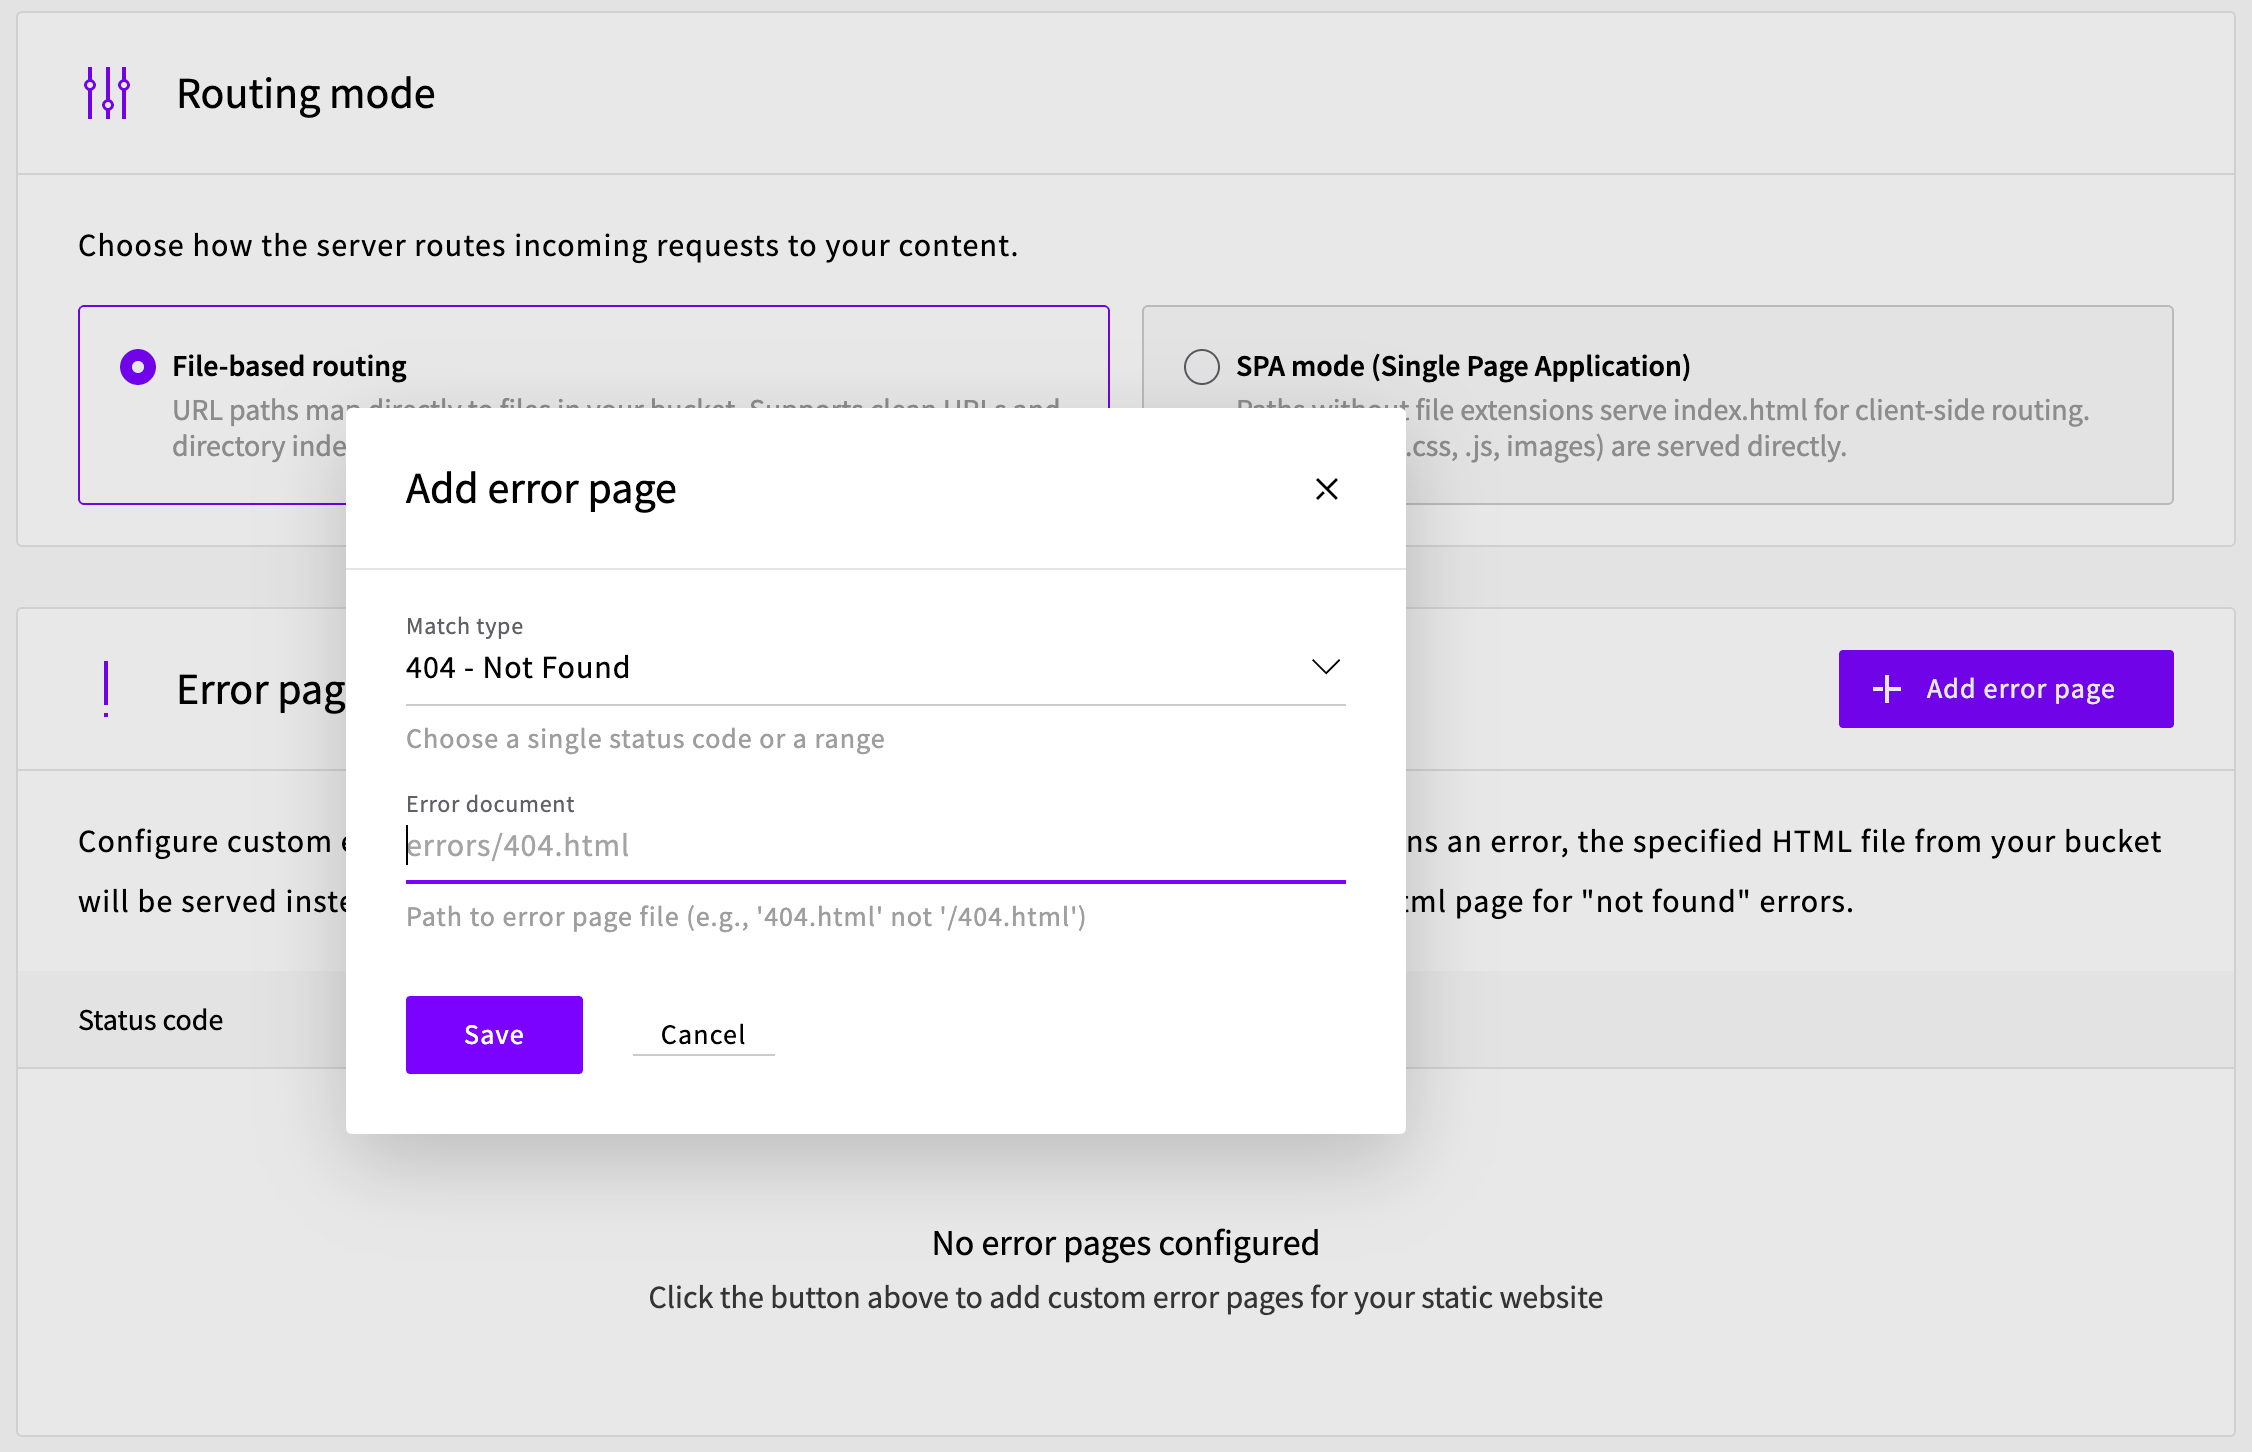
This is optional - if no custom error pages are configured, a default error page will be shown.
Create the static website
Once you have configured all the settings, click the Create button at the bottom of the page to enable static hosting.
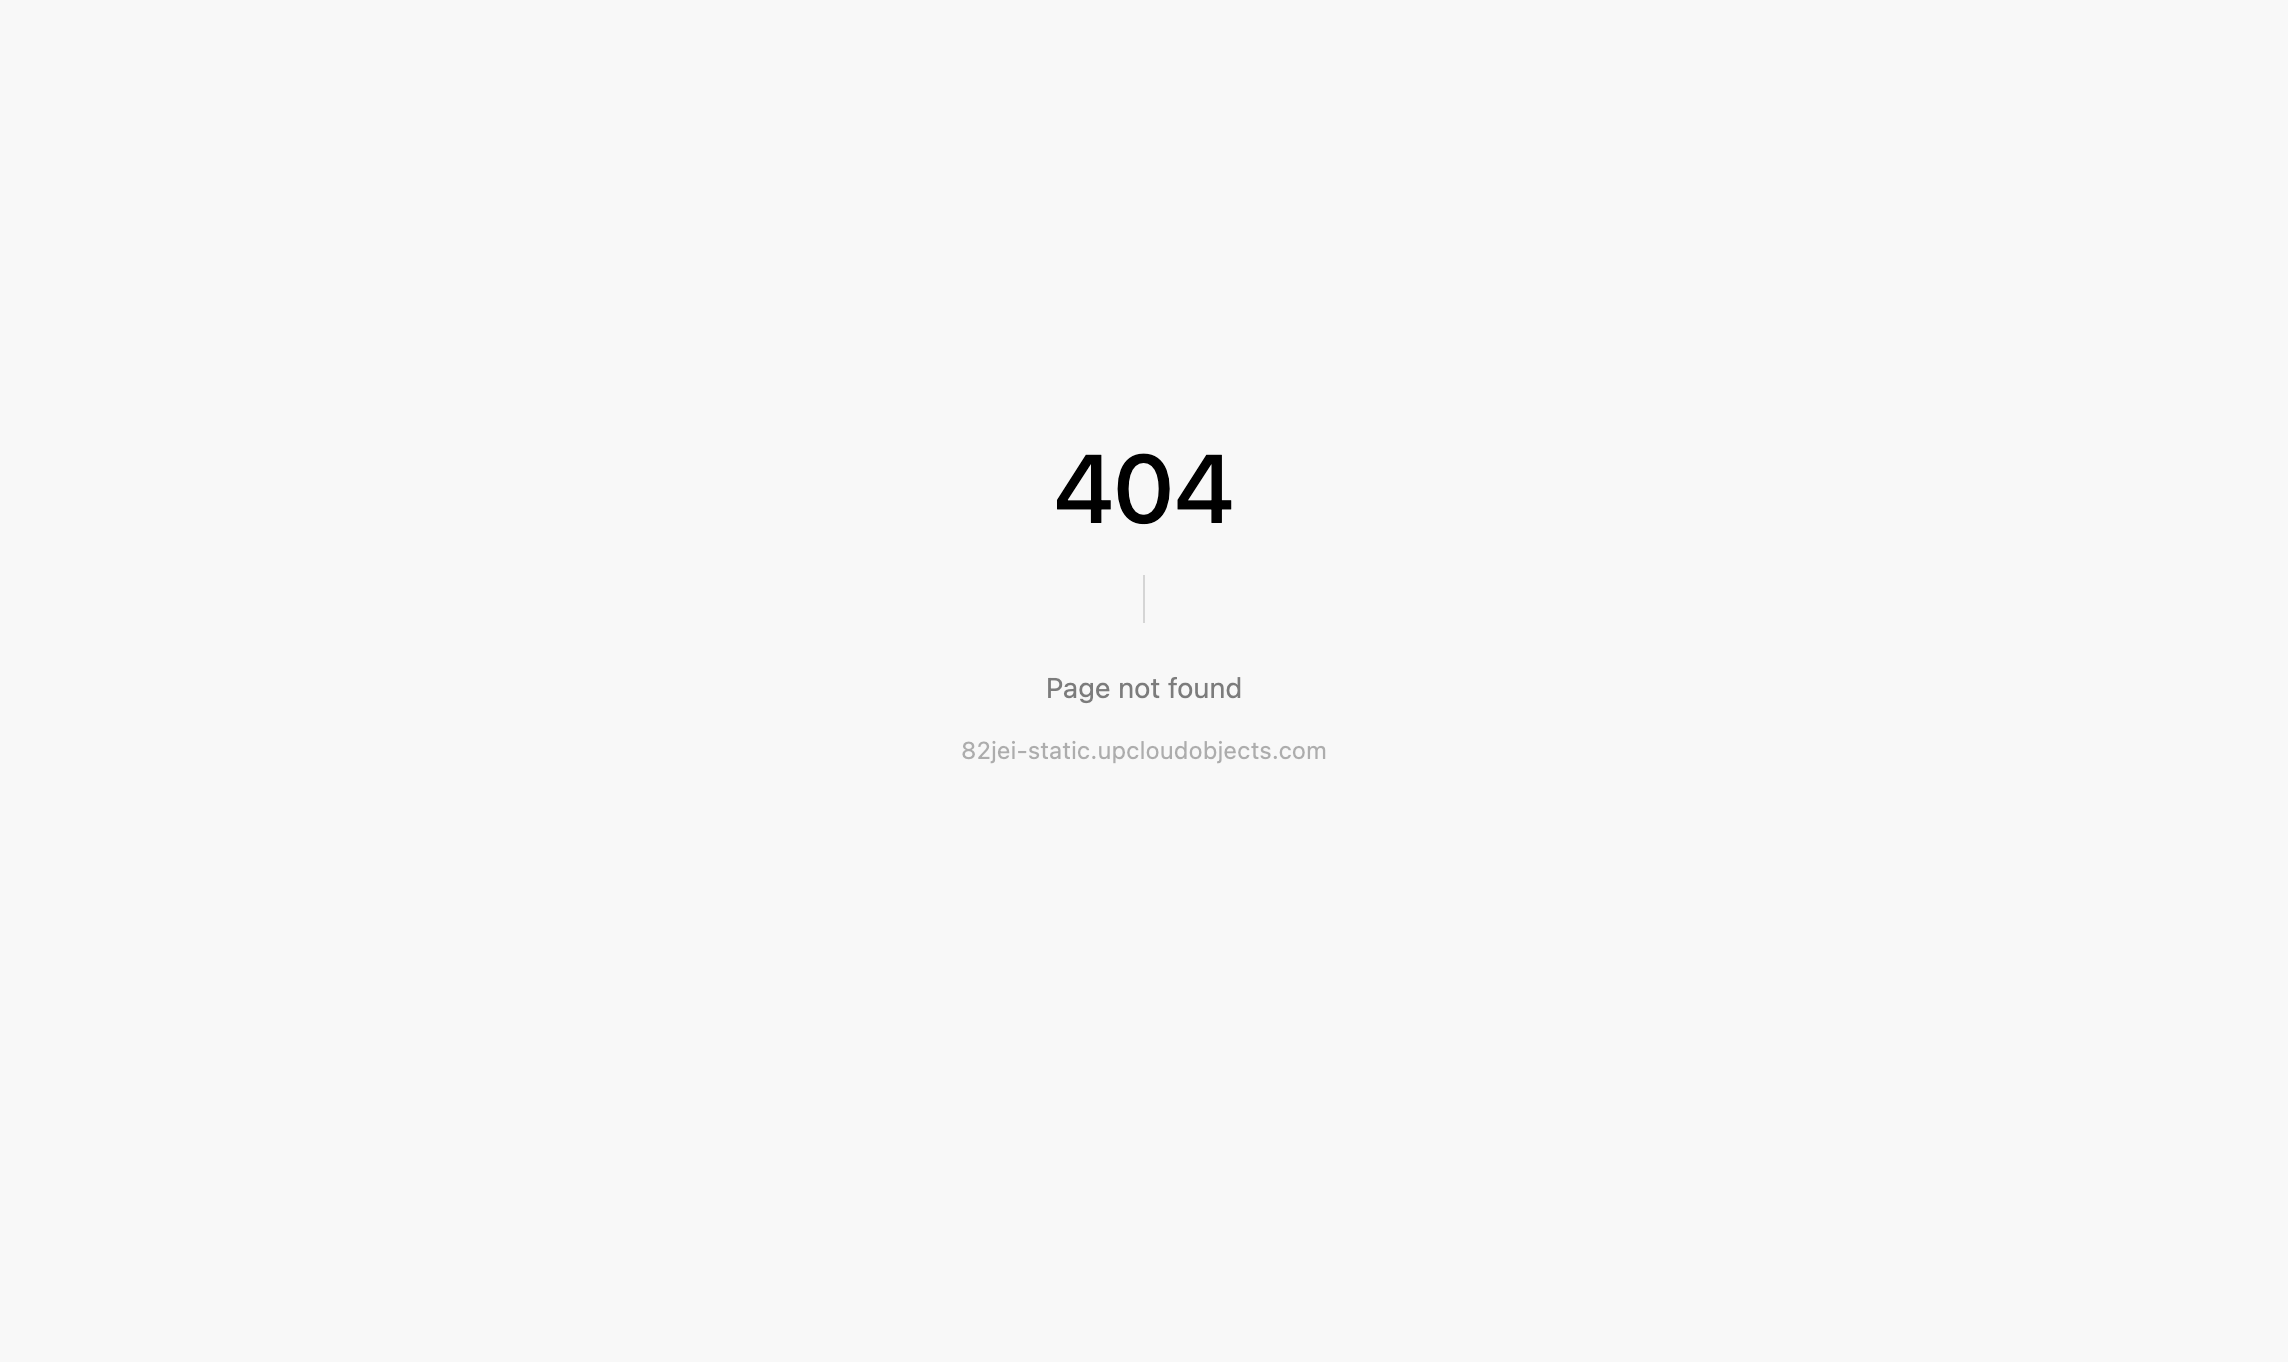
Step 4: Verify your website
After creating the static website configuration, your Object Storage instance status will briefly show as yellow while the necessary setup is completed. When it turns green and shows Running, your site is ready. You can click the View website link next to your site in the Static websites tab to open it directly, or copy the endpoint URL and navigate to it in your browser.
Check that:
- The homepage (
index.html) loads - CSS styles are applied correctly
- JavaScript functionality works
- Images and other assets load properly
- Internal links navigate correctly
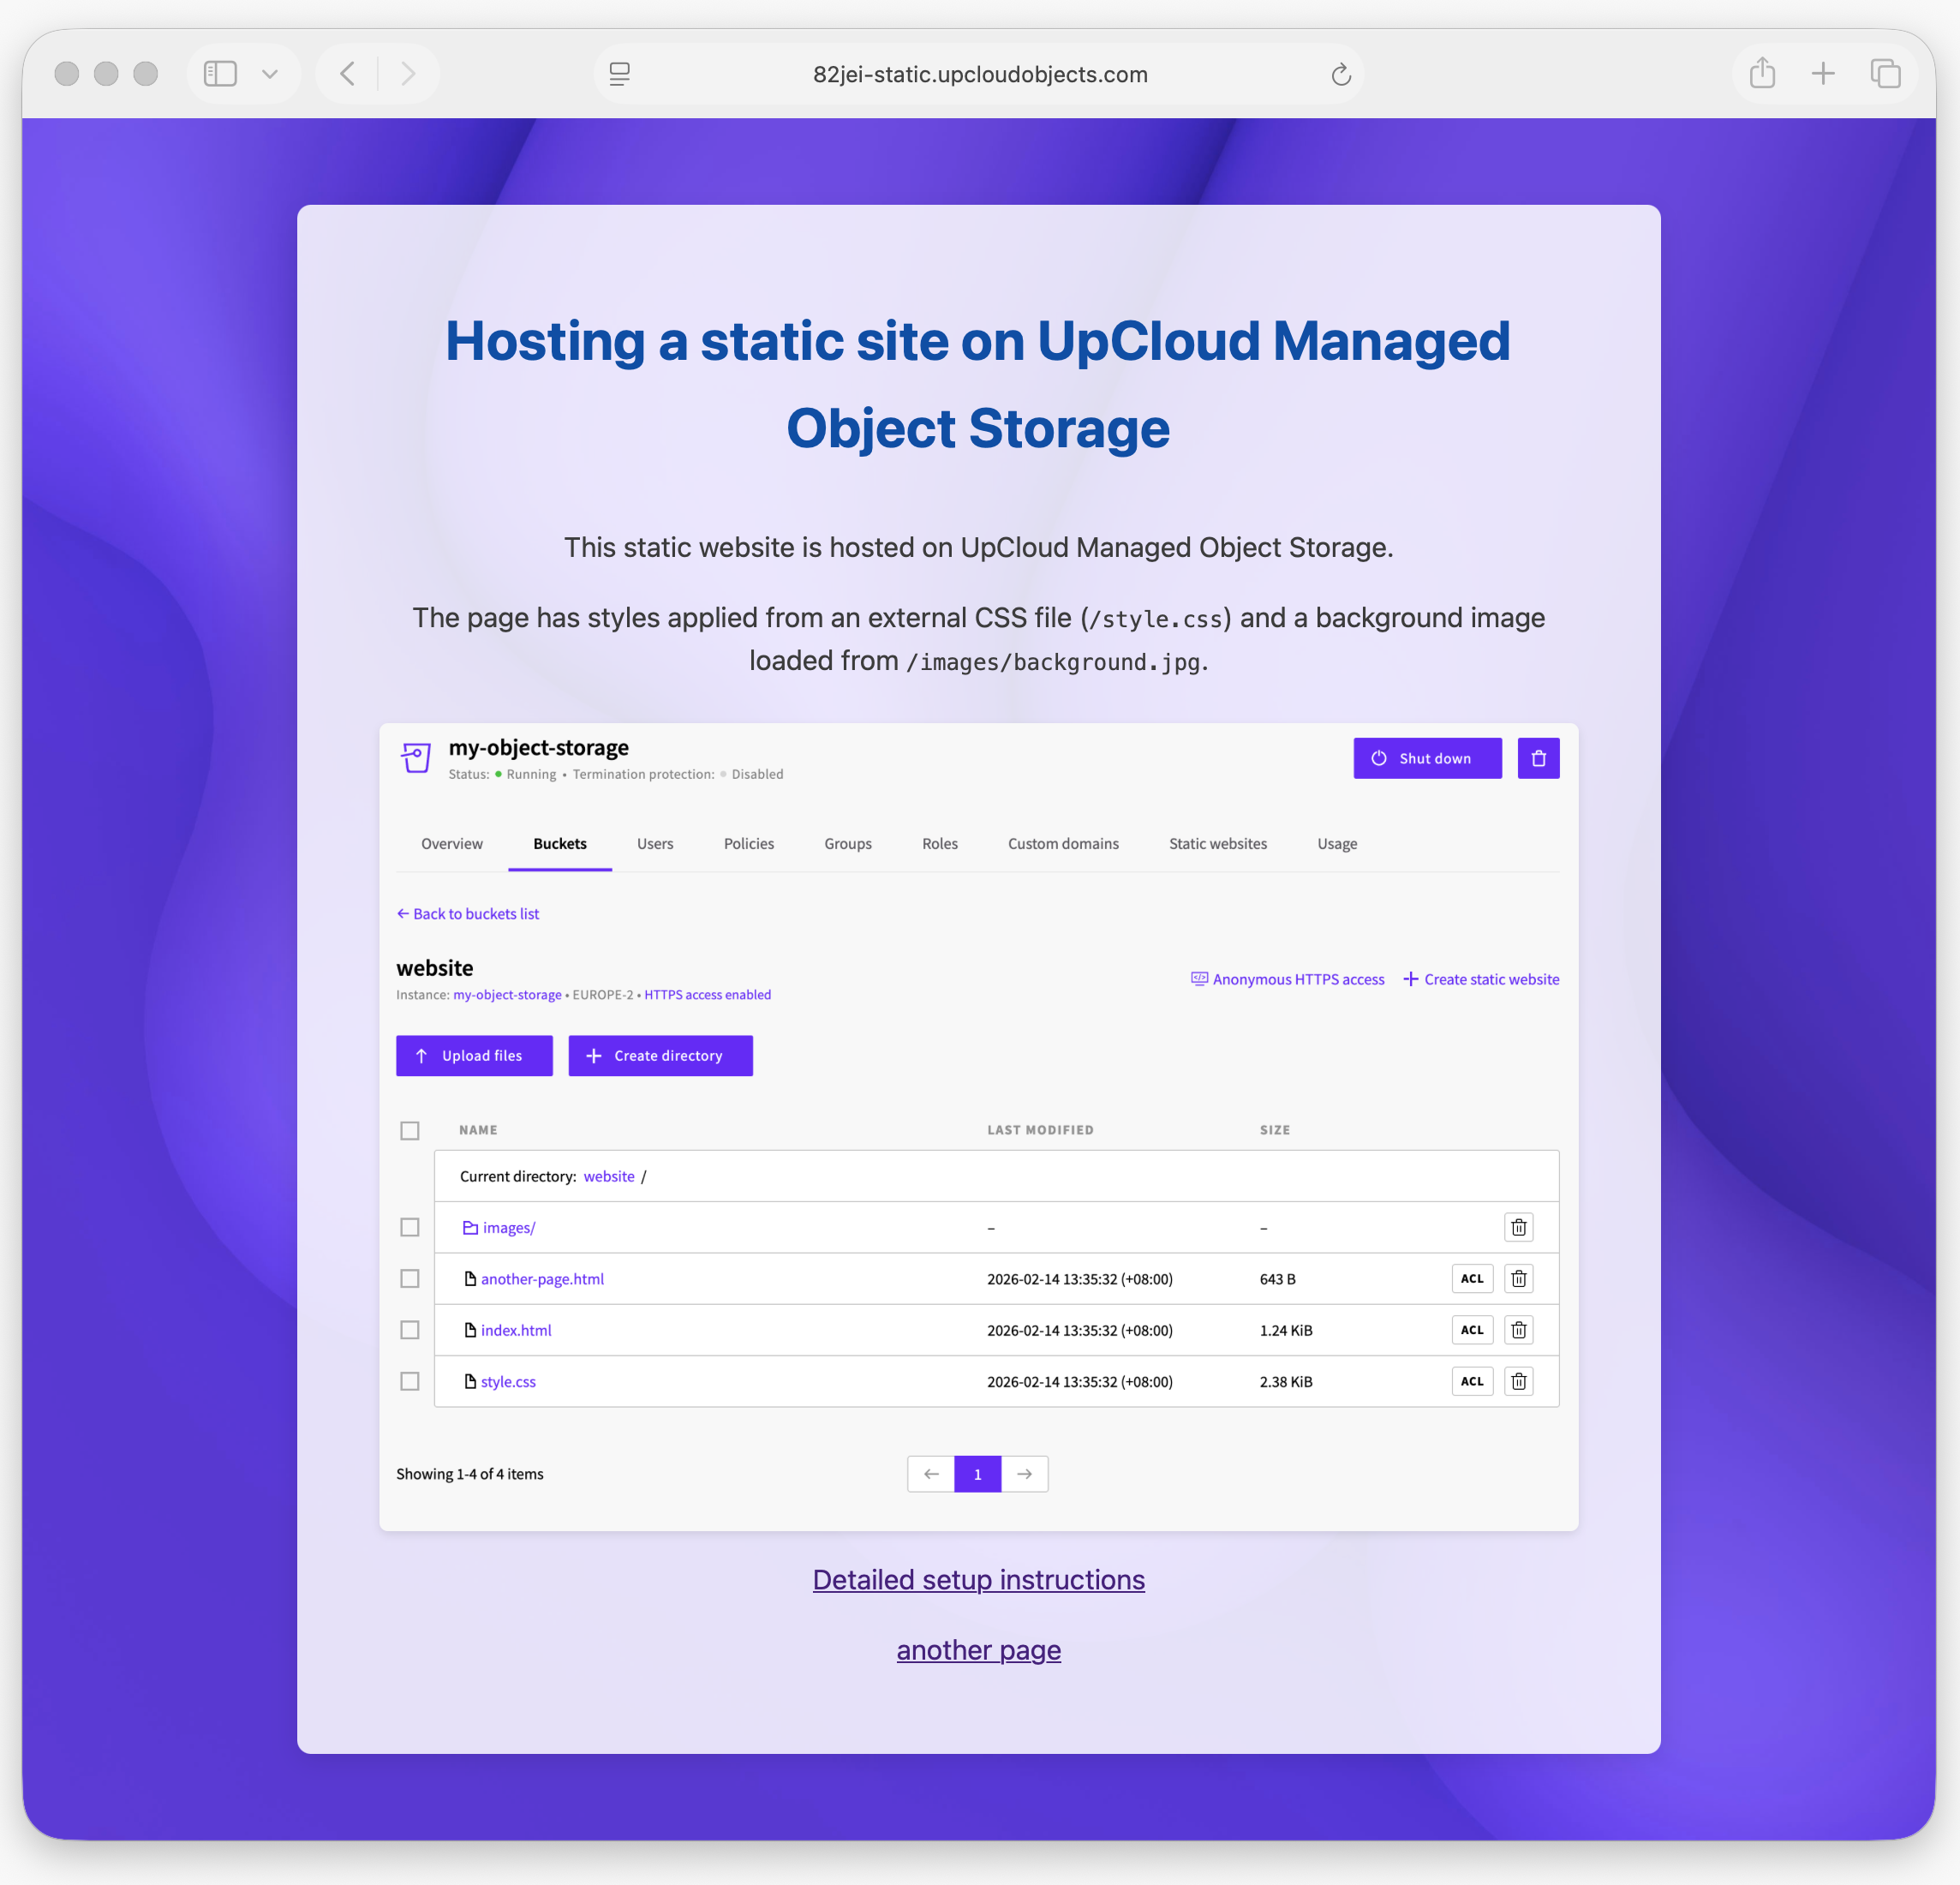
Note that in the image above, the navigation bar shows that this website is being served from a domain that’s been automatically generated for you, in this case https://82jei-static.upcloudobjects.com
Step 5: Configure a custom domain (optional)
To serve your site from a custom domain (e.g., yourdomain.com) instead of the default Object Storage endpoint, you can attach a custom domain during static site creation.
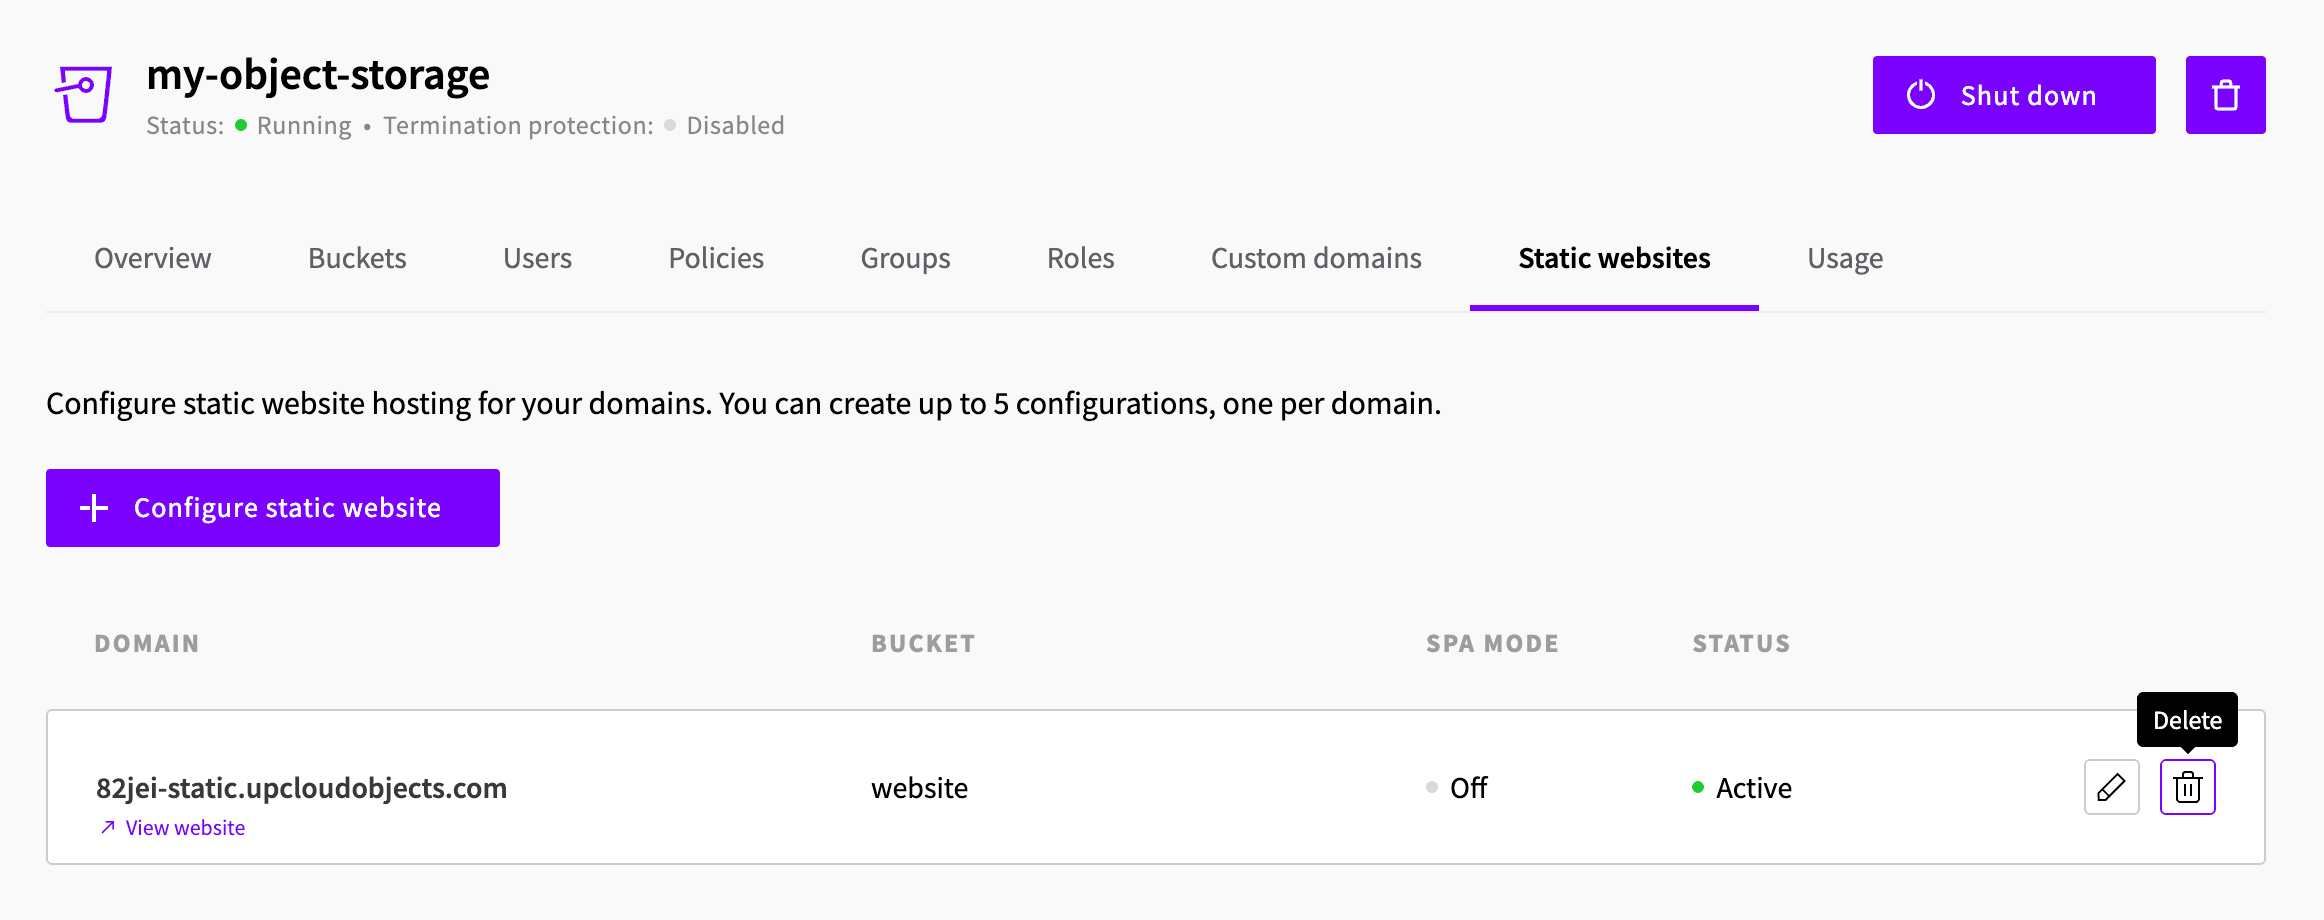
Important: Custom domains can only be configured when creating a new static website. If you have already created a site without a custom domain, you will need to delete the existing configuration and create a new one. Deleting a static website configuration only removes the hosting settings - your website files in the bucket are not affected.
To delete an existing configuration, go to the Static websites tab, find your site in the list, and click the delete (trash can) icon.
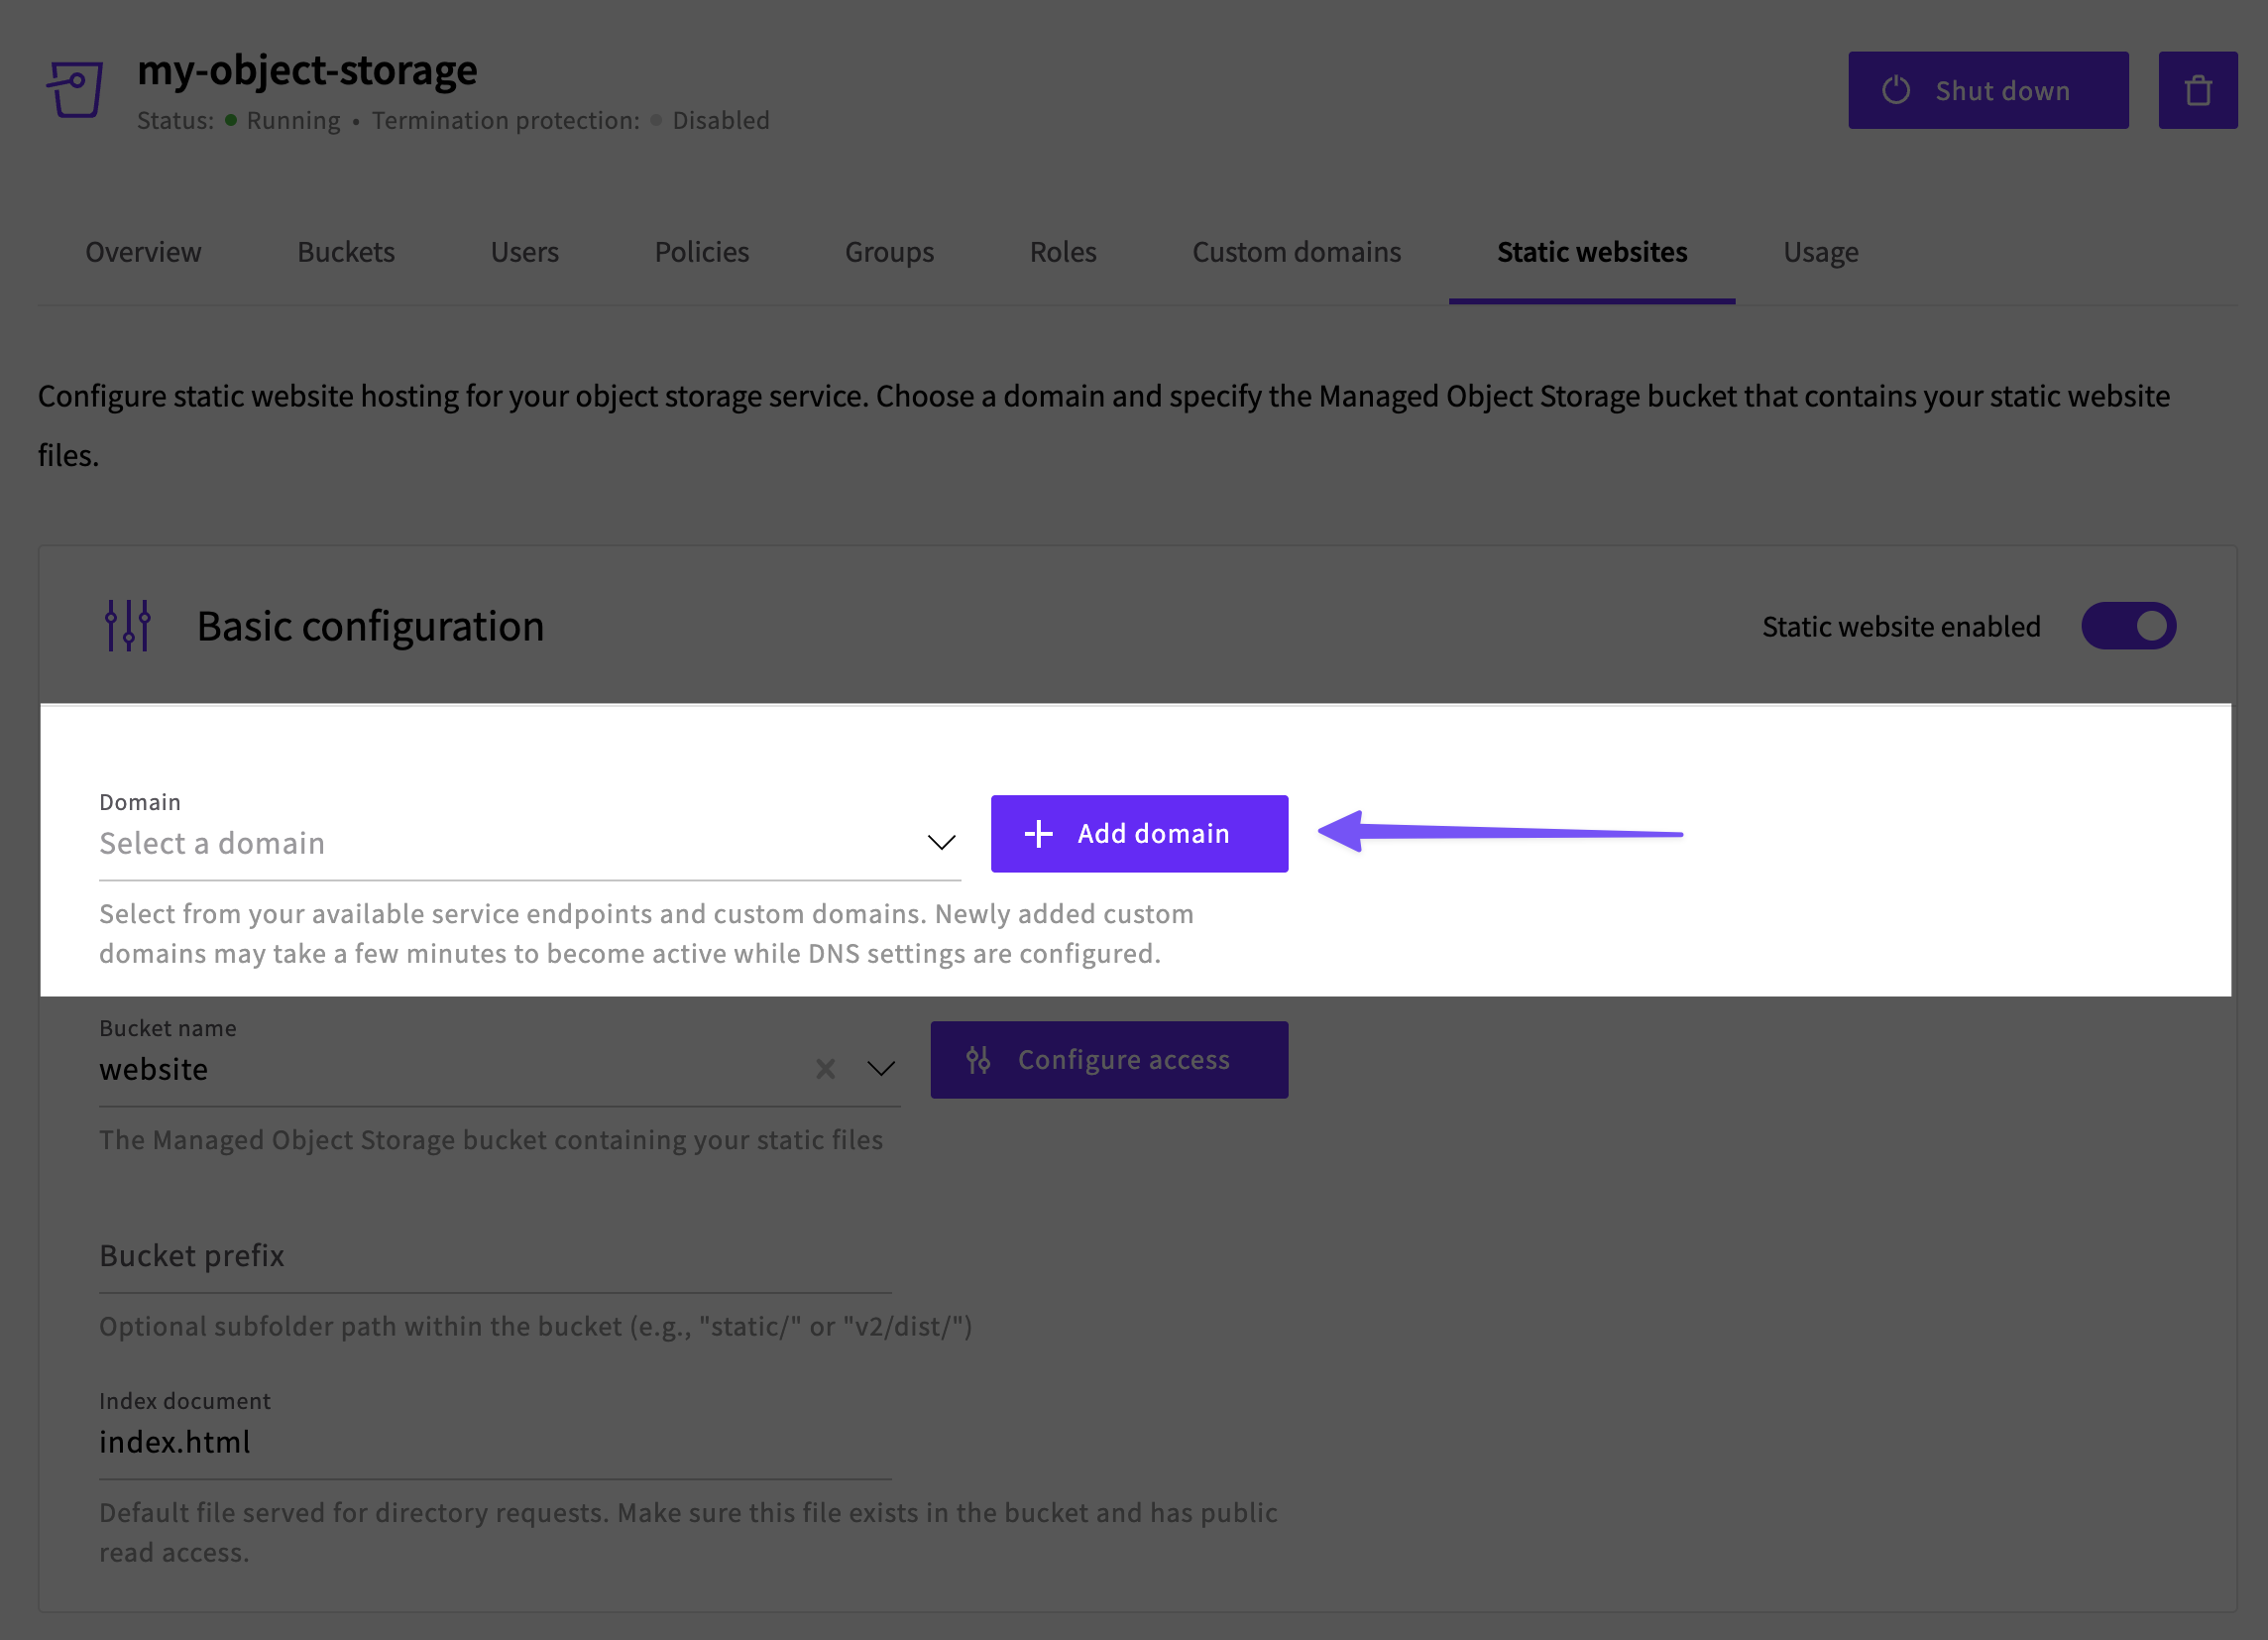
With the previous configuration deleted, click + Configure static website to start again. This time, in the Domain section, click the + Add domain button instead of selecting the default endpoint.
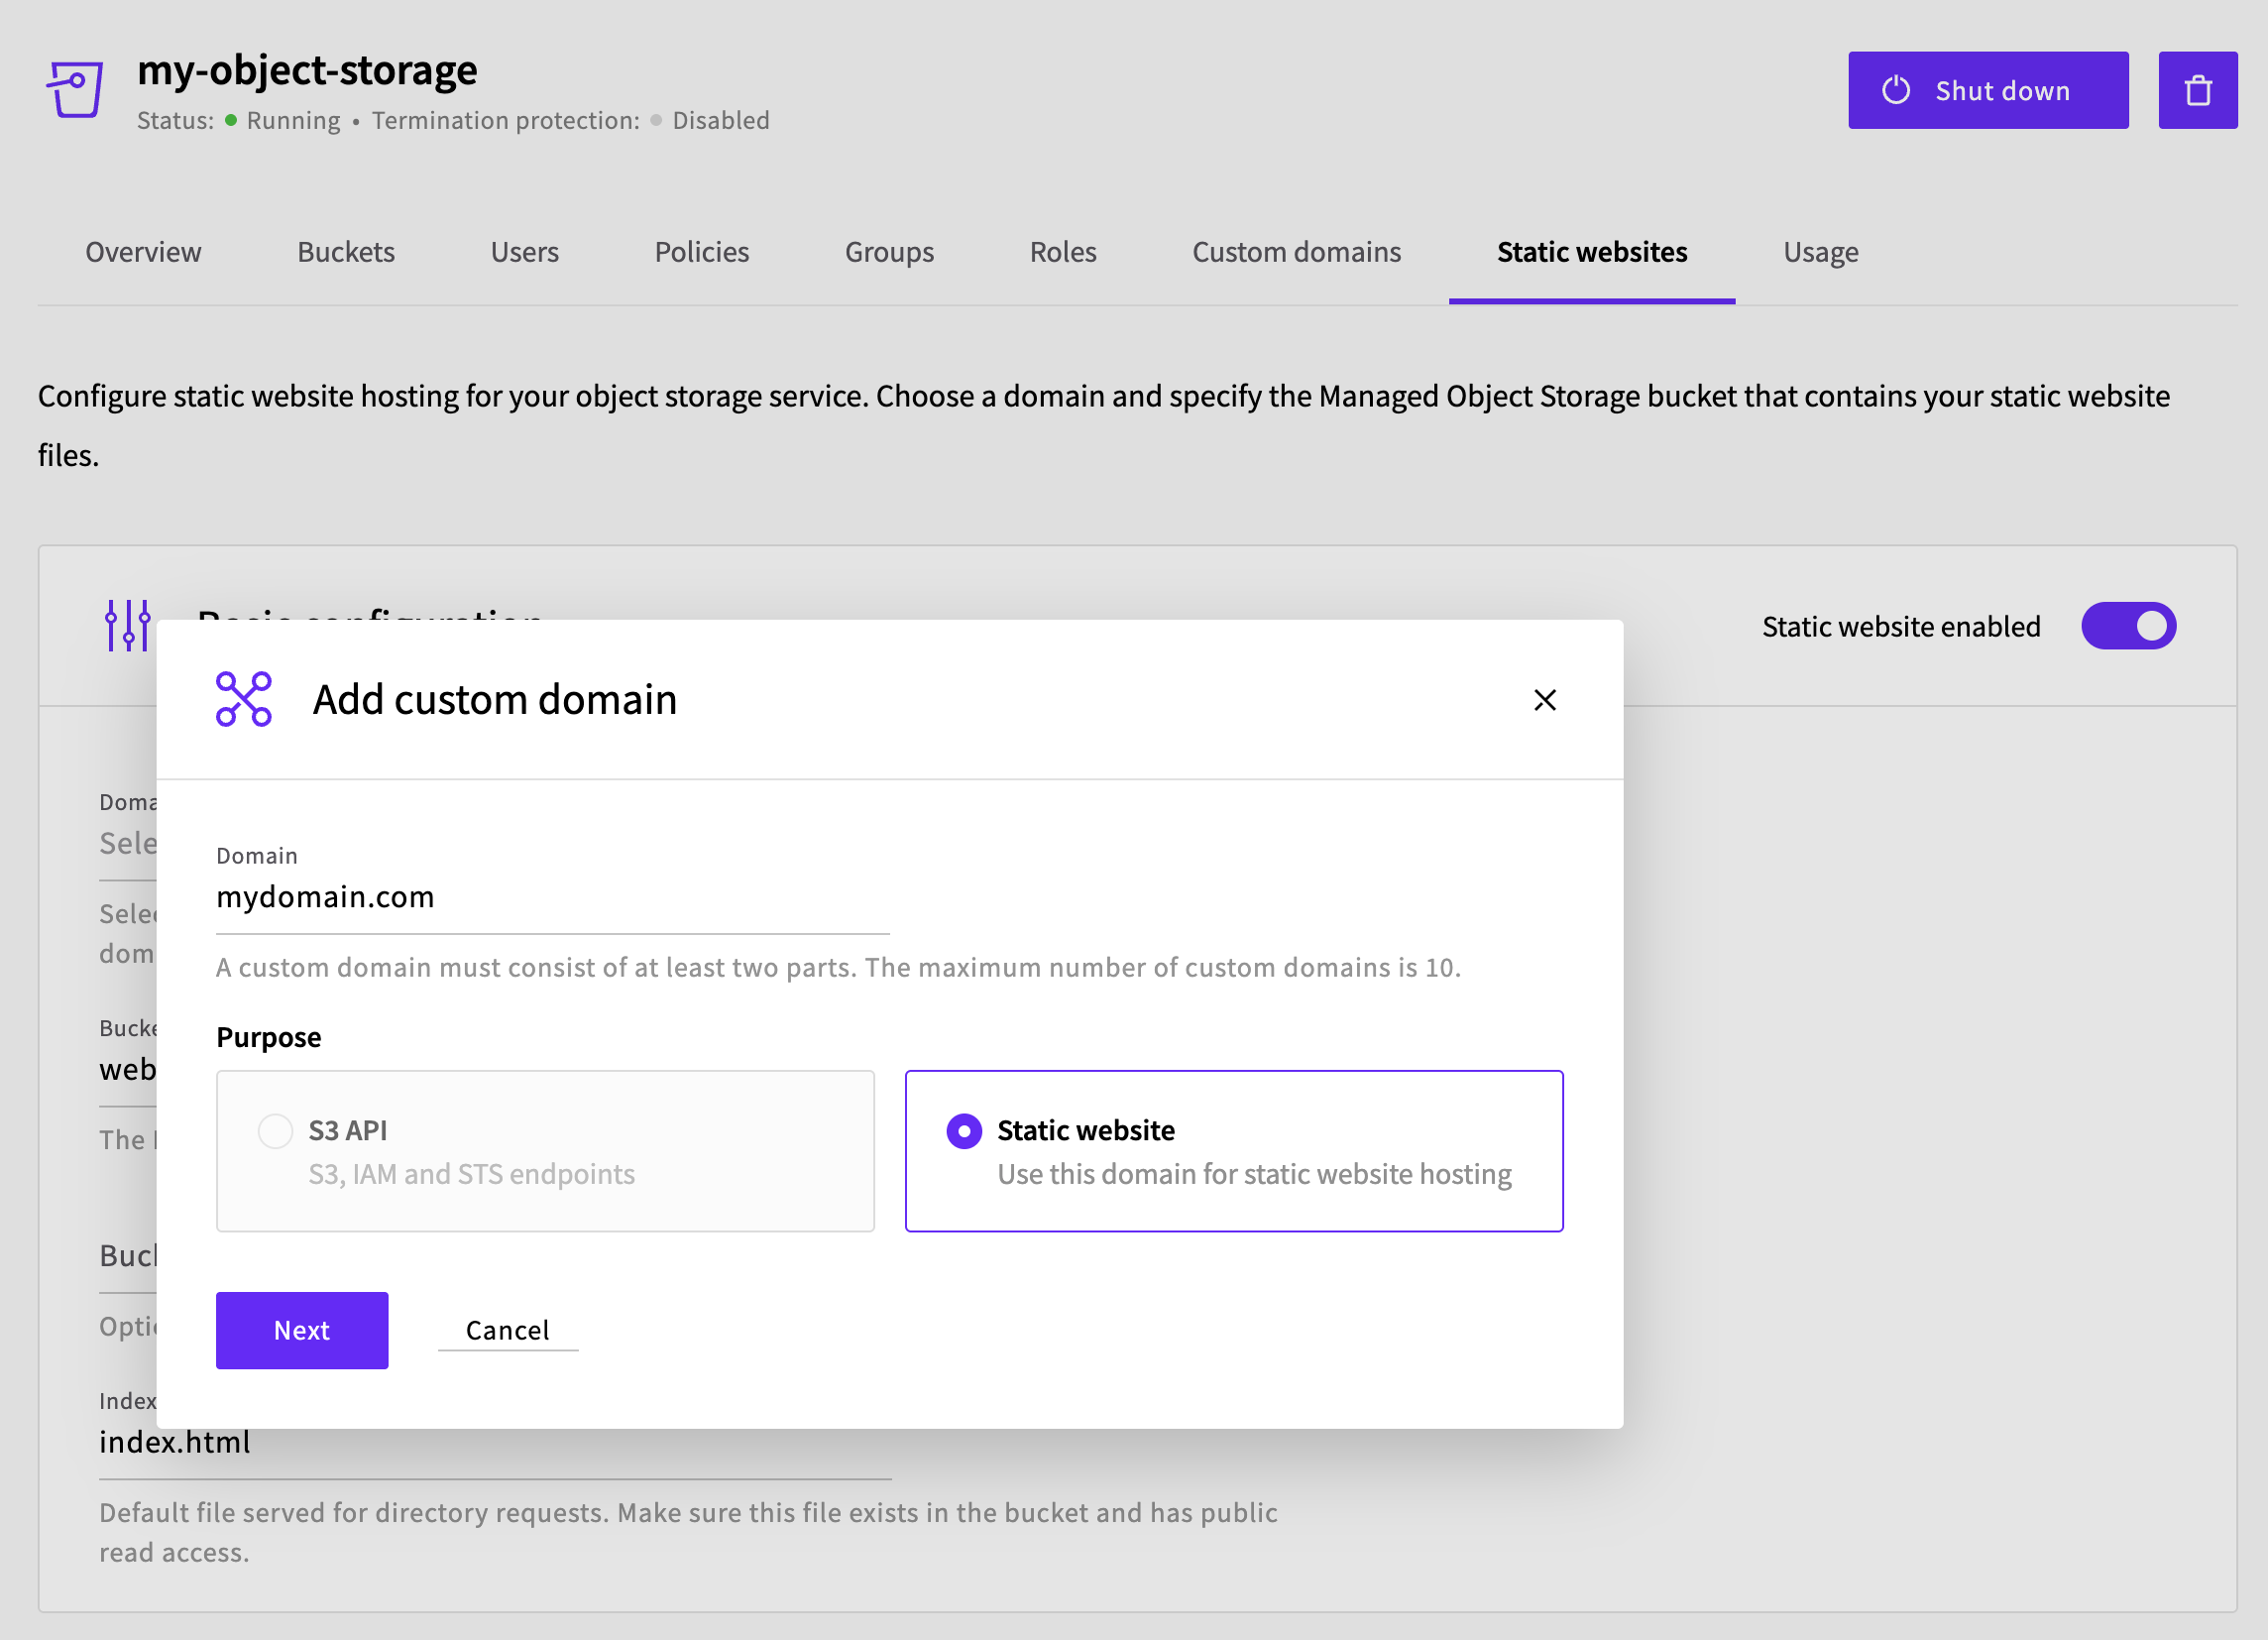
In the dialog that appears, enter your custom domain in the Domain field and select Static website as the purpose. Click Next to continue.
The next screen displays the DNS records you need to add at your domain provider's control panel. You will typically see:
- A CNAME record for the ACME challenge (used for automatic SSL certificate provisioning)
- An ALIAS or CNAME record pointing your root domain to the Object Storage endpoint
- A CNAME record for the
wwwsubdomain (if applicable)
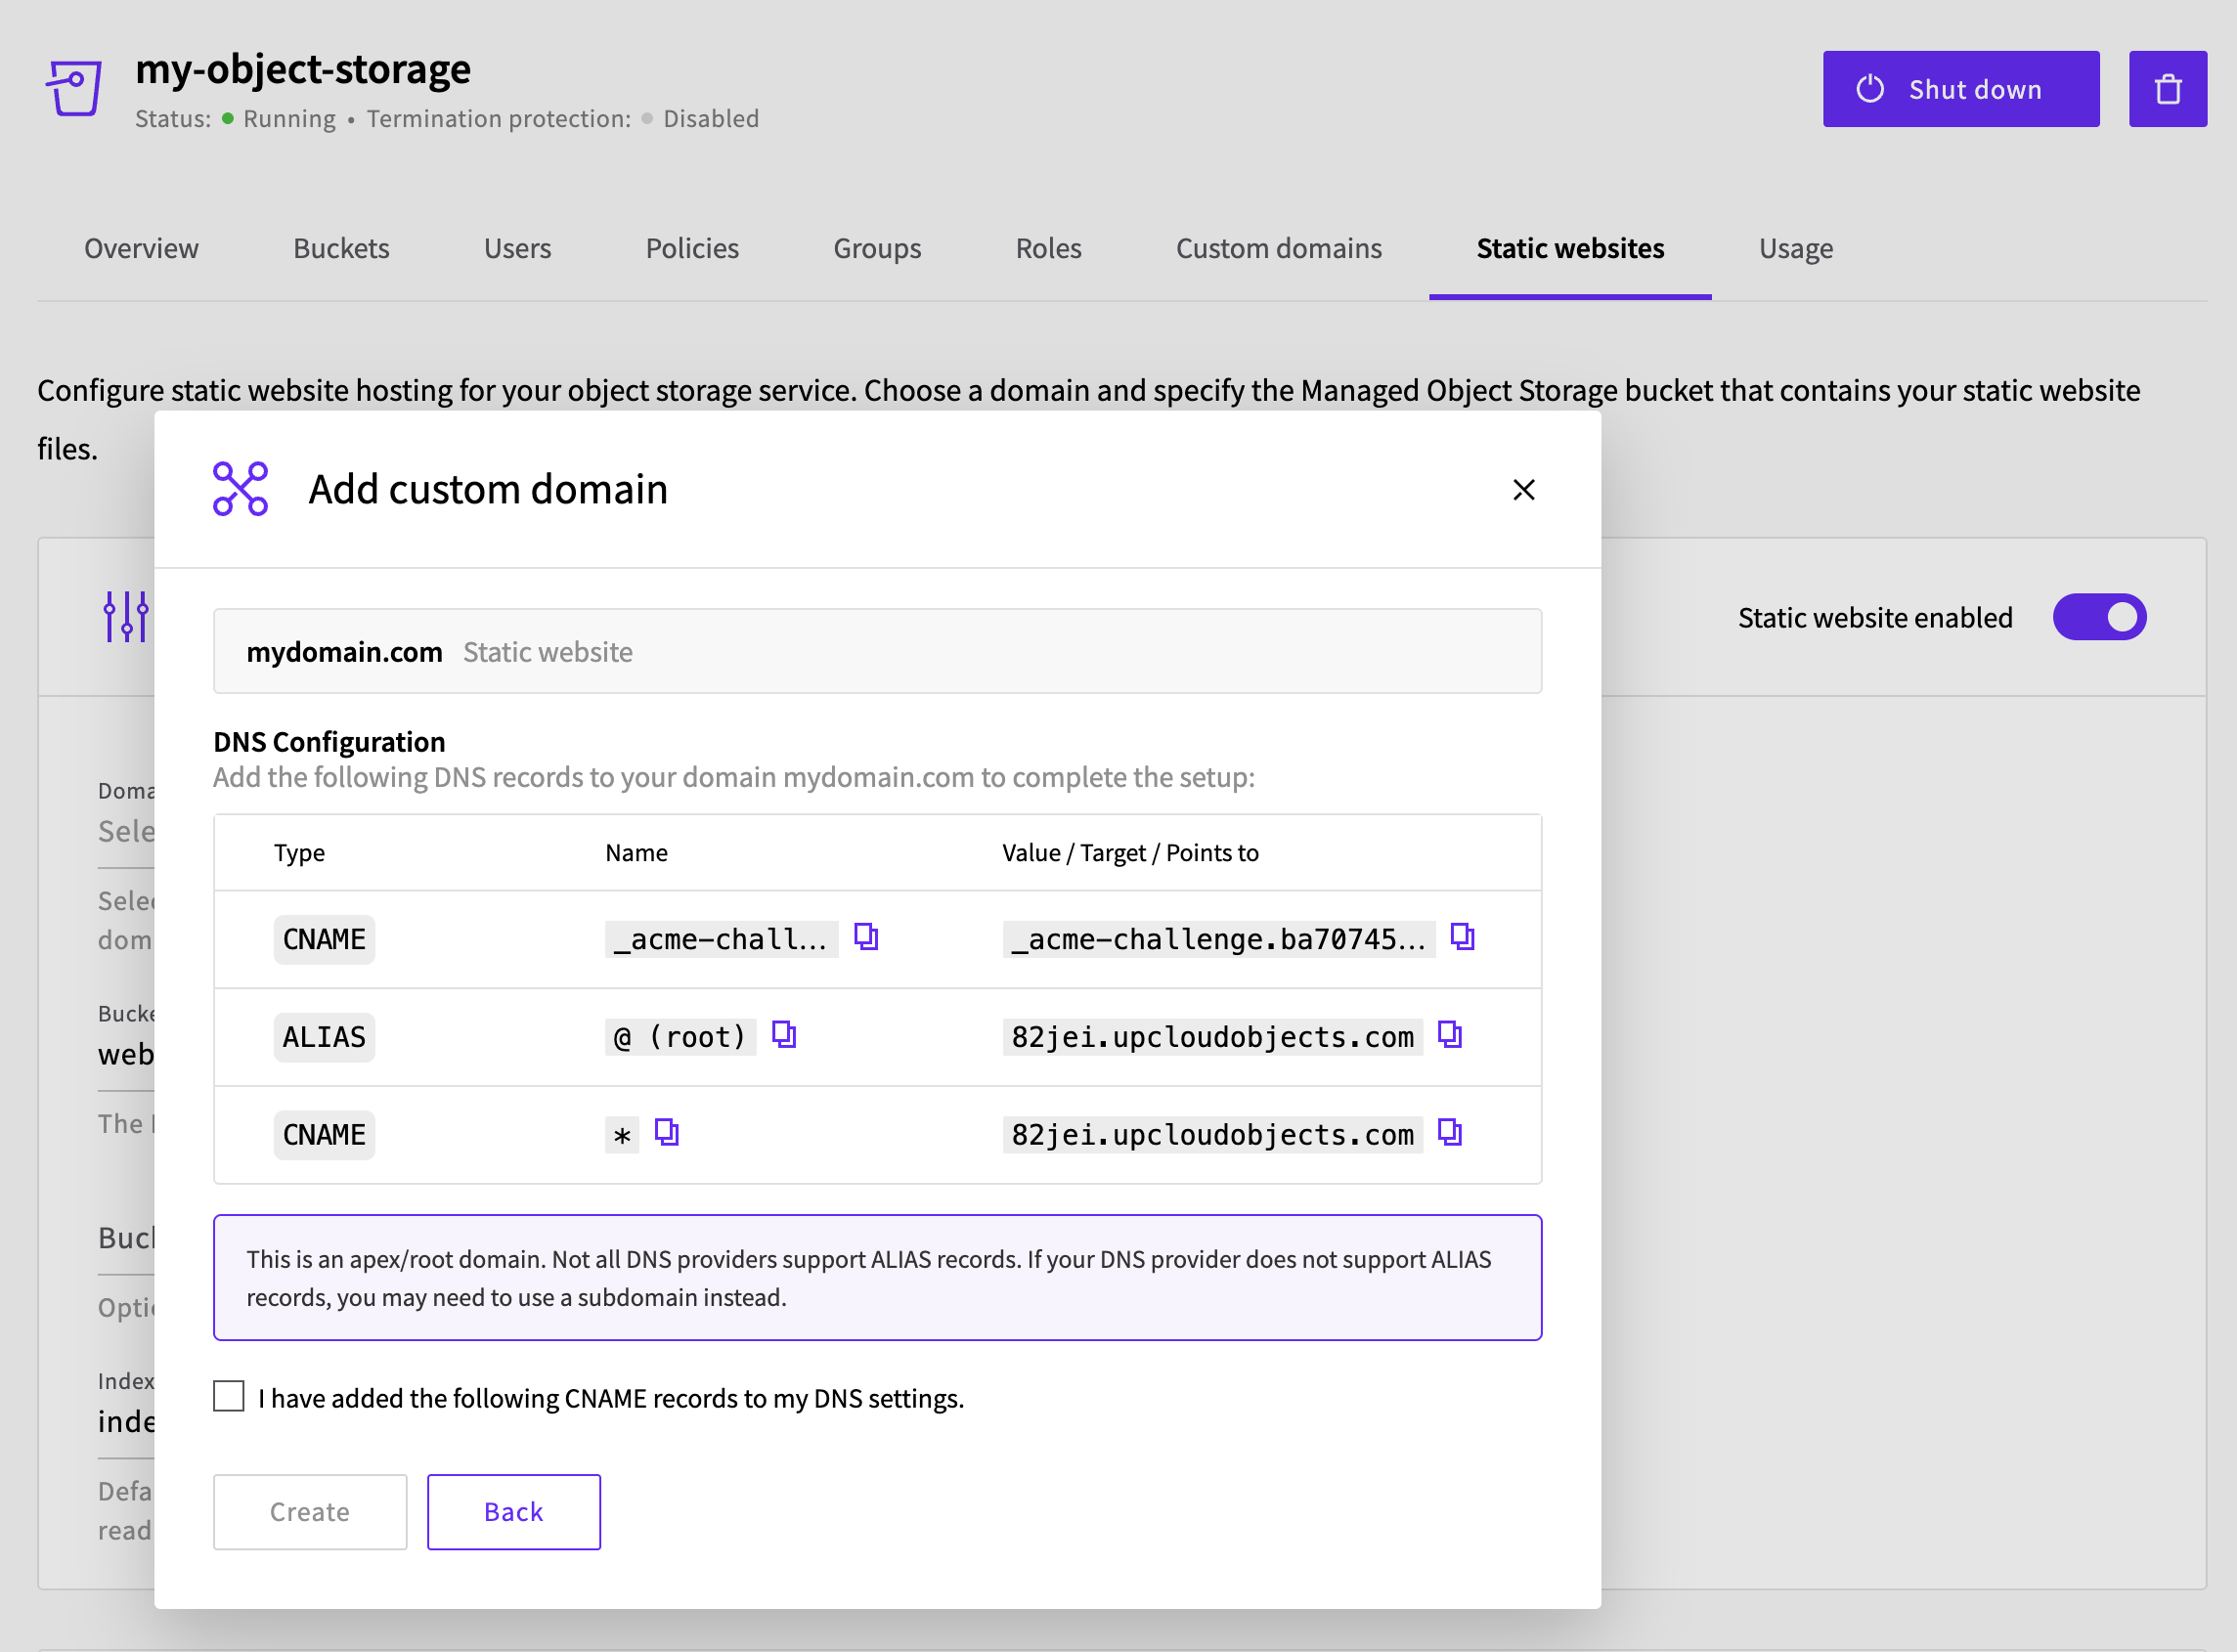
Copy and paste these records to your domain provider's DNS settings. Once you have added the necessary records, tick the checkbox that says "I have added the following CNAME records to my DNS settings" and click Create.

Depending on your domain registrar, it may take some time for the DNS records to propagate. You can use an online propagation checker tool like DNSChecker to verify that the records have fully propagated.
After creation, your custom domain will appear as the domain in the static website configuration. Review the other settings (bucket, routing mode, and error pages), then complete the setup.
Once configured, your static site will be accessible from your custom domain with HTTPS enabled automatically.
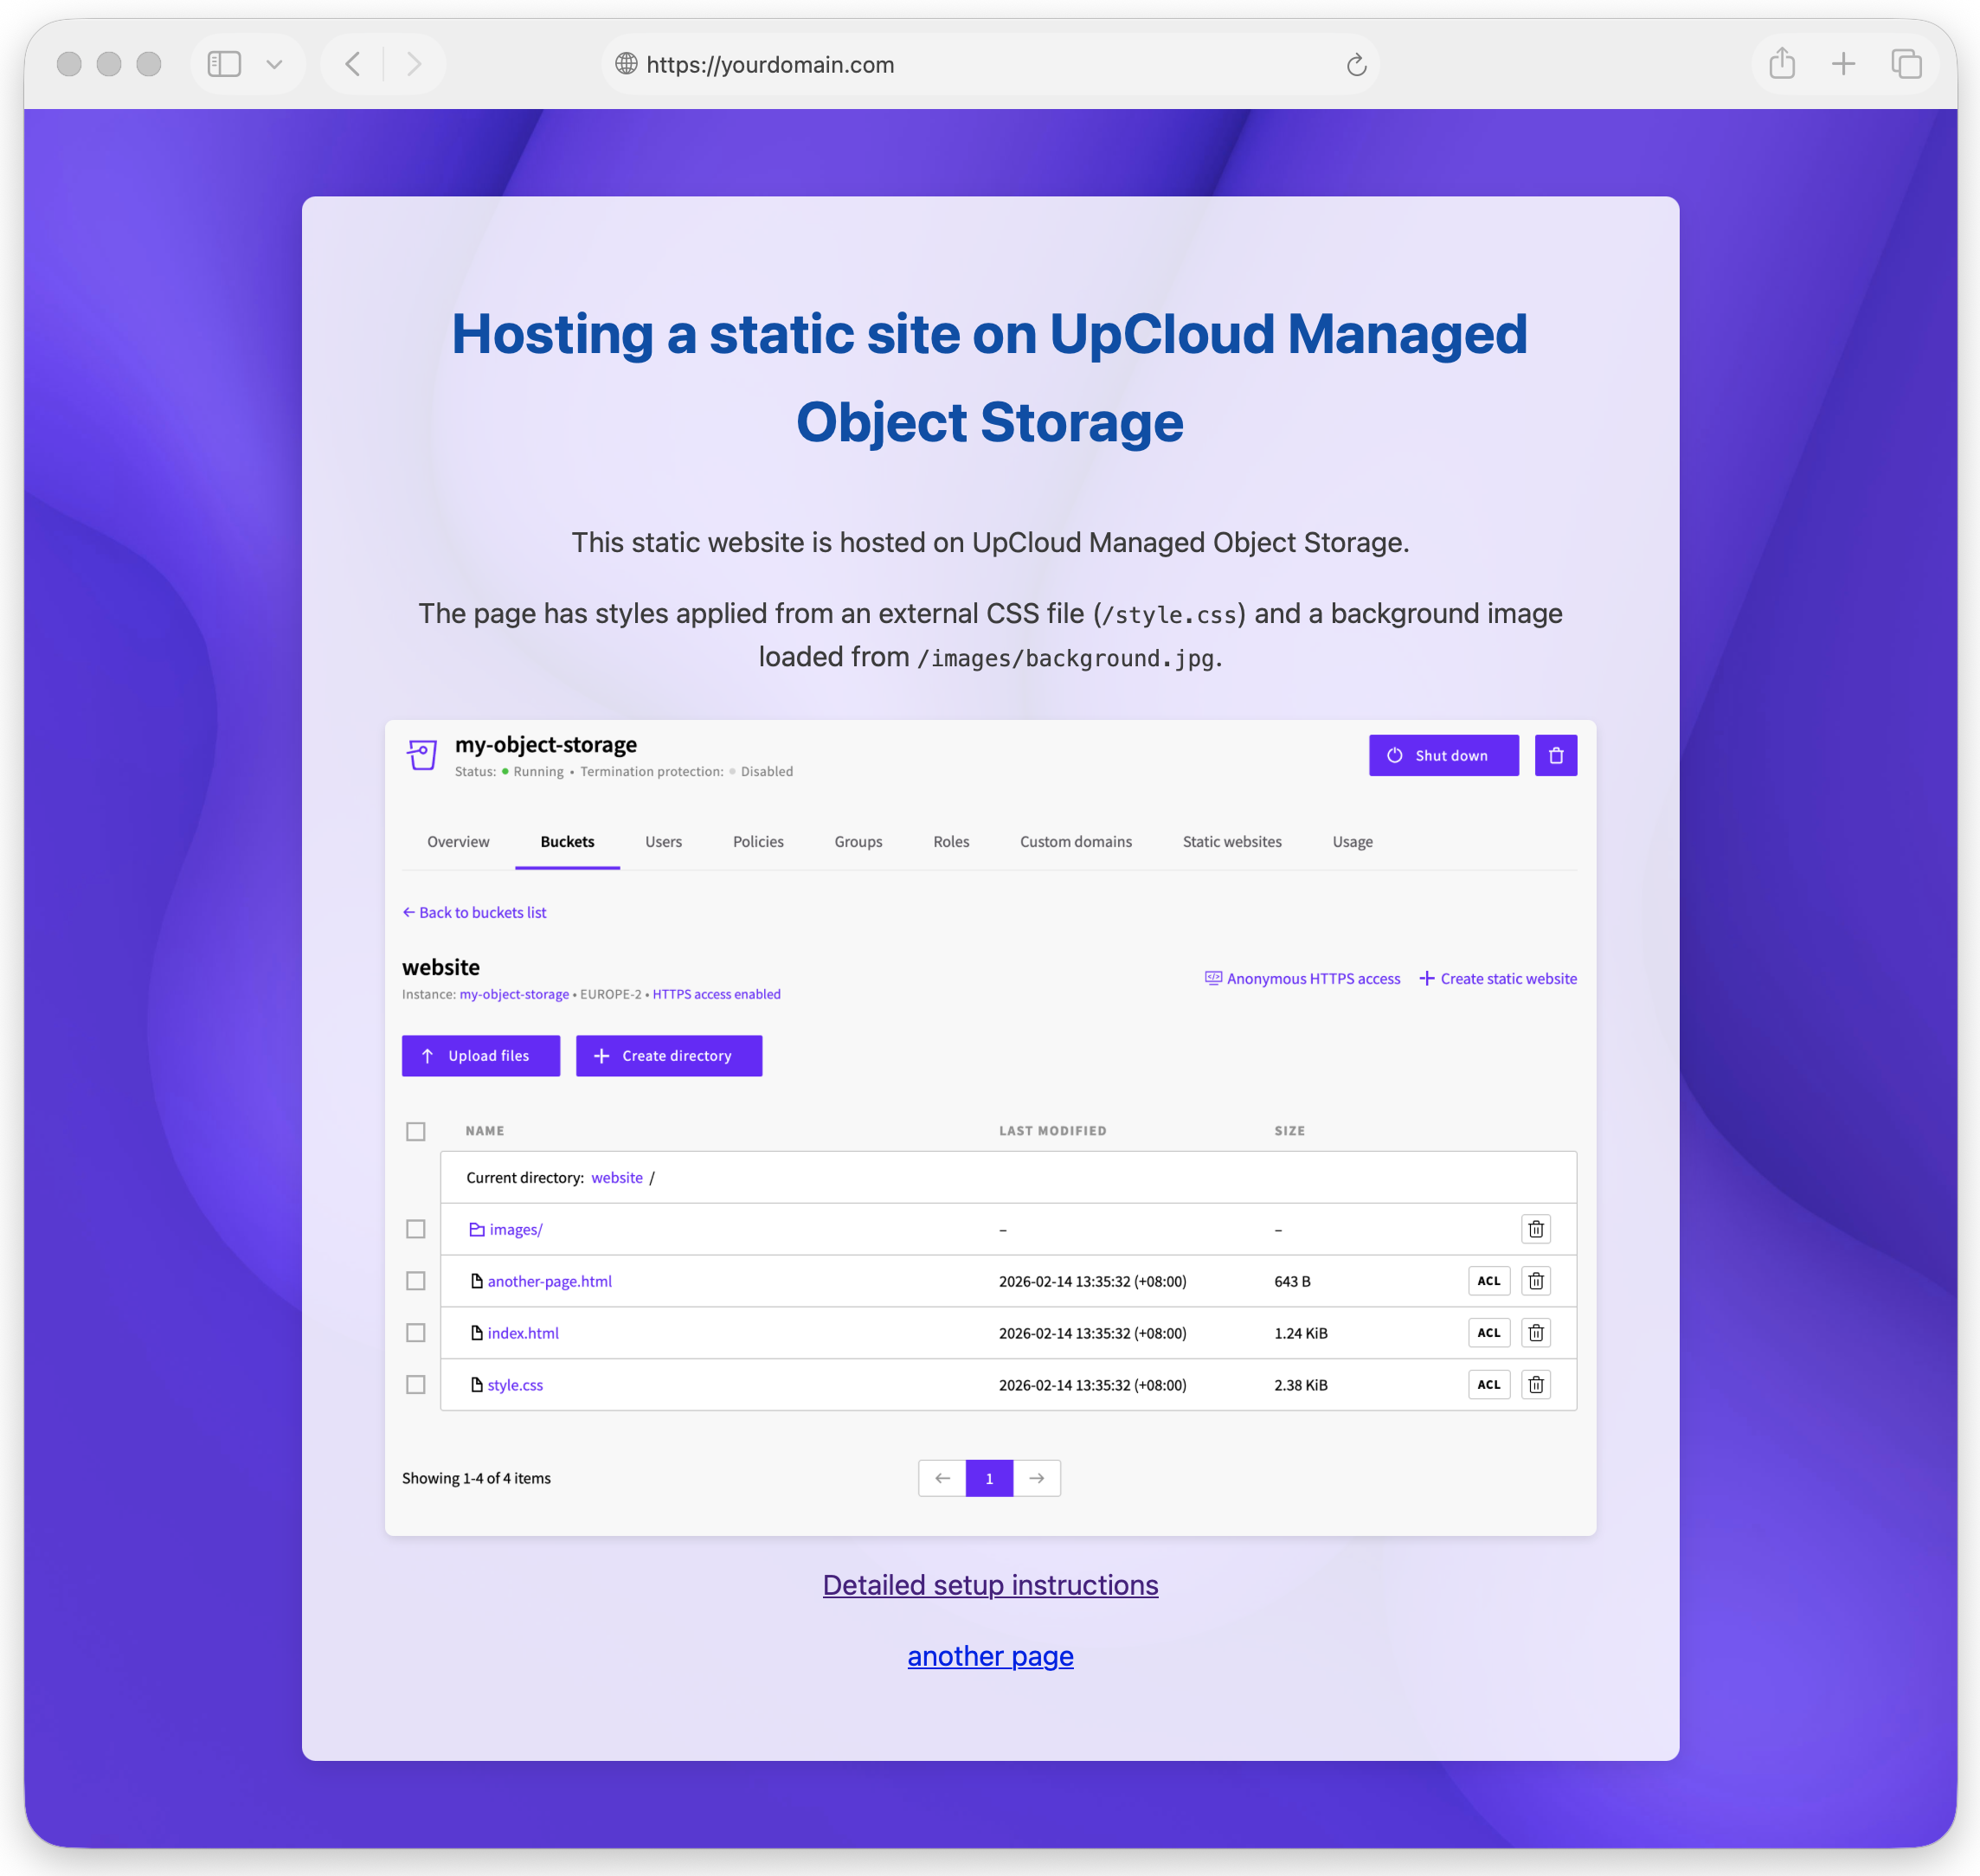
Note that in the image above, the navigation bar shows that this website is now being served from a custom domain of your choice, in this case, https://yourdomain.com.
Apex domains and CNAME flattening
When using an apex (root) domain such as yourdomain.com rather than a subdomain like blog.yourdomain.com, the DNS configuration screen shows an ALIAS record instead of a CNAME for the root entry. This is because the DNS specification does not allow CNAME records at the zone apex.
Not all DNS providers support ALIAS records natively. If your provider does not, there are a couple of alternatives:
- CNAME flattening - Some providers, such as BunnyDNS and EuroDNS, offer CNAME flattening, which allows you to create a CNAME record at the root domain. The provider resolves it to an IP address behind the scenes, achieving the same result as an ALIAS record.
- Use a subdomain instead - If your DNS provider supports neither ALIAS records nor CNAME flattening, use a subdomain (e.g.,
blog.yourdomain.com) as your site's primary domain.
Important: If you are using Cloudflare, you'll need to set the proxy status to DNS only (grey cloud icon) for all three DNS records. Cloudflare's orange-cloud proxy can interfere with the ACME SSL certificate challenge that UpCloud uses to provision HTTPS for your site.
Limitations and considerations
- Up to 5 static website configurations: You can create up to 5 static website configurations on a single Object Storage instance, one per domain.
- Static content only: Object Storage serves files as-is. Server-side scripting (PHP, Python, etc.) is not supported. If your site requires server-side processing, consider hosting it in a Cloud Server or a small Kubernetes Cluster instead.
- Index document behaviour: Ensure each directory that should be directly accessible contains an
index.htmlfile. - Caching: Objects are served without
Cache-Controlheaders by default. You can set them when uploading via your S3 client to improve page load times for returning visitors. For example, with AWS CLI:aws s3 sync ./my-website s3://<bucket-name> --cache-control "max-age=86400".
Troubleshooting
If your site doesn't load correctly:
- Check file paths: Ensure your
index.htmlis at the root of the bucket (or the configured directory) and that all asset paths in your HTML are correct. - Verify static hosting is enabled: Confirm that static hosting is turned on and the index document is set correctly.
- Check public access: Ensure the bucket allows public read access. See our guide on setting up a public read bucket if needed.
- Review file permissions: If individual files return access denied errors, check that they are publicly readable.
- Inspect browser console: Open your browser's developer tools and check for 404 errors or mixed content warnings.
Conclusion
You've successfully hosted a static website on UpCloud Managed Object Storage. This setup provides a simple, cost-effective solution for serving static content with automatic scaling, no egress fees, and flat monthly pricing - all without the overhead of managing web servers.