
Migrating to UpCloud's Managed Object Storage using the migration tool
This guide describes how to migrate existing data from any other object storage provider to UpCloud's new Managed Object Storage service.
There are two methods available for doing this:
- Using the migration tool in the UpCloud Control Panel (Recommended)
- Using the UpCloud API
Method 1: UpCloud Control Panel
The UpCloud Control Panel provides a user-friendly migration tool that simplifies the process of transferring your data to Managed Object Storage.
To begin, navigate to the migration tool in the UpCloud Control Panel, and click "+ Create new migration"
Next, fill in the source details:
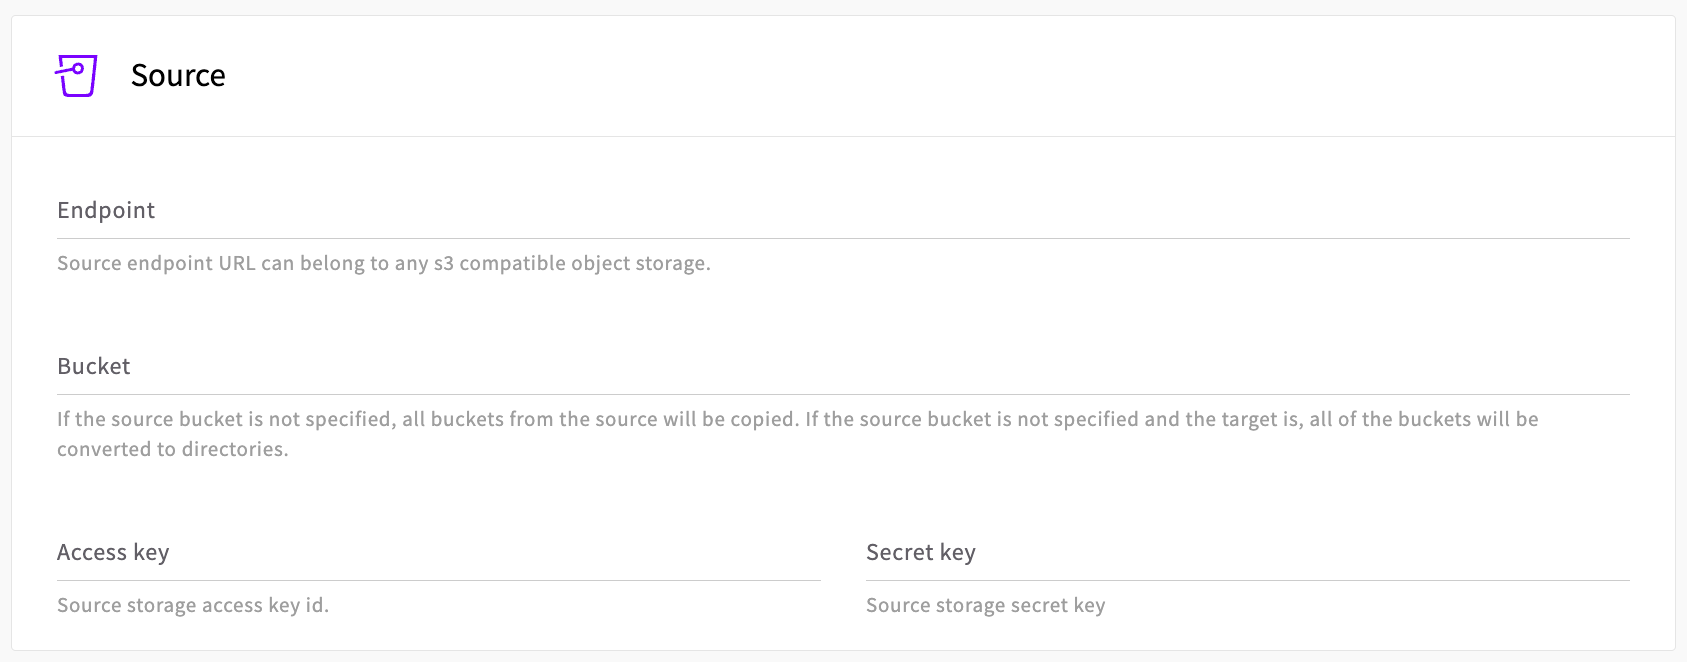
Source endpoint: This is the public endpoint for the source object storage (where you are transferring your data from).
Source credentials: This is the Access key and Secret key.
Source bucket (optional): If no bucket is specified, all buckets from the source will be copied to the target.
Then, configure the target settings: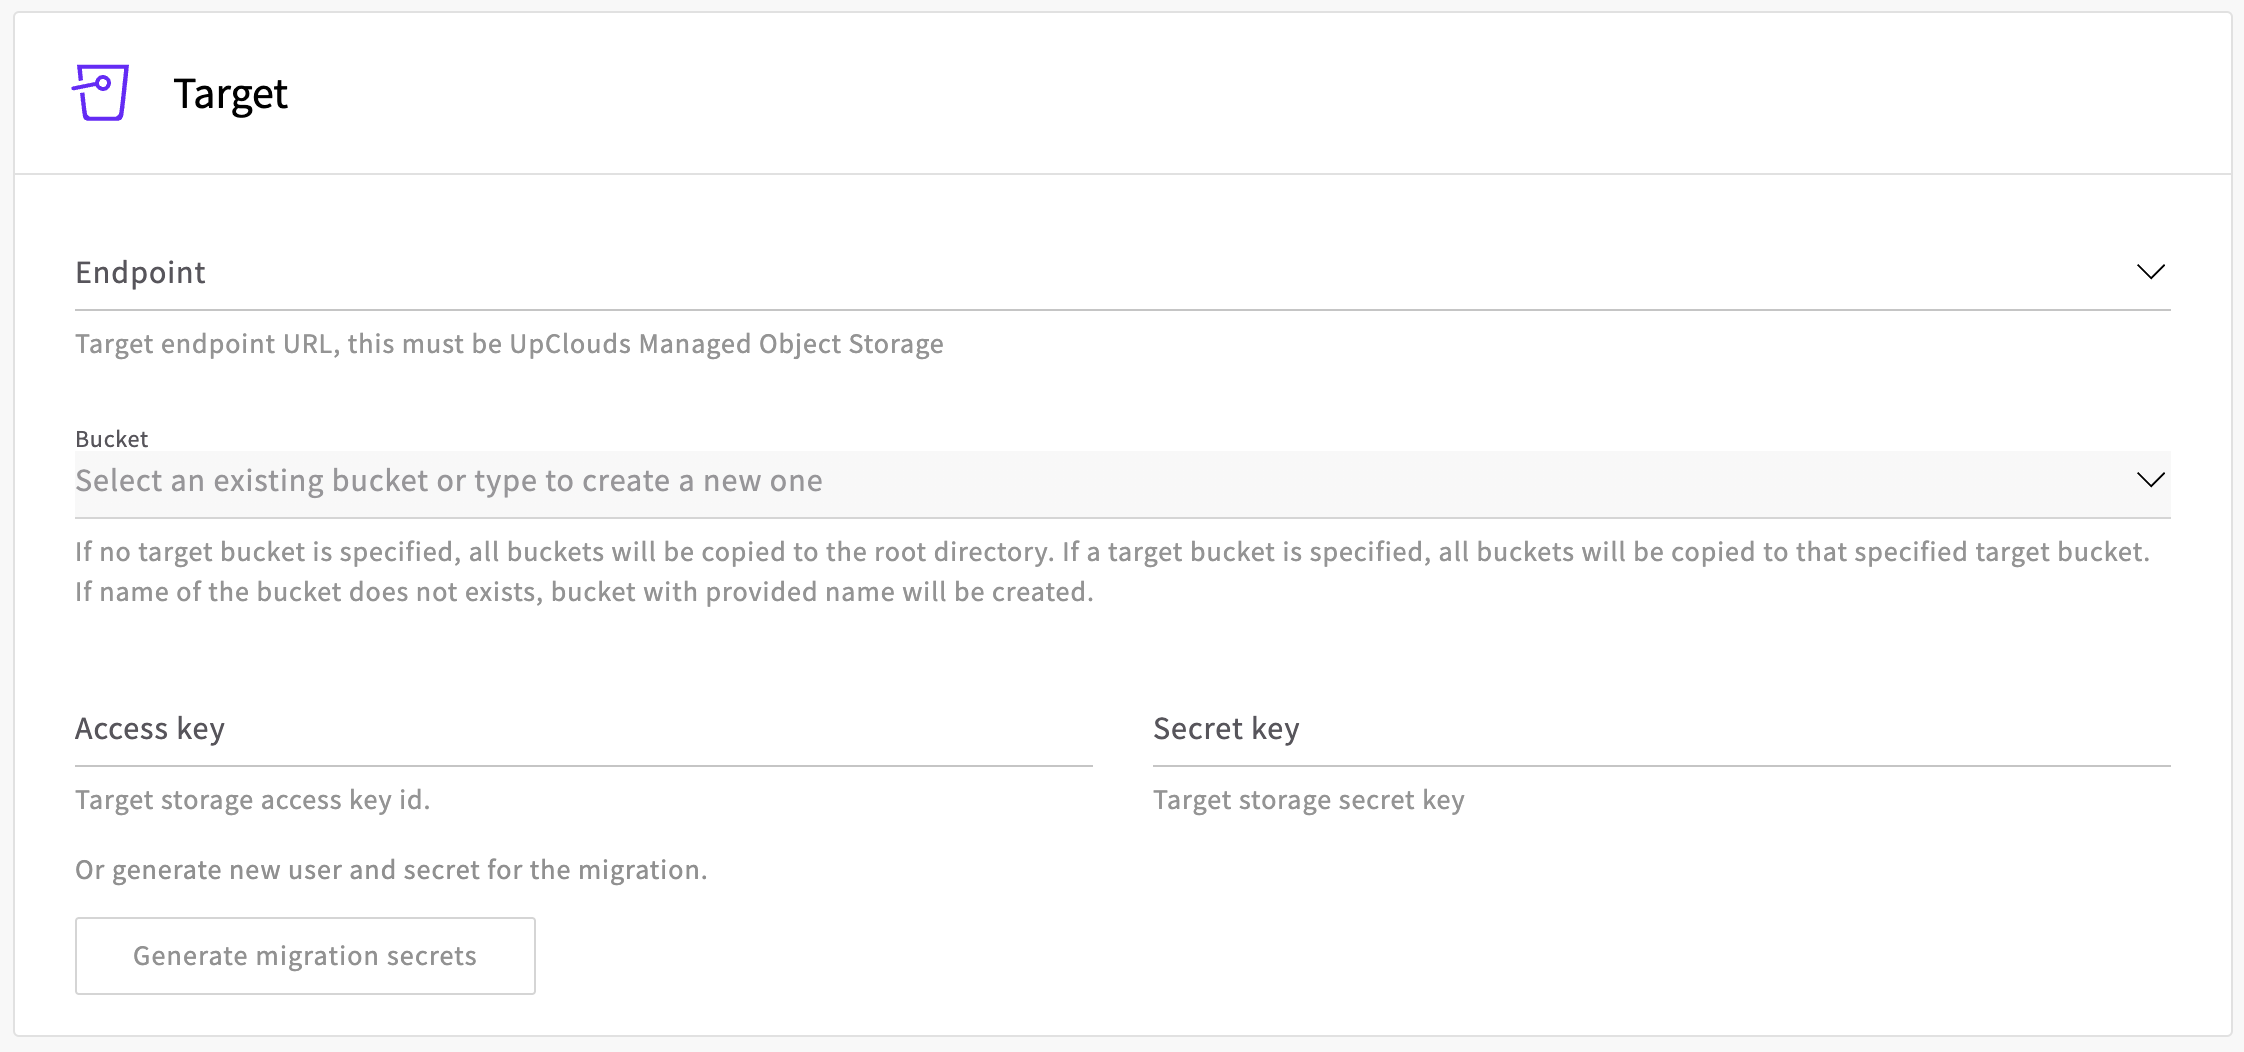
Target endpoint: Select an existing Managed Object Storage instance from the Endpoint dropdown.
Target credentials: This is the Access key and Secret key for the target Managed Object Storage instance. You can also create new credentials by clicking "Generate migration secrets". This will create a user with full access to the object storage instance. Be sure to delete this user once the migration is finished.
Target bucket: Choose a target bucket for your data by selecting an existing one from the dropdown menu, or typing a name to create a new one. If no target bucket is selected, all buckets will be copied to the root directory.
Click "Create" to start the migration.
Checking the progress
You can track the progress of your migration jobs in the control panel. For each job, you'll see its current status and any issues that arise. To stop an ongoing migration while it's running, simply click the "Cancel" button in the action column.![]()
Method 2: UpCloud API
For users who prefer programmatic control or need to automate the process, the migration can also be performed using the UpCloud API.
To get started, you will need an UpCloud user account with API credentials. Instructions for creating this can be found in the Getting started using the UpCloud API guide.
You’ll also need an API client or a way to make API calls. In this guide, we’ll be using an API client called Insomnia. However, you can use any API client that you’re comfortable with, such as Postman or the curl command line tool.
The process involves creating copy jobs via the API to transfer data from your source storage, which can be any other object storage provider, to the target Managed Object Storage. The system handles the data transfer automatically while providing status updates and detailed progress information.
It's worth noting that the migration process is non-destructive, meaning any files or buckets that exist only in the destination will be left untouched.
Before beginning the migration, make sure you have the following:
Source endpoint URL: This is the public endpoint for the source object storage.
Credentials for the source object storage: This refers to the Access key and Secret key.
Target endpoint URL. This is the S3 public access endpoint for the UpCloud Managed Object Storage. You can find your endpoint URL via the API.
Target credentials. This is the Access key and Secret key for the UpCloud Managed Object Storage. If you don't have this, you'll need to generate new keys for your user. It is also necessary to ensure that the user has full permission to access all storage buckets in the Managed Object Storage.
Creating a full migration job
To migrate all buckets in an object storage instance, create a POST request using the API call below:
POST https://api.upcloud.com/1.3/object-storage-2/jobs

{
    "type": "copy",
    "source": {
        "access_key_id": "<source_key>",
        "secret_access_key": "<source_secret>",
        "endpoint_url": "<source_endpoint>"
    },
    "target": {
        "access_key_id": "<target_key>",
        "secret_access_key": "<target_secret>",
        "endpoint_url": "<target_endpoint>"
    }
}
In an API client, such as Insomnia, the call above will look like this: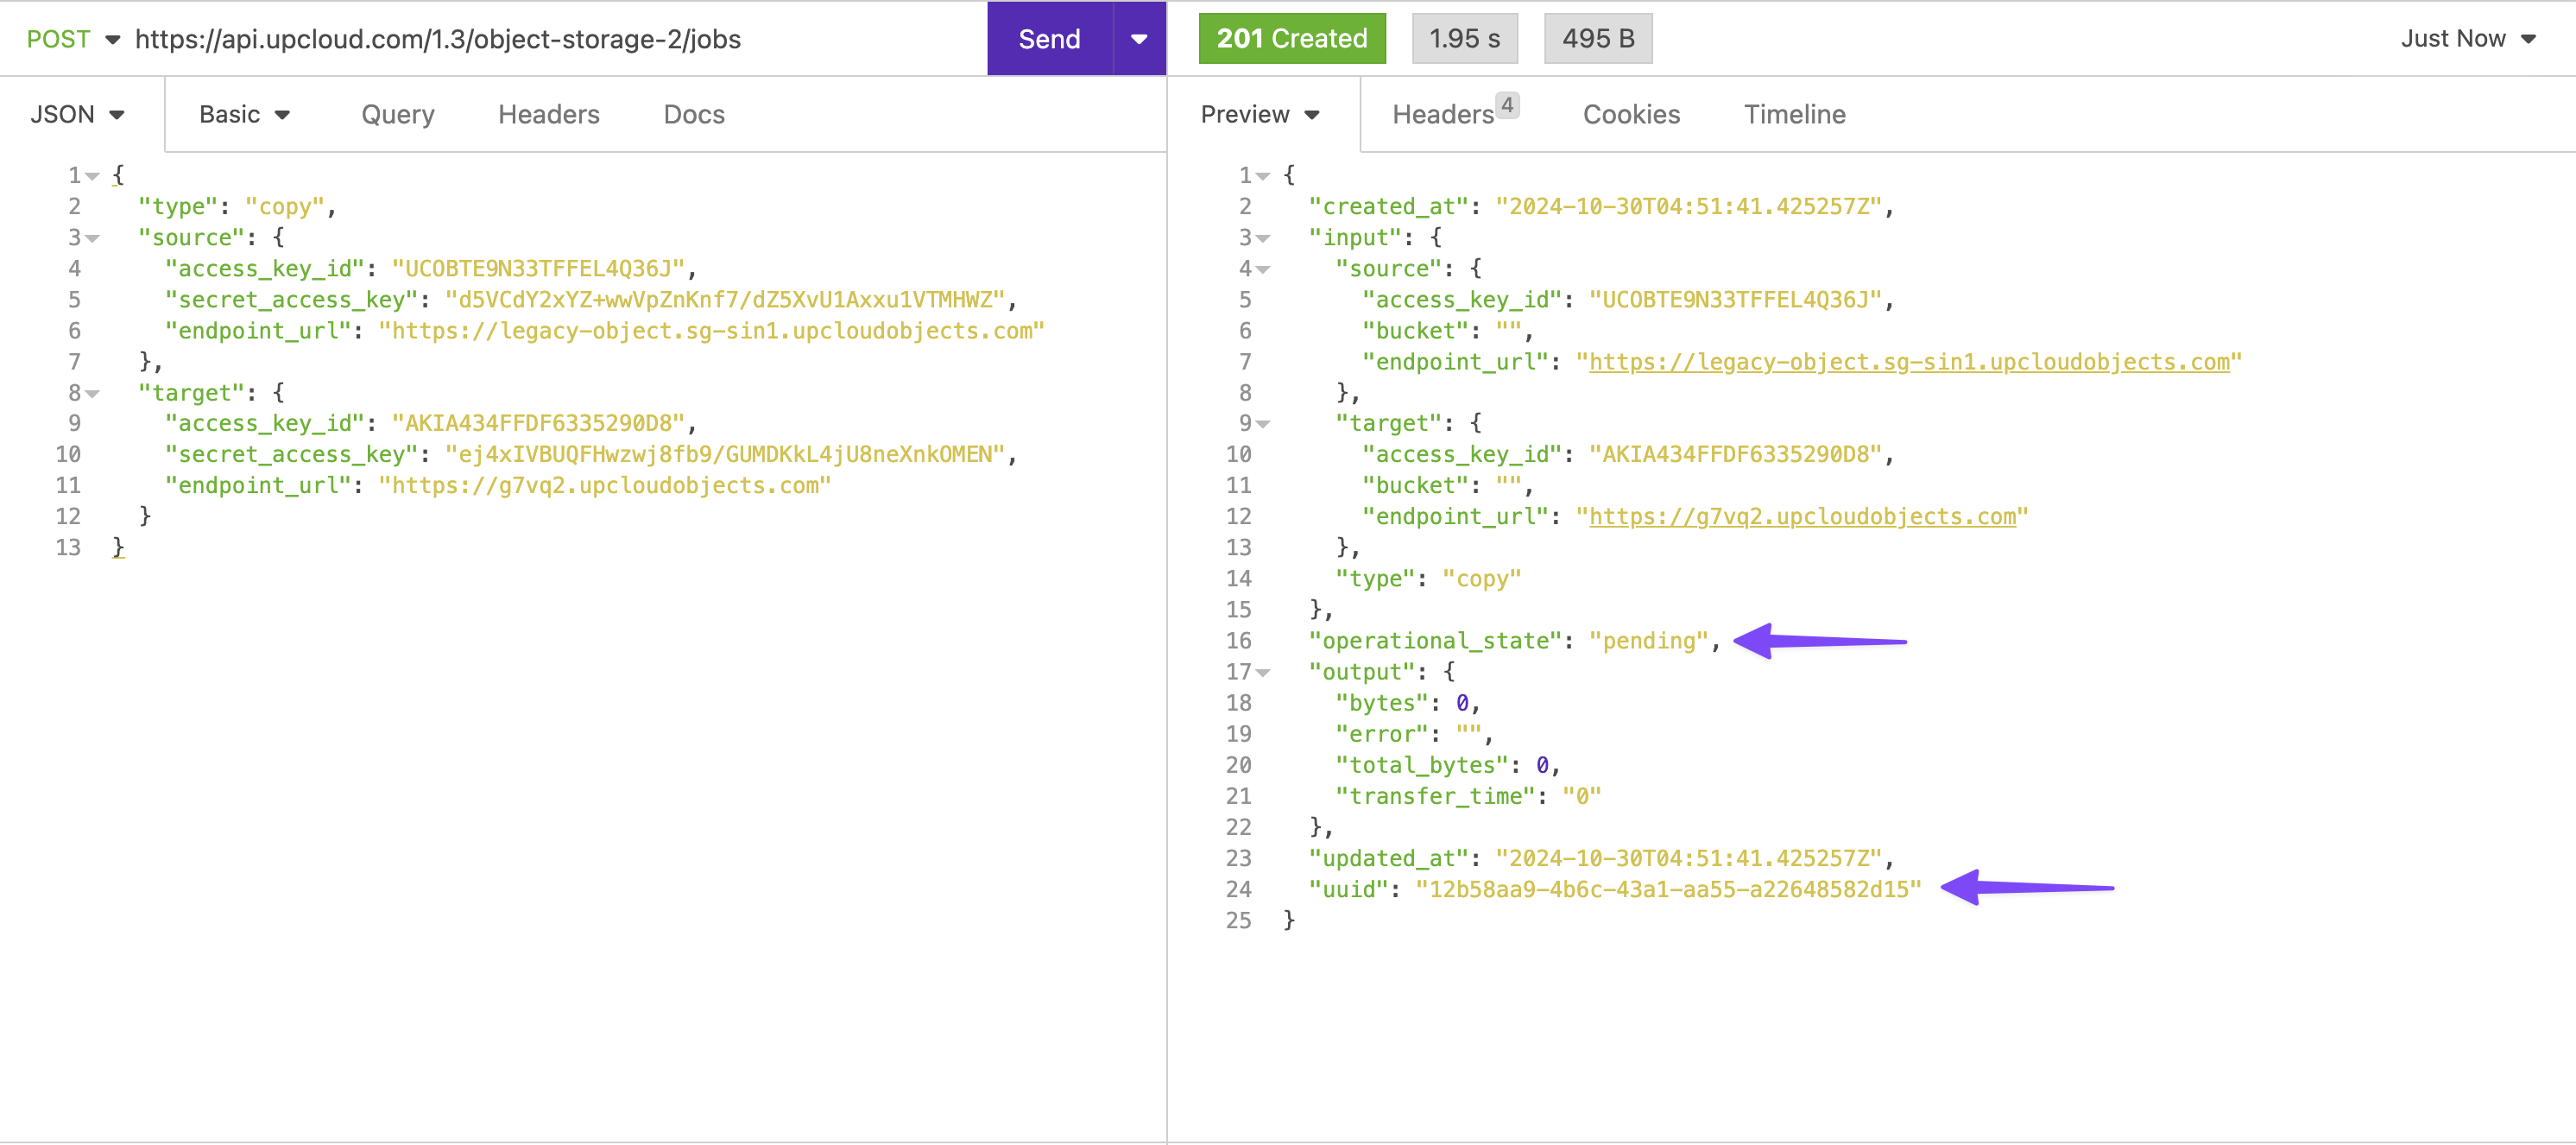
The returned response will include the operational status of the migration job as well as the UUID of the job. You will need to UUID of the job later to check on the progress of the migration.
Creating a selective migration job
The migration tool can also be used to migrate specific buckets. This can be done using the POST request below:
POST https://api.upcloud.com/1.3/object-storage-2/jobs

{
    "type": "copy",
    "source": {
        "access_key_id": "<source_key>",
        "secret_access_key": "<source_secret>",
        "endpoint_url": "<source_endpoint>",
        "bucket": "<source-bucket-name>"
    },
    "target": {
        "access_key_id": "<target_key>",
        "secret_access_key": "<target_secret>",
        "endpoint_url": "<target_endpoint>",
        "bucket": "<target-bucket-name>"
    }
}
Here is how the call looks in an API client: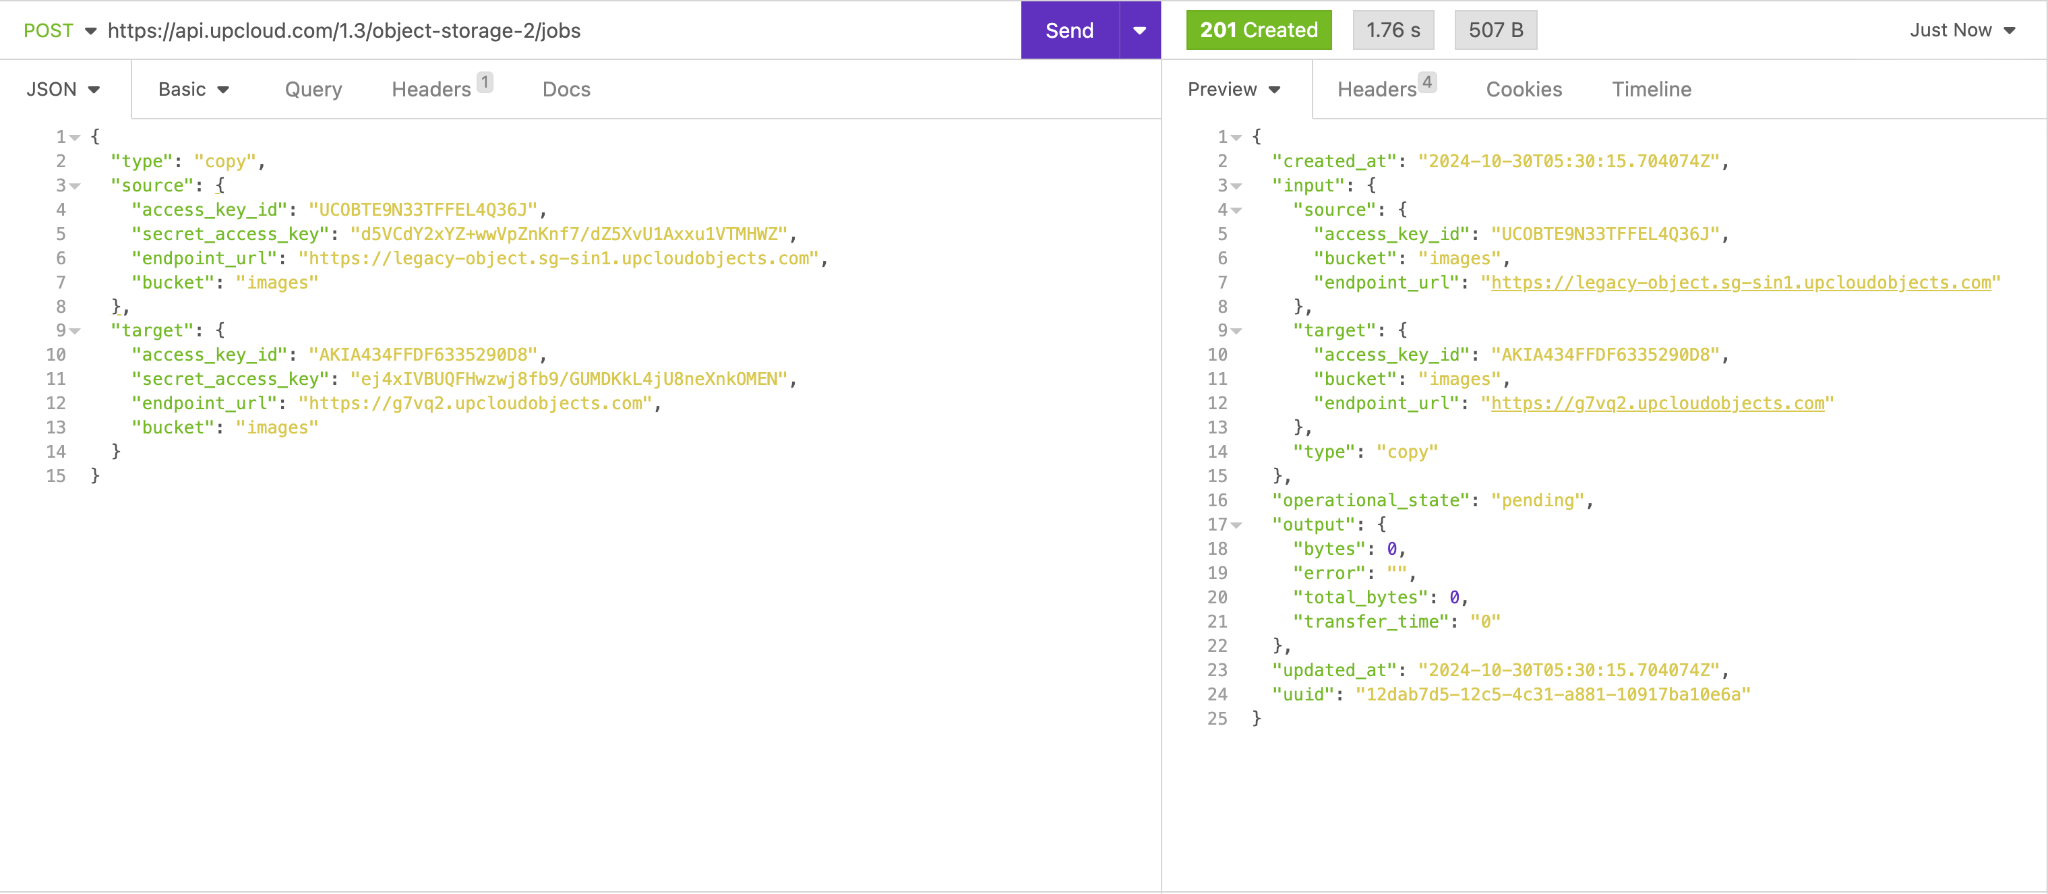
Its worth noting that you do not need to create buckets on the destination ahead of time as they will be created automatically if they do not exist. If a bucket with the same name already exists in the destination, the new files will be added into that bucket, alongside what's already there.
The migration is non-destructive, meaning any files or buckets that exist only in the destination will be left untouched.
Monitoring the progress of a migration
As explained earlier, every time you initiate a migration job, you'll receive a response containing the job UUID:
{
...
  "updated_at": "2024-10-30T05:31:44.21534Z",
  "uuid": "12dab7d5-12c5-4c31-a881-10917ba10e6a"
}
You can check on the status of a job using its job UUID in the following GET request:
GET https://api.upcloud.com/1.3/object-storage-2/jobs/{uuid}
Jobs progress through the following operational states:
pending- The job has been queued for processingconfiguring- The job is going through initial setup. This can take between 1-2 minutesrunning- The migration is still running, and data is being transferredcompleted- The migration has finished successfullyfailed- An error occurred during the execution of the job. Checkoutput.errorin the job status response for more informationcancelled- The job was manually terminated. See below for how to do this
Cancelling an ongoing migration
If needed, you can cancel an existing migration job using the API call below:
DELETE https://api.upcloud.com/1.3/object-storage-2/jobs/{job-uuid}Post-migration
Once you've finished copying your data over, take time to check that everything has transferred correctly to the new Managed Object Storage. You’ll also want to update your applications so they connect to the new storage endpoint.
If everything works as expected, you can go ahead and delete the old object storage instance. However, its usually good practice to keep it around for a few days after the migration - just in case.