
How to create and use UpCloud API Tokens
API Tokens are a secure way to authenticate with the UpCloud API without using your account password. They're great for automations and scripts, and they can be used even with two-factor authentication enabled on your account.
This guide shows you how to create API tokens through the UpCloud Control Panel and use them with different tools. You'll also learn security best practices for managing your tokens.
Prerequisites
- An UpCloud account with permission to create API tokens
- (Optional) upctl CLI installed - see our UpCloud CLI guide
- (Optional) curl for HTTP examples
Why use API tokens?
API Tokens offer several advantages over traditional username/password authentication:
- Enhanced security: Tokens can be easily revoked and have automatic expiration dates
- Better automation: No need to share your account password with scripts or third-party tools
- Access control: Set IP restrictions and control whether tokens can create other tokens
- Easy management: View and revoke all active tokens from the Control Panel
Creating tokens
Sign in to the UpCloud Control Panel and go to Account > API Tokens.
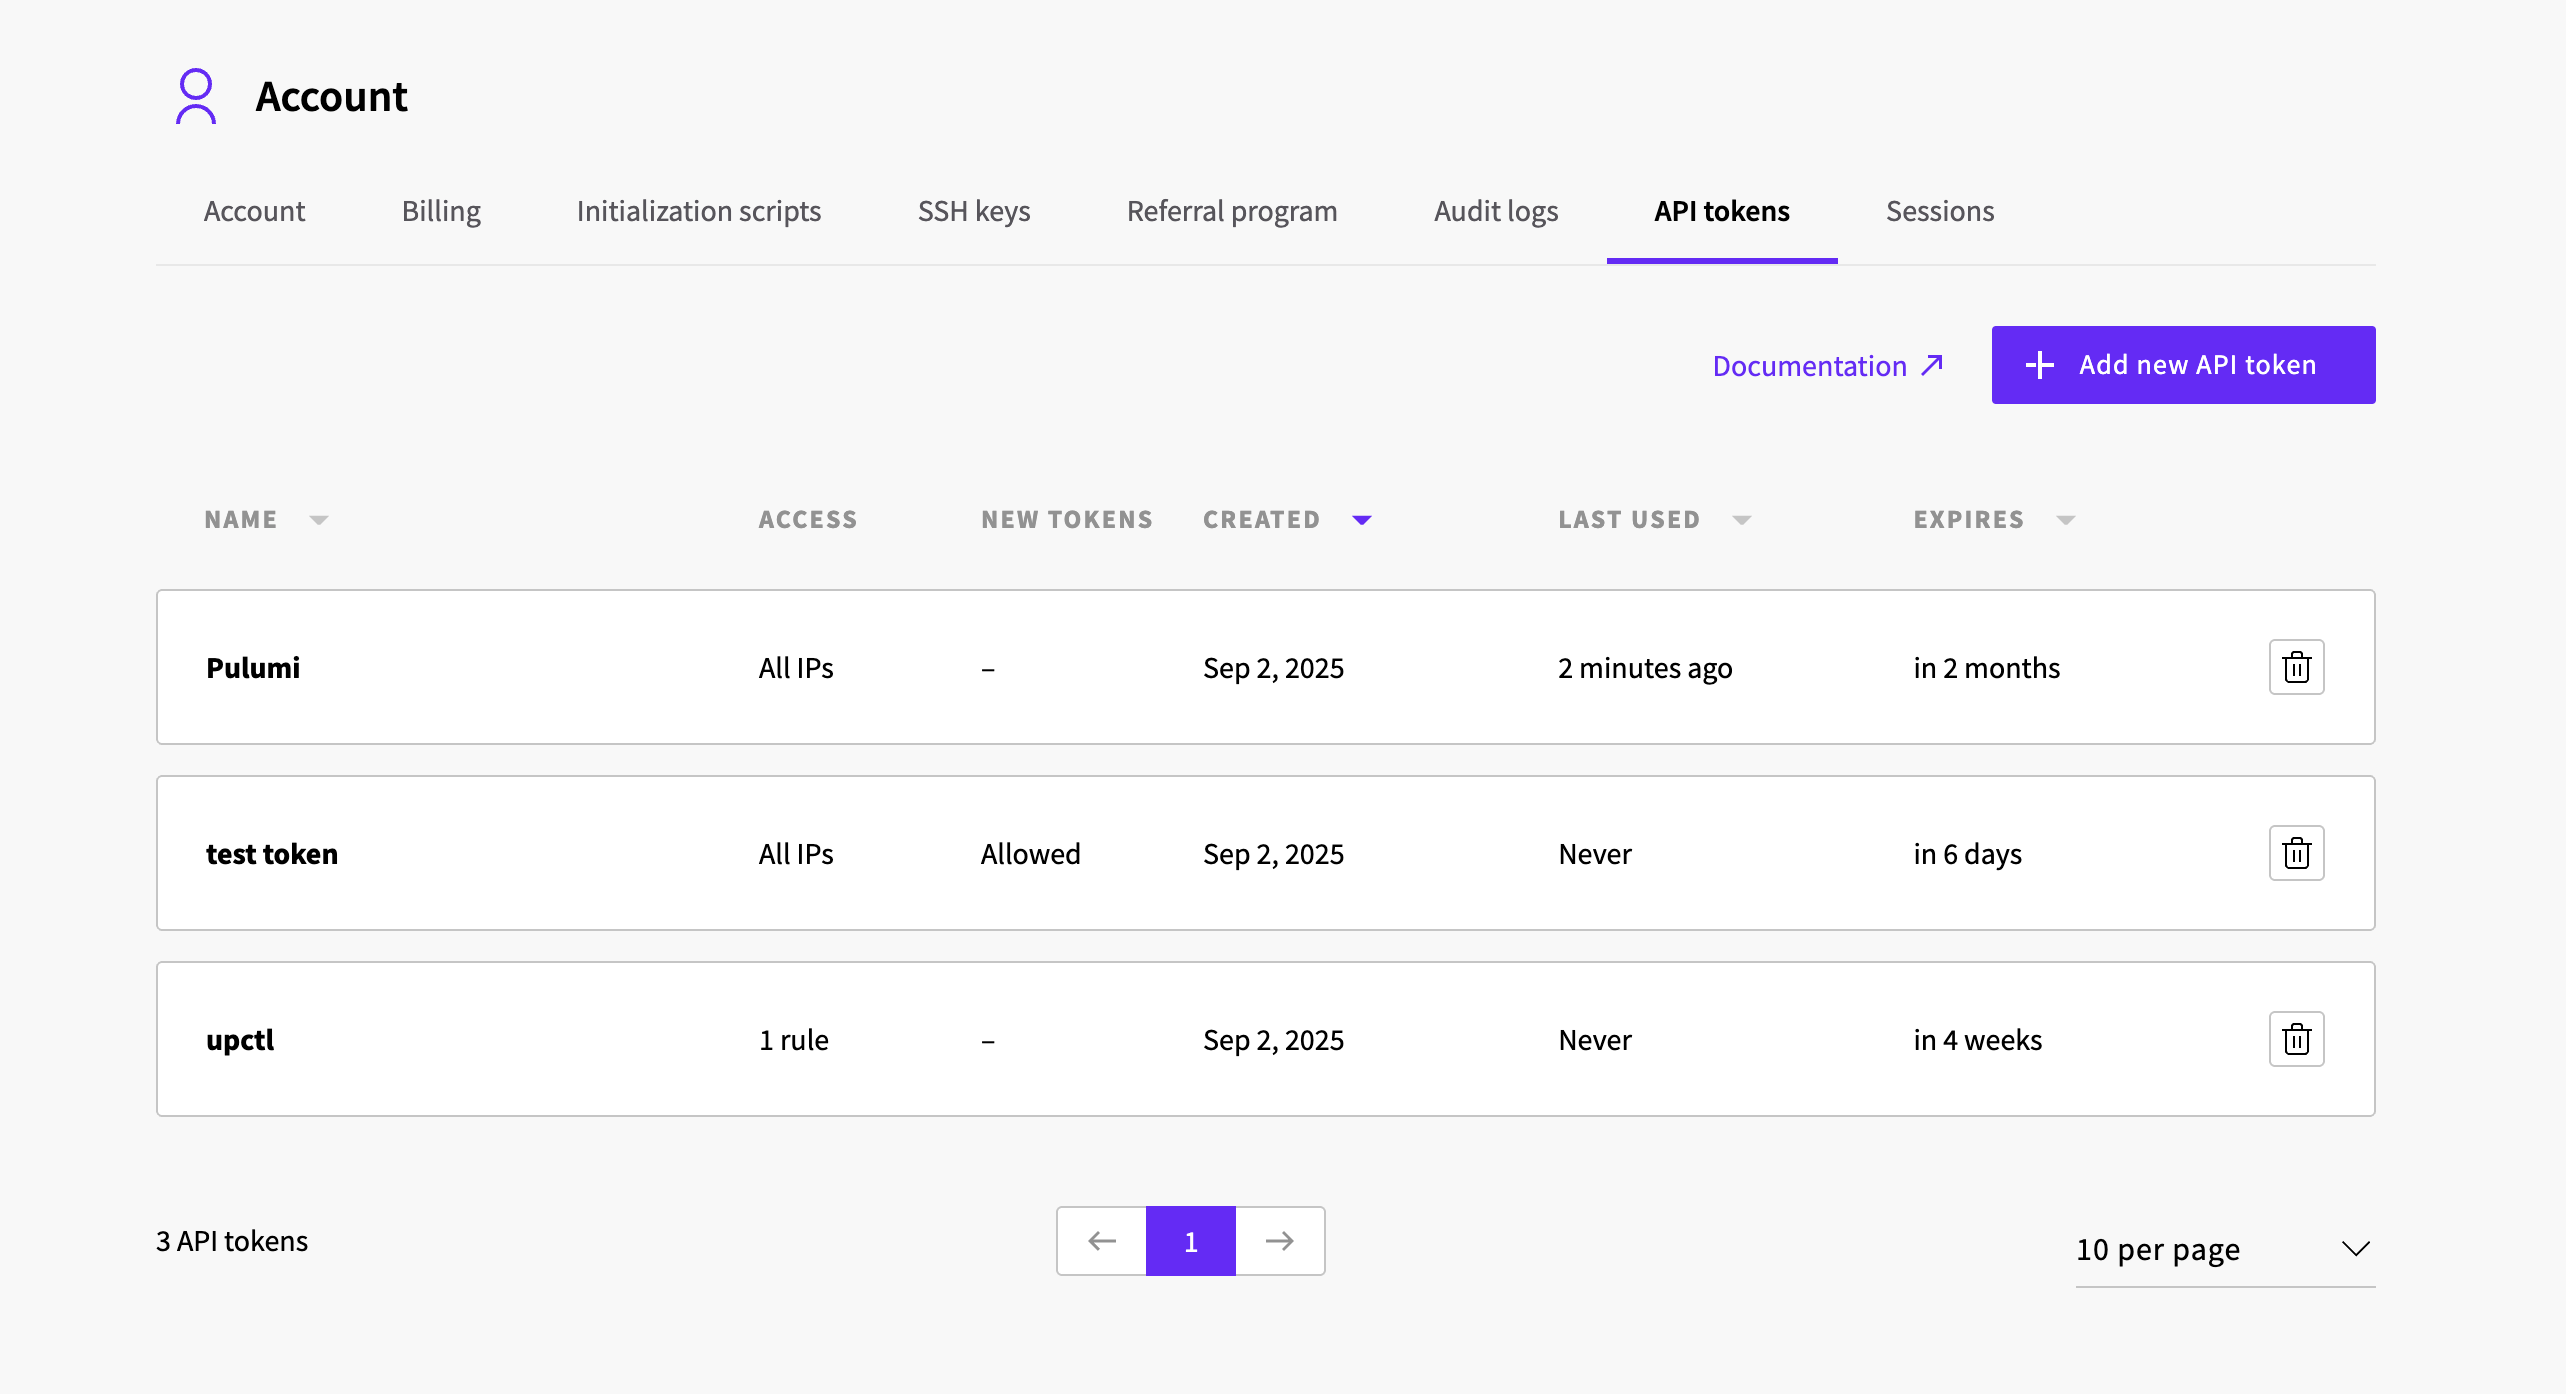
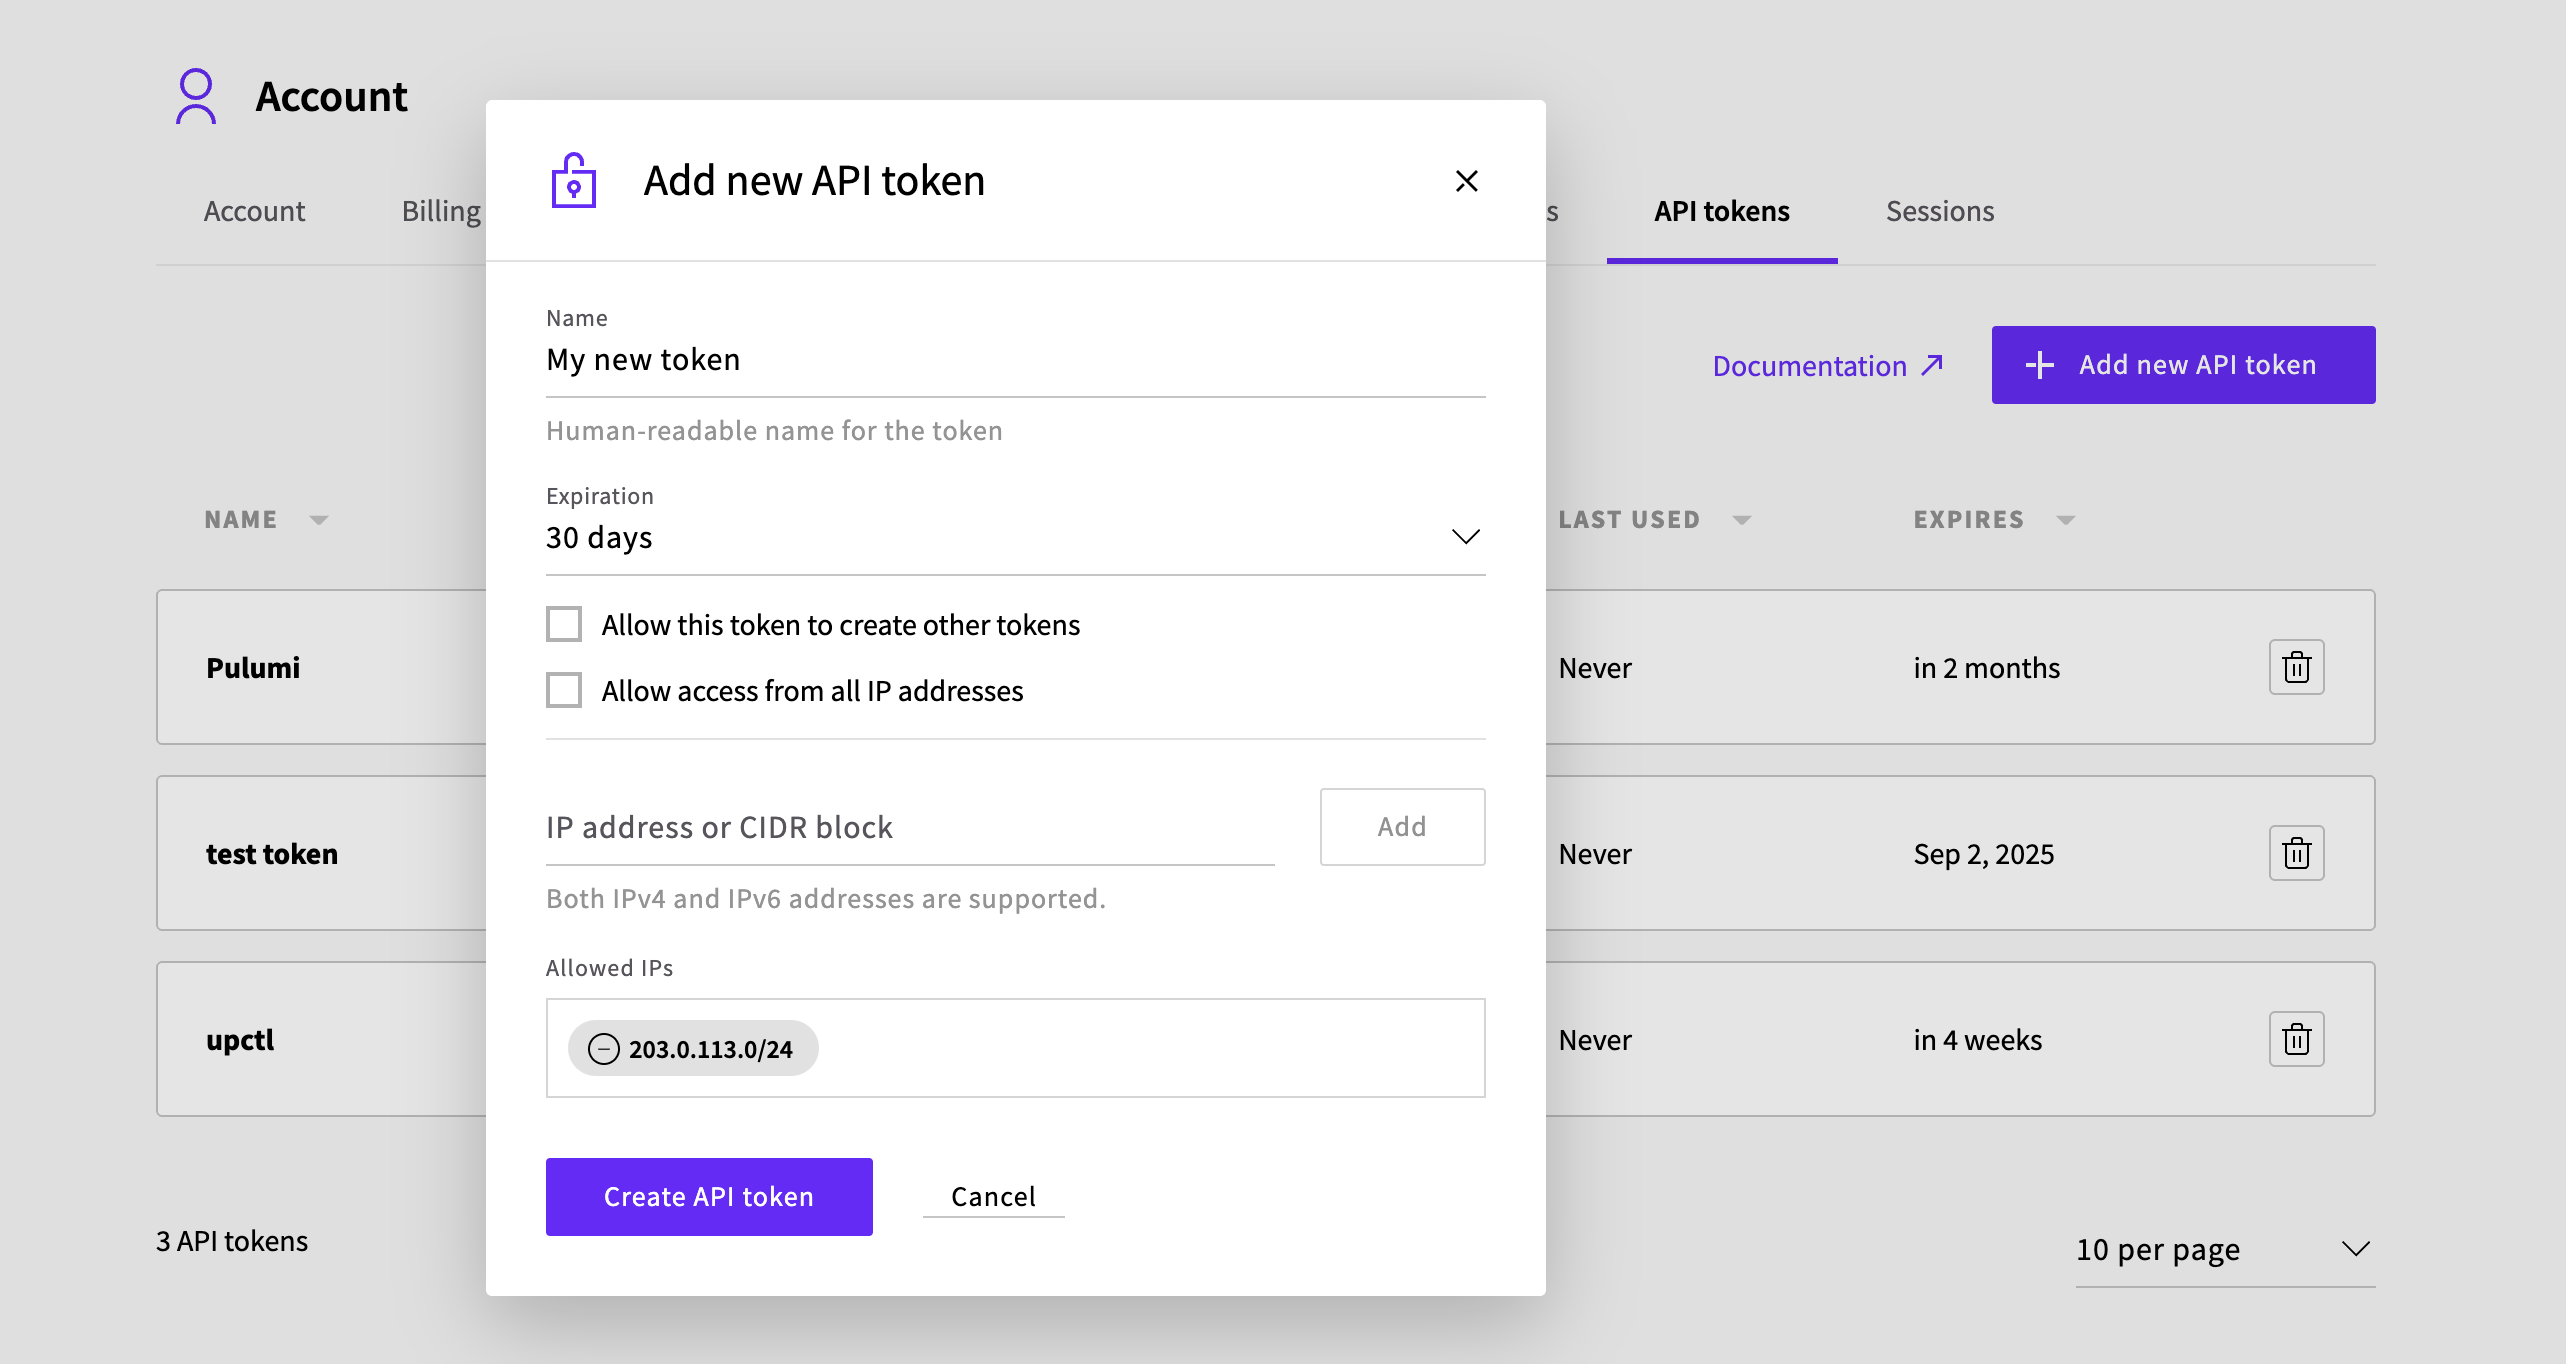
Click Add new API token and fill in the details:
- Name: A descriptive label like "ci-prod-deployer" or "terraform-dev"
- Expiration: Choose a specific date/time or duration. Maximum validity is 365 days
- Allow token to create tokens: Only enable this if your token needs to create other tokens (most workflows don't need this)
- Allowed IP ranges: Leave "Allow access from all IP addresses" unchecked to specify CIDR blocks or IP addresses (e.g;
203.0.113.5or203.0.113.0/24). Check the box to allow access from any IP address
Click Create API token. Copy the token value immediately - for security reasons, the full token is only shown once at creation.
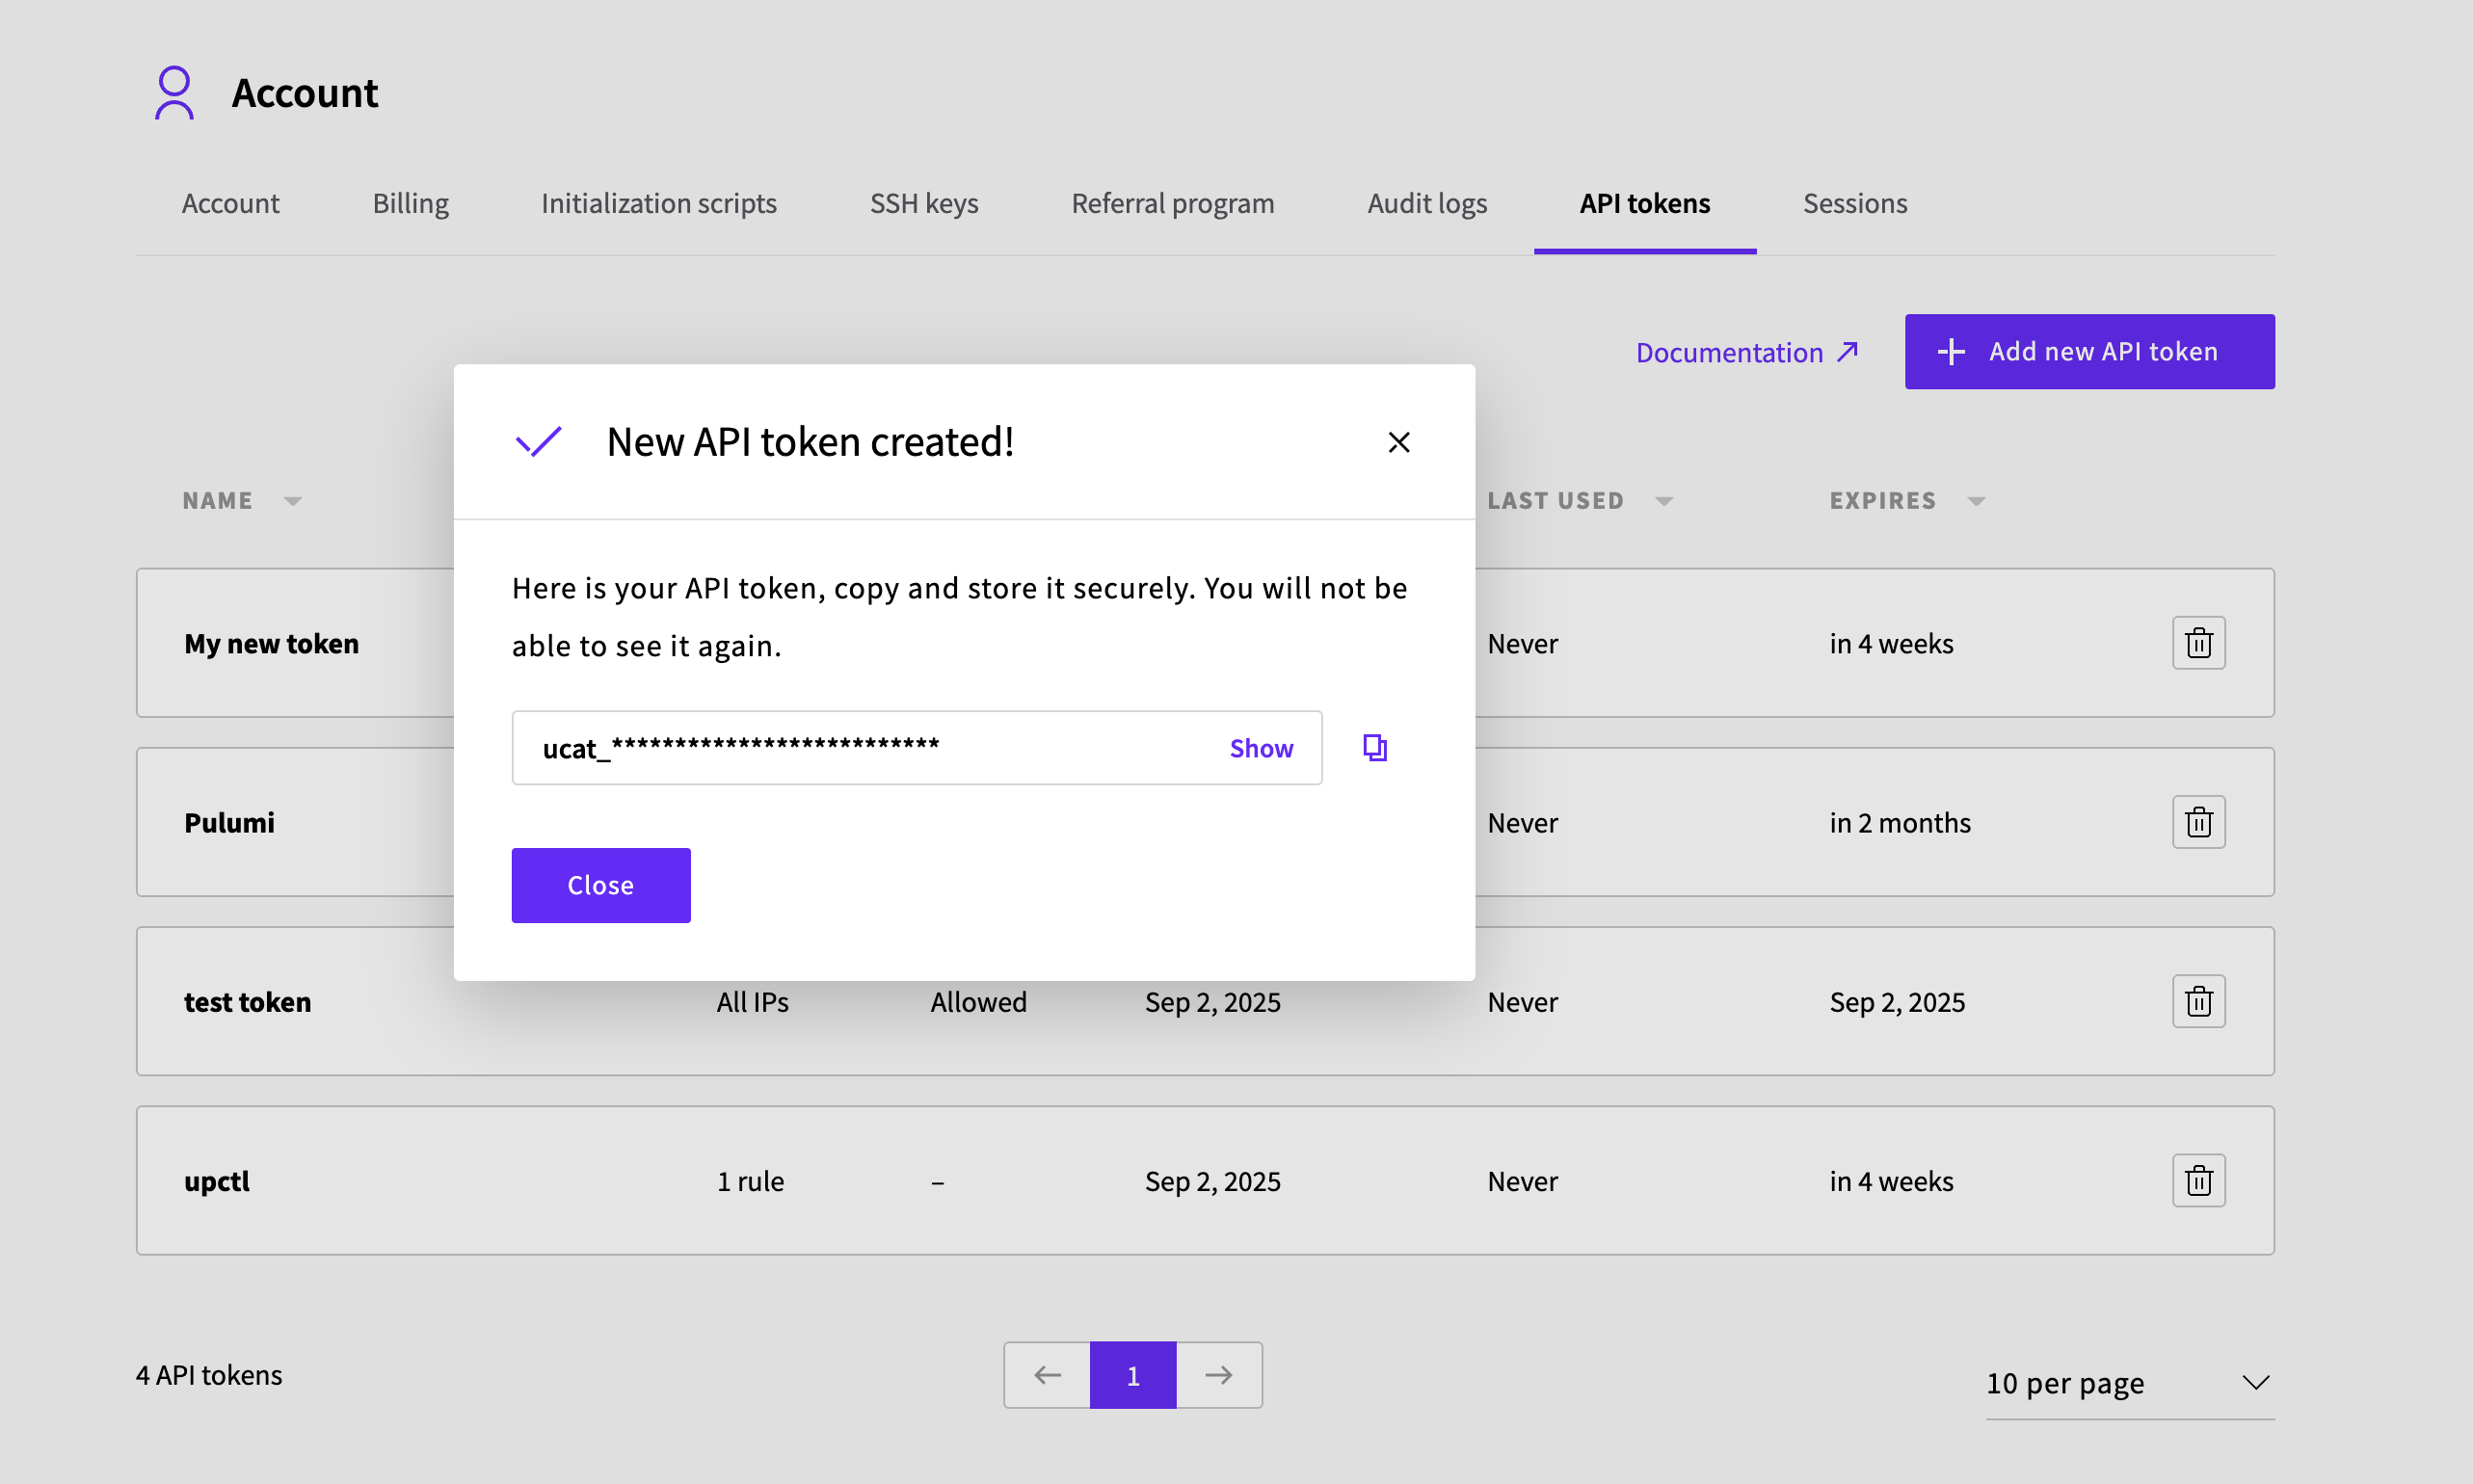
Revoking (deleting) tokens
Go to Account > API Tokens in the Control Panel. You can see all your tokens with their:
- Name and creation date
- Last used timestamp
- Expiration date
- Status
To revoke a token, click the Delete button next to it. Revocation is immediate - all requests using that token will fail right away. Note that it may take up to 1 minute for the deletion to fully propagate.
Using tokens with HTTP requests
Put the token in the Authorization header as a Bearer token:
curl -H "Authorization: Bearer ucat_01DQE3AJDEBFEKECFM558TGH2F" \
  https://api.upcloud.com/1.3/account
This replaces the old Basic Auth method and works with any HTTP client.
Using tokens with upctl CLI
Config file method
Create or update your upctl config file at $HOME/.config/upctl.yaml:
token: ucat_01DQE3AJDEBFEKECFM558TGH2FThis replaces the username/password fields in your config.
Environment variable method
Set the UPCLOUD_TOKEN environment variable:
export UPCLOUD_TOKEN=ucat_01DQE3AJDEBFEKECFM558TGH2F
upctl account show
The environment variable takes precedence over the config file.
Using tokens with environment variables
For automation tools and scripts, environment variables are the most common way to use tokens.
Setting environment variables
One-time use:
export UPCLOUD_TOKEN=ucat_01DQE3AJDEBFEKECFM558TGH2FPersistent setup (bash):
echo 'export UPCLOUD_TOKEN=ucat_01DQE3AJDEBFEKECFM558TGH2F' >> ~/.bashrc
source ~/.bashrc
Persistent setup (zsh):
echo 'export UPCLOUD_TOKEN=ucat_01DQE3AJDEBFEKECFM558TGH2F' >> ~/.zshrc
source ~/.zshrc
Using tokens with Terraform
The UpCloud Terraform provider reads the UPCLOUD_TOKEN environment variable automatically:
export UPCLOUD_TOKEN=ucat_01DQE3AJDEBFEKECFM558TGH2F
terraform plan
You can also set it in your provider configuration:
provider "upcloud" {
  token = var.upcloud_token
}

variable "upcloud_token" {
  description = "UpCloud API token"
  type        = string
  sensitive   = true
}
Then pass it via environment variable:
export TF_VAR_upcloud_token=ucat_01DQE3AJDEBFEKECFM558TGH2FUsing tokens with Pulumi
Pulumi also uses the UPCLOUD_TOKEN environment variable:
export UPCLOUD_TOKEN=ucat_01DQE3AJDEBFEKECFM558TGH2F
pulumi up
Or configure it using Pulumi's config system:
pulumi config set upcloud:token ucat_01DQE3AJDEBFEKECFM558TGH2F --secretUsing tokens in programming
Python example
import requests

token = "ucat_01DQE3AJDEBFEKECFM558TGH2F"
headers = {"Authorization": f"Bearer {token}"}

response = requests.get("https://api.upcloud.com/1.3/account", headers=headers)
print(response.json())
Node.js example
const token = "ucat_01DQE3AJDEBFEKECFM558TGH2F";
const headers = {
  "Authorization": `Bearer ${token}`,
  "Content-Type": "application/json"
};

fetch("https://api.upcloud.com/1.3/account", { headers })
  .then(response => response.json())
  .then(data => console.log(data));
Security best practices
Enable two-factor authentication
With API tokens, you can now enable 2FA on your UpCloud account without losing API access. This wasn't possible with the old username/password authentication.
Consider IP restrictions
For enhanced security, consider setting allowed_ip_ranges when creating tokens. This restricts where your tokens can be used from:
- Specific IP:
203.0.113.5(single server or workstation) - Network range:
203.0.113.0/24(office network) - All addresses: Check "Allow access from all IP addresses" (convenient but less secure)
Set appropriate expiration times
Consider setting reasonable expiration times based on your use case:
- CI/CD pipelines: 30-90 days
- Development/testing: 7-30 days
- Production automation: Review and rotate every 90-180 days
Store tokens securely
- Never hardcode tokens in your source code
- Use environment variables or secure secret management systems
- Don't commit tokens to version control
- Rotate tokens regularly
Monitor token usage
Regularly review your active tokens in the Control Panel and revoke any you no longer need. Each token shows when it was last used.
What's next?
Now that you have API tokens set up, you can:
- Get started with the UpCloud API
- Deploy servers using the API
- Use the UpCloud CLI
- Set up Terraform with UpCloud
For complete API token reference and programmatic token management, check out the API Tokens documentation.