
While screenshots in this guide may show MySQL specifically, the same interface and workflow apply to PostgreSQL migrations, with only minor differences in connection details noted where relevant.
How to migrate managed MySQL and PostgreSQL databases from DigitalOcean to UpCloud
UpCloud's migration tool provides an easy way to move your managed MySQL and PostgreSQL databases from DigitalOcean to the UpCloud Managed Databases service. This guide walks you through the process for both database types.
Note
Setting up the migration
Get started by logging into your UpCloud Control Panel and navigating to your Managed Database service.
Click the "Settings" tab and scroll down to the Migration section. This is where you'll configure the details needed to connect to your DigitalOcean database and initiate the migration.
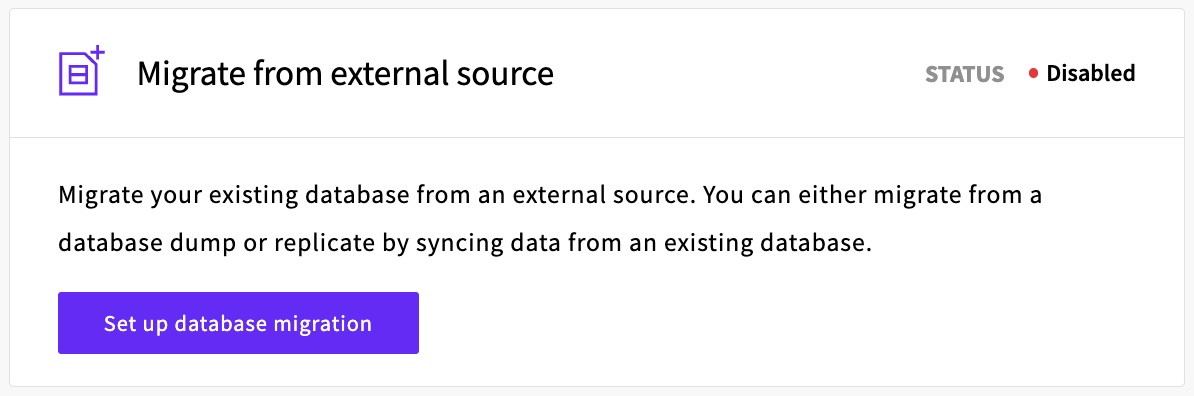
Click "Set up database migration" to begin the migration.
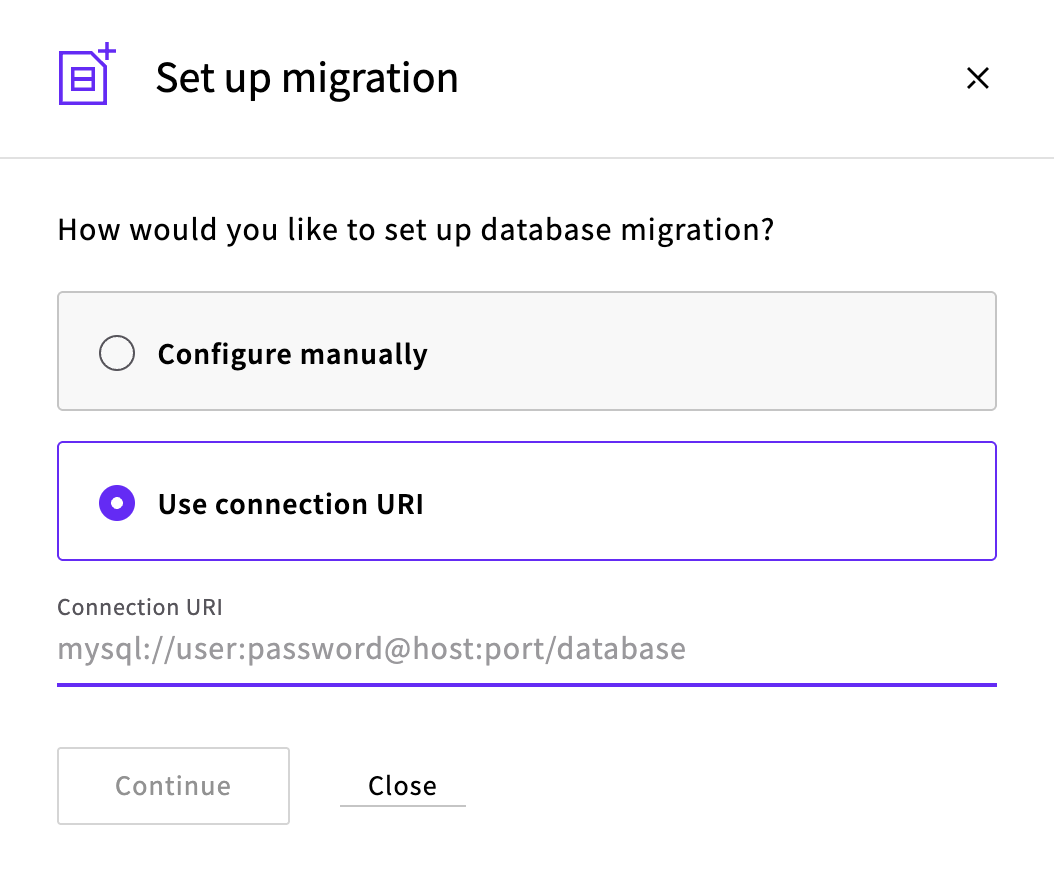
When migrating from DigitalOcean, we recommend using the connection URI option, as DigitalOcean provides a ready-to-use connection string for your database. You can find this connection string in your DigitalOcean dashboard under the "Connection Details" section of the Overview tab.
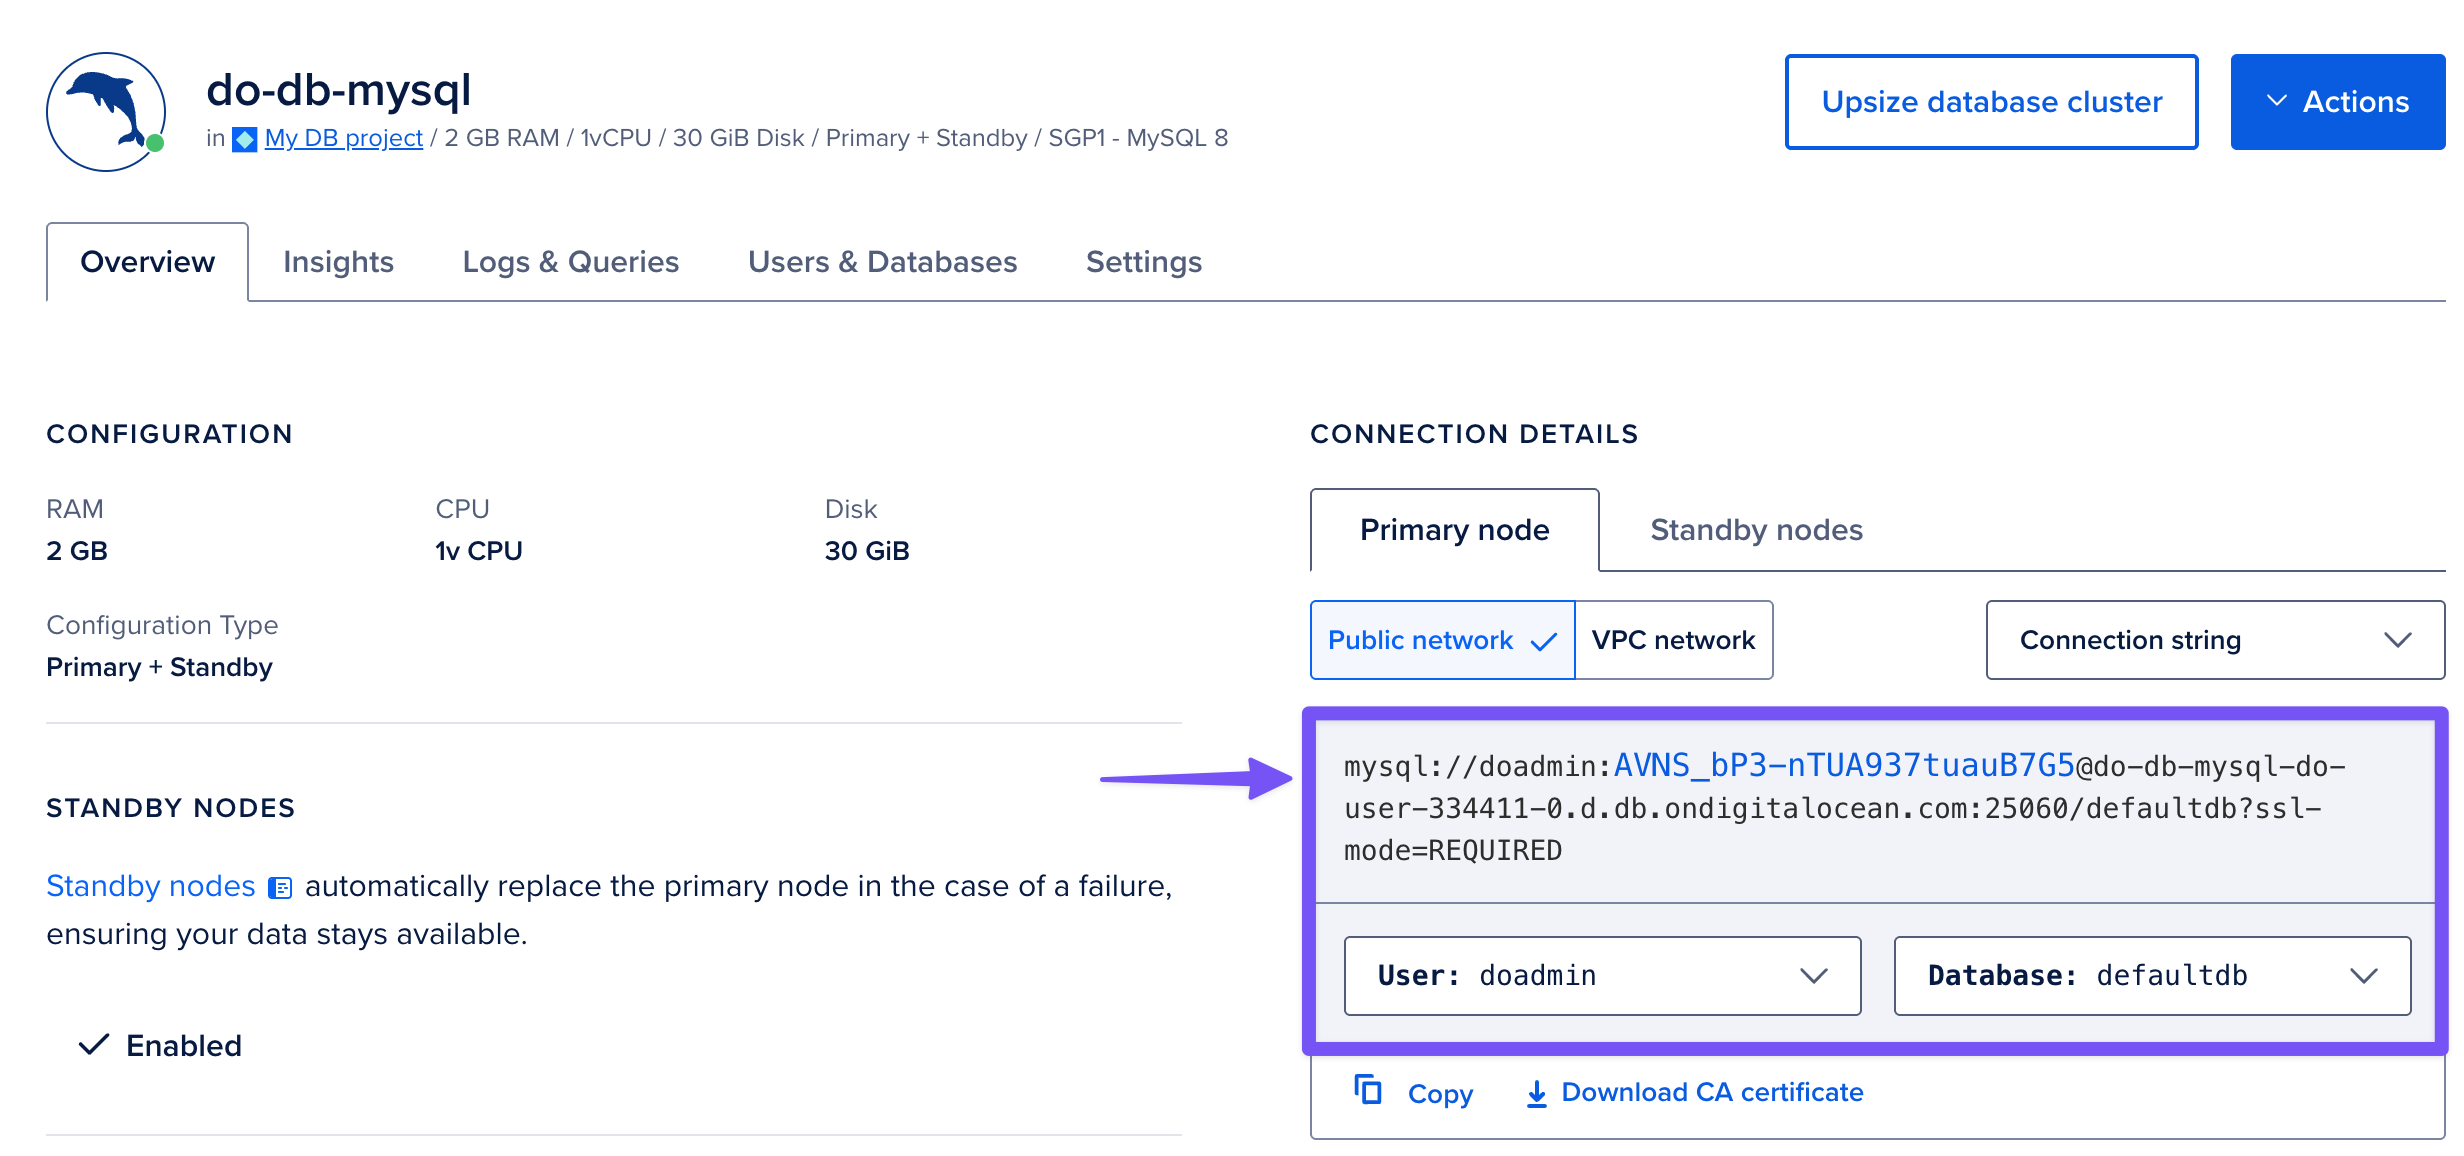
Before copying the connection string from the DigitalOcean dashbaord, make sure to reveal the password if it is hidden. Also, make sure the user is set to doadmin and the database is defaultdb. The doadmin user is the default administrator account created by DigitalOcean with full privileges across all databases in your cluster, making it ideal for migration purposes. The database in the connection string (defaultdb) is simply used to establish the initial connection and doesn't determine which databases will be migrated.
Paste the copied connection string into the connection URI field in the UpCloud migration setup pop-up.

Click "Continue" to proceed.
On the next screen, select the method you would like to use for the migration. The dump method (mysqldump/pg_dump) is the default option and is the simplest approach. However, you can also select the replication method if you require continuous synchronisation during migration. This guide outlines the difference between the two methods and explains how to choose the most appropriate option for your needs.
If there are specific databases you want to exclude from the migration, you can list them in the "Ignore databases" field. This is useful when you only want to migrate certain databases from a server that contains many.
You can also specify whether to use SSL for the connection to your source database. Using SSL is recommended when your source database is accessible over the public internet, as it encrypts the data in transit.
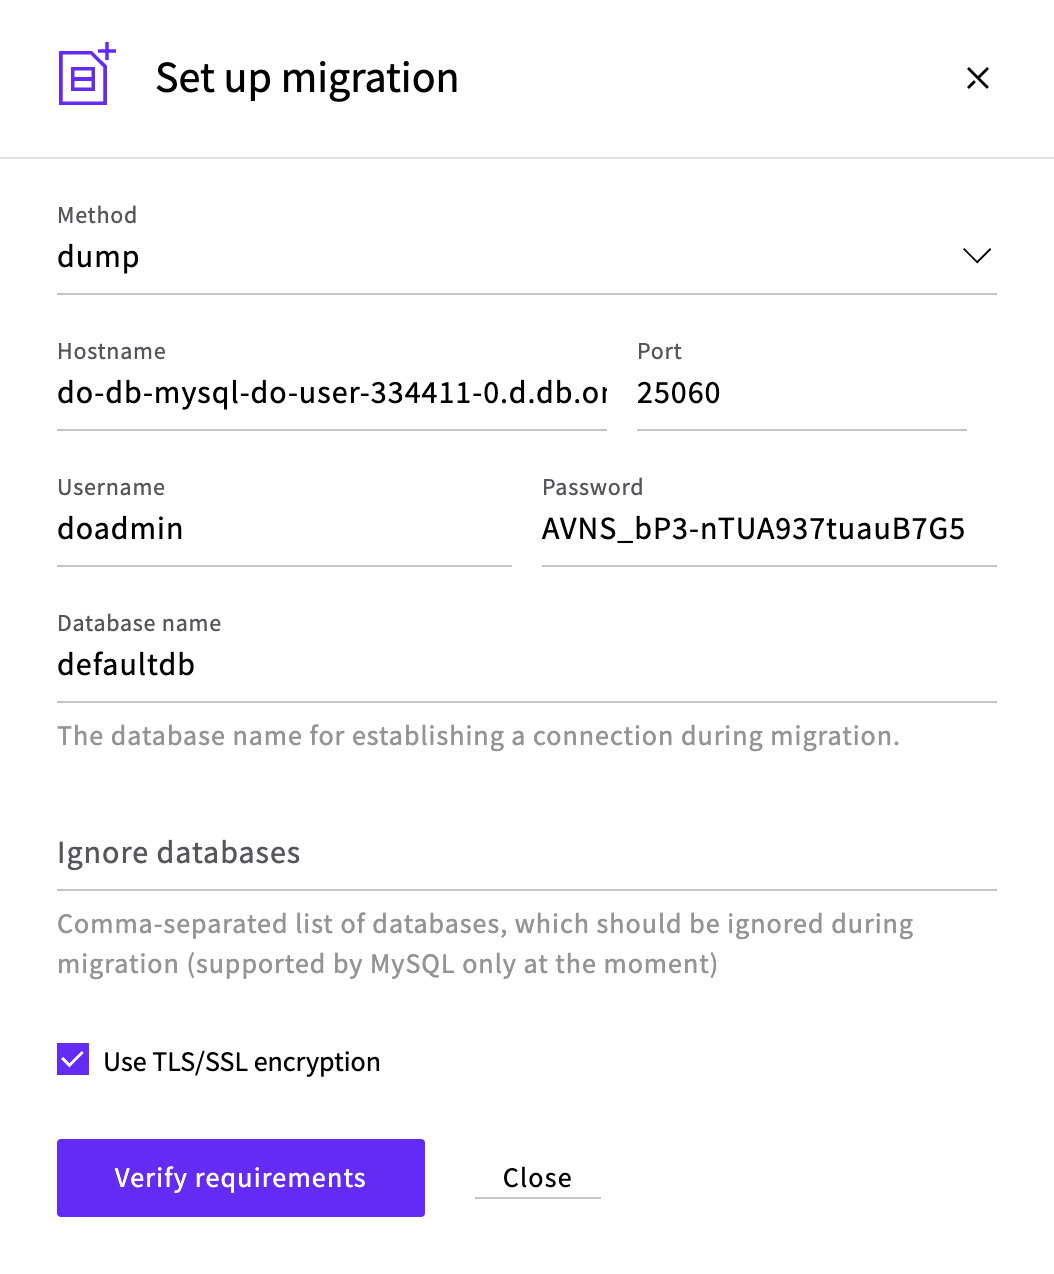
Clicking "Verify requirements" will run a quick test to check connectivity to your DigitalOcean database and assess the preferred migration method based on your database configuration.

The verification results will highlight if there are any issues that need to be fixed.
Starting and monitoring the migration
Once the verification is successful, you can start the migration process by clicking "Start migration".
The migration will begin immediately, and you'll be presented with a progress window that provides real-time status updates.
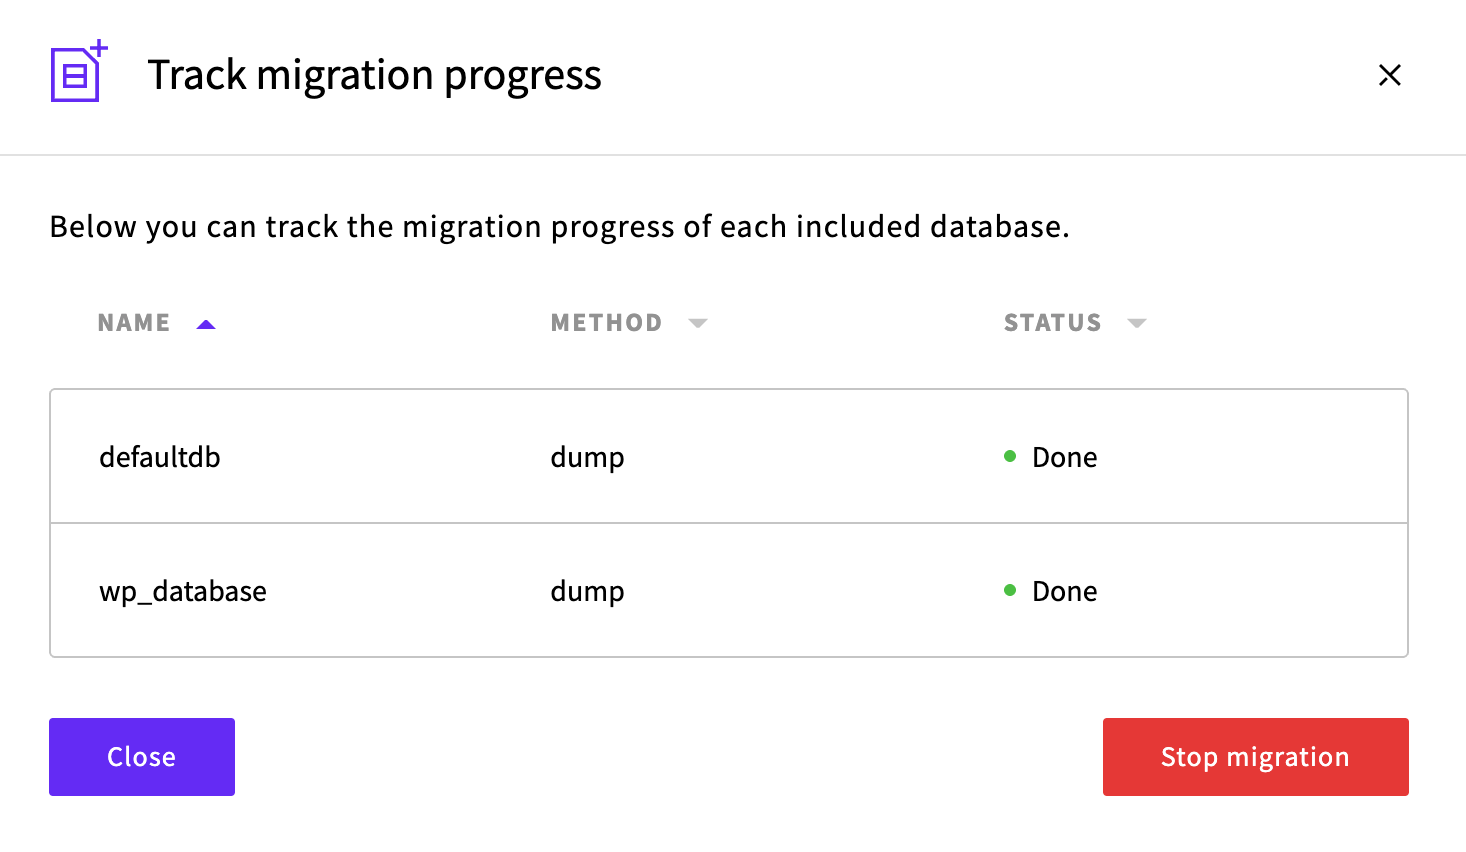
The migration time depends on the size of your databases and the complexity of your data. Small databases might migrate in minutes, while larger ones could take longer.
Completing the migration
When the migration status shows as complete for all databases, it's time to finalise the process:
Verify your data has been transferred correctly by connecting to the new database and checking key tables and records.
Create your database users via the UpCloud Hub. These are not migrated automatically, so you'll need to recreate them with the appropriate permissions.
Update your application configuration to point to the new database. This involves changing the connection details in your application's configuration files or environment variables.
If you used the replication method, your source and target databases will remain in sync until you disable replication. This gives you a safety net – if anything goes wrong after switching to the new database, you can easily switch back while you troubleshoot.
Once you're confident everything is working correctly with the new database, you can disable replication from the settings page if you used that method.
Conclusion
After completing your migration from DigitalOcean to UpCloud's Managed Database service, you can refer to our database-specific documentation for next steps:
MySQL
PostgreSQL
These resources provide additional information about database user management and application configuration updates specific to your database type.
For additional support or questions about the migration process, don't hesitate to reach out to our customer support team, who are available 24/7 to assist with your database migration needs.