
How to migrate an OpenStack server to UpCloud
Migrating an existing OpenStack server to UpCloud's infrastructure is a relatively straightforward process and can be performed with most OpenStack servers. This guide describes an image-based migration, which works best for:
- Servers with storage volumes under 100GB
- Simple server setups that do not have complex networking requirements
- Standalone servers not dependent on other cloud resources
For larger deployments or more complex setups, consider an application-level migration approach instead:
- Database servers: Use native database replication tools
- File servers: Use file synchronisation tools like rsync
- Web applications: Set up fresh instances and sync application data
- Servers with managed services: Migrate services individually using service-specific tools
In any case, we recommend reading through the entire guide before starting the migration process. This will help you understand the full scope of the migration and identify any potential compatibility issues with your setup.
Our support team is also on hand 24/7 to answer any questions you may have regarding the process. While they can't do the actual migration for you, they can advise you and walk you through the steps should you get stuck at any part of the process.
With that out of the way, to get started, all you’ll need is API access to your OpenStack server. You can consult your OpenStack provider's documentation for this or refer to the official OpenStack documentation.
The process involves deploying a new UpCloud server. You will then download the OpenStack image to this new cloud server. Finally, the downloaded image is used to set up and configure a bootable storage device.
In the following sections, we will describe each step of the process. By the end of this guide, you will have successfully transferred your OpenStack server image and have it up and running on UpCloud.
Prerequisite for older Operating Systems
If you are running CentOS 6.7 or older or Ubuntu 12.04 or older, you must prepare your OpenStack server for migration by logging into your OpenStack server and running the following command:
sudo mv /etc/udev/rules.d/70-persistent-net.rules /etc/udev/rules.d/70-persistent-net.rules.oldThis step is necessary because older OS versions store network interface configurations with MAC addresses, which can cause networking issues after migration. The command renames the file containing the current MAC address references. On the next boot (which will be on UpCloud), the system will generate a new file with the correct network interface information.
Servers running newer versions of Linux distributions (such as CentOS 7+, Ubuntu 14.04+) do not require this preparation step as they handle network interface detection differently.
Deploy a new UpCloud server
Start by creating a new cloud server of your choice at your UpCloud Control Panel.
Make the required configurations by:
- Selecting the location you wish to import the server
- Selecting a suitable plan. The chosen plan should have enough storage to hold the image of your OpenStack server.
- Adding a second storage disk by clicking the “Add a new device” button and choosing the size. The secondary storage should be at least the same size as the disk on the OpenStack server being imported, plus some extra just to be safe.
- Picking the OS you are comfortable with for a one-time boot. The latest version of Ubuntu is a good option.
- Adding an SSH key to allow password-free login
- Naming your server and giving it a description
- Confirming your selections and clicking the Deploy button
Once your UpCloud server has finished deploying, you can log in to it with SSH using the SSH keys that you selected during deployment.
Next, update the UpCloud server to make sure the software is running the latest version.
# Debian and Ubuntu
sudo apt-get update && sudo apt-get dist-upgrade -y

# CentOS
sudo yum update -y
With the new UpCloud server up to date, check that both of the storage devices are attached and report their size correctly.
lsblkNAME MAJ:MIN RM SIZE RO TYPE MOUNTPOINTS
vda 253:0 0 50G 0 disk
├─vda1 253:1 0 1M 0 part
└─vda2 253:2 0 50G 0 part /
vdb 253:16 0 50G 0 diskHere the vda disk with a partition called vda2 is your primary storage, and the vdb disk is the second device without partitions. If everything seems in order, continue with uploading your server image to the cloud host.
Setting up OpenStack CLI access
To manage your OpenStack server from your newly deployed UpCloud server, you'll need to install the OpenStack CLI client on your UpCloud server. Do that using the appropriate command for your system:
# Debian and Ubuntu
sudo apt install python3-openstackclient
# CentOS
sudo yum install python3-openstackclientYou'll also need an OpenRC file containing your credentials to authenticate with the OpenStack API. Please refer to your OpenStack provider's documentation for instructions on obtaining these API credentials, as the process varies between providers.
The credentials are typically delivered in the form of an OpenRC file that looks something like this:
export OS_ENDPOINT_TYPE=publicURL
export OS_INTERFACE=publicURL
# COMMON OPENSTACK ENVS
export [email protected]_sam-api
export OS_PROJECT_ID=f9caa8ea662c45af92e13b2813fs5561
echo "Please enter your OpenStack password as user $OS_USERNAME: "
read -sr OS_PASSWORD_INPUT
export OS_PASSWORD=$OS_PASSWORD_INPUT
export OS_AUTH_URL=https://lax-controller.example.com:5000/v3
export OS_NO_CACHE=1
export OS_USER_DOMAIN_ID=default
export OS_PROJECT_DOMAIN_ID=default
export OS_REGION_NAME=LA
# For openstackclient
export OS_IDENTITY_API_VERSION=3
export OS_AUTH_VERSION=3Create and save the file somewhere on your UpCloud server using the command below:
nano openrcNext, type source openrc to load the OpenStack configuration information.
You will be prompted for your OpenStack API User's password if it's not already included in the file.
If everything went well, you should be able to list the instances running in your project using the following command:
openstack server listIf you see a list of instances (or even an empty list), it means you have correctly configured your API user's access for this environment, and your connection is working.

Choosing your migration path
The next steps will differ depending on how your OpenStack server is configured. OpenStack servers typically use one of two storage configurations:
- Ephemeral storage - Where the root disk is part of the instance itself
- Volume-backed instance - Where the root disk is on a separate persistent volume
You can find out which type you have by running the OpenStack server list command.
openstack server listThe command will show a list of your instances, and you can tell the storage type by looking at the "Image" column:
- If it shows an actual image name (like "Ubuntu 24.04 Cloud"), the instance uses ephemeral storage.
- If it shows something like "N/A (booted from volume)", the instance is volume-backed.

You can also find out by checking your OpenStack provider's dashboard or consulting with your provider.
To continue following along, skip to the appropriate section below based on your configuration:
Migrating an ephemeral storage instance
Migrating a volume-backed instance
Migrating an ephemeral storage instance
For ephemeral instances, you’ll need to create an image of your OpenStack server and download it to your UpCloud server.
First, list your servers to find the ID of the server you want to migrate:
openstack server list
Take note of the server ID as you'll need this for the next step.
Create an image of the server with:
openstack server image create --name <snapshot-name> <server-id>Replace <snapshot-name> with a suitable name for your image, and <server-id> with the ID of the server that was obtained from the previous step.
Depending on the size of your server, the image creation may take a while to complete.
When it is created, you will see details of the image, including its ID. Take note of the image ID as you will need it for the next step.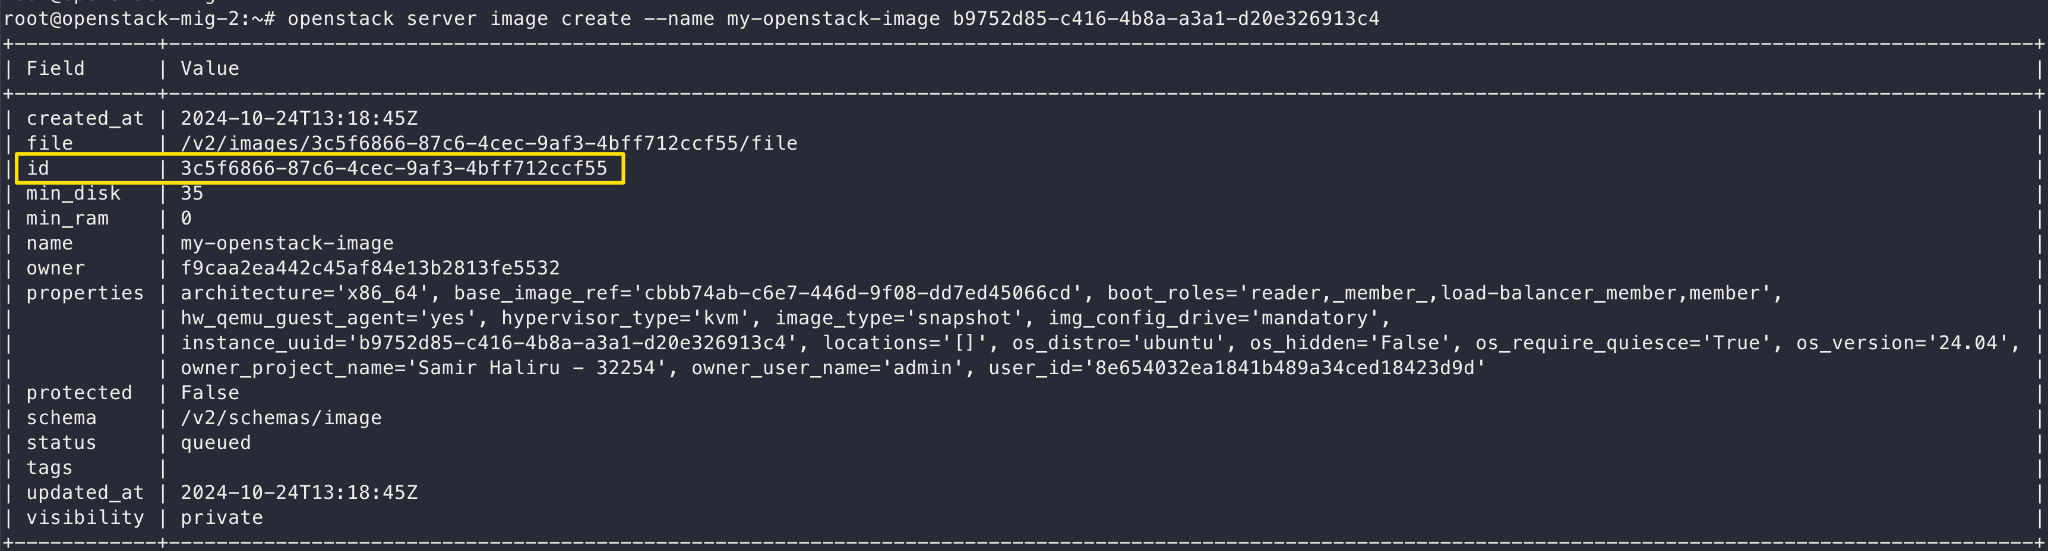
You can confirm that the image has been created by running the command below:
openstack image listThe initial status of the image may be 'queued' or 'uploading'. Make sure to wait for the status to show 'active' before continuing.
Next, use the image ID in the command below to download the image to your UpCloud server:
openstack image save --file <image-name>.qcow2 <image-id>Replace <image-name> with a descriptive name you want to give to the saved image on your UpCloud server (for example: "my-openstack-image"), and <image-id> with the ID of the image from the previous step.
This will download the image to your UpCloud server. Again, this may take a while depending on the size of the image.
When the prompt eventually returns, confirm that the image has been downloaded to your server using the ls command .
Optional:
To verify the integrity of the downloaded image file, first get the image's checksum with the following command:
openstack image show <image-id> -f value -c checksumThen calculate the checksum of your downloaded file:
md5sum <image-name>.qcow2Compare the two checksums - they should match exactly. If they do not match, you may need to download the image again.

You can now continue to the next step of the guide; Converting and copying the Image.
Migrating a volume-backed instance
For volume-backed instances, you’ll need to first create a clone of your volume, convert it to an image, and then download it to your UpCloud server.
First, list your volumes to find the ID of the volume you want to migrate:
openstack volume list
Take note of the volume ID and its size. You'll need these for the next step.
Create a new volume that is a clone of your original volume:
openstack volume create --source <volume-id> --size <size-in-GB> <name-of cloned-volume>Replace <volume-id> with your volume's ID, <size-in-GB> with the size of your original volume, and <name-of-cloned-volume> with a descriptive name for the cloned volume.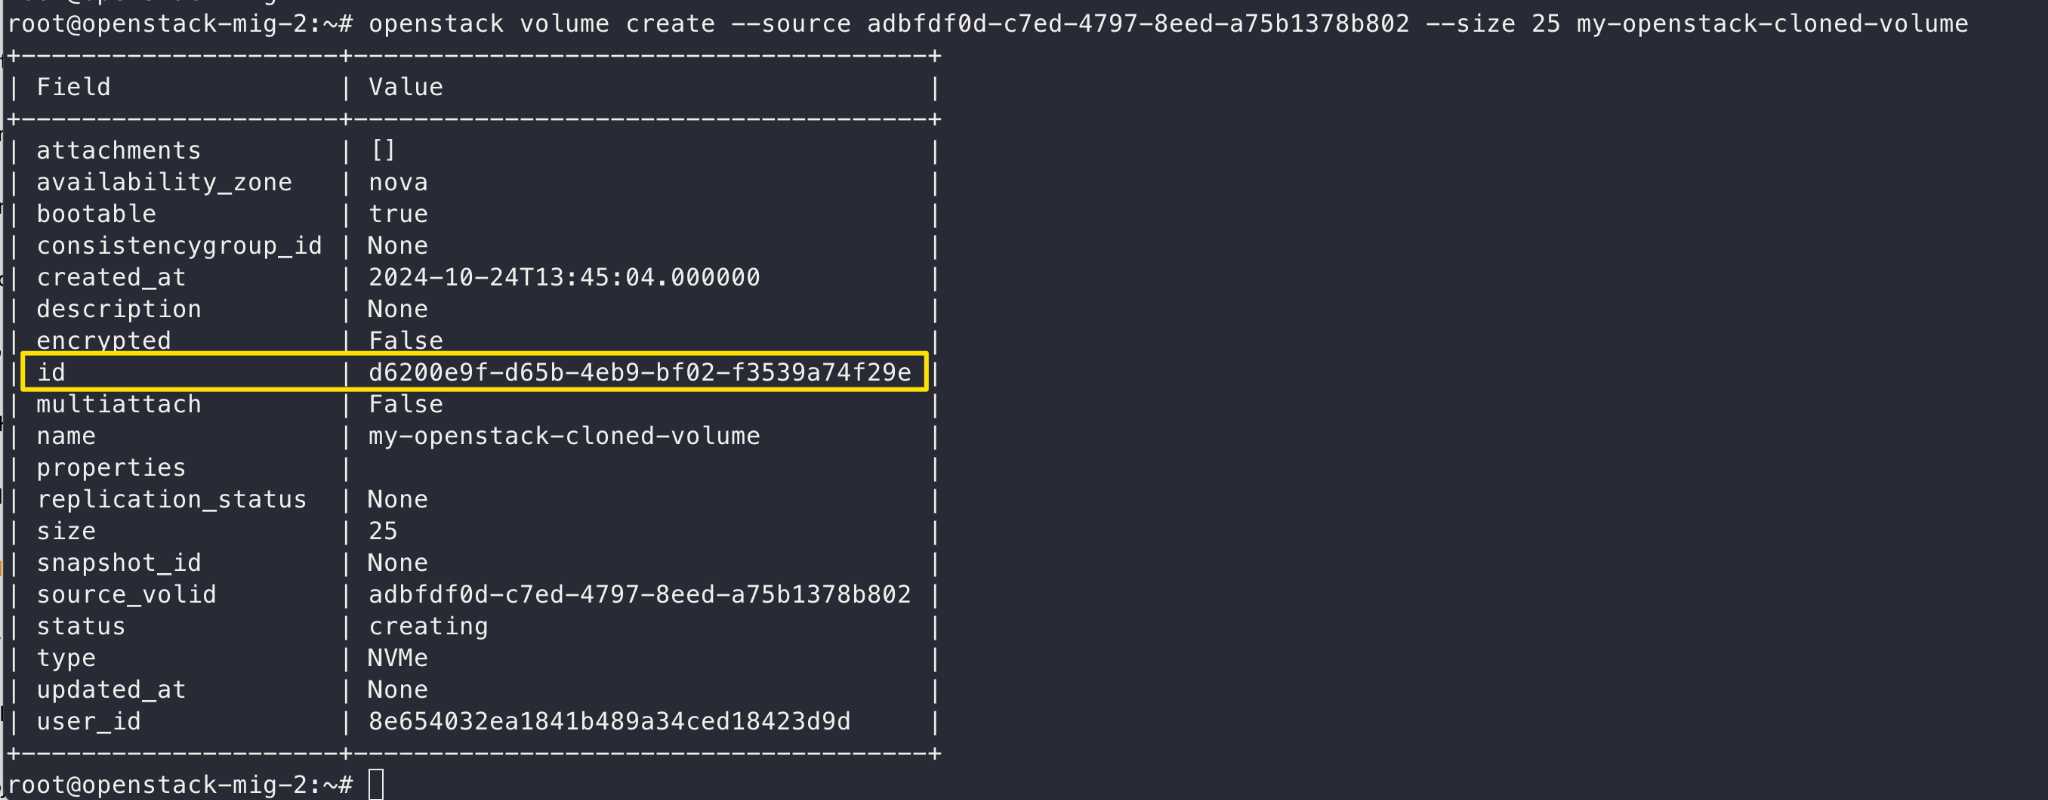
Take note of the newly cloned volume’s ID, as it will be used in the next step.
Next, create an OpenStack image from the newly cloned volume:
openstack image create --volume <cloned-volume-id> --disk-format qcow2 --container-format bare <volume-image-name>Replace <cloned-volume-id> with the volume ID you obtained in the previous step, and <volume-image-name> with a descriptive name for the image.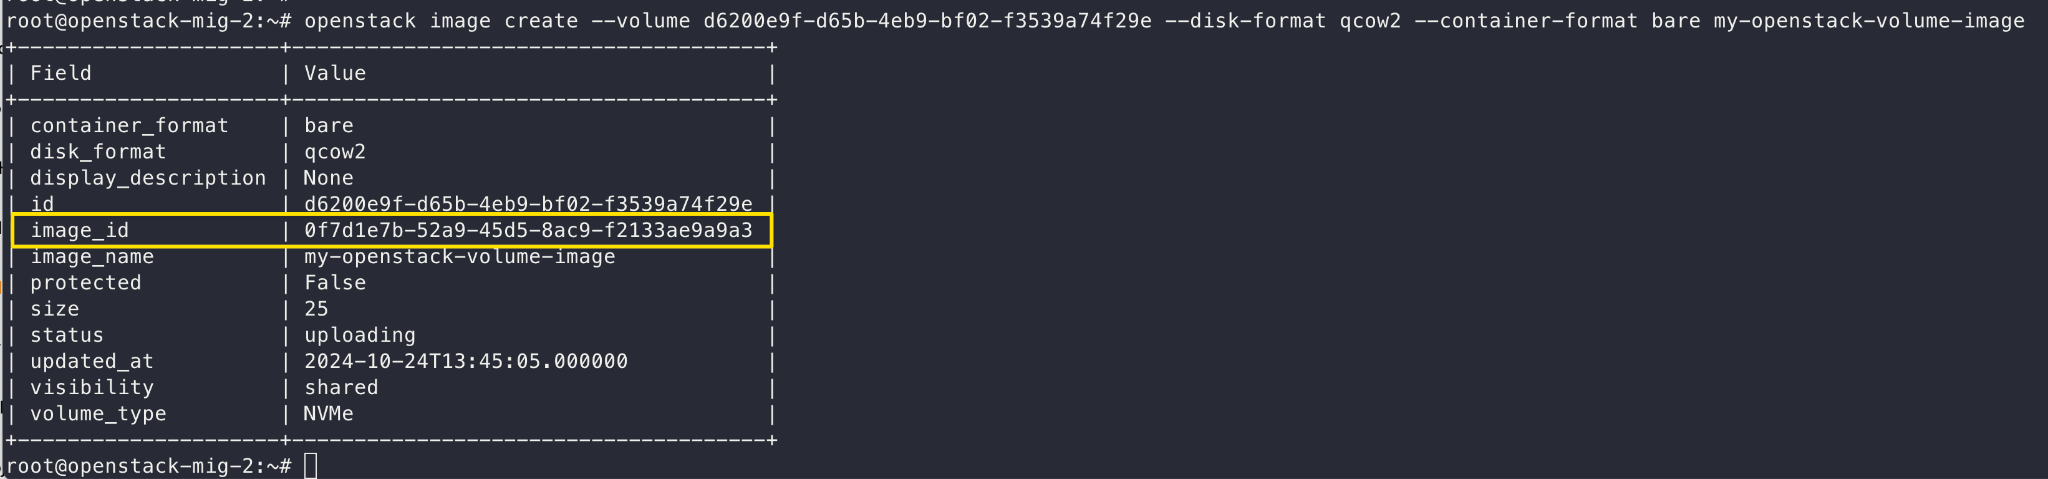
Depending on the size of the image, this may take a while. You can run the command below to list your images and check on its status. You want to wait till it shows a status of ‘active’ before continuing.
openstack image listOnce the image creation is complete and the status from the above command shows active, take note of the image_id and use it in the command below to download the image to your UpCloud server:
openstack image save --file <image-name>.qcow2 <image_id>Replace <image-name> with a descriptive name you want to give to the saved image on your UpCloud server (for example: "my-openstack-image"), and <image_id> with the ID of the image from the previous step.
Be careful not to confuse id (the volume ID) with image_id (the image ID).
This will download the image to your UpCloud server. Again, this may take a while depending on the size of the image.
When the prompt eventually returns, confirm that the image has been downloaded.
optional:
To verify the integrity of the downloaded image file, first get the image's checksum with the following command:
openstack image show <image_id> -f value -c checksumThen calculate the checksum of your downloaded file:
md5sum <image-name>.qcow2Compare the two checksums - they should match exactly. If they don't match, you may need to download the image again.

You can now continue to the next step of the guide; Converting and copying the Image.
Converting and copying the image
With your OpenStack server image now saved on your UpCloud server, the next step is to copy it to the empty storage device that is currently attached to your server.
However, before copying, we need to convert the image from its current qcow2 format to RAW format. This requires the qemu-img tool, which you can install using the following commands:
# Debian and Ubuntu
sudo apt-get install qemu-utils
# CentOS
sudo yum install qemu-imgAfter the qemu-img tool is installed, use it to convert your .qcow2 image to .raw format with the following command:
qemu-img convert -f qcow2 -O raw <image-name>.qcow2 <image-name>.imgIn the above command:
-f qcow2is the format of the source file-O rawis the format of the output file<image-name>.qcow2is the source file (the one you downloaded to your server earlier)<image-name>.imgis the output file (give this a suitable name)

You’re now ready to copy the image to the empty storage device. Use the following command while replacing the <server_image> with the system image file that you just converted:
dd if=<image-name>.img of=/dev/vdb bs=16M oflag=direct
Thats it! The second disk now contains a bootable image of your OpenStack server image.
You can confirm this by running the lsblk command again. Notice now that the secondary storage disk has several partitions.
NAME   MAJ:MIN RM SIZE RO TYPE MOUNTPOINTS
vda    253:0    0  50G  0 disk
├─vda1 253:1    0   1M  0 part
└─vda2 253:2    0  50G  0 part /
vdb    253:16   0  50G  0 disk
├─vdb1 253:17 0 34G 0 part
├─vdb14 253:30 0 4M 0 part
├─vdb15 253:31 0 106M 0 part
└─vdb16 259:0 0 913M 0 partFinal steps
However, before shutting down the server and removing the primary disk, it's helpful to temporarily mount the secondary storage device and update your network interface settings. This will ensure you have no issues connecting to the server later after removing the primary storage device.
To do this, run the following commands:
# create a mount point
sudo mkdir /mnt/vdb1

# mount the partition
sudo mount /dev/vdb1 /mnt/vdb1
If the mount was successful, you should be able to browse the files on the partition by simply navigating to the mount point.
cd /mnt/vdb1Now, depending on the OS of your original OpenStack server (not the UpCloud server), you can configure your network settings as follows:
Ubuntu 22 and later
Create a new network configuration file:
sudo nano /mnt/vdb1/etc/netplan/60-my-network-config.yamlAdd the following content, replacing <MAC for interface #1/2/3> with the MAC values from the UpCloud server’s Network tab:
network:
  version: 2
  ethernets:
    eth0:
      dhcp4: true
      match:
        macaddress: '<MAC for interface #1>'
      set-name: eth0
    eth1:
      dhcp4: true
      match:
        macaddress: '<MAC for interface #2>'
      set-name: eth1
    eth2:
      dhcp6: true
      match:
        macaddress: '<MAC for interface #3>'
      set-name: eth2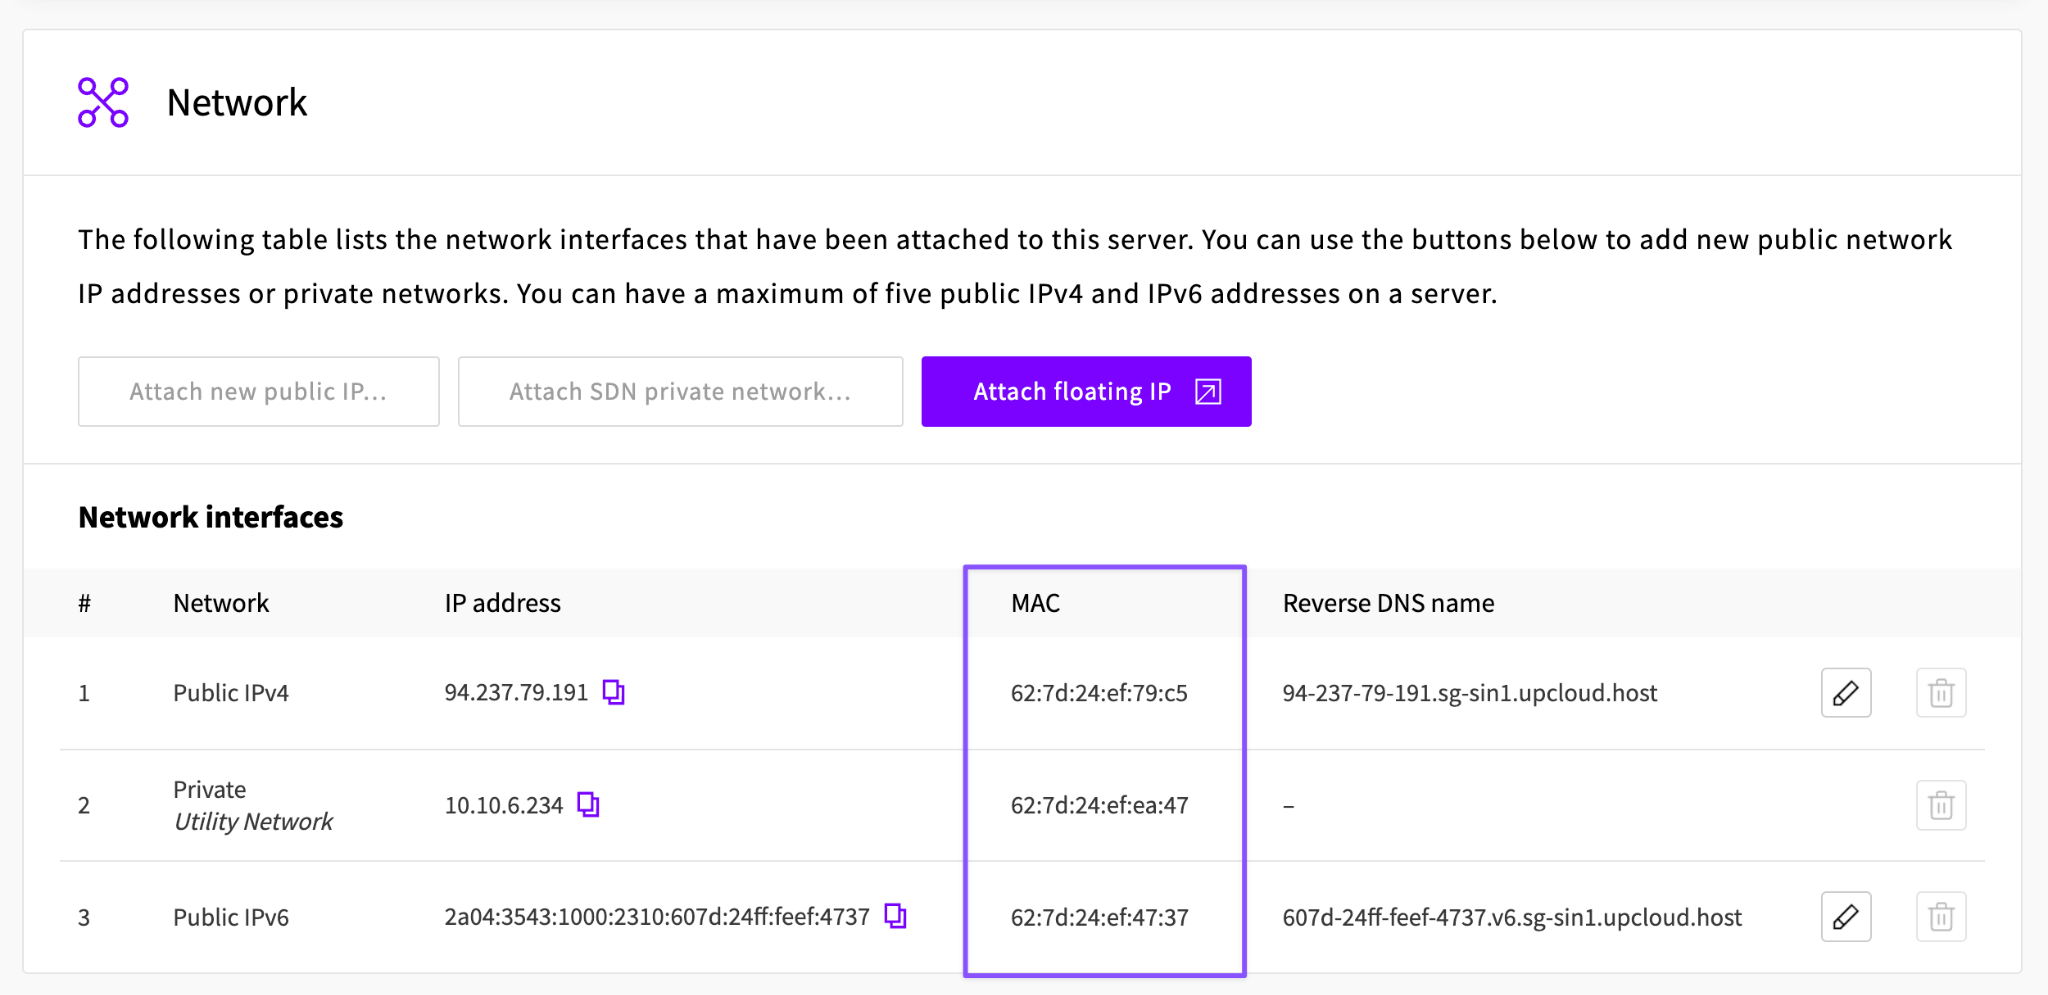
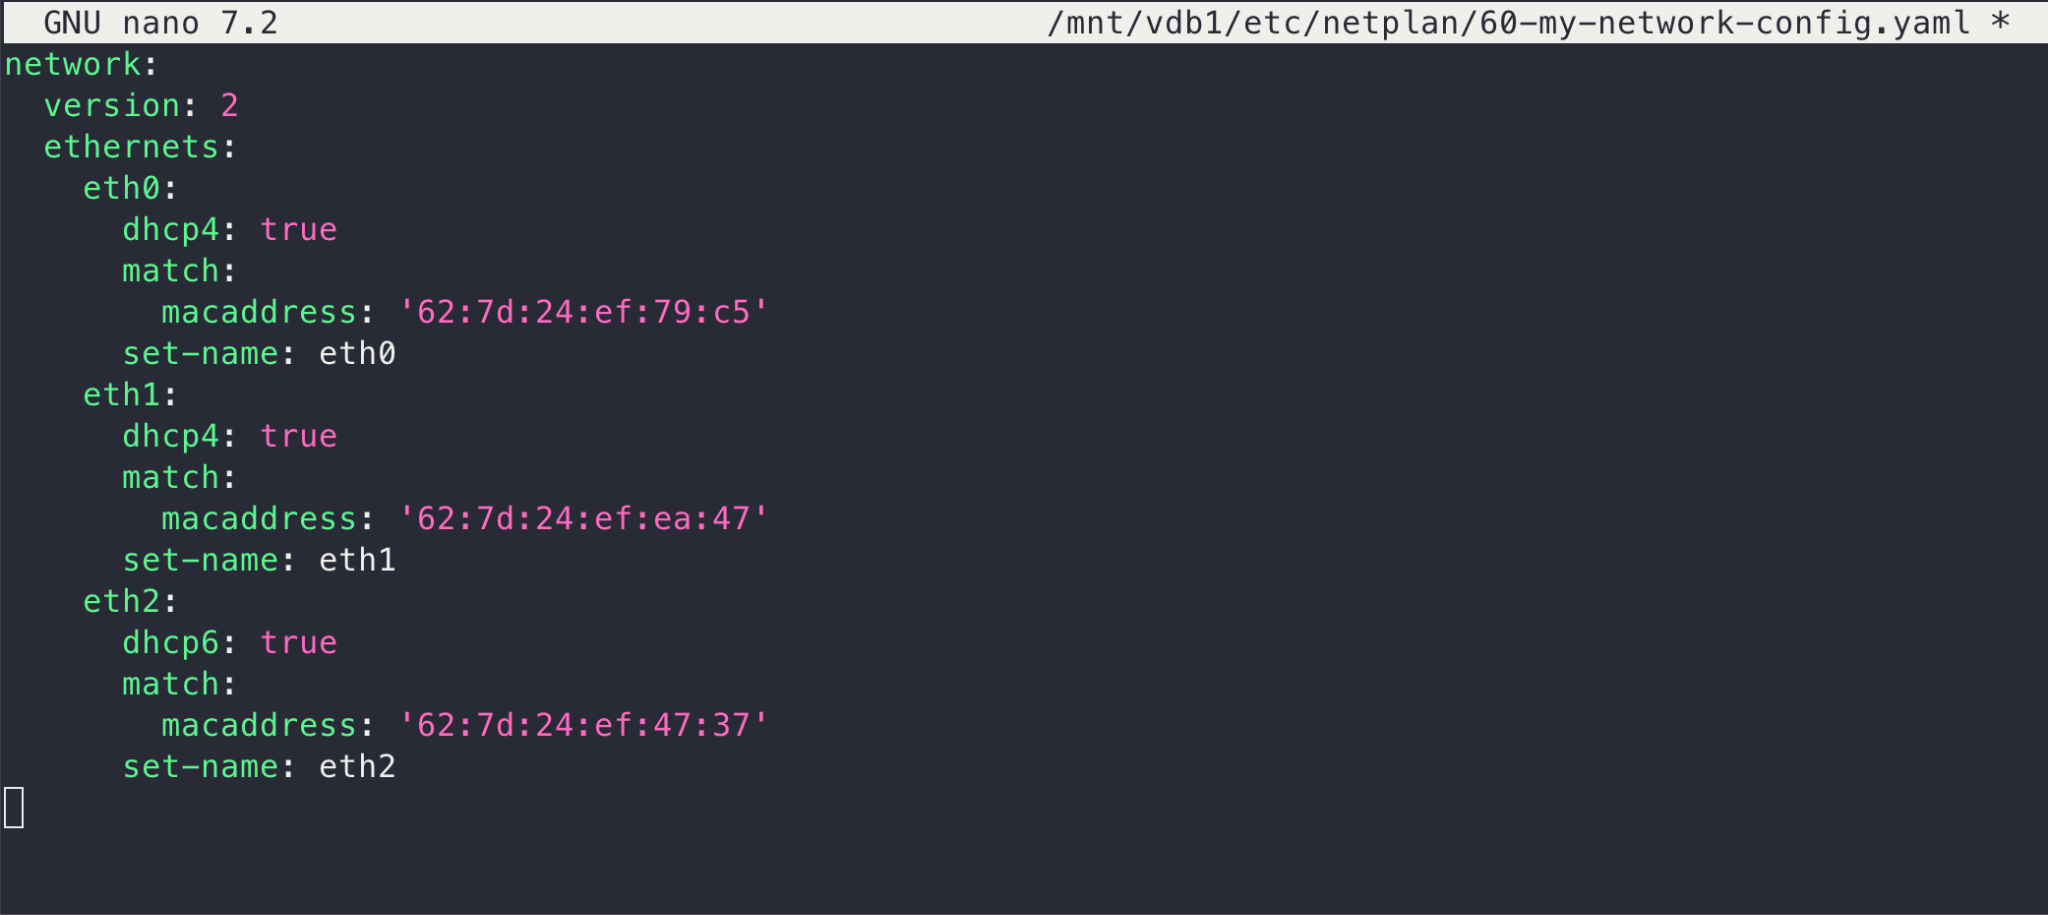
Then, save the file and exit the editor.
Debian and Ubuntu 20 or earlier
Edit the interface configuration file:
sudo nano /mnt/vdb1/etc/network/interfacesIf the file already exists, you can replace its content with the following:
auto lo
iface lo inet loopback

auto eth0
iface eth0 inet dhcp

auto eth1
iface eth1 inet dhcp

auto eth2
iface eth2 inet6 auto
Save the file and exit the editor.
CentOS
Create or edit three separate interface files in the /mnt/vdb1/etc/sysconfig/network-scripts/ directory:
# /mnt/vdb1/etc/sysconfig/network-scripts/ifcfg-eth0

DEVICE=eth0
BOOTPROTO=dhcp
ONBOOT=yes

# /mnt/vdb1/etc/sysconfig/network-scripts/ifcfg-eth1

DEVICE=eth1
BOOTPROTO=dhcp
ONBOOT=yes

# /mnt/vdb1/etc/sysconfig/network-scripts/ifcfg-eth2

DEVICE=eth2
NM_CONTROLLED=yes
IPV6INIT=yes
Booting the server
With those changes in place, you can shut down the server and remove the old primary disk. To do this, go to your UpCloud Control Panel and the Storage tab in your server settings. Once the server is stopped, click the eject icon on the primary storage device (the first one on the list) to remove it. The second disk, where you just transferred the system image, will then be automatically set as the new primary device.
Turning the server on should now boot up the OpenStack server from which you created the image earlier. You should be able to SSH into the server using the IP address of the UpCloud server and the credentials of the OpenStack server.
If everything works correctly, you can safely delete the old storage device you just removed. However, it's recommended to keep your old OpenStack server powered off for a few days before completely deleting it. This gives you a backup option in case you need to access any data from it, or if you encounter unexpected issues with the new setup.