Replacing a server's main IP address with a floating IP
A Cloud Server gets its main public IPv4 address when it is created. If you have also attached a floating IP to the same server, you might want the floating IP to become the server's main IP address and get rid of the original one.
To do this, you first delete the server's public IPv4 interface. This deletes the original IP address and detaches the floating IP, which stays in your account. You then create a new public IPv4 interface and select the floating IP as its address. This guide shows how to do that without losing access to your server.
If you want to do the opposite and turn a server's own IP address into a floating IP, see Converting a server IP address to a floating IP address.
Before you begin
Read these points before you make any changes:
- The server is offline during the change. You need to shut the server down to delete and create network interfaces.
- The original IP address is deleted permanently. You cannot get it back after you delete the interface.
- The address can no longer be moved to another server. Once it is the interface's main IP address, it stops being a floating IP, so you cannot transfer it to another server or detach it.
- Use the same interface index. The new interface must use the same index as the interface you delete. With a different index, the operating system can fail to configure the new interface, which leaves the server without an IPv4 address.
- Keep a way into the server. You lose SSH access through the original IP address as soon as you shut the server down, and you reconnect using the floating IP afterwards. If something goes wrong, the web console in the Control Panel is your fallback. The console asks for a password, so if you log in with SSH keys only, set a password for the account you will log in with at the console before you start. On UpCloud templates this is
rootunless you have created your own user.
This guide covers the following operating systems, installed from the UpCloud templates:
- Ubuntu 22.04, 24.04, and 26.04
- Debian 12 and 13
- AlmaLinux 8, 9, and 10
- Rocky Linux 8, 9, and 10
- CentOS Stream 9 and 10
Other operating systems, including Windows, have not been covered here. For those, check the network configuration against the floating IP guide for your system: AlmaLinux, CentOS, Debian, Ubuntu, or Windows.
Before making changes to your network configuration, it's always a good idea to take a backup.
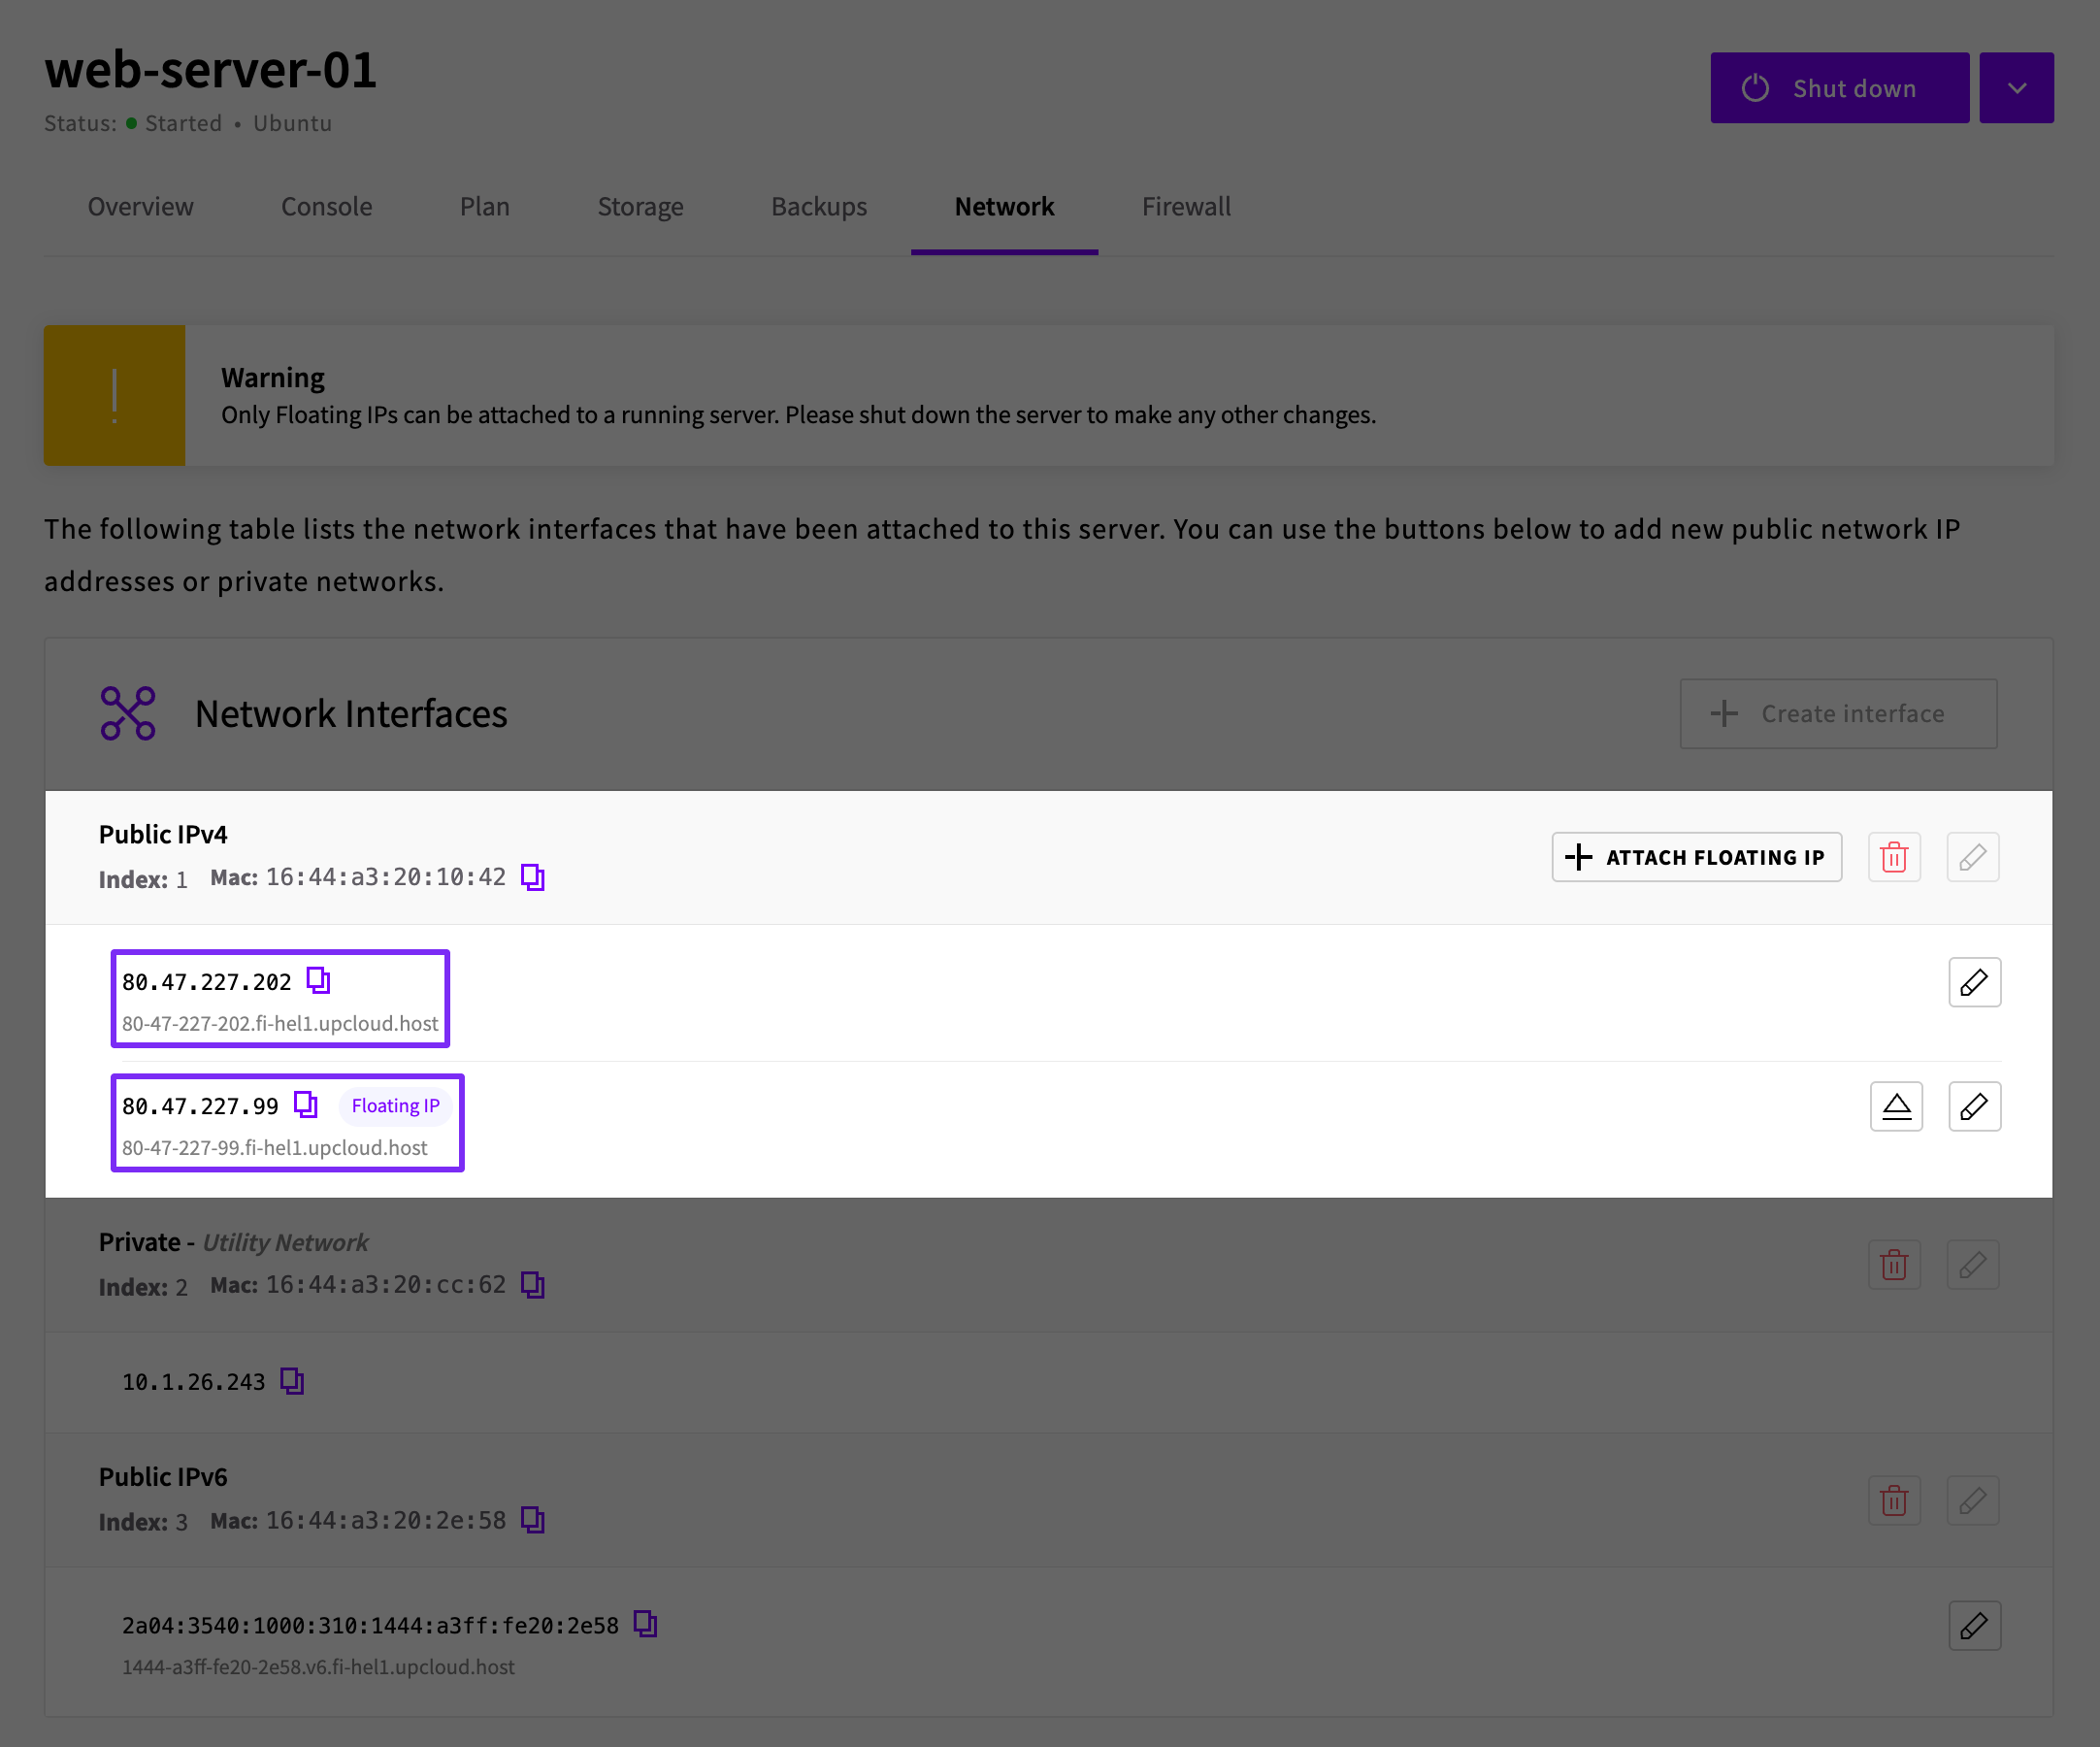
In the examples below, the server's main IP address is 80.47.227.202 and the floating IP is 80.47.227.99. Replace them with your own addresses when you run the commands.
1. Prepare the operating system
When you create the new interface, it gets a new MAC address. On Ubuntu and Debian 13, the network configuration created by cloud-init identifies the public interface by its MAC address, so it no longer matches after the change and the server can come back without an IPv4 address.
To prevent this, change the configuration to identify the interface by its name instead. Do this now, while you can still connect over SSH using the original IP address.
Make a backup copy of the netplan configuration file.
sudo cp /etc/netplan/50-cloud-init.yaml /root/50-cloud-init.yaml.bakOpen the file in a text editor.
sudo nano /etc/netplan/50-cloud-init.yamlIf the file starts with a comment saying that changes to it will not persist across a reboot, you can still make this change. On UpCloud Cloud Servers, cloud-init only writes this file when the server is first set up, not on every boot, so your change stays in place across restarts.
Find the
eth0section near the start of the file. It looks like the example below, with your server's MAC address.network: version: 2 ethernets: eth0: match: macaddress: "16:44:a3:20:10:42" dhcp4: true set-name: "eth0"Replace the
macaddressline withname: "eth0"and delete theset-name: "eth0"line. Leave the other interfaces as they are. The start of the file should then look like this.network: version: 2 ethernets: eth0: match: name: "eth0" dhcp4: trueSave the file and exit the editor.
Apply the change with
netplan try.sudo netplan tryYou might see warnings that the permissions of
/etc/netplan/99-floating-ip.yamlare too open. They do not affect this change.Press Enter when asked to keep the new settings. If you do not confirm before the timeout shown on screen, for example because your SSH connection dropped, netplan restores the previous network settings on the running server, but your edited file stays in place. In that case, restore the backup and then repeat steps 2 to 4.
sudo cp /root/50-cloud-init.yaml.bak /etc/netplan/50-cloud-init.yamlDo not shut down the server until
netplan tryhas accepted the change and the next step shows the main IP address.Check that the server still has its main IP address.
ip addr show eth0
2. Shut down your server
Shut down the server. You can do this from within the server itself, or in the Control Panel by going to your server and clicking Shut down.
3. Delete the public IPv4 interface
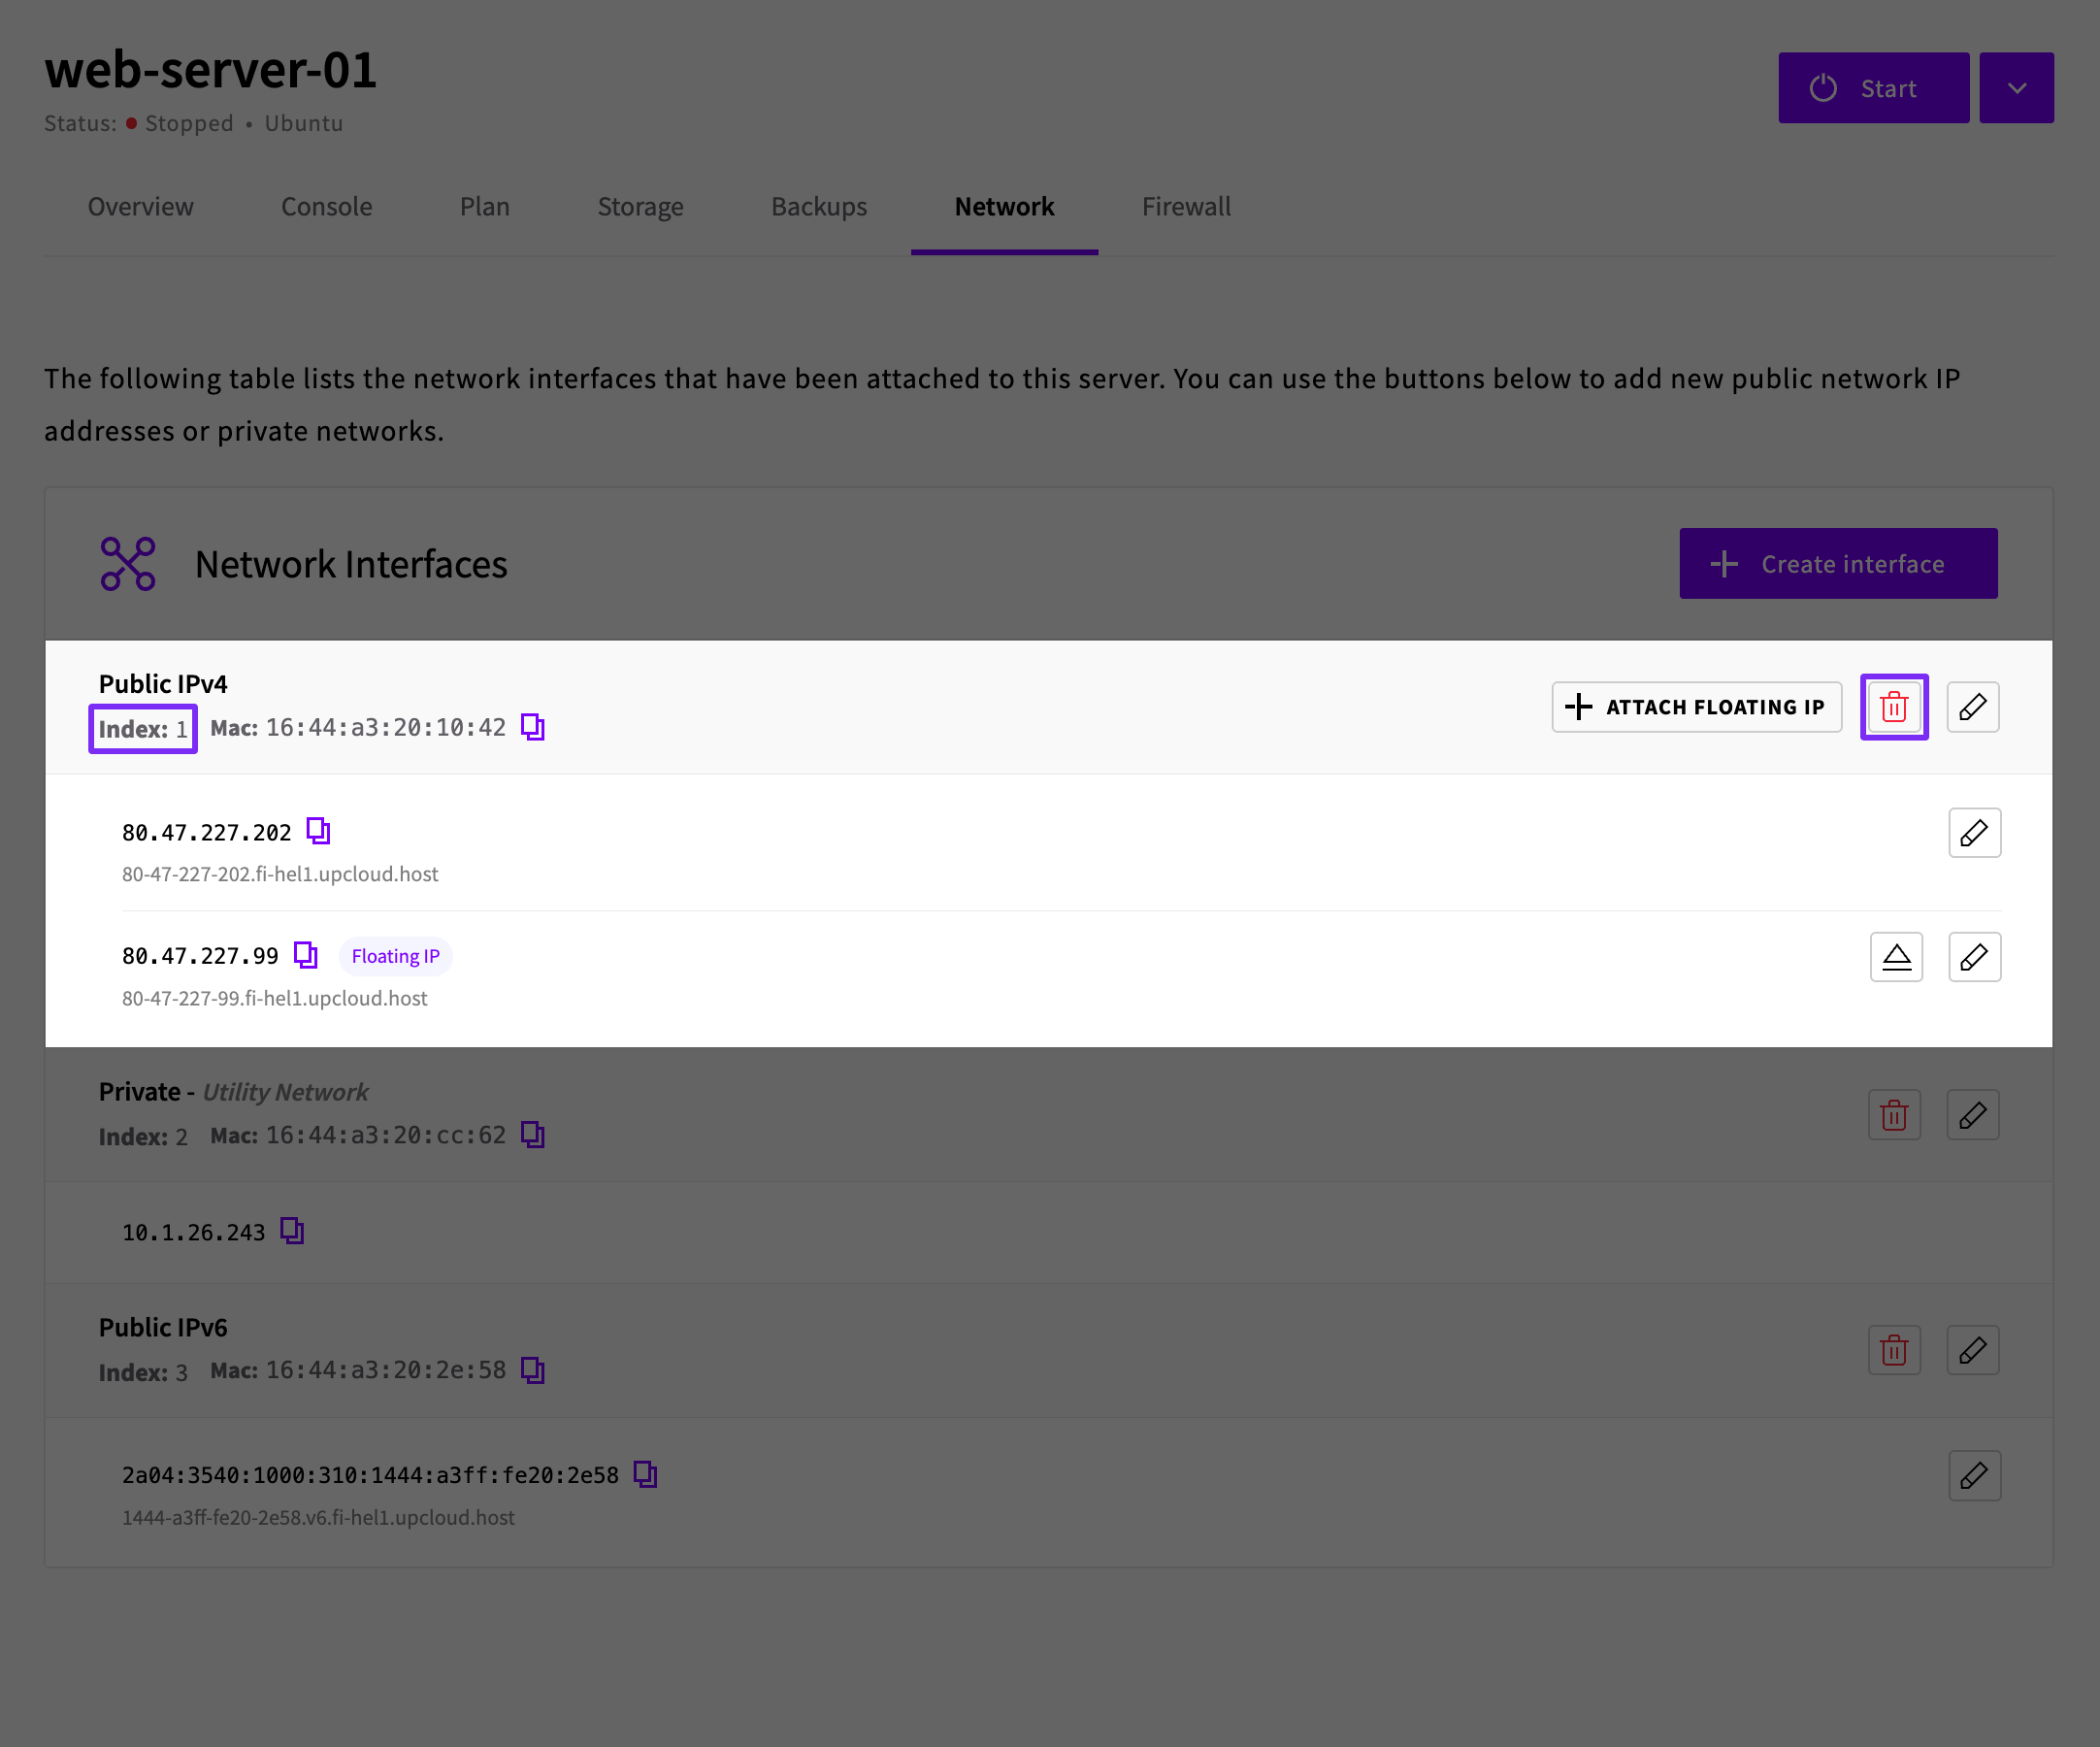
Go to the server's Network tab and find the Public IPv4 interface that has both the main IP address and the floating IP. Note down its interface index. You need it in step 4.
Then click the delete button for that interface.
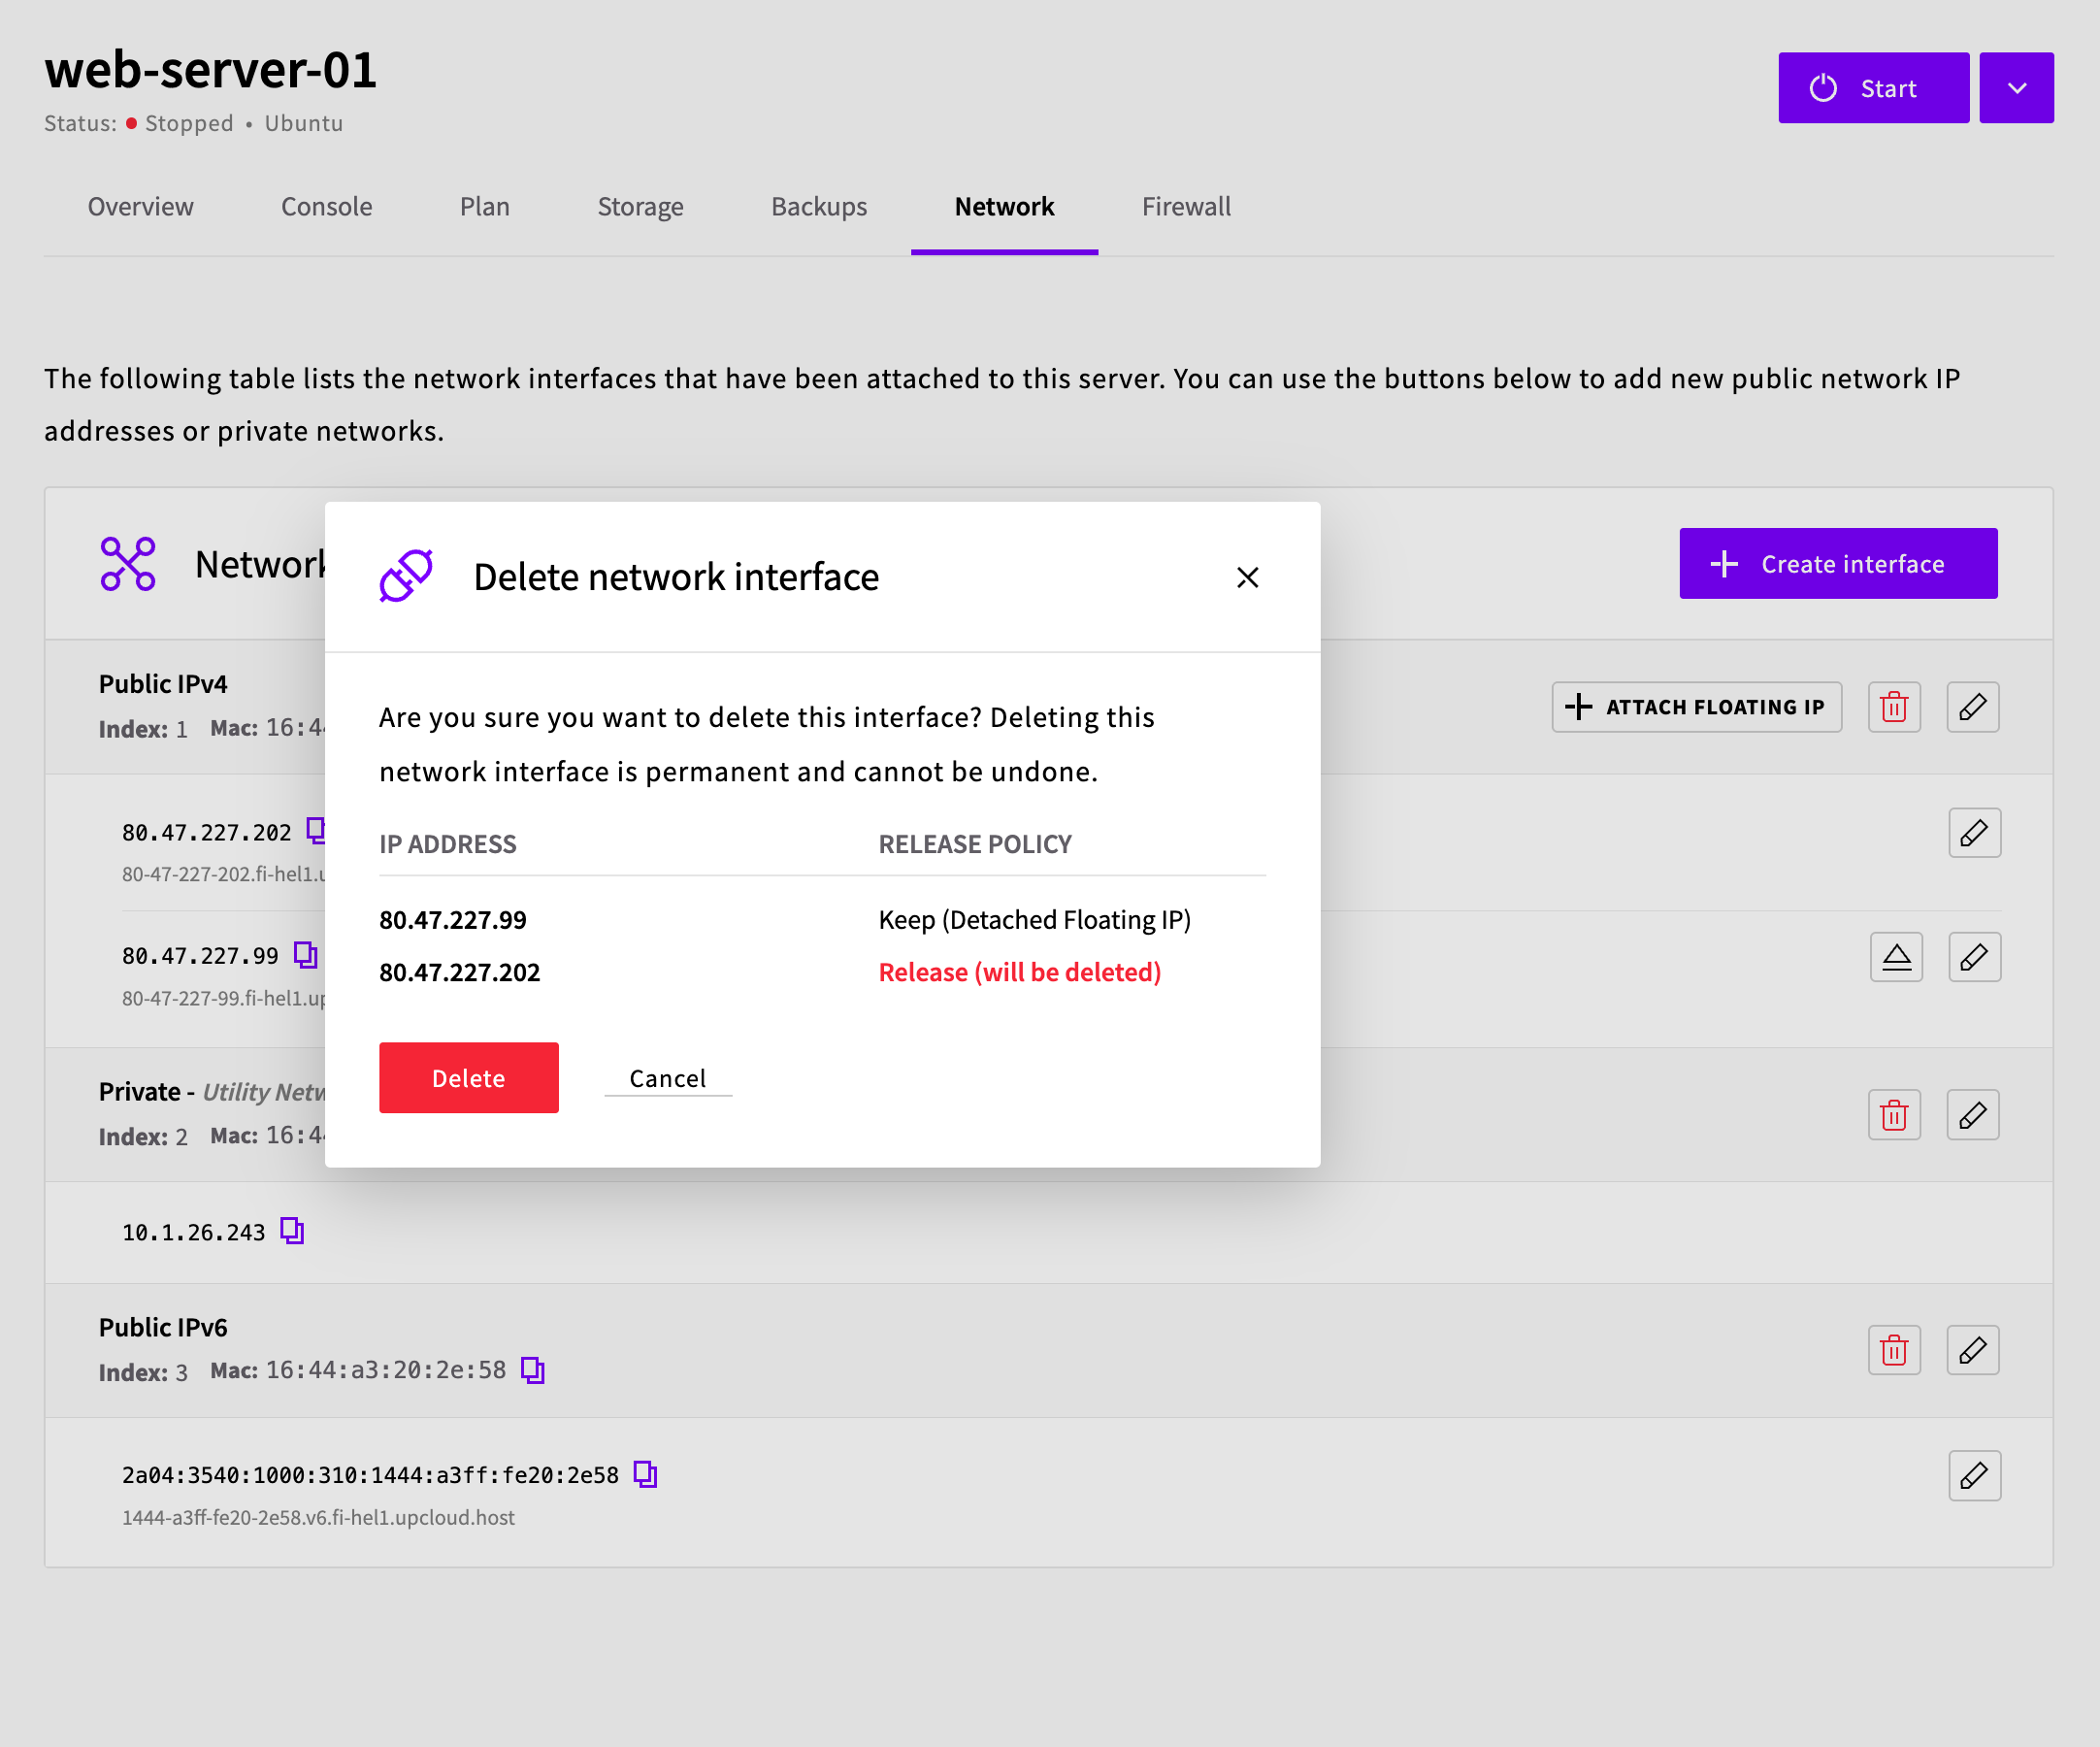
The confirmation dialog lists both addresses with their release policies. Check that the main IP address shows Release (will be deleted) and the floating IP shows Keep (Detached Floating IP), then click Delete.
If either address shows a different release policy, click Cancel and change it before you continue. On the Network tab, click the edit button next to the address, set Release policy to Release for the main IP address or Keep for the floating IP, and click Save. Then delete the interface again.
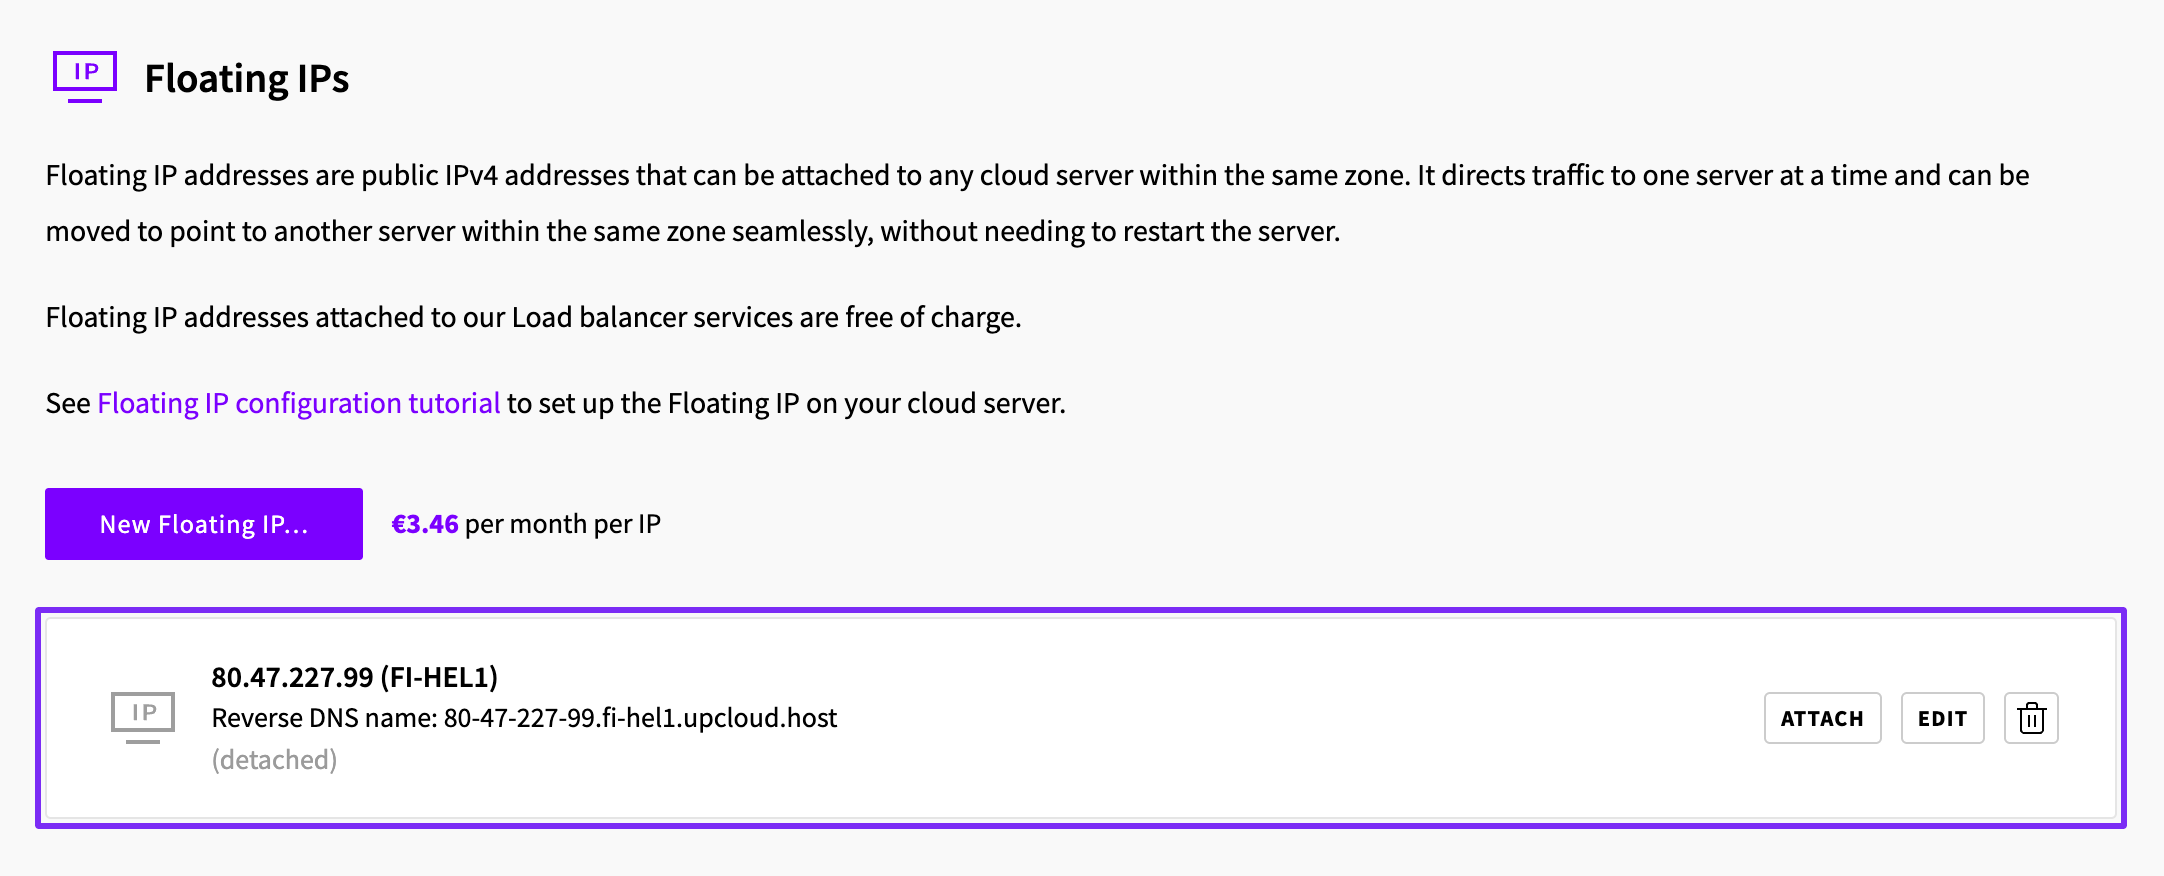
The main IP address is now deleted, and the floating IP is detached from the server and kept in your account. You can see it on the Floating IPs page under Network, where it is shown as "(detached)".
4. Create a new interface with the floating IP
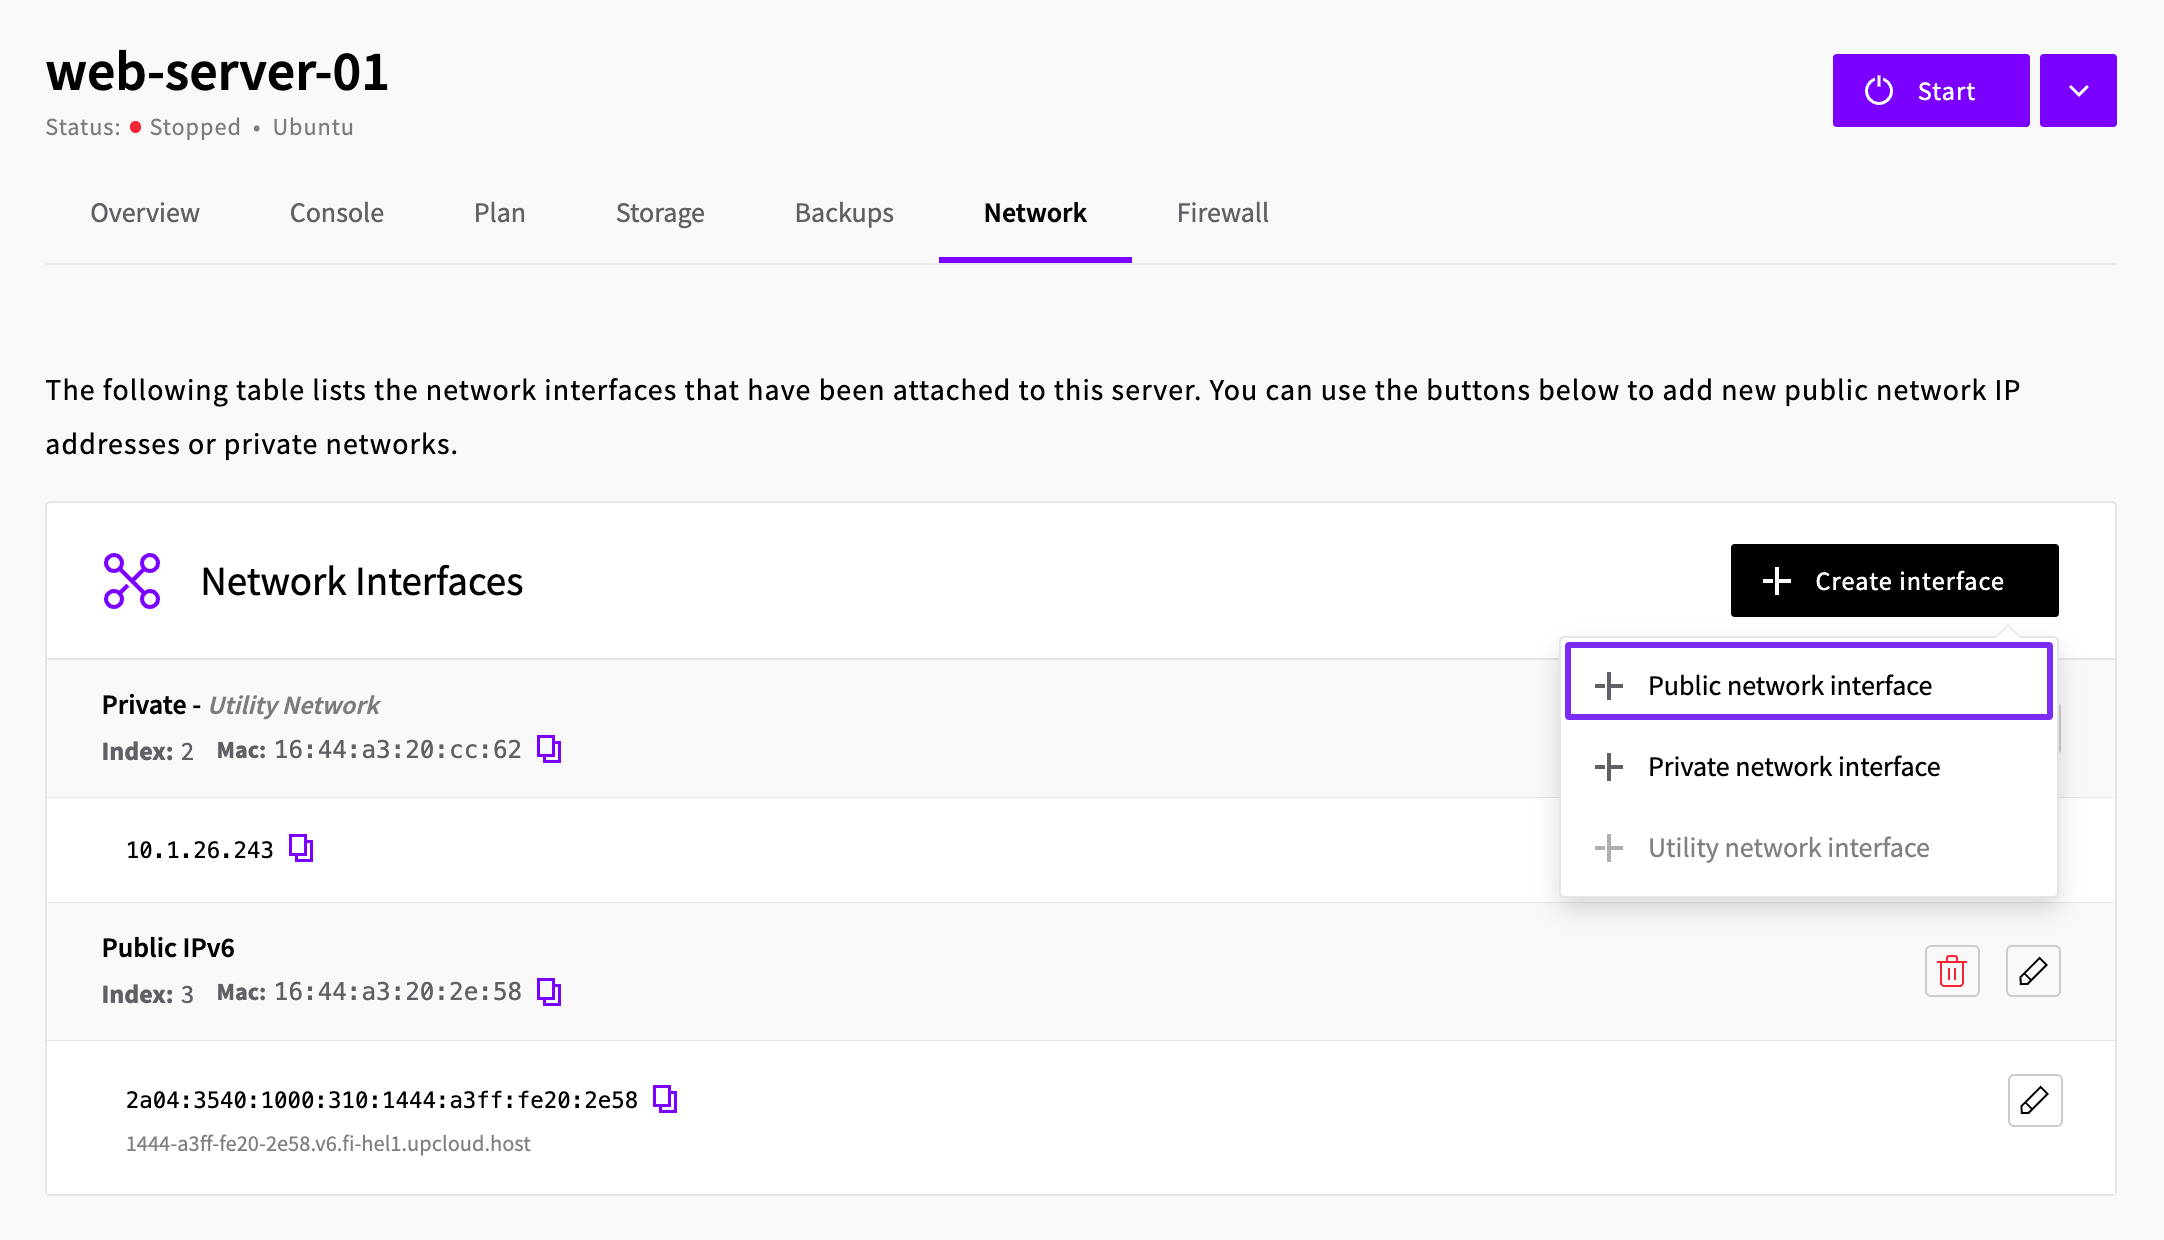
On the server's Network tab, click Create interface and select Public network interface.
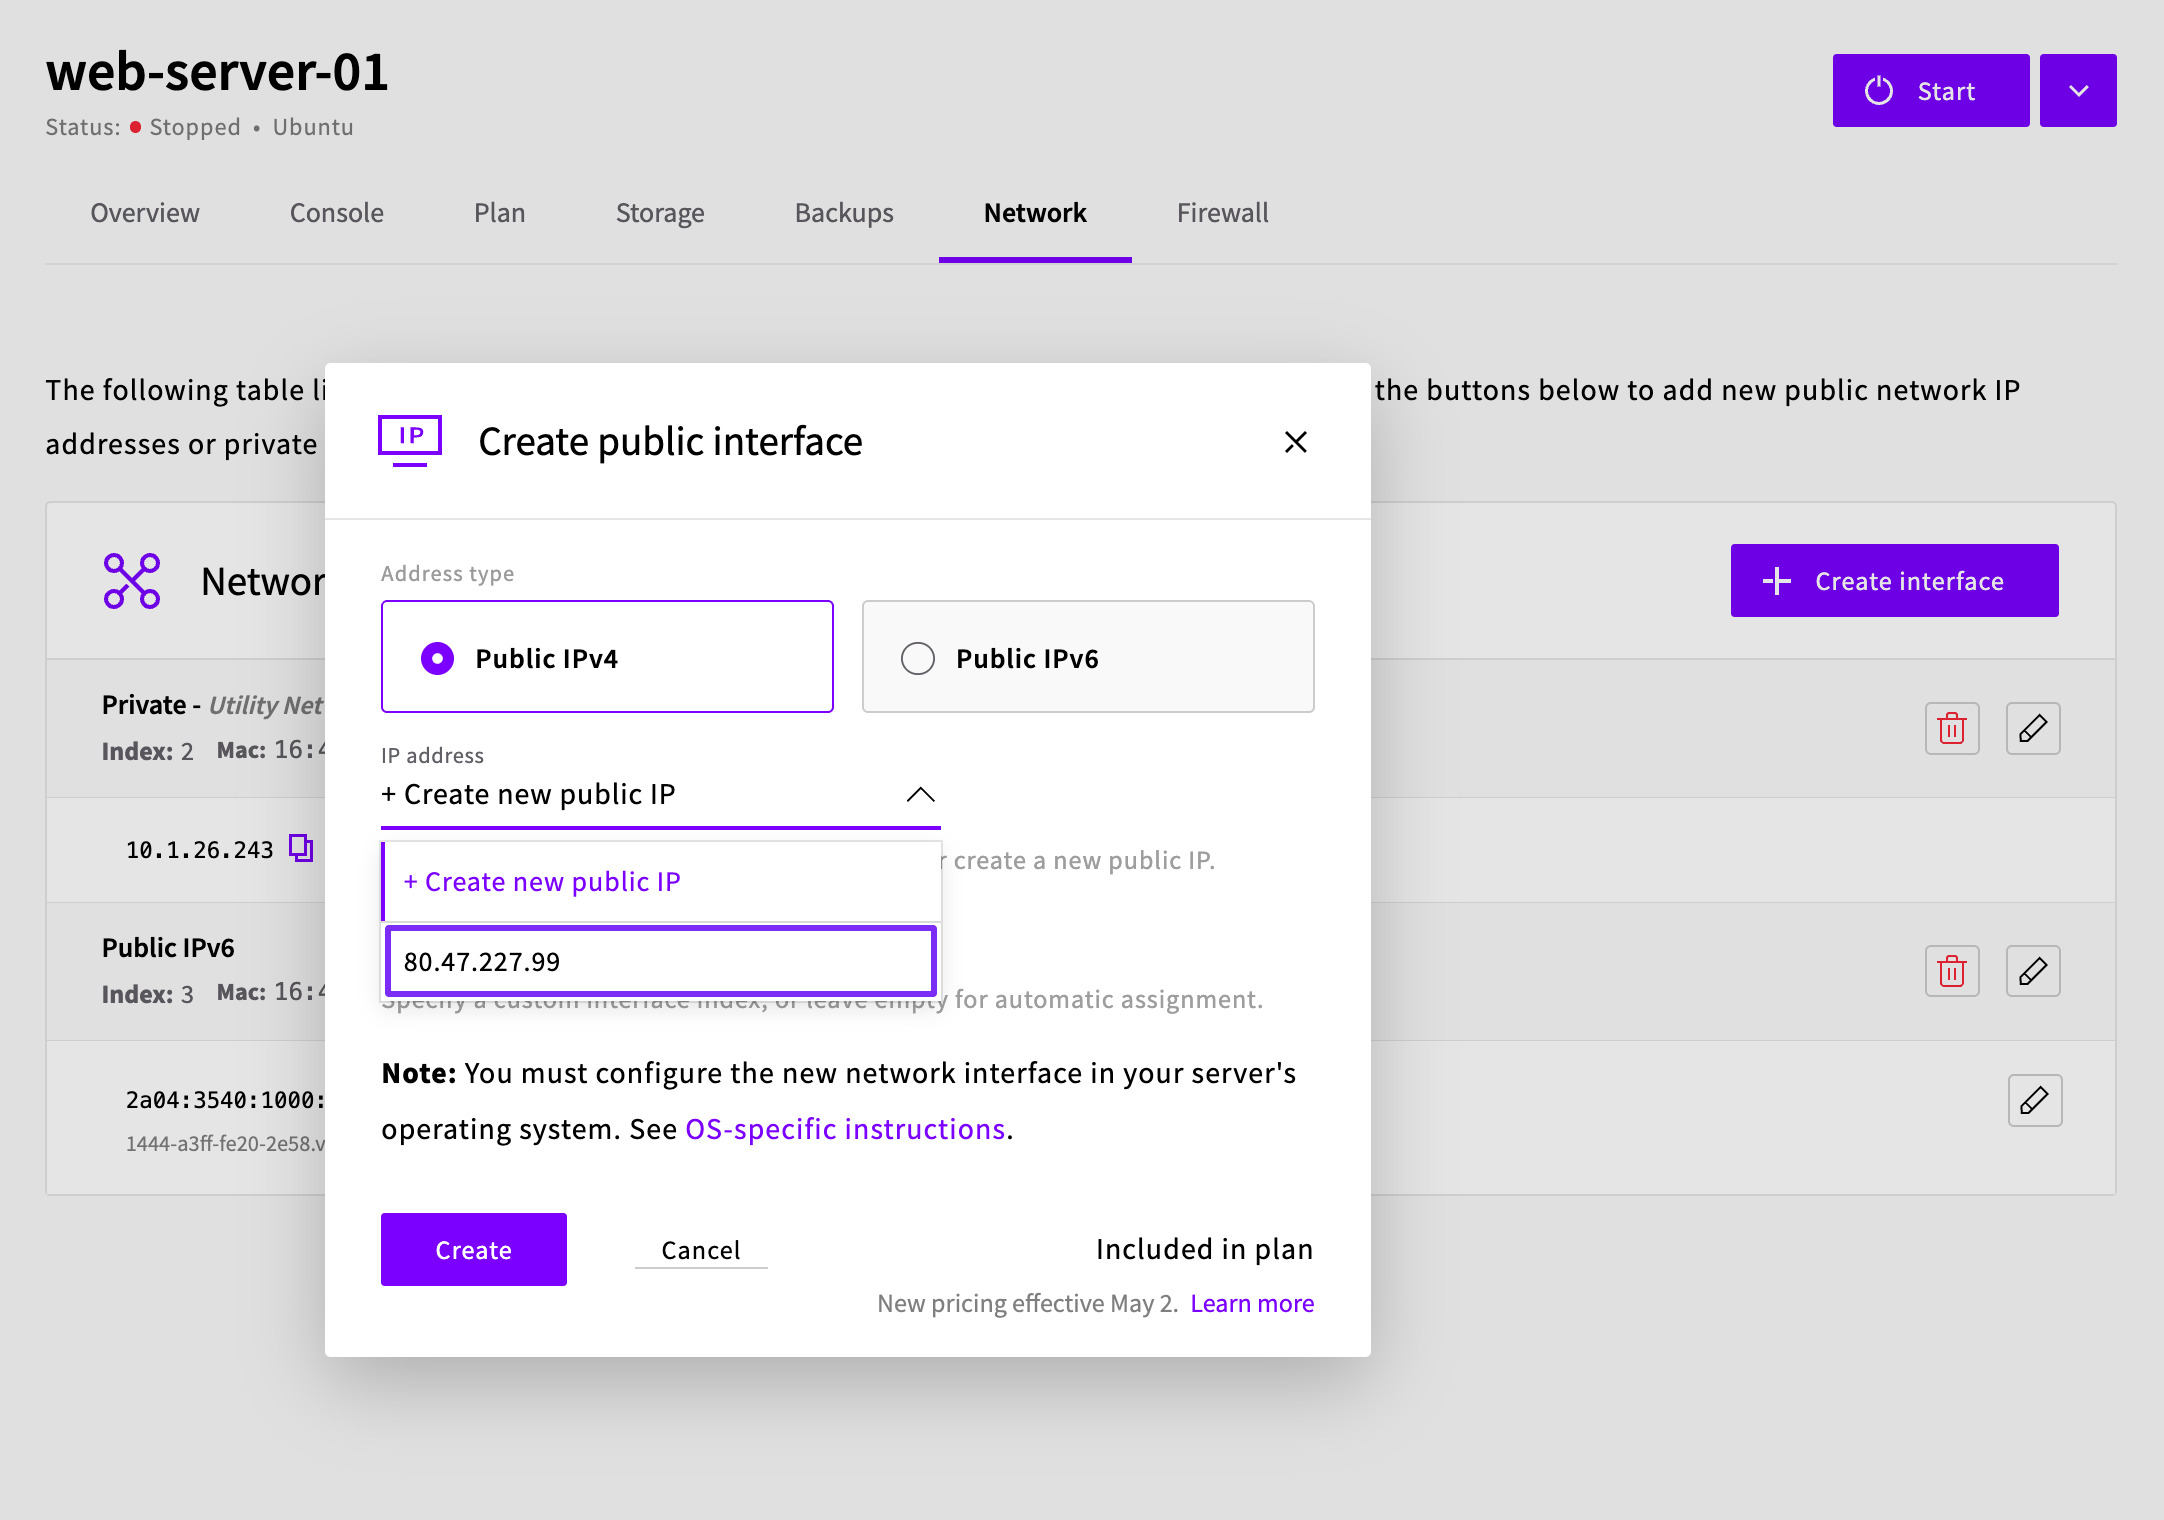
Keep Public IPv4 selected as the address type. Open the IP address dropdown and select your floating IP.
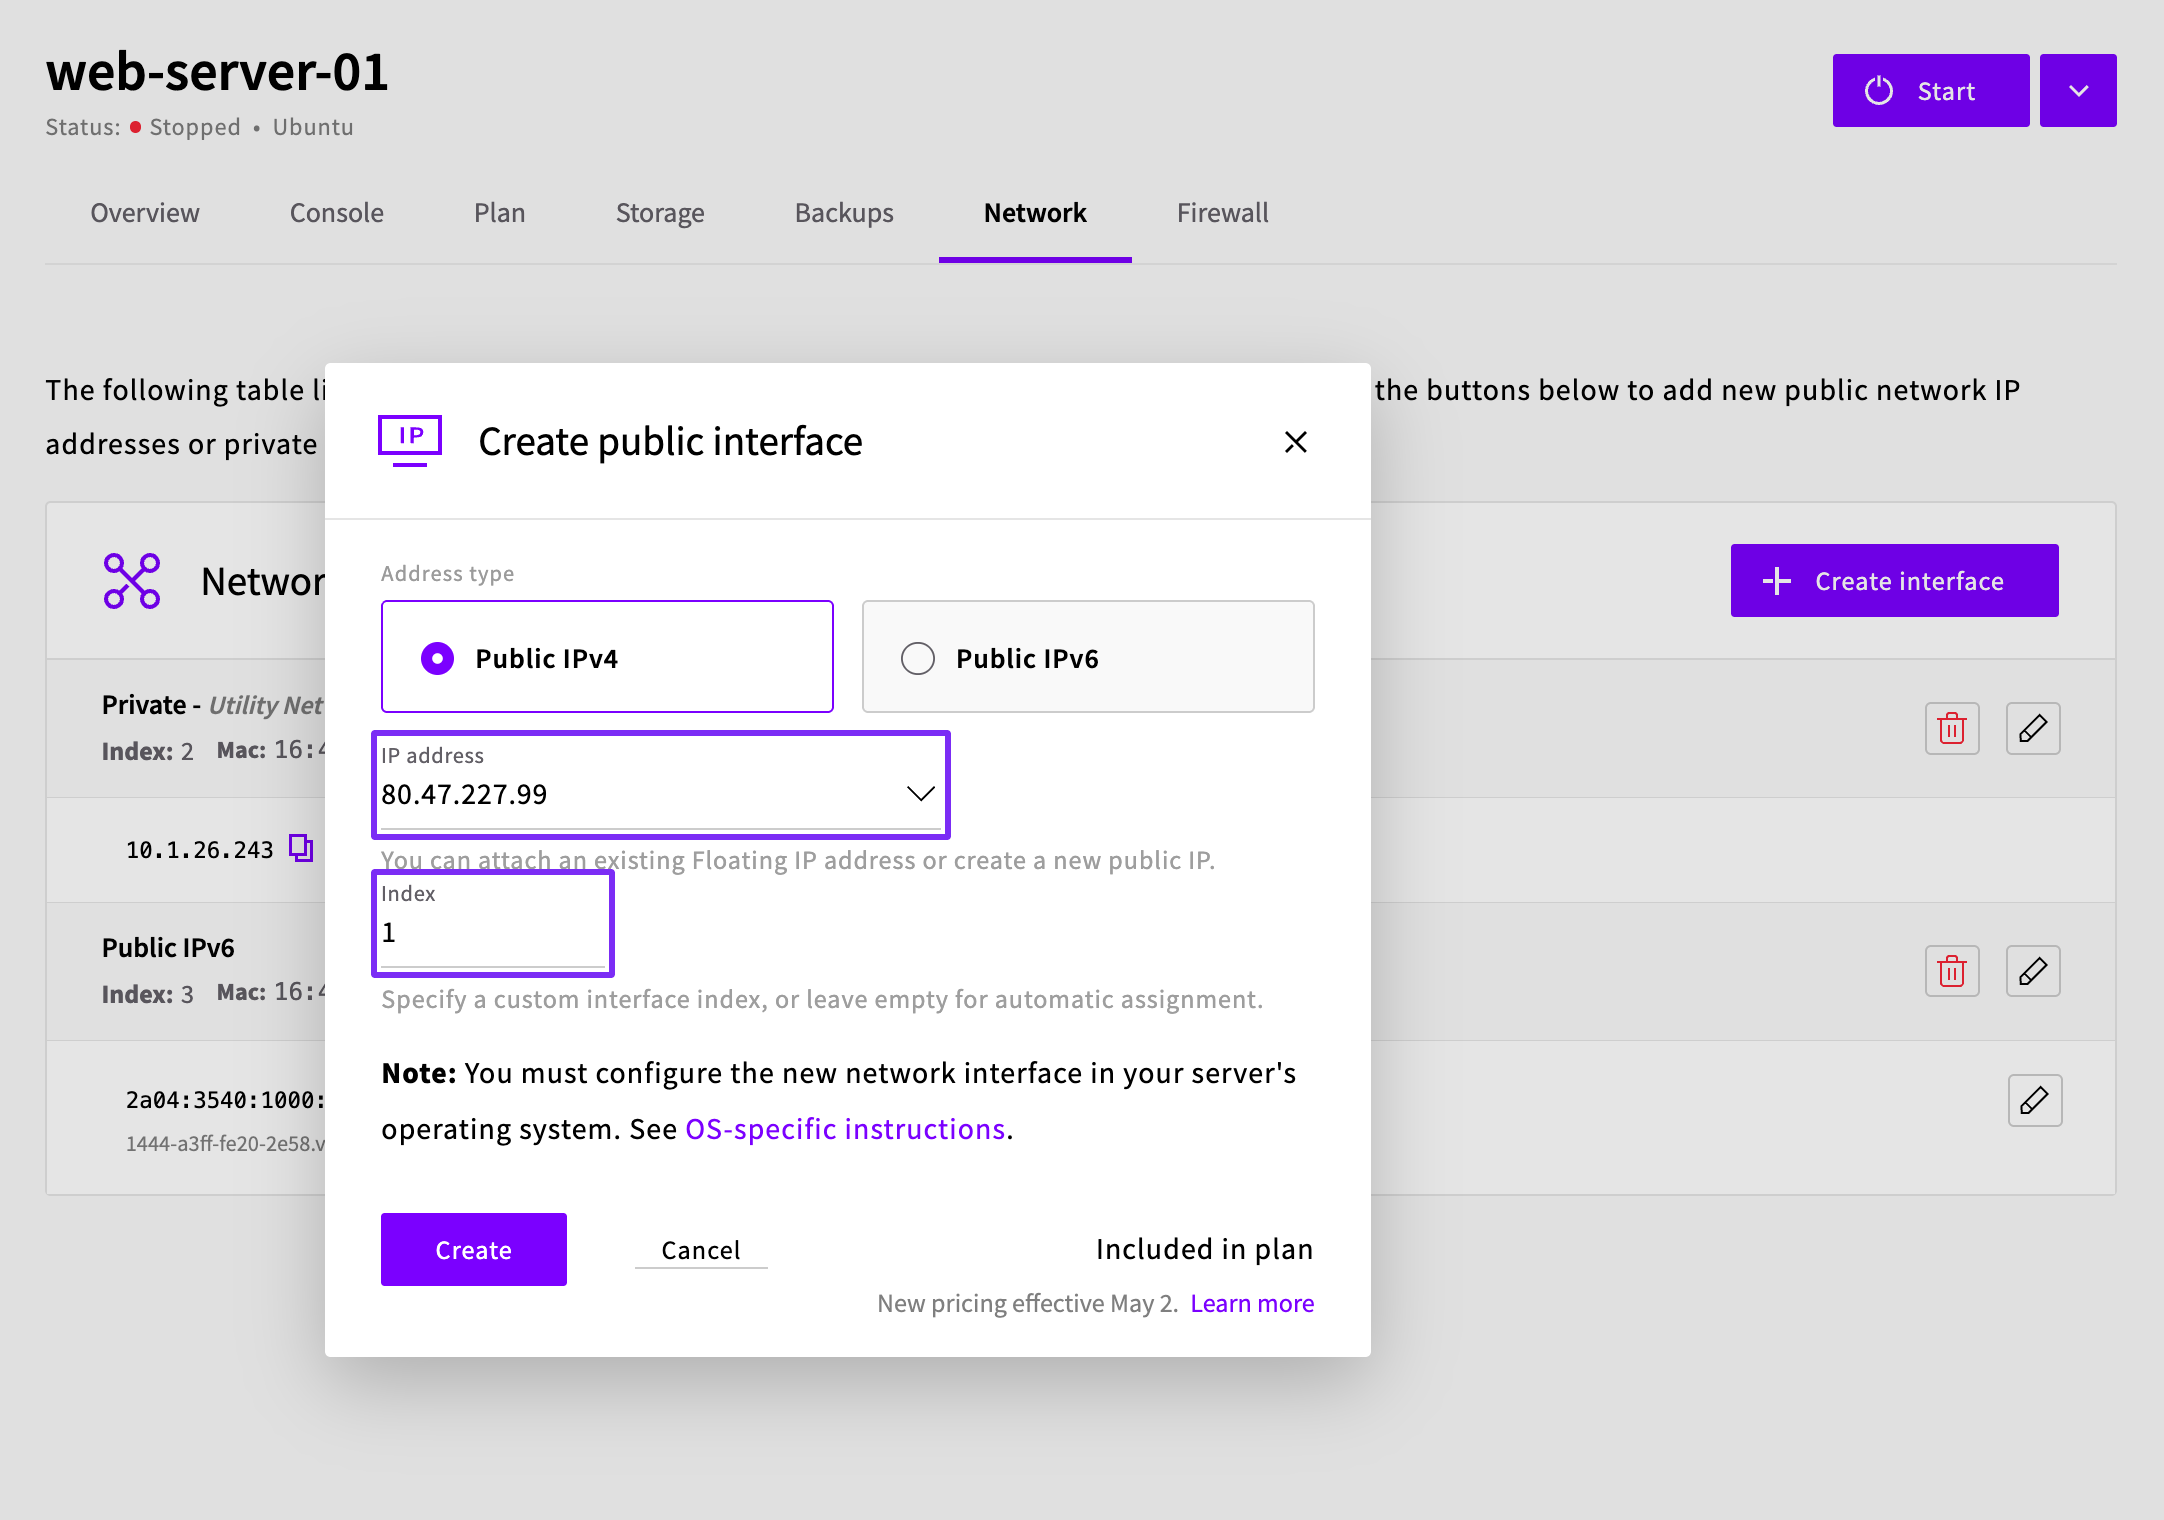
In the Index field, enter the interface index you noted in step 3, then click Create.
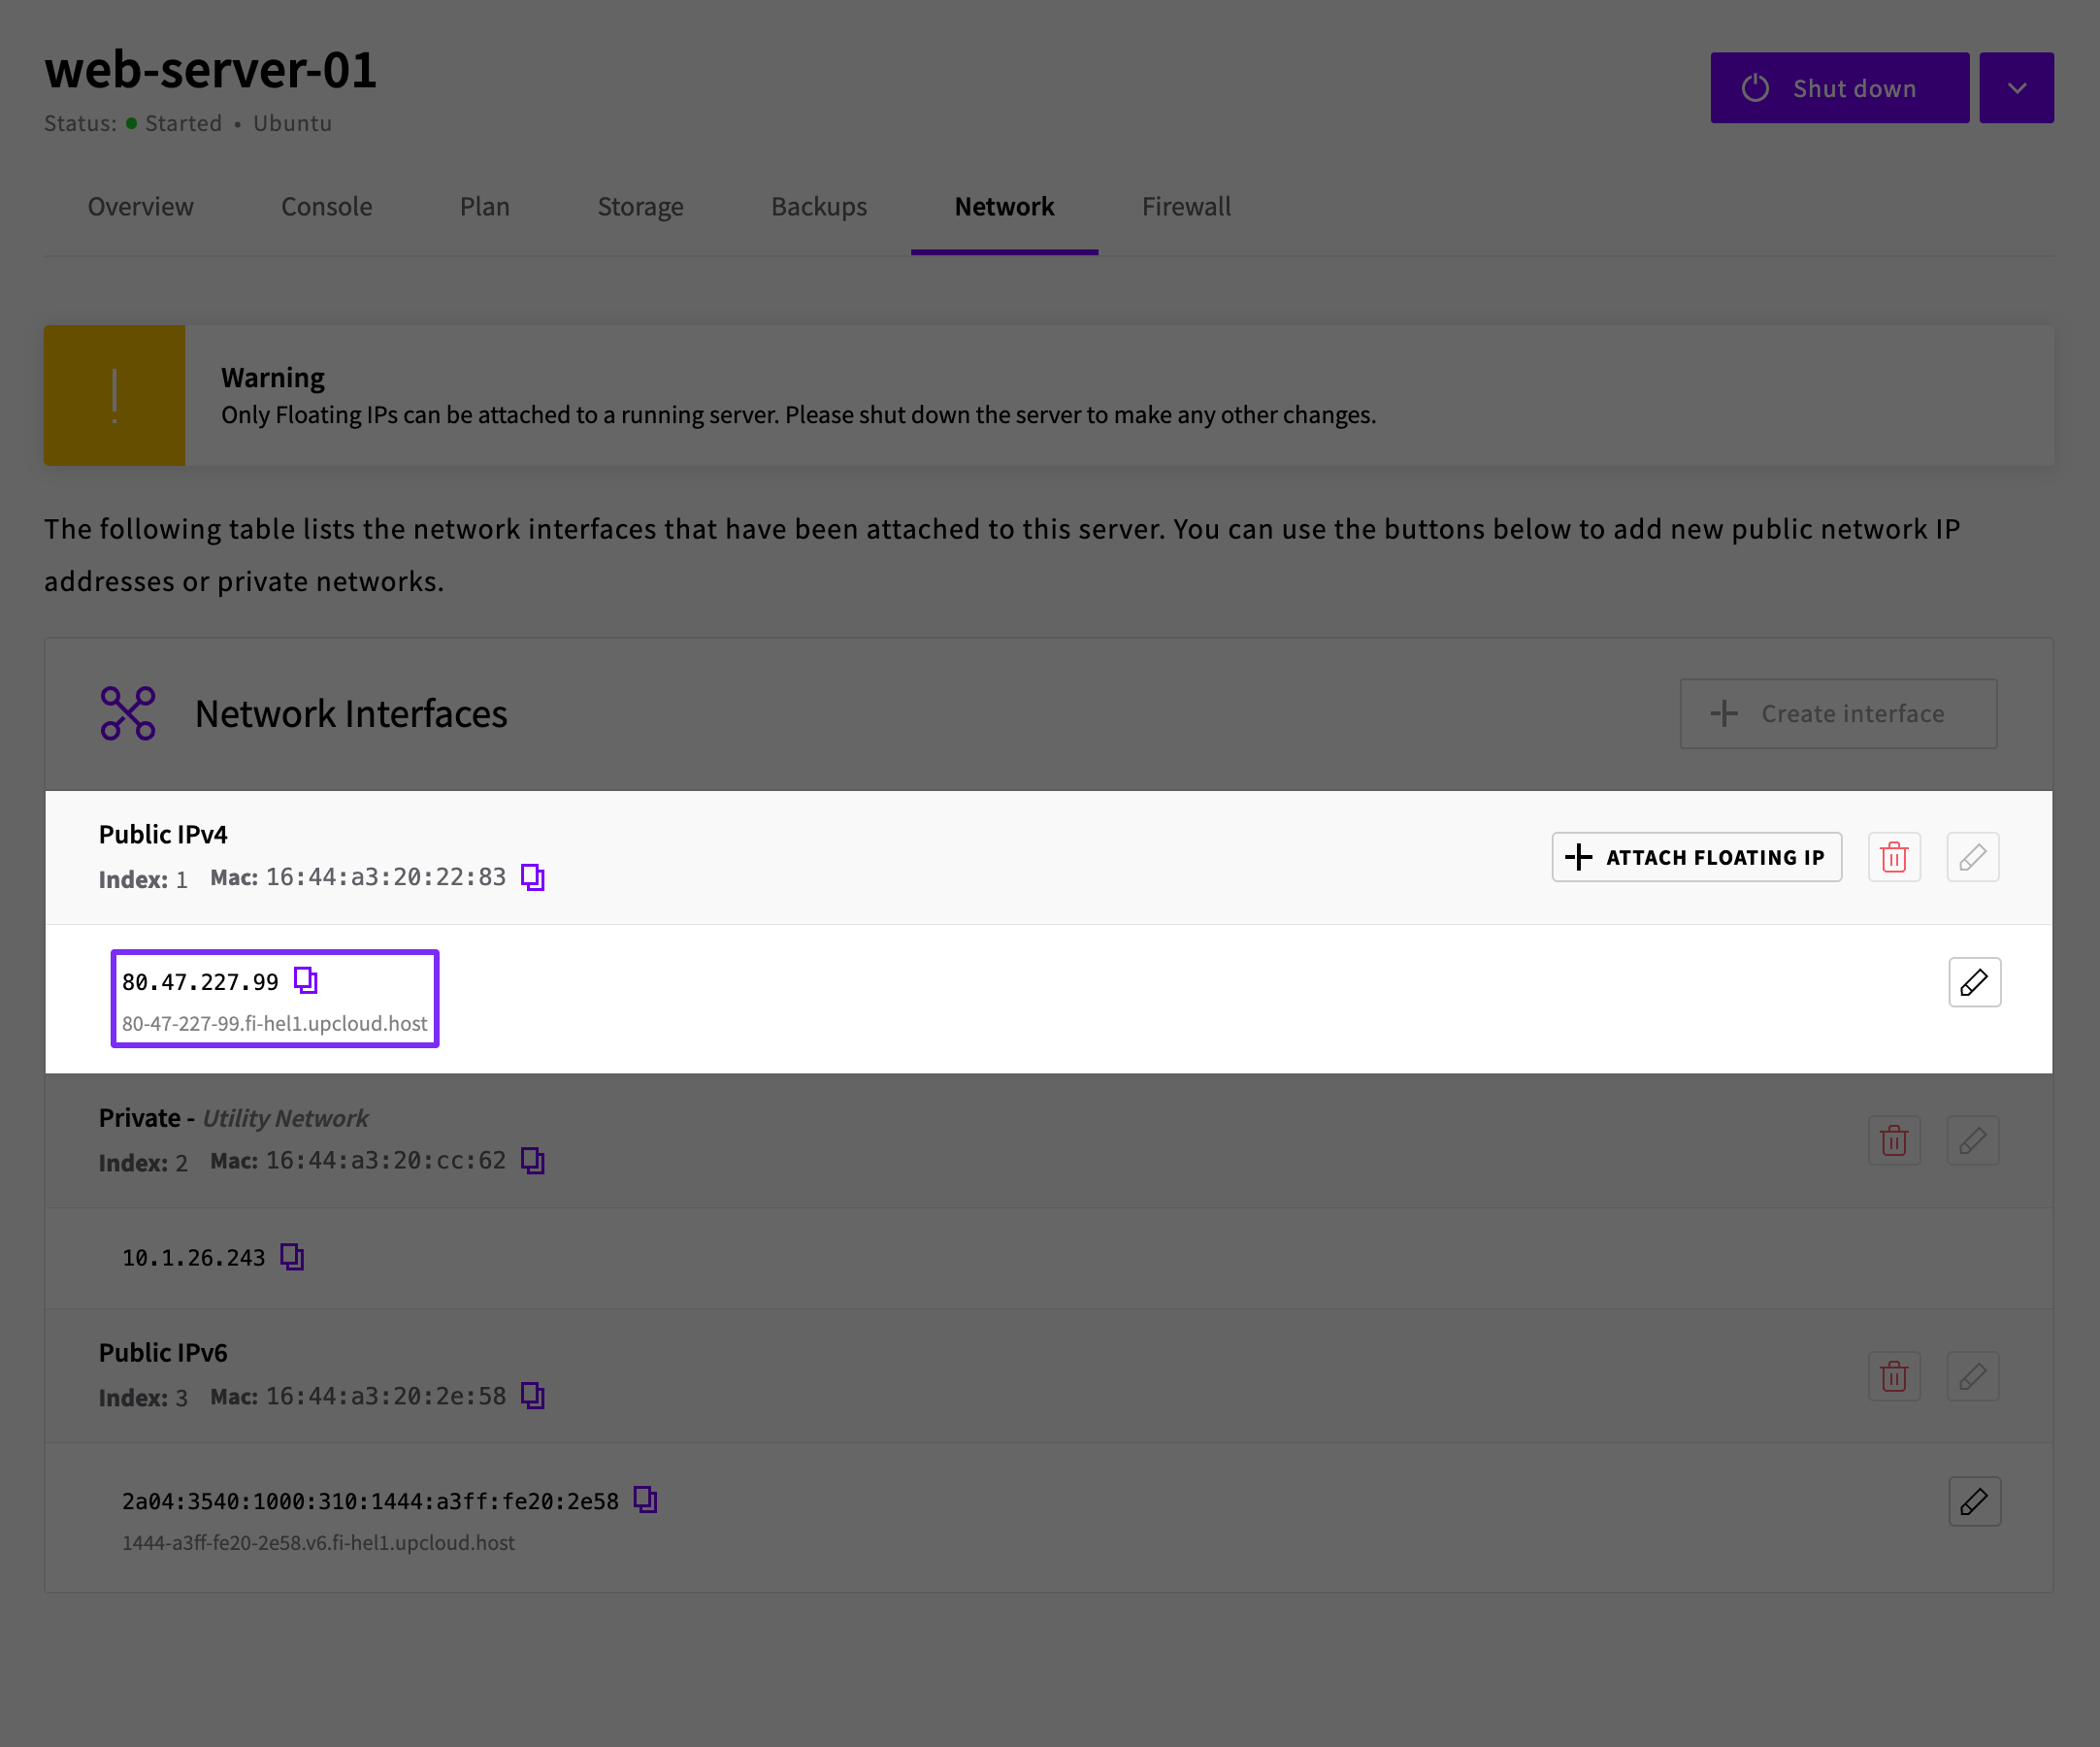
The floating IP is now the IP address of the new public IPv4 interface. It is no longer marked as a floating IP on the Network tab.
5. Start your server
Start the server from the Control Panel. When it has booted, connect to it over SSH using the floating IP address, which is now the server's main IP address. Replace the address with your floating IP.
Outgoing connections from the server now also use this address.
If you cannot connect, log in with the web console and check the network configuration.
6. Remove the old floating IP configuration
The static configuration you added when you set up the floating IP is no longer needed, because the server now gets the address automatically. Remove it and restart the server.
If you configured the floating IP differently from the setups below, remove the static configuration for the old floating IP address.
This applies if you added the floating IP in a separate netplan file as described in How to configure Floating IP on Ubuntu.
Delete the file and restart the server.
sudo rm /etc/netplan/99-floating-ip.yaml
sudo rebootAfter the restart, connect to the server using the floating IP address again and check that the interface only has the new main IP address.
ip addr show eth0Next steps
Your floating IP is now the server's main IP address. If other systems still refer to the old IP address, such as DNS records or firewall rules, update them to use the new address.
If you later want to move this address to another server, convert it back to a floating IP by following Converting a server IP address to a floating IP address. If you delete the server, the address stays in your account as a detached floating IP. Delete it separately if you no longer need it. For more information about floating IPs, see our guide on managing floating IP addresses.