
Upgrading a Starter plan server to a higher-tier plan
If you find that you have outgrown the Starter plan server that you started with, it's possible to upgrade to a Premium plan. These plans use MaxIOPS storage, which offers improved read and write performance compared to the Standard tier storage used by Developer plan servers.
This tutorial guides you through the process of upgrading a Starter server to a higher-tier plan. We'll cover the following key steps:
- Creating an on-demand backup
- Cloning the existing storage to MaxIOPS® using the UpCloud API
- Detaching the old storage and attaching the new MaxIOPS® storage
- Upgrading the server plan
- Resizing the storage (if needed)
- Verifying the changes
By following this tutorial, you'll be able to upgrade your server's performance while minimising downtime. The process involves using both the UpCloud control panel and API, so make sure you have access to both before starting.
Note: This tutorial assumes you're familiar with basic server management concepts and have experience working with cloud platforms. If you're new to UpCloud, it's recommended to review our documentation first.
Begin by creating a backup of your current server configuration.
By creating an on-demand backup you can easily restore your server back to its initial state should something go wrong.
After the backup has finished, shut down the server.
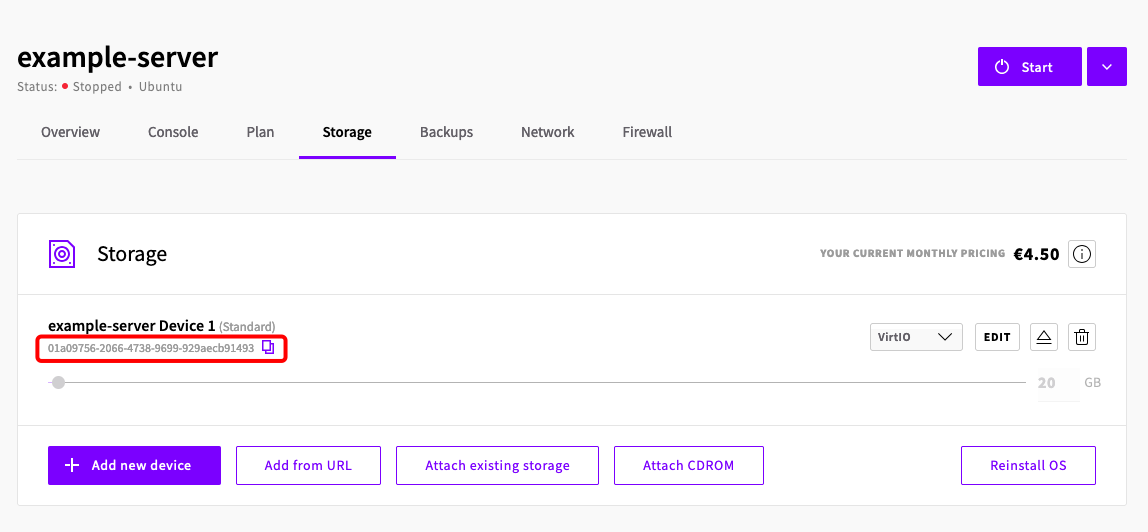
Then navigate to the Storage tab of the server and copy the storage UUID.
Using the API, clone the storage to MaxIOPS®. Ensure that you use the same zone (data centre location) as the existing server and that you create a name or “title” for the cloned storage.
If you are unfamiliar with using the UpCloud API please refer to our getting started guide.
Once you’ve authenticated; create a POST request via the API, and replace the UUID placeholder with the storage UUID you’ve copied above.
POST /1.3/storage/{uuid}/clone HTTP/1.1

{
  "storage": {
    "zone": "fi-hel1",
    "tier": "maxiops",
    "title": "your server's storage name here"
  }
}
Replace “fi-hel1” with your respective zone. The related API documentation can be found here.
The expected successful response is 201 Created. If you get an error, please refer to the Possible responses table for a solution or reach out to our 24/7 Support team for assistance.
Alternative method:
Using the UpCloud CLI run the following command.
upctl storage clone {storage_uuid} --title {example_storage_clone} --zone {my-zone1} --tier maxiopsThe new storage will be created.
On the control panel, you should be able to see the new disk on the Storage > Devices page.

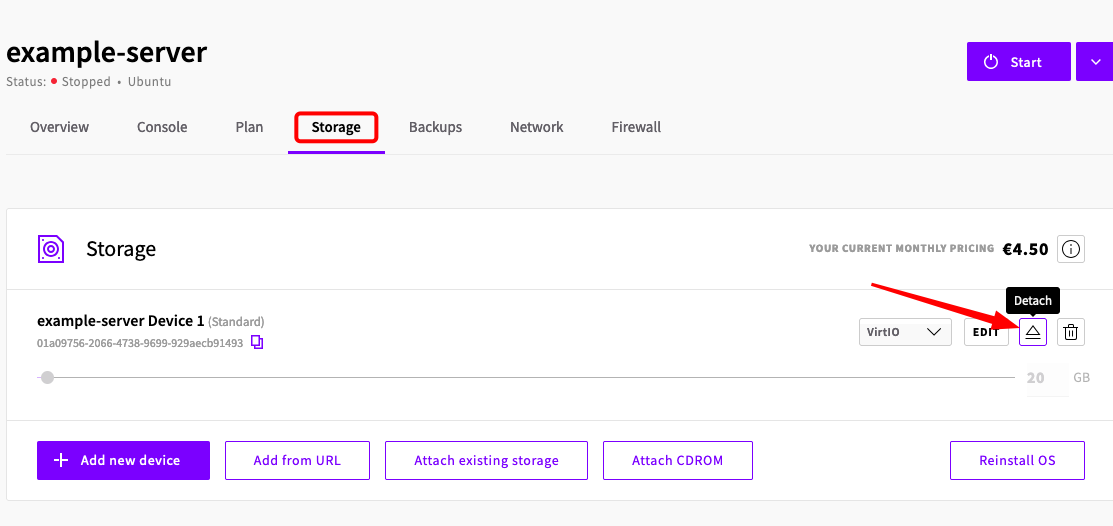
Once the new MaxIOPS® storage is created, return to the Starter server and navigate to the Storage tab again, then Detach the Standard tier storage.
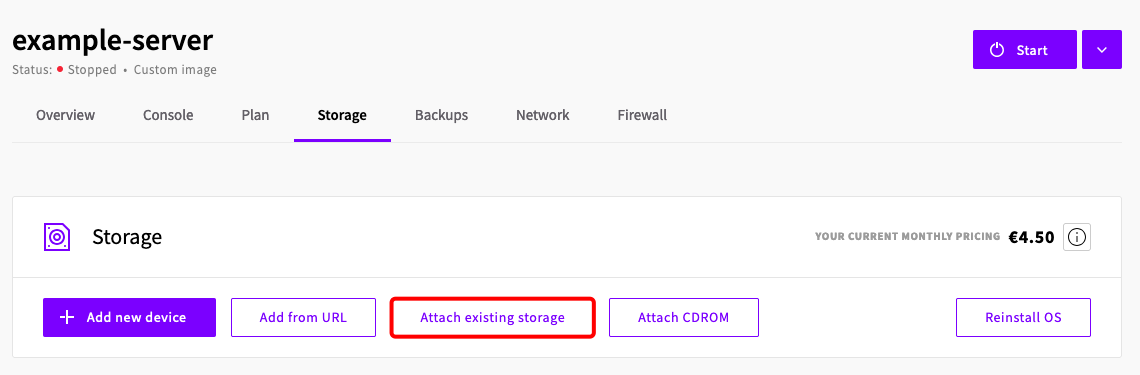
Then attach the new MaxIOPS® storage you cloned earlier.
Finally, choose to add a storage device.
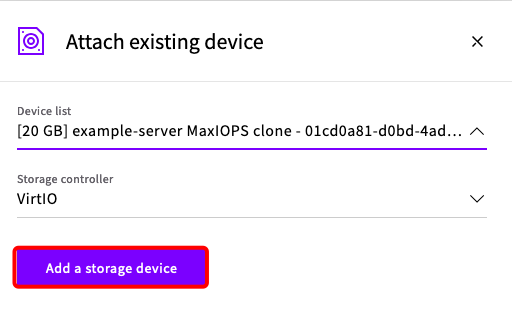
Note: If you dont see the new storage right away, close the popup and try again. If you still don’t see it verify that the new storage is in the same data centre zone as the server.
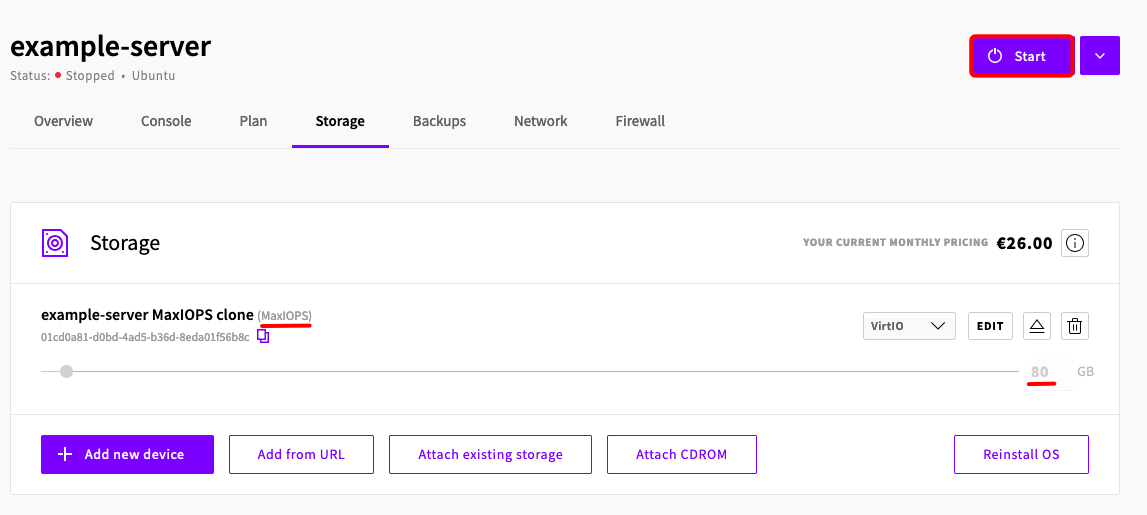
Ensure the the newly attached storage is tier MaxIOPS®, then (if no other changes are needed) Start your server.

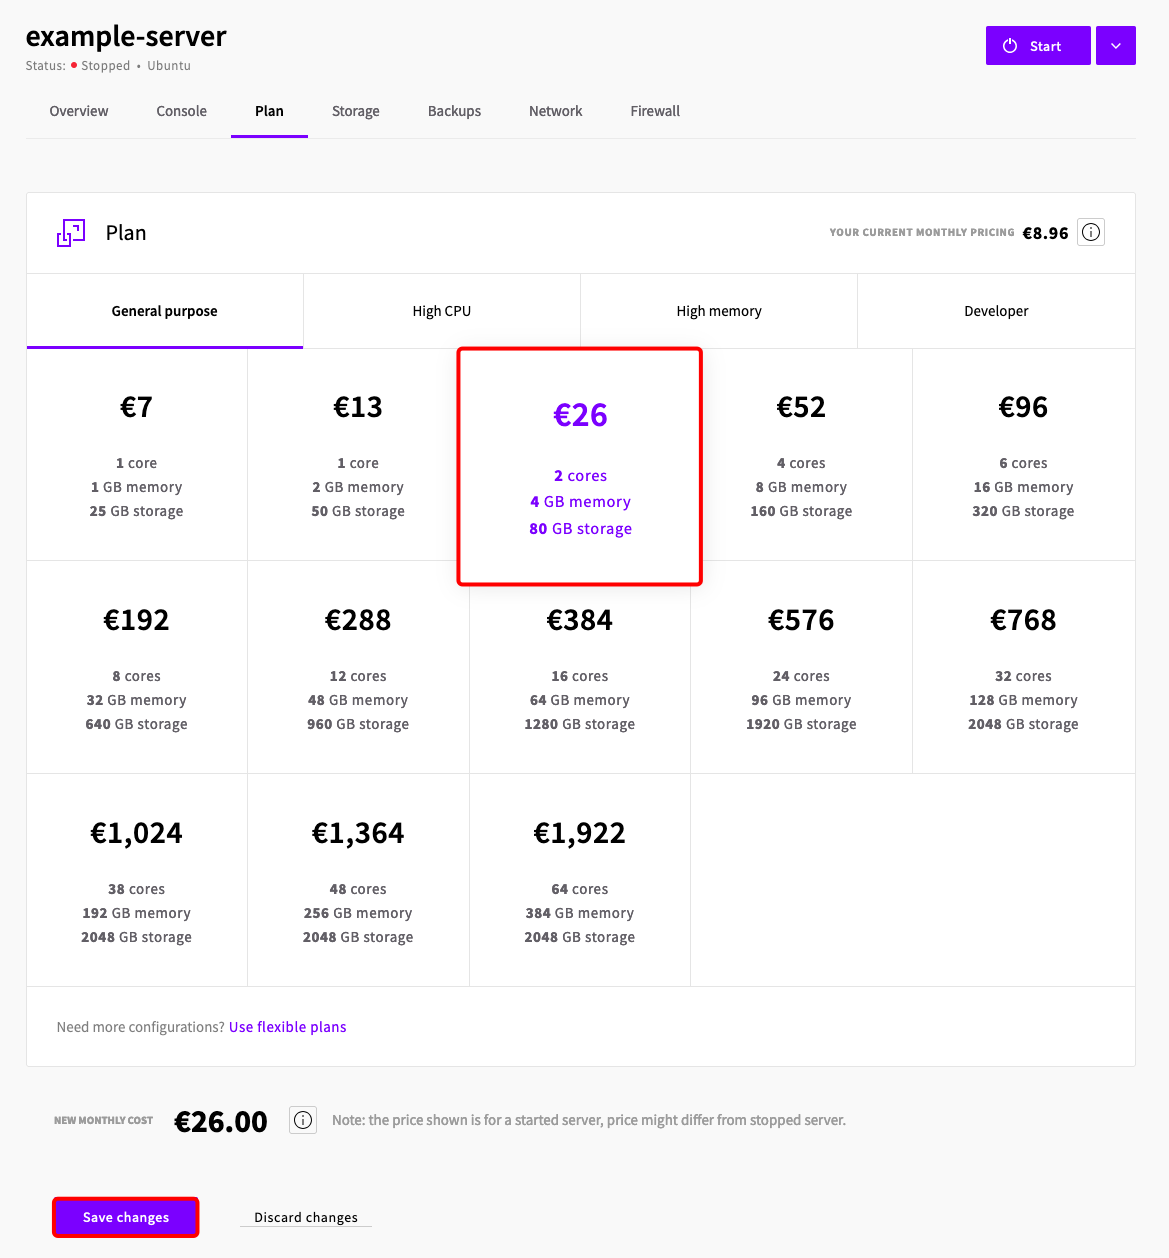
You can go ahead and change our server plan to the higher tier you want. After that is done, Save changes. This plan change can be done when the server is shutdown or when the server is started, by using the Live Resizing feature.
Optionally, you may also want to increase the storage amount to match your new plan. This must be done manually via the Storage tab when your server is shutdown.
Navigate to the Storage tab and select the Edit button.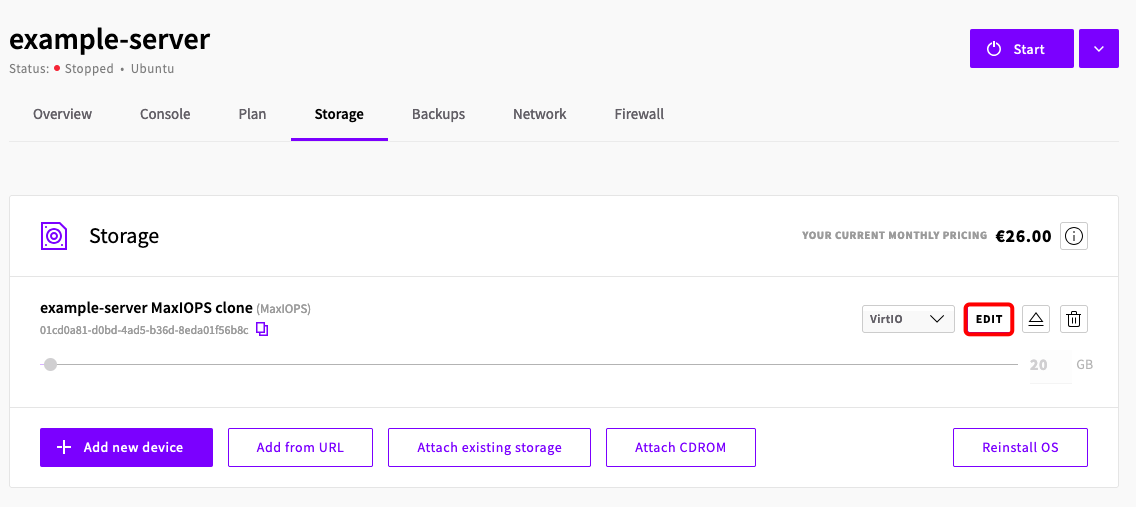
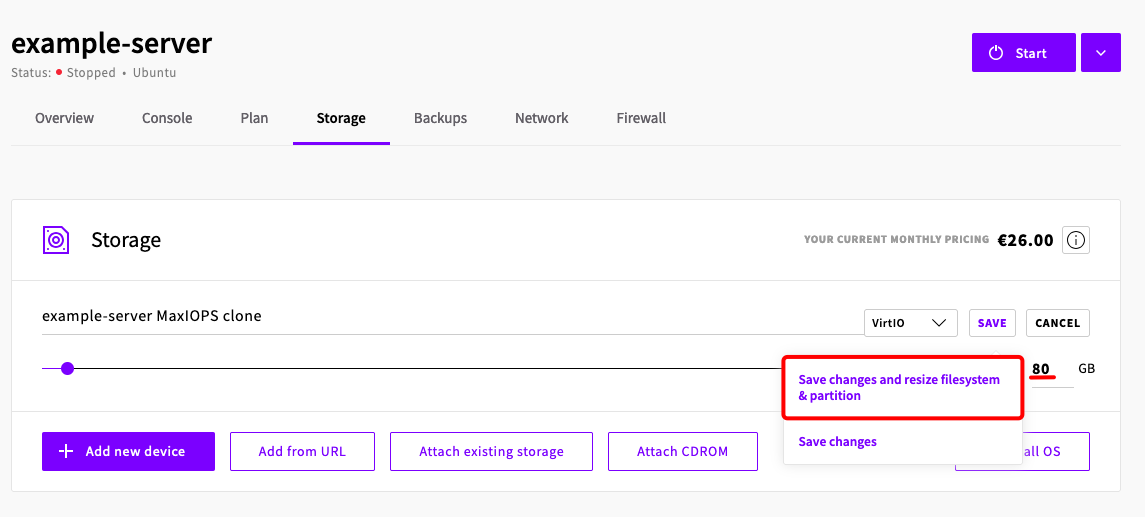
Change the storage space amount to the amount that your new plan allows (in GB). Then choose Save changes and resize filesystem & partition.
Note: If you plan to manually create a secondary partition then choose the Save changes option instead.
This process will create a new on-demand backup that can be used to restore this server.
Wait for the storage to exit the Maintenance and Syncing state. The duration for this wait period changes depending on the size of the storage that must be synced, i.e. larger storages will take longer to complete.
Once that finishes, then Start your server.
Your server’s login credentials will remain the same. Ensure that you can login to your server and that there are no unexpected issues.
root@example-server:~# lsblk
NAME   MAJ:MIN RM SIZE RO TYPE MOUNTPOINTS
vda	253:0	0  80G  0 disk
├─vda1 253:1	0   1M  0 part
└─vda2 253:2	0  80G  0 part / 				    # My storage

root@example-server:~# df -h
Filesystem  	Size  Used Avail Use% Mounted on
tmpfs       	387M  5.9M  381M   2% /run
/dev/vda2    	79G  2.3G   74G    4% / 			# My storage
tmpfs       	1.9G 	0  1.9G    0% /dev/shm
tmpfs       	5.0M 	0  5.0M    0% /run/lock
tmpfs       	387M   12K  387M   1% /run/user/0
Optional Cleanup
If everything works, you can remove the unnecessary resources. Do note that once resources are deleted they cannot be restored.
- Delete the original Standard tier storage.
- On the control panel, Navigate to Storage > Devices and press the Delete button.

- On the control panel, Navigate to Storage > Devices and press the Delete button.
- Delete the on-demand backups.
- Go to the Backups tab on your server and scroll down to the History section and delete the Resize Backup
- Delete the Initial Backup via the Storage > Backups page.