
Connecting to your Cloud Server
After deploying a new Cloud Server you’ll need to pick a method for connecting to it. This guide outlines your options for remote connection and the differences between them. Whether you chose password authentication or an SSH key, continue reading to learn how to connect to your cloud server.
OpenSSH
The primary way of connecting to a Linux server should be using an SSH client.
For Unix-based systems, including macOS, Linux, and WSL (Windows Subsystem for Linux), OpenSSH is readily available and can be utilised directly through the local terminal. Using OpenSSH to log in is very simple, the single command to start a connection consists of 3 parts; the application command ssh, your username, and your remote host.
Open a terminal and type in the command below to log in using the root account. Replace the remote-host with the public IP of your server.
ssh root@remote-hostIf an SSH key has been configured for use, the system will attempt to authenticate using the key.
If this is your first time connecting to the server, you will encounter a prompt regarding the host’s authenticity. Confirm that the IP address displayed matches your server’s IP, and then accept the prompt by typing “yes”. Then press enter to continue.

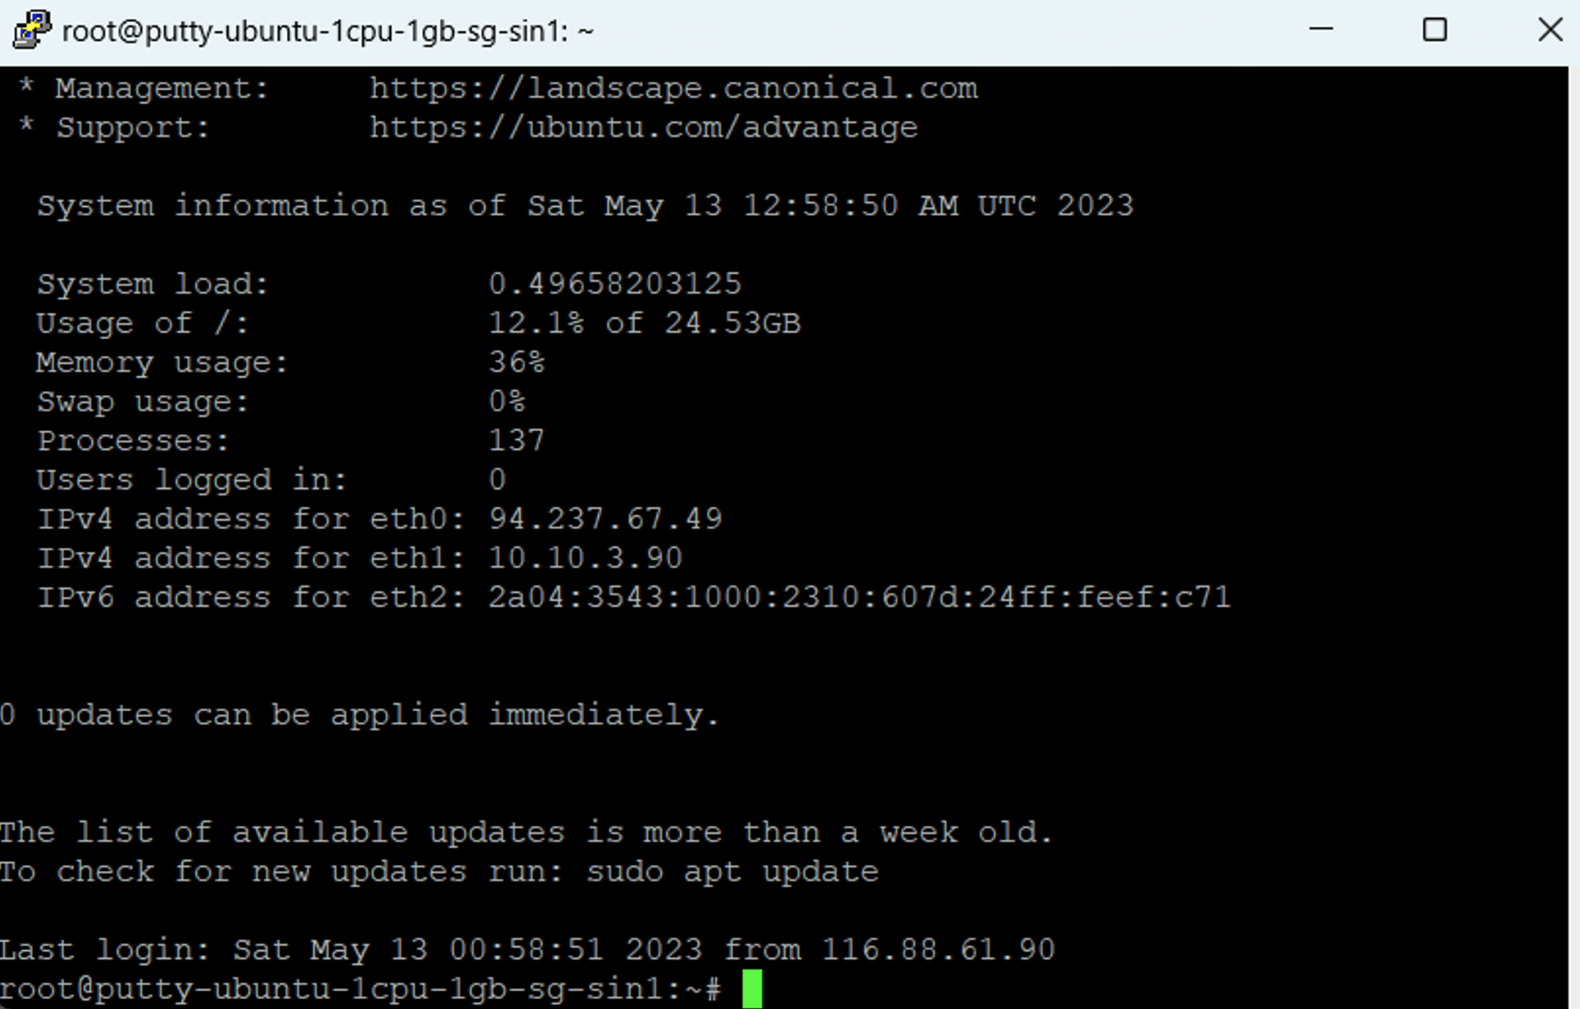
If the authentication was successful, you will be logged into the server straightaway.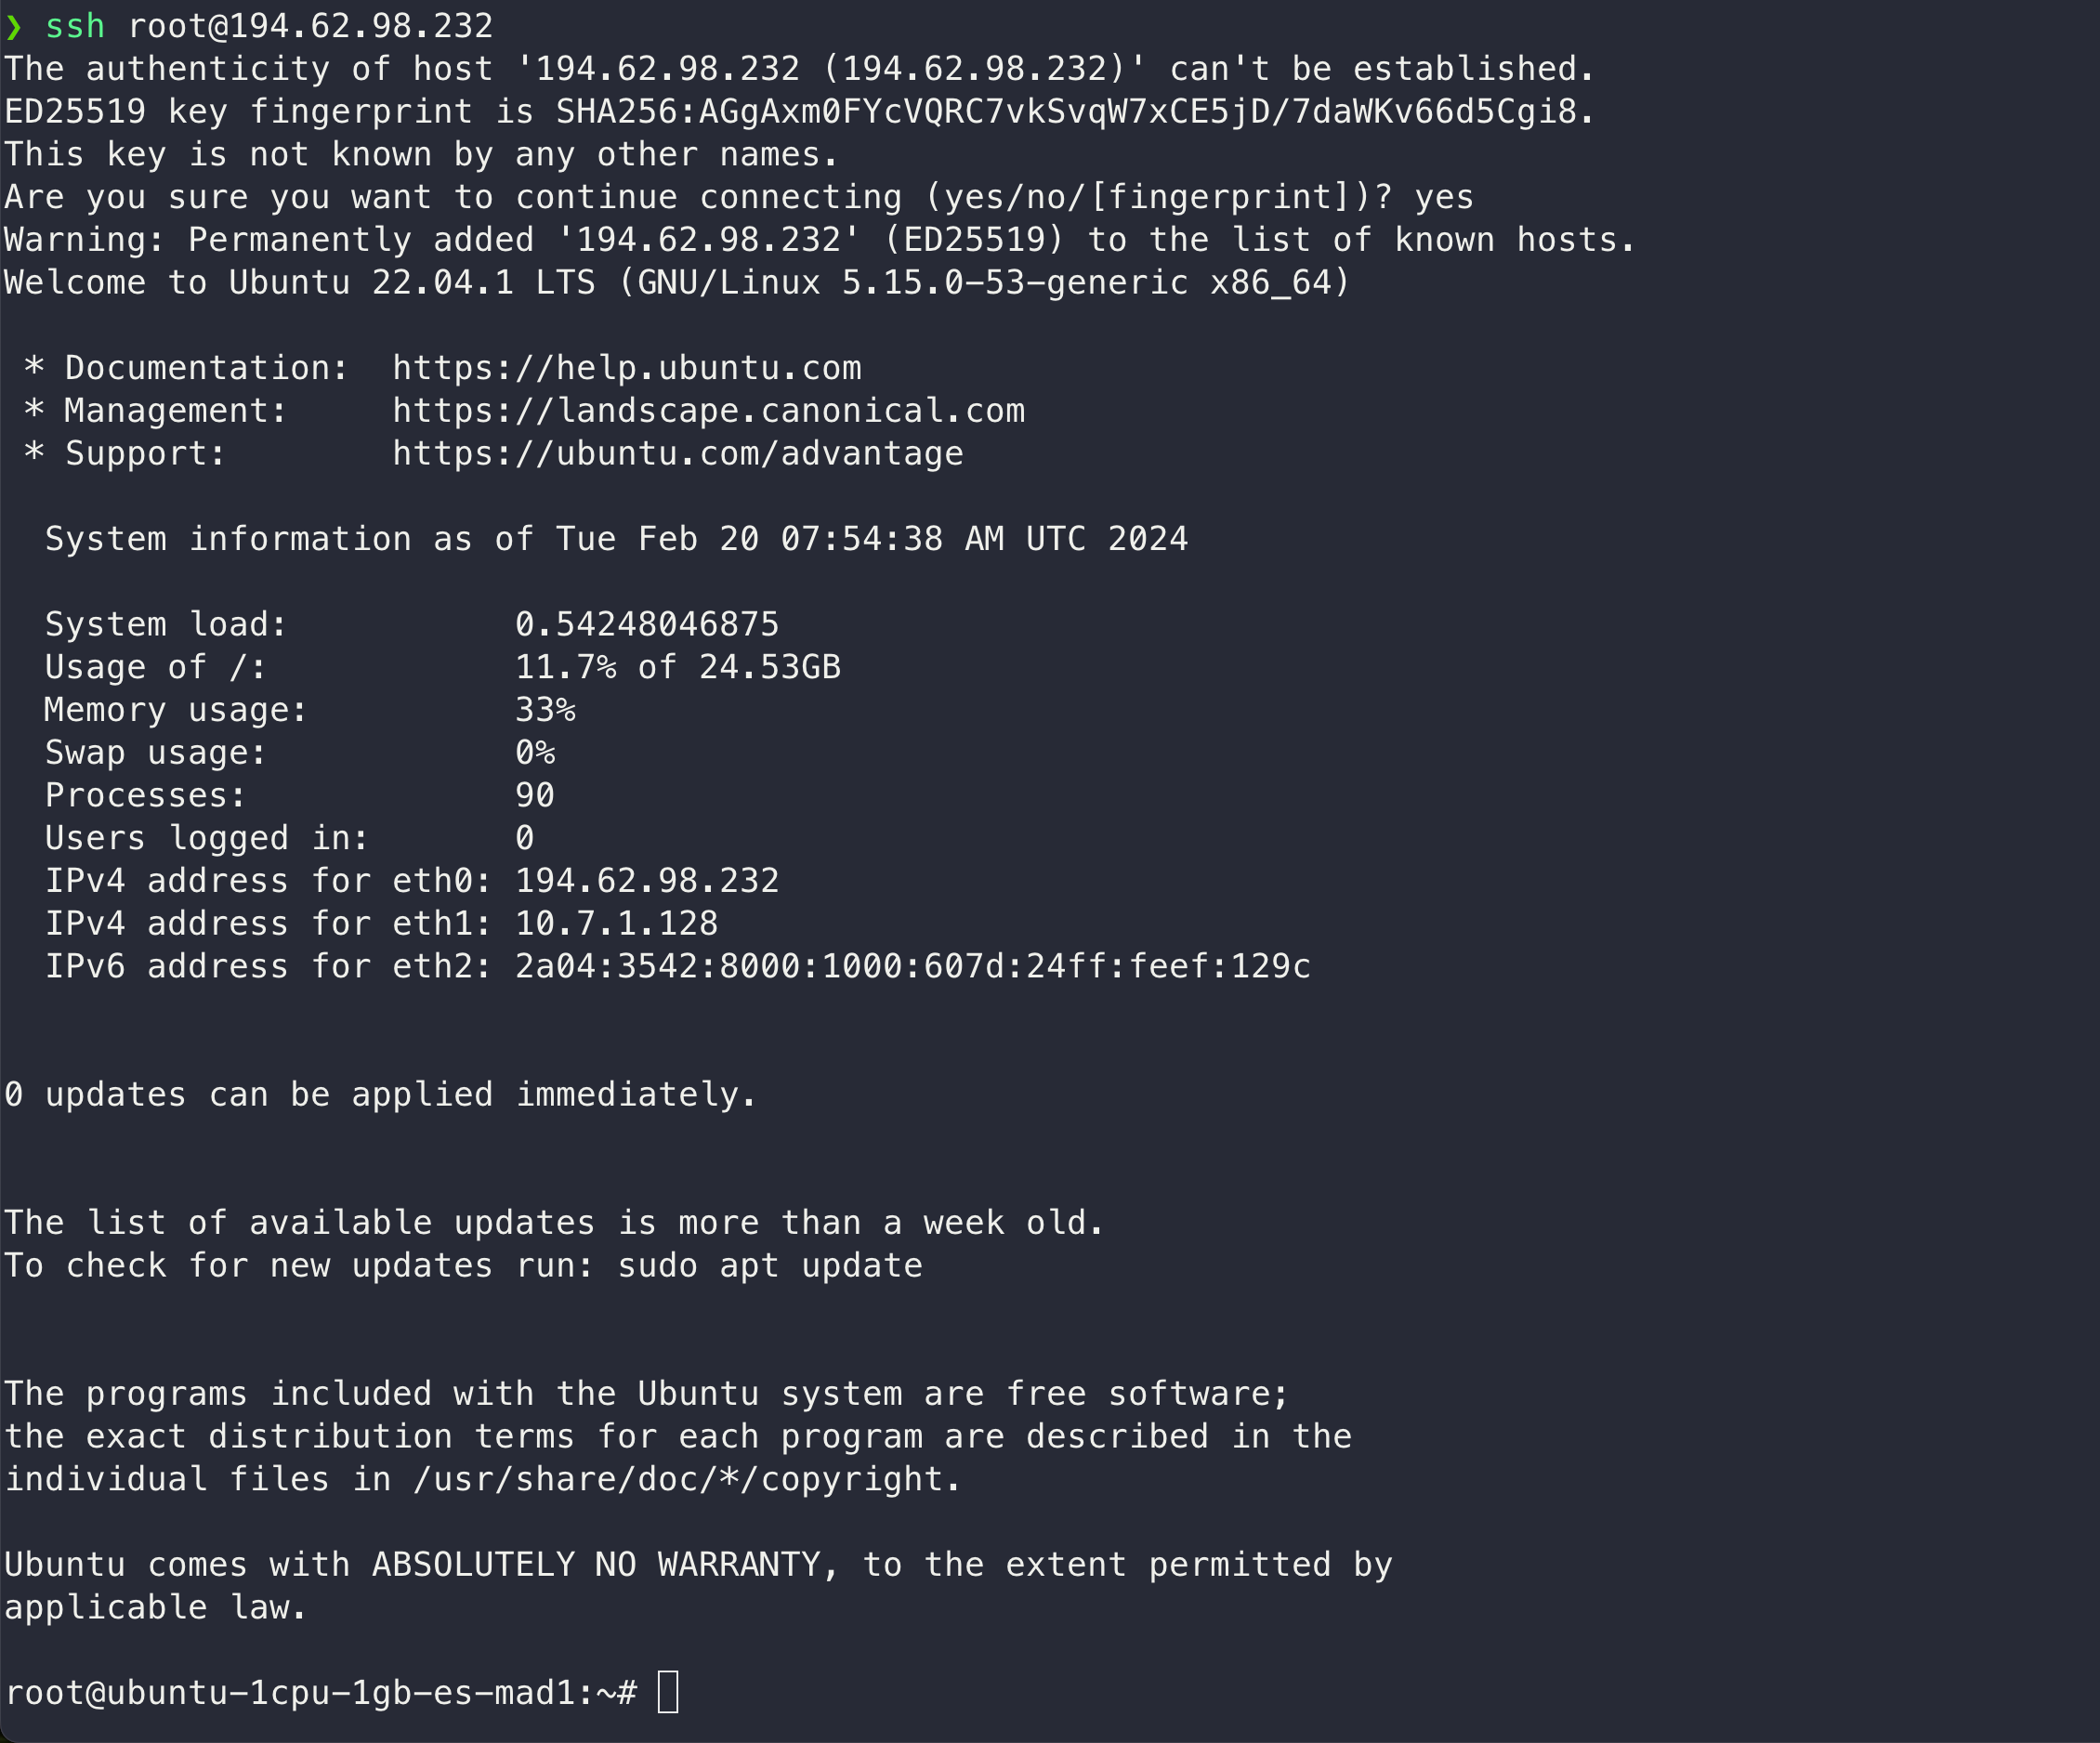
If no SSH key was configured during the server deployment, the system will revert to password authentication. You’ll instead be be prompted to enter your server’s one-time password (OTP) during the login process.

After successfully logging in, the system will prompt you to change your one-time password. You’ll need to first enter the current OTP, then create a new secure and unique password. For verification, you’ll be asked to enter your new password again to confirm it.
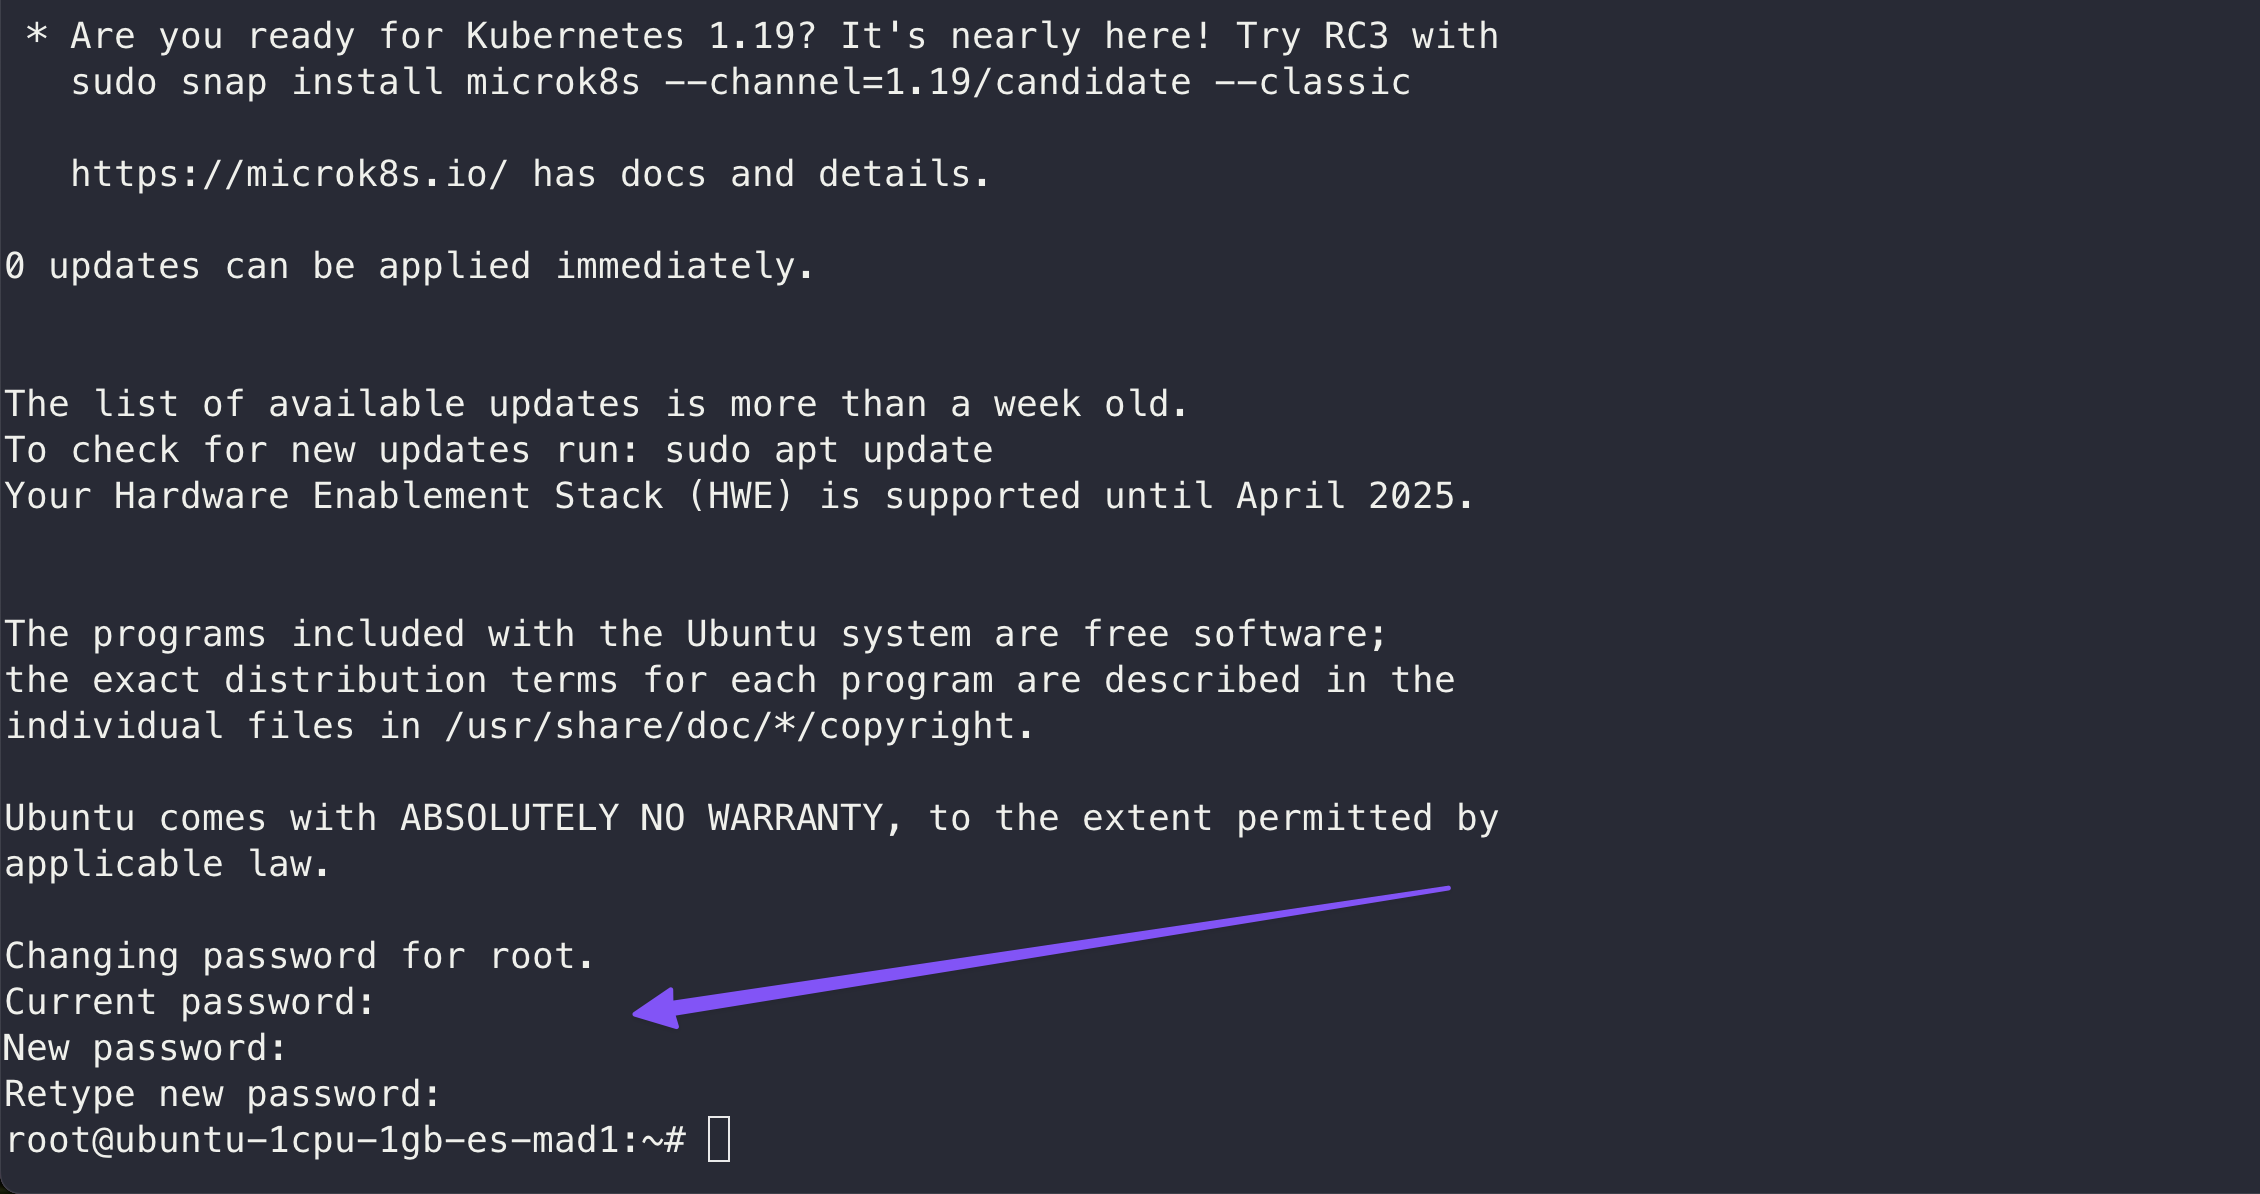
While entering the password, note that characters will not be displayed on the screen; this is a standard security measure designed to protect your password visibility.
PuTTY
Windows users do not have a built-in solution for SSH, but there are options for Windows as well. PuTTY is one of the most commonly used SSH clients for Windows. It’s easy to get started with, but also offers a lot of features for advanced users.
Open PuTTY and enter your server’s public IP address in the Hostname field.
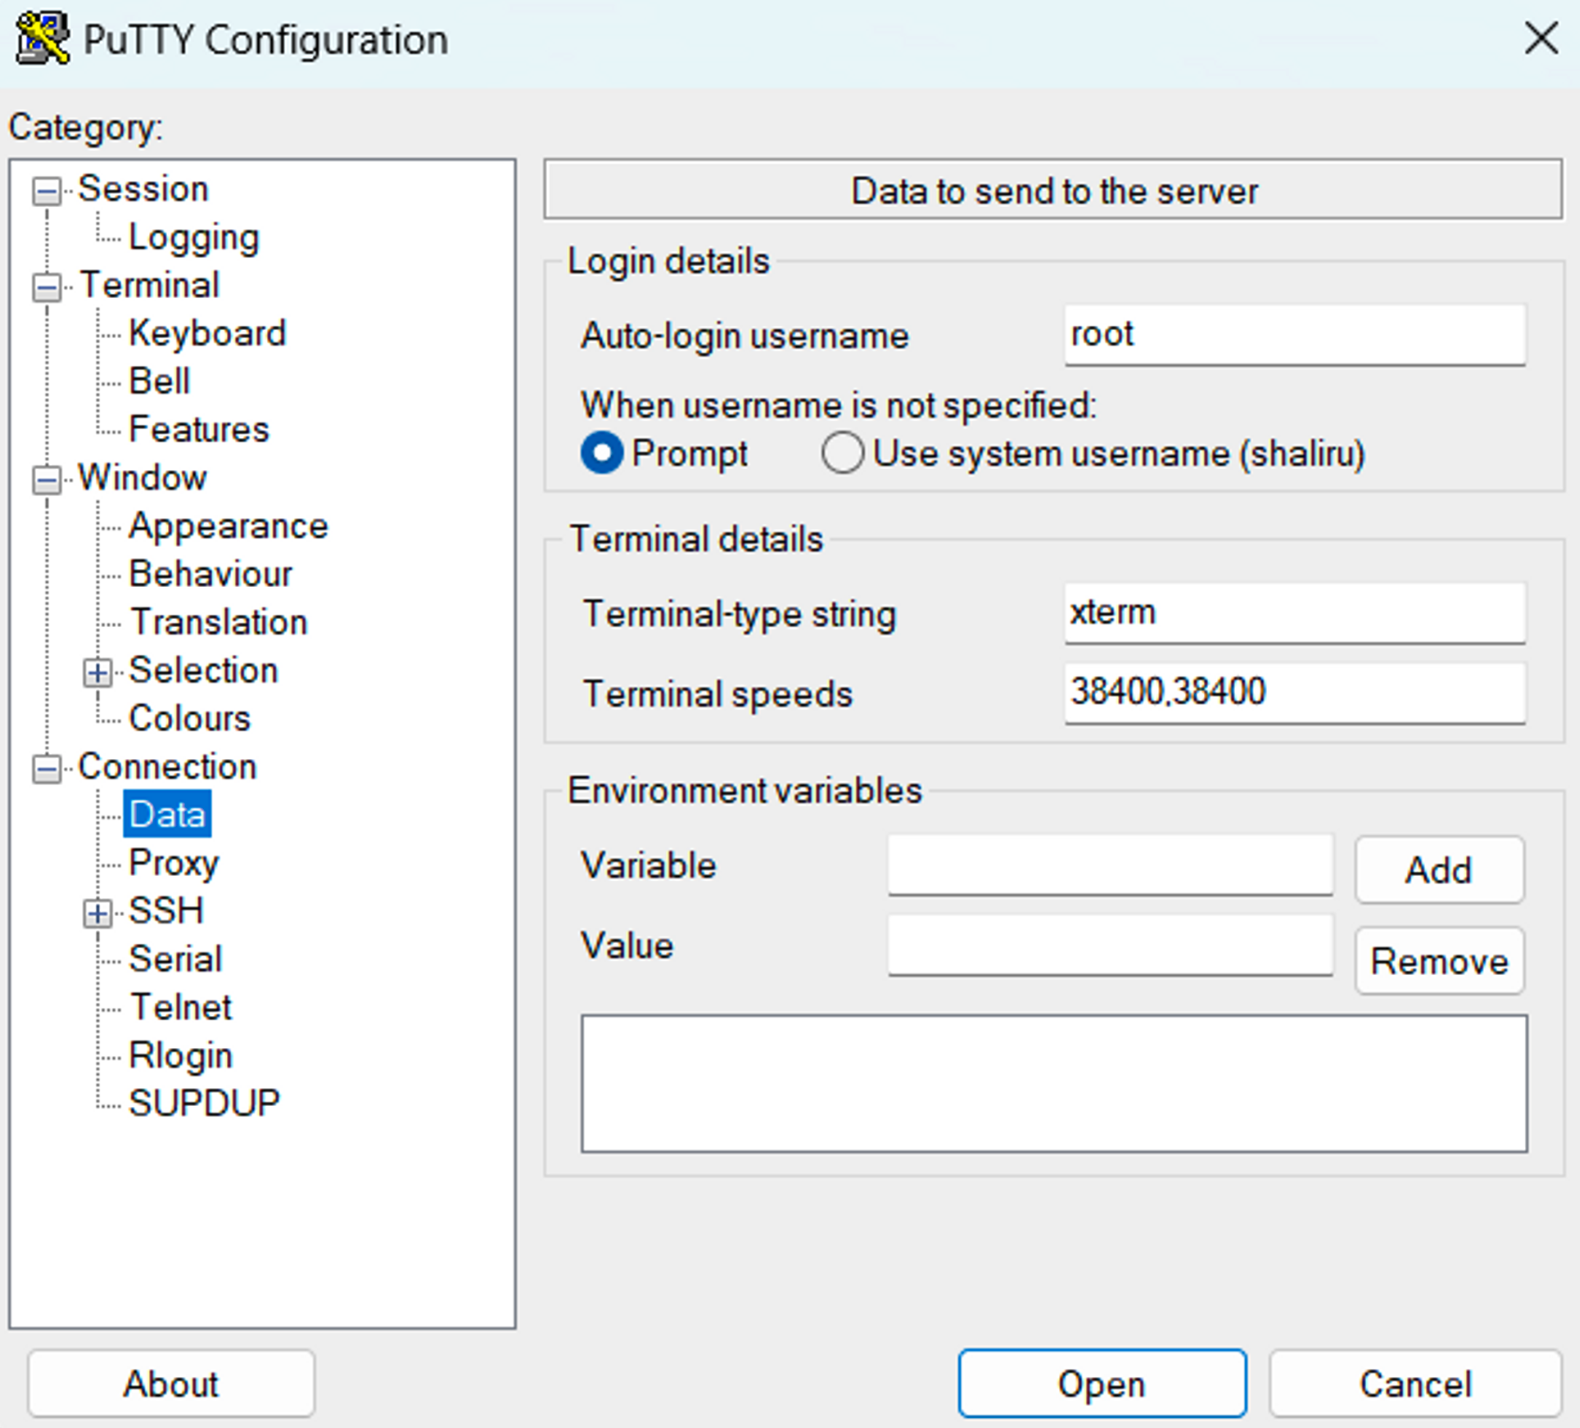
Then, from the menu tree on the left-hand side, navigate to Connection > Data and enter the username that you want to use in the Auto-login username text box. For new Linux servers, this will usually be root.
Next, navigate to Connection > SSH > Auth > Credentials and click the Browse button to select the private key you used to deploy your cloud server.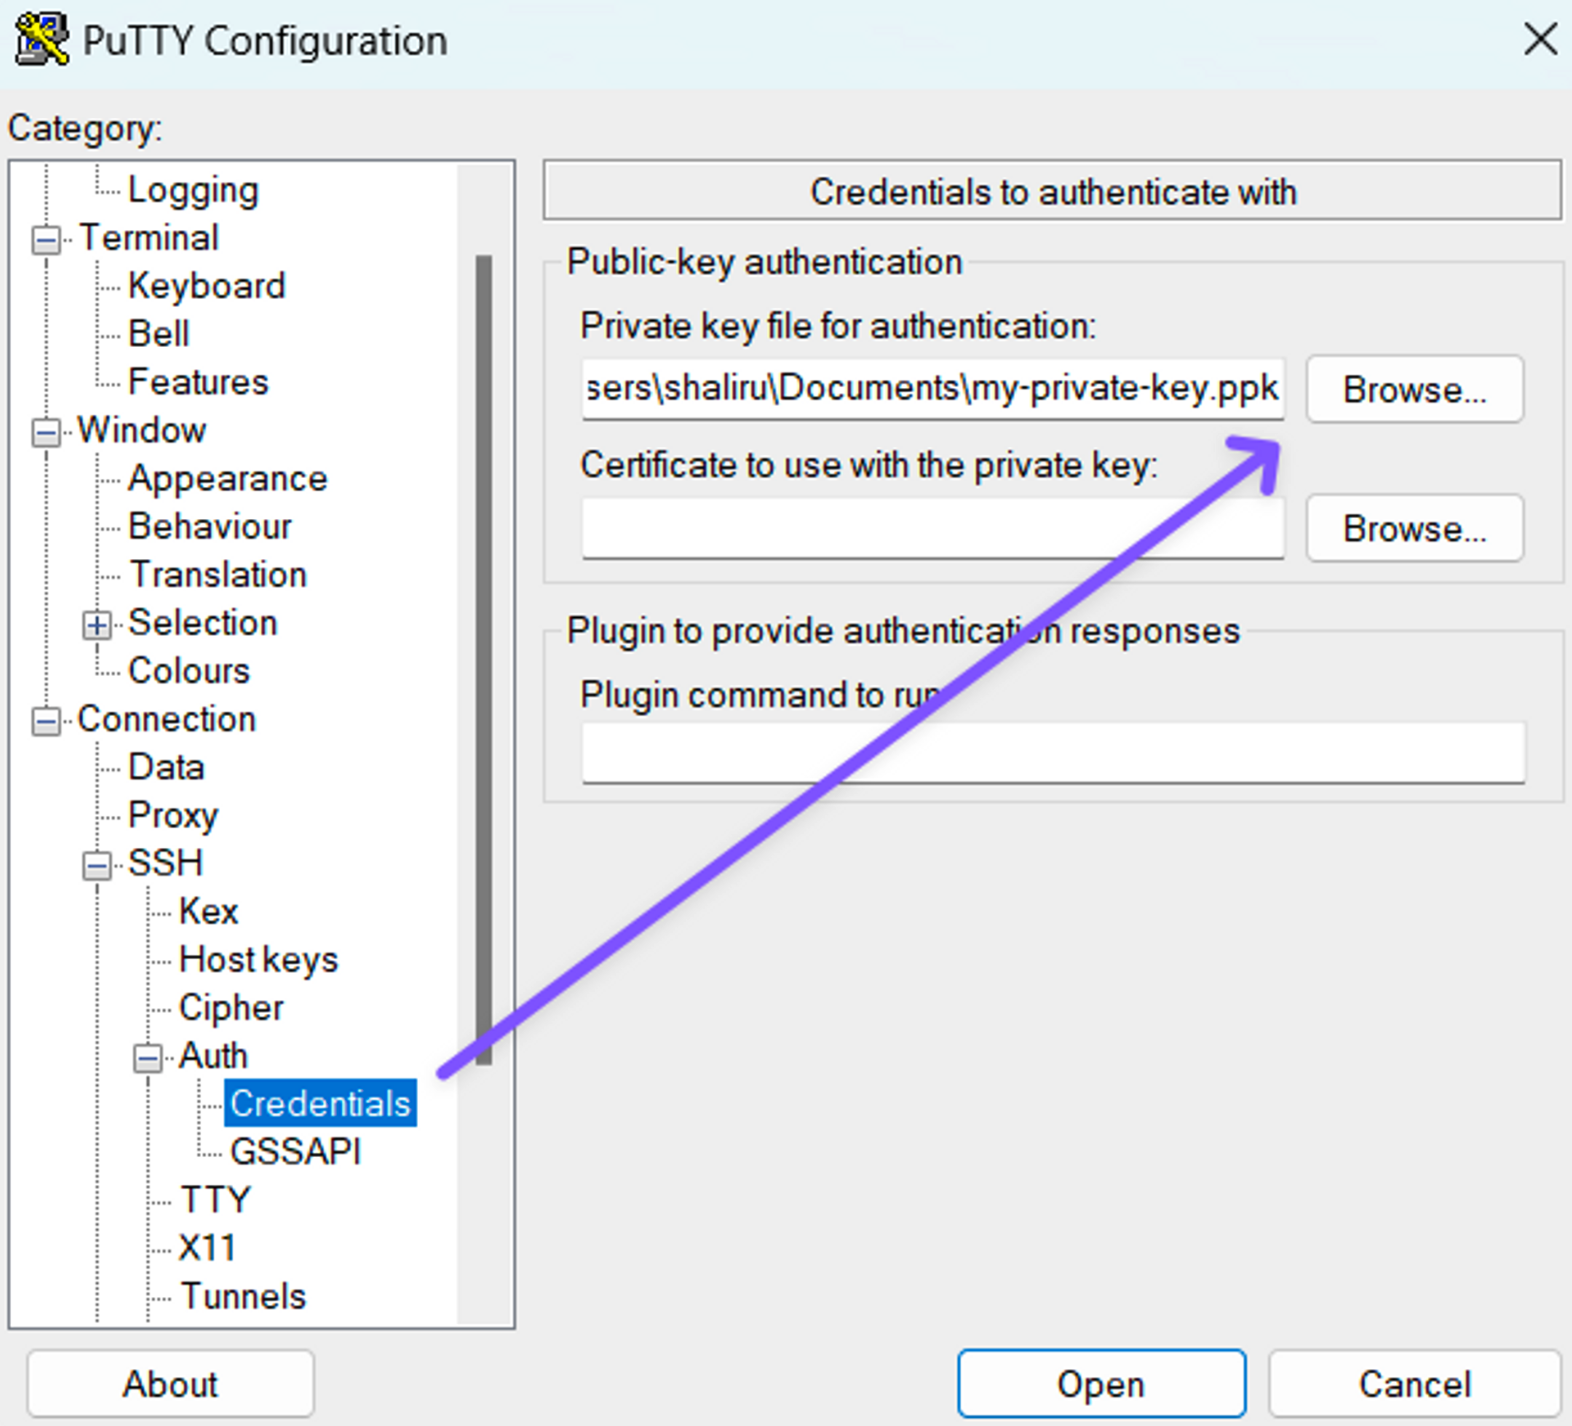
Before proceeding, it’s a good idea to save this configuration, so you won’t have to repeat the steps each time you want to connect to your server in the future.
To do this, navigate back to the Session screen, and under Saved Sessions, enter a name for the configuration. This can be anything you want, but it makes sense to give it a memorable name, such as the IP address or name of the server – or both. Click the Save button to save your changes.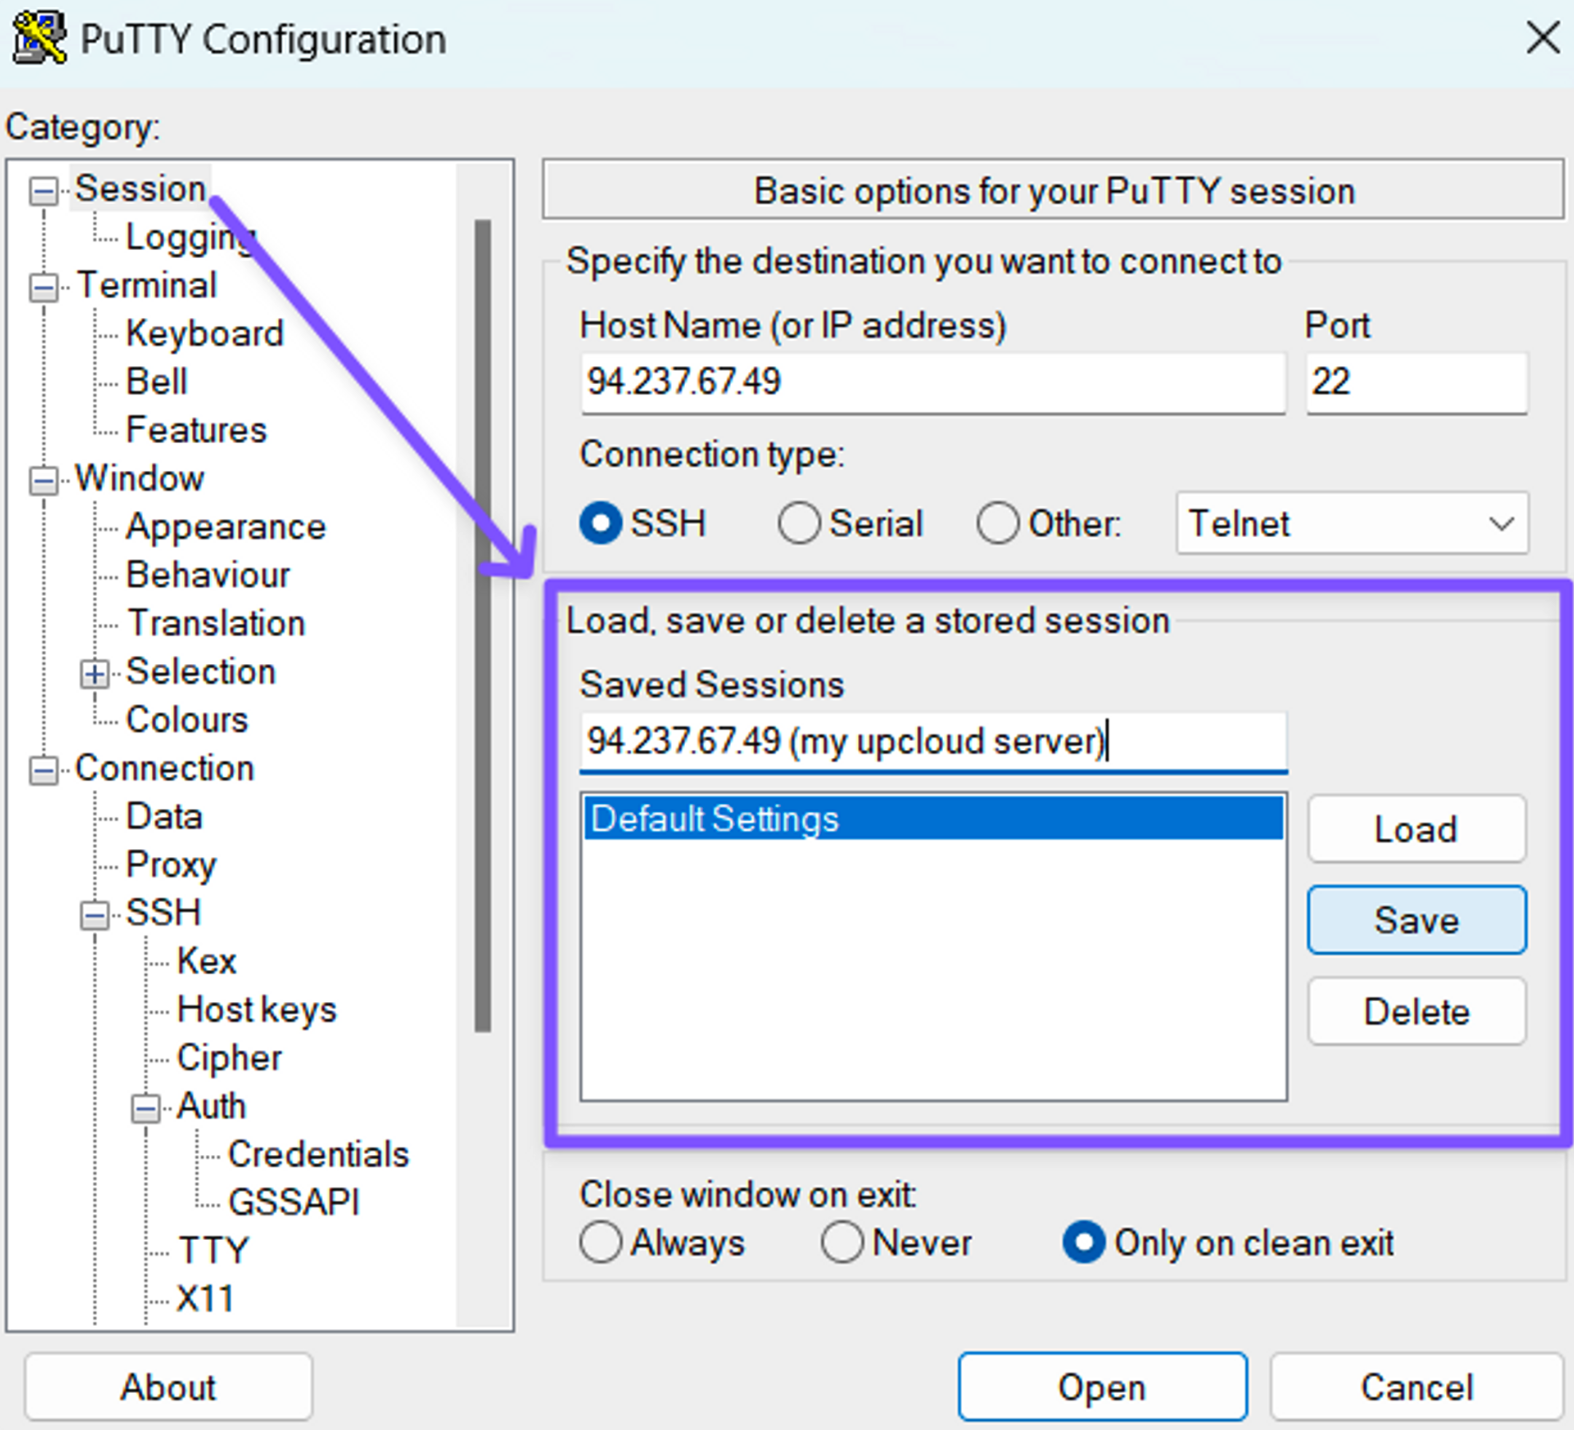
Now you can load this configuration at any time, and it will have the IP address, username, and SSH key information pre-populated and ready to connect.
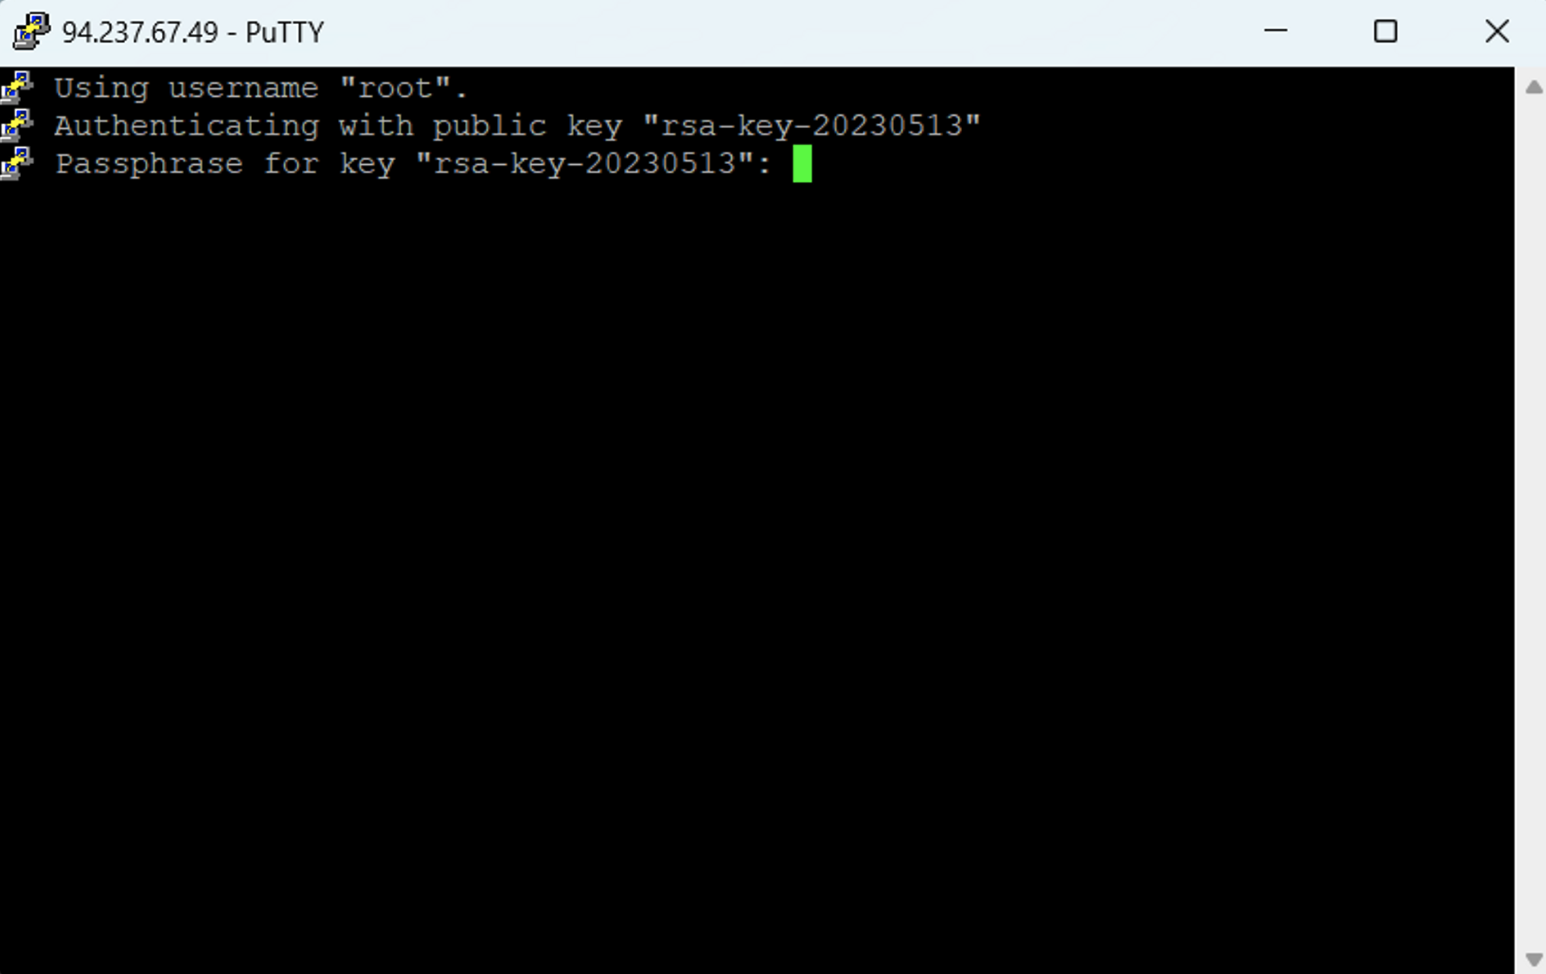
Clicking Open will open a new terminal window prompting you to enter your key passphrase. Type it in and press enter to connect to your server. If you created your keypair without a passphrase, then you won’t see this prompt. You will instead be connected to the server straightaway.
If no SSH key was configured during the server deployment, simply enter your server’s public IP address in the Hostname field, and click Open.
Remote desktop connection
Windows servers employ their own remote desktop connection that allows you to operate your Windows Server just like your own desktop. Windows users should have the Remote Desktop Connect client installed by default. It is also available for macOS in the Mac App Store as well as on most Linux distributions through open-source alternatives such as Remmina .
When connecting, simply enter your server IP address and authenticated it with the username Administrator and the password generated at deployment. Most clients support a fullscreen desktop experience and allow you to save user credentials for convenience, granted that your computer is sufficiently secure and not shared by other users.
Console connection
The third option is to use the HTML5-based web console at your UpCloud Control Panel with no browser extensions or setup required. Although you probably want to use SSH primarily, this is a useful addition in case of faulty firewall rules, OS error states, or any other reason that prevents the usual access methods.
Open your server settings and go to the Console tab. Then simply click the button on the left to Open the console connection. Log in using root or any other username and password stored on your Cloud Server.

Regardless of the server settings or network connection state, you should always be able to connect to a running server with the web console.
VNC Console
UpCloud also offers optional VNC console access using your choice of VNC client. To enable a VNC connection, log in to your UpCloud Control Panel, open your server settings and go to the Console tab.
By default the VNC service is disabled on new servers, click the toggle switch to enable the VNC connection. Underneath that, you will find the connection details for your server. Here is where you can set the password for VNC and change the keyboard mapping. Click the Save changes button to update the settings when done.
Note that while enabling/disabling VNC console as well as changing the VNC password can be done with the Cloud Server running, changing the keyboard map will require the server to be powered down.
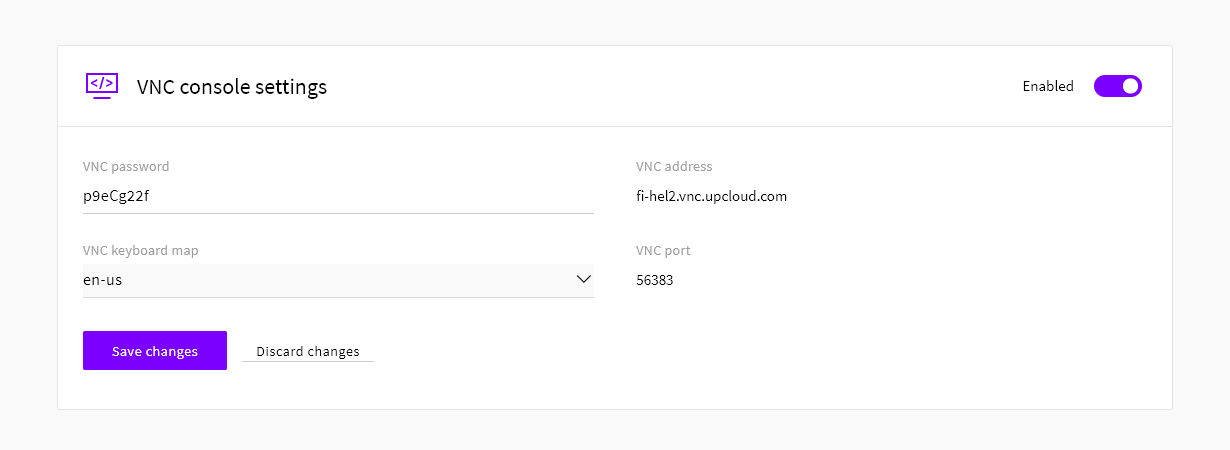
Some VNC clients only ask for the hostname of your server without a second field for the port number, simply enter both the VNC address and VNC port number together separated by a colon ( : ) sign, for example, fi-hel2.vnc.upcloud.com:12345 to open a connection.