Adding and removing storage disks on a cloud server at your UpCloud Control Panel is easy, but the changes also require actions on the operating system level. Whether you are looking to increase data storage or make other changes to the disk configurations, this guide will help you to perform the required operations on Linux and Windows hosts.
The server must be powered down before attaching or removing storage devices.
Adding a new disk
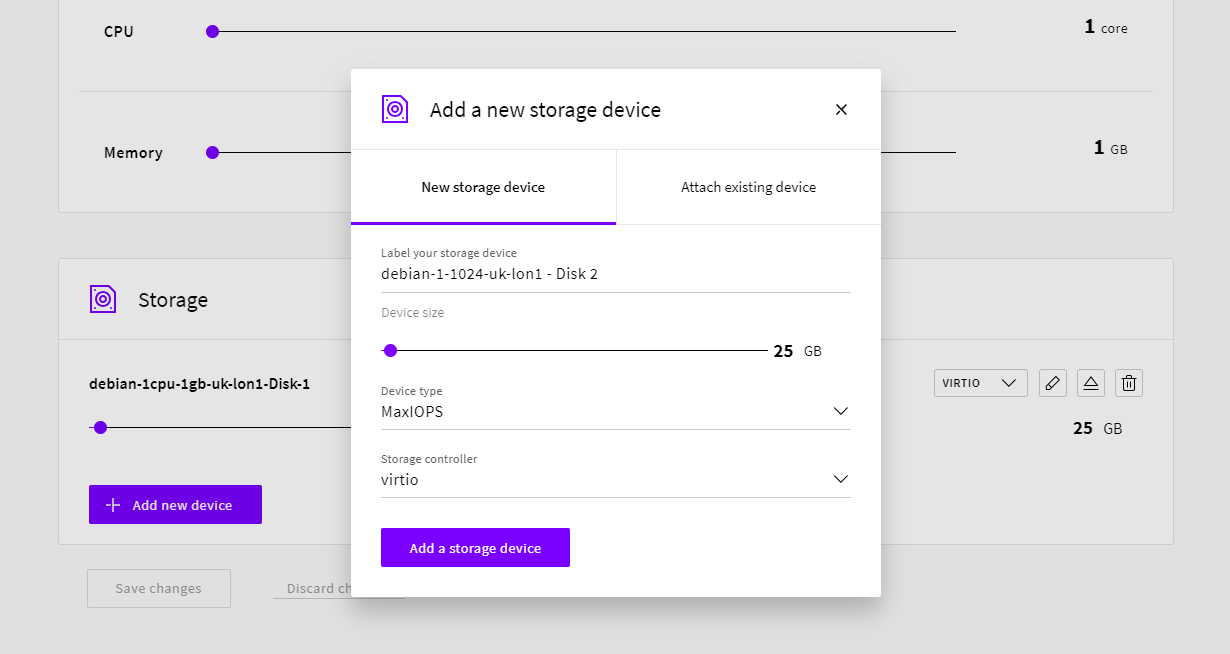
Start by logging into your UpCloud Control Panel. Shut down the server in question and go to the Storage tab in your server settings. Create a new disk by clicking the Add new device button.

In the disk configuration window, select the Create a new disk option, and give the new disk a name and size in gigabytes as required. Then click Add a storage device to confirm.
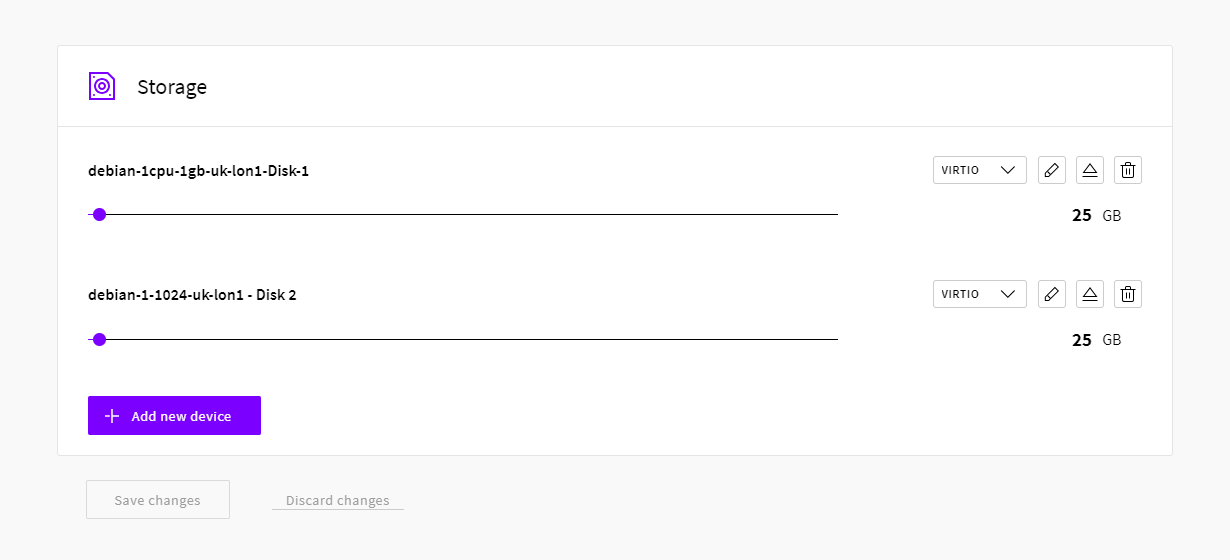
After the attaching process is complete, you can power the server up again.
Once your server is up and running, you can continue with the process at the OS level. Find the operating system-specific instructions below for Linux distributions and Windows servers.
Linux operations
Connect to your server, for example, using SSH. Check the names of the storage disks currently attached with the following command.
lsblk
NAME MAJ:MIN RM SIZE RO TYPE MOUNTPOINT
vda 253:0 0 25G 0 disk
└─vda1 253:1 0 25G 0 part /
vdb 253:16 0 25G 0 disk
The disk you are looking for is usually the last on the list, and will not have partitions on it like vdb in the example above.
Partitioning and formatting the disk
Create a new partition on the new disk using fdisk. Replace the disk in the command below with the new disk name.
sudo fdisk /dev/diskThe utility will open its own command prompt showing Command (m for help): instead of the usual user@host:/$. The following one-letter commands will be entered in the fdisk utility.
First, start a new partition configuration with n. Use default values by just pressing enter on each of the options, or type in the required parameter if no default value is given.
> n
# Primary p, partition 1, start sector 2048, end sector at disk end.
If you are looking to install an OS on the new disk, make it bootable with command a.
> a
# Partition 1 if asked.
Afterwards, you can check that the partition was configured properly, it should show something along the lines of the example underneath.
> p
Device     Boot  Start  End       Sectors   Size  Id  Type
/dev/vdb1  *     2048   52428799  52426752  25G   83  Linux
If everything is in order, write partition changes to the disk with the command w. In case there was a mistake in the setup, delete the faulty partition by entering the command d and then create a new one again with command n.
> w
Once fdisk has finished writing the partition table to the disk it will exit and return you to the usual command prompt. Check that the new partition shows up using the lsblk command.
lsblk
NAME   MAJ:MIN RM SIZE RO TYPE MOUNTPOINT
vda    253:0    0  25G  0 disk
└─vda1 253:1    0  25G  0 part /
vdb    253:16   0  25G  0 disk
└─vdb1 253:17   0  25G  0 part
You should now see both storage disks and their partitions with their correct sizes. The disks will be named something like vda or vdb and their partitions with the added partition identifier number e.g. vda1 and vdb1. Notice that some of the commands below require you to enter the disk name while others use the partitions.
Set up the partition with a file system type appropriate for your server. Ubuntu and other Debian variants should use EXT4 while CentOS 7 hosts might be using XFS instead.
# Creating an EXT4 file system on Debian, Ubuntu or CentOS 6.5
sudo mkfs.ext4 /dev/partition
# Creating an XFS file system on CentOS 7.0
sudo mkfs.xfs /dev/partitionWith the formatting complete, you will next need to create a mounting point for the device.
Mounting a new disk manually
Mounting a disk is as simple as making a new directory to which you wish to attach the disk, for example, /disk1 at your root directory.
sudo mkdir /disk1Then, mount the new storage disk on your system at the mounting point you just created.
sudo mount /dev/partition /disk1
The added storage space will now be available as a directory on your system.
df -h
Filesystem  Size  Used  Avail  Use%  Mounted on
/dev/vda1    25G  1.4G    23G    6%  /
/dev/vdb1    25G   44M    24G    1%  /disk1
That is it, you can then start using the new storage space.
Remounting a new disk automatically
To enable the new storage disk to mount automatically at boot, you still need to add it to the fstab file. The fstab file contains descriptive information about the various file systems on your server and needs to be maintained properly. Each file system is described on a separate line in the order they should be mounted.
Start by checking the UUID of the new disk using the command below.
blkid
/dev/vda1: UUID="9dbc7ddd-5c2b-4e66-b284-ffd3f146c80b" TYPE="ext4" PARTUUID="861dadf7-01"
/dev/vdb1: UUID="3dfce0f1-1c50-455d-adbc-16bd1c0560a2" TYPE="ext4" PARTUUID="3b9f0276-01"
Note down the UUID of the new disk, usually the last on the list. Most systems use the UUID to identify disk devices in the fstab file but the /dev/partition denomination would also work.
Next, open the fstab file with your favourite text editor and add the new disk description similar to the examples according to your OS. Remember to set the <UUID of the new disk> like on the first line.
Below are shown examples of the fstab file from Ubuntu and CentOS.
# On Ubuntu or Debian
nano /etc/fstab
# <file system>                          <mount point> <type> <options>      <dump> <pass>
UUID=9dbc7ddd-5c2b-4e66-b284-ffd3f146c80b /             ext4   errors=remount-ro 0      1
UUID=new_disk_uuid                        /disk1        ext4   defaults          1      2
# On CentOS
vi /etc/fstab
# <file system>                          <mount point> <type> <options> <dump> <pass>
UUID=e0c76c31-e8c6-49a1-879c-238266e0fb07 /             xfs    defaults  1      1
UUID=new_disk_uuid                        /disk1        xfs    defaults  1      2
Once you have added the description of the new disk device, save the file and exit the editor.
All done! The new disk will now be always automatically mounted at boot.
Windows operations
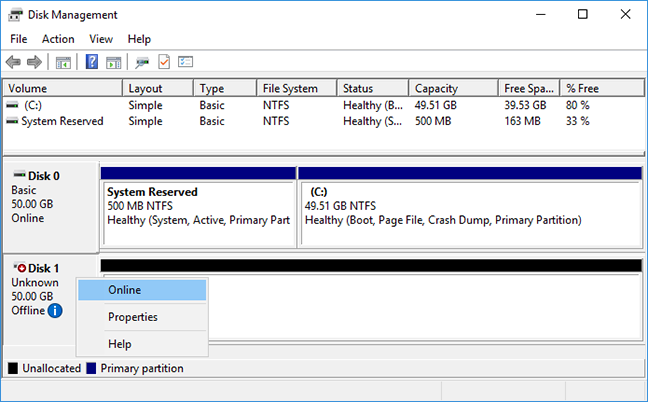
Start by opening the Disk Management panel by right-clicking the Windows Start button and selecting Disk Management from the appearing list. Alternatively, type diskmgmt.msc in the search or run window and then press enter.
The newly attached storage device should be listed as the last disk in the bottom part of the window. Start by right-clicking the new disk and selecting Online to enable the device.
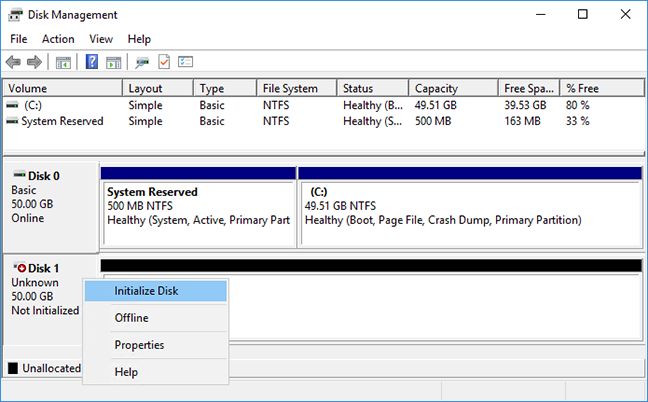
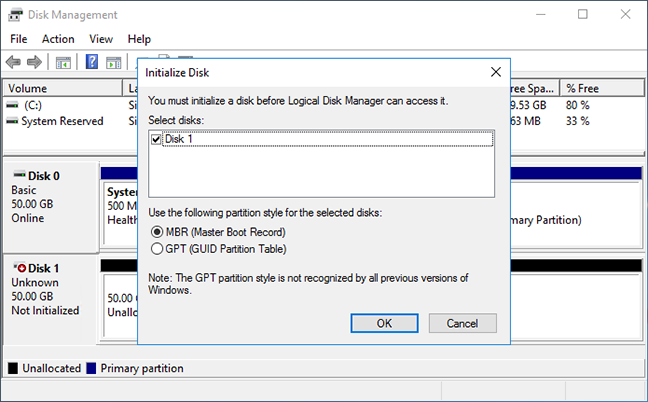
Next, you will need to initialize it by right-clicking the disk and selecting Initialize Disk.
In the next window, initialize the newly attached disk by selecting MBR and clicking OK.
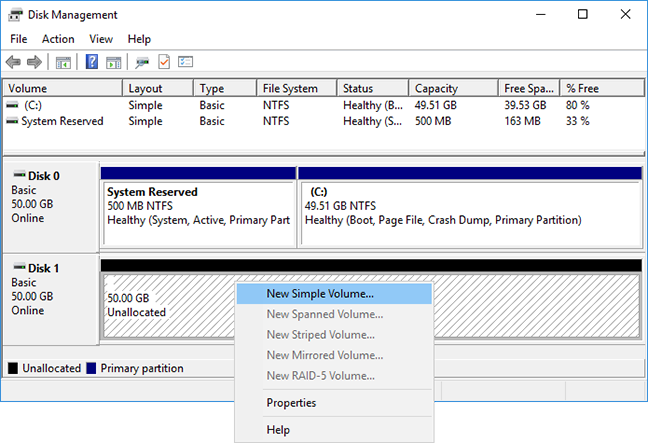
Before the new disk can be accessed you will need to format it. Right-click the unallocated partition and select New Simple Volume. Go through the wizard, the default options are fine for most cases.
The formatting might take a moment depending on the size of the new volume. You can continue using the server normally until the process is completed.
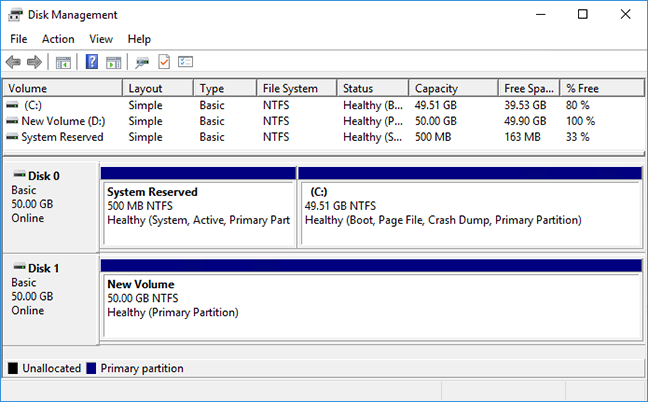
Once the volume creation wizard is done formatting the new partition, the device will show a blue indicator and report the status as Healthy.
Done! You can then start using the added storage space as usual.
Unmounting a disk
Detaching a storage disk is a considerably simpler process than attaching one.
To ensure data integrity on your cloud server after the detachment, check that the host does not have active services using the disk being removed. Once you are sure it is safe to detach the device proceed with the steps below for either Linux or Windows hosts.
Linux
Unmount the disk being removed with the command underneath.
sudo umount mounting_point
# For example
sudo umount /disk1
If you are permanently removing a disk that was configured to automount at boot, you will also need to remove the disk in question from the fstab file.
# On Ubuntu and Debian
nano /etc/fstab
# Or on CentOS
vi /etc/fstab
Delete the line describing the disk you want to remove. These are usually easiest to identify according to their mounting points. Then save the file and exit the editor.
Then, shut down your server either with the Shutdown request at your control panel or by using the command below in your server terminal.
sudo shutdown -h now
When the server is powered down, continue to your UpCloud control panel to remove the disk.
Windows
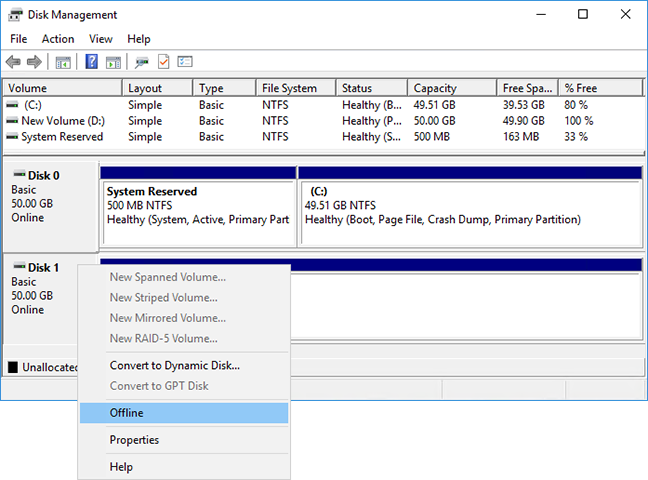
Open the Disk Management panel by right-clicking the Windows Start button and selecting Disk Management from the appearing list. Alternatively, type diskmgmt.msc in the search or run window and then press enter.
Right-click the disk you wish to remove and select Offline to turn off the device.
Shut down your server at Windows over a Remote Desktop Connection or through the web console at your UpCloud control panel.
Detaching a disk
With your server powered down, go to your UpCloud control panel and open the Storage tab under the server settings.
There are two ways of removing storage disks.
- Detaching a disk simply frees the storage to be attached again and keeps the data for later use.
- Deleting a disk removes the device from the server and deletes the data permanently.
Scheduled backups will continue even while the disk is detached according to the settings and retention time. Any backups made from the original storage disk are retained when deleting devices and can be used to restore deleted storage.
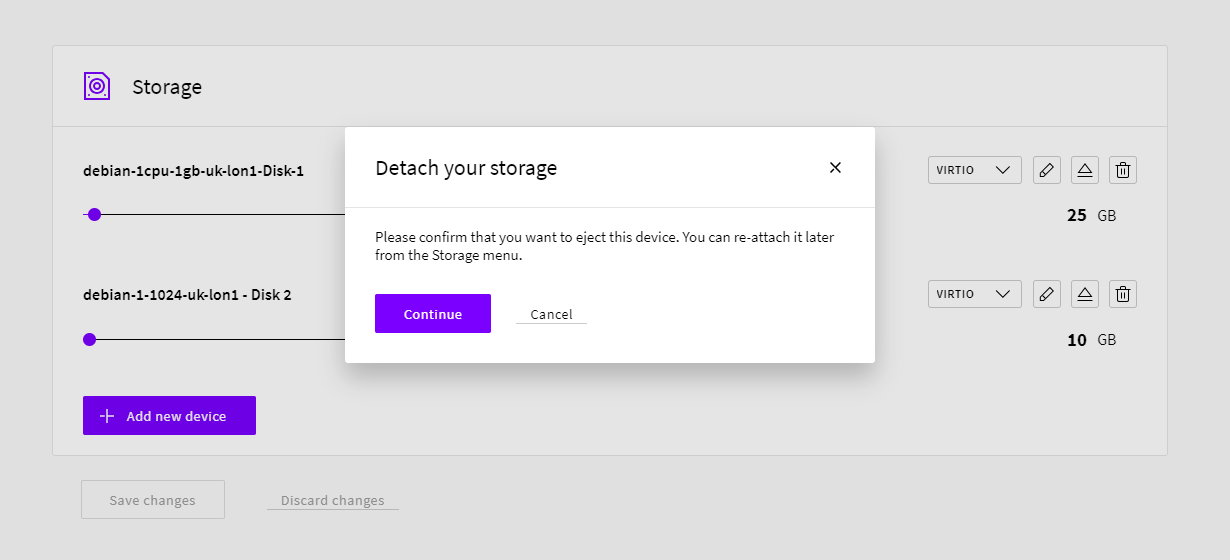
Click the eject icon on the storage you wish to remove but not delete.
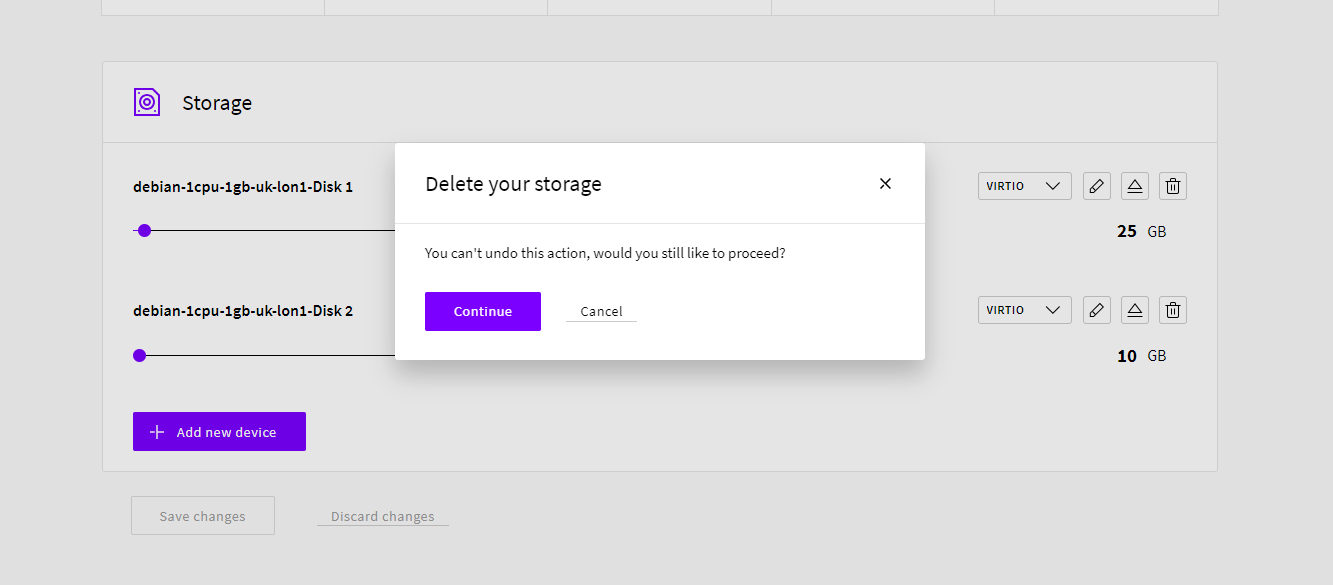
Alternatively, if you are sure to not need the device any longer, you can click the bin icon to delete the storage device permanently.
Once the removal operation is complete, you can start up your server again.
If you are later confident that your cloud server runs as it should without the removed device, you can delete the detached storage at your UpCloud control panel in the Storage section.