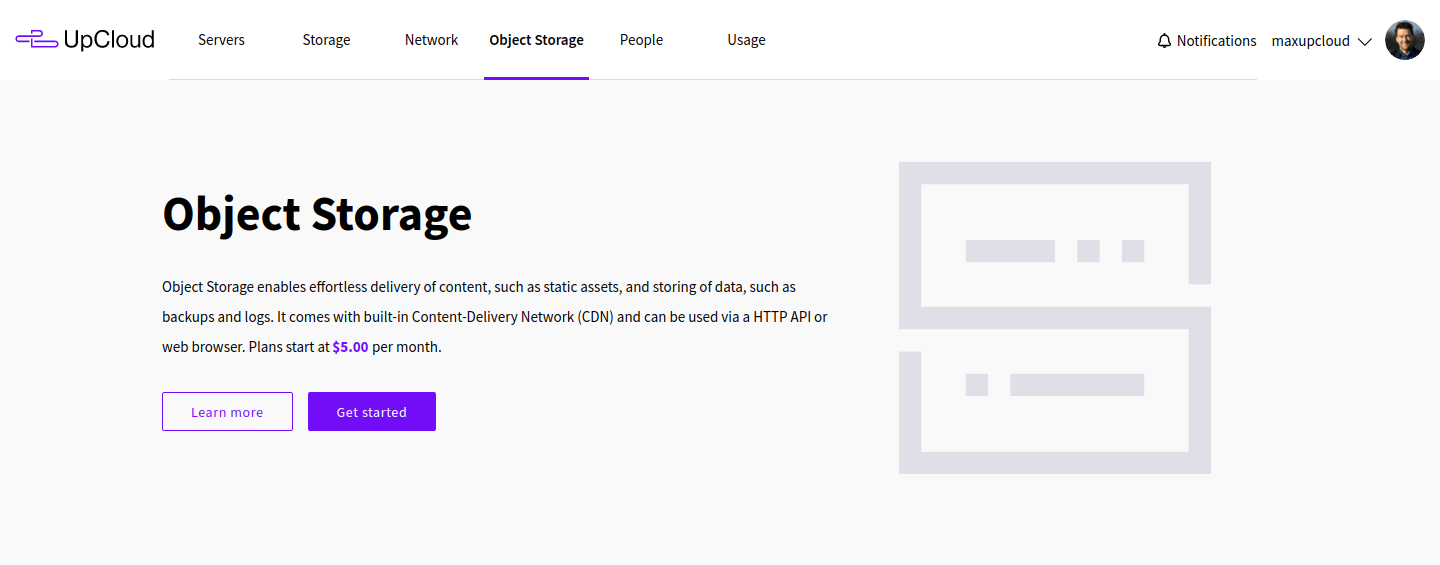
SnapShooter offers easy-to-use backup scheduling and management on a host of cloud providers. Their backup options include everything from full storage snapshots to individual databases and files by utilising UpCloud Object Storage.
The security and redundancy ensured UpCloud Object Storage is the perfect place to store any data for your needs. Thanks to the S3-compatible and programmable interface, SnapShooter can integrate directly with Object Storage on UpCloud.
Signing up on UpCloud
First things first, if you have not yet registered on UpCloud, begin by getting signed up. Follow the link here to register for a new account and you’ll receive $50 in credits to use for 14 days! You’ll also want to upgrade your account for full access by making a one-off minimum payment of $10 to be able to create Object Storage instances.
Afterwards, you might also want to deploy a Cloud Server to be able to test out SnapShooter. This can be of any configuration or location you choose. Simply go to your UpCloud Control Panel and select Deploy. Configure the server as you please and then click Deploy at the bottom of the page.
You can find out more about each of the configuration options in our deployment tutorial.
Creating Object Storage
To be able to save your backups in UpCloud Object Storage, you first need to create a new Object Storage instance.
Begin by logging into your UpCloud Control Panel and going to the Object Storage section.
Click the Get started button to create your first Object Storage.
Select your configuration options:
- Location of where you want the storage to be situated
- Plan by how much storage you want
- Name your Object Storage, this will be used in the endpoint URI and needs to be unique
Note that it can’t be changed later without recreating the Object Storage - Choose access networks
- Then create the first bucket by entering a name for it
Finally, click the Create Object Storage button to launch the new storage device.
When the Object Storage is created, you’ll be presented with the randomly generated access and secret keys. Download and keep the keys safe for later use.
You can find out more in our UpCloud Object Storage tutorial.
Registering on SnapShooter
Next, if you haven’t already, head over to SnapShooter and register for their 14-day free trial. During the trial, you can back up one server for free forever. Additionally, when you are ready to make use of SnapShooter to a larger extent, do so worry-free thanks to their 30-day money-back guarantee.
After registering, log into the SnapShooter dashboard. Don’t forget to confirm the email address you registered with to unlock the required features.
When first logging into your dashboard, you’ll need to create a team. Choose the name of your team account and click the Create Team button.
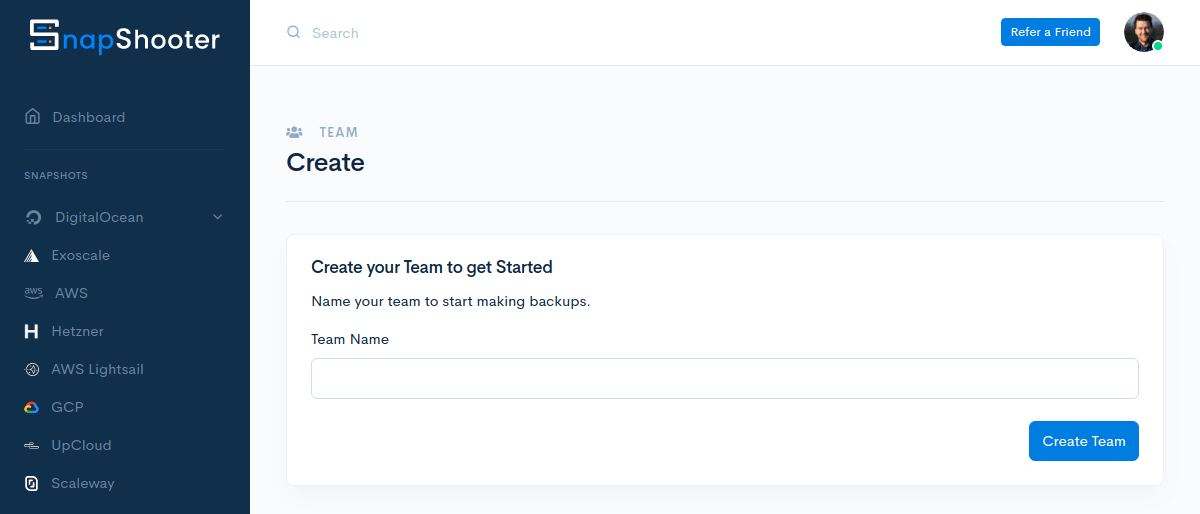
Once you’ve created your Team account, you can invite other members to your team and manage your billing settings.
Connecting UpCloud Object Storage on SnapShooter
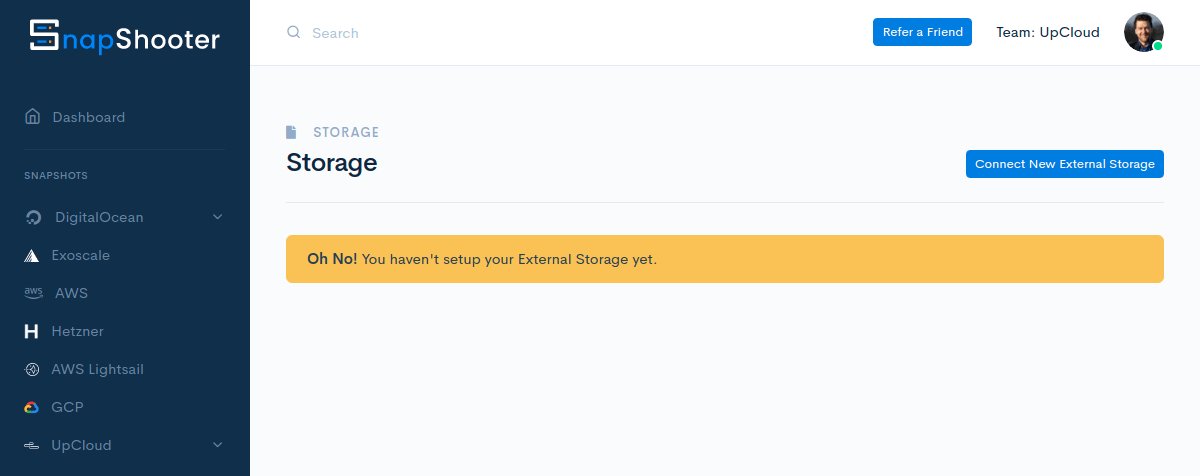
Now that you’ve set up your SnapShooter account, you can get started connecting your cloud services.
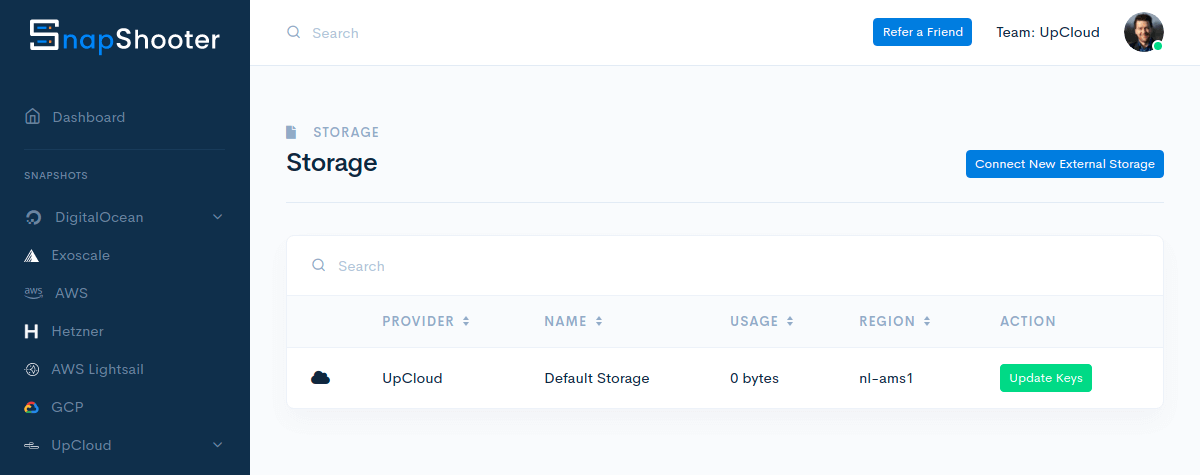
The first thing to do is to authorise SnapShooter to access your UpCloud Object Storage. This is done by connecting a new External Storage in the section by the same name.
Click the Connect New External Storage button to open the settings view.
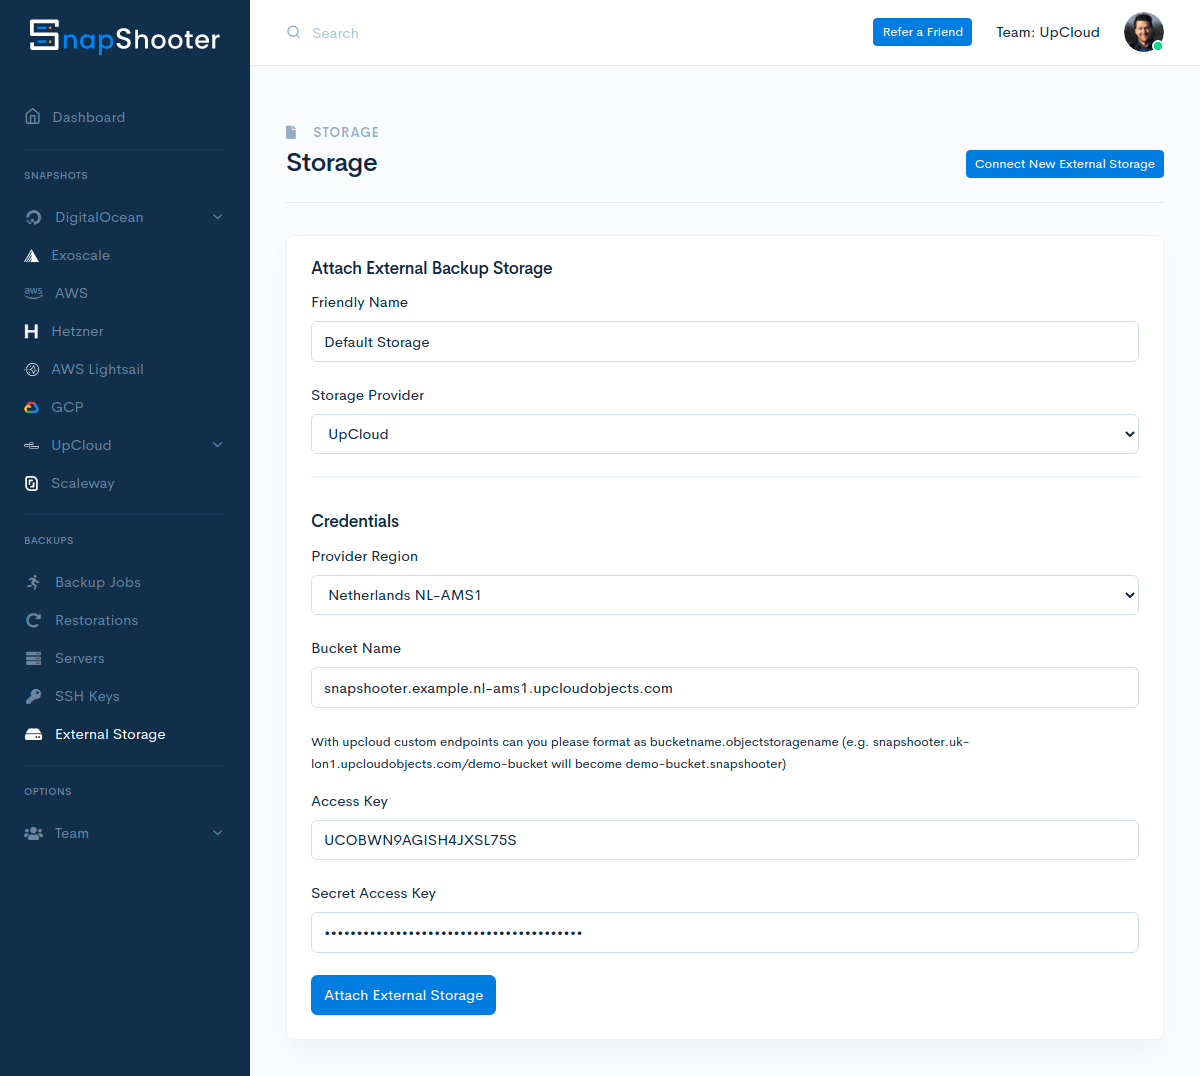
In the next view, configure the connection to your Object Storage by entering the following details:
- Name your Object Storage such that it’s easy to recognise
- Select UpCloud as the storage provider
- Select the data centre location you created your Object Storage instance
- Enter your storage endpoint URI where you want to save your backups, e.g.:
https://snapshooter.example.nl-ams1.upcloudobjects.com/ - Lastly, set your Access Key and Secret Key to their corresponding fields
Once done, click the Attach External Storage button to confirm.
SnapShooter will then make a quick test connection to check the Object Storage is accessible. Afterwards, you’ll see your new backup location listed in the External Storage view.
Your backup storage is then ready to save your data. Continue in the next section on how to connect your Cloud Server on SnapShooter.
Connecting Cloud Server on SnapShooter
SnapShooter is able to back up files on a whole host of server operating systems, including most Linux distributions, by using simple remote commands.
To have SnapShooter backup your Cloud Server, you’ll first need to connect it to your dashboard. This is done by installing the necessary packages and granting SnapShooter access to the server with an easy single-line command.
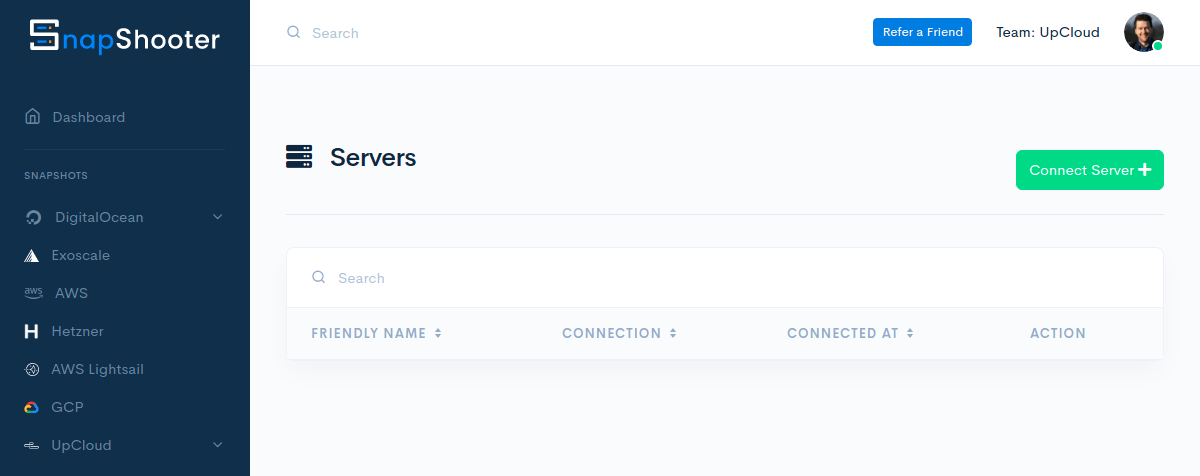
Go to the Servers section in your SnapShooter dashboard and click the Connect Server button.
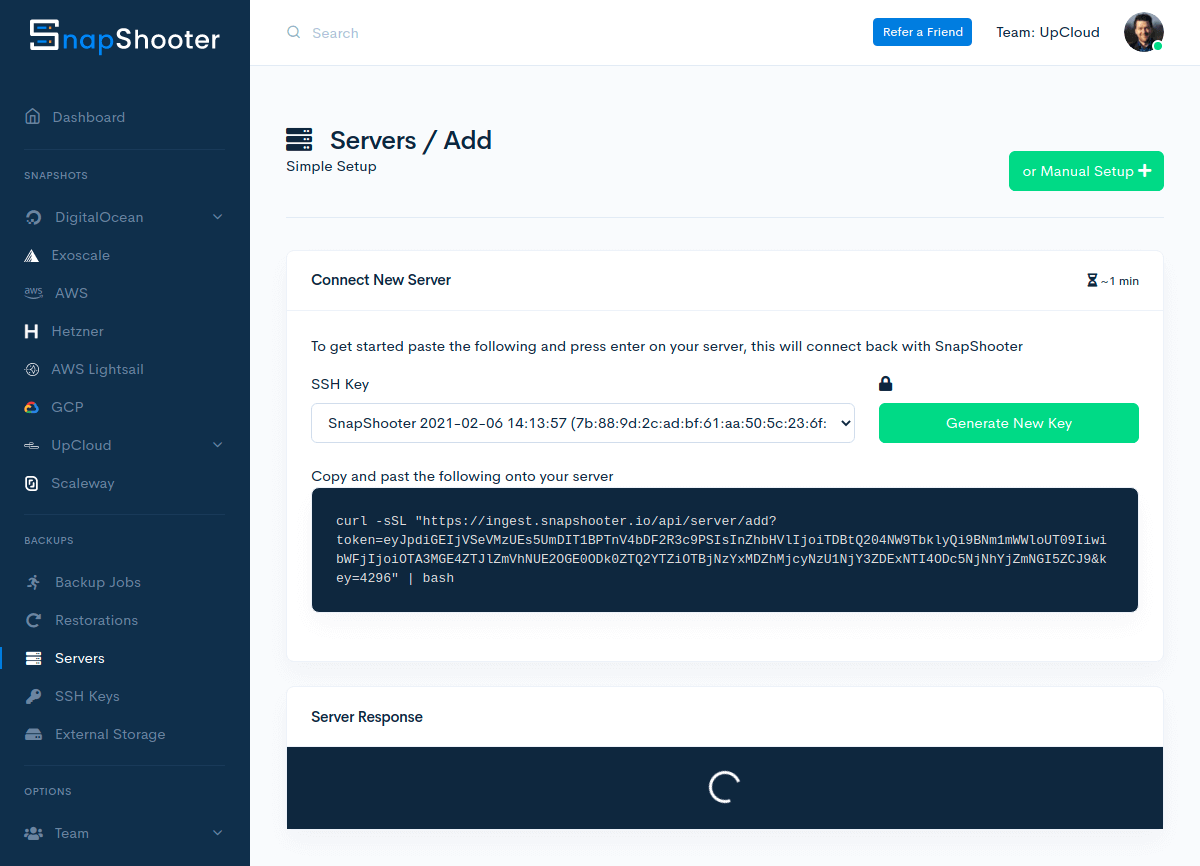
In the following view, you will be presented with the simple command to connect your Cloud Server.
Connect to your Cloud Server, for example using SSH.
Once logged into your Cloud Server, check that you have the required packages installed.
# Debian and Ubuntu
sudo apt install curl netcat
# CentOS
sudo dnf install curl netcat
Then run the command by copying and pasting it to the command line.
[root@snapshooter-example ~]# curl -sSL "https://ingest.snapshooter.io/api/server/add?token=eyJpdiI6IjFhLy9UbUpXZk9LdWrgS1RnSCtTOFE9PSIsInZhbHVlIjeqK3ZIUERsZDlxMUVURm8xMHBCMzdYZz09IiwibWFjIjioZDU1ZDI1YWM4MmMxNGNiMzIyNDA3ZWJhODIxZmQ0OTRjNGIyOGZjNWYzNWE3NjFjYmU1OWI3OTM2Mzk0MTdlOSJ9&key=4296" | bash
You should then see an output similar to the example below.
Welcome to SnapShooter Server Setup
Environment Detected: OS: linux, OS Type: amd64
Installing SSH public key
Creating temp SSH key file
Creating authorized_keys backup /root/.ssh/authorized_keys.bak-1612736956
Key Installed /root/.ssh/authorized_keys
Removing temp SSH key file
Scanning SSH config
Checking 22
matched (22)
SSH test confirmed, Server Added to SnapShooter ...
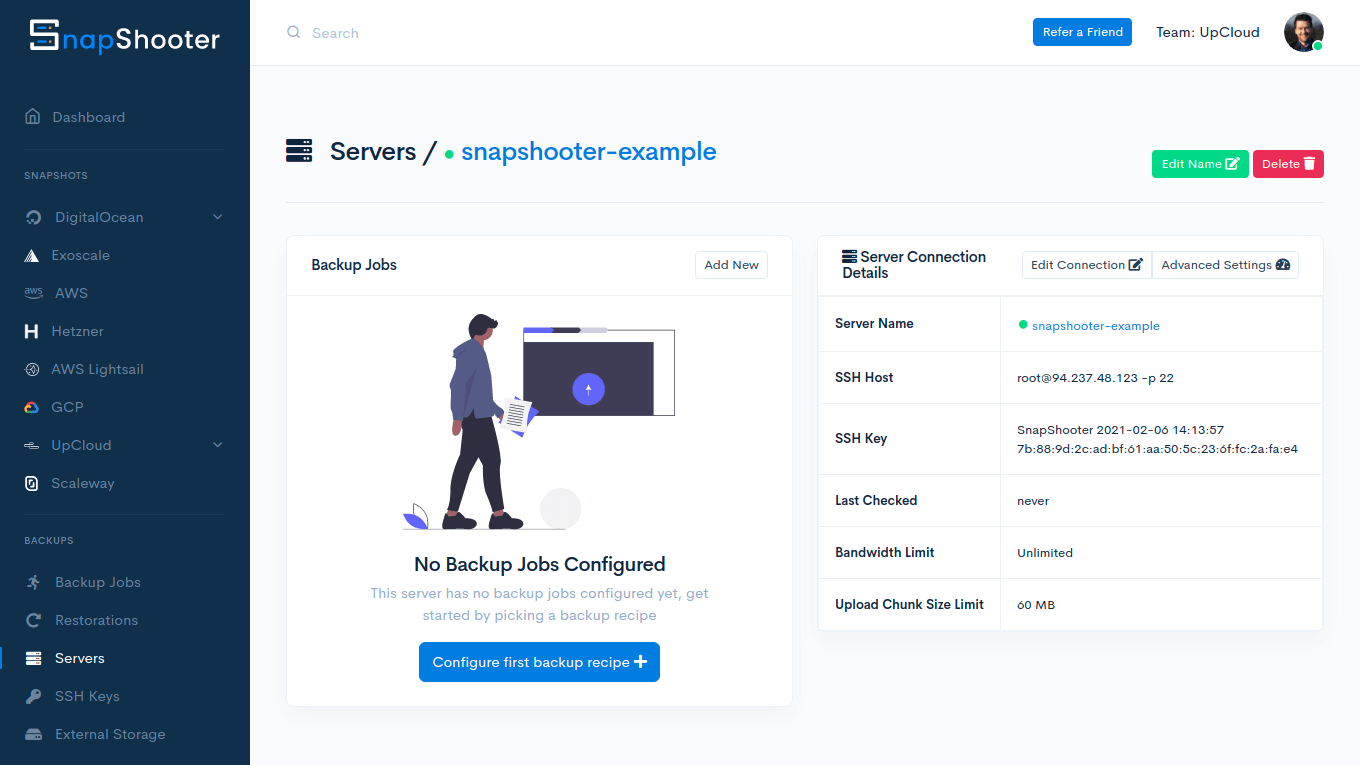
That’s it! Your Cloud Server should now be connected to your SnapShooter.
Confirm the connection was successful by checking that SnapShooter has fetched the server details. You should see a view similar to the example underneath.
Scheduling backup jobs
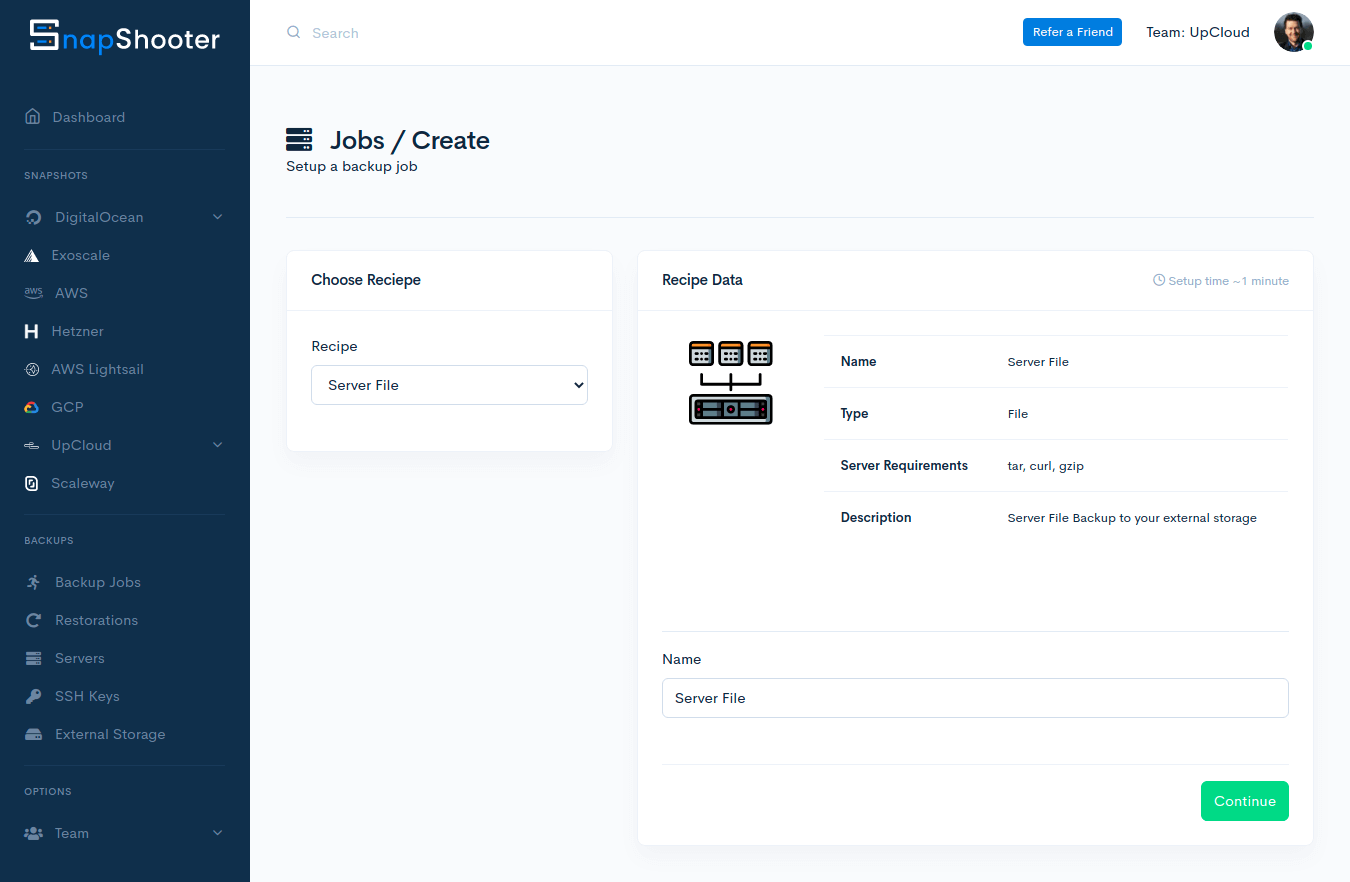
Once you’ve connected your Cloud Server, click the Configure first backup recipe button to start creating your first backup job.
Choose what you want to back up from the preconfigured recipes. Then name your backup job and click the Continue button.
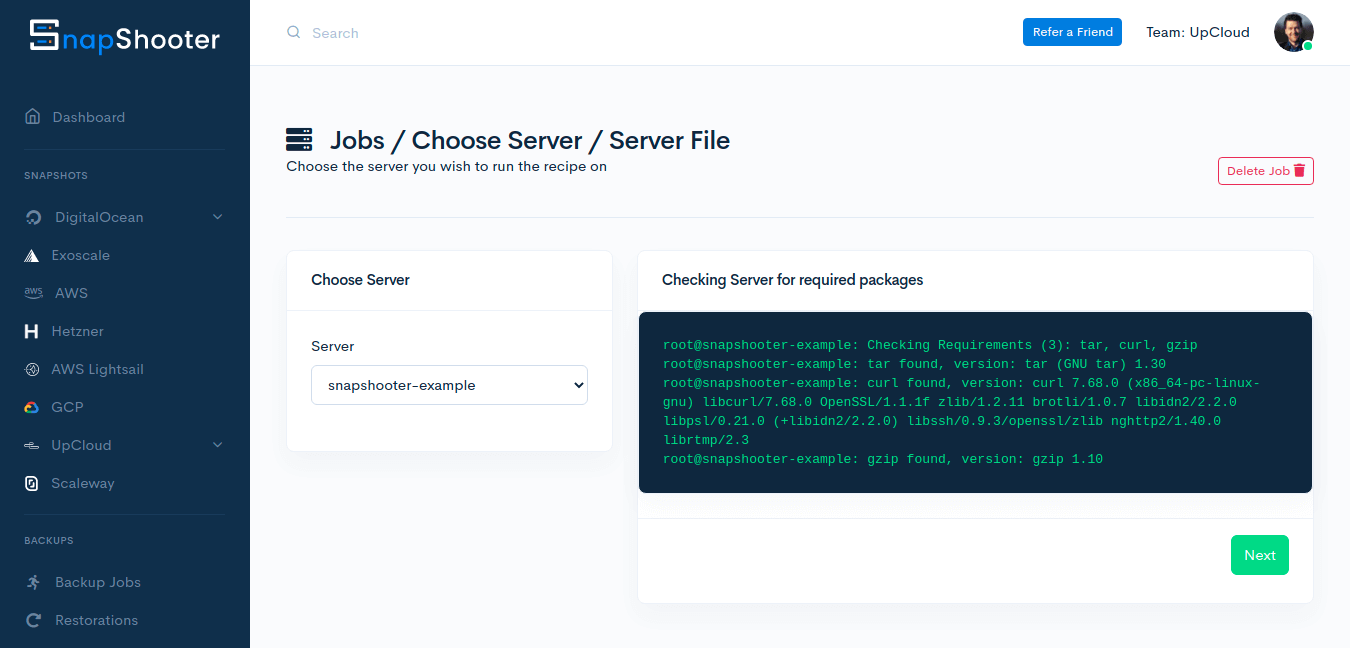
Next, select the server you want the backup job to apply and click the Next button.
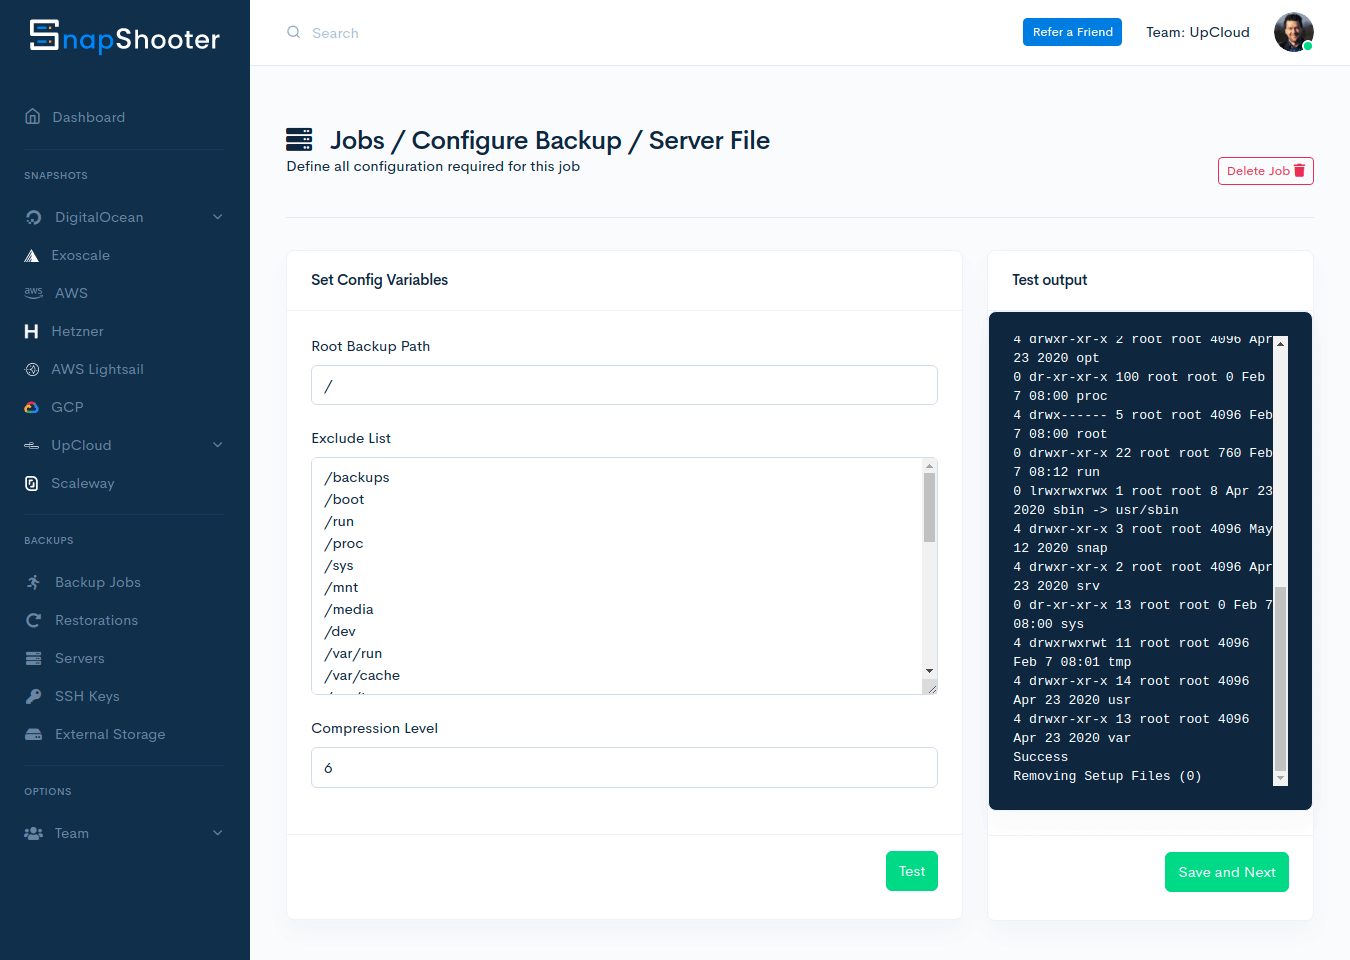
As an example, by selecting the Server File backup recipe, you’ll have the further option to choose the directory and exclusion list. Once set, click the Test button to check the server can be reached. Then click the Save and Next button to proceed.
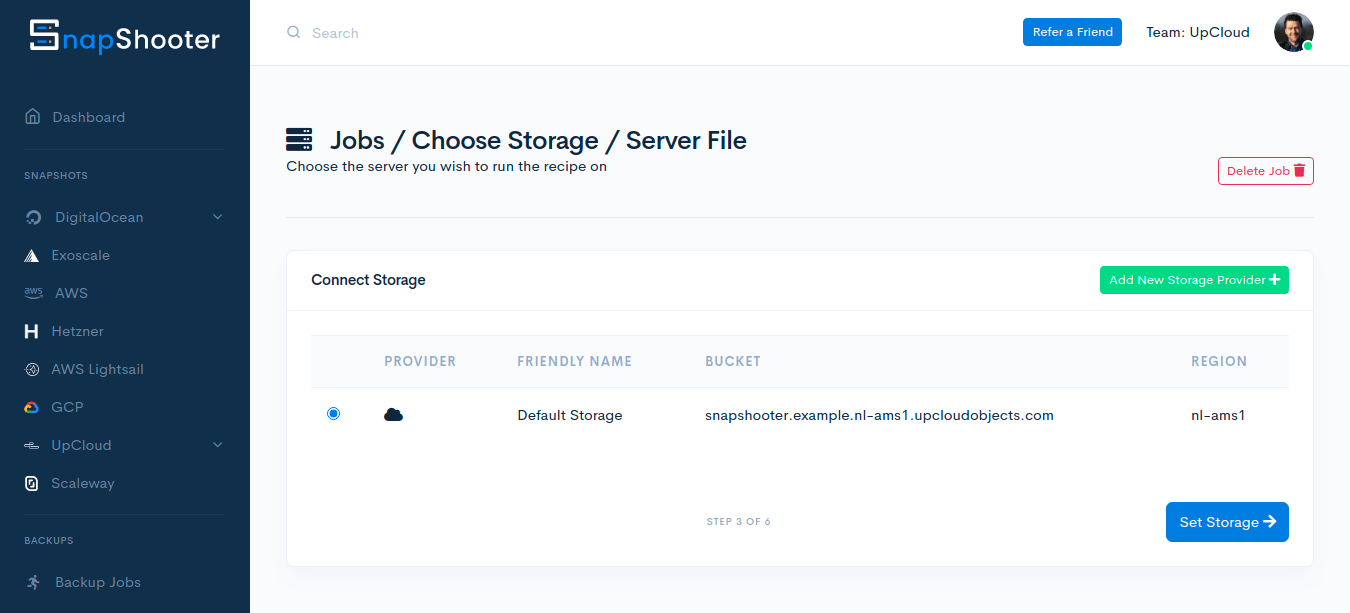
Once you’ve configured your backup job and chosen the target server, you’ll next need to select your backup storage. As we already connected an Object Storage instance for this purpose, simply click the Set Storage button to continue. If you don’t have External Storage yet available, check the previous section on how to connect UpCloud Object Storage on SnapShooter.
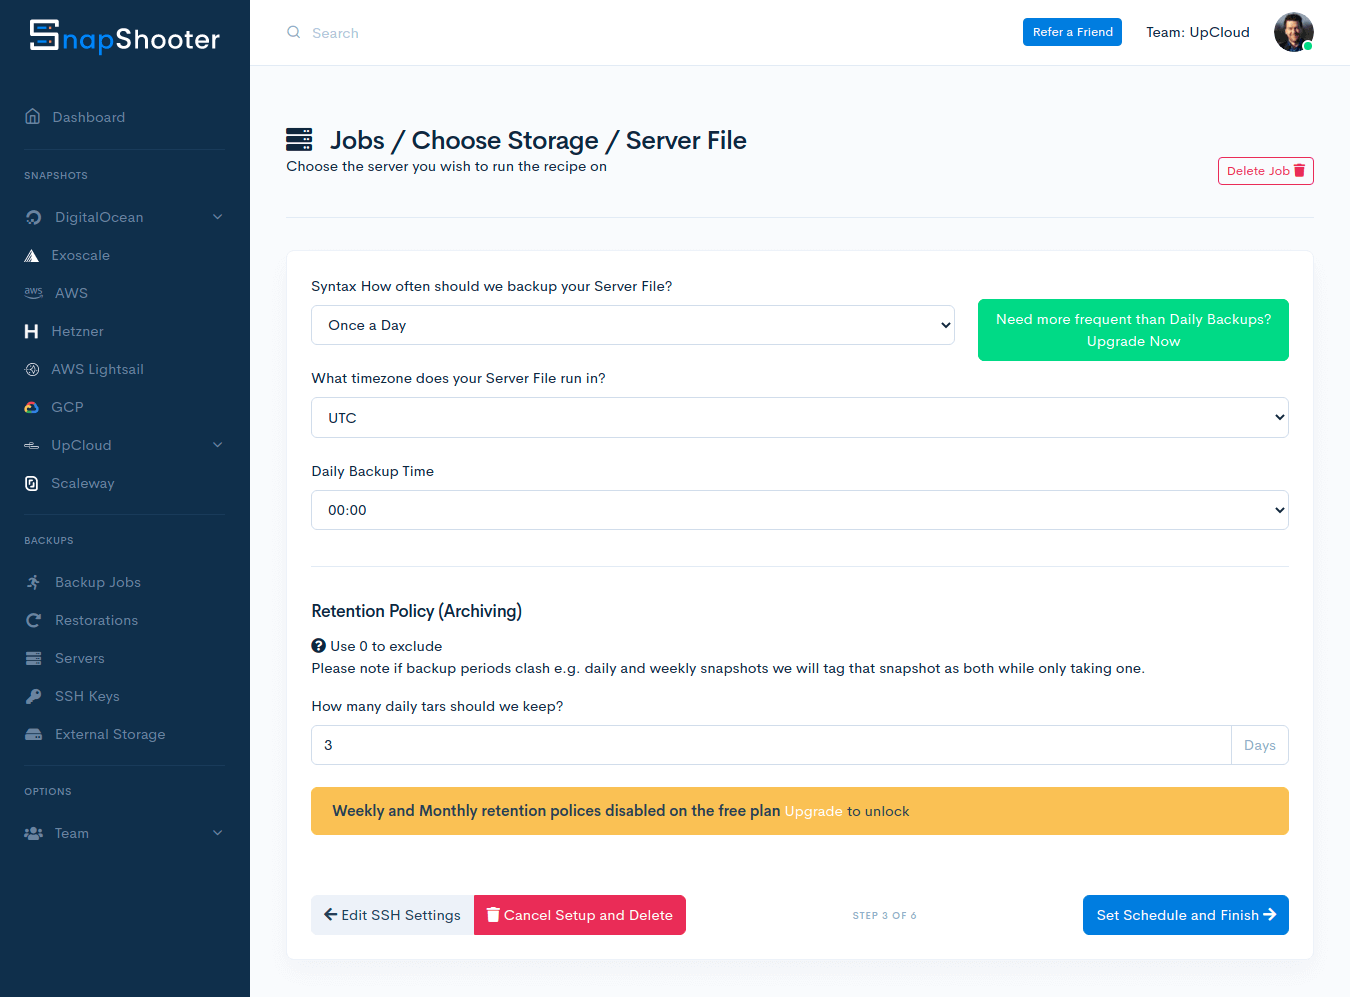
Lastly, you will have the option to choose the frequency of the backups and the retention period of each backup. For example, taking backups Once a Day and keeping them for 3 days will allow you to have 3 concurrent backups to restore data from.
After you’ve configured your backup options, click the Set Schedule and Finish button.
Your backup job is then scheduled and will save the first snapshot at the next Daily Backup Time.
Taking backups manually
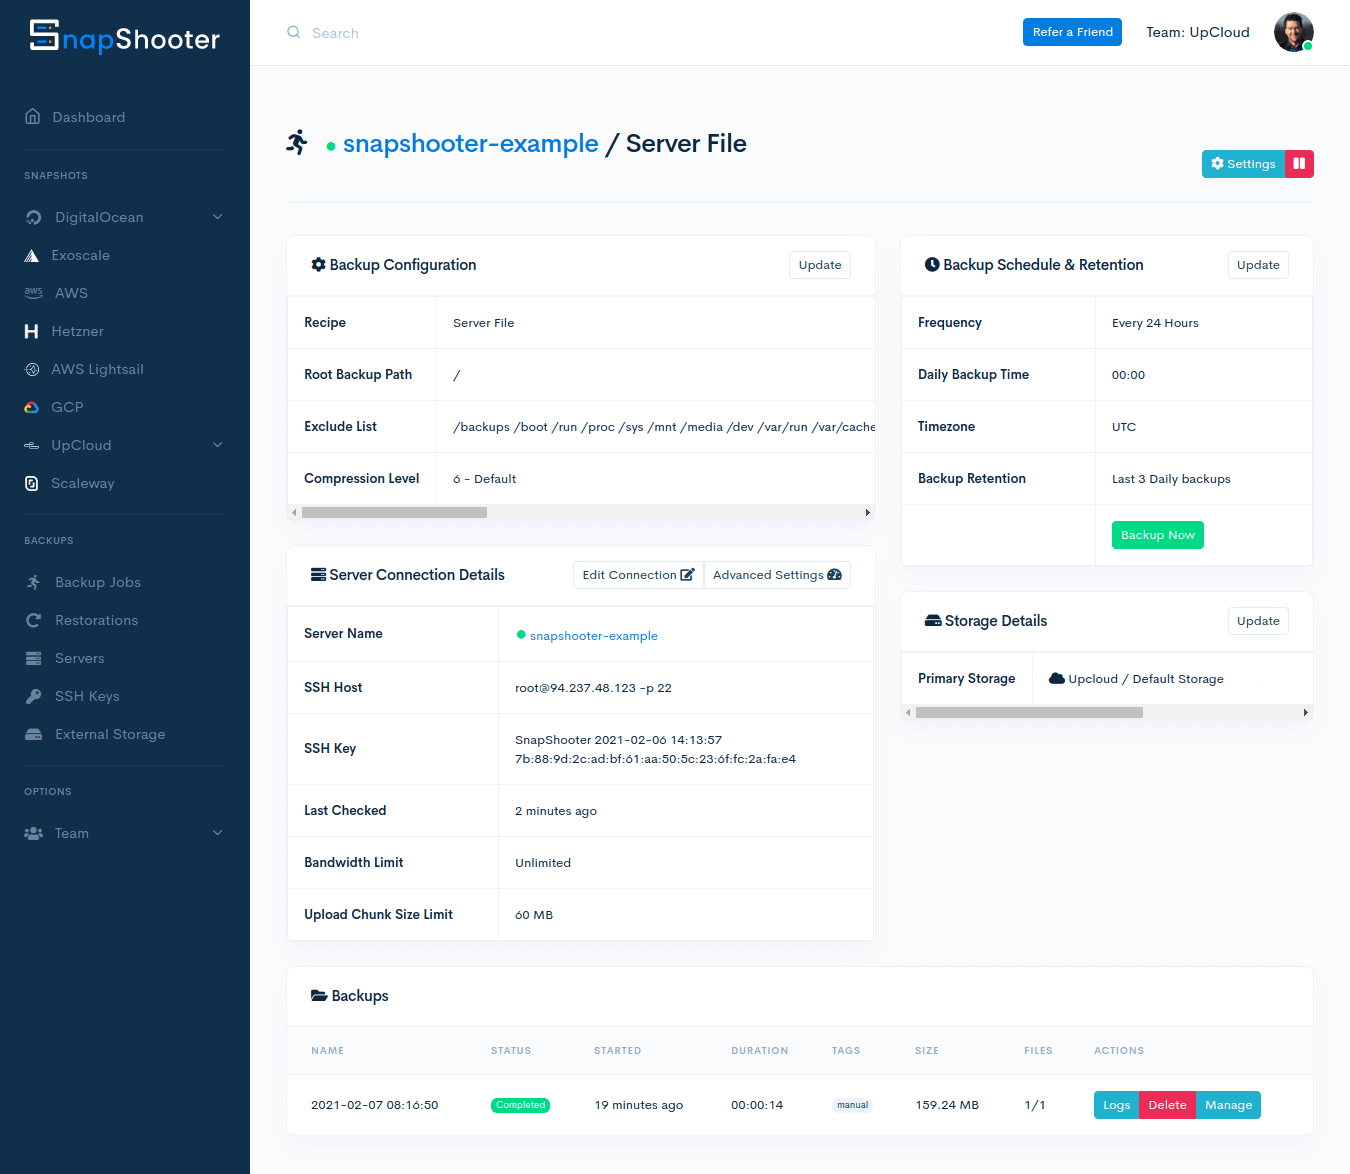
On SnapShooter, it’s also possible to take manual backups whenever required. You can find the option in your Backup Job under the Server details.
Under the Backup Schedule & Retention, you can see the active backup job as well as the option for manual backup. Click the Backup Now button to start.

Once instructed, SnapShooter will create a compressed backup of your Cloud Server files according to the backup job configuration. The backup is then uploaded to the selected Object Storage bucket. Just sit back and wait for the backup job to complete.
You can follow the backup process as each step is completed.
When done, you’ll see a notification informing you that the backup was completed successfully. Afterwards, click the Go Back button to return to the Backup Job page.
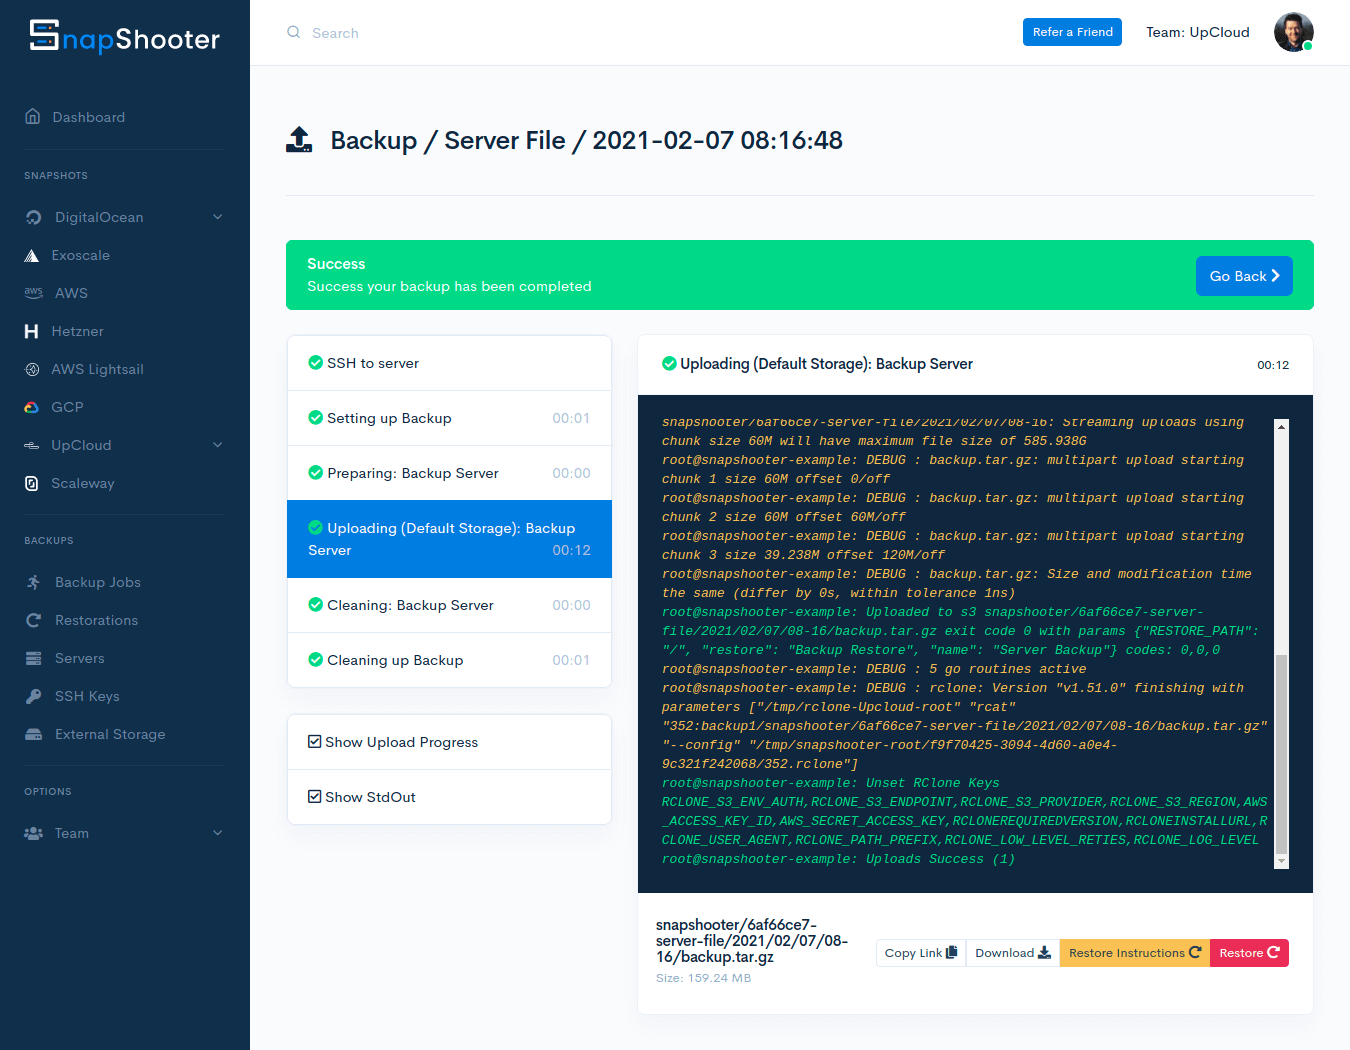
Each backup based on the selected job can then be found on the list of Backups. You can identify the different types of backups by their tags, e.g. manual for the instant backup we just made.
Note that manual backups do not have a retention period and will be kept until deleted.

Restoring from backup
The purpose of backups is to have a version of your files kept safe in case of data loss or unfavourable changes. Therefore, to be able to make use of the backups, you need to be able to restore them with ease. Luckily, SnapShooter makes the restore process quick and simple.
To restore any specific backup, go to your Server detail and the Backup Job the backup was made with. Then find the backup you want to restore and click the Manage button.
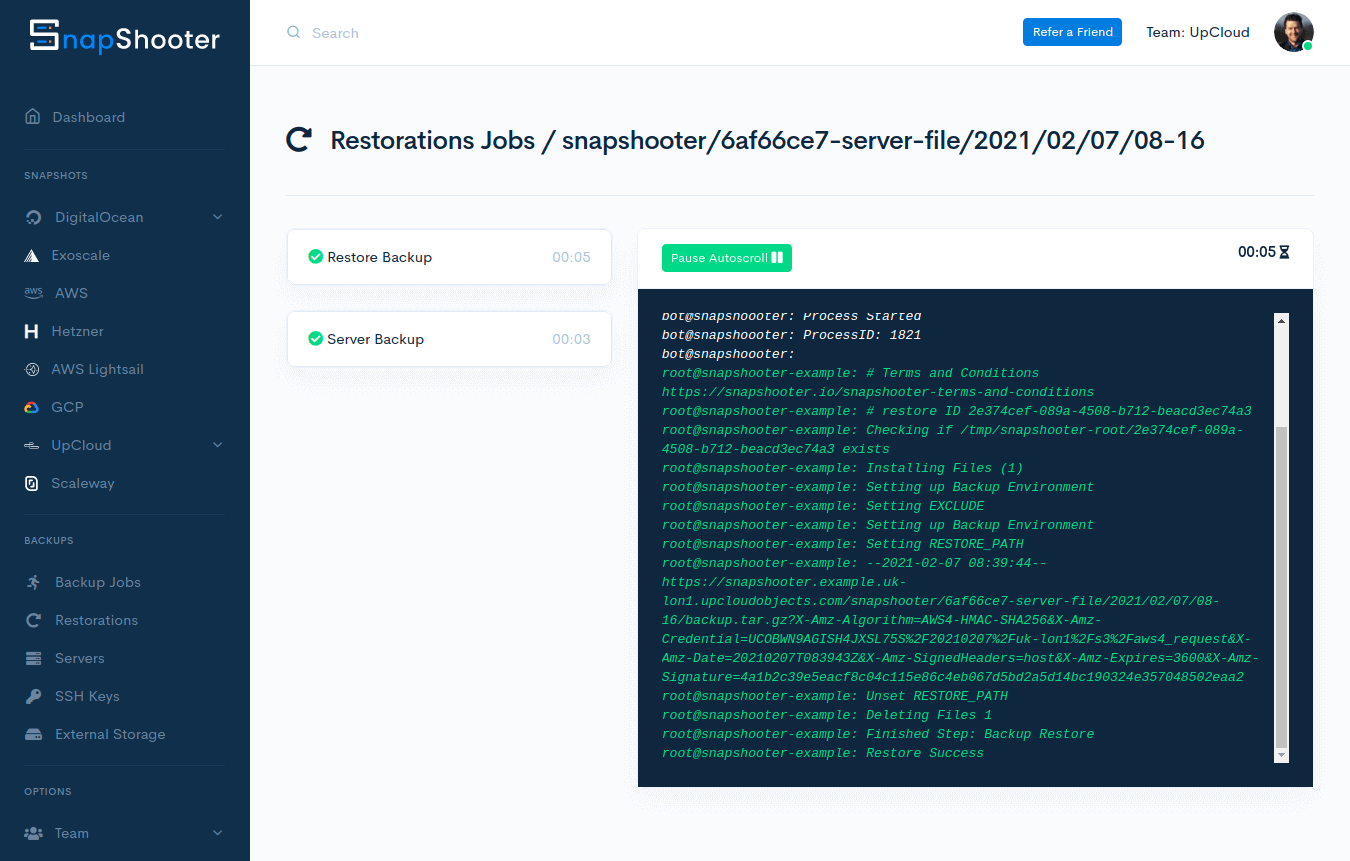
Next, in the backup details, you can click the Restore button to have SnapShooter handle the restore. Alternatively, you can find the command line option to restore the files manually by clicking the Restore Instructions button.

Clicking the Restore button instructs SnapShooter to copy over the files from your Object Storage to the Cloud Server.
You can follow the restore process on the same page. Smaller backups will be quick to restore, larger files will take a little bit longer.
Once restored, you can find the backed-up versions of your files copied to their original location. Depending on the files you restored, you may need to reload or restart services before the changes take effect.
Conclusions
Setting up and managing all of your backup jobs is made simple using SnapShooter. Their easy-to-use dashboard and compatibility with S3 object storage let you focus on what matters.
In addition to supporting file-level backups to any S3-compliant object storage, SnapShooter is also able to operate native backup solutions across a number of cloud providers. Check out our other tutorial on how to schedule UpCloud Backups using SnapShooter.