If you’ve ever thought about wanting to speed up the menial tasks of setting up new hosts with the backend services to support your new application you’ve come to the right place. D2C is a great platform for automating repeatable routines and building infrastructures for applications. It takes over the DevOps deployment tasks and presents you with a simple but powerful web interface.
In this guide, we’ll go through the steps of configuring UpCloud as a provider on D2C, deploying your first host, and installing a new service. Follow along to get started with D2C!
1. Sign up on UpCloud
First things first, if you have not yet registered on UpCloud, you should begin by getting signed up. The link opens in a new window – we’ll wait here for you!
2. Configure UpCloud API access
To allow API access to your UpCloud account, you first need to enable the API permission. We recommend setting up a new workspace member account specifically for API usage with its own username and password for each external service you might use. This allows you to limit API access and specify permissions for increased security.
You can find detailed instructions on how to create API credentials in our beginners’ guide for UpCloud API.
3. Configuring UpCloud on D2C
Getting started on D2C is really straightforward. Begin by logging into your account or signing up as a new user. Once logged in you’ll land on their friendly control panel. On the dashboard, you can manage your cloud servers, projects, and applications with but a few clicks.
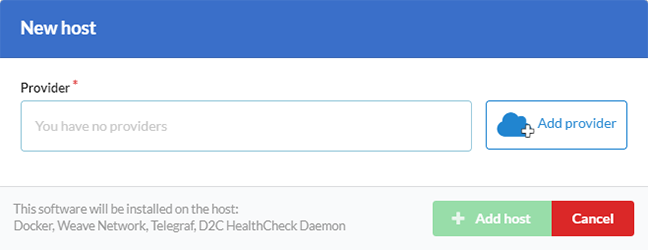
Firstly, to be able to deploy a new cloud server, you’ll need to configure a provider. The easiest way to do this is by clicking the Create host button and then the Add provider in the dialogue.
Select UpCloud in the hosting provider window. Name the provider account as you like, then enter your UpCloud API username and password.
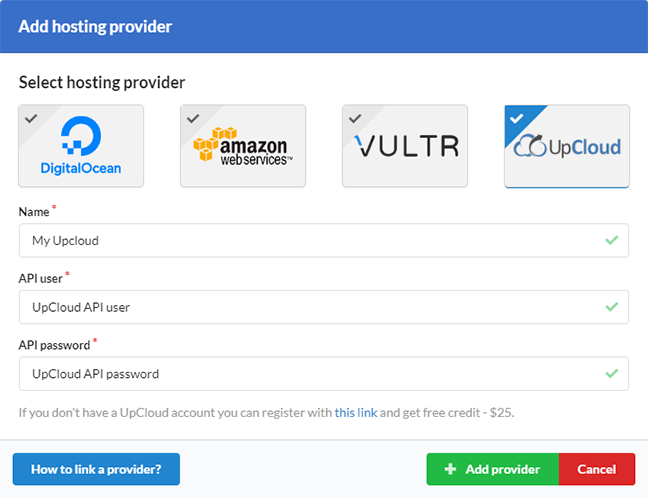
With your API credential details configured, click the Add Provider button to confirm.
4. Creating a new host
Once you are done adding a provider, the new host dialogue window should pop up again. If not, click the Create Host again in the control panel.
Select your UpCloud account as the provider and name the new host. Choose the region you wish to deploy to and pick the instance type depending on your resource requirements.
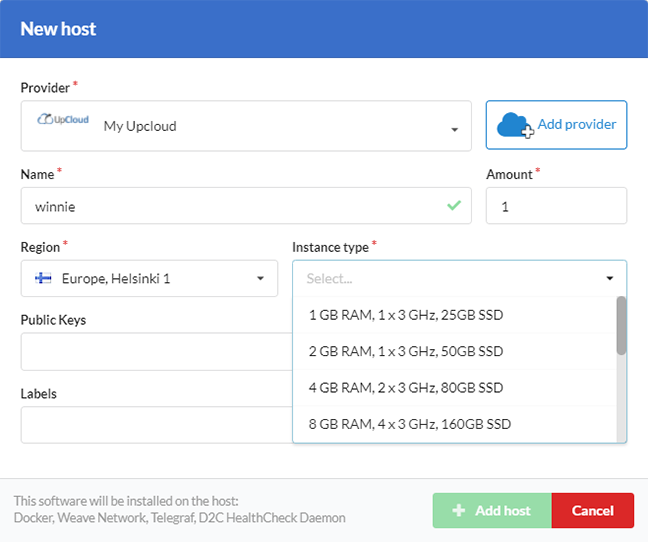
You can also select saved public keys or add labels at this point but these are optional.
When you have made the selections you want, click the Add Host button to deploy the configuration. You can then follow the progress of the deployment at your D2C dashboard.
5. Deploying a new service
Now that you have a cloud server connected to your D2C account, you might want to test installing services onto it. Click to select an existing project or create a new one. Then in the Services view, click the Create service button.

This will open the list of available services for you to choose from. Select the service you want to deploy, for example, nginx.

Depending on the service you want to install, you’ll get a few options to name the service, choose the software version, and some other additional properties. For example, configuring nginx requires only the basic information and selecting the target host. Choose the server you want to deploy on then click the Create service button to launch.
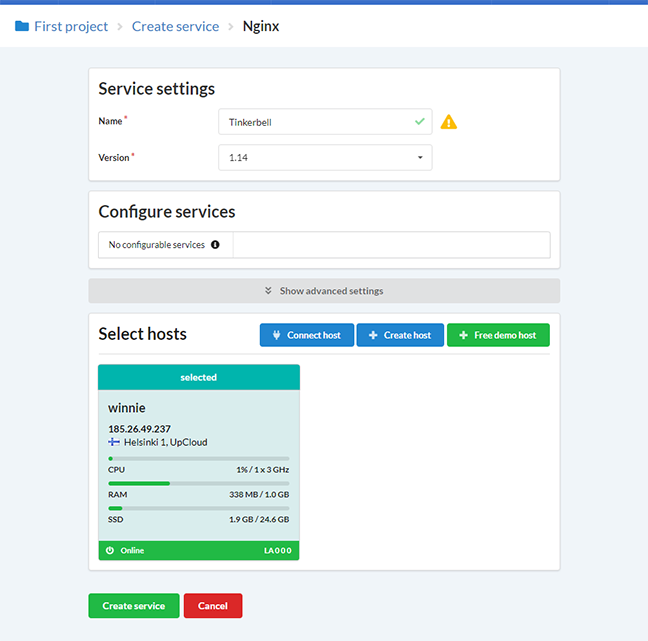
The service will be up in a few moments. Afterwards, click on the new service to check the status, system logs, and more.
All set!
That’s all you need to get going using D2C on UpCloud! Feel free to tinker around the services and try out the other available services. Or if you need help, check out the D2C documentation pages to learn more.