If getting web apps running in the cloud sometimes feels overly complicated look no further. Flynn is the open-source turnkey solution to the cloud, containers, and everything needed for running applications in production. Installing Flynn onto a cluster allows anyone to deploy, run, and manage web applications in the cloud right from their own terminal.
This guide will help you get started with Flynn by explaining the required steps to installing and configuring Flynn CLI locally as well as the Flynn host services in the cloud. Following these instructions enables you to set up your personal Flynn cluster with all the benefits and none of the work or complexities usually associated with a production-ready environment.
Installing Flynn CLI locally
Running your own Flynn cluster allows you to easily deploy applications to the cloud straight from the codebase. To do this, you will first need to install the Flynn CLI which is used to control the cloud hosts at the backend.
The Flynn client is available on a number of different operating systems. Below you can find the one-liner commands for installing it on Linux, macOS or Windows.
Install the Flynn client on your own computer.
Linux or macOS systems, use the following command in a terminal.
L=/usr/local/bin/flynn && curl -sSL -A "`uname -sp`" https://dl.flynn.io/cli | zcat >$L && chmod +x $L
On Windows, run the command underneath in PowerShell.
(New-Object Net.WebClient).DownloadString('https://dl.flynn.io/cli.ps1') | iexOnce the installation has finished, you can test that the client was configured successfully by checking the software version number with the next command.
flynn version
v20170401.0
You can then continue by deploying new cloud servers to create your Flynn cluster.
Deploying cloud servers
Login to your UpCloud control panel and select Deploy Server under the servers menu.
- Enter a domain name and a description, then select the availability zone and configuration you wish to use.
- Flynn recommends running the nodes with a minimum of 2 GB RAM and 2 CPU cores.
- Select the Ubuntu 16.04 template for out of the box compatibility.
- Then in the Miscellaneous settings, include an SSH key for easier and more secure access to the node.
- Once you have made the required configurations and selections, click the Deploy button at the bottom of the page to start the cloud server.
Repeat the above steps to deploy as many servers as you wish to include in your cluster. The minimum multi-node cluster size is three, but it is possible to operate the Flynn host on a single server as well.
Choosing how to install the Flynn host services
There are two available ways for installing Flynn on a host or cluster in the cloud.
For the easy option, Flynn provides a straightforward web browser installer for setting up the server software on any number of nodes. Simply set up an SSH connection method for the servers, after which Flynn will run through the installation automatically configuring and bootstrapping the cluster ready to use.
The other option is to take a hands-on approach by manually installing the Flynn host services. Doing the installation yourself allows you to check through the install scripts and configure a custom domain if you have one available.
Regardless of the install method you choose, you can have a Flynn cluster up and running in a matter of minutes.
Option 1. Cloud installation over SSH
Installing Flynn to your cluster using the web installer is very simple. With the Flynn CLI installed on your computer, run the following command in a terminal or PowerShell window.
flynn install
This starts the installer and opens the configurations in your default web browser.
Select the SSH option at the top right corner of the page, then enter your cluster details to the list of instances. Set the number of instances to match your cluster and include each node’s IP address once on the list. After entering your node connection details, click Launch to begin.
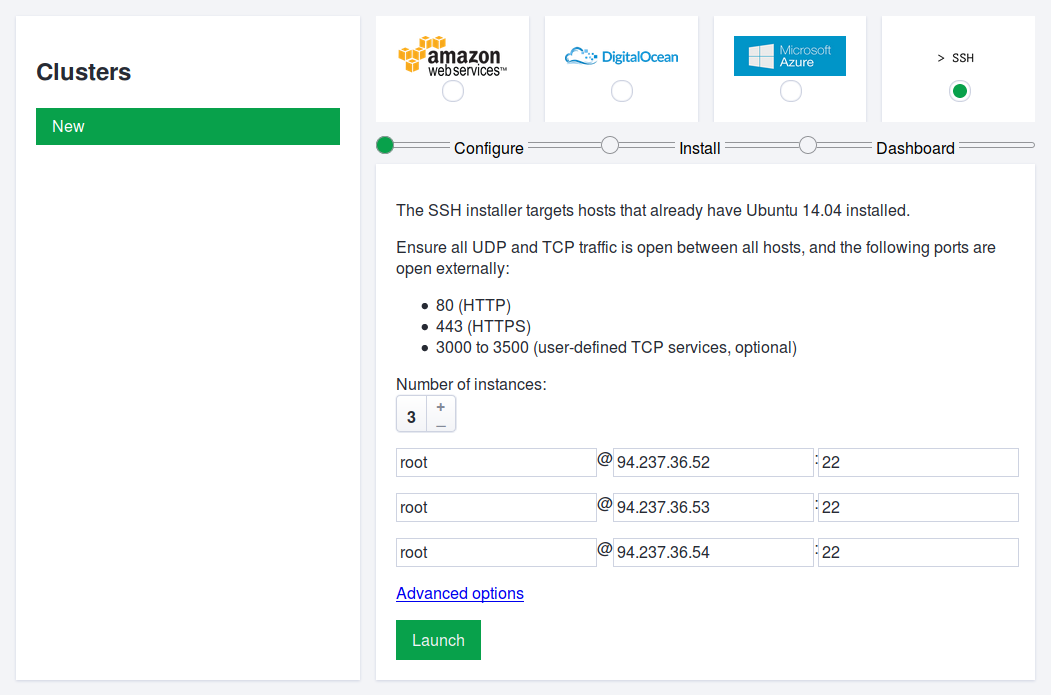
If you included an SSH key to your cloud servers at deployment, you can use it for authentication during the installation by having it open in your SSH agent. In case the key is not detected automatically, include it by selecting the Private Key option, adding an OpenSSH compatible key, and providing the passphrase when asked.
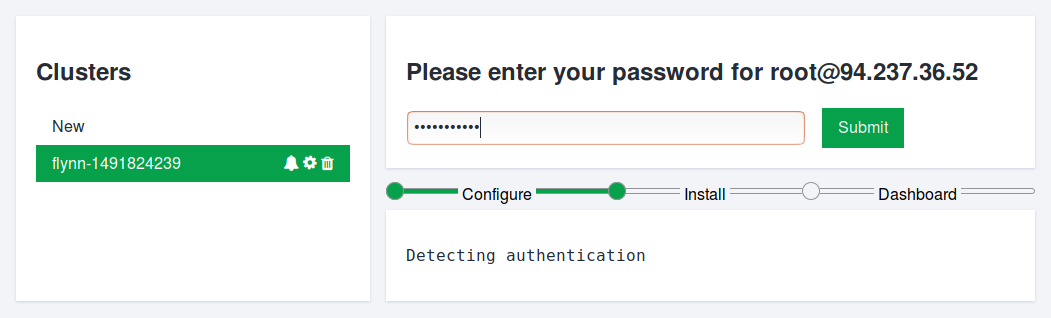
If you did not configure SSH keys for the cluster, use the Password authentication option and enter the server root password for each node when prompted.
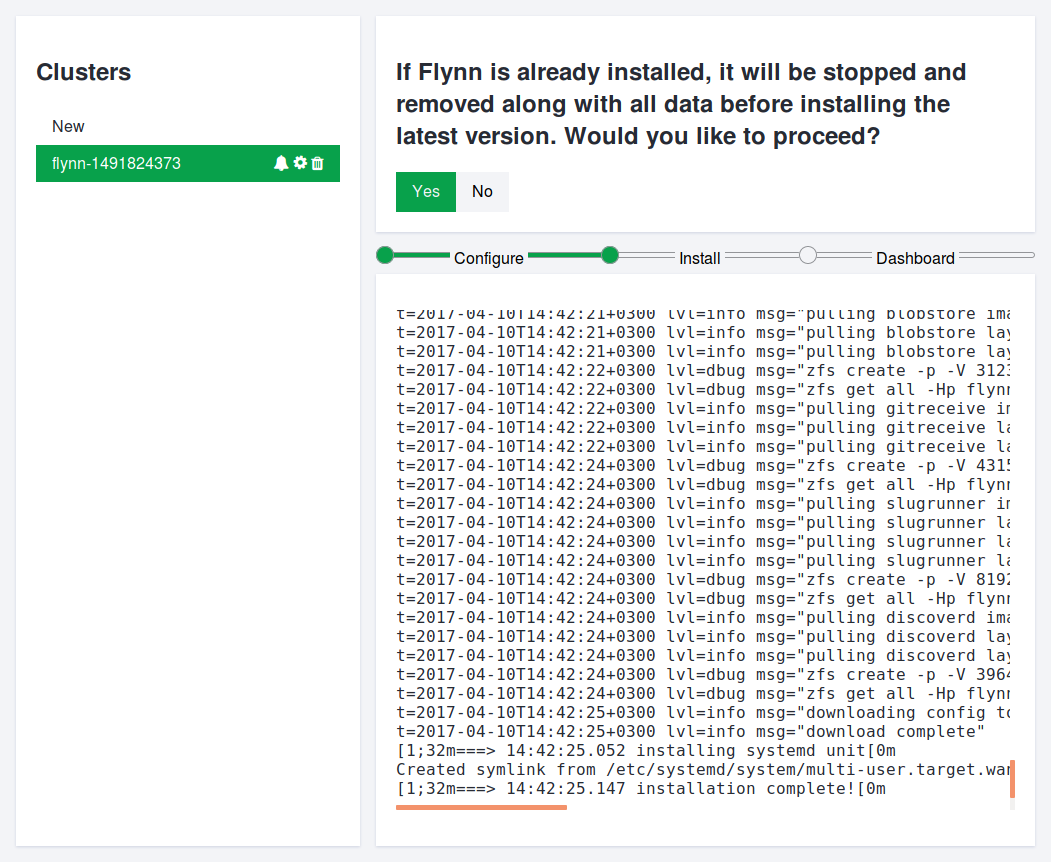
Once the installer has successfully authenticated to the nodes in your cluster it will begin installing the host software. Click Yes once for each node in your cluster to confirm and proceed with installing Flynn.
After the cluster has been configured, you will be asked to install a CA certificate which is required to accept the self-signed certificate the dashboard uses. Follow the instructions show in the web installer.
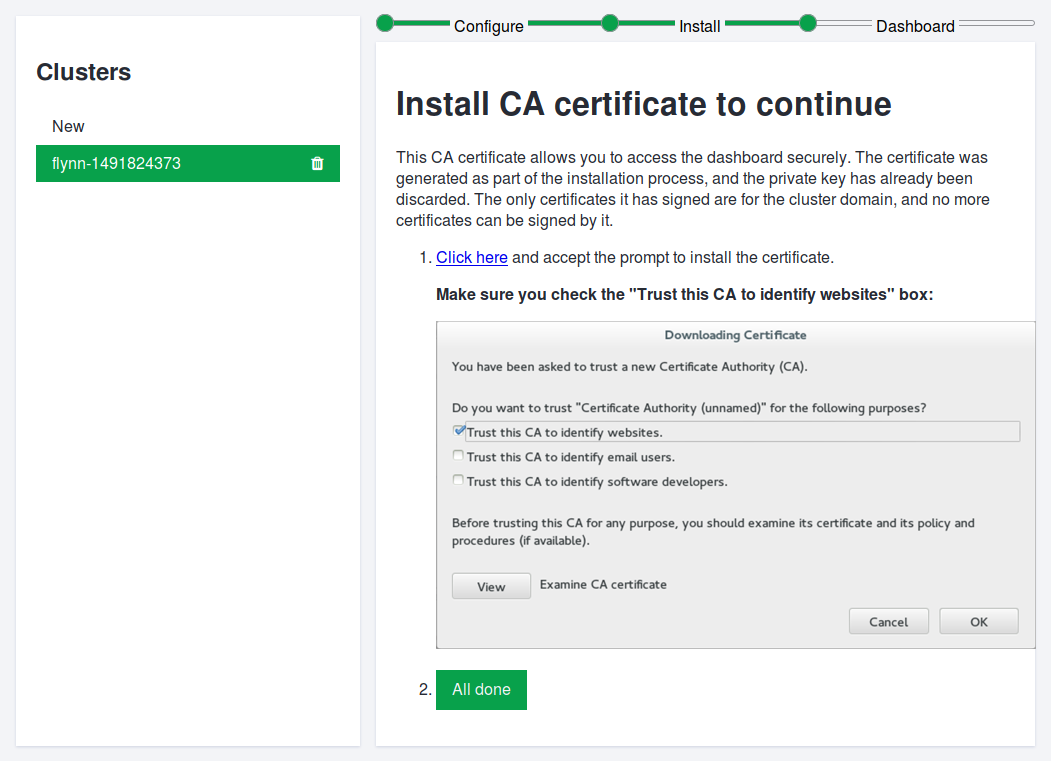
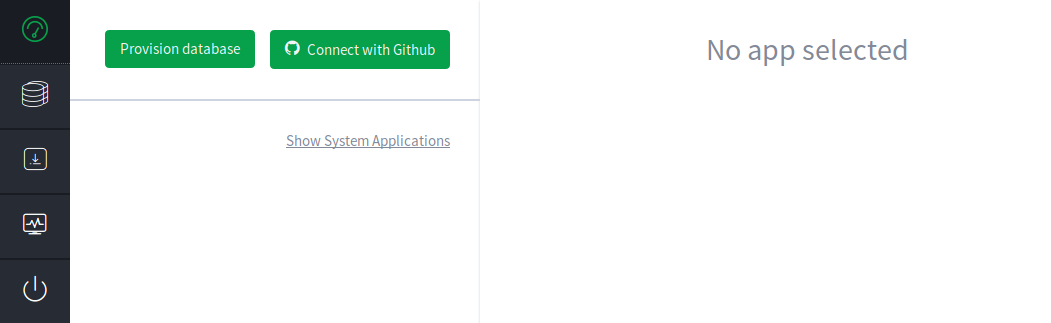
With the certificate installed, click the Dashboard button to continue to the Flynn control panel. You should get logged in automatically.
If you need to relog to the dashboard, you can retrieve the login token using the following command on your own computer.
flynn -a dashboard env get LOGIN_TOKEN
ed4b963692780d778667e2b8c9e6301d
Setting up a Flynn cluster with the web installer configures and bootstraps the cluster ready for applications. You can now continue to deploying a test app.
Option 2. Installing Flynn manually with a custom domain
Installing Flynn manually allows you to use your own domain name for the applications. If you do not have a domain name easily available, you should use the web installer and let Flynn assign a domain to your host or cluster.
Configure your domain name on a DNS as shown below. Include A records pointing to each of the nodes and a CNAME record as a wild card for the cluster domain.
flynn.example.com.    A      <node 1 public IP>
flynn.example.com.    A      <node 2 public IP>
flynn.example.com.    A      <node 3 public IP>
*.flynn.example.com.  CNAME  flynn.example.com.
As DNS records might take a moment to propagate, therefore it is good to get these done early to avoid unnecessary waiting later on.
Next, log in to your new servers and run the usual updates to get the nodes prepared.
sudo apt update && sudo apt upgrade
Then download the Flynn install script and run it with the command below.
curl -fsSL -o /tmp/install-flynn https://dl.flynn.io/install-flynn
sudo bash /tmp/install-flynn
You can verify the installation was successful by checking for the version number.
flynn-host --version
v20170417.2
Repeat the steps above to install Flynn on every node that you want to include in the cluster.
Configuring the nodes
With the Flynn host services installed on the cluster, it is time to get them connected. Flynn provides a discovery system that allows servers to find each other using a generated discovery token.
On one of the nodes in your cluster, generate a new token with the --init-discovery flag.
sudo flynn-host init --init-discovery
https://discovery.flynn.io/clusters/53e8402e-030f-4861-95ba-d5b5a91b5902
Then configure the discovery token on the rest of the nodes with the command below. Replace the <discovery token> with the whole URL given by the init command above.
sudo flynn-host init --discovery <discovery token>
Once all of the nodes have been configured to use the same discovery token, start the host services on every node with the next command.
sudo systemctl start flynn-host
With the nodes up and running, you can bootstrap the cluster with a single command on one of the nodes. The node used here will become the default cluster leader and is used to schedule jobs on nodes across the cluster as required.
Include your custom domain by replacing the <flynn.example.com> and replace the <discovery token> with the same URL you just generated.
sudo CLUSTER_DOMAIN=<flynn.example.com>
flynn-host bootstrap
--min-hosts 3
--discovery <discovery token>
If the bootstrapping was completed successfully, you will see a confirmation along with a command to add your cluster to the Flynn CLI on your own computer. Follow the instructions and run the command in your terminal.
Flynn bootstrapping complete. Install the Flynn CLI (see https://flynn.io/docs/cli for instructions) and paste the line below into a terminal window:

flynn cluster add -p XzEz0FnM2ECtxI9geAFzpZyQZ+ue82a4UHQWt5r7c/E= default flynn.exampe.com c2e7af50603c8cfef89ccd5b1178db9e
You can verify that the cluster was added to the client and set as the default with the following command.
flynn cluster default
NAME     URL
default  https://controller.flynn.example.com (default)
Also at the end of the bootstrapping output, you can find a link to your dashboard and the login token needed to sign in. If you lose your login token, it can always be retrieved with the command below on the Flynn CLI.
flynn -a dashboard env get LOGIN_TOKEN
In case the bootstrapping fails, check that the DNS records are available on your nodes and that the host service is running, then try the bootstrap command again.
Deploying a test application
Application deployment and general management on Flynn revolve around the ease of use. Developers can deploy applications with a single command straight from git, while the databases, service discovery, scheduling, containers, routeing, and cluster management are all taken care of in the background.
Now that you have your Flynn cluster up and running, you should take it for a spin by deploying a small Go example application that runs a minimal HTTP server and talks with a Postgres database.
Start by downloading the demo application using Git clone with the command below. If you do not already have Git installed, you will need to get it set up before continuing.
git clone https://github.com/flynn-examples/go-flynn-example
Change into the downloaded directory.
cd go-flynn-example
Then create a new application on Flynn.
flynn create example
Doing so adds a new Flynn Git remote which you can verify using the following command.
git remote -v
flynn https://git.flynn.example.com/example.git (push)
flynn https://git.flynn.example.com/example.git (fetch)
origin https://github.com/flynn/nodejs-flynn-example.git (fetch)
origin https://github.com/flynn/nodejs-flynn-example.git (push)
Each application should also have a default route that can be seen with the next command.
flynn route
ROUTE                           SERVICE      ID                     STICKY  LEADER  PATH
http:example.flynn.example.com  example-web  http/46d02fc6-9a21...  false   false   /
While much of the database operations are performed automatically, you will still need to create one for the applications to use.
flynn resource add postgres
The preparations are then complete and you can deploy the application to the cluster using the next command.
git push flynn master
=====> Application deployed
To https://git.flynn.example.com/example.git
* [new branch] master -> master
At the end of the deployment output, you should see a confirmation of what was deployed and where. You can then open the application URL in a web browser or use curl as shown below to test the application by replacing the <flynn.example.com> with the cluster domain.
curl http://example.<flynn.example.com>
Hello from Flynn on port 8080 from container 4767bda1-f828-4191-bcb7-864c4096e052
Hits = 1
Great, the example application is working and responding correctly.
One of the main advantages of a cluster is redundancy in multiple replicas of the services, but the application is currently running only a single instance. To increase the number of instances, use the following command.
flynn scale web=3
scaling web: 1=>3
07:02:27.944 ==> web 56815ce0-3536-41b0-b385-3beb08712c6d pending
07:02:27.944 ==> web 881b65b0-caa1-4715-9280-2c22f02756ff pending
07:02:27.944 ==> web flynn-881b65b0-caa1-4715-9280-2c22f02756ff starting
07:02:27.944 ==> web flynn-56815ce0-3536-41b0-b385-3beb08712c6d starting
07:02:28.447 ==> web flynn-56815ce0-3536-41b0-b385-3beb08712c6d up
07:02:28.447 ==> web flynn-881b65b0-caa1-4715-9280-2c22f02756ff up
If you now refresh your browser window or run the curl command as above a couple of times, you should see replies from 3 different container IDs.
Conclusions
Congratulations, you should now have a production-ready Flynn cluster at your disposal. Next, you might want to look into deploying your own applications on Flynn. To find out more about Flynn and its advanced features, check out the Flynn application documentation pages.
Flynn also gets better every day as they track the infrastructure space and regularly integrate new components and features. New and modern technologies are often quickly available without the users needing to figure out how everything fits together. So keep your systems up to date and you will always have the latest and greatest that Flynn has to offer.