SnapShooter offers easy-to-use backup scheduling and management on a host of cloud providers. It shows all of your cloud resources in a centralised dashboard and provides straightforward options for backup frequency and retention.
Their backup options include everything from full storage snapshots to individual databases and files by utilising UpCloud Object Storage. Easily configure the backup frequency and retention duration between daily, weekly and monthly rules. Then sit back and let SnapShooter manage your Cloud Server backups.
Sign up on UpCloud
First things first, if you have not yet registered on UpCloud, begin by getting signed up. Follow the link here to register for a new account and you’ll receive $50 in credits to use for 14 days! You’ll also want to upgrade your account for full access by making a one-off minimum payment of $10 to unlock backup features.
Afterwards, you will need to deploy at least one Cloud Server to be able to test out SnapShooter. This can be of any configuration or location you choose. Simply go to your UpCloud Control Panel and select Deploy. Configure the server as you please and then click Deploy at the bottom of the page.
You can find out more about each of the configuration options in our deployment tutorial.
Set up API access
To allow SnapShooter to access your UpCloud account through our API, you first need to set up API permissions. We recommend creating a new workspace member account specifically for API usage with its own username and password for each external service you might use. This allows you to limit API access and specify permissions for increased security.
- First, log into your UpCloud Control Panel and go to the People section.
- Create a new workspace member for the API access by clicking the Add button.
- Set the username and password for the API subaccount. These are comparable to an API ID and key pair with the added benefit of being able to set them yourself.
- Enter the contact details for your API credentials and enable API access in the permissions.
- By default, the new API subaccount will have full permissions to any resources it creates but no access to existing servers or storages. You can leave the access settings to their default values.
- Once done, click the Create subaccount button.
If you want to learn more, you can find detailed instructions on how to handle API credentials in our beginners’ guide for UpCloud API.
Once you’ve created an account for SnapShooter API access, continue ahead to their platform.
Registering on SnapShooter
Next, if you haven’t already, head over to SnapShooter and register for their 14-day free trial. During the trial, you can back up one server for free forever. Additionally, when you are ready to make use of SnapShooter to a larger extent, do so worry-free thanks to their 30-day money-back guarantee.
After registering, log into the SnapShooter dashboard. Don’t forget to confirm the email address you registered with to unlock the required features.
When first logging into your dashboard, you’ll need to create a team. Choose the name of your team account and click the Create Team button.
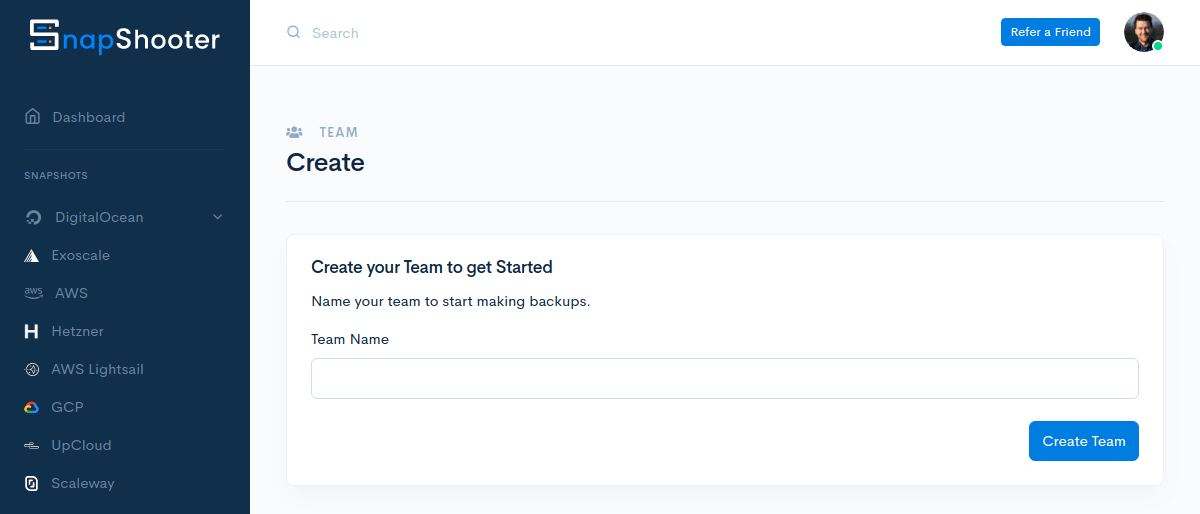
Once you’ve created your Team account, you can invite other members to your team and manage your billing settings.
Connecting UpCloud account
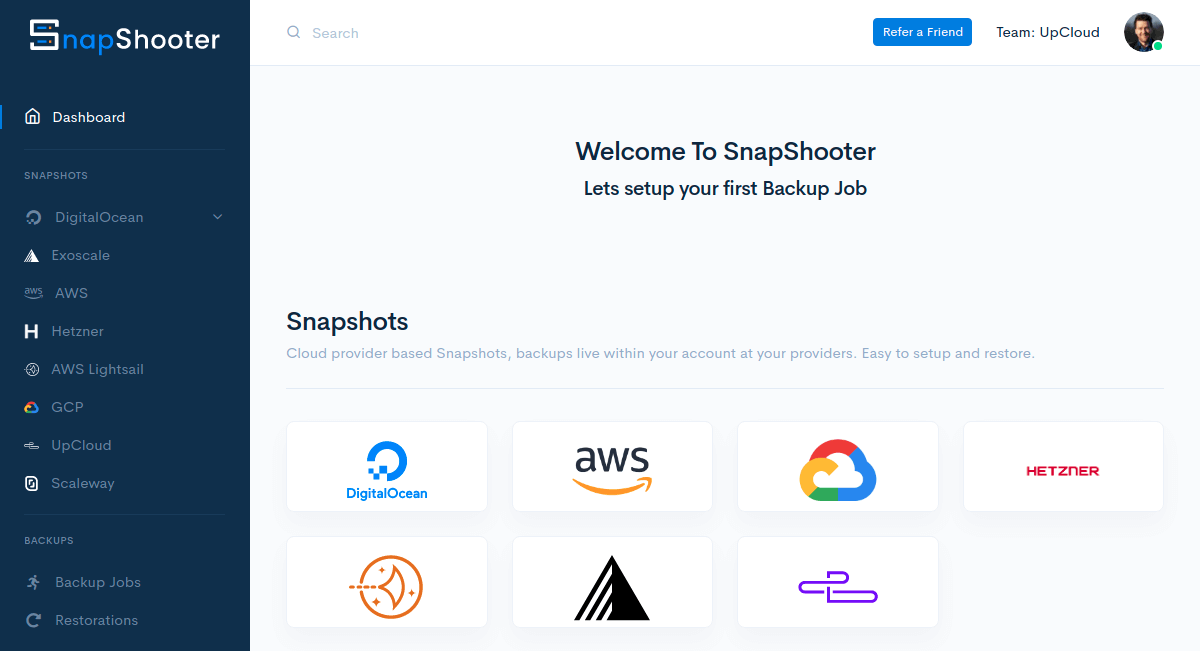
SnapShooter allows you to configure and manage the schedules of your Cloud Server backups all from one place.
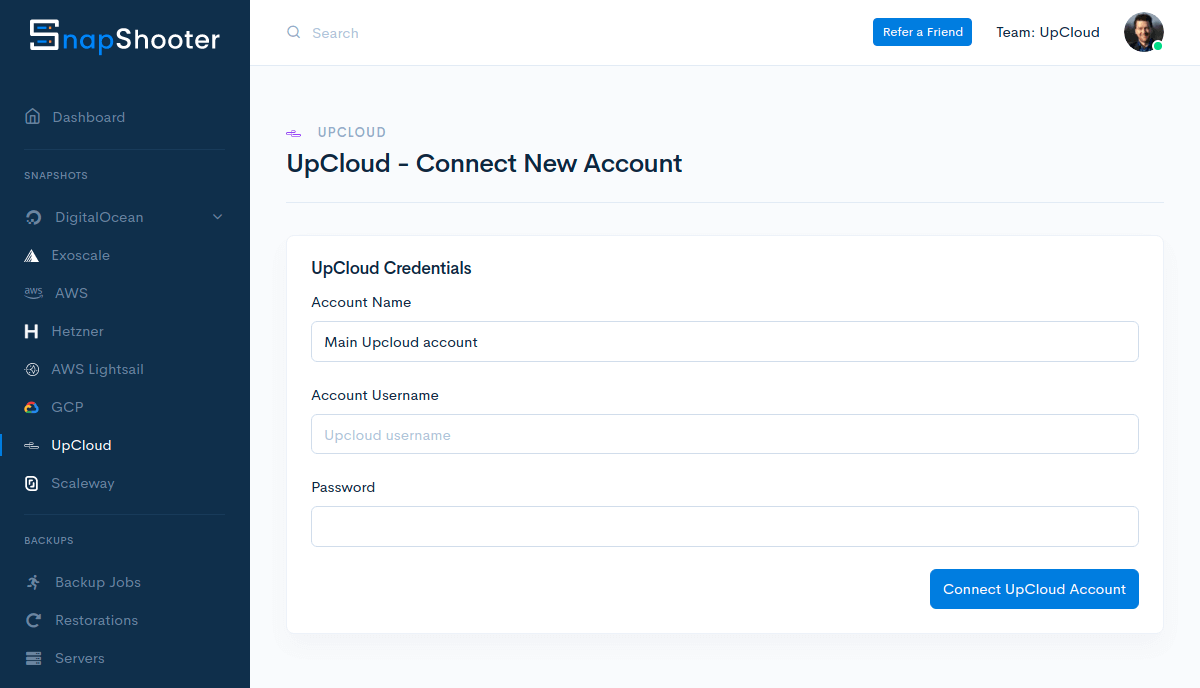
To enable SnapShooter to manage your backup schedules, you’ll need to connect your UpCloud account. This is done using the API credentials you created earlier.
Select UpCloud among cloud providers.
Then name your integration and enter your API credentials.
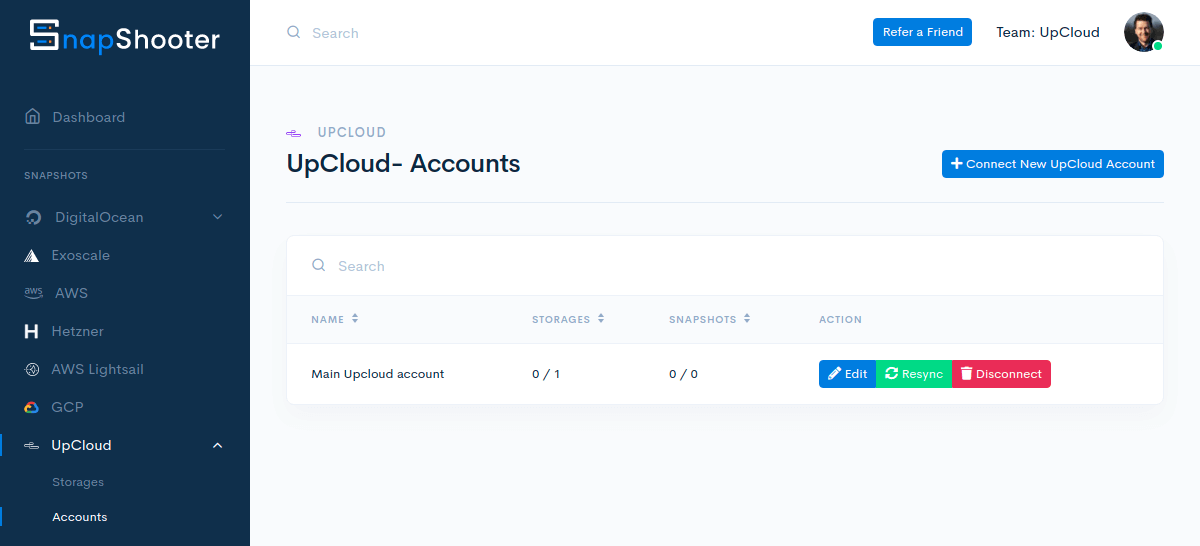
Once connected, SnapShooter will show your account details including the number of storage devices and active backups.
You are then ready to start scheduling snapshots!
Setting up snapshot schedule
SnapShooter enables you to configure snapshot schedules while all UpCloud backups are kept secure inside UpClouds’s infrastructure. Your data is always securely stored by the provider you’ve chosen and approved.
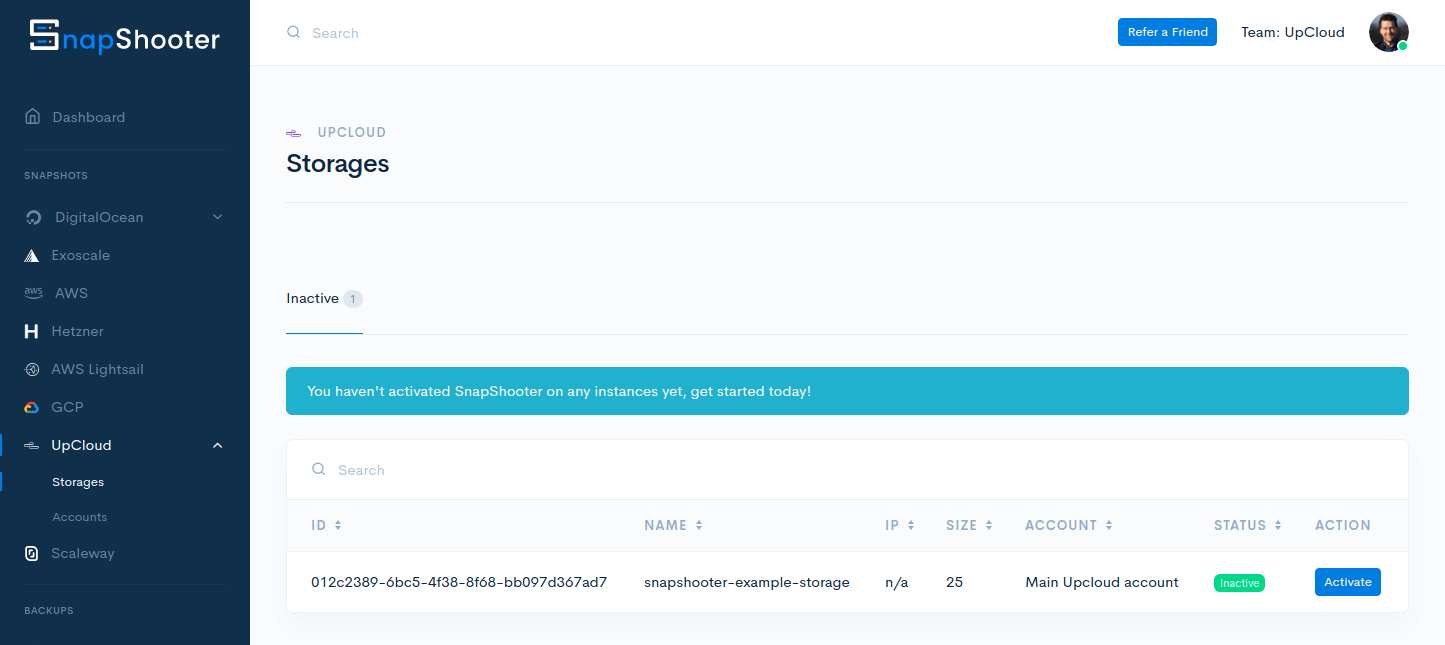
After you’ve connected your UpCloud account on SnapShooter, you can view a list of your storage devices under UpCloud and Storages.
Create a new schedule by clicking the Activate button on the storage device you want to back up.
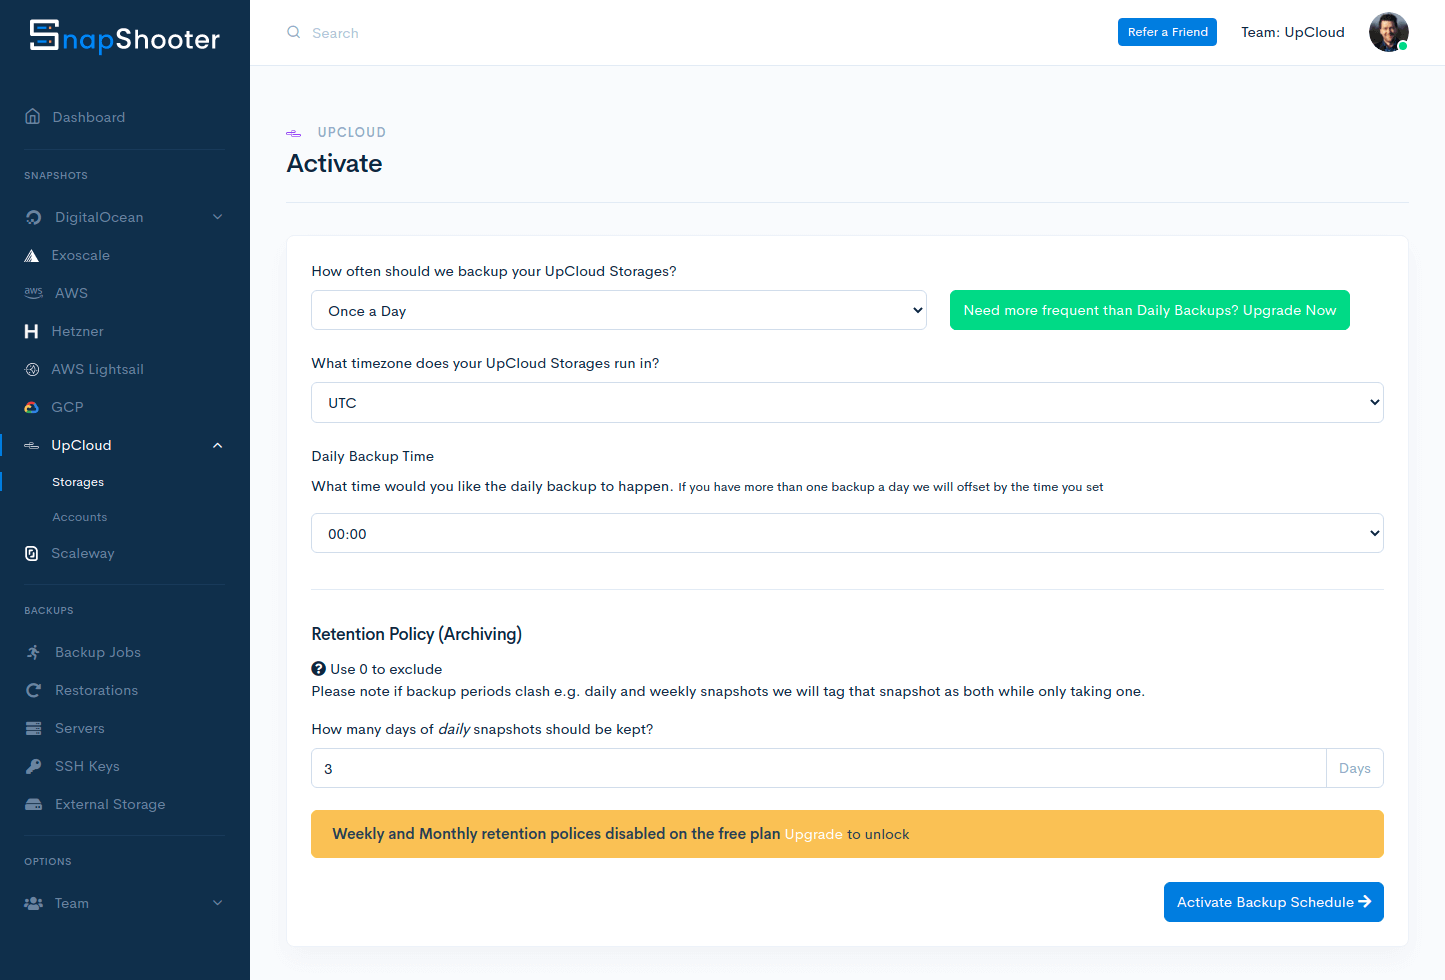
In the backup schedule settings, you can choose the frequency of the backups, the time of the day the backup is taken, as well as the duration the backups are kept.
Note that during the free trial, you can only select the daily backups. To be able to select weekly or monthly backups, you’ll need to upgrade your SnapShooter account.
Once you’ve made your selections, click the Activate Backup Schedule button to confirm.
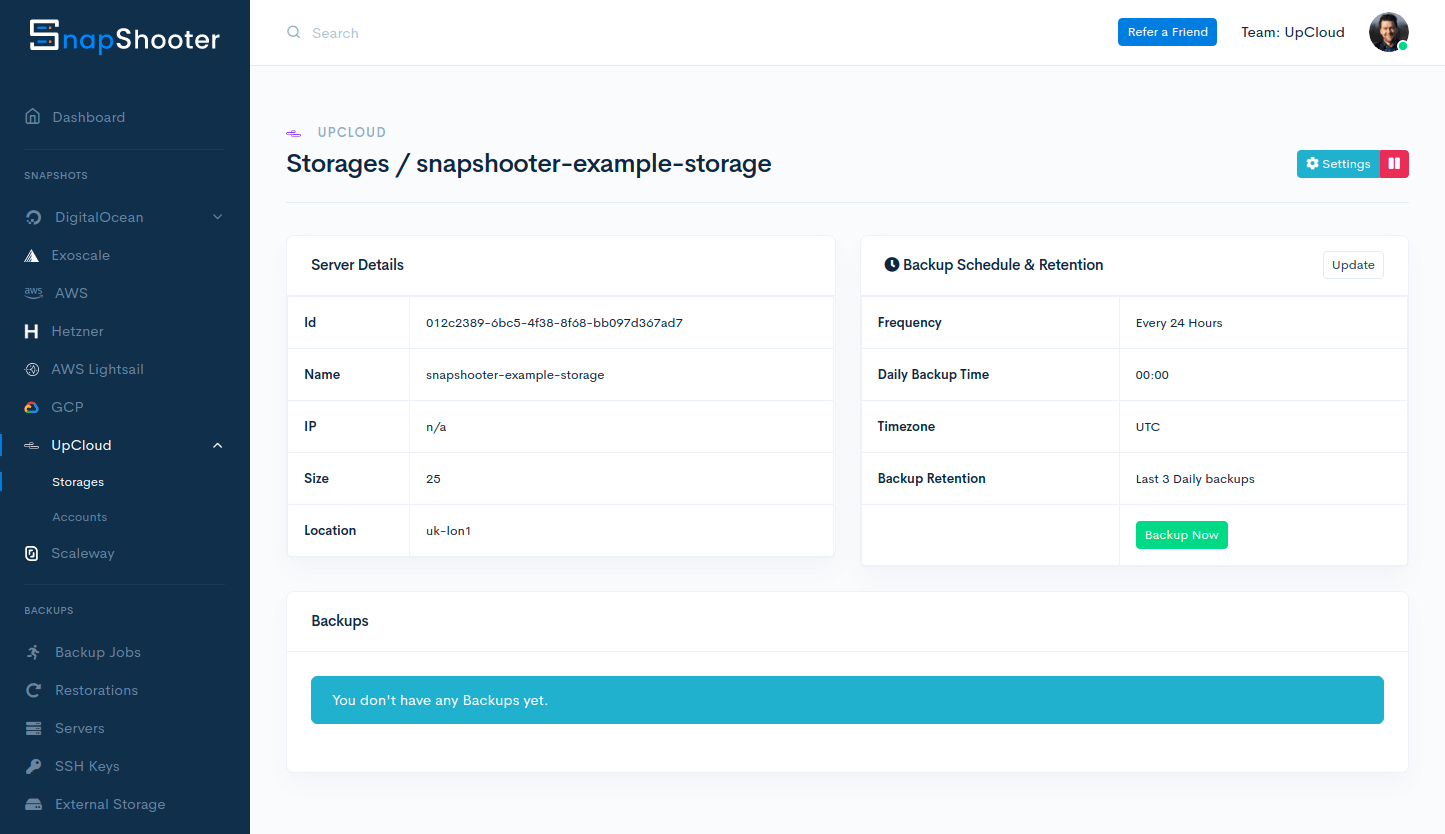
After saving the new backup schedule, you’ll be presented with an overview of the backup settings for the selected storage devices.
Here you can also take backups on demand by clicking the Backup Now button.
SnapShooter will then send a command to your UpCloud account to make a new backup of the storage. Afterwards, the new snapshot will appear on the list of Backups. On this list, you will see current and expired snapshots, when the snapshot was taken, as well as other relevant information.
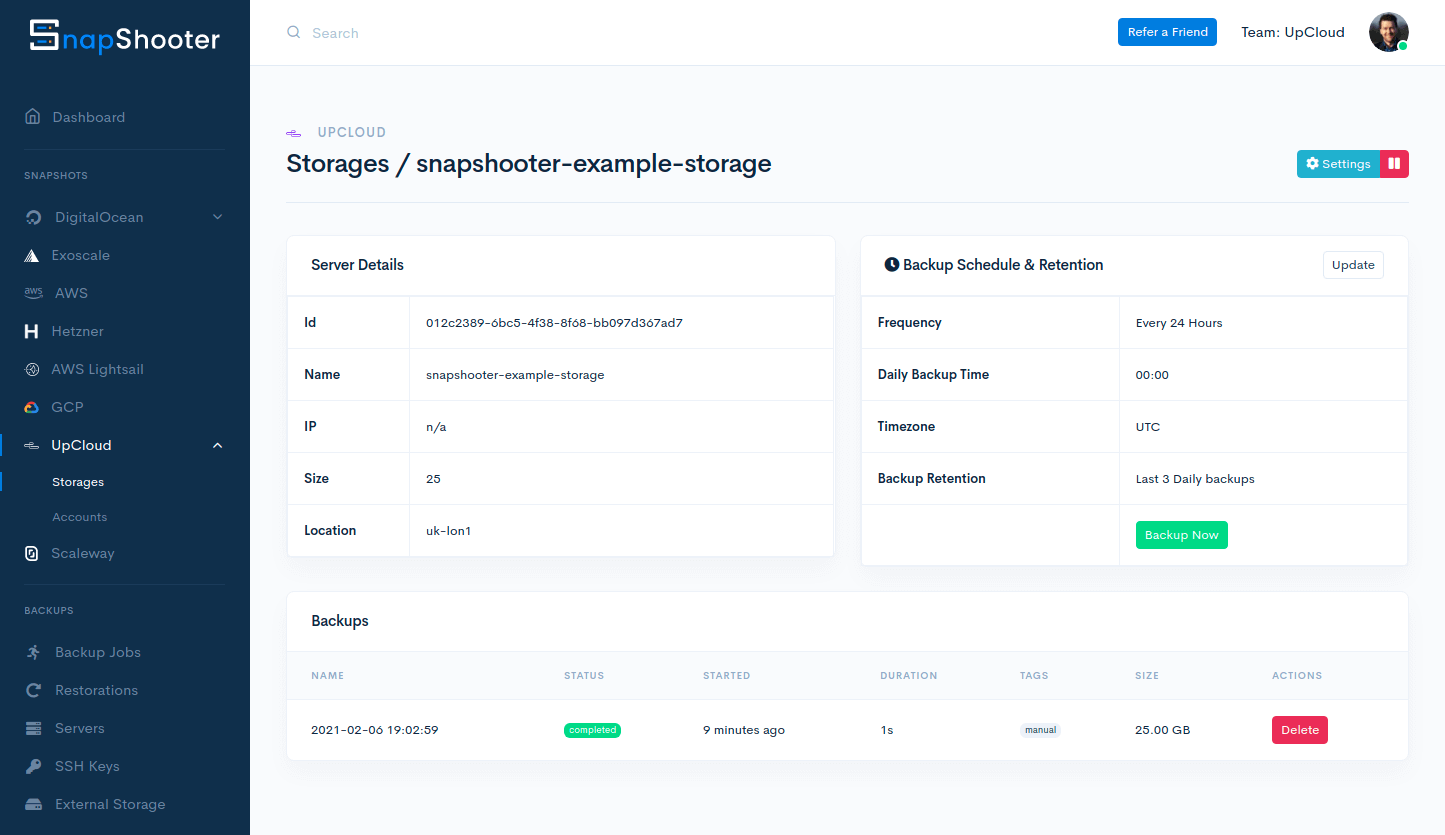
All of your business-critical data is then safely stored in an instant snapshot on UpCloud.
Restoring from a snapshot
All backup schedules and snapshots can be viewed on the list of Active backups under each storage device. However, restoring data from a snapshot needs to be done via your UpCloud Control Panel. Restoring backups affords you two options for bringing back data.
- Each backup on UpCloud is a full snapshot of the storage device and can be restored in place. This reverts any changes made to the storage after the snapshot was taken.
- Alternatively, if you only want to restore specific files without reverting the entire storage, you have the option to clone the backup to a new storage device and manually copy the required files.
You can find more detailed instructions on how to restore backups in our separate tutorial.
Conclusions
Setting up and managing all of your backup schedules is made simple using SnapShooter. Their easy-to-use dashboard and robust integration of the native backup snapshots on UpCloud let you focus on what matters.
In addition to managing native backup solutions across a number of cloud providers, SnapShooter also supports file-level backups to any S3 compliant object storage. Check out our tutorial on how to save backups to UpCloud Object Storage using SnapShooter to learn more.
long
Can I ask, is this service free or paid ?
Janne Ruostemaa
Hi Long, thanks for the question. SnapShooter has a number of pricing tiers starting with a free option.