
If the UpCloud firewall is enabled on your Cloud Server, add incoming rules that accept NTP replies. Without them, the clock does not synchronize, even when all outgoing traffic is allowed.
Managing time zones and synchronisation
Configuring the time zone and synchronization is an important but often overlooked part of maintaining Cloud Servers. Many web applications require accurate and reliable timekeeping to function correctly.
Configuring time zones
It is important to note that with the UpCloud virtualized systems the time zone of your cloud servers can be adjusted at two levels.
At your UpCloud Control Panel, you have the option to select the time zone provided to your cloud server by the hardware. Meanwhile, the operating system on your server will also most likely offer options for configuring the timezone settings.
These two layers of time zone configurations operate independently. In most cases, you should only select your desired local time zone at one of these options.
Selecting the hardware timezone
The time passed to the Cloud Server by the underlying hardware is usually expected to represent UTC +0000 by the operating system. Therefore, for the majority of server OS options, it is recommended to select the UTC time zone at the hardware level and then configure the local time in the operating system settings.
You can select the time zone at deployment in the Optionals section. Click More settings and choose the time zone from the Timezone drop-down menu.
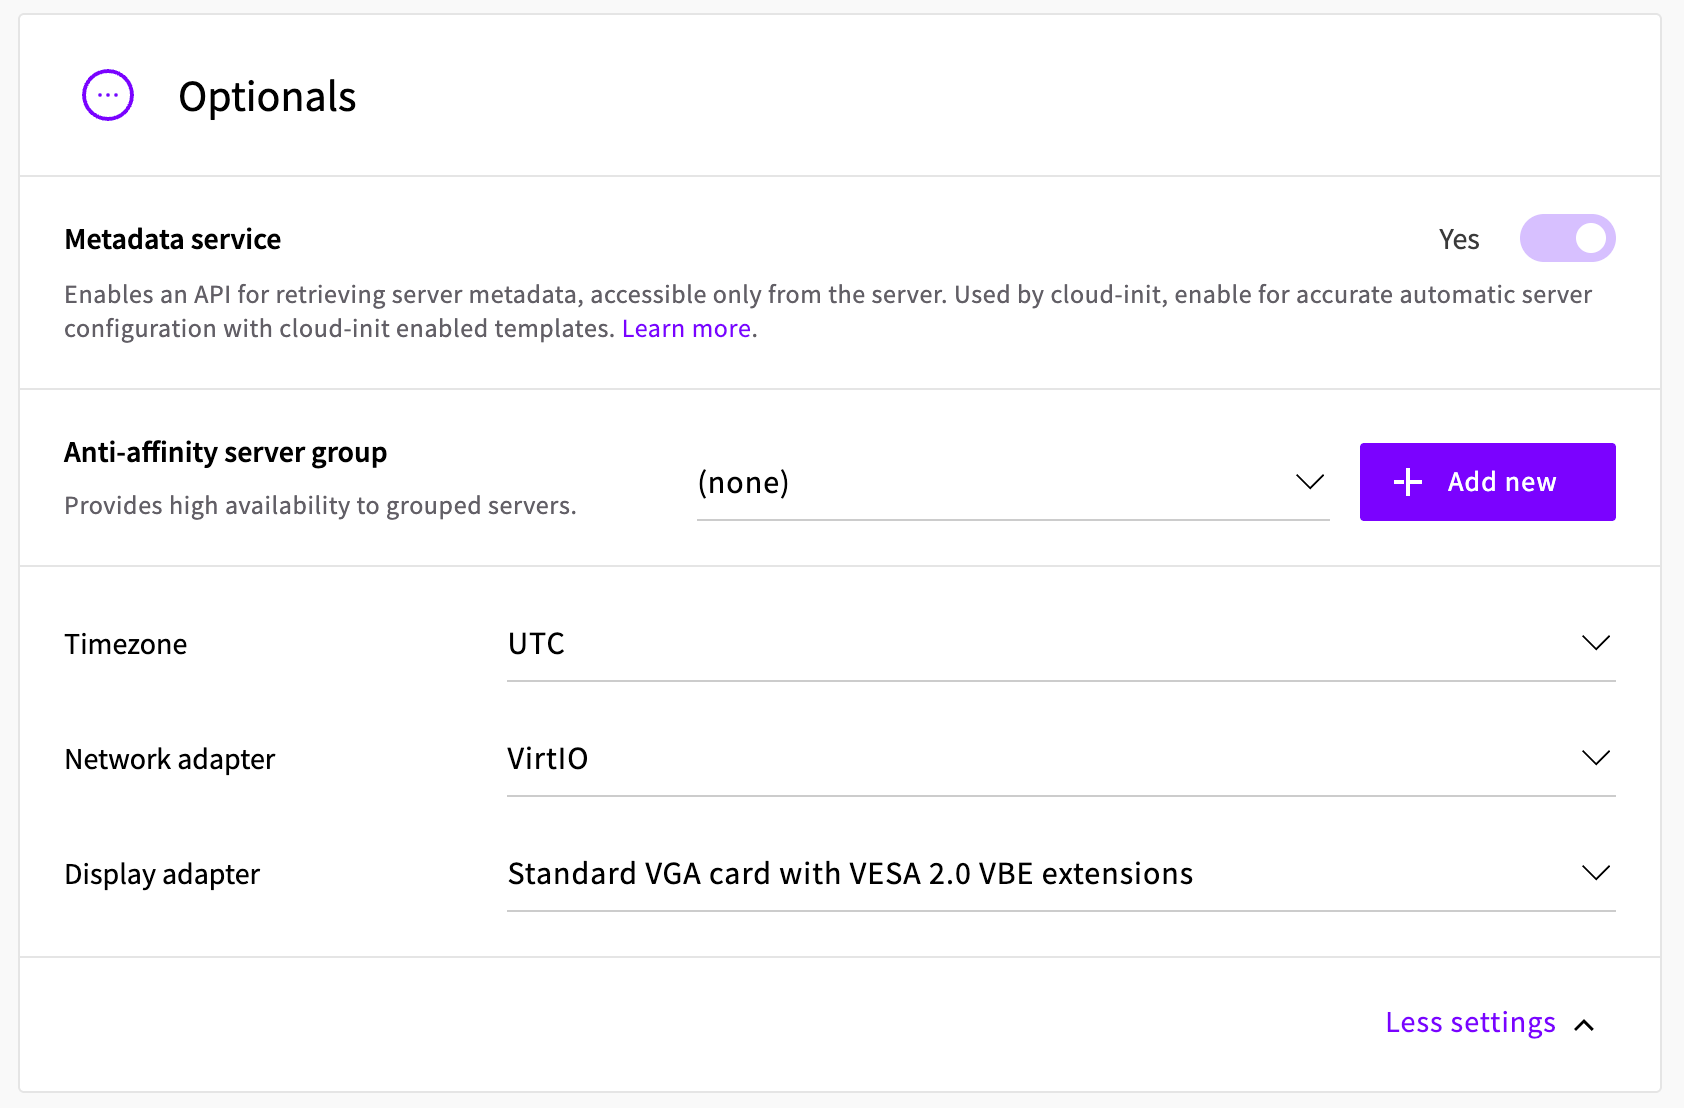
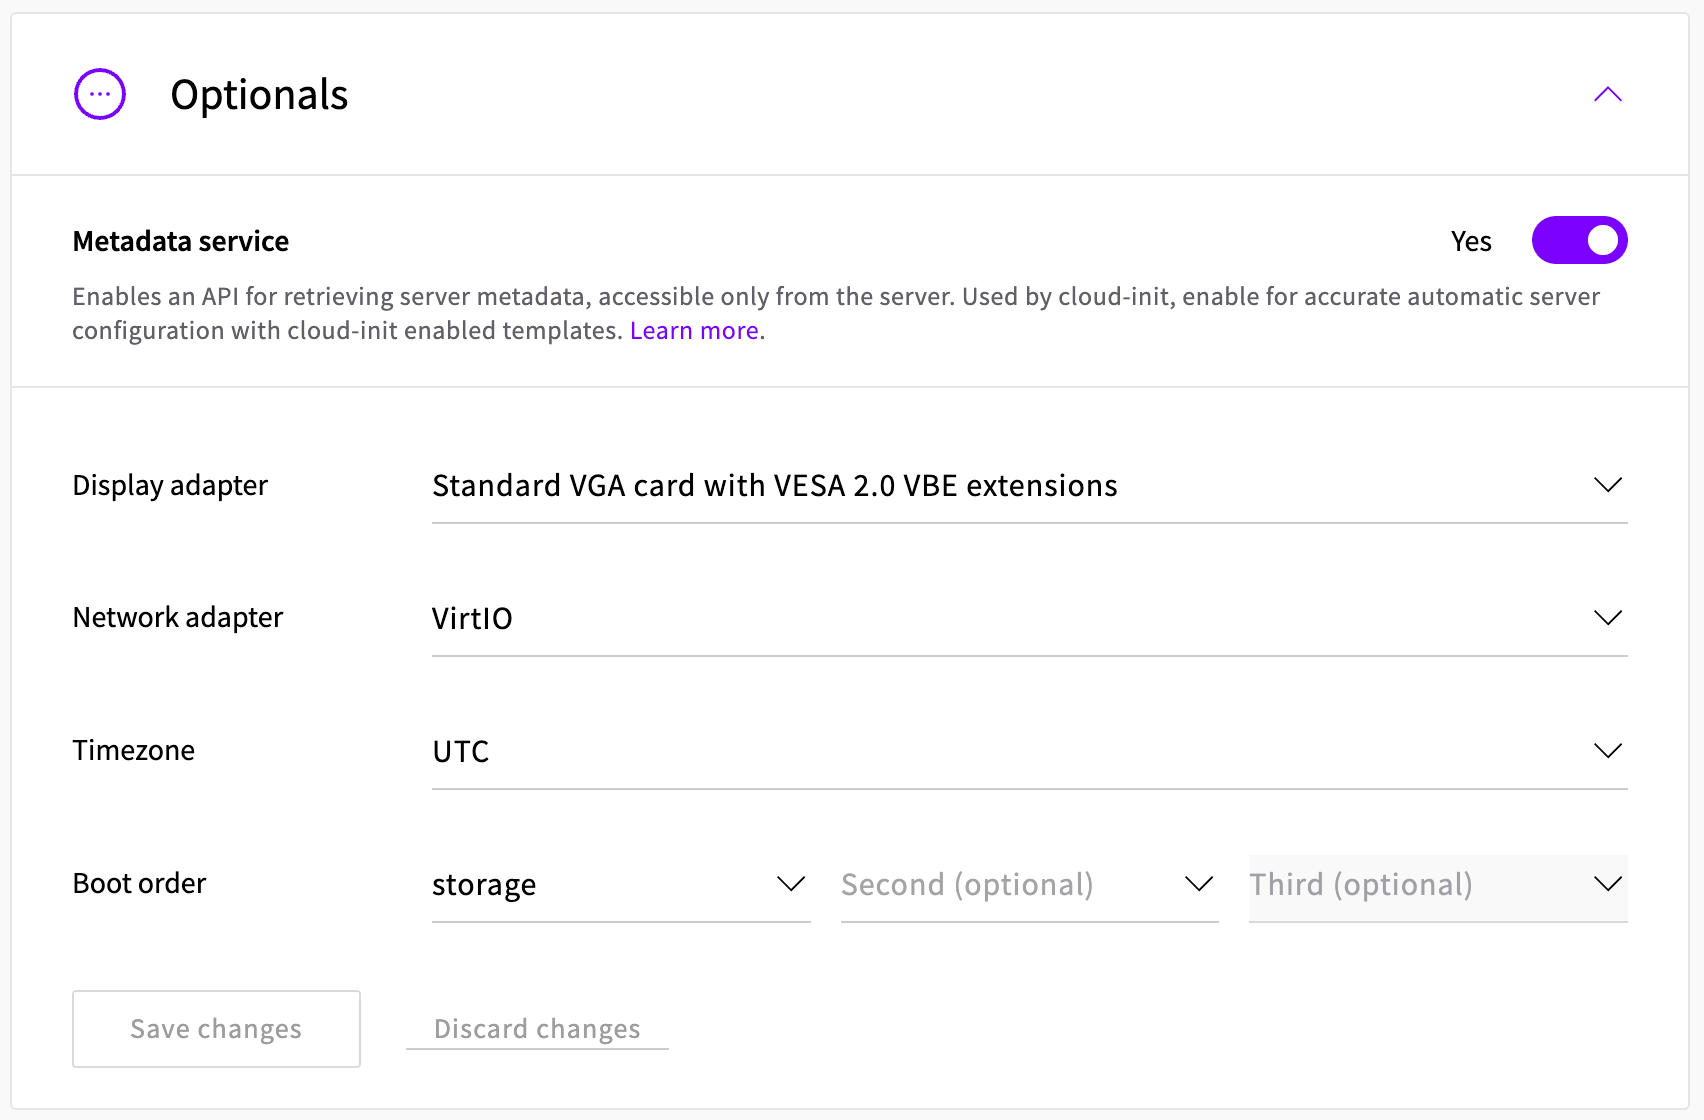
You can also change the time zone after deployment, while the server is shut down. Open your server's Overview tab, click Shut down, and wait for the server to stop. Then expand Optionals, choose the time zone from the Timezone drop-down menu, and click Save changes. Afterwards, start your server again.
Changing the operating system time zone
Changing the time zone at the system level depends on the operating system in use. This guide covers the following operating systems:
- Ubuntu 24.04 and 26.04
- Debian 13
- CentOS Stream 10
- AlmaLinux 10
- Rocky Linux 10
- Windows Server 2025
Linux
On Linux, the system time zone is configured using the timedatectl tool.
Check your current time zone using the following command.
timedatectl Local time: Mon 2026-10-12 14:16:24 UTC
Universal time: Mon 2026-10-12 14:16:24 UTC
RTC time: Mon 2026-10-12 14:16:24
Time zone: Etc/UTC (UTC, +0000)
System clock synchronized: yes
NTP service: active
RTC in local TZ: noIn the output, you should see the current local and universal times along with the selected time zone. By default, the time zone is UTC +0000 as above.
If you wish to change the local time zone, get a list of the available time zone names with the next command.
timedatectl list-timezonesThe time zone names are listed alphabetically in the format Region/City, for example Europe/London. You might need to scroll down the list to find a city in your time zone.
When you know the name of your time zone, configure it using the command underneath.
sudo timedatectl set-timezone Europe/LondonThe command above sets the local time zone to Europe/London. The time zone follows daylight saving time automatically, so the clock shows GMT +0000 in winter and BST +0100 in summer.
Run timedatectl again to check the change.
               Local time: Mon 2026-10-12 15:16:24 BST
                Time zone: Europe/London (BST, +0100)
Windows
On Windows servers, open the Date and Time settings by entering the following in the Run window or the taskbar search.
timedate.cpl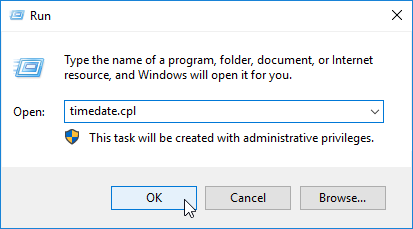
This opens the Date and Time settings which show the current time and selected time zone.
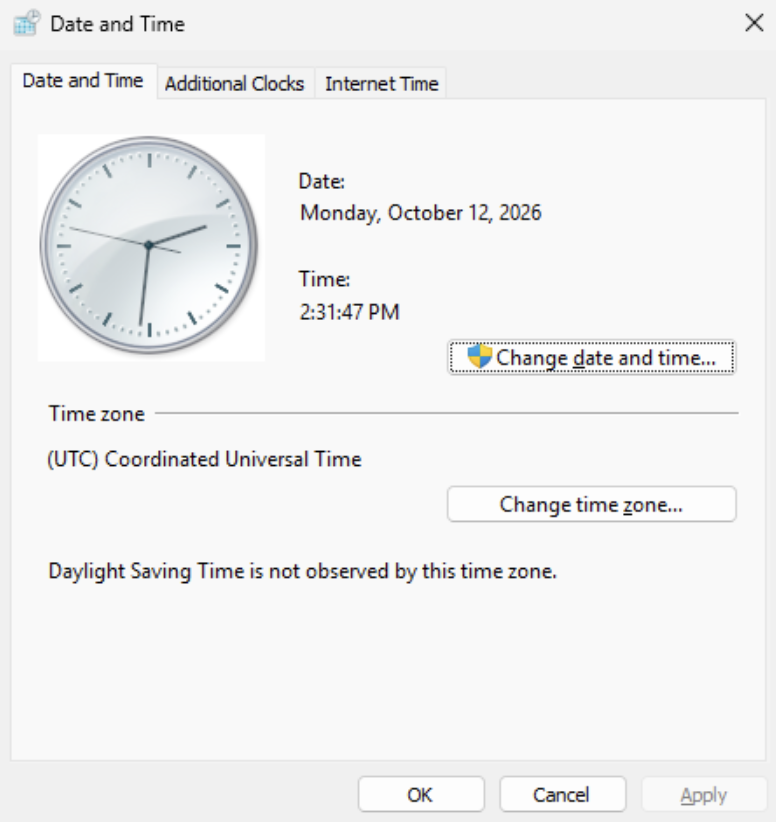
Click the Change time zone... button to open the Time Zone Settings.
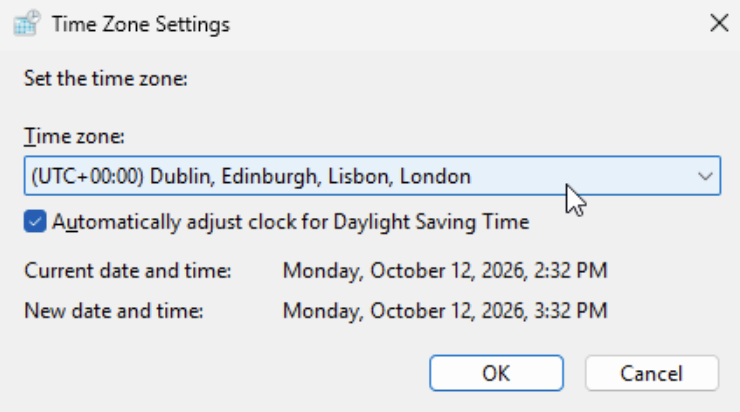
Select the desired time zone from the Time zone drop-down menu. For time zones that observe daylight saving time, the Automatically adjust clock for Daylight Saving Time option is selected by default.
When you are done, confirm the selection and close the windows by clicking the OK button.
Synchronizing time with NTP
Your Cloud Servers can periodically synchronize the time with an authoritative time server using the Network Time Protocol (NTP). The NTP synchronization calculates the drift of your system clock and continuously adjusts it, which prevents large corrections that could lead to inconsistent logs for instance. The cost of this is a little processing power and memory, but for a modern server, it is negligible.
Allowing NTP through the UpCloud firewall
Important
To add the rules in the UpCloud Control Panel:
- Open your server's Firewall tab and click Edit rules.
- Under Incoming traffic rules, click Add new rule, then choose the NTP - UDP 123 template in the Name / Template field. The template accepts UDP traffic from source port 123 to all ports.
- Add a second rule with the same template, and select All IPv6 addresses as its source.
- If your incoming rules include Drop rules, move the two NTP rules above them.
- Click Save changes.
Set port 123 as the source port of the rules, not the destination port.
If you manage the firewall through the API, create the same rules with protocol udp, direction in, source_port_start and source_port_end set to 123, and no destination port.
If the operating system on your server also runs a firewall, such as ufw, and it blocks outgoing traffic, allow outgoing UDP traffic to port 123 as well.
Linux
Time synchronization is turned on by default on the Linux operating systems listed above. You can check its status with timedatectl.
timedatectlSystem clock synchronized: yes
NTP service: activeNTP service: active means that time synchronization is turned on. If it shows inactive, turn it on with the following command.
sudo timedatectl set-ntp trueThis starts the time synchronization service and sets it to start at boot. The clock synchronizes with a time server within a few seconds.
To see the details of the synchronization, use the tool for the time synchronization service on your server.
On Ubuntu 24.04, the service is systemd-timesyncd.
timedatectl timesync-status Server: 185.251.115.30 (0.ubuntu.pool.ntp.org)
Poll interval: 1min 4s (min: 32s; max 34min 8s)
Leap: normal
Version: 4
Stratum: 1
Reference: GPS
Precision: 1us (-25)
Root distance: 0 (max: 5s)
Offset: +8.235ms
Delay: 6.609ms
Jitter: 0
Packet count: 1
Frequency: +56.358ppmIf Packet count stays at 0, the server is not receiving replies from the time server. Check your firewall rules.
On Ubuntu 26.04, Debian 13, CentOS Stream 10, AlmaLinux 10, and Rocky Linux 10, the service is chrony.
chronyc trackingReference ID : FD7AB21D (2a07:e043:1:127::123)
Stratum : 3
Ref time (UTC) : Mon Oct 12 14:16:40 2026
System time : 0.000017212 seconds fast of NTP time
Last offset : +0.000036895 seconds
RMS offset : 0.000036895 seconds
Frequency : 5.568 ppm fast
Residual freq : +2.888 ppm
Skew : 0.025 ppm
Root delay : 0.001951147 seconds
Root dispersion : 0.000220626 seconds
Update interval : 1.8 seconds
Leap status : NormalLeap status: Normal means that the clock is synchronized. If it shows Not synchronised, the server is not receiving replies from time servers. Check your firewall rules.
Windows
Windows servers have time synchronization turned on by default. To check or change the settings, open the Date and Time settings by entering the following in the Run window or the taskbar search.
timedate.cplThen click the Internet Time tab in the Date and Time settings.
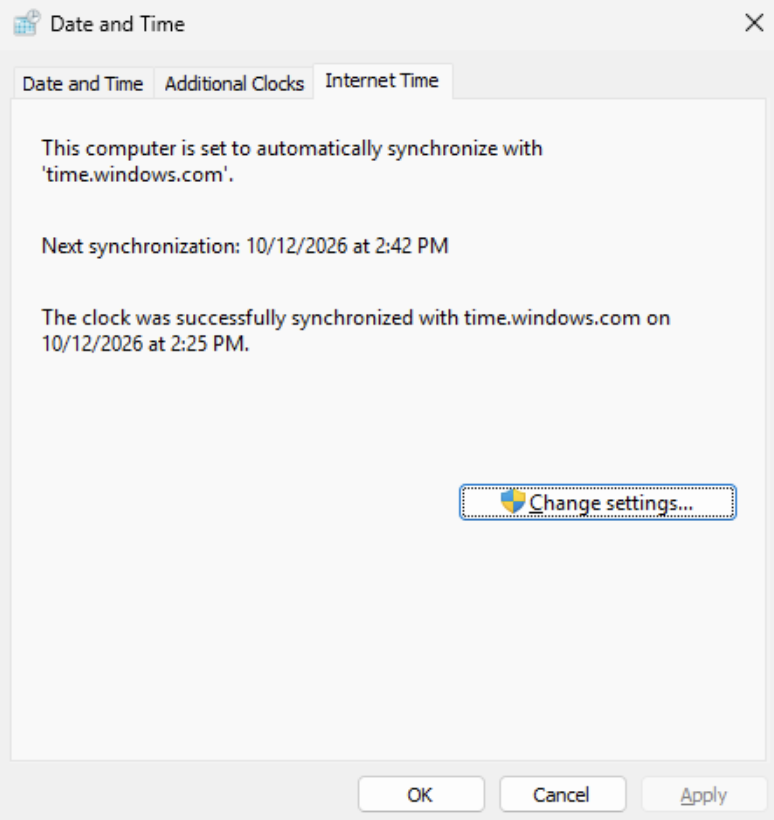
Click the Change settings... button to open the Internet Time Settings.
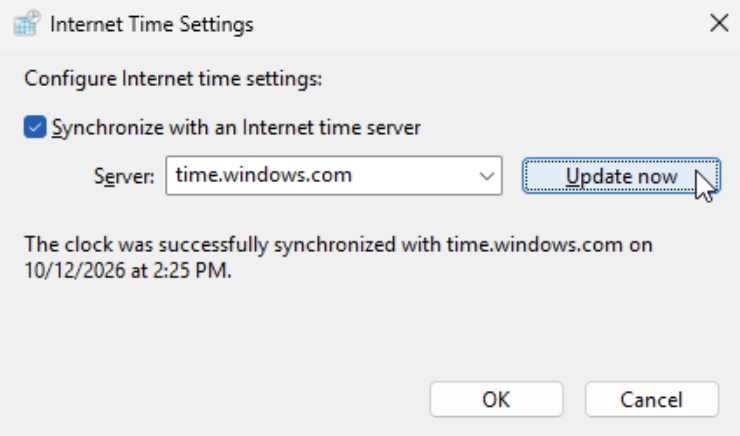
The Server field shows the time server in use, which is time.windows.com by default. To test the server connection and synchronize the time right away, click the Update now button. After a moment, you should see a message confirming that the clock was successfully synchronized with the server.
If the message says that the timeout period expired, the server is not receiving replies from the time server. Check your firewall rules.
When you are done, close the windows by clicking the OK button.