The open-source community edition of the Magento e-commerce platform is a great option to set up an online storefront. Especially growing small new businesses will appreciate the low upfront charges and cost-effectiveness of hosting your store on a cloud provider.
But not all clouds are made equal, and much of your store sales will depend on your capacity to serve customers. To be able to quantify performance between providers you will need a standardized test. This is where Apache JMeter and Magento Performance Toolkit come in.
Apache JMeter
JMeter is an open-source load generator software written in Java. Originally designed for testing web applications, it is well-suited for trialling the functional behaviour and measuring the performance of a Magento site. As cloud service providers may offer very different performance levels depending on the available resources, JMeter will help you evaluate the offerings on a level playing field.
It is important to be able to test and measure the actual capabilities of the servers hosting your application. The best way to gauge the performance is to run a benchmark, a series of simulated operations with comparable results across the providers.
Magento provides a performance toolkit with a set of metrics that can be used to judge the performance and overall load capacity of your server.
Preparing the Magento server
The best way to purely measure the differences between providers is to set up identical test sites with no actual product data. If you have not installed the open-source Magento site yet, check out our getting started guide to get up and running. For the best results, install the site without any sample data. The test products will be generated in the next step.
Once you have a test site configured, you can continue with the benchmarking. However, before you can start load testing the site, you will need to go through a few steps to prepare the server for the task. Start by generating the test data for the purpose of this benchmark.
Generating test data on your Magento server
The following is best used only on a Magento install without sample data. If you have already configured a storefront including the samples, you can uninstall the unneeded entries by following the instructions provided at the Magento GitHub repository.
With a clean, empty site, proceed by setting the following global parameter in your database.
mysql -u root -p -e "SET GLOBAL log_bin_trust_function_creators = 1;"
mysql -u root -p -e "USE magento2; UPDATE quote SET is_active = 0 WHERE is_active = 1;"
Then go to the bin directory in the Magento web root.
cd /var/www/html/magento2/bin/You should see a PHP script simply named magento. It can be used to set up the site for testing by generating a suitably sized set of test data.
If the script does not have execution rights by default, enable them with the next command.
sudo chmod +x magentoDepending on the amount of data to be generated and indexed, the process might take quite some time. We recommend using the small data set for convenience, as large data sets might take hours to index.
First, generate the product data with the following command while including the -s parameter to skip the initial indexing.
./magento setup:performance:generate-fixtures -s /var/www/html/magento2/setup/performance-toolkit/profiles/ce/small.xml > ~/magento-setup.outOnce the data has been generated, index it manually with the next command.
./magento indexer:reindexWhen the test data is ready, you might need to fix some file permissions. Run the following command to make sure everything is set to the right owner for the site to work.
sudo chown -R www-data:www-data /var/www/html/magento2/
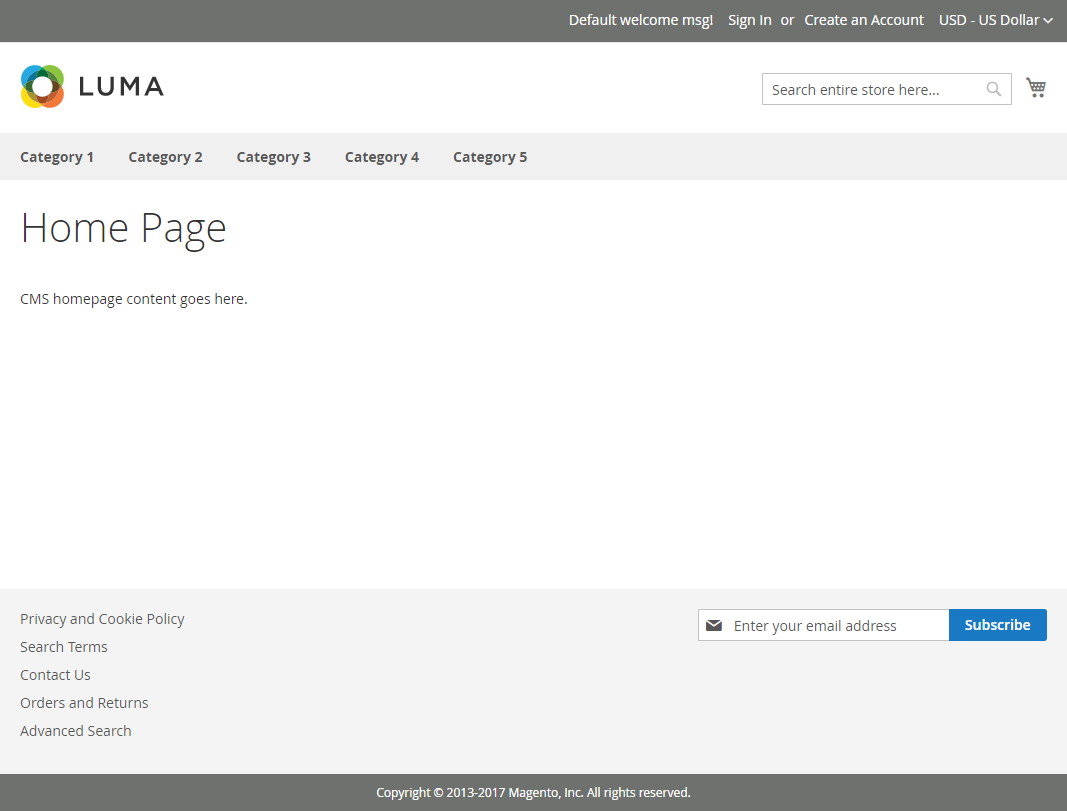
You should now see a number of generic categories with simple placeholder products when browsing your test storefront like in the picture above.
Configure your Magento site for benchmarking
Besides generating the test data, you should also adjust a few settings in the Magento administration control panel.
Open your site’s admin page and log in, then browse to the following menu.
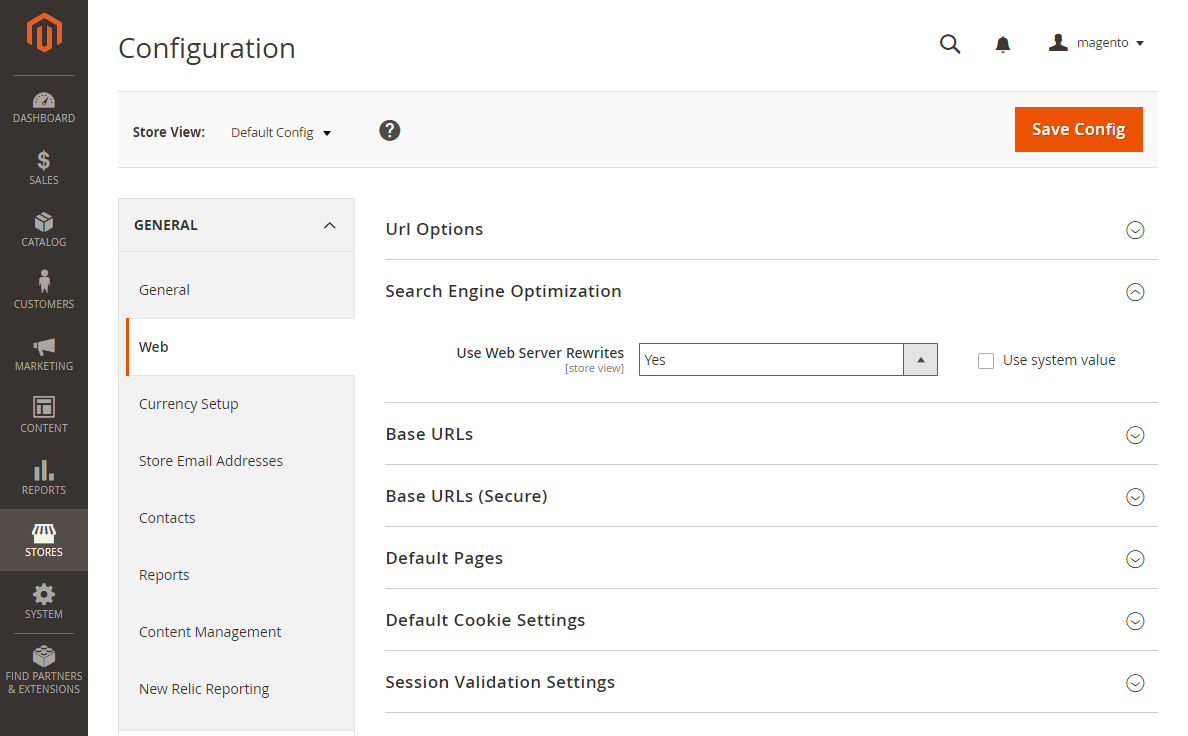
1. Stores > Configuration > General > Web > Search Engine Optimization
Enable the web server rewrites in the first category if not already set. Unselect the “Use system value” to change any of the default settings that are greyed out.
Use Web Server Rewrites “Yes”
Then save the change by clicking the Save Config button at the top of the page.
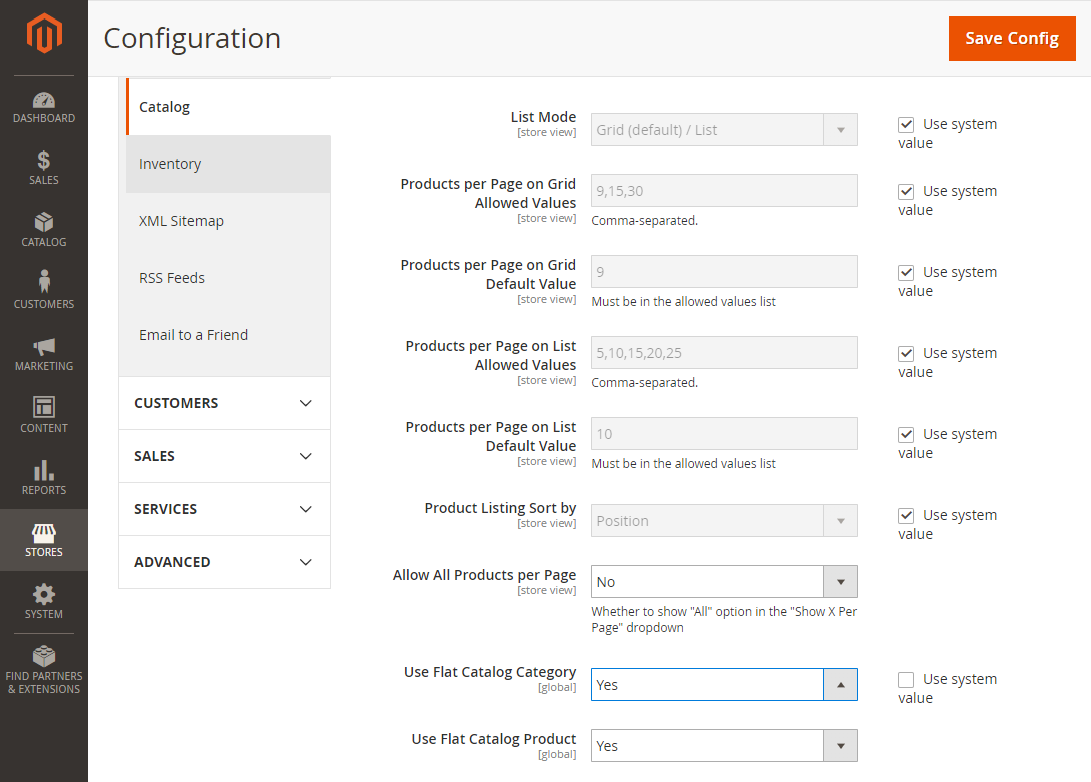
2. Stores > Configuration > Catalog > Catalog > Storefront
You will find the two settings that are set to “No” by default, and change them to “Yes” as shown below.
Use Flat Catalog Category “Yes”
Use Flat Catalog Product “Yes”
Confirm the changes by clicking the Save Config button.
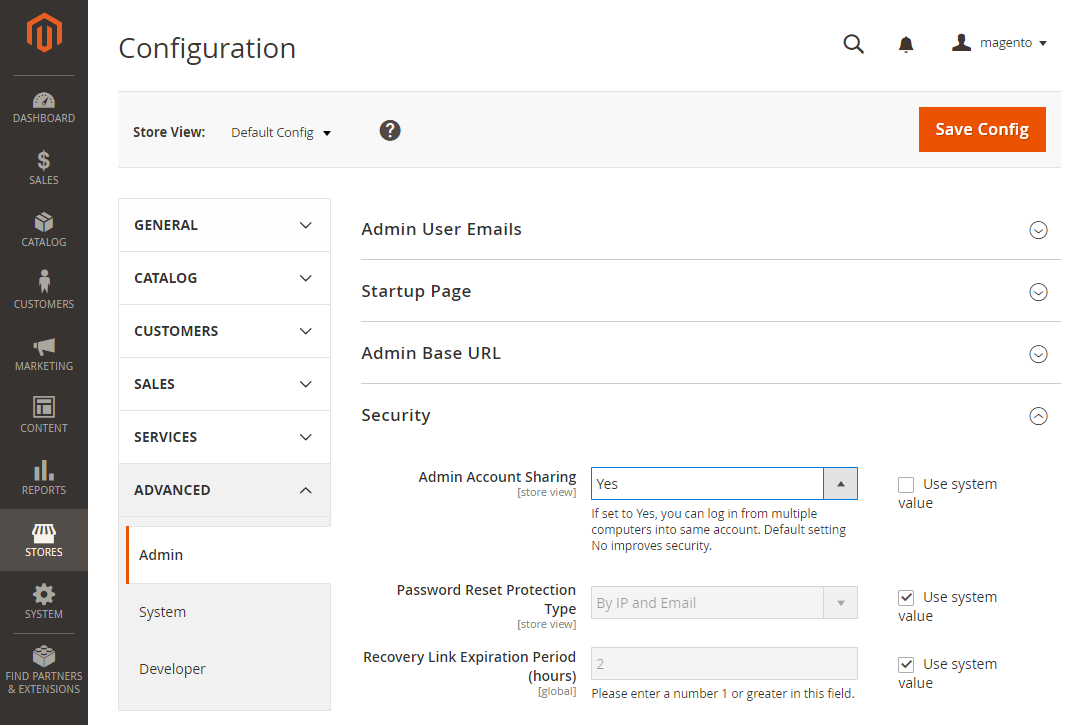
3. Stores > Configuration > Advanced > Admin > Security
Enable Admin Account Sharing to run a multithreaded admin pool by setting the following.
Admin Account Sharing “Yes”
With the setting changed, apply it by clicking the Save Config button at the top of the page.
4. Stores > Configuration > Advanced > Developer
Click to expand the JavaScript Settings section.
Set Merge JavaScript Files to “Yes.”
Click to expand the CSS Settings section.
Set Merge CSS Files to “Yes.”
Again, apply the changes by clicking the Save Config button at the top of the page.

If you get an error when saving any changes, make sure the file permissions and ownership are set correctly and try saving again. Similarly, reset the permissions if you come up with an empty menu in the admin control panel.
sudo find /var/www/html/magento2/ -type d -exec chmod 775 {} ;
sudo find /var/www/html/magento2/ -type f -exec chmod 664 {} ;
sudo chown -R www-data:www-data /var/www/html/magento2/
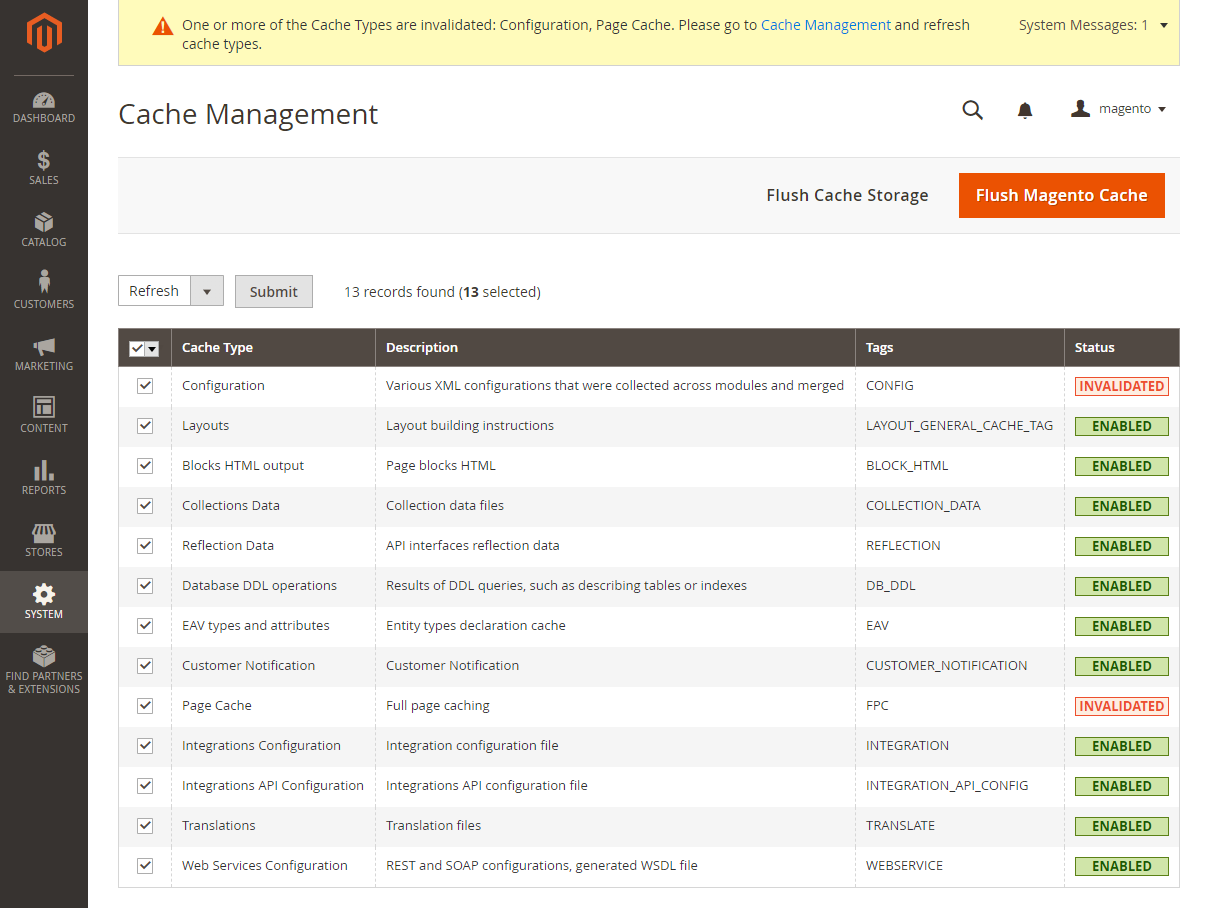
Afterwards, check your site cache management page and update any invalidated data.
5. System > Cache Management
Select all cache types and Refresh the caches by clicking the Submit button.
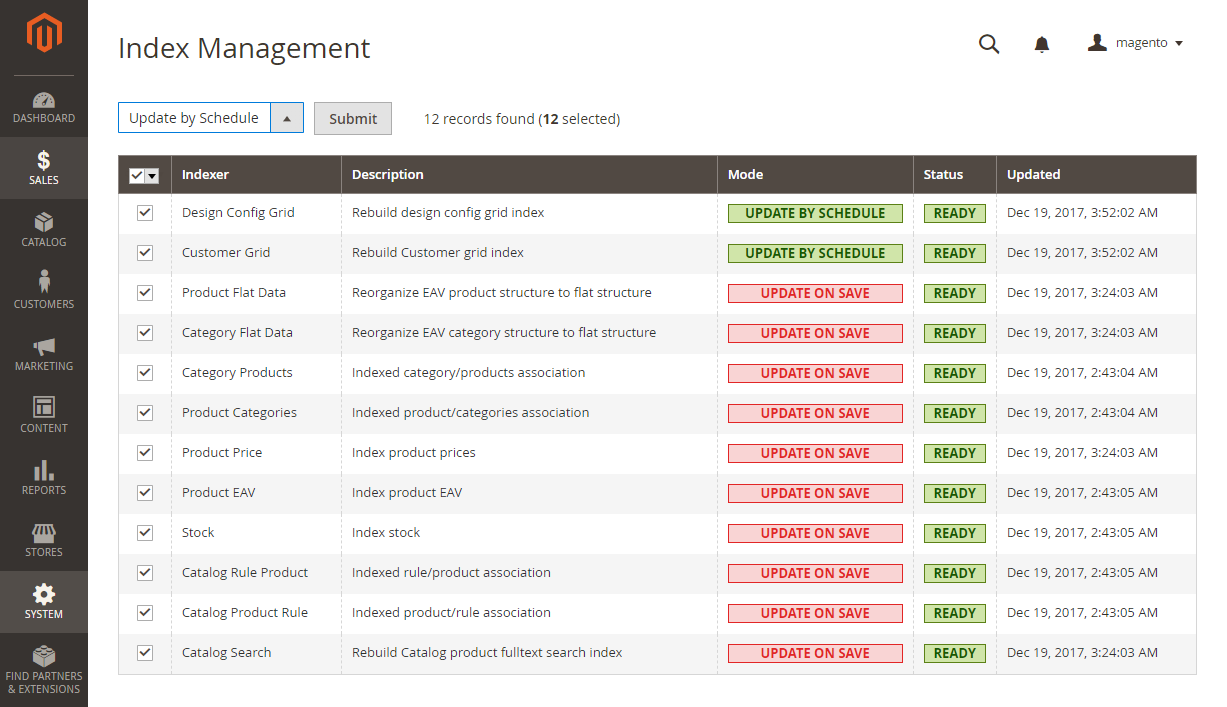
6. System > Index Management
Lastly, check the site indexes and make sure all show a ready status.
Set all to the “Update by Schedule” mode by selecting all and clicking the Submit button.
If you get an error while updating the index settings, confirm you enabled the database global to trust function creators.
mysql -u root -p -e "SET GLOBAL log_bin_trust_function_creators = 1;"
Also, make sure you have the following cronjob entries enabled. Open the crontab on your Magento site users for example with the following command.
sudo crontab -u magento -e
Choose the editor you wish to use, then check that the following lines appear in the file. If no, add them, save the file, and exit.
* * * * * /usr/bin/php /var/www/html/magento2/bin/magento cron:run | grep -v 'Ran jobs by schedule' >> /var/www/html/magento2/var/log/magento.cron.log
* * * * * /usr/bin/php /var/www/html/magento2/update/cron.php >> /var/www/html/magento2/var/log/update.cron.log
* * * * * /usr/bin/php /var/www/html/magento2/bin/magento setup:cron:run >> /var/www/html/magento2/var/log/setup.cron.log
When the indexers are run the next time, the status on the management page should show Processing to indicate that the indexes are being updated. After a moment, all indexes should show green again.
Installing JMeter on your load-generating computer
With the Magento site configured for benchmarking, continue by installing JMeter on another computer that will be used to generate the test load.
JMeter is available on any operating system that supports Java Runtime Environment. The following instructions are for getting JMeter installed and ready on most Linux variants. You can find other download links better suitable for your OS on their website.
First, install the required packages e.g. with the command below on Ubuntu or Debian derivates. Use of version 8 of JRE is required until JMeter finishes adding support for the new version 9.
sudo apt install curl openjdk-8-jre unzip
Then, download and unpack JMeter on your load generator system. The Magento benchmark plan provided by the performance toolkit was developed for JMeter version 3.1.
curl -k -O http://apache.mirror.anlx.net/jmeter/binaries/apache-jmeter-3.1.tgz ~/
tar zxf ~/apache-jmeter-3.1.tgz
You will also need to install the JSON plugin for JMeter. Download it with the command below and unpack it to the JMeter directory.
curl -k -O https://jmeter-plugins.org/files/packages/jpgc-json-2.6.zip
unzip jpgc-json-2.6.zip -d ~/apache-jmeter-3.1/
You can confirm the app is working with the following command.
./apache-jmeter-3.1/bin/jmeter -v
Once you have JMeter and the JSON plugin downloaded and ready, continue with the instructions on how to use it and how to run the benchmarks.
Using JMeter to benchmark Magento
JMeter can be run either on the command line or with the graphical user interface. Below you will find the steps for both of these options to help with the benchmarking.
Note: JMeter GUI should only be used for scenario debugging and viewing reports.
The command line option should be used for real-world load testing, as it requires significantly fewer resources. For best results, make sure your load-generating computer is powerful enough to run the benchmark without limiting the throughput.
To begin, download the testing plan from the Magento performance toolkit repository.
cd ~/apache-jmeter-3.1/bin/
curl -k -O https://raw.githubusercontent.com/magento/magento2/2.3-develop/setup/performance-toolkit/benchmark.jmx
The benchmark plan also uses preconfigured search terms supplied in the performance toolkit. Create a files directory and download the search_terms.csv into that folder.
mkdir ~/apache-jmeter-3.1/bin/files
cd ~/apache-jmeter-3.1/bin/files
curl -k -O https://raw.githubusercontent.com/magento/magento2/2.3-develop/setup/performance-toolkit/files/search_terms.csv
The benchmark plan includes a number of possible interactions a customer might have on your Magento site. It can simulate purchases, account management, and admin actions to get a good estimate of the load capacity of your server.
JMeter on the command line
Running JMeter on the command line is really quite easy. You can find the app in the downloaded director for example with the following command.
cd ~/apache-jmeter-3.1/bin/Start the application in the non-GUI mode by invoking the parameter -n.
./jmeter -nWithout the rest of the required parameters, JMeter will simply print out a list of available command-line options.
To run the load test, you will need to include the benchmark plan, log and result files, and your server details as described in the example below.
Replace the <public IP/domain> with your server’s public IP address or domain name, depending on how you configured Magento at installation. Also, include the path to the <admin_page> in the control panel as well as the <admin_username> and <admin_password>.
./jmeter -n -t ./benchmark.jmx -j ./benchmark.log -l ./benchmark-results.jtl
-Jhost=<public IP/domain>
-Jbase_path=/
-Jadmin_path=<admin_page>
-Jadmin_user=<admin_username>
-Jadmin_password=<admin_password>
-JfrontendPoolUsers=90
-JadminPoolUsers=10
When run, you will see an output similar to the example below. It already shows some initial performance metrics with the response times and the average throughput by thread group. For a more detailed report, continue on to the results sections below to learn how to read the benchmark results.
Creating summariser <summary>
Created the tree successfully using ./benchmark.jmx
Starting the test @ Wed Jan 10 12:11:00 GMT 2018 (1515586260784)
Waiting for possible Shutdown/StopTestNow/Heapdump message on port 4445
summary + 1 in 00:00:00 = 17.2/s Avg: 16 Min: 16 Max: 16 Err: 0 (0.00%) Active: 1 Started: 1 Finished: 0
summary + 1446 in 00:00:29 = 49.9/s Avg: 214 Min: 0 Max: 3608 Err: 0 (0.00%) Active: 16 Started: 101 Finished: 85
summary = 1447 in 00:00:29 = 49.8/s Avg: 214 Min: 0 Max: 3608 Err: 0 (0.00%)
summary + 370 in 00:00:18 = 20.5/s Avg: 319 Min: 0 Max: 2666 Err: 0 (0.00%) Active: 0 Started: 1 Finished: 1
summary = 1817 in 00:00:47 = 38.6/s Avg: 235 Min: 0 Max: 3608 Err: 0 (0.00%)
Tidying up ... @ Wed Jan 10 12:11:48 GMT 2018 (1515586308196)
... end of run
If the test ends abruptly, check that the database global to trust function creators is enabled.
mysql -u root -p -e "SET GLOBAL log_bin_trust_function_creators = 1;"Also, make sure your load generator can reach your Magento server without issue.
Reading results with JMeter GUI
Open the JMeter application in the GUI mode with the following command in the same ~/apache-jmeter-3.1/bin/ directory, but without any parameters.
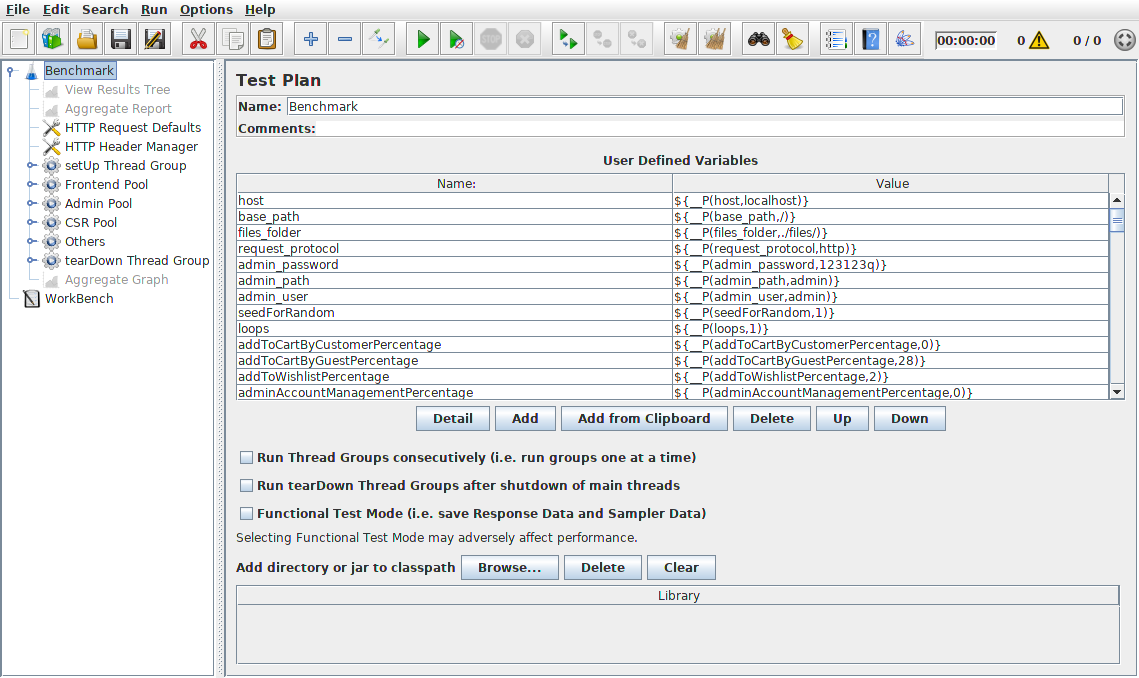
./jmeterThe test plan benchmark.jmx can be opened in the application for viewing, debugging, and further development. Click the folder icon or select Open under the File menu to load the benchmark plan.
JMeter supports a number of ways to view the test results such as the Aggregate Report, Results Tree, and Graph Results.
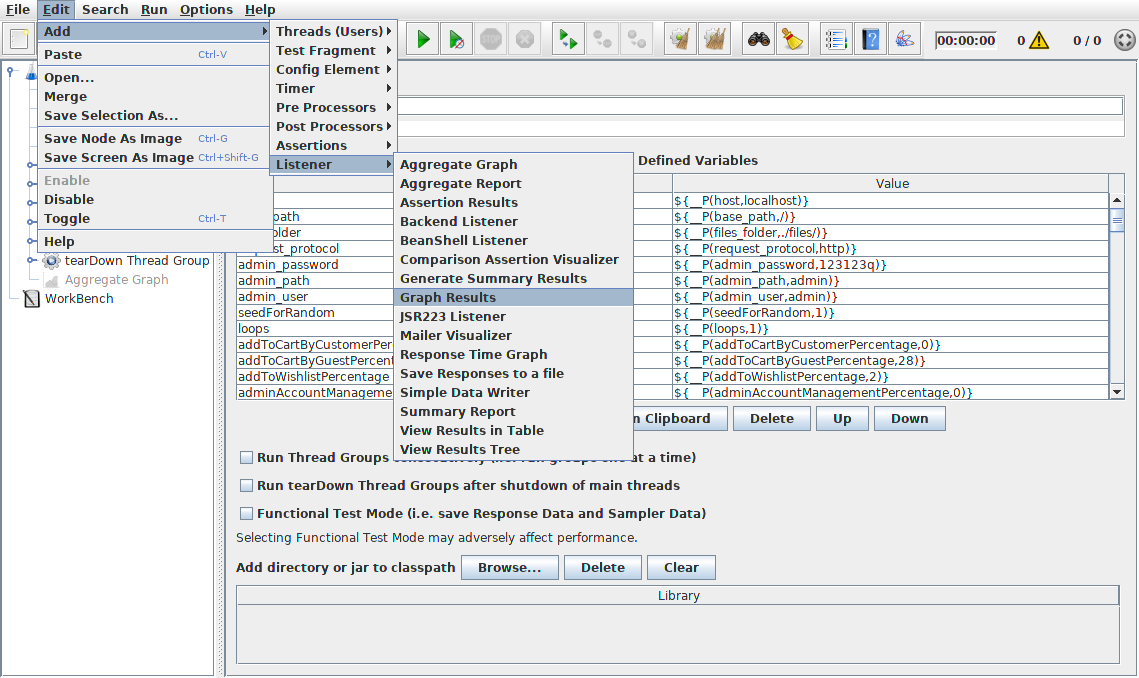
Add a new view by selecting the Benchmark top section in the left panel, then browse through to the following menu.
Edit > Add > Listener > Graph Results
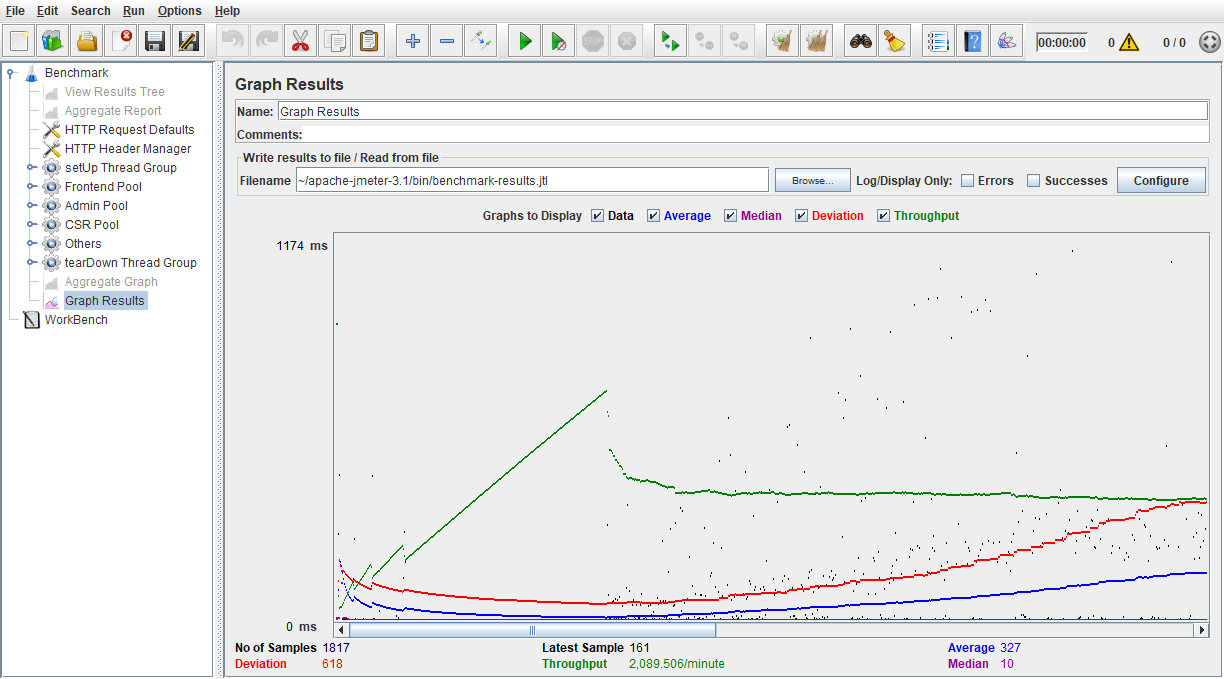
You can open the saved test result file by clicking the Browse button for example in the Graph Results view. Loading up the results will draw a graph that displays the server’s overall throughput performance with the corresponding statistical values beneath.
You may also like to review the benchmark results in JMeter using the other two listeners already mentioned.
View Results Tree option shows all requests and responses made during the scenario in a report tree. In this report, you can find information about response times, headers, and response codes.
Aggregate Report contains collected information about all of the requests, including counts, min, max, average, error rate, and approximate throughput.
Summary
JMeter and the Magento performance toolkit enable you to test your e-commerce server capabilities, from the impact of customization to differences between cloud service providers. With the ability to generate sample data for and run test scenarios, you have everything needed to make the right choices based on repeatable test results.
If you would like to further optimize your Magento server for the best performance per resource, you can easily change your server configuration in the server settings. Check out our other Cloud Server plans to learn more.
Discussion