Webmin is a web-based system configuration and management tool for Unix-based systems. Meaning that with it you can do the management on all your Linux servers. It’s robust, powerful and has a lot of features. It has become a good open-source alternative for cPanel as not only can it do user administration, package management, network configuration and performance monitoring, but it can also manage web servers. Thanks to the rich feature set, it can be a powerful tool for system administrators and webmasters.
This post will cover the procedure on how to install Webmin on Debian 10. The same methods can also be applied to earlier versions, Debian 9 and 8, and to other Debian-based distros such as Ubuntu with possible small differences.
Some Webmin use case scenarios
If you plan to set up a cloud server on which you intend to host multiple websites, then Webmin could be a good solution for you. You can also do the same on your local network.
Another great Webmin feature is the ability to register multiple servers on Webmin and manage all of them from a single Webmin dashboard. This can work with multiple different machines, physical and virtual, as long as they are all on the same network.
Webmin installation methods
There are two ways to install Webmin on your server.
- The first option is to install the Webmin software from the .deb package which you can download from their website.
- The second option is to add a Webmin source and install it via the apt package manager.
We are going to cover both of these methods to provide the best option for you.
Option 1. Installing Webmin from the .deb package
First what we need to do is install all necessary packages that Webmin uses, otherwise, Webmin won’t install. Below you can see an error that will show up if the packages are not installed.
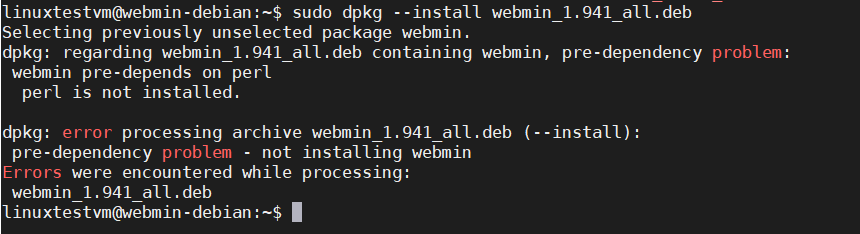
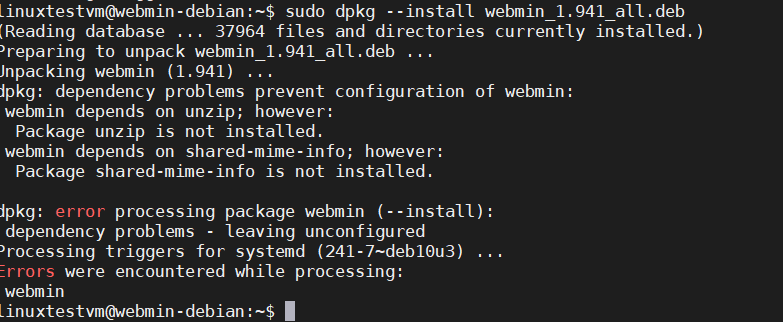
Use the following command to install the necessary packages.
sudo apt update
sudo apt install perl libnet-ssleay-perl openssl
libauthen-pam-perl libpam-runtime libio-pty-perl
apt-show-versions python unzip shared-mime-info wget
Next, you need to download the .deb package. Check the Webmin website for the latest version number. In the package name, they write the version number of Webmin and they post the latest stable release to download.
Download the .deb package using the command below. Replace the version number with the latest if a newer release is available.
wget http://prdownloads.sourceforge.net/webadmin/webmin_1.941_all.deb -P ~/
Once the package has been downloaded, install Webmin with the following command.
sudo dpkg --install ~/webmin_1.941_all.deb
Setting up webmin (1.941) ...
Webmin install complete. You can now login to https://webmin.example.com:10000/
as root with your root password, or as any user who can use sudo
to run commands as root.
Processing triggers for systemd (241-7~deb10u4) ...
If the installation was successful, you’ll see an output like the example above. You can then access the Webmin dashboard by going to the IP address or domain of your Webmin server on your web browser.
Option 2. Installing Webmin from the APT repo
Installing Webmin from the APT repository via the package manager is perhaps a more maintainable option allowing easier updates and reinstall if necessary.
To do this, first, we need to install the prerequisites.
sudo apt-get install apt-transport-https gnupg2 curl
Next, add the Webmin repository to its own sources list.
sudo echo "deb https://download.webmin.com/download/repository sarge contrib"
> /etc/apt/sources.list.d/webmin.list
Then add the GPG key which you need to download and save with the command below.
curl https://download.webmin.com/jcameron-key.asc | sudo apt-key add -
Update the repository lists which now include the Webmin source and finally install Webmin itself.
sudo apt-get update
sudo apt-get install webmin
Setting up webmin (1.941) ...
Webmin install complete. You can now login to https://webmin.example.com:10000/
as root with your root password, or as any user who can use sudo
to run commands as root.
Processing triggers for libc-bin (2.28-10) ...
Processing triggers for systemd (241-7~deb10u4) ...
Processing triggers for man-db (2.8.5-2) ...
Processing triggers for mime-support (3.62) ...
If the installation was successful, you’ll see an output like the example above. You can then access the Webmin dashboard by going to the IP address or domain of your Webmin server on your web browser.
Firewall settings for Webmin
Webmin is configured by default to listen on port 10000. If you have a firewall running, you must allow HTTP and HTTPS access as well as traffic to port 10000. In this section, we’ll cover the steps for the ufw and iptables firewalls on your server. Also, for the cloud server, you need to configure a firewall rule to allow traffic on the same port if you are using a firewall service by your cloud provider.
Depending on which firewall you are using, you need to configure it to open port 10000 and allow HTTP and HTTPS traffic on it.
iptables config:
Run the following commands:
sudo iptables -A INPUT -p tcp -m tcp --dport 10000 -j ACCEPT
sudo iptables -A INPUT -p tcp -m tcp --dport 80 -j ACCEPT
sudo iptables -A INPUT -p tcp -m tcp --dport 443 -j ACCEPT
ufw config:
Run the following commands:
sudo ufw allow http
sudo ufw allow https
sudo ufw allow 10000
Access the Webmin dashboard
Once you’ve finished installing Webmin, the message on completion shown in the terminal output tells you how to access the Webmin dashboard. However, that only works if you’ve configured a domain name on your cloud server as Webmin generated the URL from the hostname of your server.
To access the Webmin dashboard on a cloud server without a domain name, you’ll need to use a public IP address. Your cloud provider would have assigned this to your server. Also, remember to include the port number 10000 used by Webmin.
If you installed Webmin on the local network, the process is the same. Use the IP address assigned to your server.
The first time you access the dashboard, you’ll get a potential security risk prompt on your web browser. This is because Webmin uses a self-signed SSL certificate when you install it for the first time. These SSL certificates can be replaced later on.
For now, go ahead and add the security exception to continue.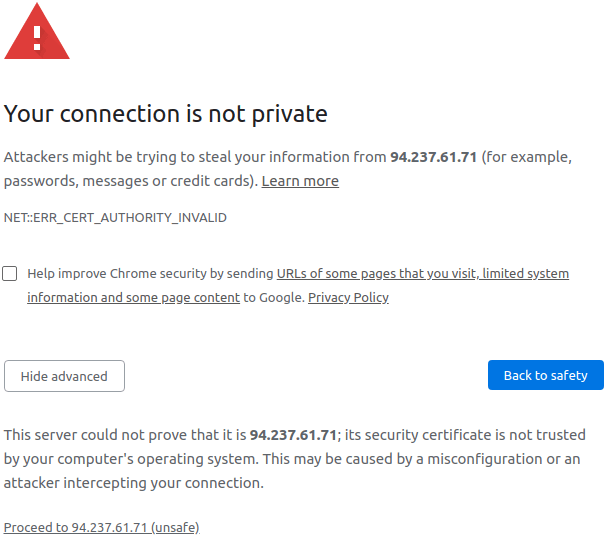
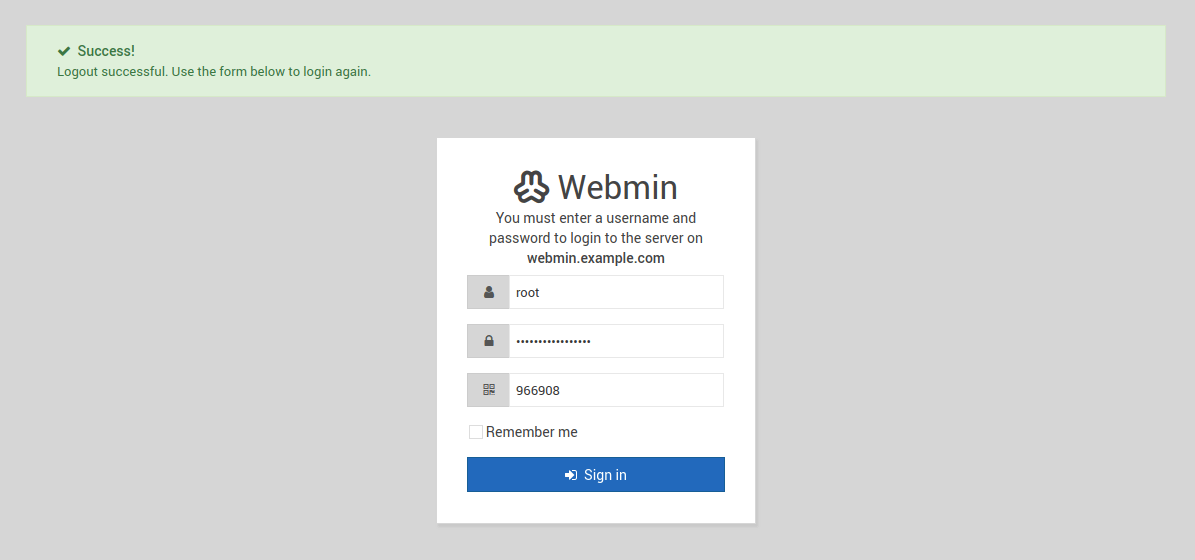
Once you pass the security warning, you’ll see the Webmin login page such as the example shown below.
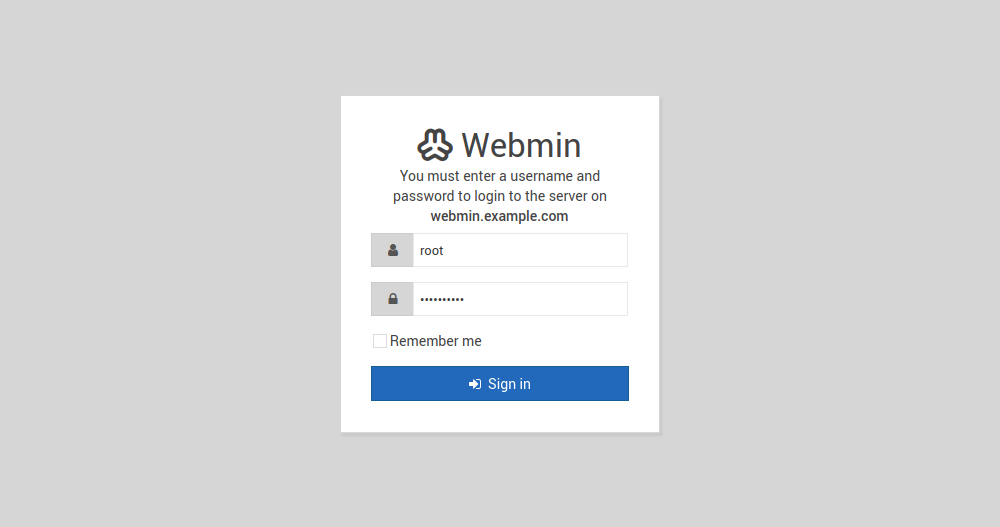
Log in using your server’s root account and password or any other user account you have which has sudo privileges.
Afterwards, you’ll be greeted by the Webmin dashboard.
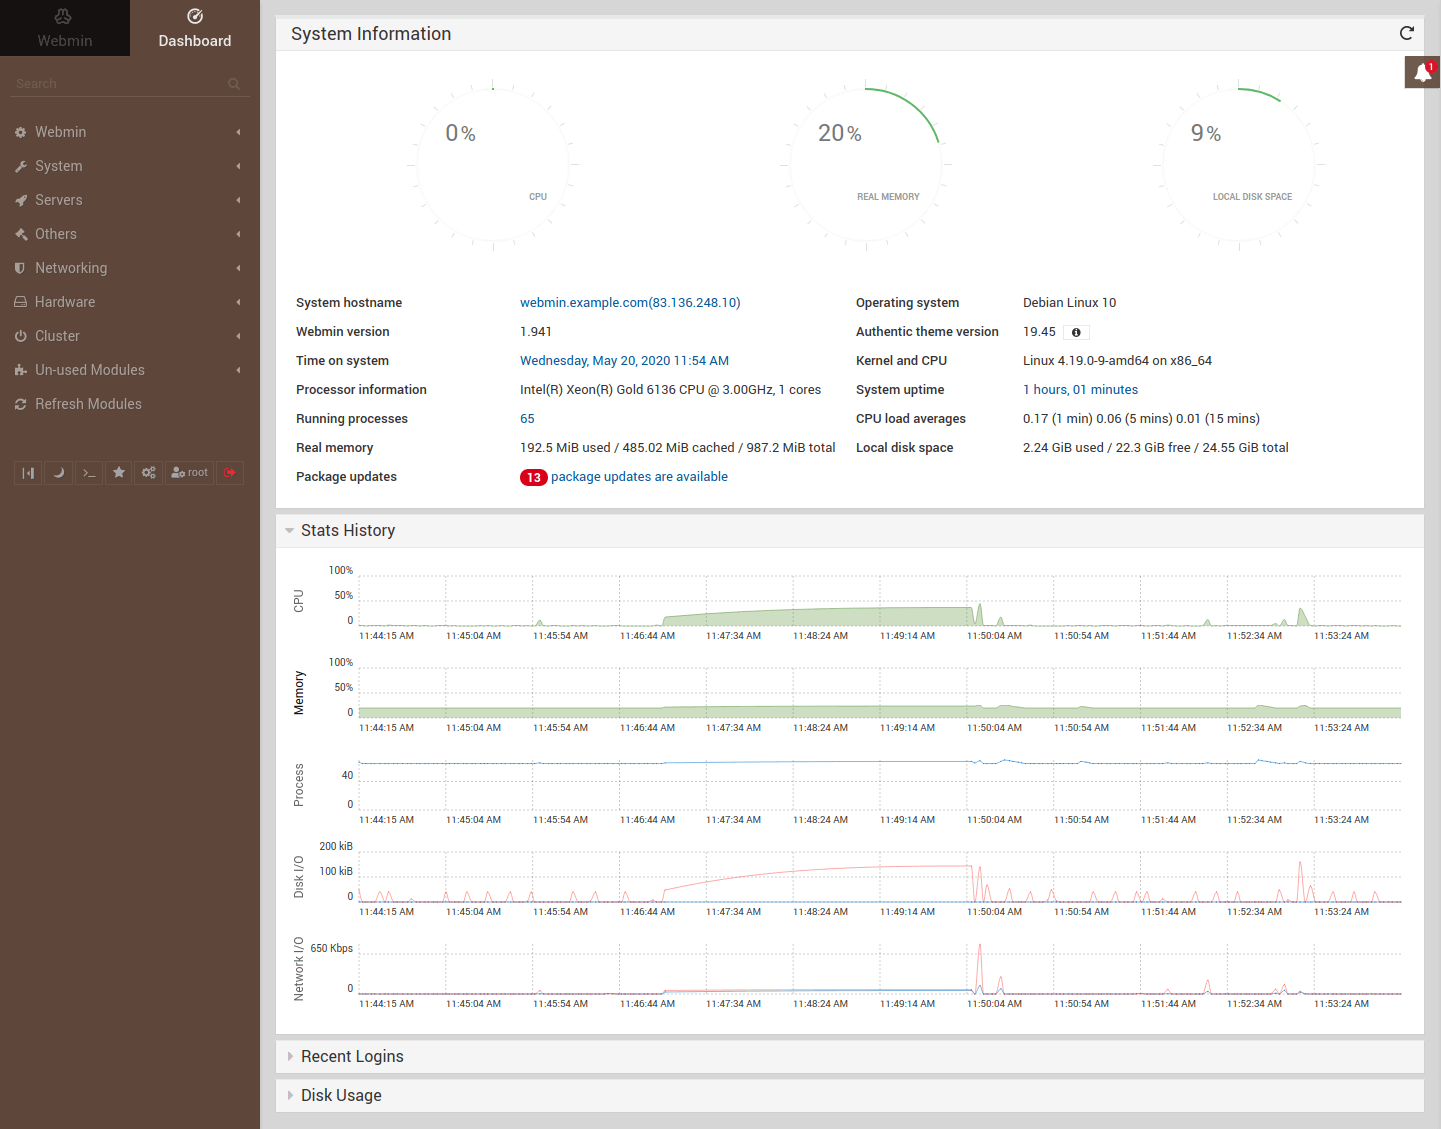
Congratulations! You’ve successfully installed Webmin on your server. Continue below with a few additional steps to improve the security of your Webmin server.
Enabling two-factor authentication
It’s worth mentioning that if you installed Webmin on a cloud server, access to the Webmin dashboard must be protected with strict measures. When you open port 10000 on the firewall and allow traffic, you’re exposing Webmin to the internet and probably to malicious attacks and potential threats.
To help protect your Webmin server, two-factor authentication, also known as 2FA, is a must. I highly recommend enabling it.
Start by installing the required packages with the command below.
sudo apt-get -y -f install libauthen-oath-perl
Then go to the following menu on your Webmin dashboard.
Webmin -> Webmin Configuration -> Two-factor authentication
Select the two-factor authentication provider you prefer, e.g. Google authenticator is compatible with most 2FA apps. Then click Save to apply the changes.
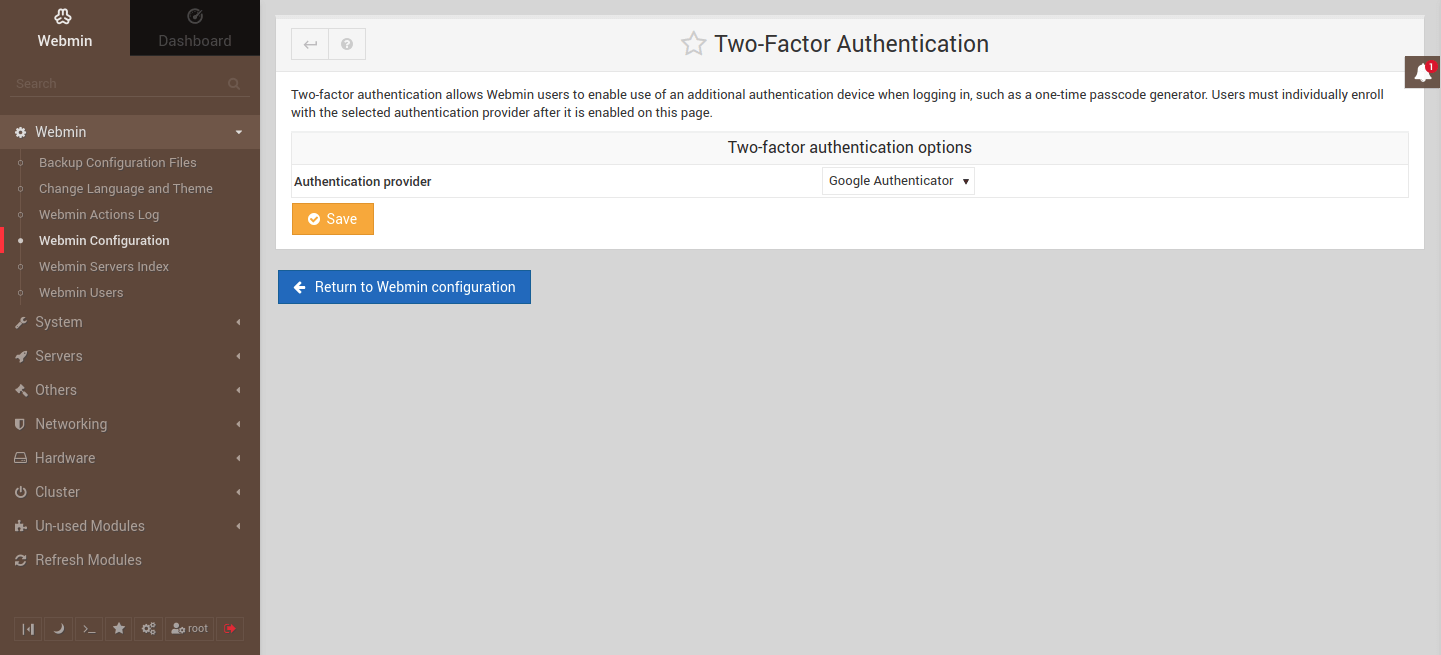
Your browser will reconnect shortly as the server restarts.
Once the module has been enabled, follow the link to the Webmin Users module.
On the Two-factor Authentication page, check that the Personal secret key option Generate randomly is selected and click the Enroll For Two-Factor Authentication button.
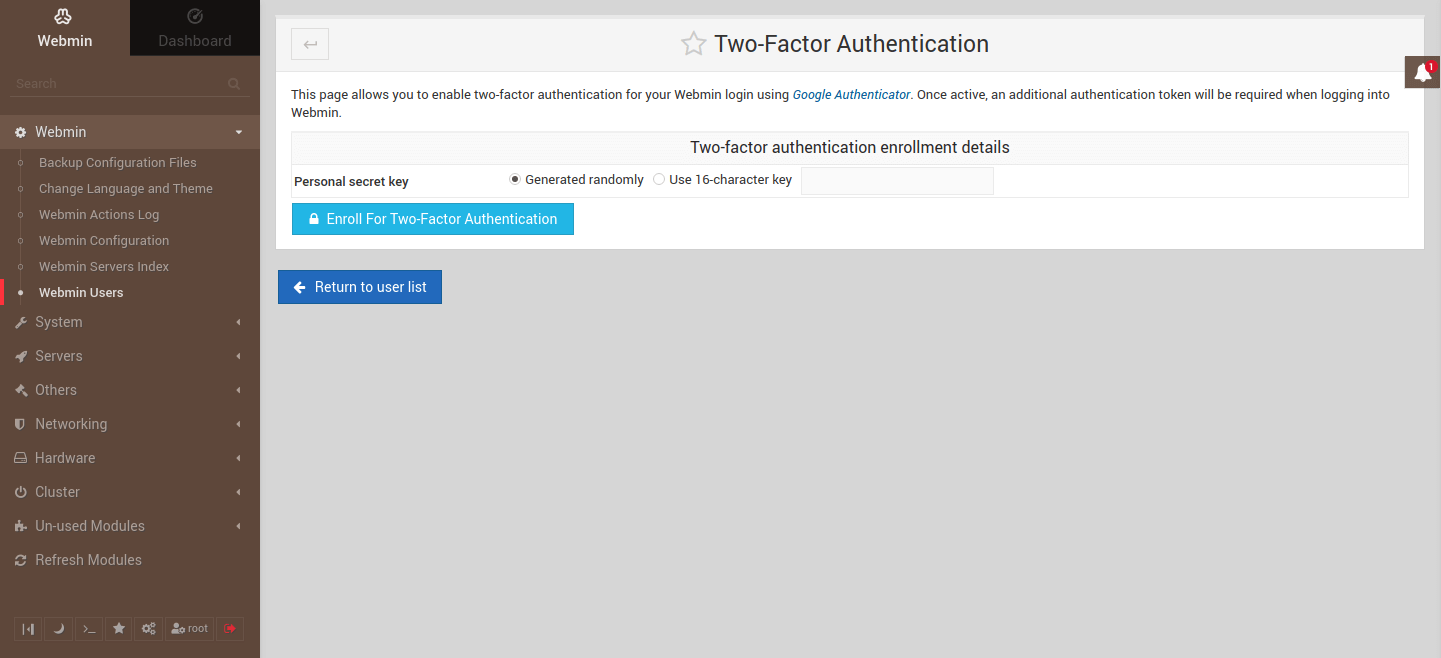
You will then be presented with your secret 2FA code for pairing your authenticator app on your smartphone, for example by using the Google Authenticator.
After you’ve scanned the QR code or manually entered the secret code to your authenticator app, you should see a 6-digit code on the authenticator app which changes once every 30 seconds. Confirm that 2FA was enabled by logging out and logging in now using the 2FA provided by the authenticator app.
Another thing you should consider as Webmin by default allows access using the root account and all accounts with sudo privileges. The reason for that is it needs to run as root or have sudo privileges in order to be able to run all tasks. Same as you run sudo in the terminal.
Webmin -> Webmin Users
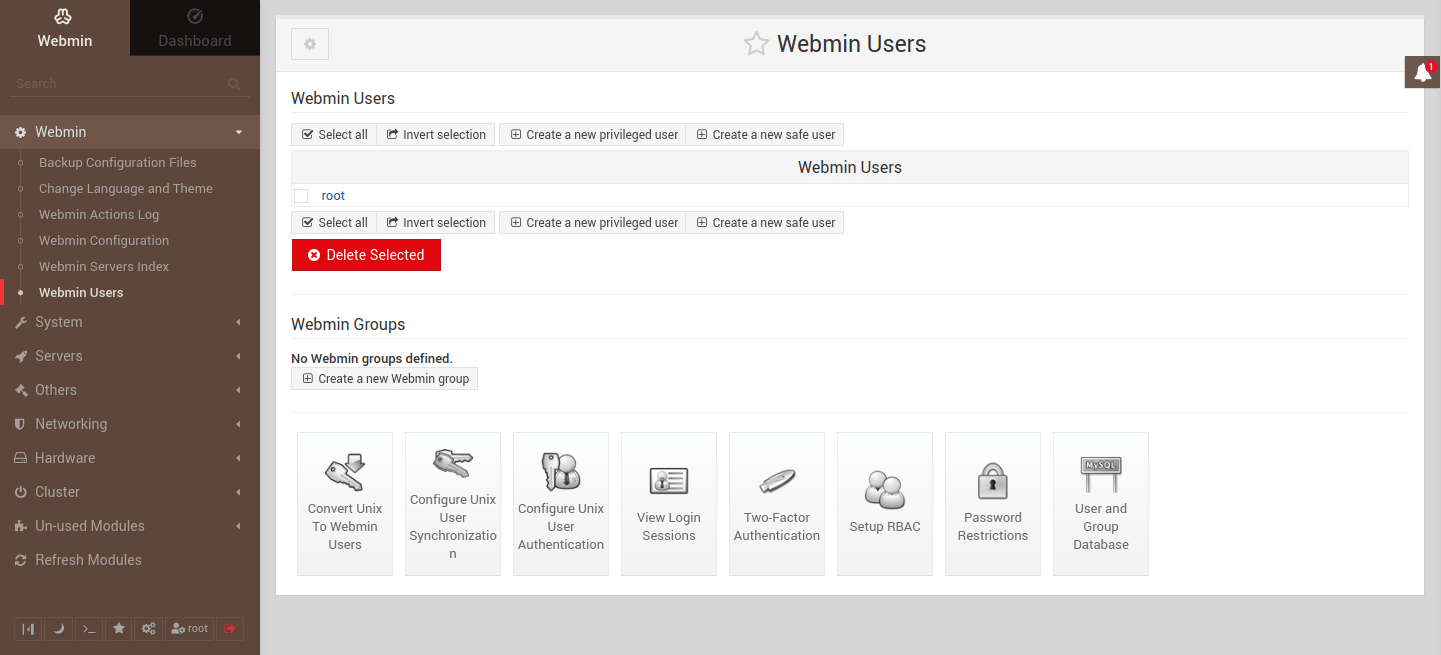
Because of the default access control, another recommended step is to either disable root login on Webmin or remove it entirely and use an existing account with sudo privileges or create a new account for Webmin alone.
Running server updates
Webmin makes the maintenance of your cloud server easy by enabling completing of system tasks directly via the dashboard without the need to worry about the command line. Test it out by updating your server software and enabling scheduled updates by following the steps below.
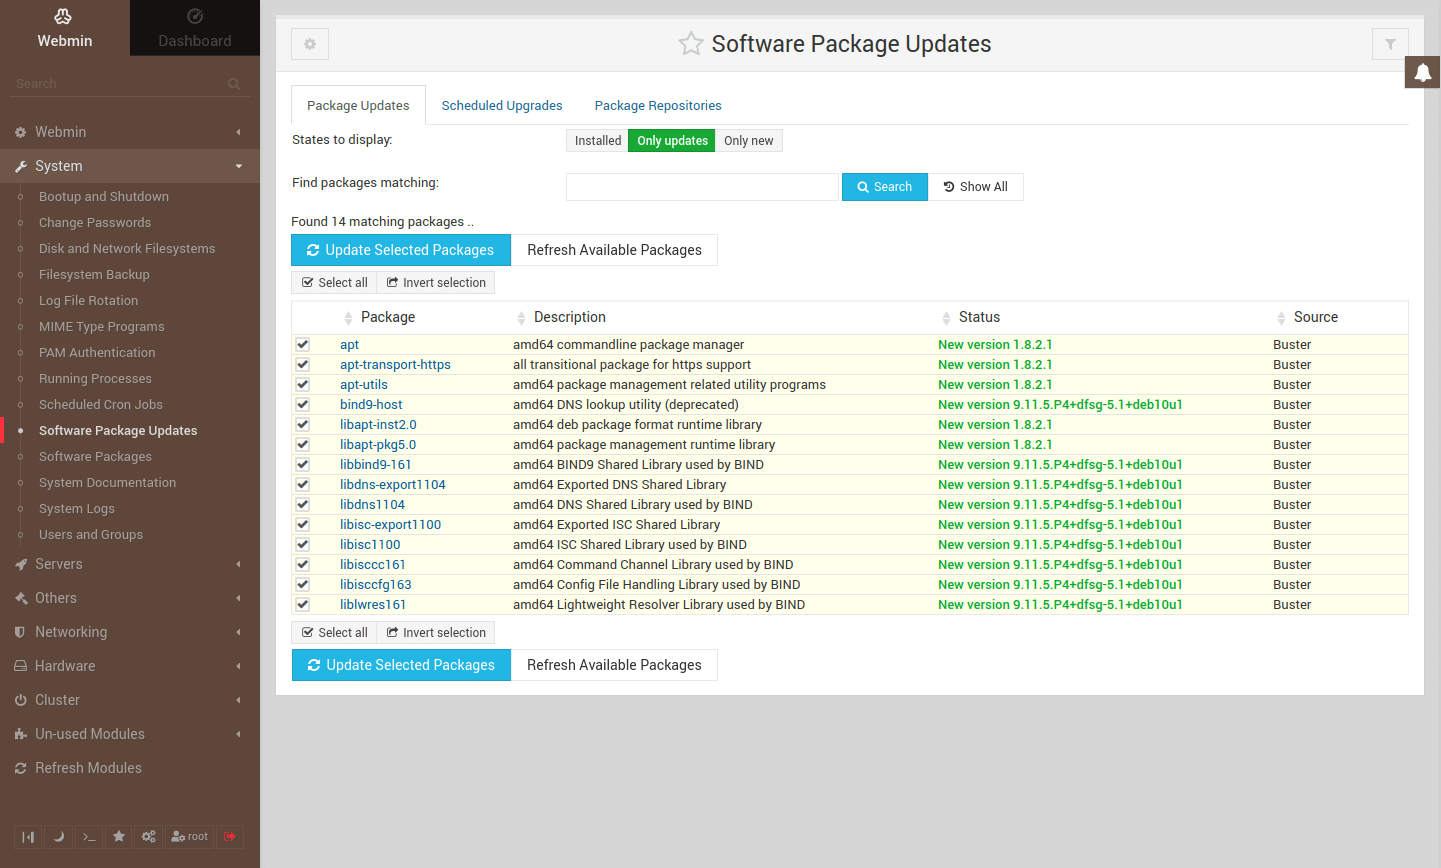
Start by going to the Software Package Updates page where you can check for any currently available updates and run upgrades.
System -> Software Package Updates -> Package Updates
Run the upgrades manually by checking that the available updates are selected and then click the Update Selected Packages button.
Double-check the list of packages selected for update and confirm by clicking the Install Now button.
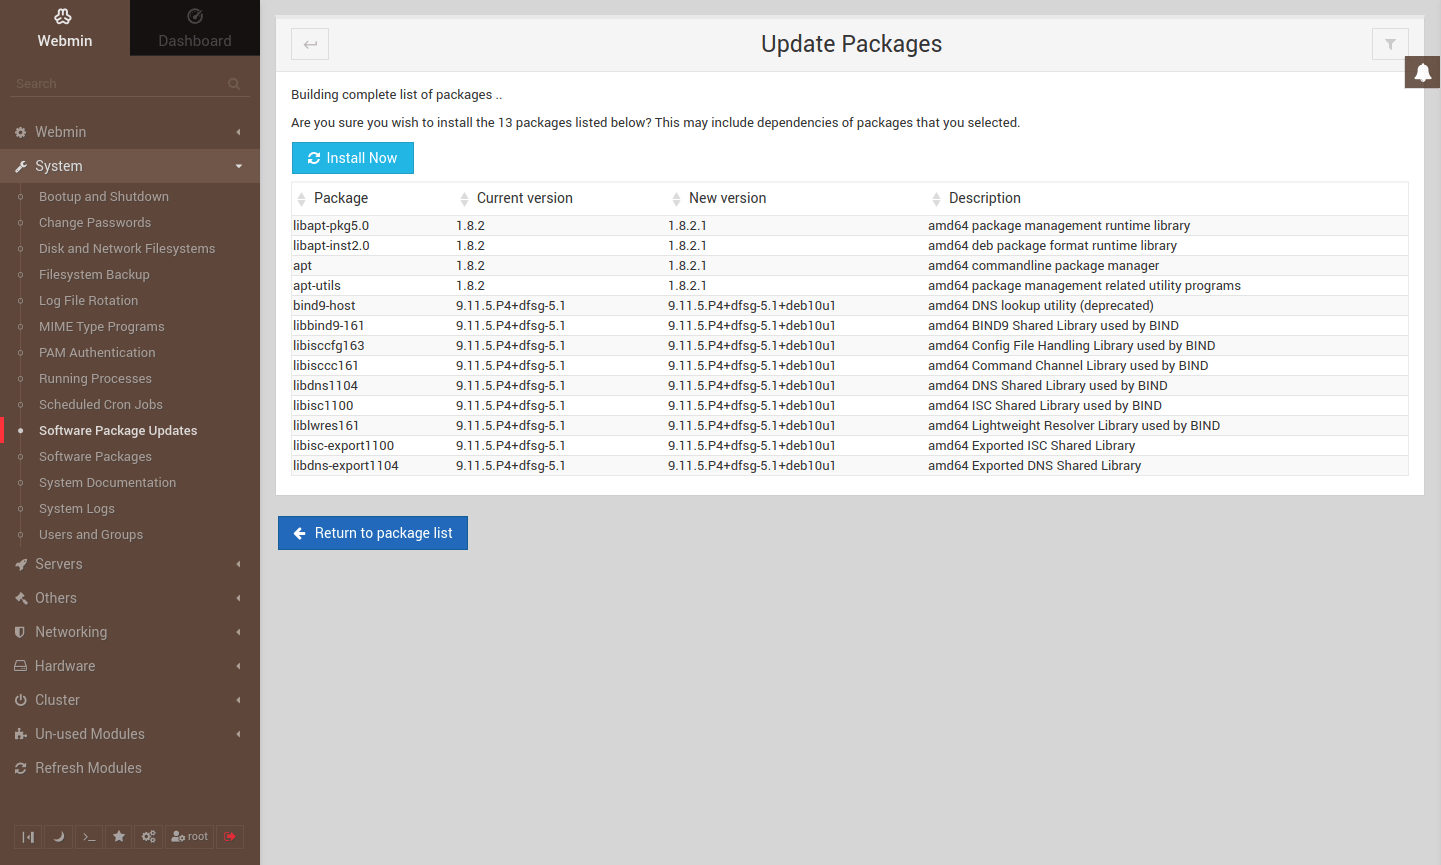
Once the install has finished, click the Return to package list button.
Next, enable scheduled updates by going to the Scheduled Upgrades tab on the Software Package Updates page.
System -> Software Package Updates -> Scheduled Upgrades
Select Yes, every option and pick the interval you prefer, e.g. once a day.
Choose the type of updates to install automatically, either any updates, security updates, or just notify.
Then click the Save button to apply the schedule.
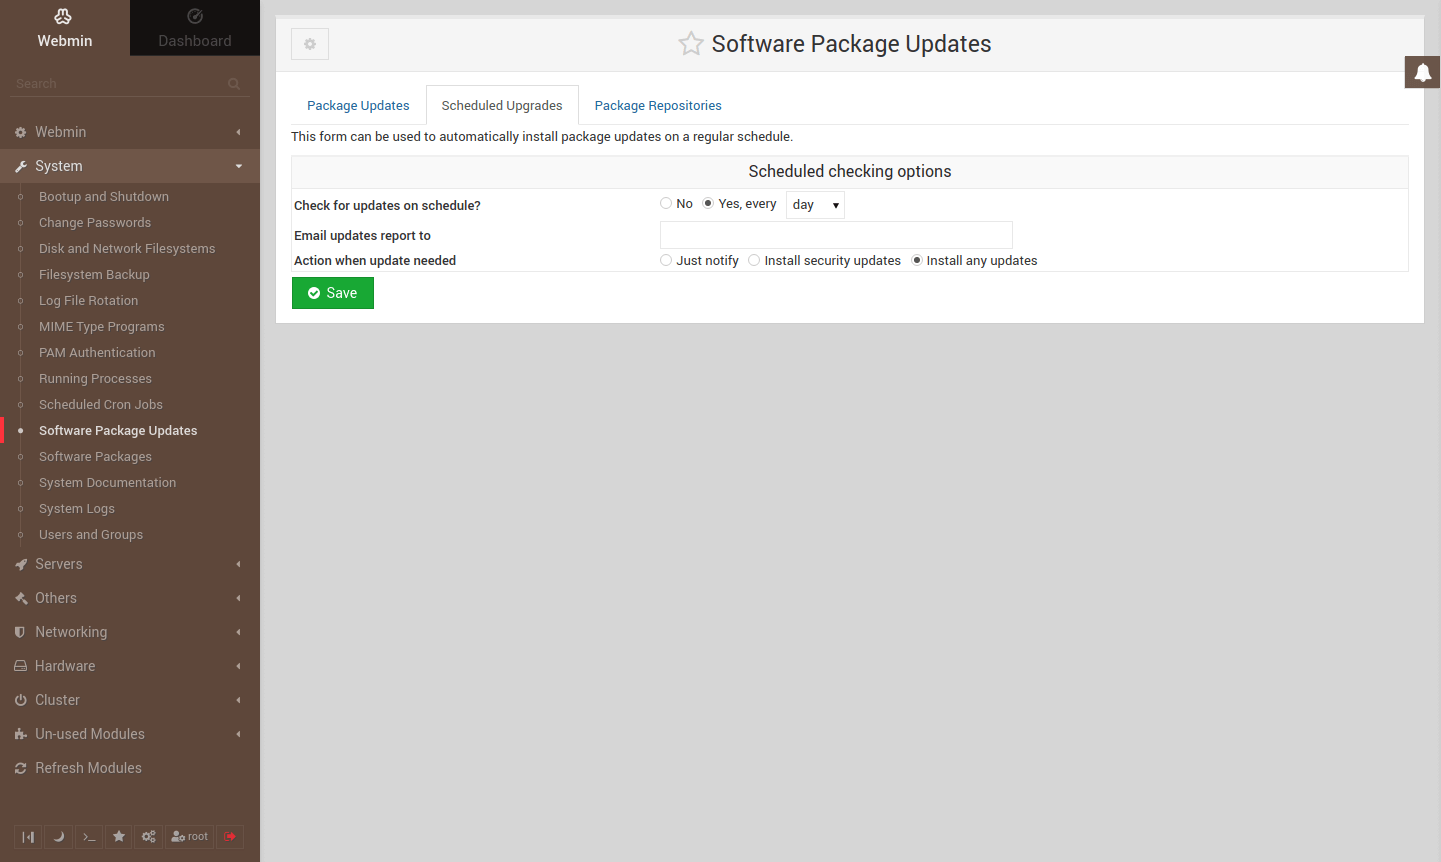
You should get a confirmation that the schedule has been enabled. Webmin will then keep your server up to date automatically.
Replace the self-signed certificate
As mentioned before, you had to accept a security exception to access your Webmin dashboard due to the used self-signed SSL certificates. While the default certificates allow a secure connection, you should obtain a valid certificate from a trusted Certificate Authority such as Let’s Encrypt which offers free SSL certificates.
NOTE
This step requires you to have a valid domain name and to configure an A record pointing to your Webmin server.
Start by installing the Certbot client developed by Let’s Encrypt.
sudo apt install certbot
Once installed, obtain a certificate with the command below. Replace the example domain name with your domain or subdomain.
sudo certbot certonly --standalone -d webmin.example.com
The command starts an interactive configuration script that asks a couple of questions to help with managing certificates.
- On the first installation on any specific host, you’ll need to enter a contact email.
- Then go through the Let’s Encrypt Terms of Service and select Agree if you accept the terms and wish to use the service.
- Choose whether you wish to share your email address with the Electronic Frontier Foundation (EFF) for updates on their work.
If the client was successful at obtaining a certificate you can find a confirmation and certificate expiration date at the end of the client output.
In case you are having problems with the client, make sure you are trying to register a domain or subdomain that currently resolves to your server as DNS configurations might take a moment to propagate. Also, check that you are running the command with sudo privileges.
With the valid certificates now available, we need to tell Webmin to use them instead of the default self-signed certificates.
Go to the Webmin dashboard and navigate to the following menu.
Webmin -> Webmin Configuration -> SSL Encryption -> SSL Settings
Change the Private key file to use the certificate you obtained using Certbot. Replace webmin.example.com with your domain.
/etc/letsencrypt/live/webmin.example.com/privkey.pem
Select Separate file for the certificate and enter the path to the certificate. Again, replace the webmin.example.com with your domain.
/etc/letsencrypt/live/webmin.example.com/cert.pem
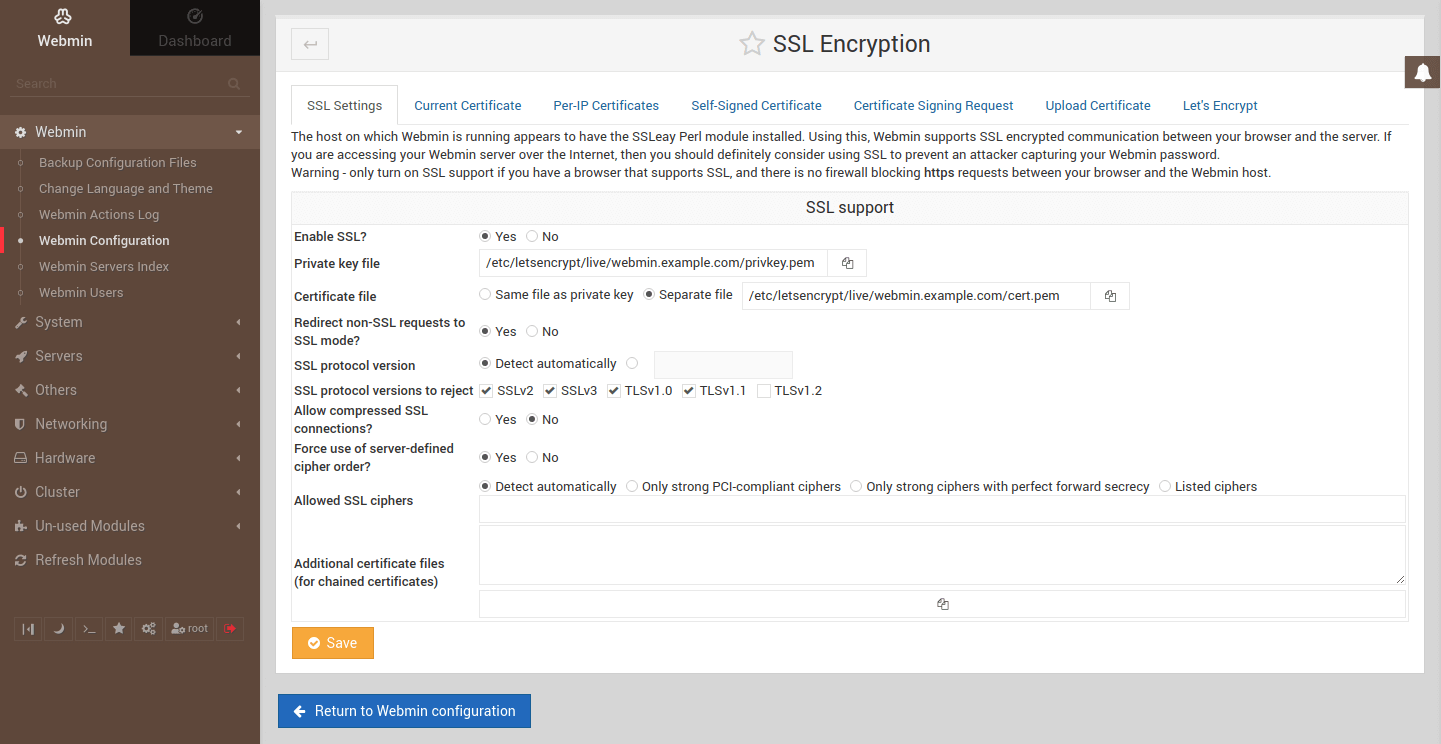
Once done, click the Save button.
Wait for the site to reconnect
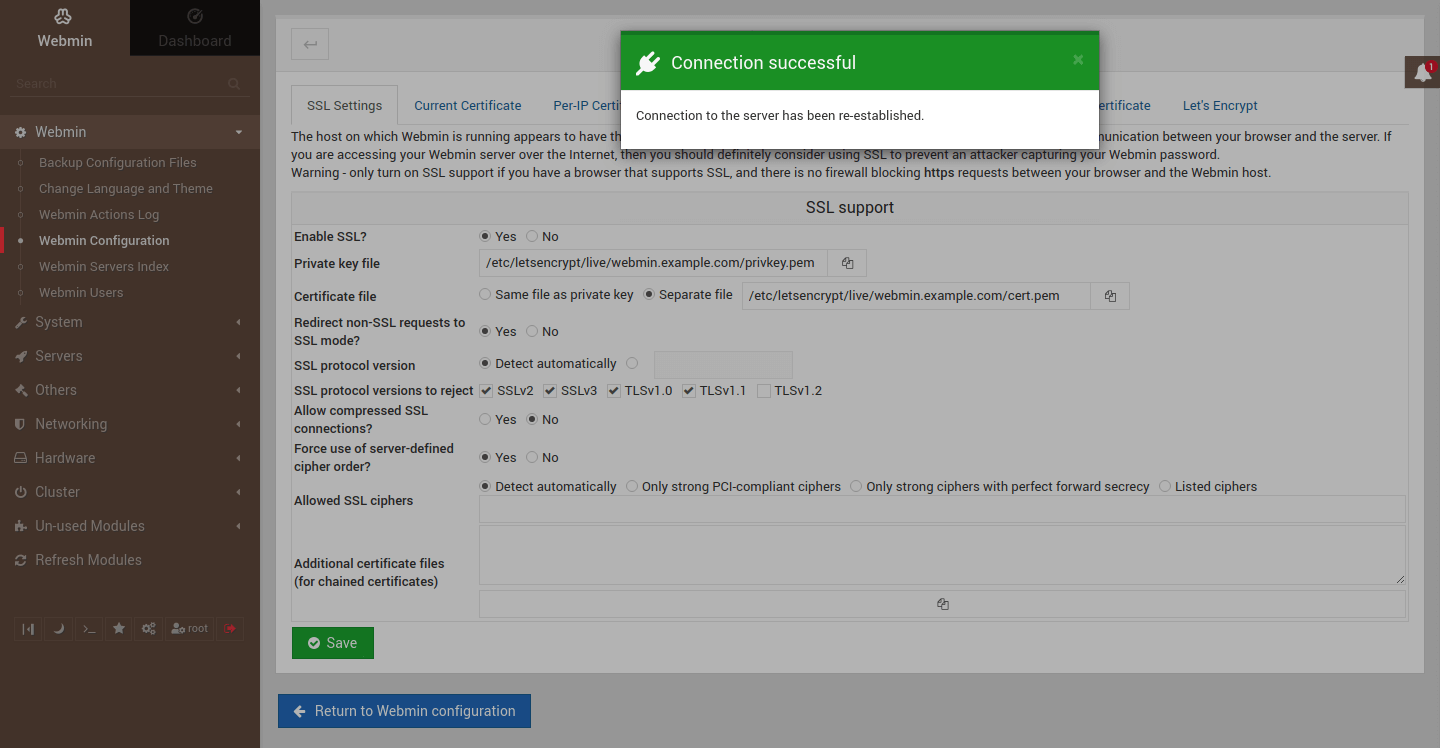
Clear the site data on your browser to delete the cached self-signed certificate.
Reload the login page https://webmin.example.com:10000 and you should now see a closed padlock next to the URL to indicate a secure connection.
Summary
Congratulations! You should now have a fully working and secure Webmin server ready for all web hosting and admin tasks. This guide explained the steps on how to install Webmin on Debian. We covered both methods to install Webmin on Debian with a .deb package and also via the APT repository. We also went over the procedure with the firewall configuration and how to access the Webmin dashboard as well as additional security and maintenance options.
Thank you for your time and happy hosting!
Discussion