Introduction
Containerization technology has revolutionized the way we build, distribute, and run software. It provides a lot of advantages including less resource overhead, portability, and startup speed. The evolution of containerization also paved the way for the microservices architecture to be widely adopted. Since a typical microservices application can be composed of tens or hundreds of separate components, it’s more efficient to use containers for deploying these microservices at scale.
In the world of containers, Docker is considered one of the most adopted tools for building and running containerized applications. Docker is the container engine that enables the creation and running of the container environment, while abstracting the low-level technologies of the Linux kernel that provide the functionality of the containers. This abstraction creates an easy-to-use interface for developers to work with containers.
Docker requires an underlying infrastructure of servers, networking, and storage to satisfy the requirements for running the containers. By leveraging a scalable and performant Cloud environment like UpCloud, we can provide the required infrastructure for running Docker and its containers.
In this guide, we’re going to cover the steps for installing and configuring Docker on a Cloud server using UpCloud. We’ll then go through the process of building and running a containerized application with Docker. Throughout this guide, you’ll be able to practice the following:
- Installing Docker on a Linux server
- Create a Dockerfile for an application
- Build a container image from Dockerfile
- Run a container from the image using Docker
Prerequisites
To follow along with this guide, you’ll need to:
- Create an UpCloud account: This gives you access to different UpCloud services using the GUI control panel, command-line interface, or the API.
- Deploy a Cloud server on UpCloud: This is going to be our target server where we’ll install Docker and run our containers.
- Create a Docker Hub account: Docker Hub is a centralized location for publishing and distributing container images. We’ll use it in this guide to work with our image.
- Familiarity with using the CLI: We’ll be using some basic commands throughout this guide to install our tools, navigate project directories, and work with SSH.
Installing Docker
Let’s begin by installing Docker on our Cloud server. For this guide, we’ll be using an Ubuntu server, but you can find the steps for other operating systems on Docker’s official documentation.
Connect to your UpCloud server using SSH. You’ll first need to generate an SSH key and use it for your server. Then you can use the command ssh -i <key-file> root@<server-IP>.
Next, install Docker using the following steps:
1. Remove any unofficial packages that might conflict with the installation packages.
for pkg in docker.io docker-doc docker-compose docker-compose-v2 podman-docker containerd runc; do sudo apt-get remove $pkg; done2. Update apt package repository index.
apt-get update3. Add Docker’s official GPG key.
apt-get install ca-certificates curl
install -m 0755 -d /etc/apt/keyrings
curl -fsSL https://download.docker.com/linux/ubuntu/gpg -o /etc/apt/keyrings/docker.asc
chmod a+r /etc/apt/keyrings/docker.asc
4. Add the Docker repository to Apt sources.
echo \
   "deb [arch=$(dpkg --print-architecture) signed-by=/etc/apt/keyrings/docker.asc] https://download.docker.com/linux/ubuntu \
   $(. /etc/os-release && echo "${UBUNTU_CODENAME:-$VERSION_CODENAME}") stable" | \
   sudo tee /etc/apt/sources.list.d/docker.list > /dev/null
5. Update the repository index again.
apt-get update6. Install Docker.
apt-get install docker-ce docker-ce-cli containerd.io docker-buildx-plugin docker-compose-plugin7. Verify the Docker installation and version.
docker --versionIf the installation was successful, the output will print the Docker version.
Docker version 28.0.4, build b8034c0
Preparing the Local Environment
Now that we’ve Docker installed and running on our server, the next step will be to clone the project repository from GitHub to our local environment so we can work on it. Let’s first verify that Git is installed correctly on our machine with the following command:
git --versionIf the output shows the version of Git, this means that it’s already installed.
git version 2.43.0Next we’ll need to clone the repository with the following command:
git clone https://github.com/Amr-tmorot/sample-python-app.gitThis will create a local copy of the repository on our environment:
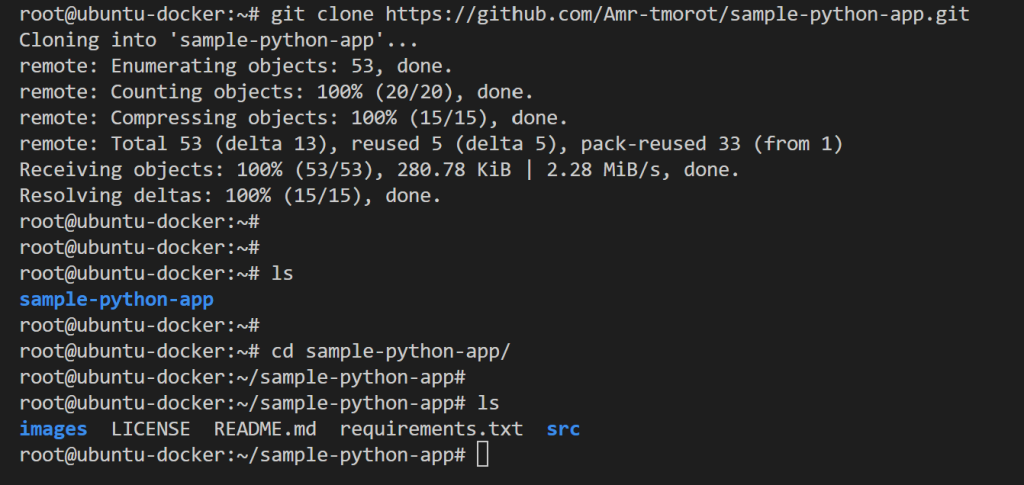
As we can see in the above image, the project files are now pulled to our local machine. For this guide, we’re mostly concerned with the src directory and the requirements.txt file.
The src directory contains the source code for our application, which is a simple Python Flask application that prints a “Hello World” message, and runs on port 5001 by default. The requirements.txt file contains a list of the dependencies (packages/libraries) that we need for our application.
Create and Inspect the Dockerfile
The Dockerfile is a text file which contains instructions and commands that Docker uses to create and build a container image. To containerize our application, create a Dockerfile with the following steps:
1. Create a new file with the name Dockerfile in the root of the project directory.
touch Dockerfile2. Open the file with a text editor and paste the following content:
FROM python:3.8.0-alpine3.10

USER root

WORKDIR /app
COPY src/ /app/src/
COPY ./requirements.txt /app

RUN pip3 install --upgrade pip
RUN pip3 install --no-cache-dir -r /app/requirements.txt

USER 1001

ENTRYPOINT ["python3", "/app/src/app.py"]
These instructions in the Dockerfile follow the specification reference for the syntax.
Now let’s understand our Dockerfile contents:
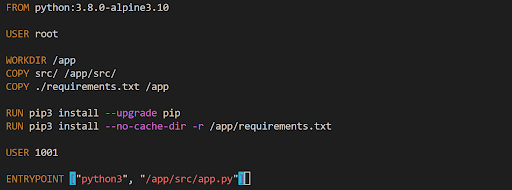
In the above image, we can see our Dockerfile starts with a FROM instruction, this specifies the base image that we’ll use. A base image is a starting layer from which we’ll build our container image, it typically contains a minimal operating system and other tools that we’ll need for our container. Here we use the python:3.8.0-alpine3.10 base image which will contain Python for running our application.
The USER instruction specifies which user you want to execute the commands with during the image build process. Here we specify the root user.
The WORKDIR instruction specifies the working directory inside the image that we need to use for the following instructions. Here we specify the /app as our working directory.
The COPY instruction copies files from our local environment filesystem to the image filesystem. Here we copy our src folder and the requirements.txt file inside the image’s /app directory.
The RUN instruction executes a specific command during the build process. Here we first upgrade the pip package manager, and then we use it to install the dependencies in our requirements.txt file.
Finally, the ENTRYPOINT instruction specifies the process or the command that will run when a container is started from this image. Here we want to start our Python application from its source file app.py.
Building the Container Image
Now that we understand our Dockerfile, it’s time to build a container image from it. Building an image is the process of executing the instructions inside the Dockerfile to create actual binary data that includes our application, dependencies, and any other files that we copied to the image.
The image build process creates the image on the local filesystem, which is not an efficient option if we want to publish and share the image. Therefore, we need a centralized location where we can store our image and access it from multiple places. This location is the image registry, which in our case is Docker Hub.
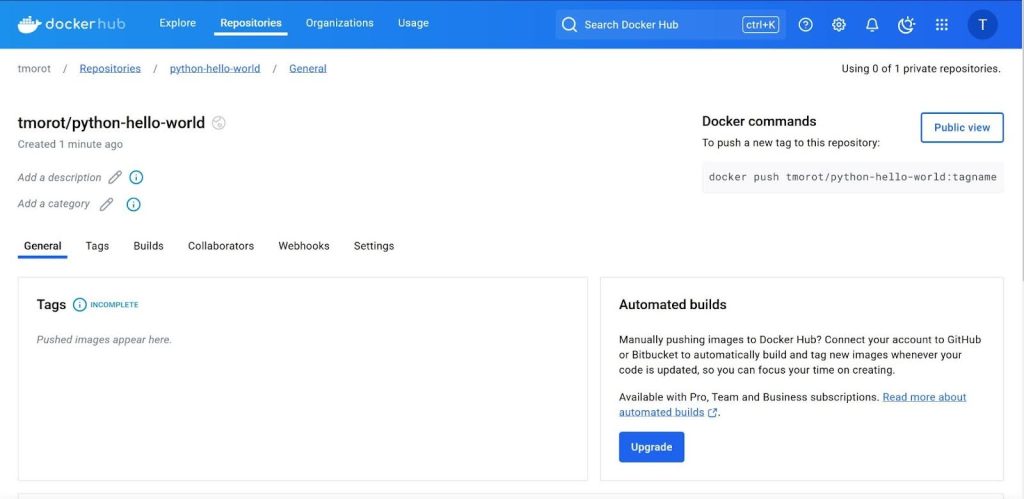
So before starting the build process, go to your Docker Hub account and create a repository to store the image.
I’ve created my repository with the name python-hello-world:
Now to build the image from the Dockerfile we can use the following command:
docker build -t <username>/<repository> .Replace the <username> above with your Docker Hub username, and the <repository> with the repository name that you just created on Docker Hub.
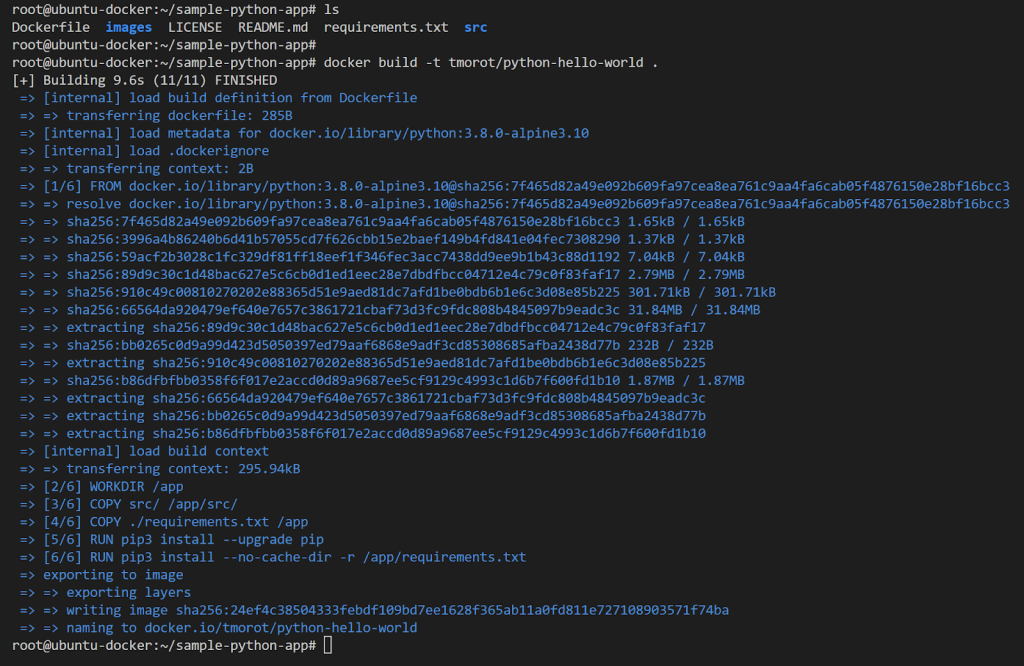
In the above image, we can see the logs of our build process showing the execution of our Dockerfile instructions.
Once the build is complete, we can push our image to the Docker Hub repository. Since we already tagged our image with the repository name, we can use the same tag to push the image with the following command:
docker push <username>/<repository>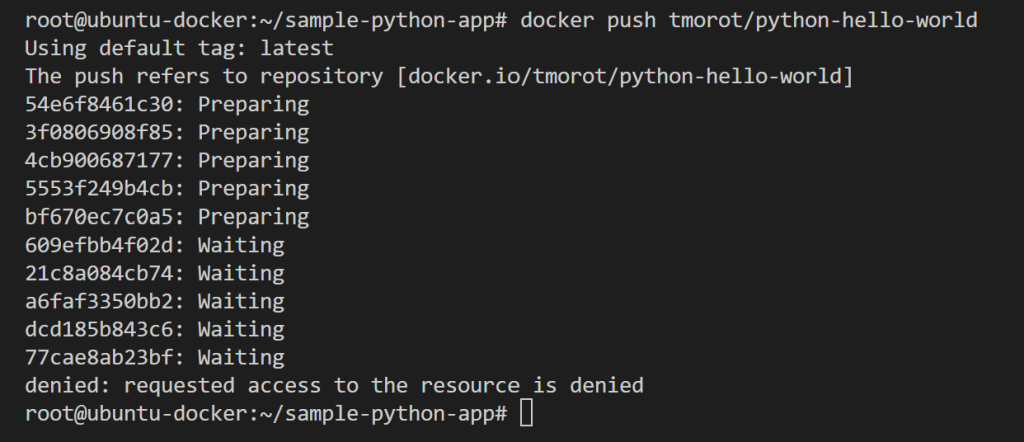
If you receive an access denied error like the above, this means you need to authenticate to your Docker Hub account from the command line. We can do this with the following command:
docker login -u <username>Again replace the <username> with your Docker Hub user.
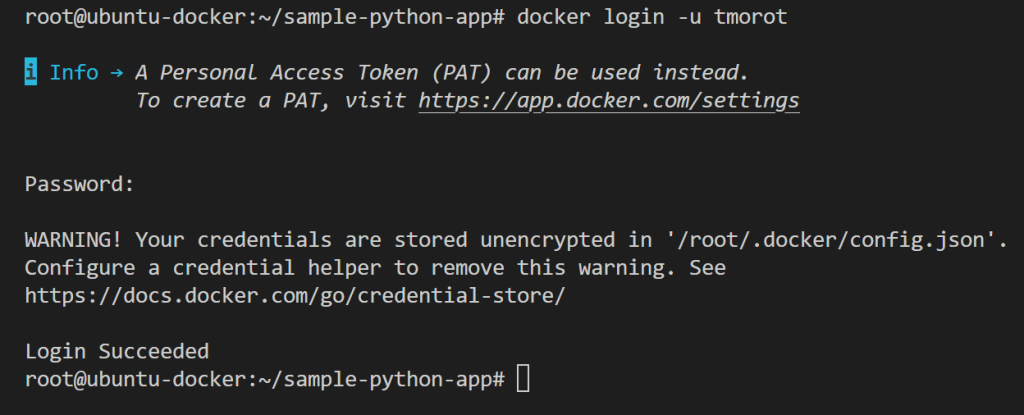
You can then try to push the image again and should be successful.
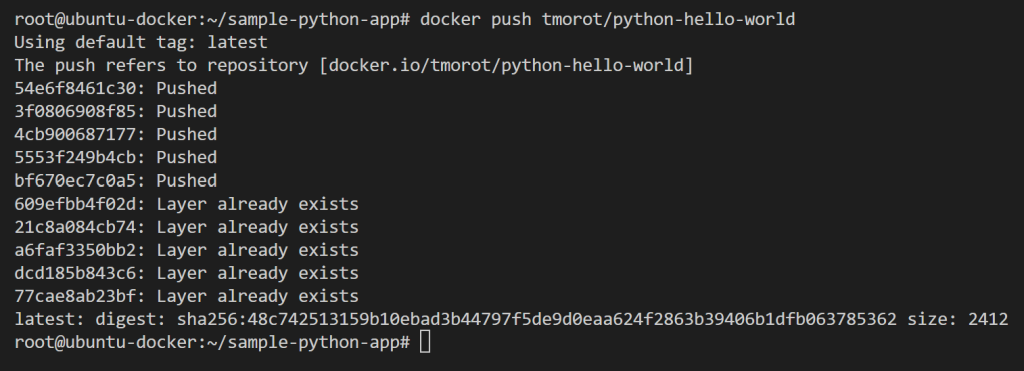
Now that our image is pushed to the registry, we can use it from anywhere that has access to this registry.
Running a Container From the Image
Since we already have our image in the registry and we configured our local environment to access it, starting a container from this image is a matter of running the following command:
docker run -p 5001:5001 <username>/<repository>In the above command, we’re telling Docker to start a new container and expose port 5001 (the port that the application listens on) from inside the container to port 5001 on our local host machine. As you did previously, replace the <username>/<repository> with your Docker Hub user and the image repository name.
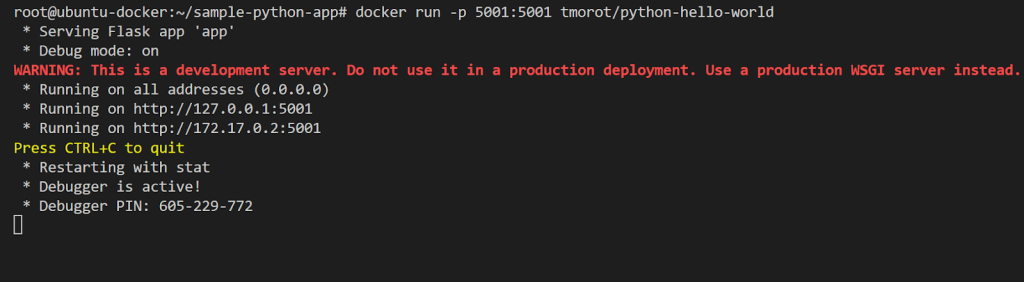
The container is now running and the application is listening for requests. Now leave this terminal open and open a new one to send a simple request using the following commands:
curl localhost:5001
curl localhost:5001/ping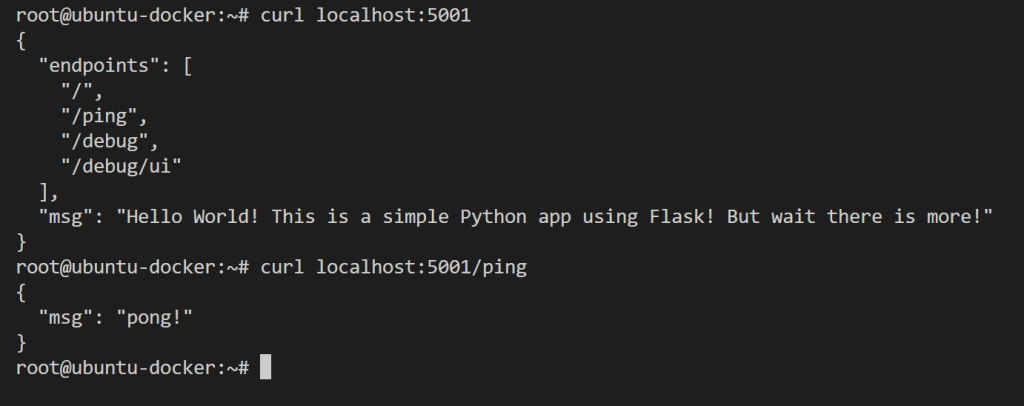
As we can see, the endpoints are responding correctly to our requests which means that our application is running as expected.
Conclusion
Containerization has offered great advantages when building and running software. It allows for better resource utilization, more portability between environments, and faster startup times. Docker is one of the most adopted tools in the container technology landscape. It offers a way to build and run containers with simple commands while abstracting the low-level complexity. In this article, we covered a step-by-step walkthrough for installing Docker and running a containerized application using UpCloud cloud servers. We started by creating a Dockerfile that specifies what the image should contain. Then we built and pushed the image to the Docker Hub registry. Finally, we tested our image by running a container from the image on our cloud server.
Ready to build and deploy your containerized application in the Cloud? Try UpCloud now and create a scalable and performant infrastructure for your container environments.
Discussion