GridPane is your one-stop shop for WordPress hosting management with support for all the popular cloud providers. With GridPane, you can install their highly-performant web server stack in minutes. Your visitors won’t waste a single second waiting for pages to load.
GridPane also takes care of many of the security steps right out of the box. It includes integrations with security software such as WAFS, Fail2Ban, Maldet + ClamAV malware scanning and multiple Nginx site hardening options.
Deploy and manage your own enterprise-grade web servers to build your WordPress hosting business with GridPane and UpCloud.
Signup on UpCloud
First things first, if you have not yet registered on UpCloud, begin by getting signed up. Follow the link here to register for a free trial to get started!
Configuring UpCloud API access
To allow GridPane to access to your UpCloud account through our API, you first need to set up API permissions. We recommend creating a new workspace member account specifically for API usage with its own username and password for each external service you might use. This allows you to limit API access and specify permissions for increased security.
- First, log into your UpCloud Control Panel and go to the People section.
- Create a new workspace member for the API access by clicking the Add button.
- Set the username and password for the API subaccount. These are comparable to an API ID and key pair with the added benefit of being able to set them yourself.
- Enter the contact details for your API credentials and enable API access in the permissions.
- By default, the new API subaccount will have full permissions to any resources it creates but no access to existing servers or storage. You can leave the access settings to their default values.
- Once done, click the Create subaccount button.
If you want to learn more, you can find detailed instructions on how to handle API credentials in our beginners’ guide for UpCloud API.
Once you have a workspace member account for GridPane API access, continue ahead to their platform.
Registering on GridPane
Register on GridPane and start your 14-day trial. GridPane offers a 2 week free trial on Pro and Developer plans. You will need to enter a valid credit or debit card to start the trial but you won’t be charged before the end of your trial.
Deploying your first server
GridPane allows you to quickly and effortlessly deploy cloud servers on multiple infrastructure providers. To enable GridPane to access your UpCloud account, you’ll need to enter the API credentials you created in the earlier step.
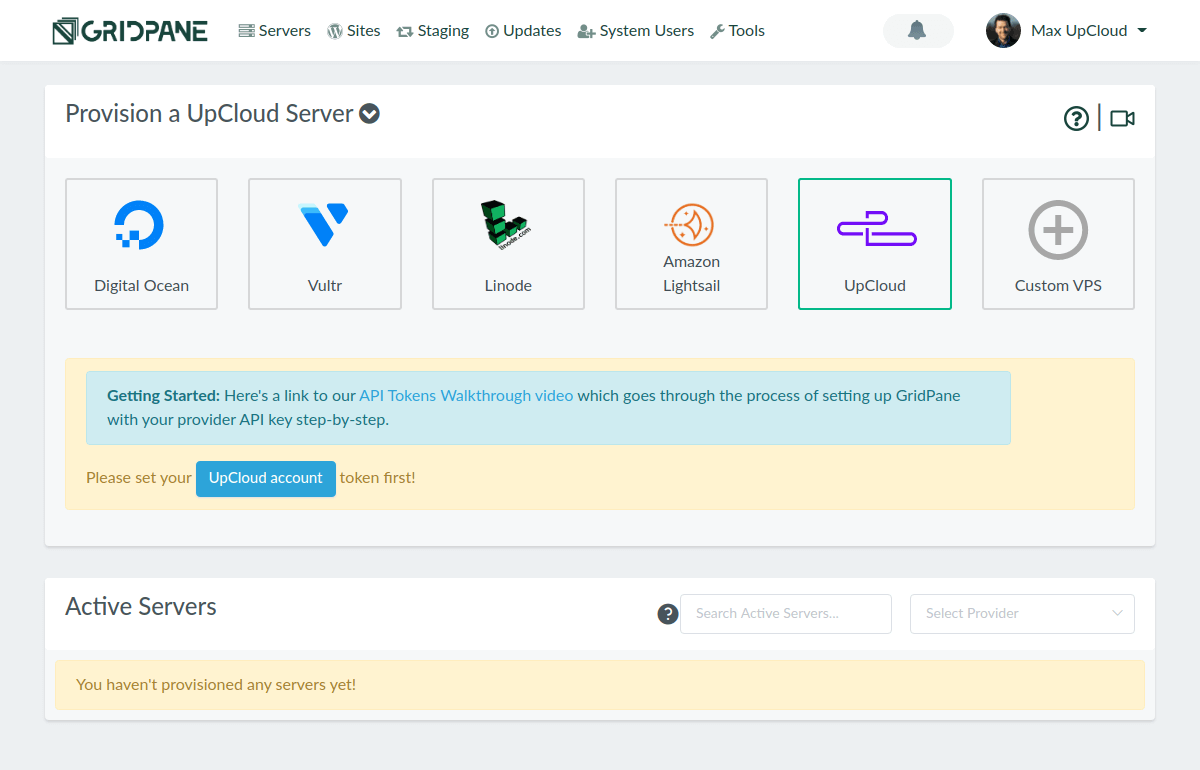
When you log in to GridPane, you’ll be greeted by their clean dashboard with the option to get started straight away. Select to provision a cloud server on UpCloud. You will then be prompted to enter your UpCloud account token.
Click the UpCloud account button to get started.
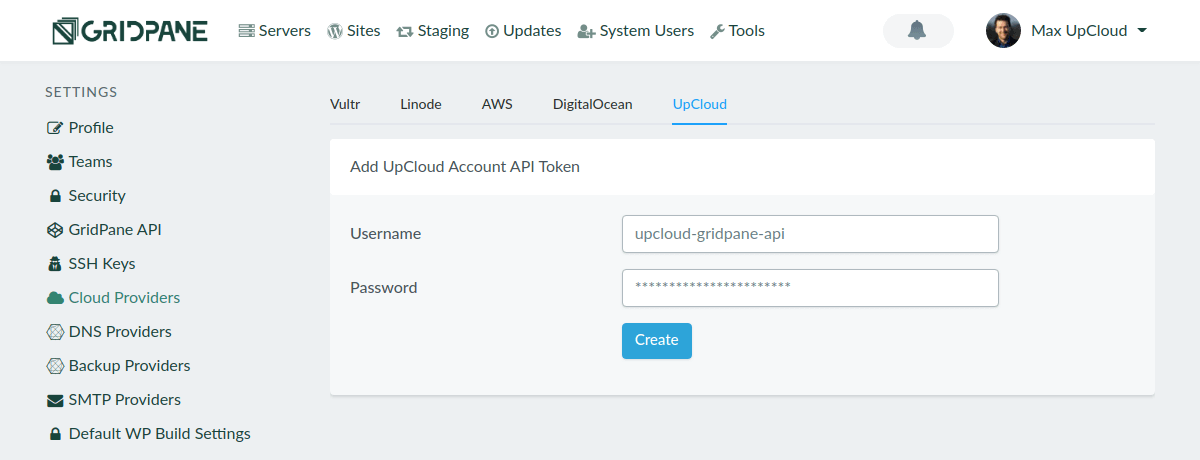
This will take you to the Cloud Provider settings.
Enter the username and password for the subaccount you created for the API access.
Then click the Create button to save the credentials.
Once done, click the Servers link in the navigation bar at the top to return to the server deployment.
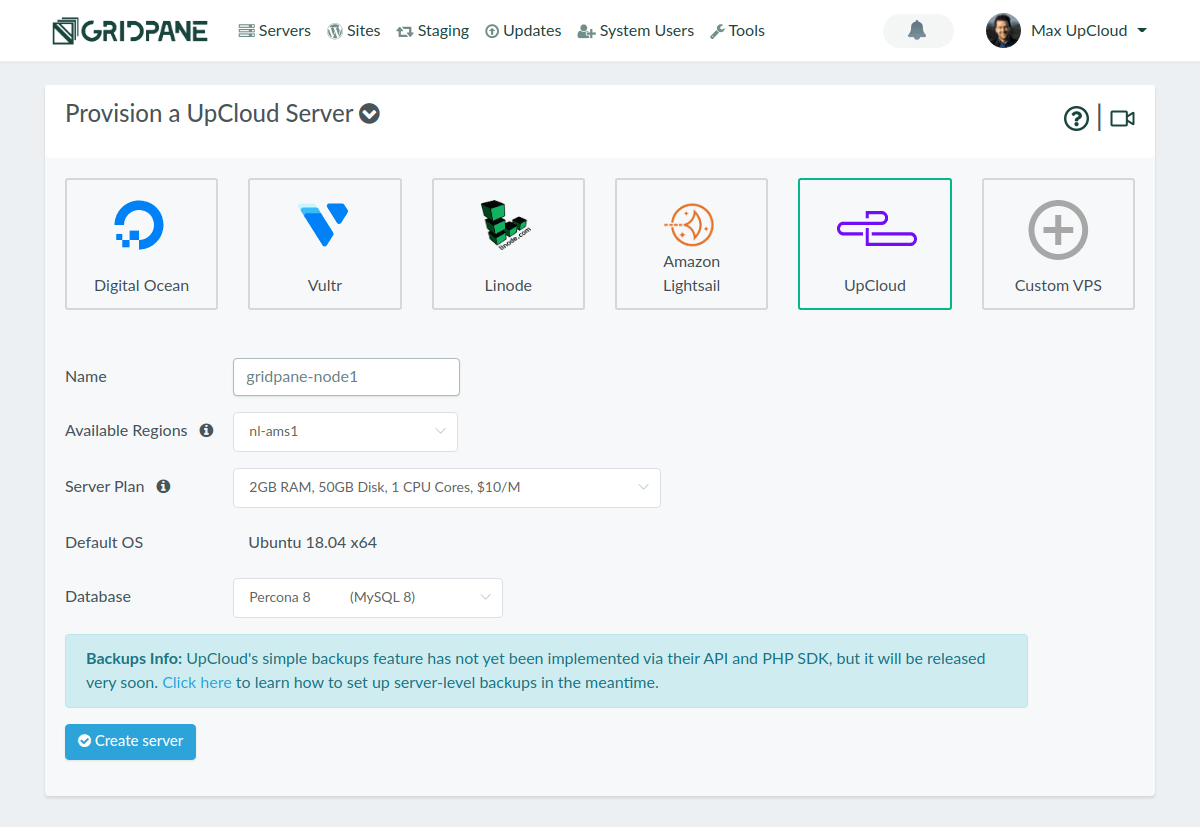
Next, configure your UpCloud cloud server.
- Name your cloud server to recognise it when logging in to your UpCloud Control Panel.
- Select the location you want the server deployed to, you can check the list of available UpCloud locations in our documentation.
- Choose your server plan as needed, a higher plan will be capable of running more concurrent websites but this can also be increased later via your UpCloud Control Panel.
After you’ve made your selection, click the Create server button to deploy the server on UpCloud.
GridPane will then deploy the cloud server according to your configuration using the UpCloud API as well as provide it with the full suite of web server software.
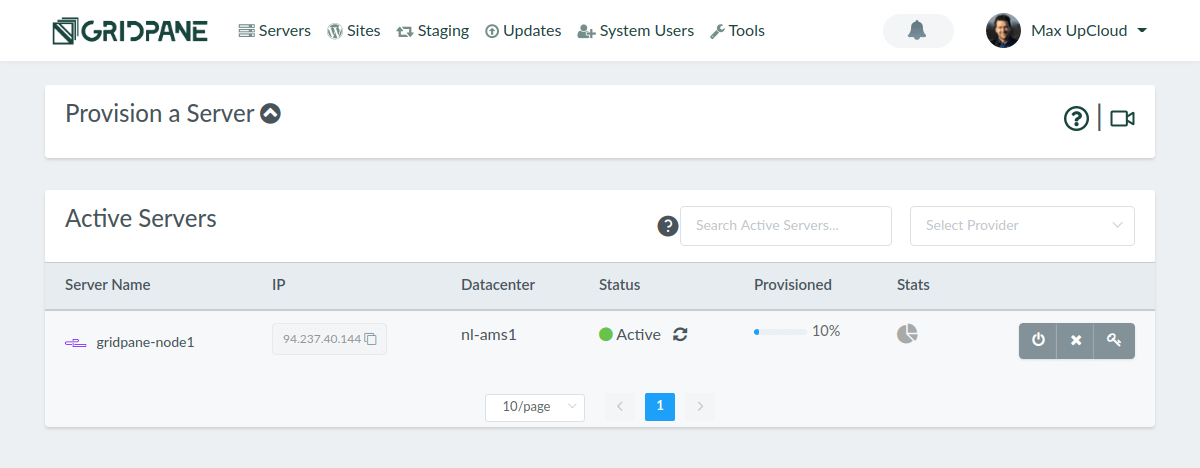
You can follow the provisioning progress on the servers page on your GridPane dashboard.
The deployment and provisioning might take a couple of minutes so feel free to explore the GridPane dashboard in the meanwhile.
This point is also an excellent time to set up DNS records for your website. If you use the Cloudflare DNS servers to manage your domain, you may wish to also configure GridPane with API access to your Cloudflare account. Check the optional section below on how to accomplish this.
Alternatively, use the IP address shown in the Active Servers list and create an A record for the domain name you wish to use to it at your domain registrar’s portal.
Check back after a while to see if your server shows the status Active and Provisioned completed as in the example below.
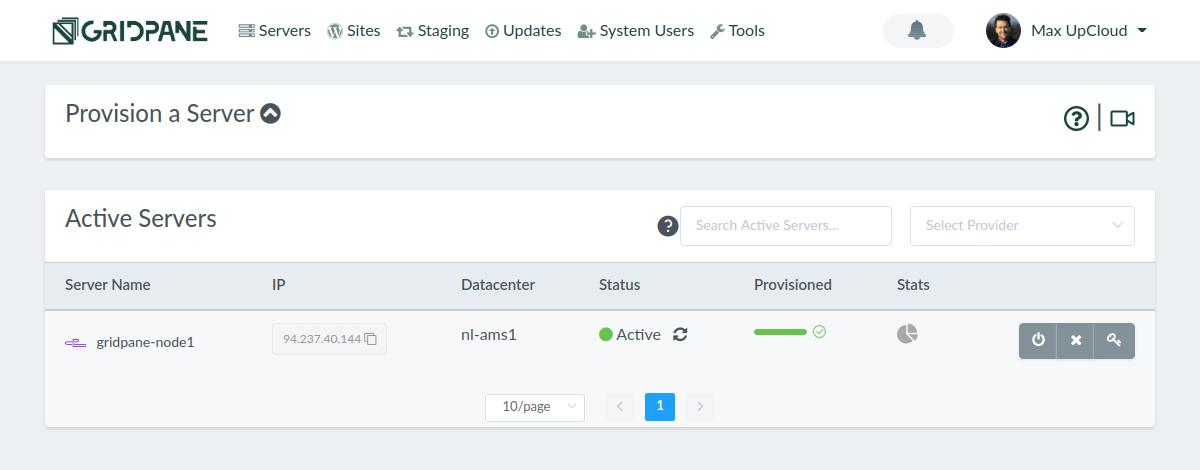
Once GridPane has finished provisioning your cloud server, you are ready to create your first website.
Optional: Configuring DNS provider
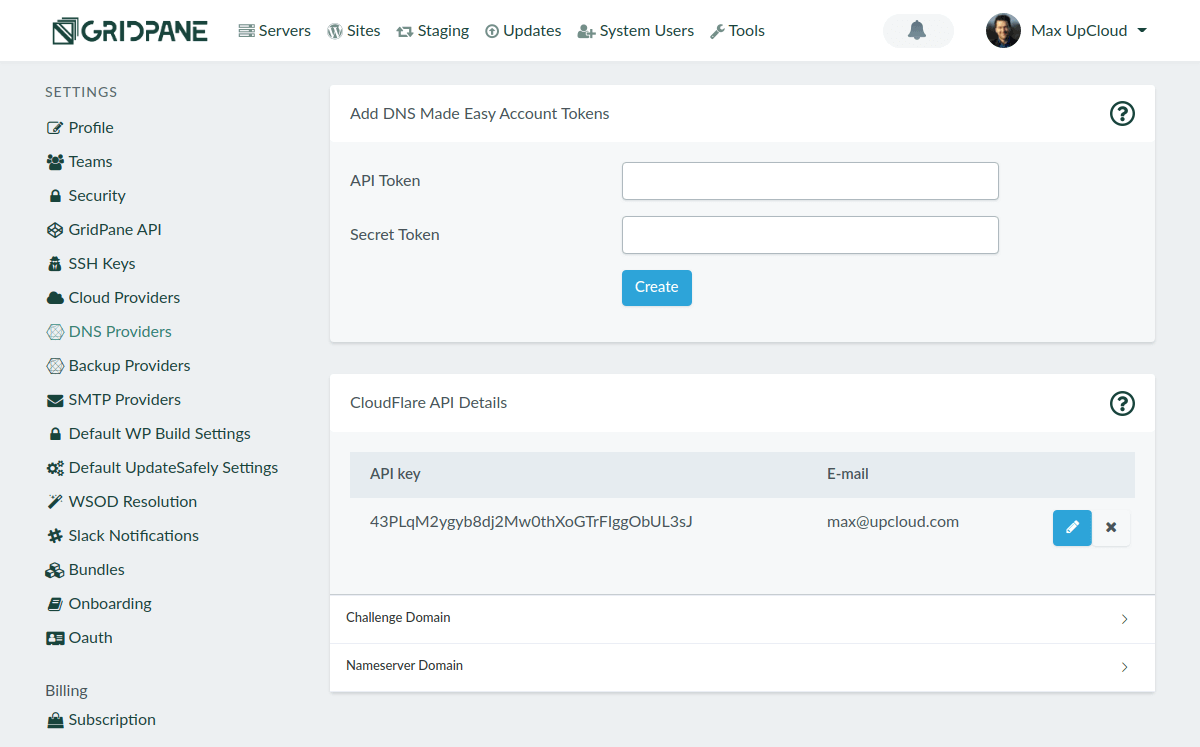
GridPane includes an option to automatically manage your domain name records if you configure it with the necessary API access. They currently support Cloudflare and DNS Made Easy which can be configured at your GridPane account settings.
For example, to enable GridPane to manage your domain records on Cloudflare, you’ll need to provide it with your Cloudflare API key and the email address attached to the account. You can find the API key at your Cloudflare account details.
Click the View button on the Global API Key. Then authenticate by entering your Cloudflare password and completing a captcha. Afterwards, copy your API key which needs to be entered in Gridpane account settings.

Next, go to your GridPane account settings and find the DNS Providers section.
Enter the Cloudflare API key and the email attached to the Cloudflare account, then click the Create button to save the API access details.
Once saved, GridPane is able to automatically create the necessary domain name records when creating websites. No need to hop between control panels, you can have new websites configured in minutes without ever needing to worry about DNS records.
Creating your WordPress site
GridPane allows you to customize the way you build your WordPress sites. Install your favourite plugins and theme, set your caching, DNS, PHP worker type, WAF, SMTP integration and more.
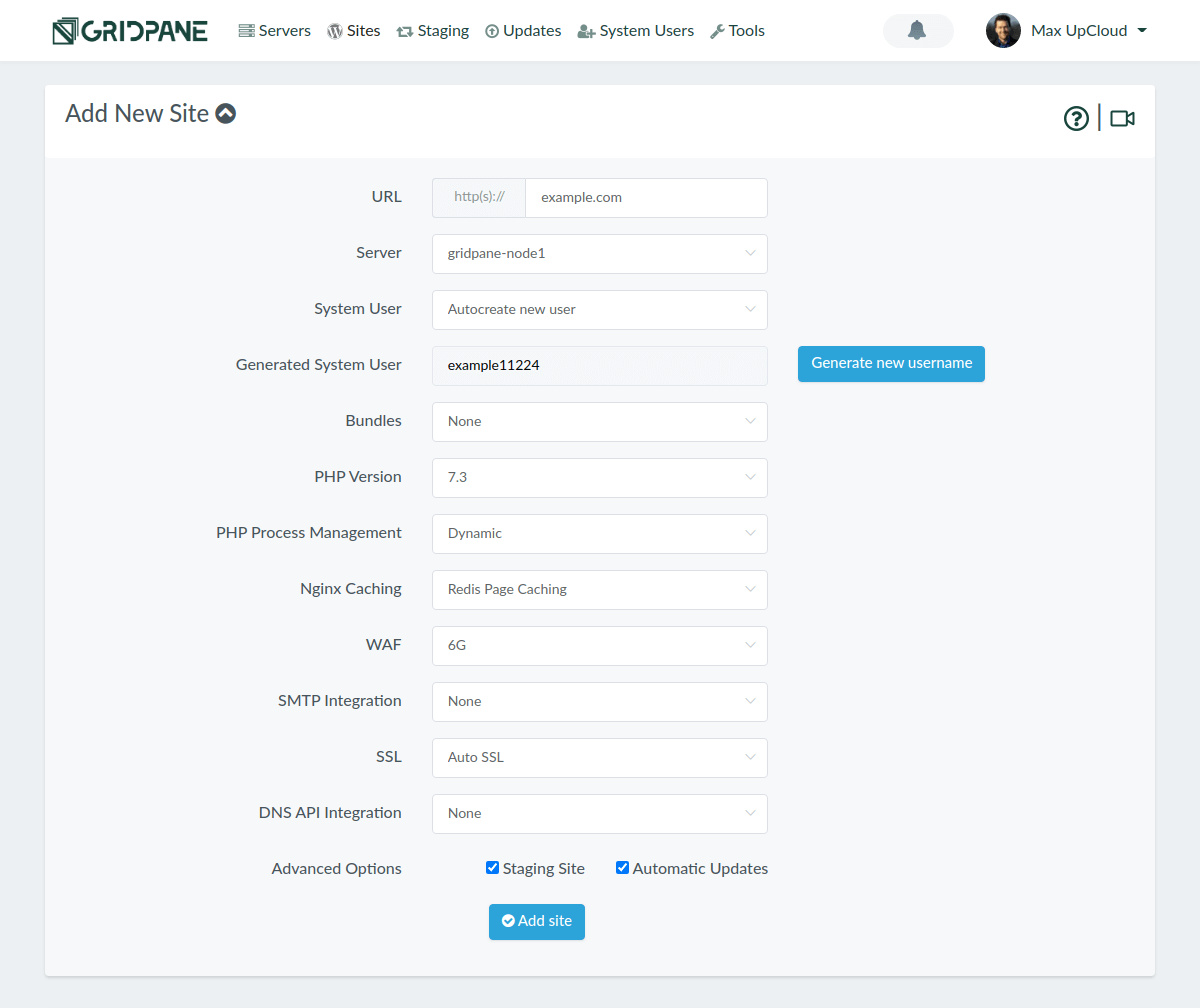
Go to the Sites section by clicking the link in the navigation bar at the top of your GridPane dashboard. Then enter your website details as required.
- Set your site URL to the domain you’ve pointed to the server IP.
- Select the server you deployed earlier.
- Choose if you want to use the autogenerated system user or set one yourself.
- Then select the PHP version, Nginx caching, and WAF (web application firewall) as needed.
- If you already created a domain name record, you can also choose to have free SSL certificates installed automatically.
- On DNS API integration, if you configured Cloudflare or DNS Made Easy account, you can select to have GridPane create the DNS records.
- Lastly, choose if you want to enable a staging site and automatic updates.
Once all set, click the Add site button to create it.
GridPane will then begin installing your website as requested. Once completed you will find the website on the list of Active Sites.
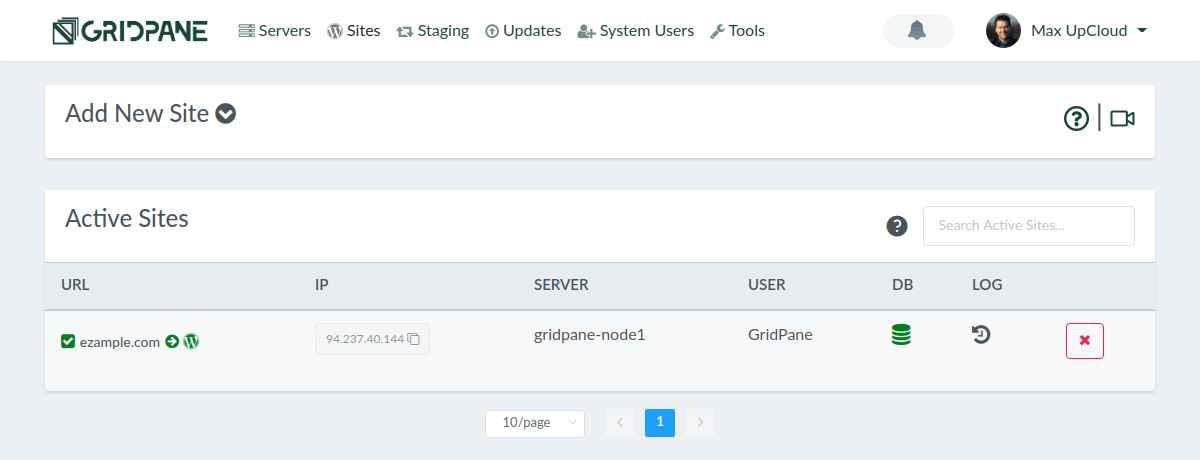
Your new WordPress website should now be up and running. Check that the site can be reached by clicking the arrow icon next to your site domain.
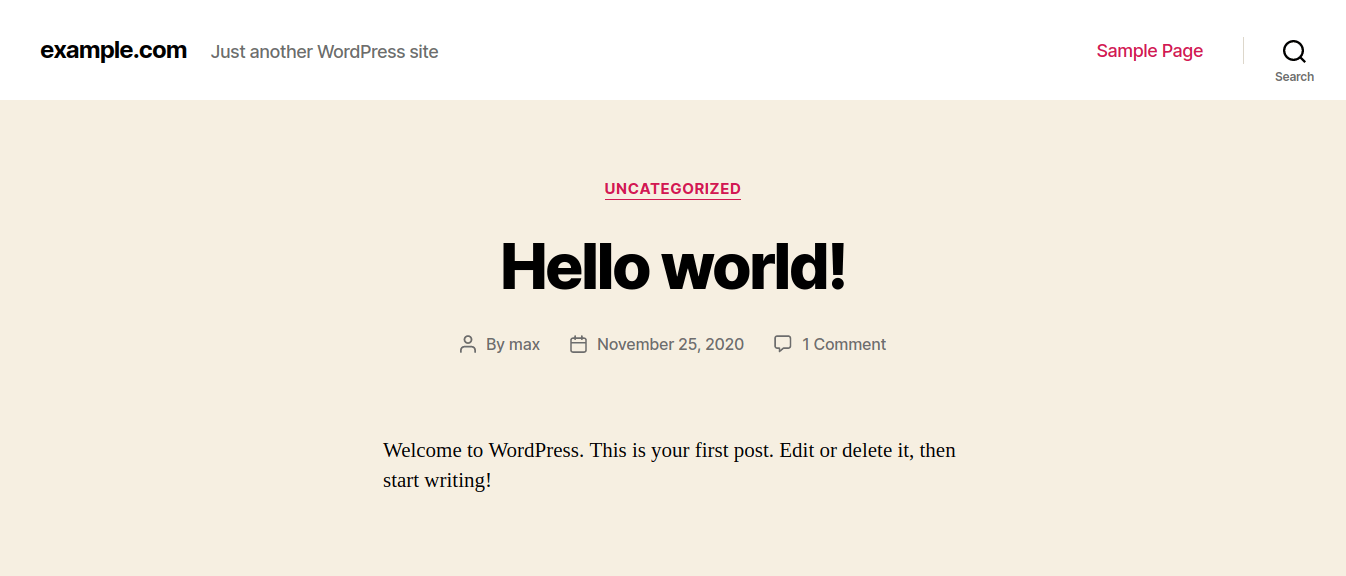
You can also access the WP admin panel by using the single-sign-on link by clicking the WordPress log next to your site domain.
That’s it, your new WordPress site has been installed successfully!
Conclusions
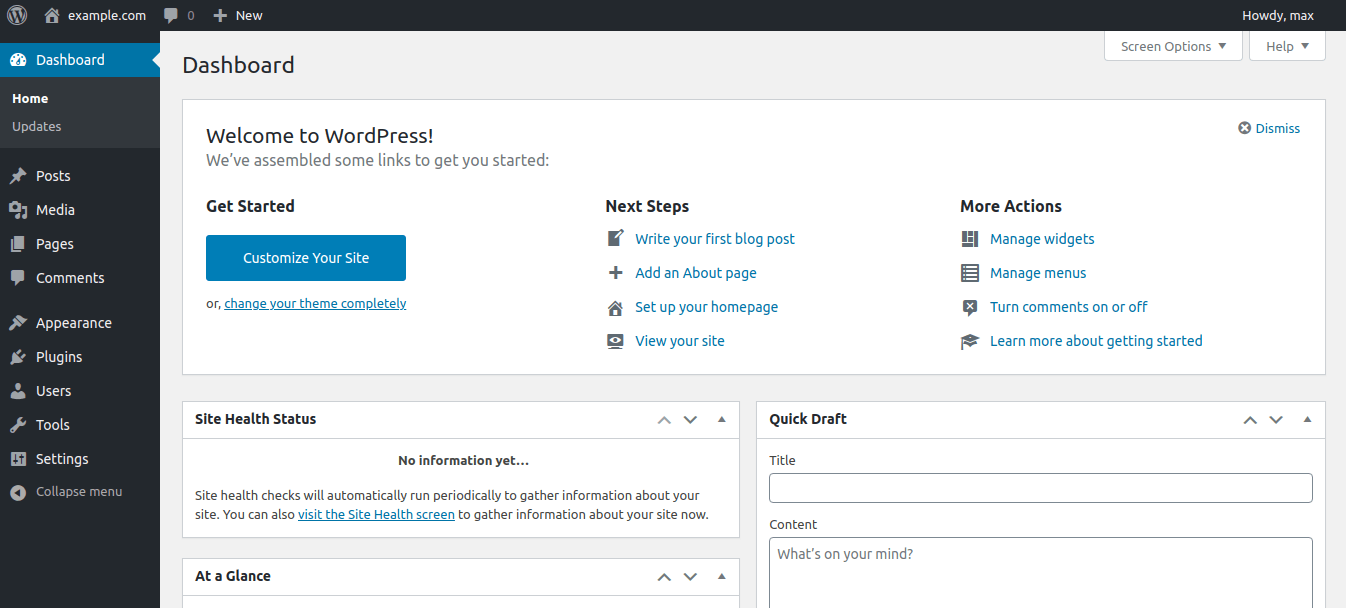
Congratulations! You should now have a fully-featured web server up and running with the latest version of WordPress. You can then begin customising your site both at the WP admin panel or at your GridPane dashboard.
GridPane will take care of much of the security right on your web server out of the box. However, make sure to also keep your WordPress installation secure by only installing the necessary plug-ins and maintaining a secure password policy.
Discussion