Building a web hosting service would take an incredible amount of effort if it wasn’t for the automation tools already available. One of the comprehensive solutions comes with cPanel & WHM which provides you with all the tools needed for automating server management tasks.
The WebHost Manager, or WHM, gives you an interface tailor-made for control and flexibility. It allows hosting providers to get the most out of their servers and offer the most to their customers. Manage hundreds of features built into cPanel or allow your customers to take control of their domains. Together with cPanel and WHM, you can take the lead on your customers’ needs.
Get started using cPanel & WHM quickly and easily by following this tutorial!
Sign up on UpCloud
First things first, if you have not yet registered on UpCloud, begin by getting signed up. Follow the link here to register for a free trial with a 30-day money-back guarantee!
cPanel and WHM requirements
Before getting started with installing cPanel and WHM, you’ll want to take a look at the system requirements. You need to have the following:
Networking requirement
- A fully-qualified hostname that does not match any of your server’s domains, e.g. cpanel.example.com and that resolves to a valid IPv4 or IPv6 address.
- A static IP address configured to a network interface. The system attempts to detect and set the ethernet device during the installation process.
- Disable firewall at the OS level before you run the cPanel & WHM installation. When the installation process finishes, configure a firewall with a third-party client, cPanel recommends APF or CSF.
- Disable Network Manager before running the cPanel & WHM installer. The Network Manager service automates the network’s settings and can disrupt connections to the IP addresses that reside in the IP aliases module.
Hardware requirements
- A compatible 64-bit operating system version of CentOS, CloudLinux, or RHEL
- Minimum 1 GB of RAM, while 2 GB is recommended
- The minimum of 20 GB storage, 40 GB recommended
Other requirements
- cPanel is designed for commercial hosting and can only be licensed on public static IP address. The license is not free but you can follow this guide perfectly well using their free trial.
- cPanel & WHM should only be installed on a freshly deployed operating system.
- Log in to the server as the root user in order to install cPanel & WHM.
- Use the cPanel & WHM installer, which installs all of the required services. Installing other services before cPanel & WHM is likely to cause compatibility issues.
We’ll be showing you how to fulfil most of the requirements while deploying the server and making the pre-required configurations. However, you will need to register a domain and delegate the cPanel server as your domain’s nameserver to get everything working.
Deploy a cloud server
To get going, begin by deploying a new server. First, log into your UpCloud control panel and select Deploy a Server under the Servers section.
The deployment page shows a number of options for customizing a new cloud server.
- Choose the server location from the available data centres, the closest location to you will often give the best experience
- Next, pick a configuration. cPanel requires at least 1GB of RAM and 20GB of storage so the $5 per month plan available on trial is enough, you can always upgrade the server later
- Select the CentOS 7.6 as the operating system
- Add any SSH keys you want to use
- Give your server a hostname and description, note that CPanel needs a fully qualifying domain name as the hostname e.g. cpanel.exampel.com
- Deploy!
You can find more detailed instructions on server deployment at our newcomer’s tutorials.
Pre-requisites
Your new cloud server is now been deployed and will soon be ready for action. Once the server status at your UpCloud Control Panel shows “Started”, with the green icon, you are good to continue.
Begin by logging into your new server using SSH. If you are unfamiliar with the method, take a quick look at our guides for connecting to your server.
When you log into a new cloud server for the first time, it’s good practice to install the latest updates as the first step.
yum update -y
With that out of the way, you can start configuring the prerequisites cPanel needs.
Firstly, set a static IP address for your server. The IP addresses are already assigned statically at the backend level but the server OS itself is still configured to use DHCP assignment.
Check your current network settings with the following command.
ip addr
Commonly the second network interface card (NIC) named eth0 has your public IPv4 address assigned to it. An example below highlighted in red.
2: eth0:  mtu 1500 qdisc pfifo_fast state UP qlen 1000
   link/ether 6e:d7:1b:bf:3a:5f brd ff:ff:ff:ff:ff:ff
   inet 185.20.139.167/22 brd 185.20.139.255 scope global eth0
      valid_lft 53810sec preferred_lft 53810sec
In addition to the IP address, you will need the default public gateway which can be found with the command underneath.
ip route
default via 185.20.136.1 dev eth0
10.0.0.0/8 via 10.1.4.1 dev eth1
10.1.4.0/22 dev eth1 proto kernel scope link src 10.1.7.180
185.20.136.0/22 dev eth0 proto kernel scope link src 185.20.139.167
Next, set the address to static on the NIC with your public IPv4, eth0 in this case. On CentOS hosts, each NIC is controlled by its own configuration file.
Open the following network interface file for edit using the command underneath.
vi /etc/sysconfig/network-scripts/ifcfg-eth0
You’ll need to change the bootproto from dhcp to static, then add the IP address, netmask and gateway to the end.
DEVICE=eth0
BOOTPROTO=static
ONBOOT=yes
IPADDR=185.20.139.167
NETMASK=255.255.252.0
GATEWAY=185.20.136.1
After making the changes, save the file and exit. You will then need to restart the interface to enable the static configuration.
ip link set eth0 down && ip link set eth0 up
The restarting of the network interface should be fast enough to not cause the SSH connection to drop. If something goes wrong and you do lose connection, you can always reach your server using the Web console at your UpCloud control panel.
Next, disable the NetworkManager service to allow cPanel to install successfully. Use the following two commands to stop and disable the service.
systemctl stop NetworkManager
systemctl disable NetworkManager
Then uninstall NetworkManager packages with the command below.
yum remove NetworkManager -y
As mentioned, you will also need to disable the firewalld service. CentOS has a rather strict preconfigured firewall already installed which could cause an issue with the cPanel and WHM installation later on. Disable firewalld using the two commands underneath.
systemctl stop firewalld
systemctl disable firewalld
Afterwards, uninstall the firewalld as well with the next command.
yum remove firewalld -y
That’s it for the prerequisites. However, as an additional convenience, cPanel recommends that the installation command is run within a Linux screen session.
The Linux screen command allows you to create a shell session that will stay active through any network disruption and allows you to return to where you left off.
Install screen with the command below.
yum install screen -y
Then start a new screen session with the screen command.
screen
If you get disconnected for any reason, log back into your cloud server and use the screen -r command to resume your screen session.
Installing cPanel & WHM
Now that all prerequisites have been met, you are ready to install cPanel and WHM themselves.
Installing cPanel & WHM on your own server signs the server IP up for a trial license to use for 15 days free, with no strings attached and no limitations.
The installation is easy and quick using the installer provided by cPanel. Any new installations default to the fast installation mode. If you want to customize your installation, follow the steps in the custom installation documentation.
Install cPanel & WHM using the following command
cd /home && curl -o latest -L https://securedownloads.cpanel.net/latest && sh latest
The installation process might take a moment but once done you’ll see a confirmation similar to the output example below.
Congratulations! Your installation of cPanel & WHM 11.80 is now complete. The next step is to configure your server.
Before you configure your server, ensure that your firewall allows access on port 2087.
After ensuring that your firewall allows access on port 2087, you can configure your server.
1. Open your preferred browser
2. Navigate to the following url using the address bar and enter this one-time autologin url:
https://94.237.46.145:2087/cpsess2088094483/login/?session=root%3ajja2wE_GT2ndEFdT%3acreate_user_session%2ce78ec6c6754e9dda90efec96091ac8c9
After the login url expires you generate a new one using the 'whmlogin' command or manually login at:
https://94.237.46.145:2087
Visit https://go.cpanel.net/whminit for more information about first-time configuration of your server.
Visit http://support.cpanel.net or https://go.cpanel.net/allfaq for additional support
Thank you for installing cPanel & WHM 11.80!
!!!!!!!!!!!!!!!!!!!!!!!!!!!!!!!!!!!!!!!!!!!!!!!!!!!!!!!!!!!!!!!!!!!!!!!!!!!!!!!!!!!!!!!!!!!!!!!!!!!!!!!!!!!!!!!!
Your system kernel may have been updated.
Current kernel (3.10.0-957.12.2.el7.x86_64) has been changed to: 3.10.0-957.21.3.el7.x86_64
Before rebooting the system, please ensure that the installed kernel version is compatible with your deployment.
!!!!!!!!!!!!!!!!!!!!!!!!!!!!!!!!!!!!!!!!!!!!!!!!!!!!!!!!!!!!!!!!!!!!!!!!!!!!!!!!!!!!!!!!!!!!!!!!!!!!!!!!!!!!!!!!
Removing /root/installer.lock.
Given that you see similar output, the installation was successful and you are ready to start configuring your cPanel server.
Next, open the WHM web interface using the one-time autologin URL as shown in your installation output. The example above has the one-time login URL highlighted.
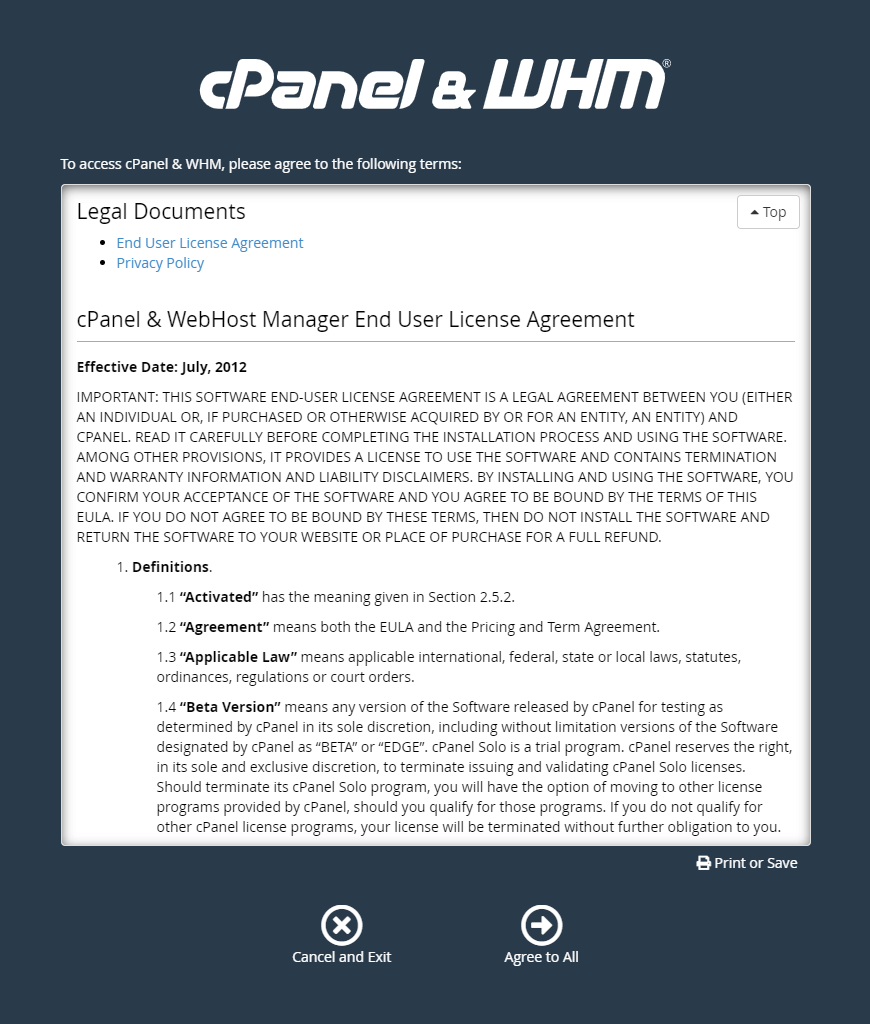
On the new installation landing page, read and then accept the terms and conditions by clicking the Agree to All button.
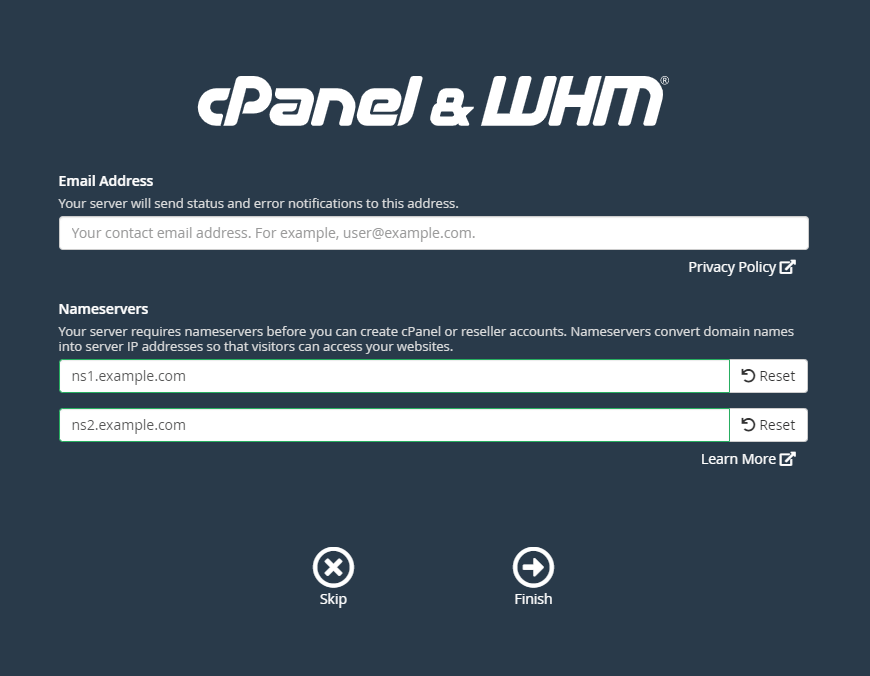
Next, enter the email address you wish to use to receive status notifications. Then add nameservers your domain will use. For example, if your cPanel server hostname was cpanel.example.com, the nameservers should be called ns1.example.com and ns2.example.com.
Once done, click the Finish button to confirm.
You will then be automatically logged into the WHM control panel.
Configuring WHM
cPanel and WHM should now be installed and ready to be configured for your domain. When you log in for the first time you’ll see page much like in the example picture below.
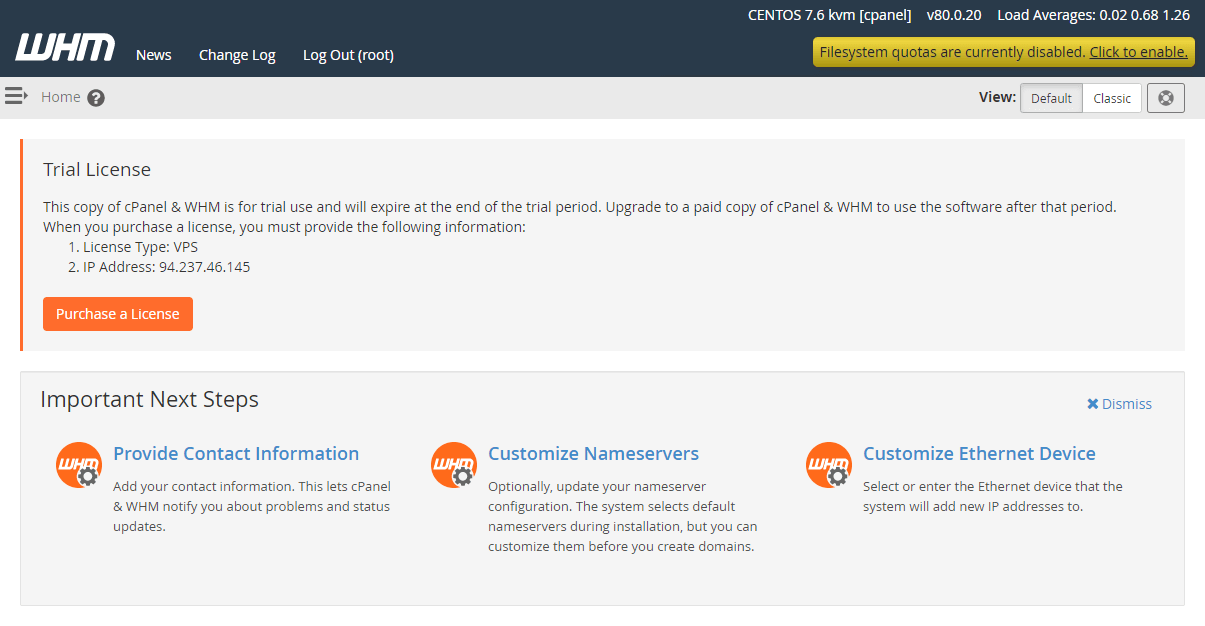
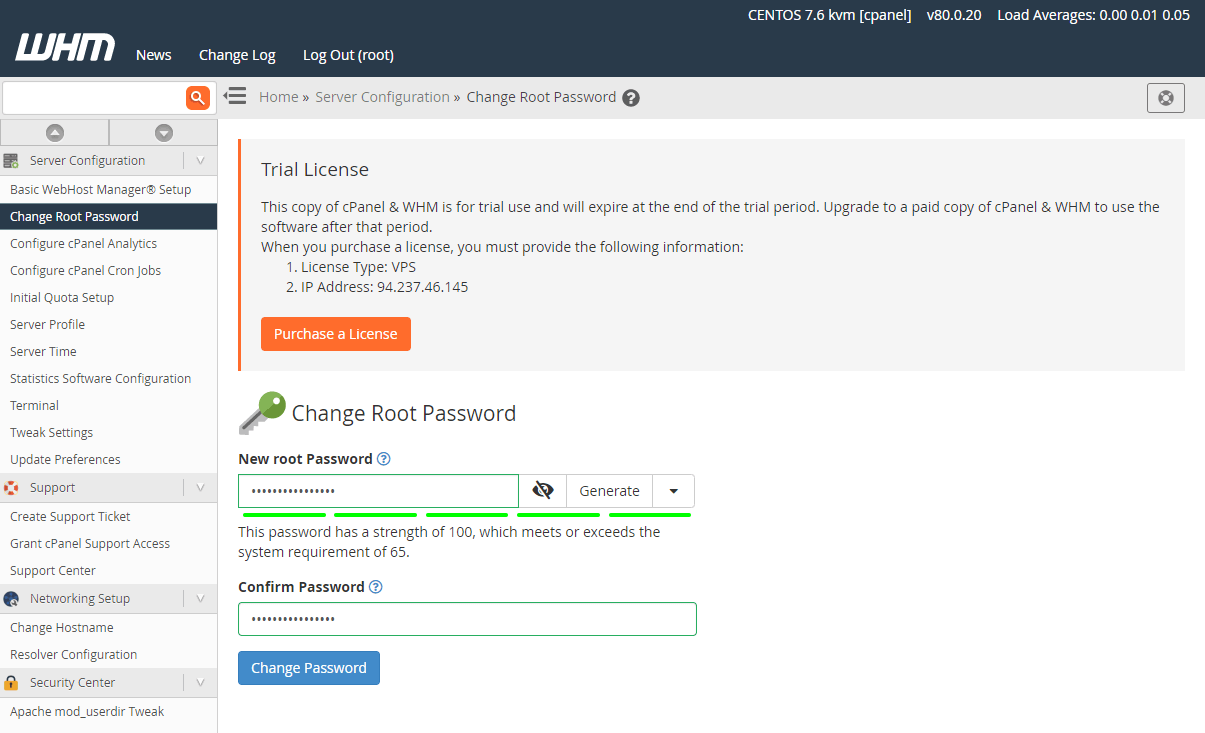
Since the login URL is temporary and will expire, your first step should be setting a new root password.
Click the menu icon to open the sidebar and select Change Root Password.
Enter a new password twice, pay attention to the password strength, then click Change Password to save the change.
Afterwards, restart the server from the yellow notification if needed.
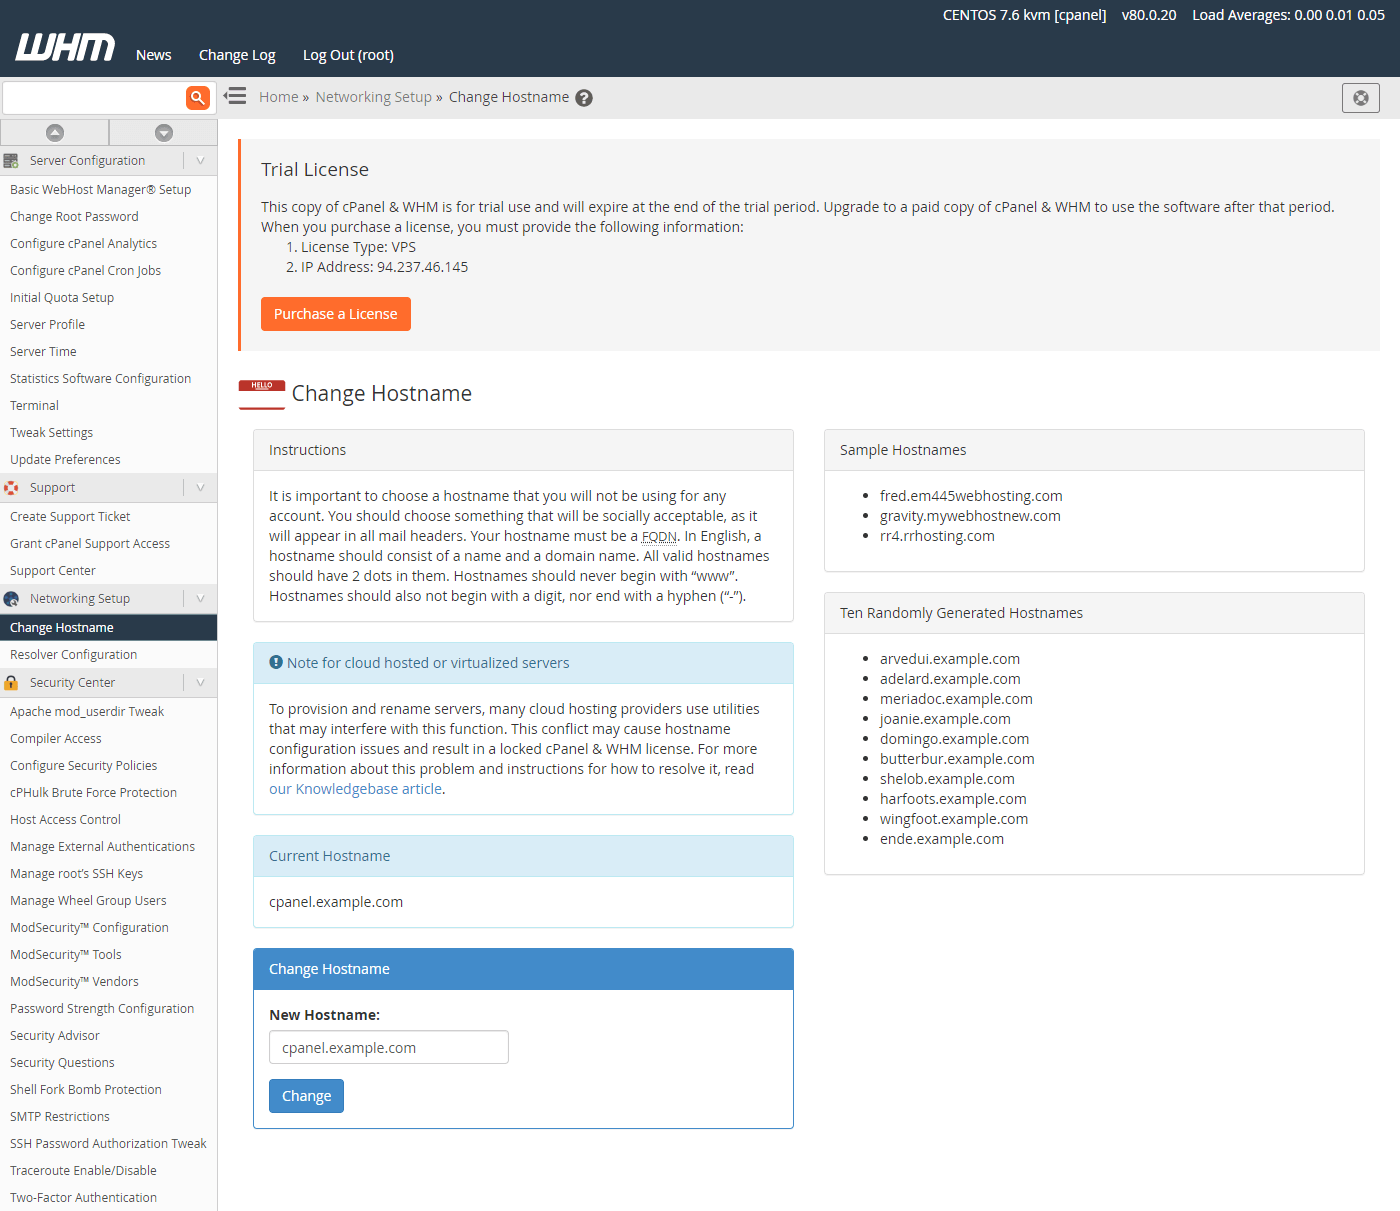
When deploying your cPanel cloud server, you had the option to set the hostname. If you need to change the hostname, you can reconfigure it under Change Hostname option. Check that the server hostname was configured correctly.
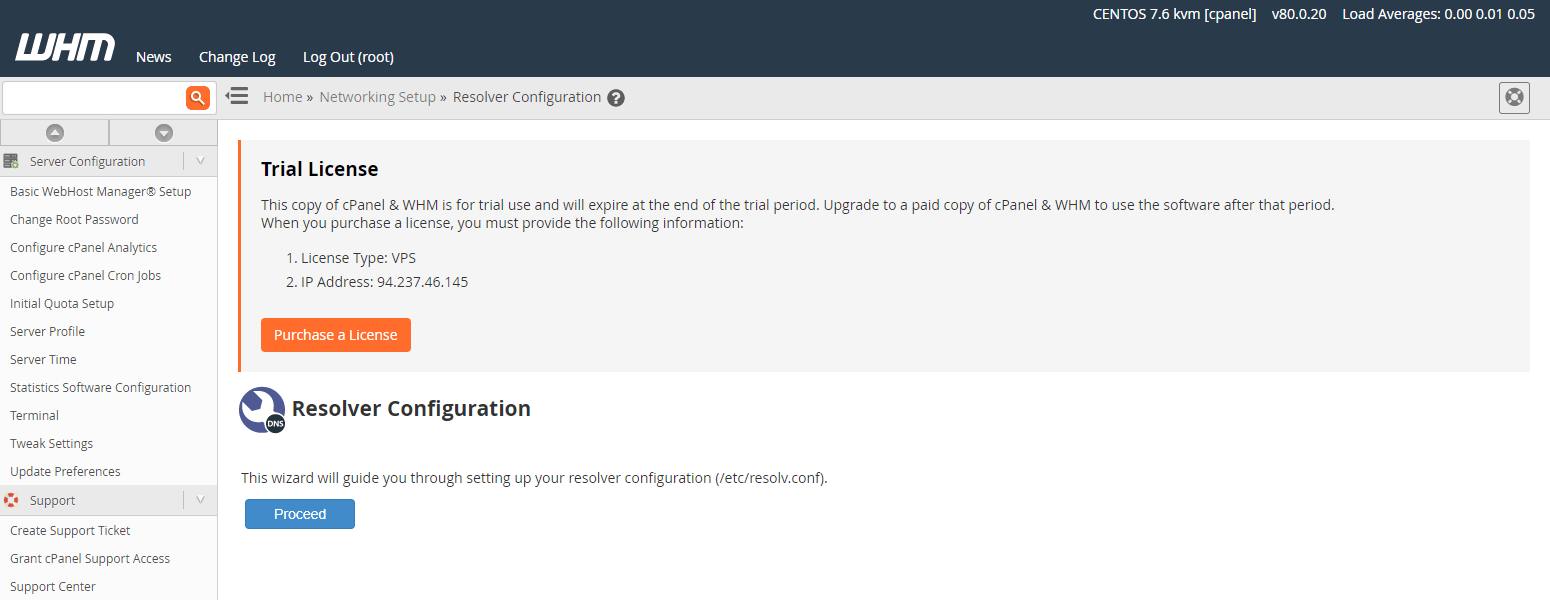
Next, confirm the DNS resolvers were configured correctly. Go to the Resolver Configuration page and click the Proceed button.
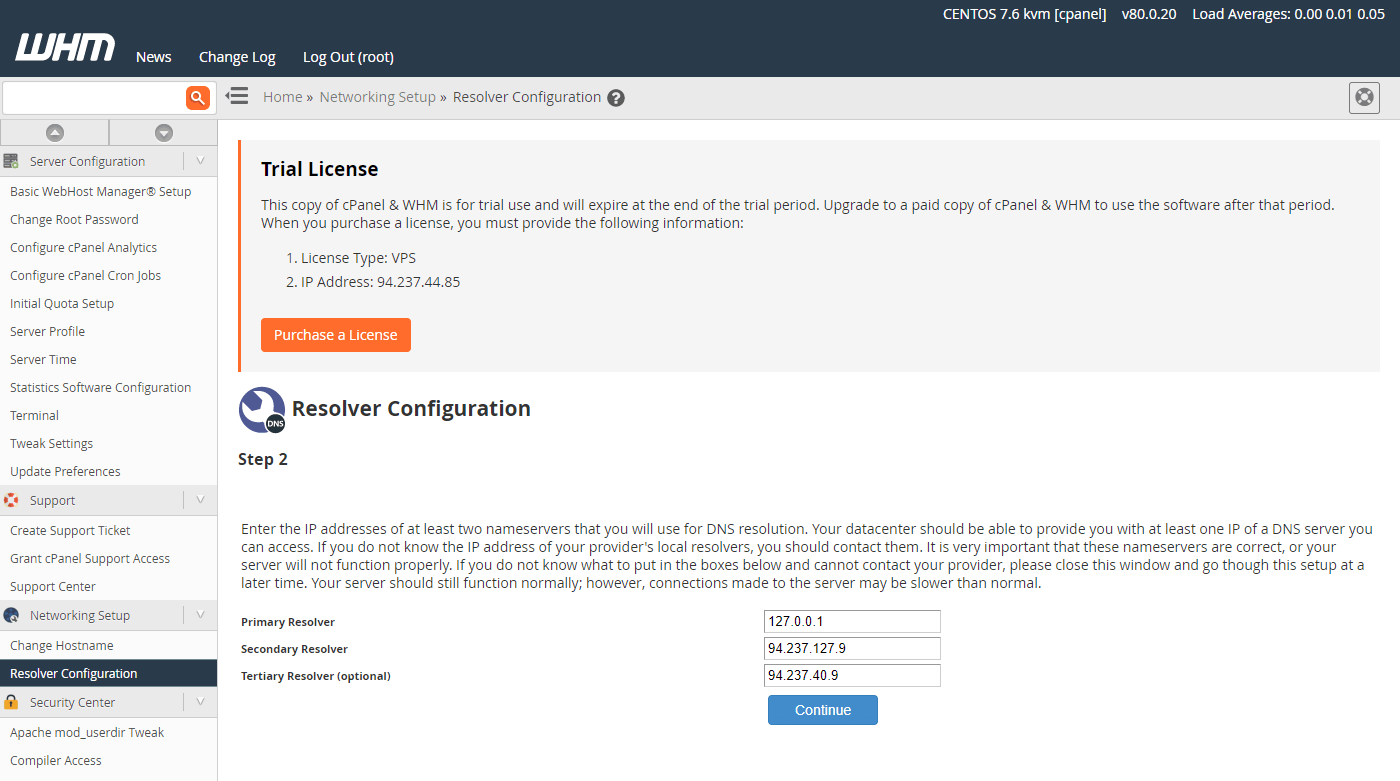
Your cloud server should automatically receive resolver information from the network but you’ll likely want to include your own resolver as well. Add the localhost IP 127.0.0.1 as the primary resolver and the UpCloud DNS addresses to the secondary 94.237.127.9 and tertiary 94.237.40.9 resolvers. Then save the settings by clicking the Continue button.
The cPanel and WHM installation includes a fully featured domain name server for your cPanel hosted domains. It allows cPanel to automatically manage your domain name records for any web servers you want to install.
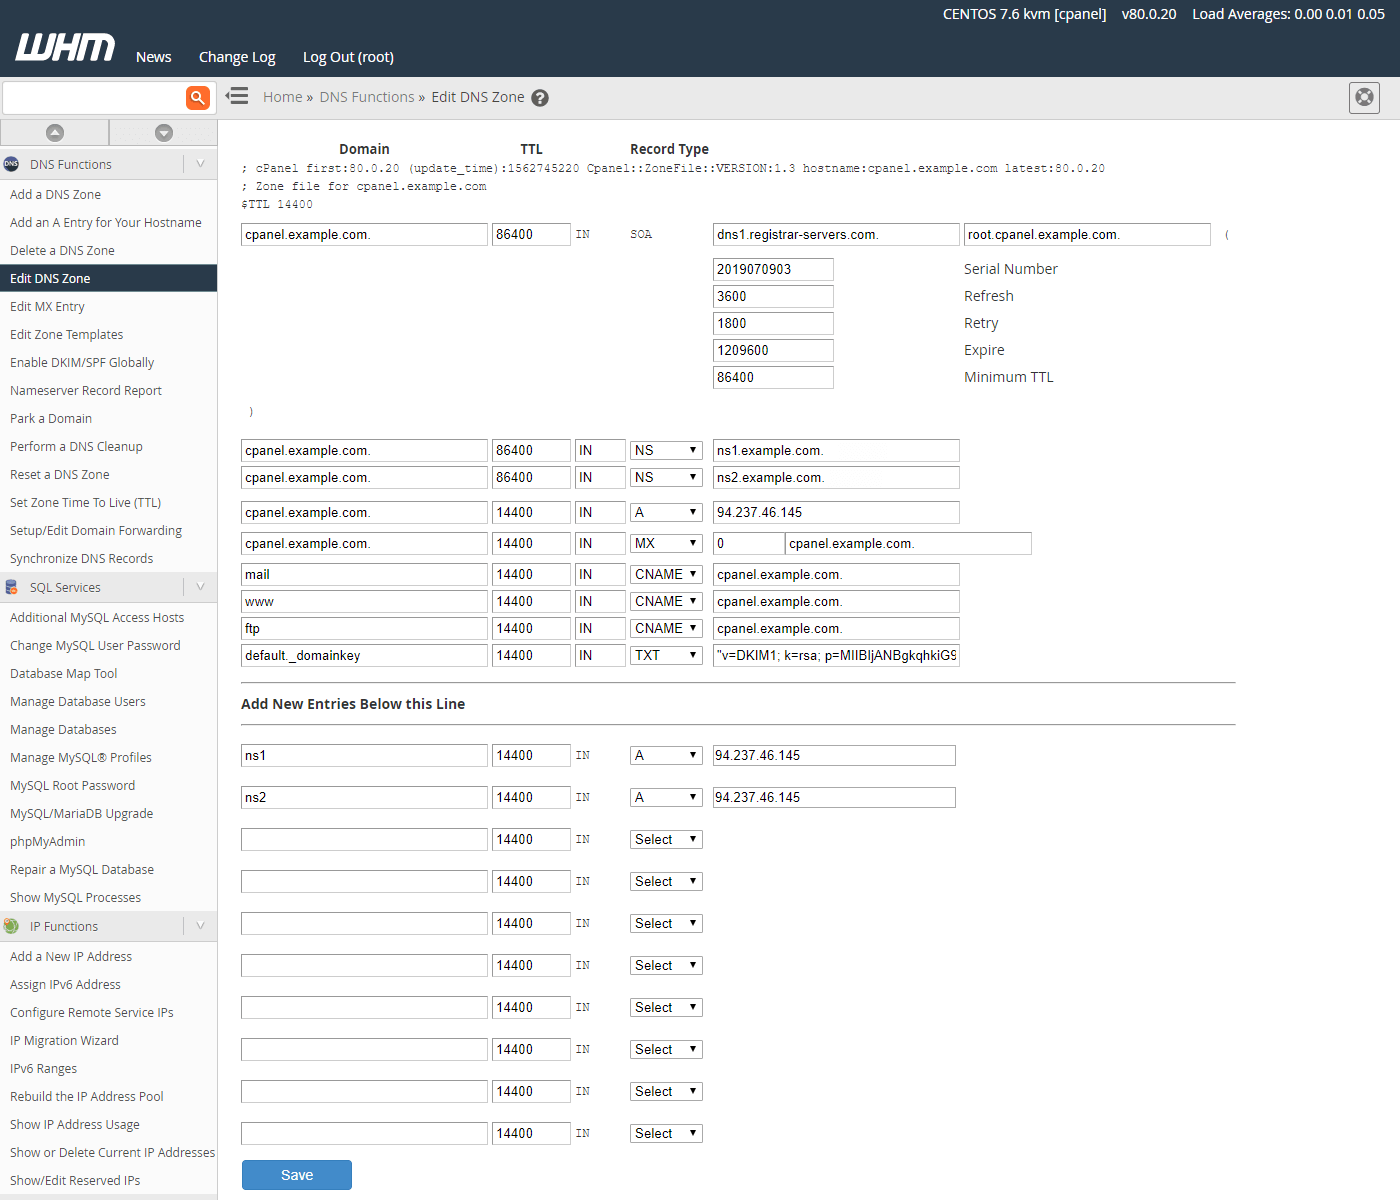
Configure your own nameserver by going to the Edit DNS Zone page, select the DNS zone you wish to change, then click the Edit button.
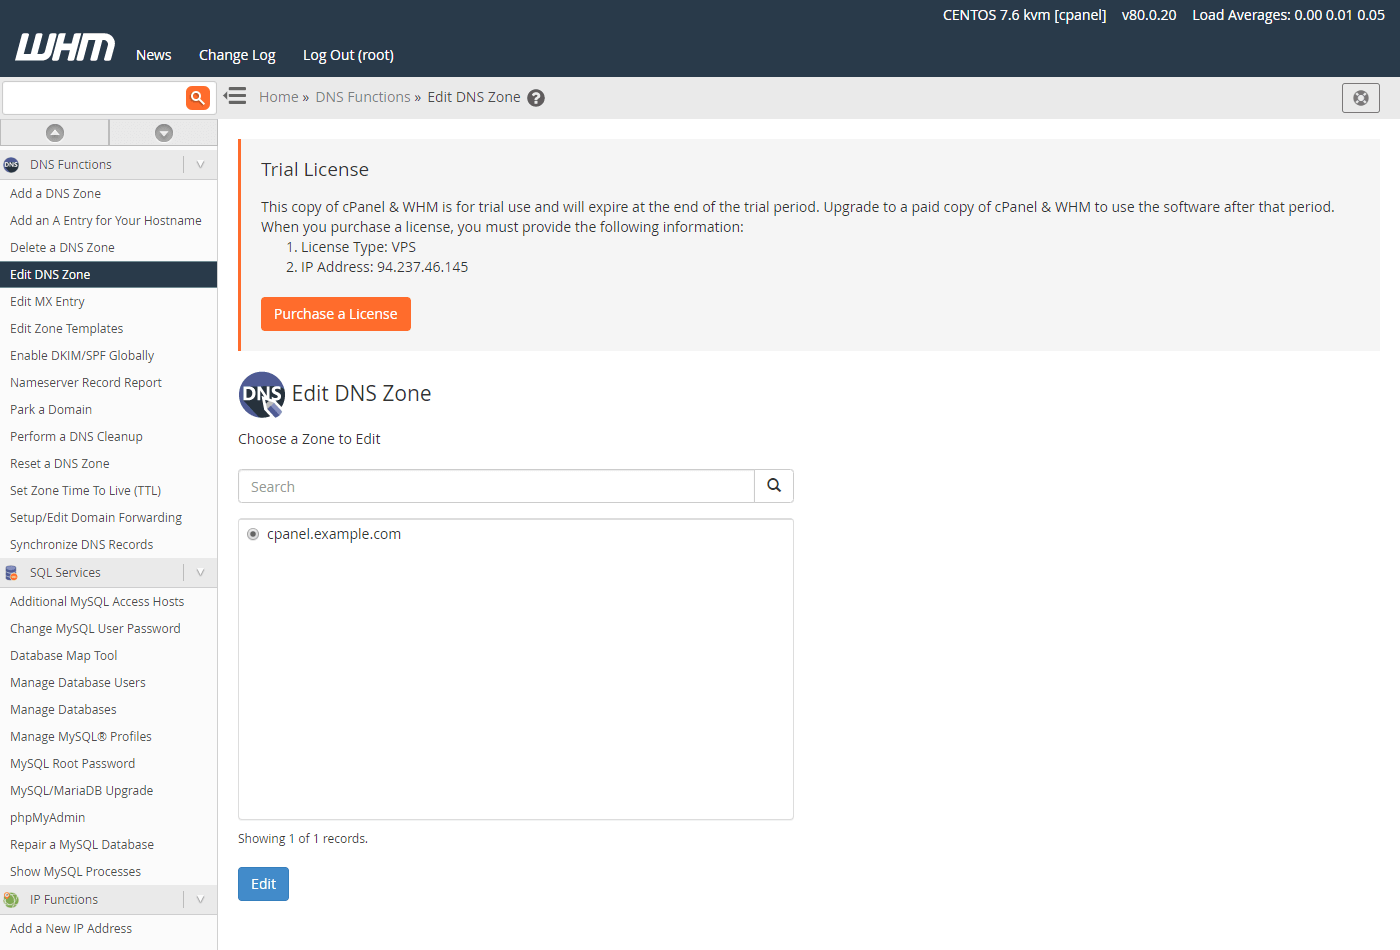
In the DNS zone, you’ll find the domain records for your cPanel server. While most of the records are preconfigured, you will need to enable the nameserver by adding NS records.
Add the ns1 and ns2 as the nameservers for your cPanel domain as by the example below. Make sure to also delegate authority to your cPanel nameserver over your domain. How this is done depends on your domain registrar but you can find some help at our domain name instructions.
cpanel.example.com.   NS   ns1.example.com.
cpanel.example.com.   NS   ns2.example.com.
ns1                   A    server-ip-address
ns2                   A    server-ip-address
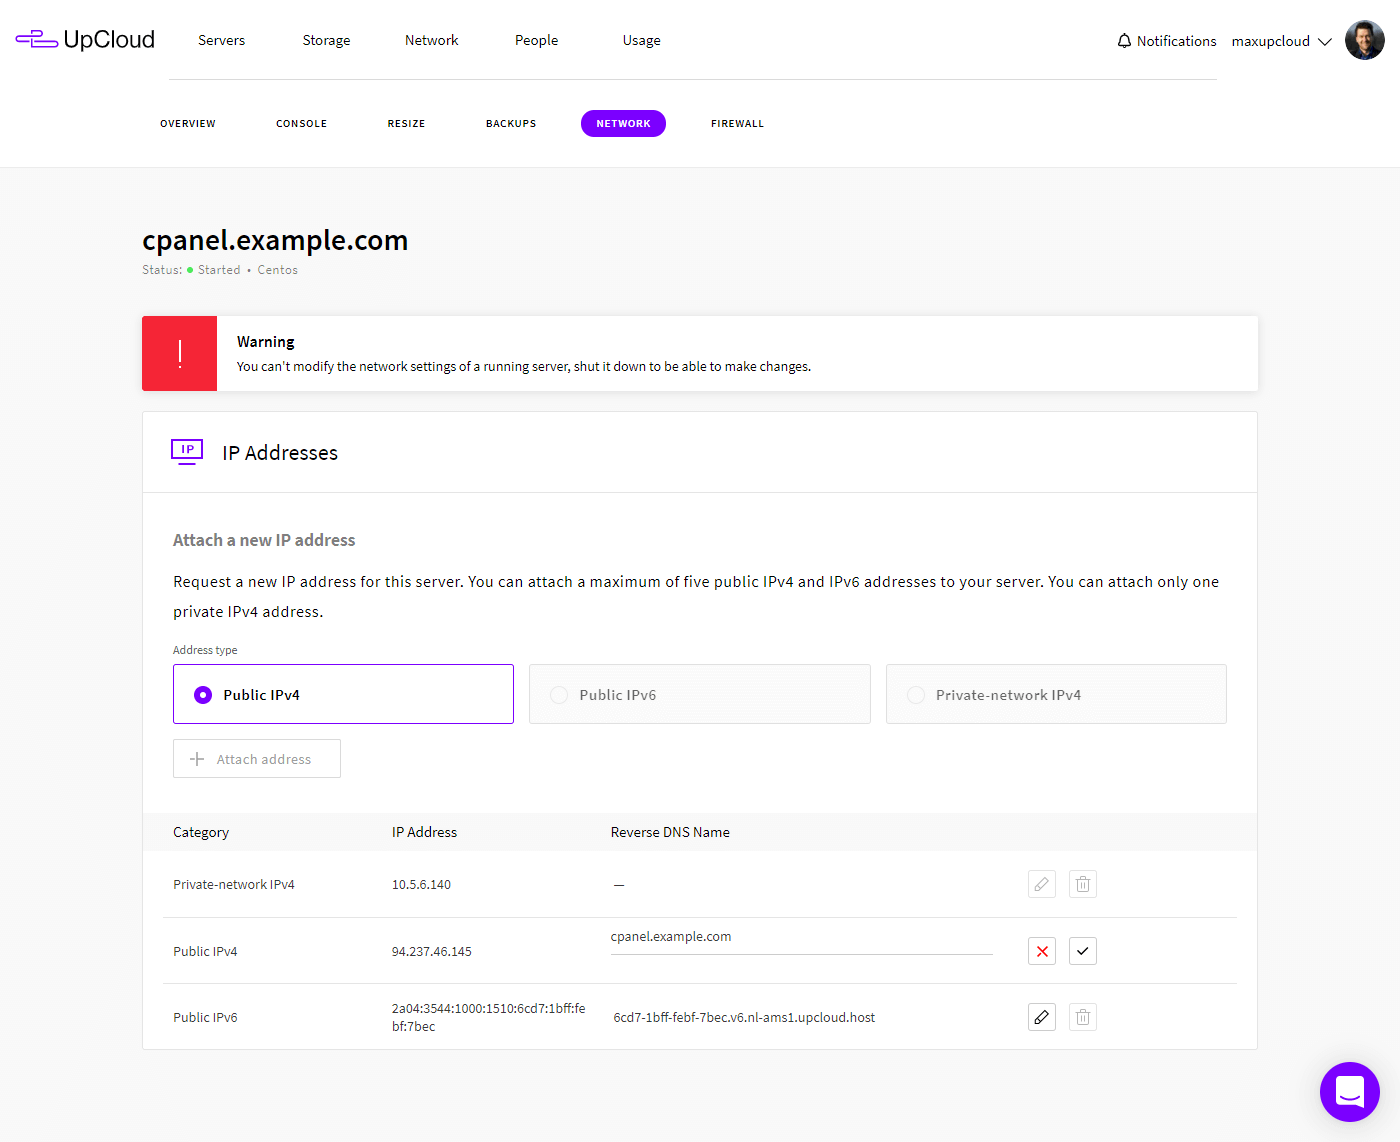
Next, set up a reverse DNS record for your cPanel server. You can do this straight at your UpCloud control panel under the server settings and Network tab.
Click the pencil icon to edit the default reverse DNS name, enter your cPanel hostname, and click the check icon to save the changes. You can do this individually for all of your public IP addresses, both IPv4 and IPv6.
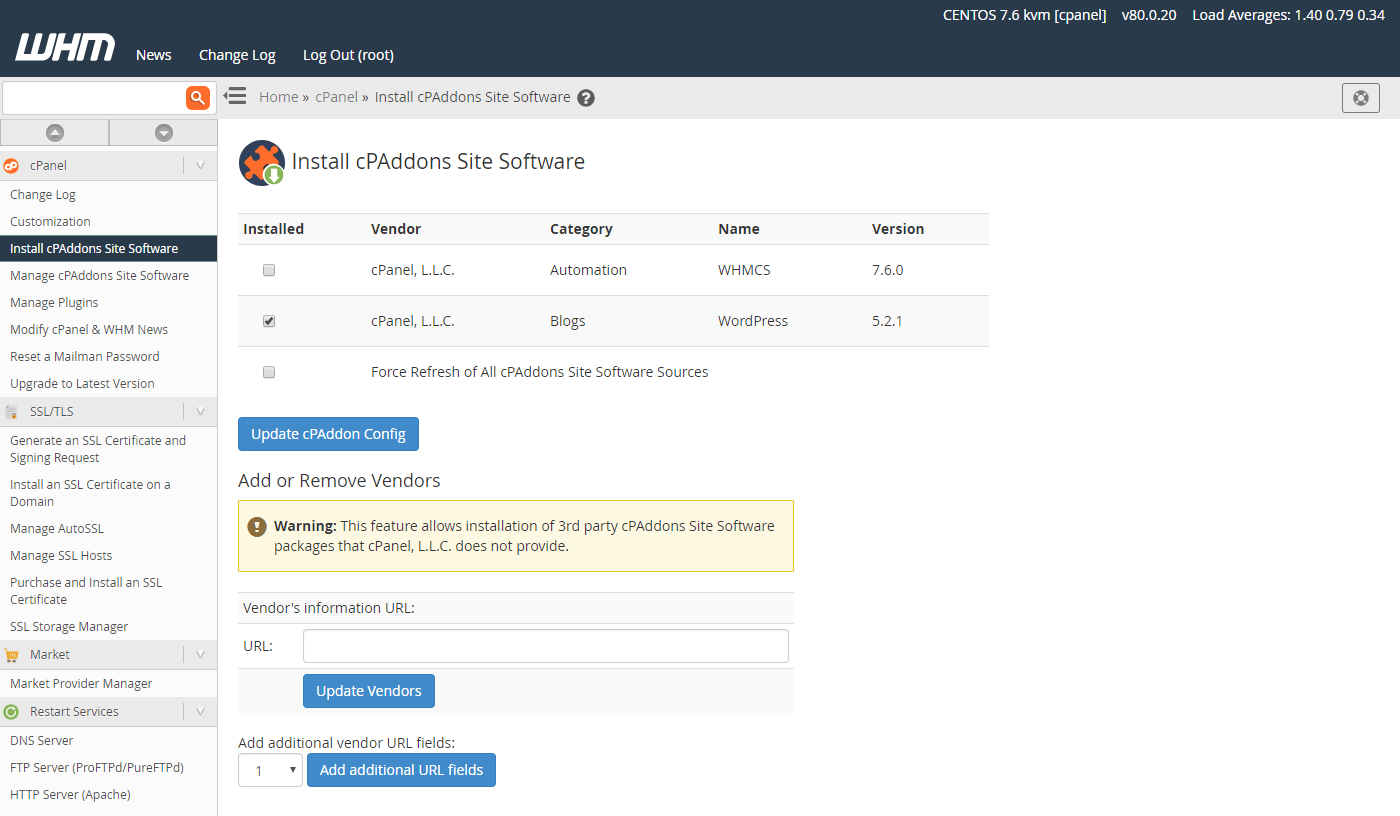
Lastly, enable the WordPress Manager add-on to allow quick website deployment. Go to the Install cPAddons Site Software page on your WHM dashboard, click to select the WordPress manager, then click the Update cPAddon Config button to install the add-on.
You’re all set! Continue below to test out the installation by creating a new cPanel user and deploying a test page.
Testing cPanel
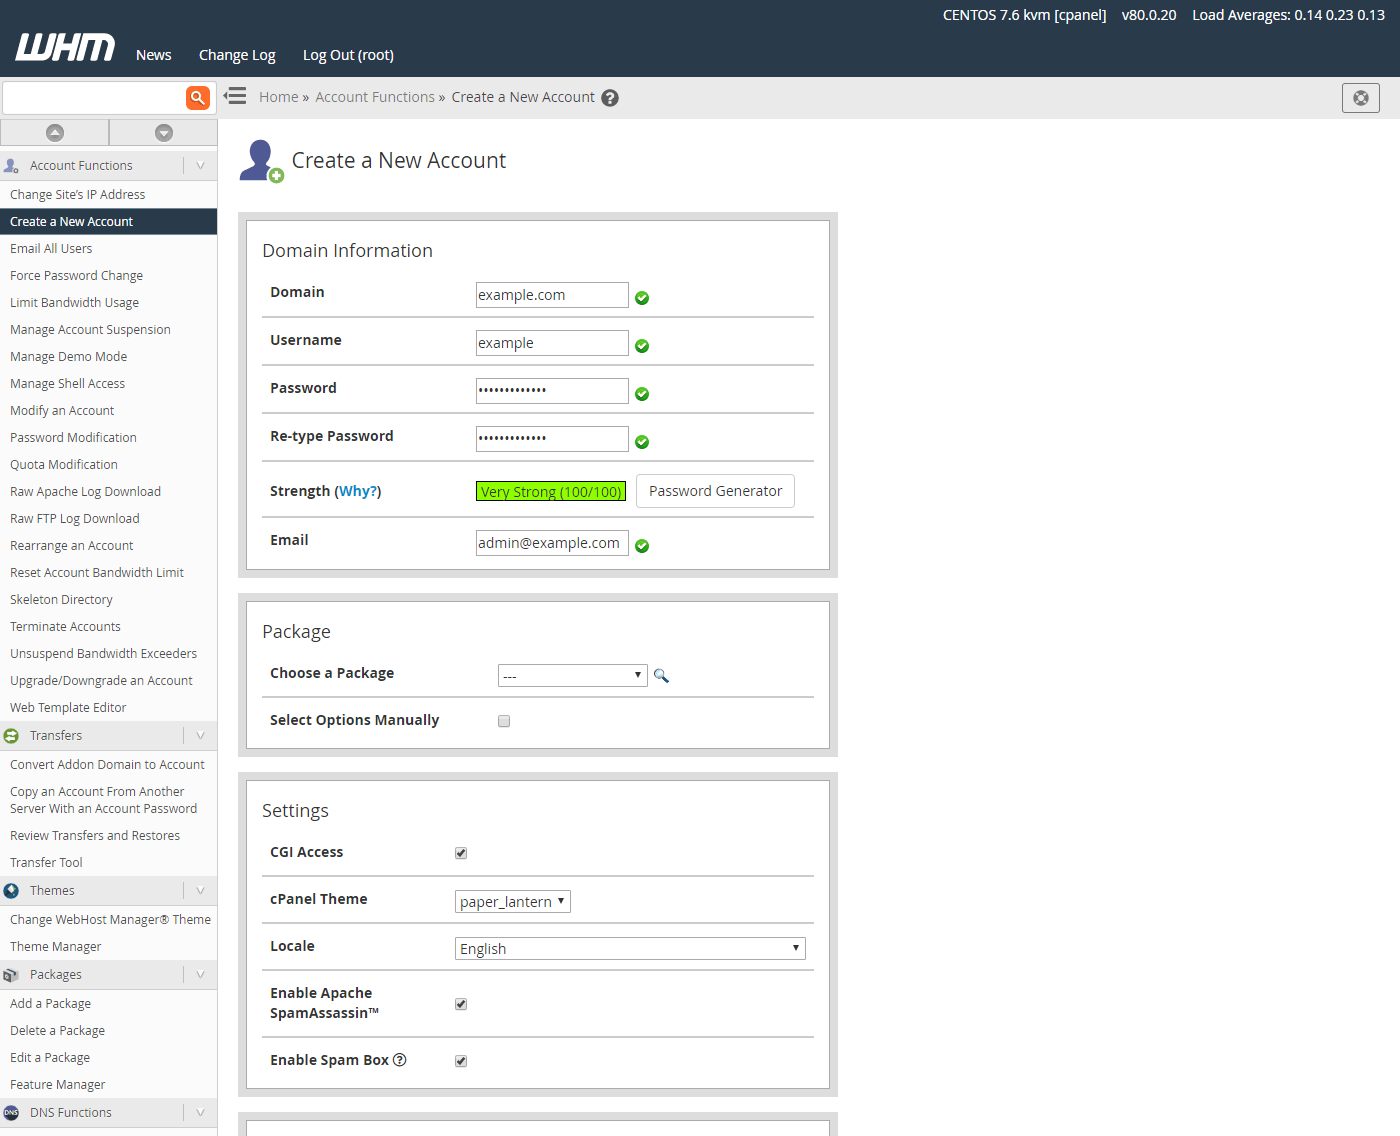
To be able to log into the other half of your cPanel & WHM server, you need to create a new cPanel user at the WHM dashboard.
Go to the Create a New Account page and fill in the required settings by entering a domain, username, password, and an email address. Then scroll to the bottom of the page and click the Create button.
Next, open your cPanel domain name at the 2083 port number on your web browser.
https://cpanel.example.com:2083
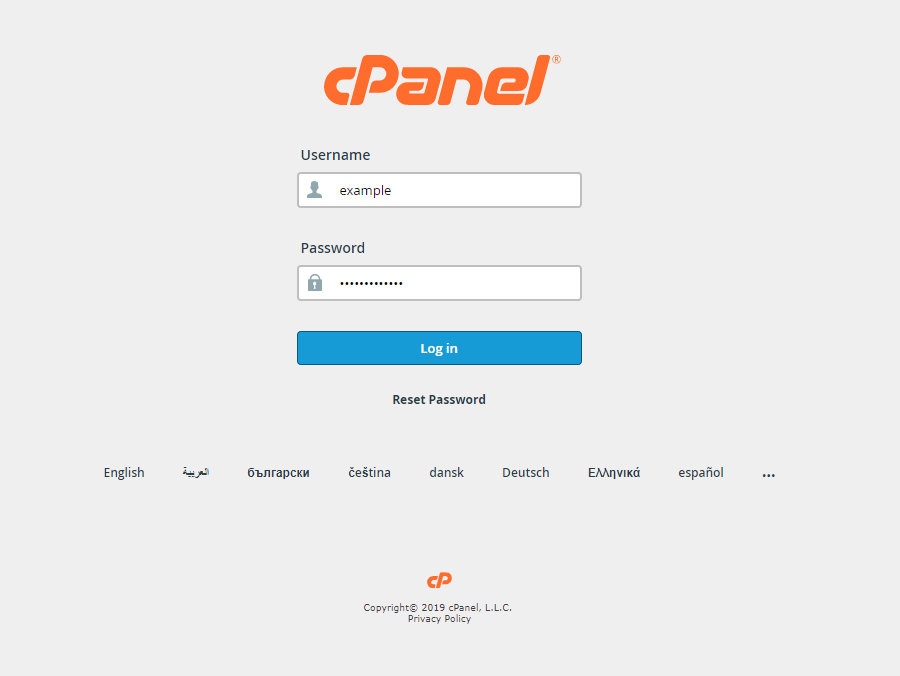
Log into your cPanel using the new user account you just created above.
Once logged on, you’ll land on the familiar cPanel dashboard. Here you have the comprehensive tools to manage your web pages without the need to dwell into the command line.
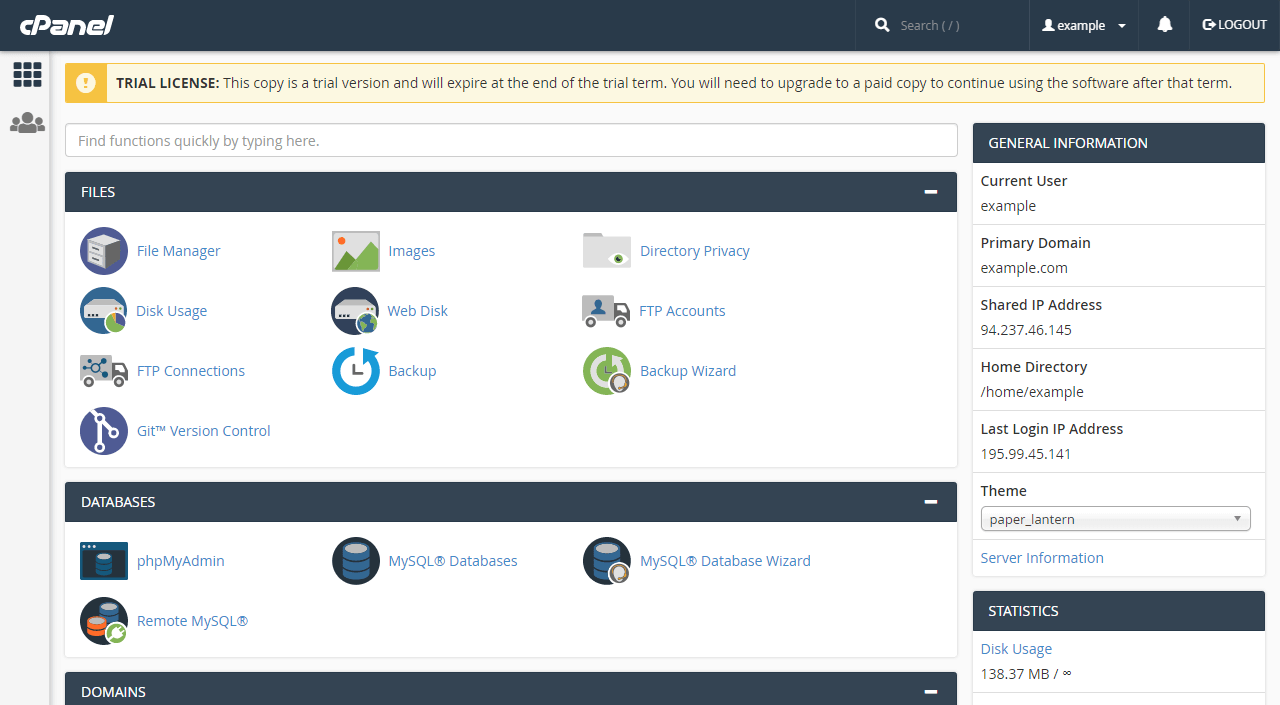
Since we installed the WordPress Manager addon earlier on the WHM side, you should be able to find the option at the bottom of the cPanel front page.
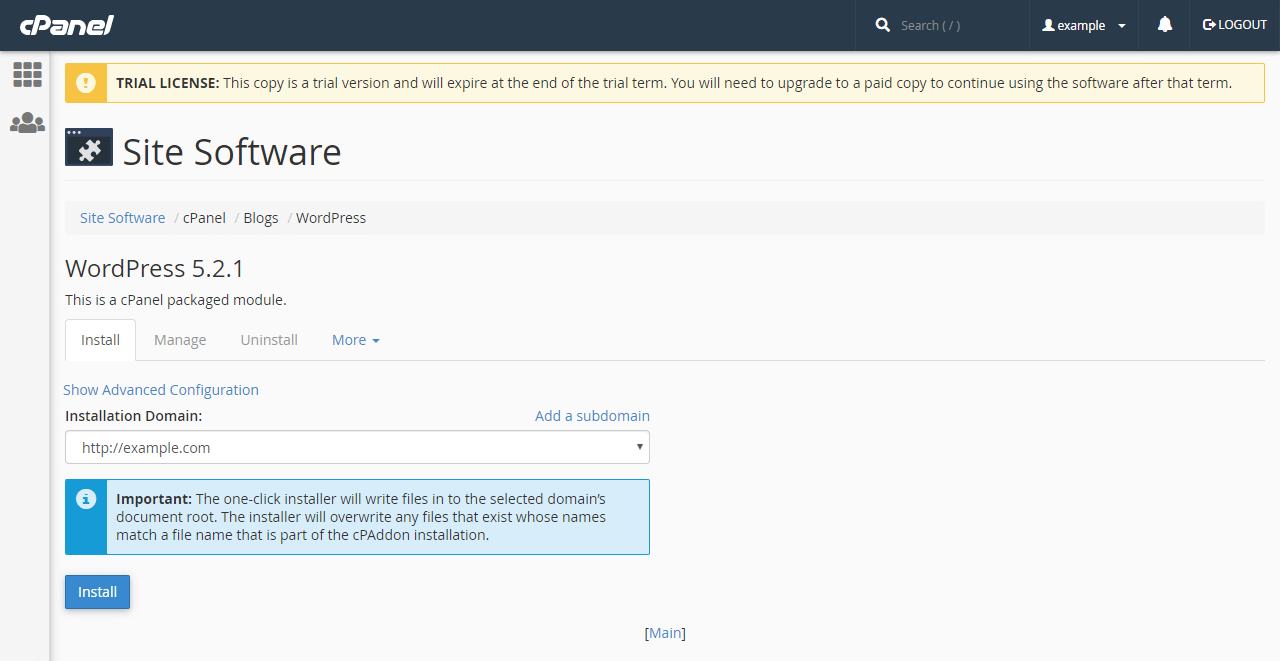
On the WordPress Manager page, deploy a new WP page by clicking the New Site button.

Then select the domain you wish to install WordPress on and click the Install button.
The installation is really quick and once done you’ll see a confirmation like in the example below.
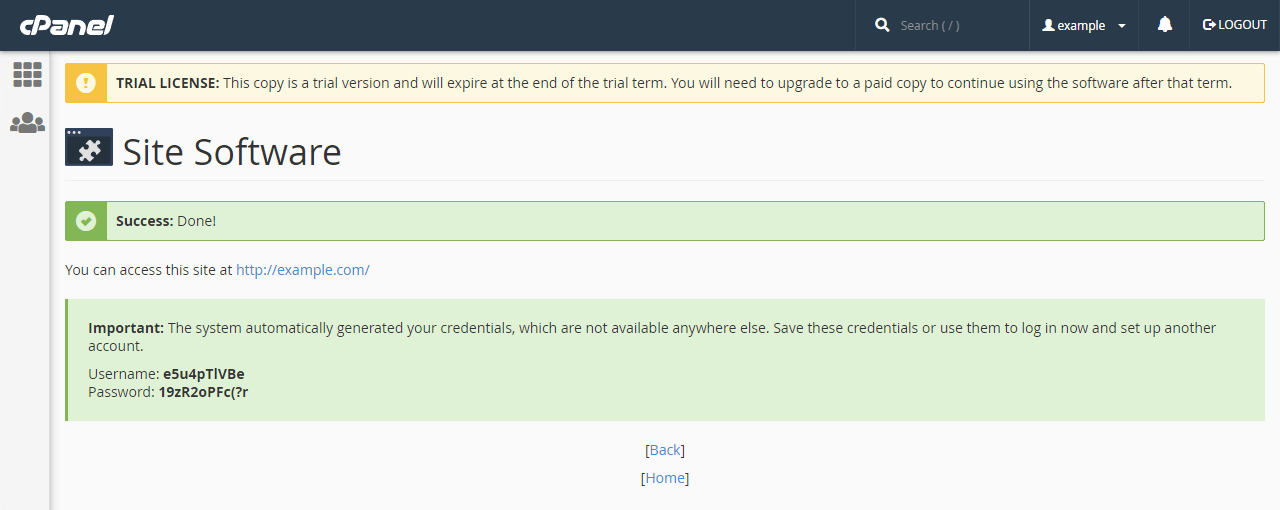
Make note of your WordPress username and password, then click the link to open your site.
If everything went well, you should see the WordPress default page like underneath.
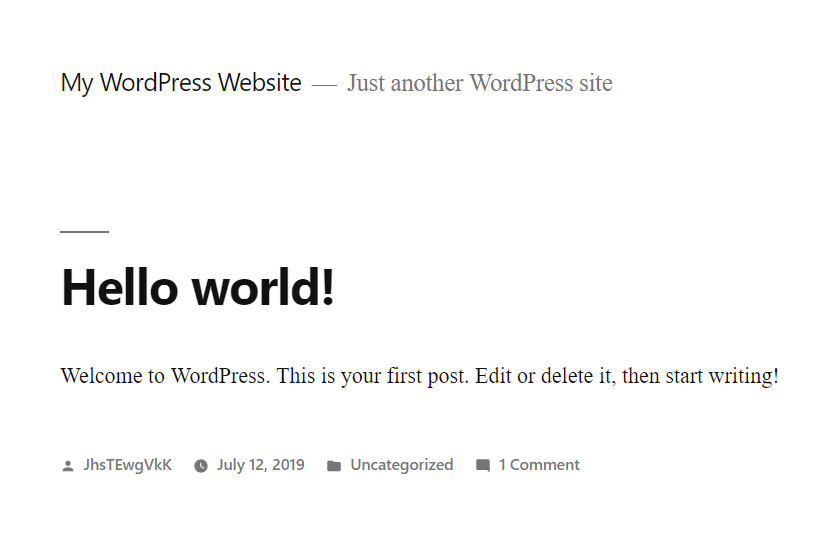
It works! Congratulations, you’ve successfully configured cPanel & WHM on your cloud server.
Other settings to consider
Your cPanel & WHM server is then ready to roll! However, you might still want to check through a few other settings. WHM includes a whole lot of further options to customize your server and improve server security.
Check AutoSSL settings
WHM can automatically configure pages with SSL certificates to enable HTTPS. The setting for this should be on by default but confirm that AutoSSL has obtained SSL certificates for your website.
Open the Manage AutoSSL page and verify that the feature is enabled by having a provider selected, cPanel by default.
On the same page, you can also check the logs for previous SSL certificate runs, manage settings per user, and run AutoSSL for all enable users.
Set up two-factor authentication
The WHM installation includes brute force protections by default but for the best results, you should configure two-factor authentication.
Go to the Two-factor authentication page where you can set the 2FA policy per site and user.
Enable the policy by clicking the toggle switch, then on the Manage My Account tab, click the button for Set Up Two-Factor Authentication.
Scan the QR code with your preferred 2FA authenticator application and enter a security code provided in the field underneath. Then click the Configure Two-Factor Authentication button to confirm.
Consult the cPanel Security Advisor
WHM includes a very useful tool for checking for security issues and recommendations called Security Advisor. It can automatically test and check for multiple different configuration options and security features to help you maintain your cPanel server.
Run the check by opening the Security Advisor page or by clicking the Scan Again button on that page.
Pay close attention to the Important issues highlighted in red, while also taking a look at the Recommendations listed in yellow. Settings that have already been optimized are shown in green.
Summary
Awesome job! With cPanel & WHM, you’ve got the tools to run a web hosting solution at any scale. The cPanel interface allows your customers to manage their sites, intranets and ensures their online properties running smoothly, while WHM keeps you in control of server resources.
The trial accounts on both cPanel & WHM and with us at UpCloud allow you to easily test your hosting options. Feel free to play around with the platform and you are sure to notice just how quick and snappy everything is. Our MaxIOPS storage technology gives you a clear advantage over other web host platforms. If you continue testing through your 3-day free trial, make sure to upgrade your account with a single minimum payment to keep your already configured cPanel & WHM server.
kOoLiNuS
So the cPanel + WHM licence should be purchased separately from the UpCloud account/plan? Did I get it right ?
Thanks
Janne Ruostemaa
Hi there, thanks for the question. You are right about the licences, we are not currently selling these and they would need to be purchased separately.
agung
any Direct admin guide?
Janne Ruostemaa
Hi there, not at the moment but thanks for the suggestion.
tai
I think your company should install cpanel whm centos for wordpress users, because there are many wp users who like your cloud server but they don’t know how to install, I think your company will be very developed if you think about it. By that, I really want to use cloud server with you but I don’t know how to install it. )))
Janne Ruostemaa
Hi there, thanks for the comment. While I completely understand where you are coming from, we would much prefer to share the knowledge and teach our users how to install a WordPress site of their own through our tutorials. But we also have a number of service partners who make installing WP super easy, for example, RunCloud, Serverpilot, and Ploi.
Tom
The email is not working from WHM, because the port 25 is blocked by default in UpCloud.
Janne Ruostemaa
Hi Tom, thanks for the comment. You are right that the port 25 is blocked by default. You can find out more about this and how to request the port to be opened in our guide to sending email and SMTP best practices.
Tom
Thank you! :) It’s working now!
Jorge
excelent!!
Jairo
Hello,
We are running cPanel on centos 6. I am looking for a step by step guide how to upgrade to centos 7
Janne Ruostemaa
Hi Jairo, thanks for the comment. Indeed it seems cPanel will be dropping support for CentOS 6 soon. You should be able to do an upgrade in place but I would highly recommend taking a backup of your server before proceeding.
vcenter
so useful and informative post
emmy
wow this information has really been helpful
Ken
I installed whm on centos virtual box and it works fine but when i try opening on phone or windows browser it doesn’t worl
Janne Ruostemaa
Hi Ken, thanks for the comment. It’s likely that your virtual box isn’t exposing the webserver ports outside the virtualised environment. You’ll need to set up port forwarding to be able to access the site from outside the VM.
NovinMarketing
i should use directadmin instead of cpanel i have heard lots of positive things about it
Janne Ruostemaa
Hi there, thanks for the comment. DirectAdmin is a great alternative for cPanel, however, it leaves quite a bit of the website management to be done in the terminal. On the other hand, cPanel provides nearly all the configuration and functionality within the control panel itself.
Sam
This is a very good tutorial and helped understand the process and I appreciate that but, what’s the point of going through it and installing WHM / CPanel on your Trial account if Your firewall won’t let me open port 2087 to access it? You go through all the installation process and at the end you can’t even see the end product much less interact with it.
Using the lure of this tutorial just to get people to sign up with your service seems a bit dishonest to me and for that reason alone I will not continue with your service.
Thank you.
Janne Ruostemaa
Hi Sam, thanks for your comment. You are right in that the trial restrictions do not permit access to some ports which impedes fully following this tutorial. The trial restrictions are in place to protect our network reputation from malicious actors and to ensure service level to our customers.