Introduction
Gatsby is an open source React-based web framework and static site generator (SSG) that enables developers to build fast, scalable, and secure websites. Although it’s mainly an SSG, Gatsby-powered websites are also capable of serving dynamic content, thanks to the underlying React functionality.
Gatsby offers some major benefits for both the developer experience and website user experience. From a development standpoint, Gatsby helps you get started quickly with your project by providing a starter library that includes reusable templates and boilerplate code that fits different project needs.
From a website user experience, Gatsby is well-known for creating extremely fast and performant websites by pre-rendering the content delivered at the first request on the server side, while also offering client-side rendering for subsequent requests using React’s hydration technique.
Another key feature of Gatsby is its ability to load data from various sources including filesystems, databases, CMS, or APIs. This is done by relying on GraphQL for querying these different data sources. The Gatsby data layer powered by GraphQL combines the data from different sources offering a unified point for data access.
Gatsby is also known for “playing nicely” with SEO. Because it pre-renders the page on the server side and generates a resulting static HTML, it allows web crawlers to retrieve and index the content. This is in contrast to SPA frameworks that rely on client-side Javascript rendering which might be challenging for some web crawlers to use.
We can double down on the performance features of Gatsby by using UpCloud’s ultra-fast servers to deploy our Gatsby websites. This also brings the scalability and resilience features of the Cloud to further enhance our application’s user experience.
In this guide, we’re going to cover the fundamental concepts and use cases of Gatsby, along with a practical example for building and deploying a Gatsby project to a Cloud server on UpCloud. Throughout this guide, you’ll be able to understand the following:
- How Gatsby works and its common use cases
- How to install Gatsby and work on a new project
- How to deploy your Gatsby project to a Cloud server
- How to optimize your project for SEO and performance
Prerequisites
To follow along with this guide, you’ll need to:
- Create an UpCloud account: This gives you access to different UpCloud services using the GUI control panel, command-line interface, or the API.
- Deploy a Cloud server on UpCloud: This is going to be our target server where we’ll deploy our Gatsby application.
- Install Node.js and npm: npm is used to install the gatsby-cli and other required dependencies or plugins for the project. A common way to install Node.js and npm is through the node version manager.
- Familiarity with using the CLI: We’ll be using some basic commands throughout this guide to install our tools, navigate project directories, and work with SSH.
What is Gatsby and Why Use It?
Gatsby is a web framework that is capable of building super fast web pages by leveraging SSG pre-rendering techniques. That is, when a user sends a request to get a page, the HTML is already generated previously and ready to be served instantly.
Let’s clarify this more with a simple analogy.
Imagine you walk into a coffee shop to order a drink, upon receiving your request, the barista starts “building” your drink by assembling the different components required. After waiting for this “build” process to finish, you finally get your drink.
Now what if the barista already “pre-built” this drink and has it ready to be served before you order it? You now don’t have to wait for the process of making your drink to finish, you just put your order and you have it delivered.
This is roughly what Gatsby or other static site generators do.
Gatsby prepares the HTML document that should be delivered to the user prior to receiving the actual user request. This process happens at build time and not runtime, meaning that when you build your Gatsby project, it starts rendering the page to make it ready for requests, instead of rendering it at runtime when receiving the request.
It’s worth mentioning that newer versions of Gatsby also offer other rendering options besides the SSG method.
To further extend our analogy, let’s assume that not all of the ingredients of your drink are actually there in the coffee shop, and they need to request it from other external sources to be able to prepare your drink.
For example, they need to use a specific type of coffee bean that is required for your drink, but it’s currently not in-stock, so they will order it from an external provider of this coffee bean. Now you’ll also have to wait for the time it takes for the ingredient to be “pulled” from its source.
Gatsby also saves this time as it pulls any required data from external sources during the build process when rendering the page. Now the generated HTML has all what’s needed to be served to the user upon request, no extra server-side processing is needed.
The process of pulling data from data sources in Gatsby relies on using GraphQL. This provides Gatsby with a lot of flexibility to query data from a variety of sources like external APIs, databases, or content management systems.
Although Gatsby can be used to build almost any type of website, it’s widely popular for content websites like blogs, documentation, and e-commerce.
Gatsby is also well-suited for SEO, it provides built-in support for server rendering of metadata like description and title, and it includes them in the generated HTML pages. This capability is provided through a Gatsby SEO component and plugins like Gatsby React Helmet.
Why Choose UpCloud for Hosting Gatsby Websites?
The performance and scalability features of Gatsby are only one piece of the puzzle. At the end, there’s still a critical role that the underlying infrastructure plays in the overall user experience. That’s why choosing the right hosting option for your Gatsby website should be of a top priority.
Taking advantage of the Cloud is considered one of the best options for hosting your application. By leveraging the massive scalability and performance features offered by the Cloud, you can satisfy your application’s non-functional requirements with less manual operations and overhead, and this is what the UpCloud servers excel at.
UpCloud servers deliver world-class performance and reliability by utilizing the underlying technologies that UpCloud uses at every component of their infrastructure. Starting from the storage component, UpCloud servers can use the MaxIOPS block storage system, an UpCloud-developed storage technology that outperforms industry-standard SSD. Additionally, the block storage systems are served from a clustered storage area network backend, and not from the local hypervisor, which provides higher levels of availability and recovery against hardware failures.
Another differentiating component for UpCloud servers is the underlying compute hosts, which are designed for availability and use enterprise-grade virtualisation and hardware resources.
UpCloud also has a global presence across multiple geographical locations, which provides the flexibility to deploy applications as close as possible to the end-users, improving their user experience.
Combining all of these features with affordable and simple configurations makes UpCloud a perfect choice for hosting different types of workloads, especially those that will benefit the most from the performance capabilities like Gatsby websites.
Installing Gatsby on UpCloud
Now let’s get into a practical scenario by installing Gatsby on our UpCloud server, then creating and testing a project. As mentioned in the prerequisites section, you need to already have your UpCloud server deployed and prepared with Node.js and npm.
Connect to your UpCloud server using SSH. You’ll first need to generate an SSH key and use it for your server. Then you can use the command ssh -i <key-file> root@<server-IP>.

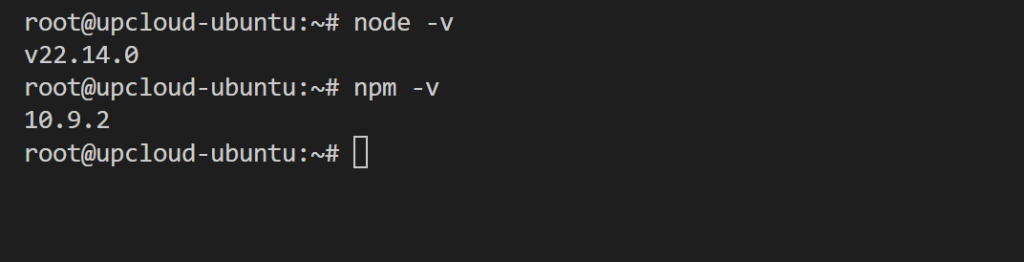
Verify your Node.js and npm installation with the commands node -v and npm -v.
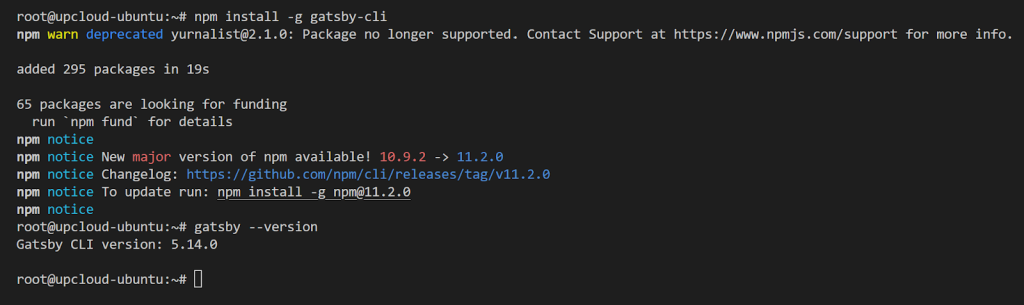
Install Gatsby CLI to initialize, build, and develop your Gatsby projects. There are multiple ways to use the Gatsby CLI, we can install it with npm using the command npm install -g gatsby-cli, or we can execute it directly as a node package using npx gatsby followed by the Gatsby command we need. For this guide, we’ll be installing it using npm.
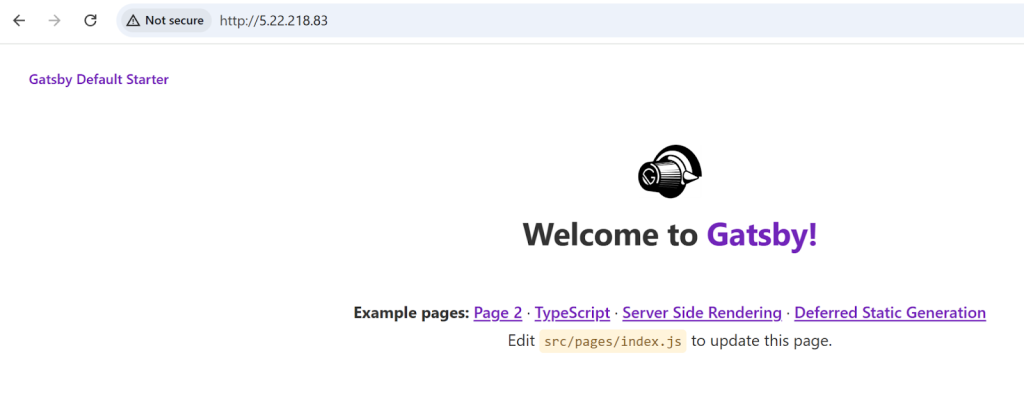
Create a new project using the command gatsby new <project-name>.
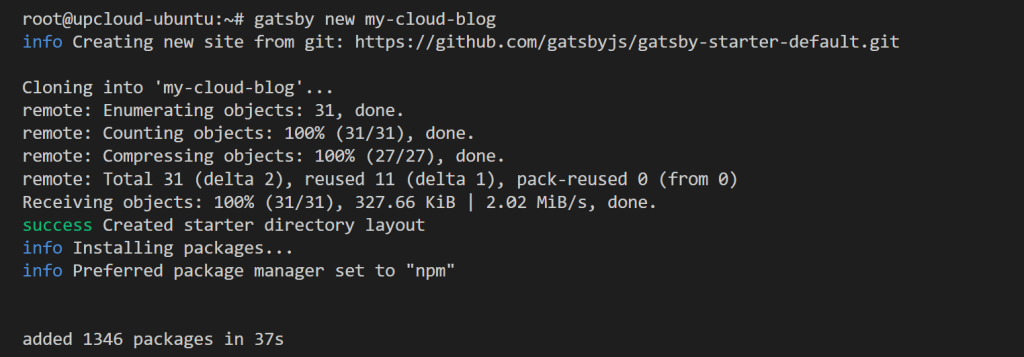
This will automatically clone and use the default Gatsby starter that includes boilerplate code and configuration to get started quickly with your project.
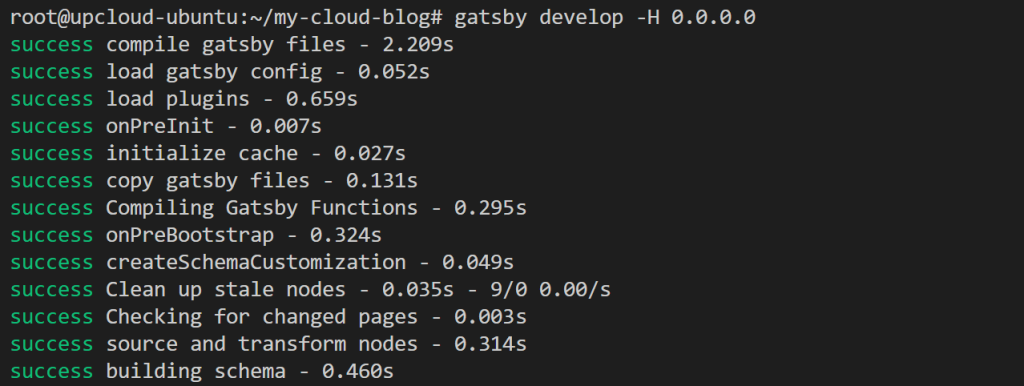
Now, navigate to your project directory and start the local development server with the command gatsby develop. This development server is useful for testing your project locally.
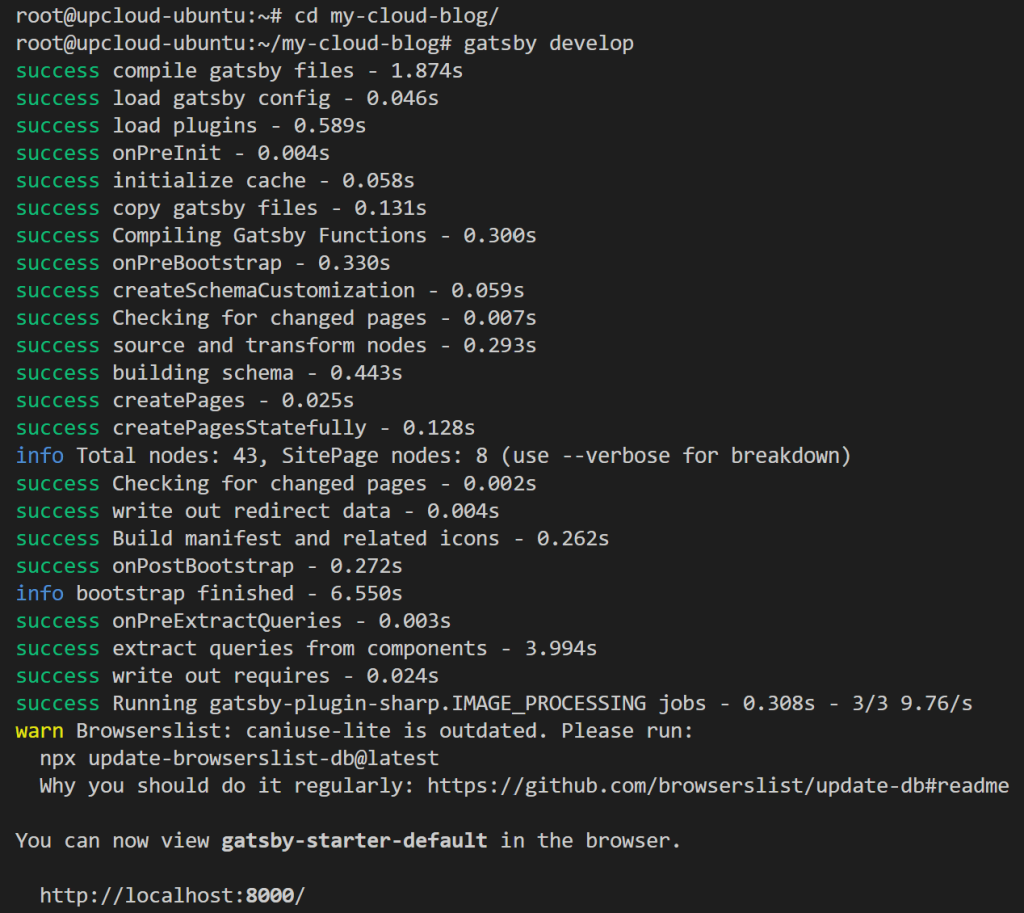
The above command starts the dev server locally on port 8000. By default, it can only accept requests on the localhost, meaning that you need to connect to it from the same server. Since our Ubuntu server doesn’t have a browser installed, we can test the connectivity using curl with the command curl localhost:8000
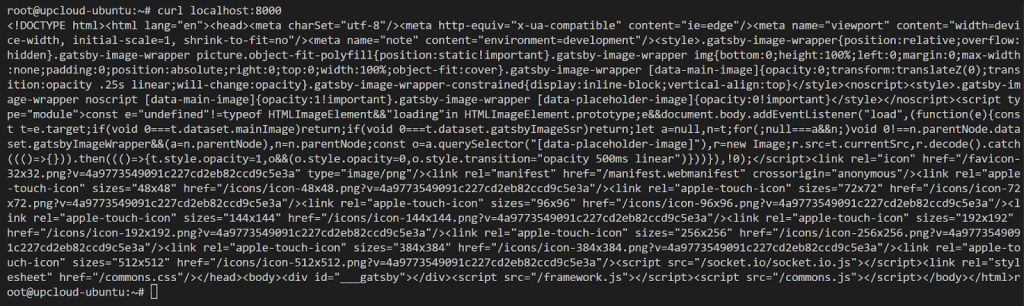
As we can see, we get a response with the HTML content of the Gatsby website. To enable connecting to our development server from anywhere, we can modify the gatsby develop command by adding -H 0.0.0.0 option, which specifies that the server should listen to requests on any interface IP address and not only the localhost.
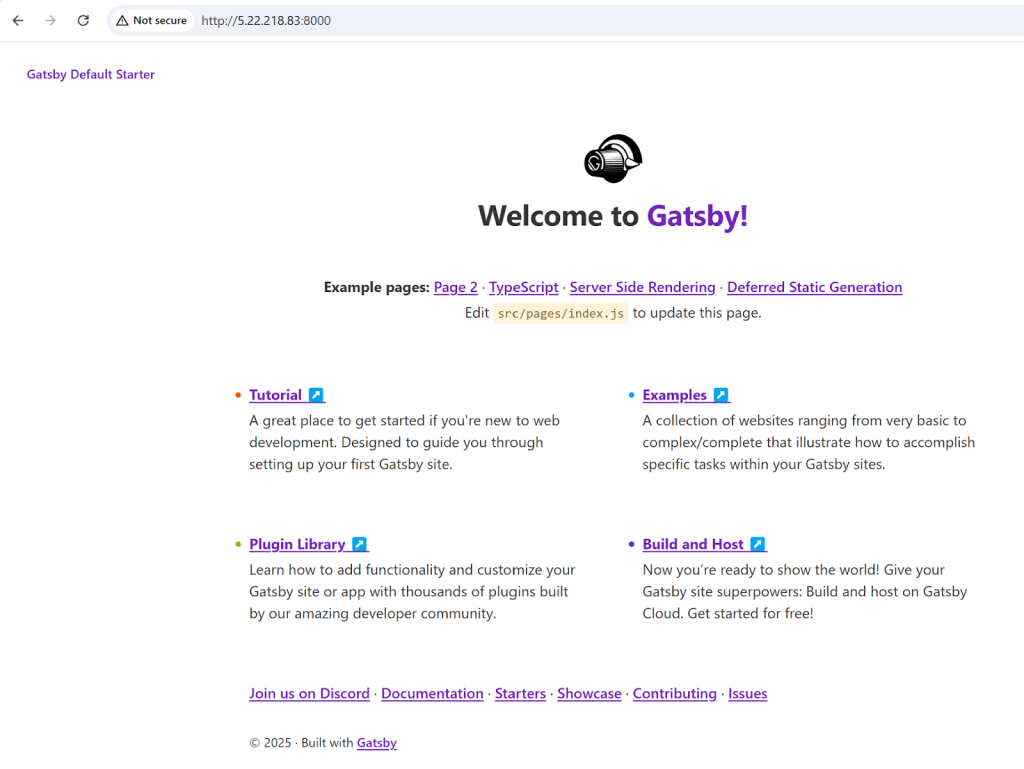
We can now connect to our server using its public IP from a browser on any other machine.
Understanding Gatsby project structure
Now let’s navigate our project folder and understand its most important contents:
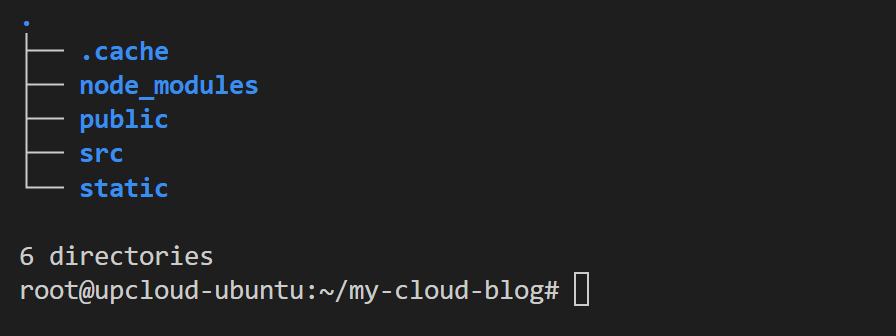
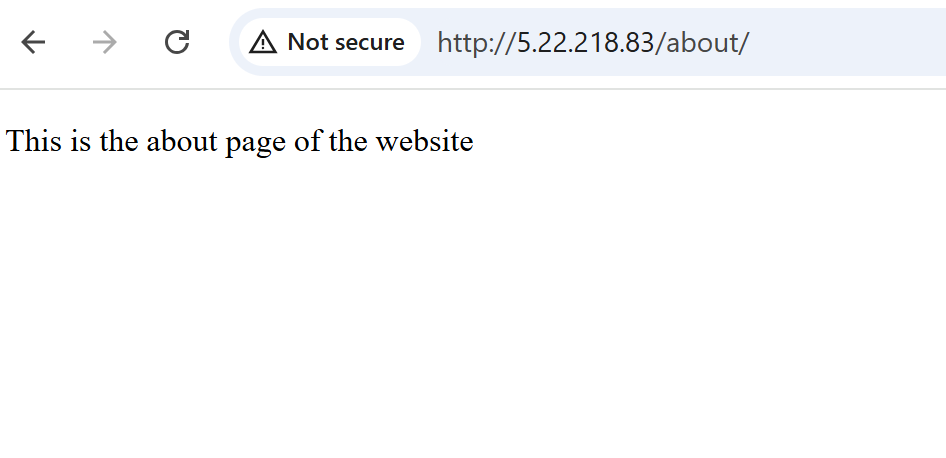
/src : This is the directory that contains the source code that generates everything in the frontend of your site. For example, there’s a /pages subdirectory under the /src directory where you can create React components that are transformed into pages in your website with their path equal to their file name.
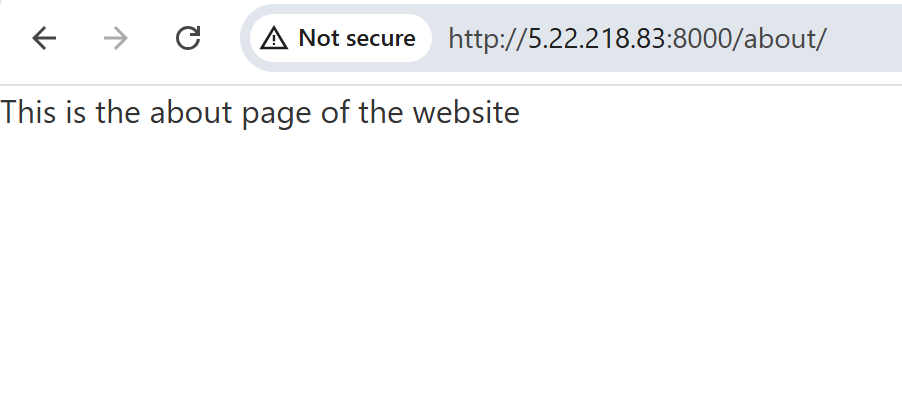
Let’s clarify this by creating a file called about.js under /src/pages. This file will contain the following React component:
// src/pages/about.js

import * as React from "react"

function AboutPage() {
  return (
    <div className="about-container">
      <p>This is the about page of the website</p>
    </div>
  )
}

export default AboutPage
Now when we build our project, we’ll be able to navigate to the /about path in the website:
/public: This directory will contain the output of the build process for our Gatsby project. For example, the HTML document generated from the React components under the /src/pages will be added to their own subdirectory under this /public directory. Let’s check this for the previous /about page:
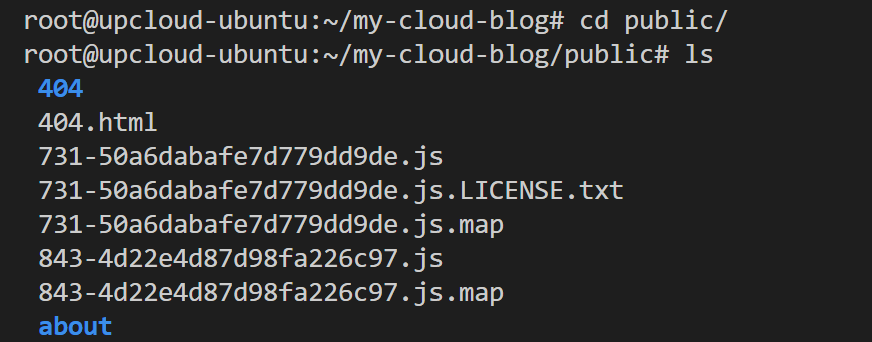
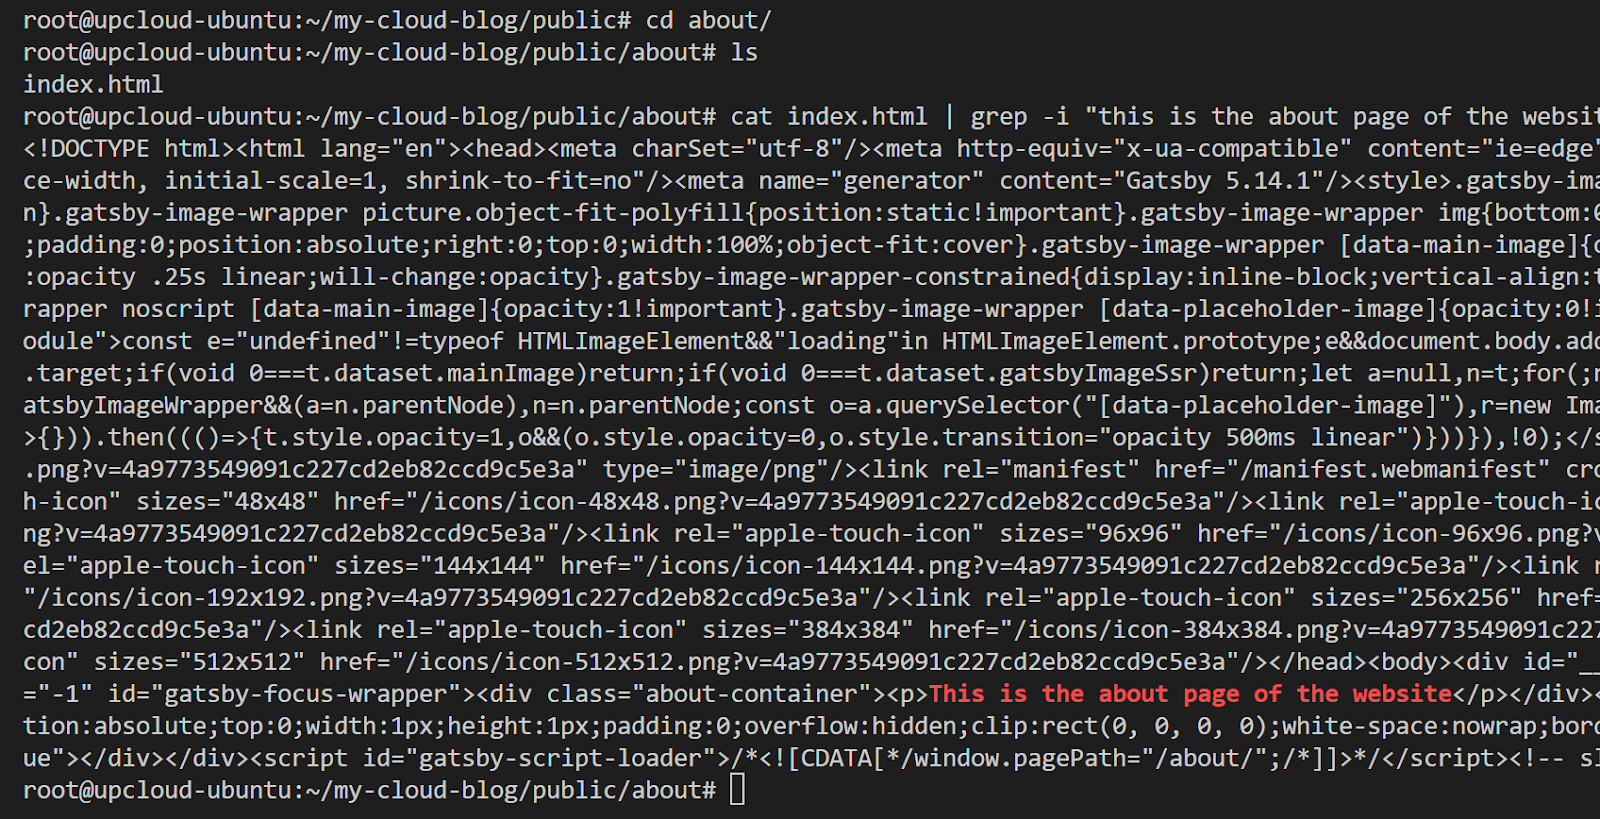
As we can see, the index.html file was created in the /about subdirectory under the /public directory. Which contains our HTML code generated from the React component.
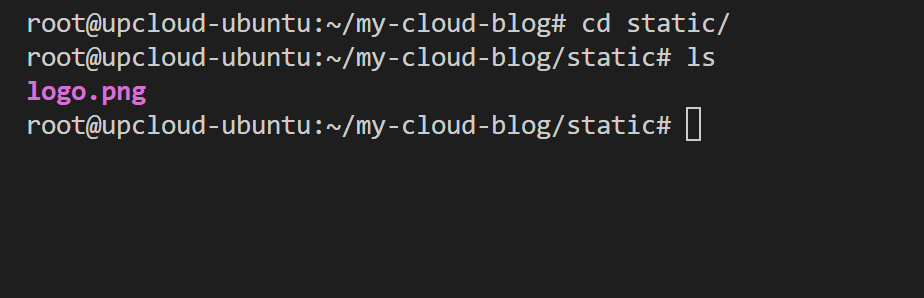
/static: Any file that you add under this directory will be copied under the /public folder as it is with no changes. This can be considered one way to add assets to your project.
We can try this by adding a simple logo image to our website:
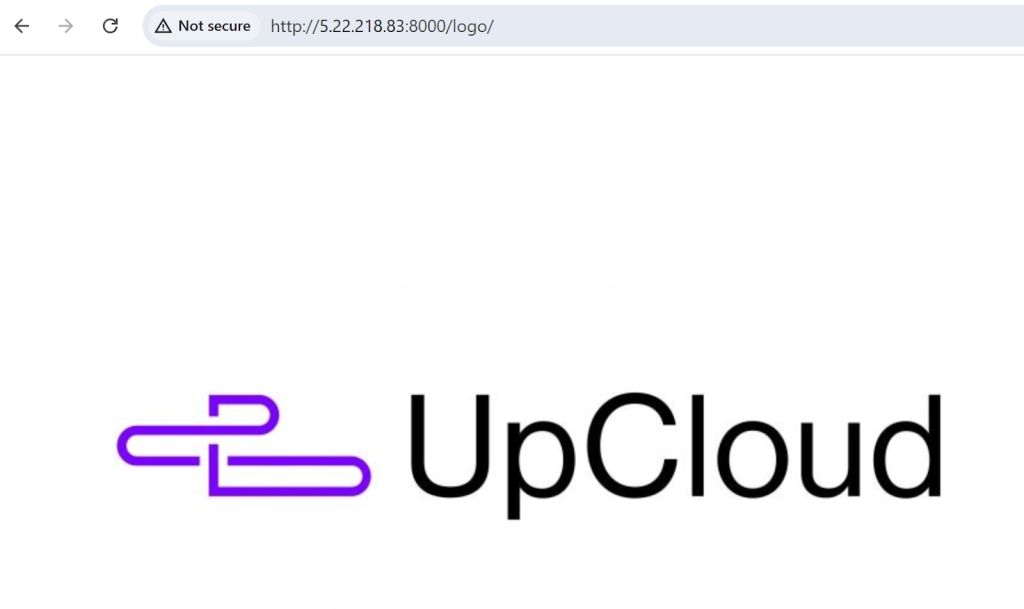
Next we’ll create a component under /src/pages to display this image:
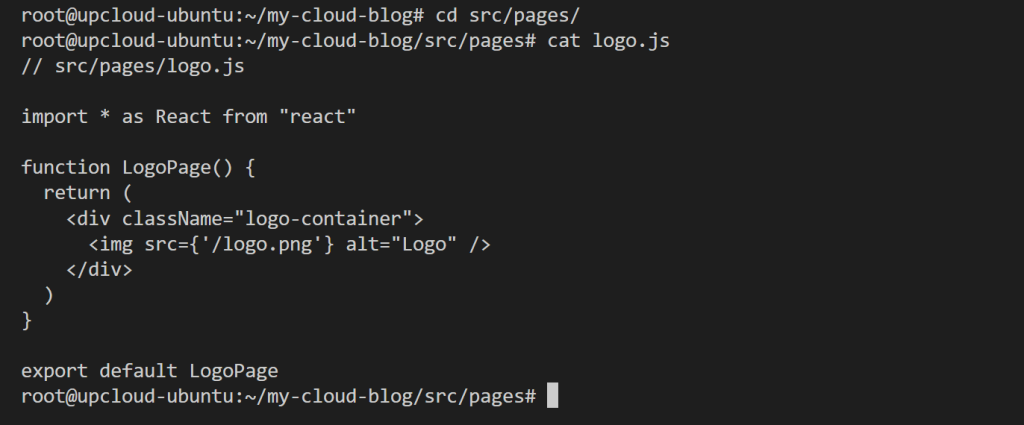
Now let’s try the /logo path for our website:
Deploying Gatsby using Nginx
So far we’ve been testing our website using the gatsby develop command, which starts a development server on the fly and starts serving the requests.
However, this setup is not production-ready, so we need to do some additional steps to prepare our website to run in a production environment. In these steps we’ll be installing and configuring Nginx to serve our Gatsby website instead of relying on the local development server, and we’ll also compile and build our project files instead of just serving them in the development mode.
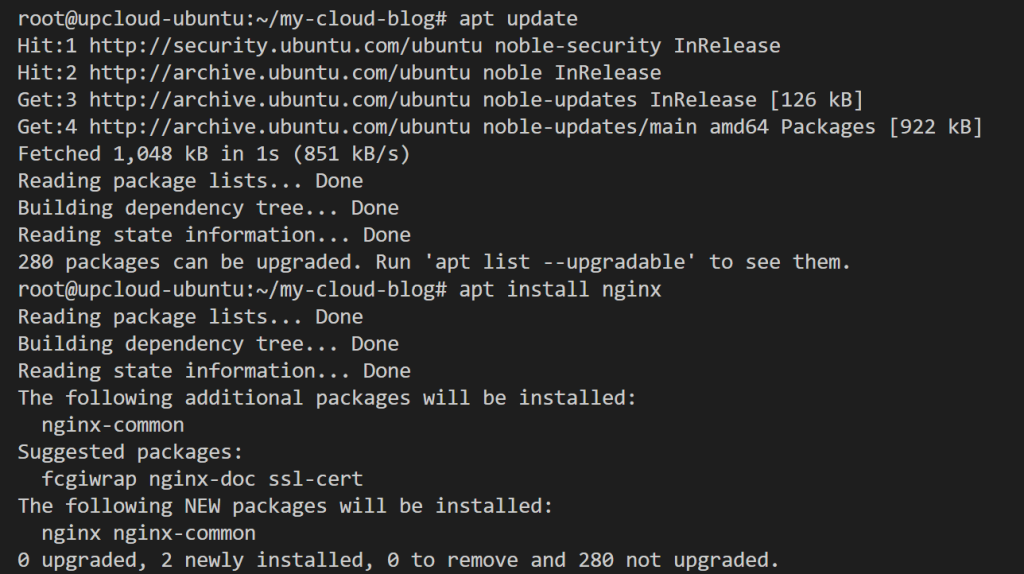
- Install Nginx on our UpCloud server. As we’re running Ubuntu, we’ll use the
apt updateandapt install nginxcommands. You can use the corresponding package manager of your operating system.
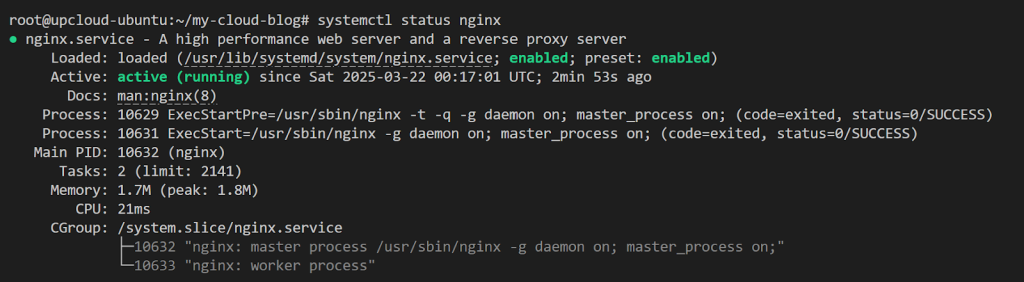
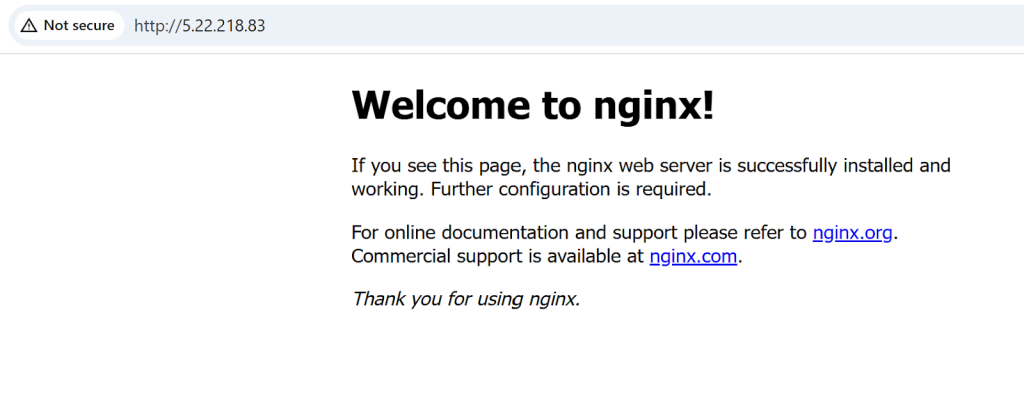
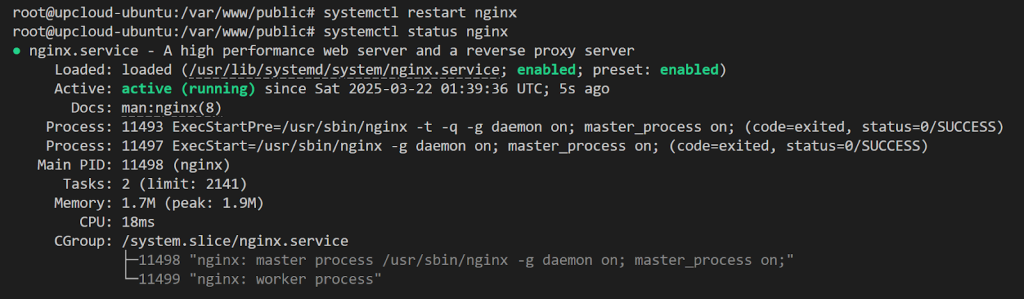
- Verify that the service is running using the command
systemctl status nginx.We can also test the service by connecting from a browser to our server IP.
- Now that we’ve our nginx web server ready, let’s build our Gatsby project. From inside the root directory of the project use the command
gatsby build.This will compile the related project files and generate the final HTML pages under the/publicsubdirectory.
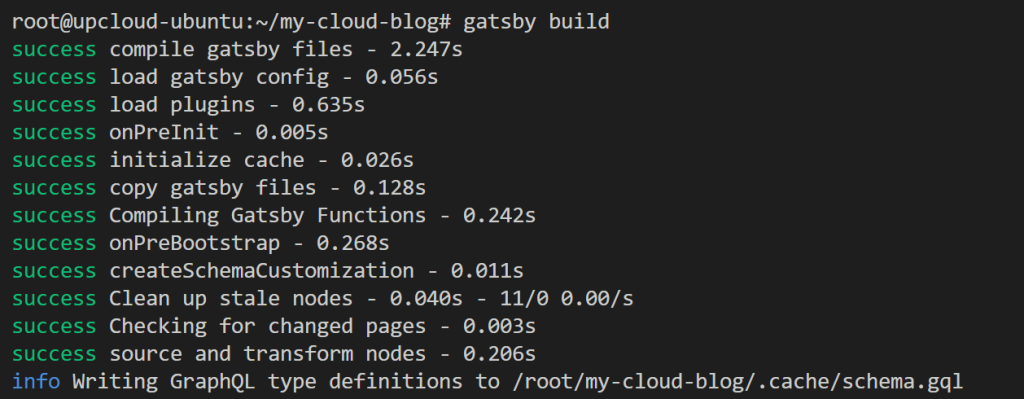
You’ll find the list of pages rendered for your project at the end of the command output.

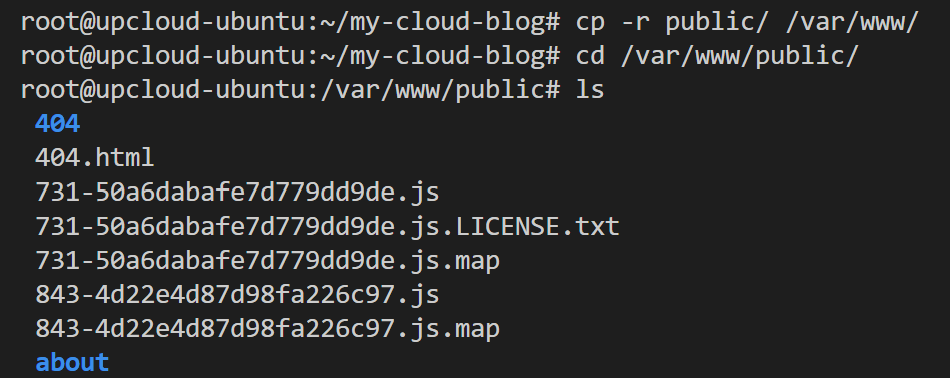
- Copy your project’s
/publicdirectory to/var/www/with the commandcp -r public/ /var/www/, this will be the web root that we’ll configure for our nginx server.
- Modify your Nginx server configuration to use your
/publicdirectory as the web root. The Nginx configuration files location depends on your operating system, but in most cases it will be under the/etc/nginx/directory.
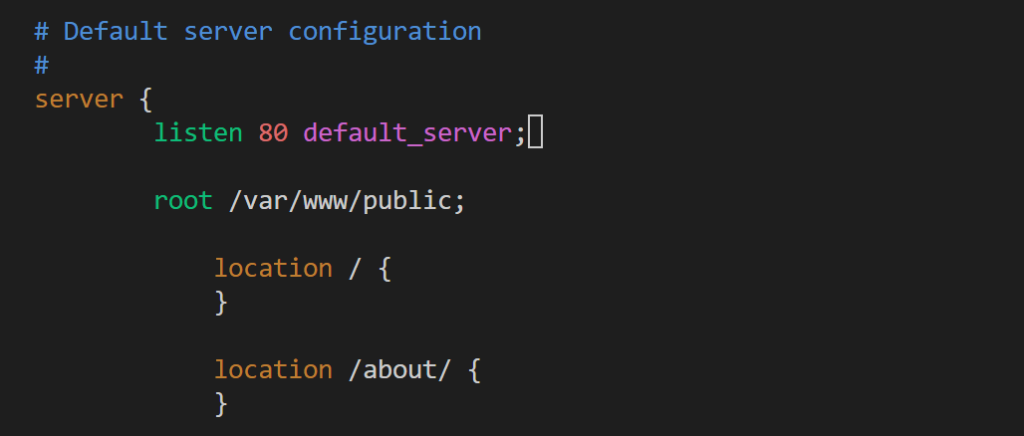
In the above configuration, we first set this server as the default, meaning that requests that have no matching host name in the Host header will be served from this server. Next we set our /public directory that we copied under the /var/www as our web root, so our Nginx server will process requests by searching for files starting from this location. Finally, we configure two locations for our website root / and /about pages.
server {
        listen 80 default_server;

        root /var/www/public;

            location / {
            }

            location /about/ {
}- Restart the Nginx service using the command
systemctl restart nginx, then test access to the website pages from the browser.
Now we’ve our production-ready Gatsby website served using Nginx!
Optimizing Gatsby for SEO
One of the major benefits of using Gatsby is its ability to boost your website’s SEO ranking. Of course, the SEO algorithms are complicated with a lot of factors taken into consideration, but we’ll cover the key features of Gatsby that optimize SEO performance:
- Static page generation: The SSG rendering technique of Gatsby creates the static HTML pages ahead of time on the server, this helps web crawlers in understanding and indexing the page contents. This is unlike client-side rendering, which sends a minimal empty HTML document and relies on executing JavaScript code on the client to manipulate the DOM and create additional content, and because some web crawlers cannot efficiently run JavaScript code, this might cause delays in rendering the page or even errors, which impacts the website ranking.
Additionally, because website performance is a key factor in SEO ranking, the performance optimization offered by the SSG rendering helps improve Gatsby’s SEO results.
- Page titles and Meta descriptions: When you get the search results for a specific keyword, chances are you’ll click on the link that has a description that caught your eyes, and this is the importance of meta information of a website page.

Meta description and title informs the user about the content included in the page, it’s like a summary of what to expect when visiting this page. So, a compelling description should be a critical factor for driving organic traffic to your website.
Gatsby enables you to dynamically set these tags for your pages in an easy and efficient way using the gatsby react helmet plugin or Gatsby Head API.
A sample component that uses gatsby react helmet to generate page title and description can look like this:
import React from 'react';
import { Helmet } from 'react-helmet';

const MyPage = () => {
  return (
    <div>
      <Helmet>
        <title>Deploy high performance website with Gatsby and UpCloud</title>
        <meta name="description" content="In this tutorial you’ll learn how to create a Gatsby website and optimize its performance with UpCloud servers" />
      </Helmet>
    </div>
  );
};

export default MyPage;
Note that you’ll need to install the plugin first using the command npm install gatsby-plugin-react-helmet react-helmet.
- URL structure and permalinks: Imagine a user reading a post on your website where the URL showing in the browser is https://your-site-name/28h79dks0-dnhfs, this of course doesn’t give any context about what content is included in the post or which category does it belong to. Compare this to a URL that is showing https://your-site-name/tutorials/install-gatsby-upcloud, which can definitely tell the story of what content you’re viewing.
This URL structuring is crucial for improving your site’s SEO performance and even for the experience of your site visitors. URLs and permalinks for a specific resource on a website should be descriptive, this helps search engines better understand and index the content.
Gatsby allows setting custom SEO-friendly URLs and slugs by modifying the gatsby-node.js file and using the Gatsby slug plugin.
- HTML heading tags: Adding proper heading tags to your page (e.g. <h1>, <h2>, <h3>) can greatly improve your website’s SEO performance. Page headings can help search engines better understand the content structure, also adding relevant keywords to the headings can boost the page SEO ranking.
You can use Gatsby to set your generated HTML page headings by configuring the page contents in its relative component.
import React from "react"
import { Link } from "gatsby"

import Layout from "../components/layout"
import SEO from "../components/seo"

const DocsPage = () => (
  <Layout>
    <SEO title="Home" />
    <h1>Explore Gatsby Documentation</h1>
    <h2>Gatsby Rendering Options</h2>
    <h2>Gatsby SEO Component</h2>
  </Layout>
)

export default DocsPage- Image Optimization: Images are one of the assets that play a significant role in improving a page SEO ranking. Optimizing images for SEO includes multiple techniques like resizing and compressing images for better performance, using descriptive file names for the images, and adding alt text to the images.
The Gatsby image plugin takes care of implementing the underlying complexities of image optimization while providing an easy way for the developer to leverage and customize the functionality of the plugin.
import { StaticImage } from "gatsby-plugin-image"

export function Smartphone() {
  return (
    <StaticImage
      src="../images/smartphone.png"
      alt="A smartphone device"
    />
  )
}
In the above example, we’re using the StaticImage component from the Gatsby image plugin to add the smartphone.png image to our page and use the alt text A smartphone device to describe our image content.
Optimizing Gatsby for Performance
We can improve our website performance by implementing some Gatsby optimization techniques. These techniques can be generally divided into the following categories:
- Third-party scripts enhancement: Some third-party scripts are “more demanding” in terms of resource consumption. This might impact the page load performance and cause delays. We need to identify any third-party scripts and understand their purpose and what type of data they use, this will help us remove any unnecessary scripts.
Additionally, Gatsby includes a built-in <Script> component that provides a more efficient and performant way for loading scripts. With this component, we can control the technique by which we load the script at a specific stage of serving our content. These techniques include post-hydrate, idle, and off-main-thread.
- Reduce JavaScript code size: JavaScript is a resource-consuming asset due to its dynamic nature of execution. The more intensive and large your JavaScript code is, the more it can impact a page’s performance. Also as more npm modules are added to the project, chances are there might be some JavaScript code that is unused.
Gatsby provides plugins such as gatsby-plugin-webpack-bundle-analyser-v2 that help analyze and understand the used JavaScript bundle; we can later use these insights to optimize the JavaScript bundle.
- Styling and Fonts efficiency: Globally scoped CSS styling applies to all the elements in the node tree that match a selector. This can result in a large CSS bundle getting pulled in every page. So, you need to properly scope and import the CSS so that only a small needed bundle is imported.
Another styling improvement is to use Gatsby plugins that correspond to CSS-in-JS libraries. This will help render the styles on the server side and avoid the browser recalculating the size and position of elements on the page, also known as reflow. Examples of these plugins are Gatsby styled components plugin and emotions plugin, which provide support for using styled-components and emotions libraries respectively.
We can also implement some minor font optimization techniques by reducing the font file size, store the font file locally instead of installing it from an external source, and avoid including font extensions that you don’t need.
- Optimize images and media assets: As mentioned in the previous SEO section, the Gatsby image plugin handles the most part of optimizing images and media-related files. This includes reducing the image file size, using a placeholder during image fetch, and delaying work for images that are not currently visible to the user within the scope of the screen (also called not above the fold).
- Use CDN for caching: CDNs are known for boosting website performance by caching static content closer to the end user. Implementing proper CDN caching policies can reduce the network latency caused by retrieving the content from the origin servers each time.
Conclusion
Gatsby is a web framework for building fast, scalable, and SEO-friendly websites. It uses SSG pre-rendering techniques to optimize website performance and improve user experience. Gatsby also has the ability to load data from a variety of data sources using GraphQL. This offers great flexibility in generating the content of the web pages created by Gatsby.
In this guide, we covered the fundamental concepts of Gatsby and why we should use it for building a website. We used UpCloud high performance servers to install Gatsby and set up our first project. Then we tested our Gatsby project in the development mode and also in the production mode by using Nginx. Finally, we explored some techniques that we can use in Gatsby to optimize our website SEO and performance.
Ready to deploy your SEO-friendly and performance-optimized Gatsby website in the Cloud? Try UpCloud now and explore a rich set of Cloud services that will help satisfy your website requirements.
FAQs
- What is Gatsby, and why is it great for SEO?
Gatsby is a modern framework for building static sites. It optimizes speed, ensures accessibility, and integrates components for different SEO optimization techniques.
- How do I install Gatsby on a server?
Install Node.js and Gatsby CLI, create a project, and test it locally. This guide provides step-by-step installation instructions.
- How can I deploy a Gatsby site on UpCloud?
Use gatsby build to generate static files, then deploy them on an Nginx server.
- What makes Gatsby fast and high-performing?
Gatsby pre-renders static assets, uses image optimization plugins, and leverages caching for blazing-fast load times.
- Why is UpCloud the best hosting option for Gatsby websites?
UpCloud provides high-speed SSD storage, scalable infrastructure, and global data centers, making it ideal for fast-loading Gatsby sites.
Discussion