ownCloud is a self-managed cloud storage platform that allows users to store, share, and collaborate on files over the Internet. It functions similarly to Google Drive, DropBox or Microsoft OneDrive but gives users complete control over data security, privacy, and management. As an open-source cloud storage solution, ownCloud enables users to self-host on their preferred cloud provider or on-premise infrastructure.
While data control is the primary advantage of ownCloud, it offers several additional benefits, including:
- Access to your data from anywhere – Sync files across Android, iOS, and desktop devices so you always have them when needed.
- Versioning –You can keep multiple file versions and roll back to a previous version whenever needed.
- Customization – Add apps like calendars, music streaming, and more from the ownCloud marketplace, or even build your own.
- Granular access control (RBAC) – Set permissions for users and groups, restrict file types, and control storage limits the way you want.
- Flexibility – Since you self-host ownCloud, you decide where and how to run it—on a cloud server, a Raspberry Pi, or your own hardware.
- Security – Encrypt your data, set up firewalls, and configure security policies to keep everything protected.
In this tutorial, we will cover a step-by-step installation and configuration of your ownCloud across different operating systems to help you understand how it works and how to optimize it for your needs.
Prerequisites
Before setting up ownCloud, ensure your system meets the basic requirements. The installation process depends on your platform, but here’s what you’ll need:
1. System requirements:
- OS Compatibility: ownCloud runs on Ubuntu, and Debian. If you prefer Docker, you can run it in a container.
- Memory & CPU: 512MB RAM minimum, but 2GB+ is recommended for handling concurrent users or large file syncs. Any 64-bit processor works.
- Storage: At least 200MB for ownCloud files, plus additional space for your stored data.
- Database: Requires MySQL/MariaDB or PostgreSQL (Docker includes this automatically).
- Web Server: Apache 2.4+ is recommended, but Nginx also works.
- PHP: Version 7.4+ or higher( 8.0+ recommended), with required extensions like cURL, GD, and OpenSSL.
2. Where can you install owncloud?
This tutorial covers installing ownCloud on Ubuntu, Debian, and Docker. Ensure you have one of these environments ready before proceeding:
- Ubuntu & Debian → If you don’t have a server yet, you can deploy an Ubuntu or Debian server on UpCloud.
- Docker → If you prefer a containerized setup, you can run containers with Docker on UpCloud.
3. Downloading ownCloud
Get the latest version of ownCloud from the official website. Choose the package that matches your setup, and you’re ready.
4. Sever with Root or sudo access.
5. Basic CLI knowledge to execute Linux commands.
Step 1: Downloading ownCloud
Before installing ownCloud, you need to get the correct installation files for your platform.
- Visit the ownCloud’s official website to download the latest version.
- Choose the version for your platform:
- Linux (Ubuntu and Debian) → Click “Go to package,” then select “Add repository and install manually” to get the installation commands for your system.
- Docker → Click “Go to Docker instructions” to find the commands for downloading ownCloud in a containerized environment.
When you move to Step 2 (Installing ownCloud), you will have the correct package and installation method ready from Step 1.
Step 2: Installing OwnCloud on Various Platforms
With the commands discovered in Step 1, we will now install ownCloud on multiple operating systems.
Step 2.1: Installing OwnCloud on Docker
This section walks through installing ownCloud and MariaDB in Docker containers on Ubuntu 24.04 LTS using docker-compose.
Before proceeding, set up a fresh Ubuntu 24.04 LTS VM on Upcloud.
1. Installing Docker
Update the system and install Docker:
sudo apt update
sudo apt install -y docker.io
Enable and Start Docker
sudo systemctl enable docker
sudo systemctl start docker
Verify Docker Installation
docker --version2. Installing Docker Compose
Docker Compose is a tool that allows you to define and run multi-container Docker applications. Instead of manually starting each container separately, docker-compose.yml lets you manage everything in a single file. It makes deployment and scaling much easier, especially for applications like ownCloud, which require both an application container and a database container.
Install Docker Compose
sudo apt install -y docker-composeVerify Docker Compose Installation
docker-compose --version3. Create a Project Directory
This folder will store the docker-compose.yml file and persist data.
kdir ~/owncloud-docker
cd ~/owncloud-docker
4. Create a docker-compose.yml File
nano docker-compose.ymlAdd the following content (Replace your-vm-ip with your actual VM IP)
version: '3'
services:
  owncloud:
    image: owncloud/server:latest
    restart: always
    ports:
      - "8080:8080"
    volumes:
      - owncloud_data:/mnt/data
    environment:
      - OWNCLOUD_DOMAIN=your-vm-ip:8080
      - OWNCLOUD_TRUSTED_DOMAINS=your-vm-ip
      - OWNCLOUD_ADMIN_USERNAME=admin
      - OWNCLOUD_ADMIN_PASSWORD=AdminPass123!
      - OWNCLOUD_MYSQL_DATABASE=owncloud
      - OWNCLOUD_MYSQL_USER=owncloud
      - OWNCLOUD_MYSQL_PASSWORD=Pass9010Cloud
      - OWNCLOUD_MYSQL_HOST=db
  db:
    image: mariadb:latest
    restart: always
    environment:
      - MYSQL_ROOT_PASSWORD=1234567890
      - MYSQL_DATABASE=owncloud
      - MYSQL_USER=owncloud
      - MYSQL_PASSWORD=Pass9010Cloud
    volumes:
      - db_data:/var/lib/mysql
volumes:
  owncloud_data:
  db_data:
Save the file: Ctrl + O, then press Enter, then Ctrl + X to exit.
What This Does:
- ownCloud Service: Runs ownCloud on port 8080, using predefined admin credentials.
- Database (MariaDB): Hosts the MySQL database required for ownCloud.
- Persistent Storage: Ensures data is stored using Docker volumes.
5. Start the Containers
Run the Containers in Detached Mode
sudo docker-compose up -dThe -d flag runs containers in the background.
Check Running Containers
sudo docker psExpected Output: The list should include owncloud/server and mariadb
6. Access ownCloud
Open a Web Browser and Go to: http://your-vm-ip:8080
Log in with the admin credentials:
- Username: admin
- Password: AdminPass123!
If the ownCloud login page loads, the setup is complete!
7. Stop Containers (Optional)
If you need to stop ownCloud and MariaDB, use:
sudo docker-compose downThis will stop and remove the containers while keeping the data intact.
Step 2.2: Installing OwnCloud on Ubuntu(22.04)
1. Connect to Your UpCloud Ubuntu Server
SSH into your spun-up UpCloud Ubuntu instance from your local machine:
ssh -i your-pem-key root@your-server-ip2. Add the OwnCloud Repository
echo 'deb http://download.opensuse.org/repositories/isv:/ownCloud:/server:/10/Ubuntu_22.04/ /' | sudo tee /etc/apt/sources.list.d/isv:ownCloud:server:10.list3. Import the Repository Key
curl -fsSL https://download.opensuse.org/repositories/isv:ownCloud:server:10/Ubuntu_22.04/Release.key | gpg --dearmor | sudo tee /etc/apt/trusted.gpg.d/isv_ownCloud_server_10.gpg > /dev/null4. Update Package Lists & Install OwnCloud
sudo apt update
sudo apt install owncloud-complete-files
5. Verify the Installation
Check if ownCloud files were installed successfully:
ls /var/www/owncloud/Step 2.3: Installing OwnCloud on Debian(12)
1. Connect to Your UpCloud Debian Server
SSH into your spun-up UpCloud Debian instance:
ssh -i your-pem-key root@your-server-ip2. Add the OwnCloud Repository
echo 'deb http://download.opensuse.org/repositories/isv:/ownCloud:/server:/10/Debian_12/ /' | sudo tee /etc/apt/sources.list.d/isv:ownCloud:server:10.list3. Install Required GPG Tool (GNU Privacy Guard)
sudo apt install -y gnupg4. Import the Repository Key
curl -fsSL https://download.opensuse.org/repositories/isv:ownCloud:server:10/Debian_12/Release.key | gpg --dearmor | sudo tee /etc/apt/trusted.gpg.d/isv_ownCloud_server_10.gpg > /dev/null5. Update Package Lists & Install OwnCloud
sudo apt update
sudo apt install owncloud-complete-files
6. Verify the Installation
Check if ownCloud files were installed successfully:
ls /var/www/owncloud/Note: While we’ve covered installing ownCloud on multiple platforms, the rest of this tutorial will use Ubuntu for configuration and setup. Most steps will still apply if you’re using Debian, but some commands or paths may differ.
Step 3: Configuring OwnCloud
Using Ubuntu for the rest
1. Installing OwnCloud Dependencies
Before configuring ownCloud, install the required dependencies:
- Apache (Web Server)
- PHP 7.4 and necessary extensions
- MariaDB (Database)
Run the following commands:
sudo add-apt-repository ppa:ondrej/php
sudo apt update
sudo apt install -y apache2 php7.4 libapache2-mod-php7.4 php7.4-mysql php7.4-curl php7.4-gd php7.4-mbstring php7.4-zip php7.4-intl php7.4-xml php7.4-fileinfo
Verify Apache and PHP Installation
Check if PHP and Apache are installed and active:
php -v
sudo systemctl status apache2
Install MariaDB (Database Server)
sudo apt install -y mariadb-server mariadb-client2. Setting Up the Database
Now, we need to secure MariaDB and create a database for ownCloud. Run:
sudo mysql_secure_installationWhen prompted, respond as follows:
- Enter current password for root → Press Enter
- Switch to UNIX socket authentication? → Type n
- Change the root password? → Type y, then enter your preferred password
- Remove anonymous users? → Type y
- Disallow root login remotely? → Type y
- Remove test database and access to it? → Type y
- Reload privilege tables now? → Type y
3. Create the Database and User for OwnCloud
Log into MariaDB:
sudo mysql -u root -p(Enter the password created earlier)
Then, run the following queries to create a database and user:
CREATE DATABASE owncloud;
GRANT ALL PRIVILEGES ON owncloud.* TO 'your_username'@'localhost' IDENTIFIED BY 'your_password';
FLUSH PRIVILEGES;
EXIT;
4. Configuring the Admin Panel
Now, we need to point Apache to ownCloud and configure domain settings.
Update Apache Default Site Configuration
Open the Apache configuration file:
sudo nano /etc/apache2/sites-available/000-default.confModify with the following lines:
ServerName anitaihuman.dev
ServerAlias www.anitaihuman.dev
DocumentRoot /var/www/owncloud
Set File Permissions
Ensure ownCloud is owned by Apache’s user group:
sudo chown -R www-data:www-data /var/www/owncloud
sudo chmod -R 755 /var/www/owncloud
Restart Apache
sudo systemctl restart apache2Complete OwnCloud Web Setup
- Open your browser and visit:
http://your-server-ip - Set up an admin username and password.
- Enter the database details created earlier (database name, username, and password).
- Click Finish Setup to complete the installation.
5. Networking & Security Settings
To make ownCloud secure and accessible, we’ll:
- Enable HTTPS with an SSL certificate
- Configure a firewall
- Enable HTTPS
Add Trusted Domains
Edit the ownCloud configuration file:
sudo nano /var/www/owncloud/config/config.phpAdd your own domain names inside the trusted_domains array:
'trusted_domains' =>
array (
0 => '94.237.50.118',
1 => 'anitaihuman.dev',
3 => 'www.anitaihuman.dev',
),
Install Certbot (SSL)
sudo apt install -y certbot python3-certbot-apacheGenerate an SSL Certificate
sudo certbot --apache- Enter your email address.
- Accept the terms and conditions.
- Choose the domain names for the SSL certificate.
Once completed, your site will be available over HTTPS.

- Configure a firewall
UpCloud’s Ubuntu comes with a firewall installed but disabled by default.
Check firewall Status
sudo ufw statusAllow Required Traffic
sudo ufw allow 22
sudo ufw allow 80
sudo ufw allow 443
Enable the firewall
sudo ufw enableConfirm Firewall Rules
sudo ufw statusFirewall should now be active with the above rules.
Step 4: Accessing OwnCloud
Once ownCloud is installed and configured, you can access it both locally and remotely.
1. Accessing OwnCloud Locally
If you are on the same network as your server, open a web browser and enter: http://your-server-ip
Log in using the admin account you created earlier.
2. Accessing OwnCloud Remotely (From Anywhere)
If you configured a domain name and SSL certificate in Step 3, access ownCloud securely via:
https://yourdomain.com/owncloud This allows you to use ownCloud from any device, anywhere in the world.
Step 5: Adding Applications and Extensions
ownCloud has a rich marketplace with various apps to extend its functionality. In this step, we’ll demonstrate how to install an app by adding the Calendar extension.
Installing an App from the ownCloud Marketplace
- Log into ownCloud using your admin username and password.
- Open the Marketplace
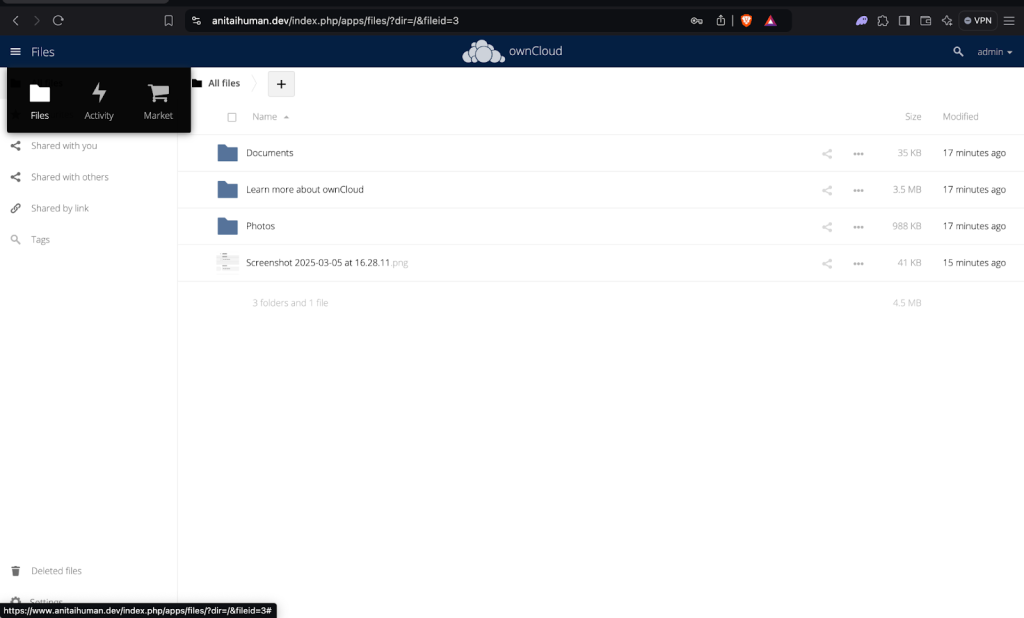
- Click the three-dash menu (☰) in the top-left corner.
- Navigate to Marketplace (as shown in the image below)
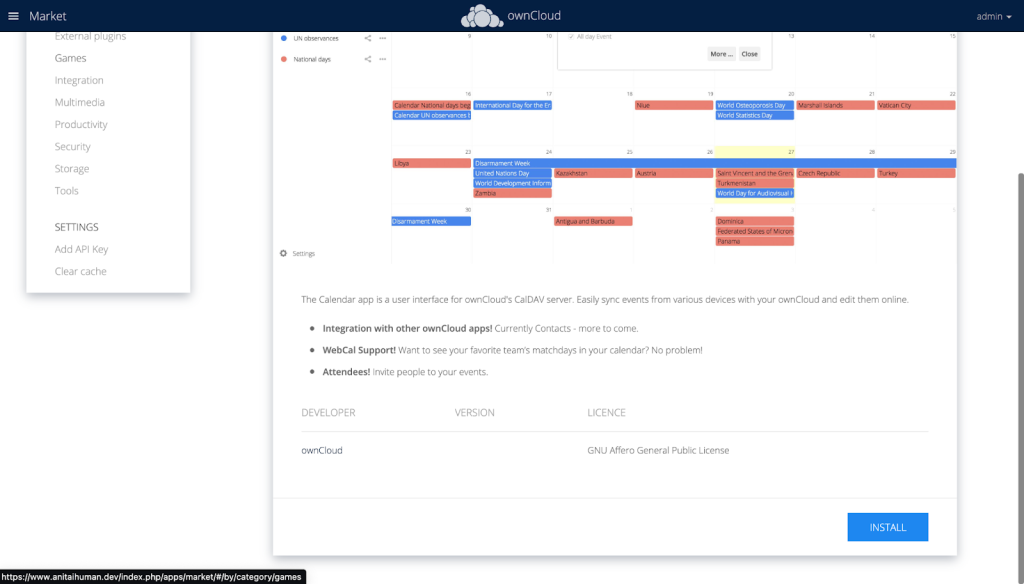
3. Find and Install the Calendar App
- Search for “Calendar” in the Marketplace.
- Click Install.
4. Access the installed App
- Once installed, Calendar will be added to your apps.
- You can now access it from the ownCloud UI.

Note: You can explore other apps in the marketplace to further customize your ownCloud instance.
Tips for Maintenance and Upgrades
To keep ownCloud running smoothly, it’s important to back up data, perform upgrades properly, and apply security best practices.
1. Backing Up OwnCloud
Regular backups prevent data loss in case of system failures or upgrade issues. Backup these key components:
- Config files → /var/www/owncloud/config/
- User data → /var/www/owncloud/data/
- Database → MySQL/MariaDB
2. Upgrading OwnCloud
Upgrading ensures security updates, bug fixes, and new features are applied
- Backup first (see the previous section).
- Disable third-party apps in the Admin Panel before upgrading.
- Download the latest ownCloud version and move old files to a backup folder.
- Restore configuration and data.
- Run the upgrade process through the command line.
For Docker users, update the ownCloud image in docker-compose.yml, pull the latest image, and restart the container.Note: Avoid skipping major versions—always upgrade in sequence (e.g., 10.13 → 10.14, not 10.12 → 11.0).
3. Security Best Practices
To protect ownCloud, follow these best practices:
- Enable HTTPS with an SSL Certificate – Use Let’s Encrypt to secure web traffic.
- Configure a Firewall – Allow only necessary traffic (SSH, HTTP, HTTPS) and block other ports.
- Secure File Permissions – Ensure ownCloud files are only accessible by the correct users.
- Keep Software Updated – Regularly apply updates to PHP, Apache, and ownCloud itself.
Troubleshooting Common Issues
Here are common ownCloud installation and configuration issues and how to fix them.
1. Database Connection Error
Problem:
SQLSTATE[HY000] [1045] Access denied for user 'ownclouduser'@'localhost'Cause:
- Incorrect username/password
- Using curly quotes instead of straight quotes (’ vs ‘)
Solution:
sudo mysql -u root -p
SELECT user, host FROM mysql.user;
Recreate the database user with straight quotes:
GRANT ALL PRIVILEGES ON owncloud.* TO 'ownclouduser'@'localhost' IDENTIFIED BY 'yourpassword';
FLUSH PRIVILEGES;
2. GPG Key Errors (Repository Issue)
Problem:
NO_PUBKEY 4ABE1AC7557BEFF9Cause:
- Missing gnupg package
- Failed repository key import
Solution:
sudo apt install -y gnupg
curl -fsSL https://download.opensuse.org/repositories/isv:/ownCloud:/server:/10/Debian_12/Release.key | gpg --dearmor | sudo tee /etc/apt/trusted.gpg.d/isv_ownCloud_server_10.gpg > /dev/null
sudo apt update
3. Apache Not Starting
Problem:
sudo systemctl status apache2Shows “failed” status.
Cause:
- Misconfigured Apache config file
- Port conflict
Solution:
A. Test Apache config:
sudo apache2ctl configtestB. If errors appear, fix misconfigurations and restart Apache:
sudo systemctl restart apache24. Trusted Domains Error
Problem:
You are accessing the server through an untrusted domain.Solution:
Edit the config.php file:
sudo nano /var/www/owncloud/config/config.phpAdd your trusted domains:
'trusted_domains' => [
    'yourdomain.com',
    'www.yourdomain.com',
    'your-server-ip',
],
Conclusion
By now, you’ve successfully installed and configured ownCloud, set up a database, secured your deployment, and even extended its functionality with applications.
Owncloud gives you complete control over your file storage, security, and access, making it a powerful alternative to third-party cloud services.
Regular maintenance—including backups, updates, and security enhancements, is essential to keep your setup running smoothly. If you encounter any issues, refer to the troubleshooting guide above to quickly resolve common problems.
If you’re looking for a high-performance hosting solution to run ownCloud efficiently, consider deploying it on UpCloud. With its fast SSD storage, scalability, and strong security features, UpCloud provides a reliable infrastructure for your ownCloud server.
Discussion