Shopware is a modern, open-source ecommerce platform built for businesses that need scalability, flexibility, and full customization. With its modular architecture, advanced SEO tools, and API-first approach, Shopware stands out as a developer-friendly solution for creating high-performance, fully responsive online stores.
Unlike closed systems like Shopify or limited platforms like PrestaShop, Shopware software gives you complete control over your ecommerce stack, ideal for teams that want to build unique, extensible storefronts. Shopware 6, the latest version, simplifies setup with a redesigned interface and cloud-ready capabilities, making it accessible to both developers and tech-savvy store owners.
To run Shopware efficiently, you need hosting that’s as powerful and reliable as the platform itself. UpCloud delivers just that with fast cloud servers, high availability, and optimized storage, making it a perfect match for Shopware hosting.
In this tutorial, we’ll look at how to set up an online store with Shopware on UpCloud—from server provisioning to full deployment, Shopware configuration and improving SEO.
What is Shopware?
Shopware is a powerful, open-source ecommerce platform designed to help businesses build flexible, scalable, and feature-rich online stores. Originating in Germany and now adopted globally, Shopware is known for its modern architecture, clean user experience, and strong developer ecosystem.
At its core, Shopware offers a modular and customizable framework that allows businesses to tailor every aspect of their storefront, from catalog structure to checkout flow. It supports both monolithic and headless commerce, making it adaptable to various business models and technical stacks. Thanks to its API-first approach, Shopware integrates seamlessly with CRMs, ERPs, PIMs, and payment providers, giving teams full control over their ecommerce operations.
Compared to other popular open-source ecommerce platforms like Magento, Shopware is often favored for its lower total cost of ownership, cleaner codebase, and developer-friendly experience. Magento can be powerful, but it tends to be heavier, more resource-intensive, and costly to maintain, especially for small to mid-sized businesses. Shopware, in contrast, offers a leaner setup, faster time-to-market, and more intuitive customization out of the box, making it a compelling choice for growing ecommerce brands.
Key Capabilities:
- Headless-ready architecture for decoupled frontend/backend development
- Advanced CMS features to create dynamic, content-rich shopping experiences
- Powerful SEO and marketing tools to optimize for search and conversion
- Plugin ecosystem for extending functionality without modifying core code
- Multi-store and multi-language support for international businesses
Why Choose UpCloud for Shopware Hosting?
When building a high-performance ecommerce store, your choice of hosting is just as critical as the platform itself. Open commerce platforms like Shopware empower you with full control and flexibility over your ecommerce experience, but to truly unlock that potential, you need infrastructure that’s equally robust. UpCloud offers computing, storage, and networking required to develop and run demanding applications like ecommerce.
With a strong focus on speed, reliability, and scalability, UpCloud is the ideal environment for Shopware hosting. It’s MaxIOPS Block storage offers industry-leading speed, ensuring fast page loads and smooth shopping experiences. With 13 global data centres worldwide, UpCloud helps you minimize latency so your Shopware store performs well no matter where your customers are. You can also easily scale your resources to handle traffic spikes, big promotions, or business growth, without downtime. Pairing Shopware’s flexible ecommerce platform with UpCloud’s high-speed infrastructure gives you a solid, future-ready foundation for your online store.
Prerequisites for Installing Shopware
Before you begin the Shopware installation, ensure you have the following setup:
UpCloud Cloud Sever: To deploy your website, you’ll need access to a cloud server on UpCloud. Start with an active UpCloud cloud server running a supported Linux distribution, such as Ubuntu 22.04. If you haven’t created one yet, you can sign up and spin up a cloud server in minutes.
Installing Shopware on UpCloud
Now that you understand the power couple of Shopware and UpCloud, let’s dive into the practical steps of bringing your online store to life.
Step 1: Prepare Your UpCloud Server
Before we can begin the Shopware 6 install, we need to ensure your UpCloud server is up-to-date and has all the necessary components. For this tutorial, we’ll assume you have a fresh Ubuntu 22.04 LTS or later server instance on UpCloud; if not, you can see how to create one here.
Connect to Your Server: Open your terminal and connect to your UpCloud server using your root credentials or a user with sudo privileges:
bash

ssh username@your_server_ip
(Replace username and your_server_ip with your actual server details.)
Update Server Packages: Update your system to ensure you have the latest security patches and stable software versions.
bash

sudo apt update
sudo apt upgrade -y
Step 2: Install Essential Dependencies
Since Shopware 6 relies on several key software components, install PHP, Composer (PHP’s dependency manager), and MySQL (the database server) on the server.
a. Install PHP and Recommended Extensions: Shopware 6 officially recommends PHP 8.1 or higher. We’ll install PHP 8.3 and some common extensions using the following command.
bash

php --version  # verify the PHP version presently installed on your Ubuntu server
bash
sudo apt install -y software-properties-common
sudo add-apt-repository ppa:ondrej/php -y
sudo apt update
sudo apt install -y php8.3 Run the following command again to confirm that PHP 8.3 is installed when the installation is finished.

b. Install Nginx (Web Server): Although Apache is a great option, Nginx is often preferred for its performance and resource efficiency.
bash

sudo apt install -y nginx
sudo systemctl enable nginx
Restart the web server to take effect the modifications if you’re running PHP with an Nginx web server.
c. Install MySQL Server:
bash

sudo apt install -y mysql-server
sudo systemctl enable mysql
sudo systemctl start mysql
After installation, it’s highly recommended to run the security script to secure your MySQL installation, using the command. You can use it to set a strong root password, remove anonymous users, disallow remote root login, and remove the test database.
bash

sudo mysql_secure_installation
d. Install Composer: Composer is essential for downloading Shopware. We’ll install Composer package manager by downloading it to /usr/local/bin using the command:
bash

curl -sS https://getcomposer.org/installer | php
sudo mv composer.phar /usr/local/bin/composer
sudo chmod +x /usr/local/bin/composer
This is what a successful installation will look like.

Next, verify the installation using the command:

Step 3: Download the Shopware 6 Installer using Composer
Now that your server is ready, we can use Composer to download the Shopware 6 project.
a. Navigate to Web Root: By default, Nginx serves files from /var/www/html. We’ll create a dedicated directory for the Shopware store using the following commands:
bash
sudo mkdir -p /var/www/upcloud_store # Create the main directory for your Shopware installation.
sudo chown -R www-data:www-data /var/www/upcloud_store
sudo chmod -R 755 /var/www/upcloud_store # Set file permissions for the Shopware directory.
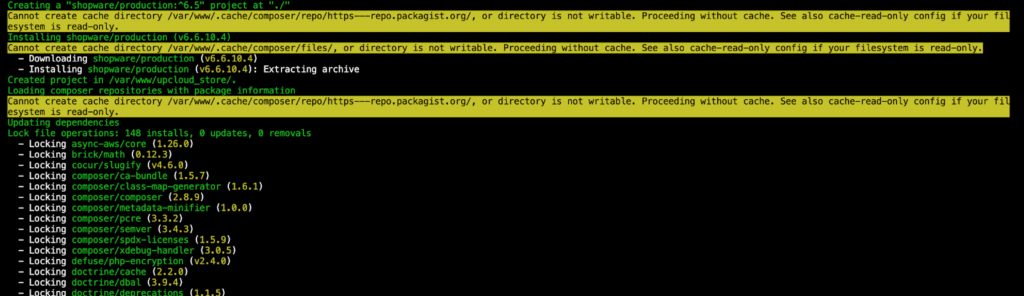
cd /var/www/upcloud_store # Enter the newly created Shopware directory.b. Download Shopware 6: With the help of the Composer, you can now install and create a new Shopware project. This command will download all necessary files and dependencies.
bash

sudo -u www-data composer create-project shopware/production:^6.5 .
If successful, you should have an output like this:
c. Adjust Permissions: Ensure that the web server (Nginx, running as www-data user) has the necessary permissions to read and write files within your Shopware installation using the following command.
bash

sudo chown -R www-data:www-data /var/www/upcloud_store
sudo find /var/www/upcloud_store -type d -exec chmod 755 {} \;
sudo find /var/www/upcloud_store -type f -exec chmod 644 {} \;
sudo chmod -R 777 /var/www/upcloud_store/var
sudo chmod -R 777 /var/www/upcloud_store/public
sudo chmod -R 777 /var/www/upcloud_store/files
sudo chmod -R 777 /var/www/upcloud_store/custom/plugins
Step 4: Configure the Database for Shopware
Shopware needs a dedicated database to store its data.
a. Log in to MySQL: Using the root password you set during mysql_secure_installation.
bash

sudo mysql -u root -p
b. Create a Database and User: Execute the following SQL commands. Remember to replace upcloud_store_db, upcloud_store, and upcloud_store_password with your desired database name, username, and a strong password.
SQL

CREATE DATABASE upcloud_store_db CHARACTER SET utf8mb4 COLLATE utf8mb4_unicode_ci;
CREATE USER 'upcloud_store'@'localhost' IDENTIFIED BY 'upcloud_store_password';
GRANT ALL PRIVILEGES ON your_shopware_db.* TO 'your_shopware_user'@'localhost';
FLUSH PRIVILEGES;
EXIT;
Step 5: Configure Nginx for Shopware
Next, we need to create an Nginx server block (virtual host) to serve your Shopware application.
a. Create Nginx Configuration File:
bash

sudo nano /etc/nginx/sites-available/upcloud_store.conf
b. Input the following configuration into the Nginx file, replacing upcloud_store.com with your actual domain name or your_server_ip if you’re using an IP address for now, and /var/www/upcloud_store with the path to your Shopware installation.
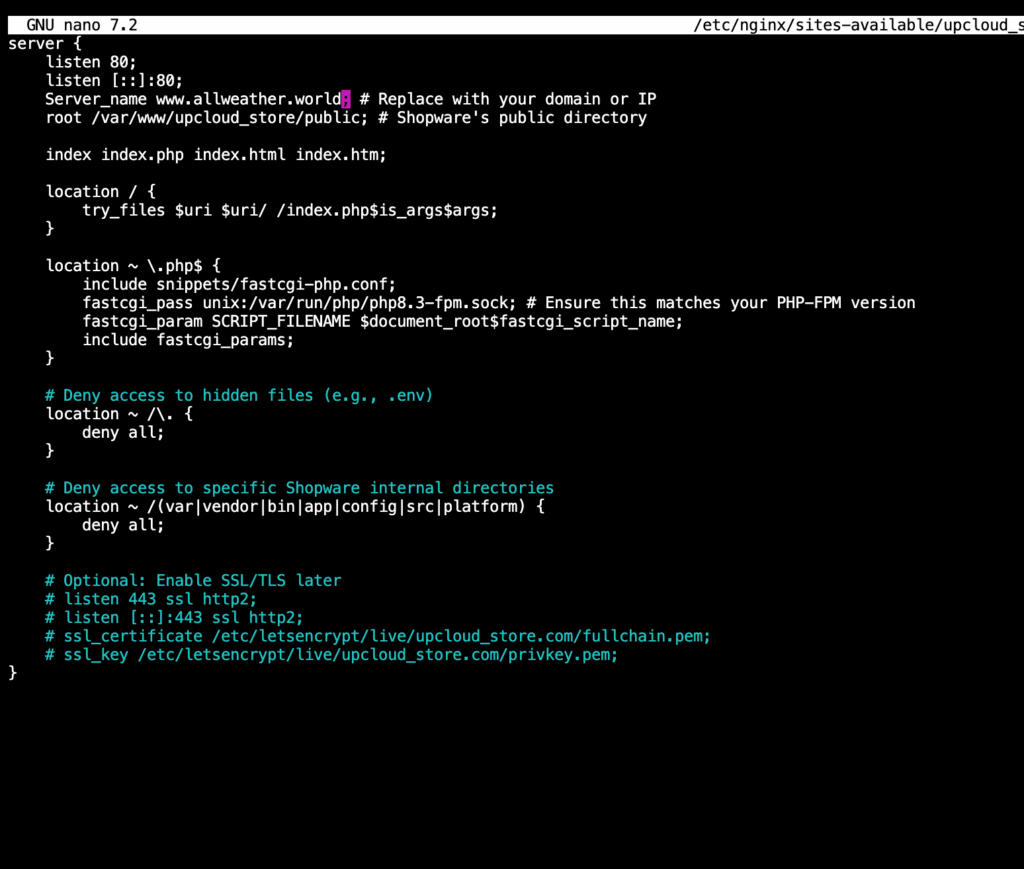
c. Enable the Site: Create a symbolic link from sites-available to sites-enabled.
bash

sudo ln -s /etc/nginx/sites-available/upcloud_store.conf /etc/nginx/sites-enabled/
d. Test Nginx Configuration and Restart: This will verify that the configuration is correct and mark it to start on boot.
bash

sudo nginx -t
sudo systemctl restart nginx
Step 5: Complete the Installation Through the Web Installer
At this point, you should be able to access your shopware web installer through your web browser.
a. Open Your Browser: Navigate to your domain name or server IP address in your web browser (e.g., http://your_server_ip).
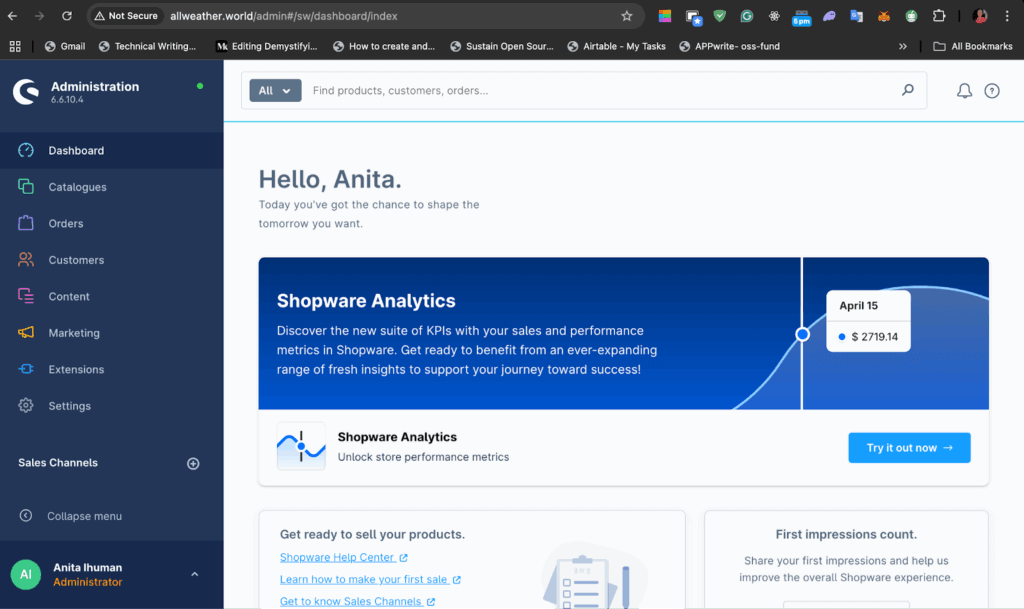
b. Follow the Shopware Web Installer: you’ll be greeted by an intuitive dashboard. Your first steps should involve configuring the fundamental aspects of your store.
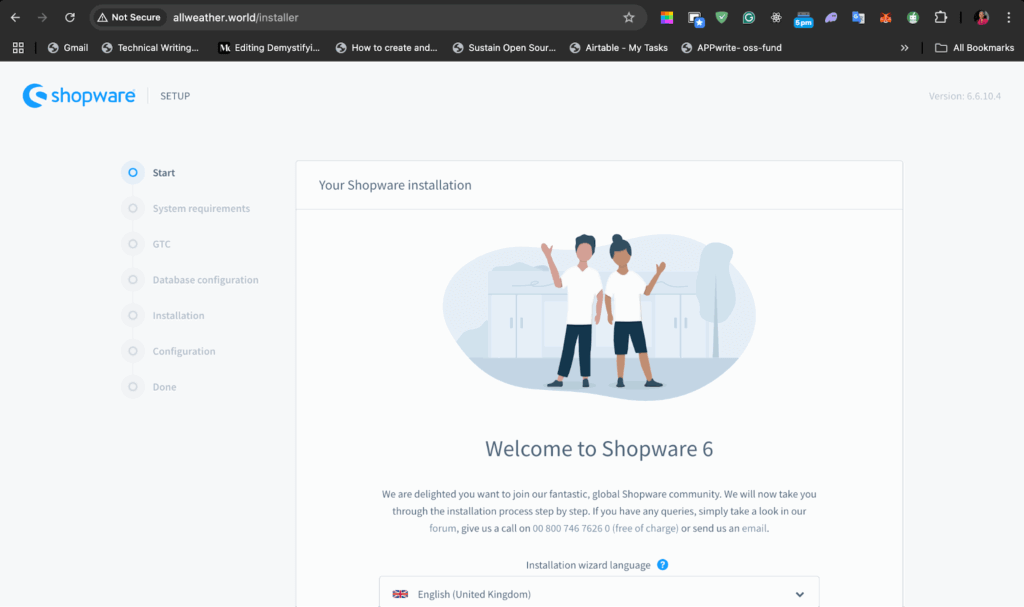
- Language Selection: Choose your preferred language.
- System Requirements: The installer will check if your server meets all requirements. If there are any warnings, address them (usually related to PHP extensions or permissions).
- License Agreement: Accept the Shopware license.
- Database Configuration: Enter the database details you created in Step 3 (Host: localhost, Port: 3306, User: upcloud_store, Password: upcloud_store_password, Database Name: upcloud_store_db).
- Admin Account: Create your Shopware administrator account. Choose a strong password.
- Shop Information: Provide basic information about your shop (shop name, email, default currency, etc.).
- Installation Progress: Shopware will now install the necessary modules and data. This may take a few minutes.
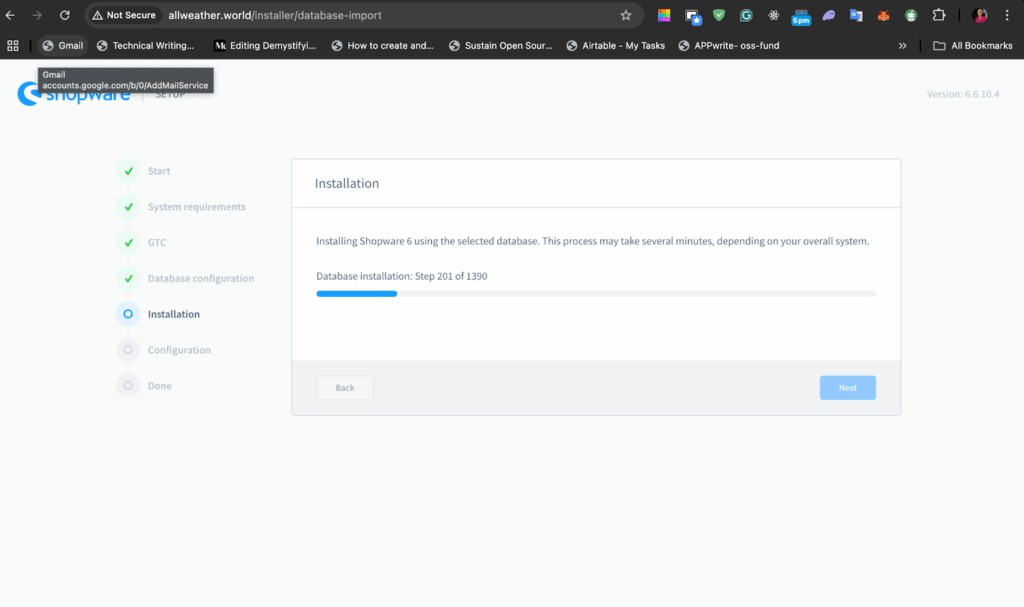
- Finish: Once completed, you’ll be redirected to your Shopware administration panel or the storefront.
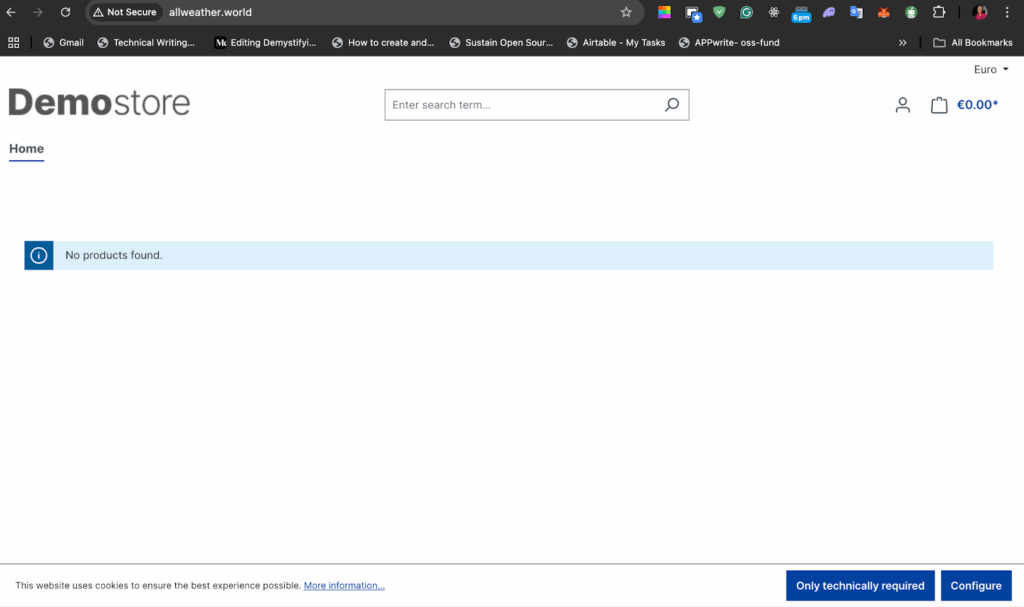
Alternative Setups for Developers: Shopware Docker Installation
For developers looking for a more isolated, reproducible, and easily scalable development environment, a Shopware Docker installation is an excellent alternative. Docker containers encapsulate your application and its dependencies, ensuring consistent environments across different machines. While a full Docker setup is beyond the scope of this step-by-step installation guide, you can see a complete guide here.
5. Configuring Your Shopware Store
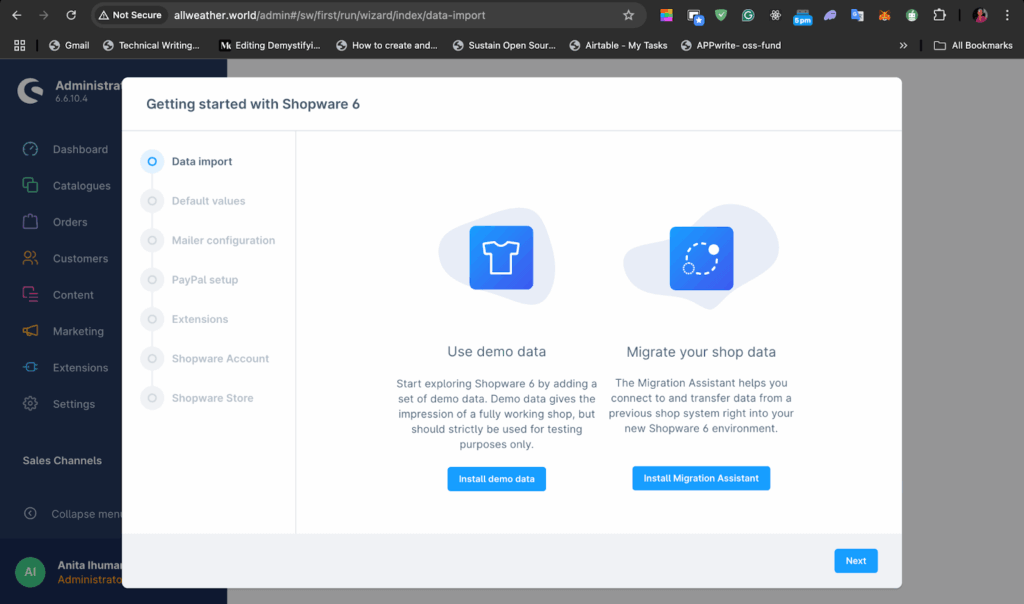
After installing Shopware, the next step is to configure your store to align with your business goals and brand identity. While the Shopware web installer lays the groundwork, the real customization begins in the administrative backend, where you can tailor the settings to suit your unique requirements and better serve your target audience.
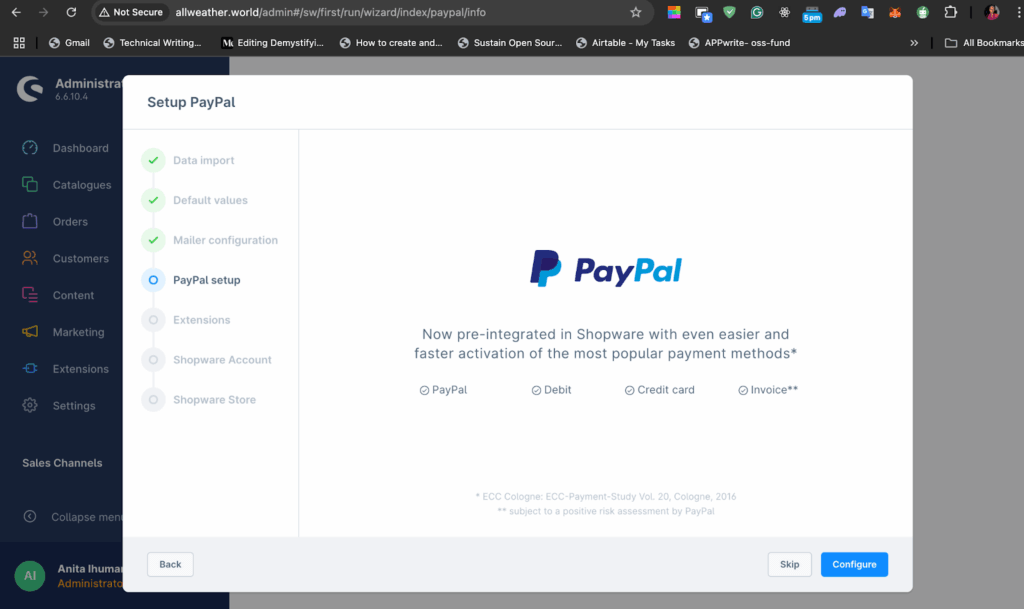
Shopware provides detailed onboarding steps to enable smooth customization, including details such as importing data, mailing configuration, and native integrations with popular providers like PayPal, Stripe, and various local payment solutions.
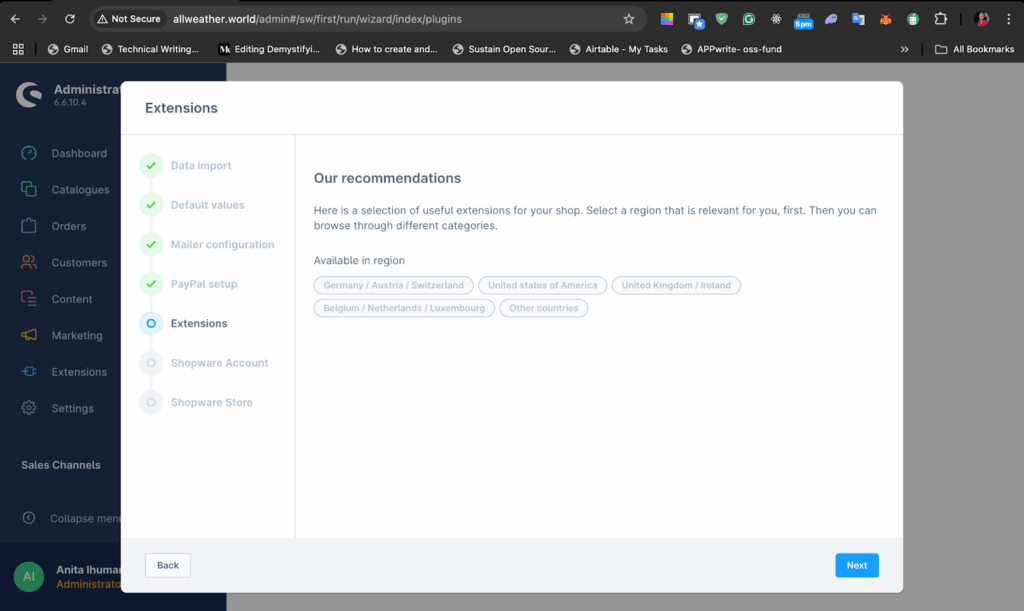
You also have access to an extensive ecosystem of plugins. These extensions allow you to add more functionalities without complex Shopware development like:
- SEO Plugins: While Shopware has built-in SEO, dedicated plugins can offer advanced features like snippets, schema markup, and deeper analytics integrations.
- Marketing Automation: Integrate with email marketing platforms or loyalty programs to engage customers and drive repeat business.
- Customer Service: Add live chat, ticketing systems, or advanced FAQ modules.
- ERP/CRM Integrations: Connect your Shopware store with your existing business management systems for seamless data flow.
- Analytics: Enhance tracking and reporting beyond the basic Shopware capabilities with integrations for Google Analytics 4, Matomo, etc.
Using Shopware’s Advanced Features
Shopware (Shopware 6) is built from the ground up with an API-first architecture, and its capabilities cater to modern digital commerce strategies and provide immense flexibility for Shopware development efforts.
- Decoupled Frontend: One of Shopware’s most praised features is its API-first structure, which makes it ideal for headless commerce. This approach allows you to decouple the frontend and backend, giving your developers the freedom to build custom storefronts, mobile apps, or integrations without being tied to a specific tech stack.
- Omnichannel Experiences: The API-first approach facilitates true omnichannel strategies. You can use Shopware to power not only your primary website but also mobile apps, progressive web apps (PWAs), IoT devices, social commerce, and even in-store kiosks, all pulling data from a single, centralized Shopware backend. This offers unparalleled modularity for your entire commerce ecosystem.
- Shopping Experiences (CMS): Beyond simple themes, Shopware’s built-in shopping experiences editor is a powerful drag-and-drop tool that allows business users to create engaging landing pages, product detail pages, and category layouts without needing to write code. This directly contributes to a compelling Shopware shop presence.
- Storefront Themes Development: Your storefront’s appearance is crucial for engaging customers and building brand recognition. Shopware provides theme management capabilities. You can start with a default template and customize it using the built-in tools or extend it through your own development efforts. For unique branding requirements, you can engage in full Shopware development to create a completely custom theme from scratch. This offers limitless possibilities for design and user experience.
6. Optimizing Shopware for SEO
A neatly designed Shopware shop with a seamless user experience is only effective if customers can find it. Search Engine Optimization (SEO) is crucial for enhancing your online visibility and generating organic traffic to your e-commerce platform. Shopware provides robust built-in SEO tools and, when combined with strategic optimization practices and a high-performance hosting environment like UpCloud, can significantly boost your search engine rankings.
- It allows you to set unique and compelling meta titles for every product, category, and content page.
- Shopware enables you to craft engaging descriptions that entice users to click. It also provides clean, SEO-friendly URL management. You can customize the URL path (slug) for each product, category, and page to be descriptive and include relevant keywords.
- Shopware automatically generates XML sitemaps (e.g., sitemap.xml) that list all your products, categories, and content pages. You can submit these sitemaps directly to Google Search Console and other webmaster tools to ensure your entire Shopware shop is efficiently indexed.
Tips for Improving SEO: Beyond the Built-in Features
While Shopware’s native tools are excellent, supplementary optimization strategies can further enhance your Shopware SEO efforts. Hence you should always:
- Enable SSL for Secure Browse (HTTPS): SSL (Secure Sockets Layer), which results in HTTPS in your URL, is a non-negotiable SEO ranking factor. Google explicitly favors secure websites. Shopware fully supports SSL/TLS encryption. Ensure you have an SSL certificate installed and correctly configured on your Nginx server (e.g., using Let’s Encrypt for free certificates) so that your entire Shopware shop loads via HTTPS. This protects user data and builds trust, contributing positively to your search performance.
- Optimize Images: Large, unoptimized images can significantly slow down your site. Shopware enables image resizing and the generation of various formats, including WebP. Implement image compression tools (e.g., ImageMagick, tinypng) and ensure images are served in appropriate dimensions.
- Caching to Improve Load Times: Shopware uses robust caching mechanisms (e.g., HTTP caching, database caching, Redis, Varnish). Hence, your caching should always be configured. When a page is requested, cached versions are served much faster, reducing server load and improving response times. This is vital for Shopware development performance.
- Leverage UpCloud’s Performance for SEO Gains. Your server’s speed is a direct factor in your SEO ranking. UpCloud’s storage and high-performance CPUs ensure fast page load times for your Shopware shop. Search engines like Google prioritize quick-loading sites, and quicker load times also improve user experience, reduce bounce rates, and encourage longer visits – all signals that contribute positively to your Shopware SEO and overall search engine visibility.
7. Migrating to Shopware
If you’re currently running your store on platforms like Magento, WooCommerce, or another legacy system, migrating to Shopware offers a chance to modernize your ecommerce infrastructure without starting from scratch. Shopware’s flexible architecture,and intuitive interface, simplifies migration through a structured and supported process that helps preserve your store’s essential data.
Shopware provides an official tool, the Migration Assistant plugin, designed to facilitate a smooth and guided migration process. It supports Magento, WooCommerce, and other platforms, enabling data transfer via API or database connection. This tool lets you select what data to migrate (e.g., only customers or products) and provides real-time progress tracking with error reporting.
Best Practices for a Smooth Migration
- Backup Everything: Before starting any migration, perform a full backup of your source store’s database and files, as well as your new Shopware database. This is your safety net.
- Test Environment First: Always perform the migration on a staging or development environment (like your UpCloud server before it goes live). Never migrate directly on a live production site.
- Clean Up Source Data: Remove old, irrelevant, or duplicate data from your source platform before migration. This streamlines the process and ensures a cleaner Shopware instance.
- Map Data Carefully: Pay close attention to data mapping during the Migration Assistant process. Ensure that product attributes, customer fields, and order statuses from your old store are correctly assigned to their corresponding fields in Shopware.
- Validate Data Post-Migration: After the migration, thoroughly review critical data points:
- Spot-check product details, including prices, stock, images, and descriptions.
- Verify customer accounts and their associated order history.
- Confirm order statuses and totals are correct.
- Test checkout processes and user registrations on the new Shopware store.
- Consider Downtime: Plan for a cut-over period during which your old store might be temporarily offline to ensure no new data is created that would be missed in the migration.
With the right planning and tools, migrating to Shopware can be a strategic upgrade that boosts performance, flexibility, and customer experience.
8. Tips for Scaling and Monitoring Your Shopware Store with UpCloud
As your Shopware store expands, so do the demands on your infrastructure. To keep up with growing traffic and customer expectations, you need a hosting solution that’s both powerful and adaptable. You can use Upcloud to handle increased traffic and maintain a smooth, responsive online experience for your customers by:
- Increasing Server Resources to Handle Traffic Spikes: UpCloud allows for vertical scaling—adding more CPU, RAM, and storage with minimal downtime. This is especially useful during seasonal traffic spikes or promotional campaigns. Distribute traffic across multiple instances to reduce server strain and improve load times for end users. UpCloud supports high-availability setups to ensure your store remains accessible even in the event of hardware failures.
- Monitoring and Performance Tracking: UpCloud’s built-in monitoring tools help track CPU usage, memory consumption, and disk I/O in real time. With these insights, you can detect bottlenecks early, optimize configurations, and plan infrastructure upgrades proactively.
- Backup and disaster recovery: Accidents happen, but they don’t have to be fatal. Set up automated backups through UpCloud’s control panel and implement disaster recovery protocols to restore services quickly in case of data loss or system failures.
Conclusion
From configuring payment gateways and securing your site to installing plugins that enhance functionality, Shopware makes it simple to manage and grow your online store. When you combine that with UpCloud’s high-performance hosting, you get a reliable foundation built for speed, scalability, and uptime. Whether you’re migrating from another platform or preparing to scale during peak seasons, this duo enables you to focus on what matters most—growing your business and delivering a seamless experience to your customers.
Whether you’re migrating from an older platform or building a brand-new store, UpCloud’s reliable and flexible environment makes growth effortless and ensures your data is protected.
Try UpCloud’s high-performance servers and explore the full potential of Shopware with a free trial today.
Discussion