Modoboa is a modular open-source mail server and management platform that integrates with well-known software such as Postfix or Dovecot. A SQL database (MySQL, PostgreSQL, or SQLite) is used as a central point of communication between all components. As a result, you are able to create your own dependable and secure email server.
In short, with Modoboa, you won’t have to rely on email providers. These are the main features of Modoboa:
- Encryption of all communications between your email server and the outside by default using the TLS protocol and a valid SSL certificate provided by Let’s Encrypt.
- Administration panel – An online panel to manage domains, mailboxes, aliases, and more!
- Amavis with SpamAssassin and ClamAV virus scanning, banned content type, and the like.
- Creation of filtering rules to organize emails
- Unlimited creation of domains, mailboxes, and aliases
- Creation of filtering rules to organize emails
- Reputation optimization – Improve email reputation using standard protocols like DKIM or DMARC, this way, you can ensure your email will always be delivered.
- Support MySQL/MariaDB, or PostgreSQL database.
- and many more…
In this guide, we’ll show how to install Modoboa on an UpCloud Cloud Server running Ubuntu 18.04 but the instructions can be easily adapted to other operating systems as well.
Prerequisites
Modoboa can be installed on multiple different operating systems and a wide variety of configurations. However, it does have some requirements you should be aware of:
- First, you will need to deploy a clean instance of a cloud server with minimum system requirements of at least 2 GB RAM, 2 CPU cores, and 10 GB of storage.
- Operating System: Debian 8 – 10 / Ubuntu 14.04 & Higher / CentOS 7
- Make sure Port 25 is not blocked: The port 25 is used for communication between mail servers and it is blocked by default for new users on UpCloud. The port 25 needs to be open, otherwise, your server may be not able to receive or/and send emails.
Note that you don’t need to register a new domain, you can use any existing one. Just make sure you are creating a new DNS Domain entry and the following DNS records exist for your domain. We will be using the domain name ‘example.com’ as an example, replace it with your own where applicable.
mail IN A
IN MX mail.example.com.
You can find out more about how to manage your DNS records in our guide on domain name systems.
This is a live example of the DNS records:

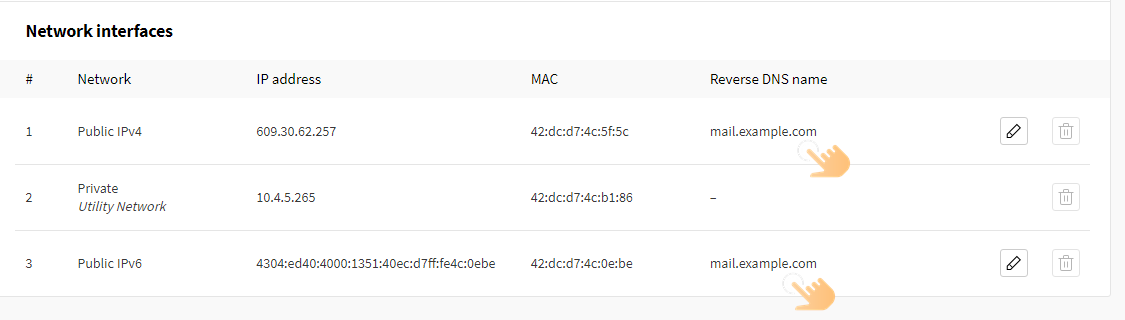
Lastly, make sure your reverse DNS is set on your email server’s IP address e.g. mail.example.com.
You can change the reverse DNS name by visiting your UpCloud Control Panel. Navigate to the Network section under your Cloud Server settings, and click the pencil icon to edit the Reverse DNS Name of your public IP address:
Step 1: Setting Up Modoboa Configuration Installer
We will be using the Modoboa installer for the mail server setup. To be able to use it, first, make sure you have Python installed as Modoboa is written in Python. We’ll also need the git utility, so install that at the same time if not already present on your system.
sudo apt update
sudo apt install python-virtualenv python-pip git -y
Once Python and git are installed and ready, download the modoboa-installer script from its GitHub repository:
git clone https://github.com/modoboa/modoboa-installer
Next, change the directory into the script folder:
cd modoboa-installer
You can customize the configuration before running the installer. Use the following command to generate a new configuration file.
sudo ./run.py --stop-after-configfile-check example.com
Welcome to Modoboa installer!
Configuration file installer.cfg not found, creating new one.
Then open the new config file in a text editor.
sudo nano installer.cfg
You can automatically generate a valid SSL certificate for your mail domain using Let’s Encrypt by changing the type under certificate from self-signed to letsencrypt. You should also set your email address which is used for account recovery and other information.
[certificate]
generate = true
type = letsencrypt
[letsencrypt]
email = [email protected]
Modoboa uses Postgres by default. However, if you prefer MariaDB, change the engine in the database section to mysql.
[database]
engine = mysql
host = 127.0.0.1
install = true
Once you are done with the setting, press CTRL + X, and Y, and Enter to save and exit.
Lastly, check your hostname using hostnamectl. Make sure it matches your MX record value, e.g. mail.example.com.
sudo hostnamectl
   Static hostname: mail.example.com
         Icon name: computer-vm
           Chassis: vm
        Machine ID: 00650ba6576b432c8ee995979b224ca7
           Boot ID: c22f9c1e5b1a4c00a3a26d25c34dddc5
    Virtualization: kvm
  Operating System: Ubuntu 18.04.5 LTS
            Kernel: Linux 4.15.0-124-generic
      Architecture: x86-64
If it is different, change it with the following command while replacing the example mail domain:
sudo hostnamectl set-hostname mail.example.com
Before you begin the installation, you should check that your DNS records for the mail server (mail.example.com) have been propagated using dnschecker.org. If yes, continue with the next step, otherwise, wait a moment and check again.
Step 2: Installing Modoboa
Once your mail domain has propagated and is generally available you can install Modoboa along with all of its components.
Simply run the installation script using the following command. Again, replace the example.com domain with your own. Note that the command above automatically appends the ‘mail’ part for your domain so leave it out here.
sudo ./run.py --interactive example.com
Welcome to Modoboa installer!
Warning:
Before you start the installation, please make sure the following DNS records exist for domain 'example.com':
 mail IN A <IP ADDRESS OF YOUR SERVER>
 IN MX mail.example.com.
Your mail server will be installed with the following components:
modoboa automx amavis clamav dovecot nginx razor postfix postwhite spamassassin uwsgi radicale opendkim
Do you confirm? (Y/n) y
Press Y and then enter to confirm. Modoboa will then obtain the SSL certificate from Let’s Encrypt and start the installation process. You should see something similar to the example output below.
The process can be long, feel free to take a coffee and come back later ;)

Starting...

Generating new certificate using letsencrypt

Installing amavis
Installing spamassassin
Installing razor
Installing clamav
Installing modoboa
Installing automx
Installing radicale
Installing uwsgi
Installing nginx
Installing opendkim
Installing postfix
Installing postwhite
Installing dovecot

Congratulations! You can enjoy Modoboa at https://mail.example.com (admin:password)
The installation takes a couple of minutes. For example on a new Cloud Server, it can take roughly 5 minutes.
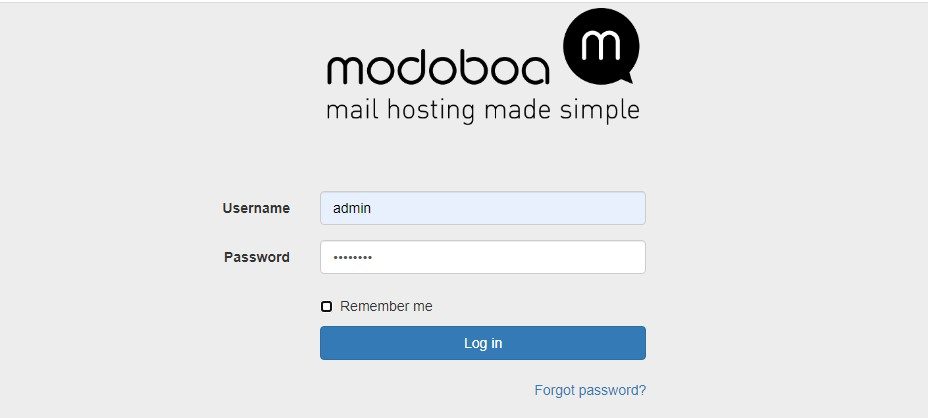
Once the installation has finished, go to the URL provided at the end of the installation and log in with admin:password.
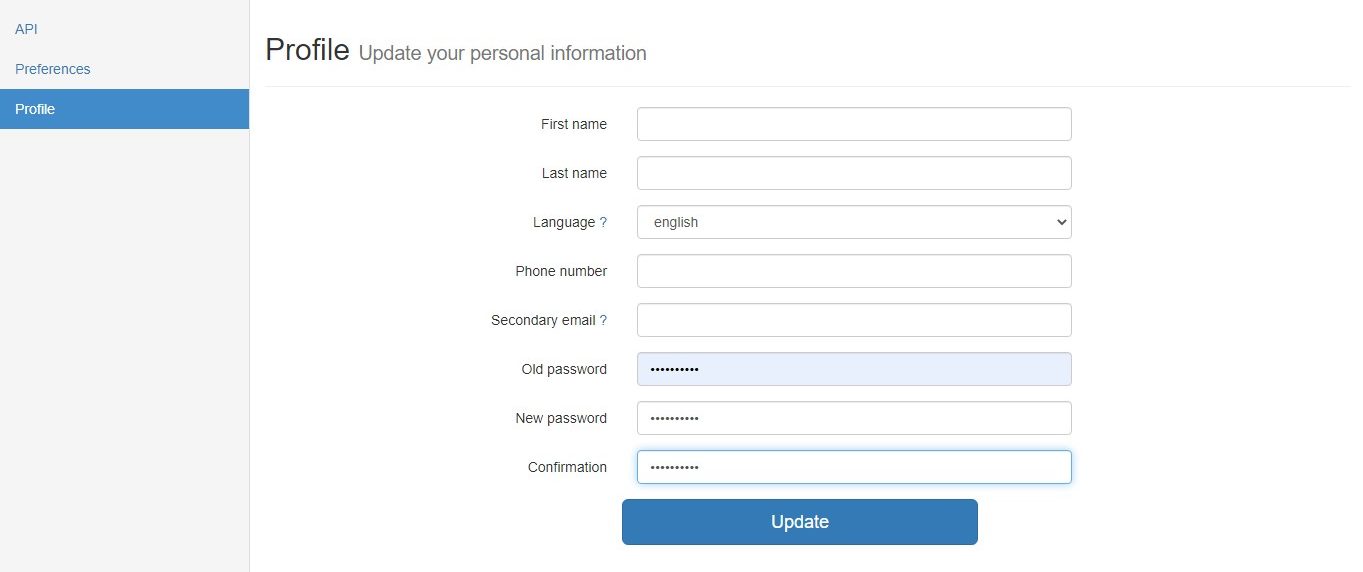
When logging in for the first time, click on the admin account name in the upper left section and go to -> Setting -> Profile to change your password.
Enter the default password and then set a new secure one by repeating it and then clicking the Update button.
After changing the password, you’ll need to relog into the dashboard to continue.
Step 3: Add Domain To Modoboa
With the Modoboa admin account secured with a new password, you can begin configuring the mail domain.
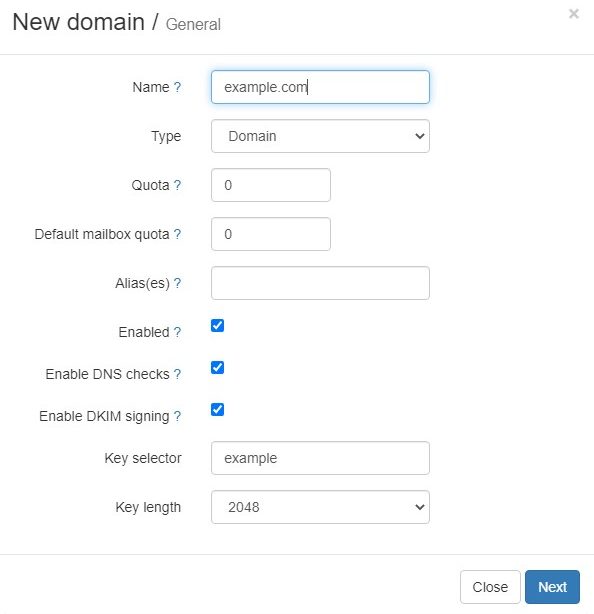
Goto the Domains section and click the Add button. Then fill in the following details:
- Name – The domain name
- Type – Domain
- Quota – The whole quota shared by all mailboxes, it is expressed in MB by default, use 0 for no quota (unlimited).
- Default mailbox quota – This is the default quota applied to new mailboxes, the default is 0 for no quota. However, the value cannot exceed the shared quota.
- Alias(es): Domain aliases allow users to receive mail with another email address. For example, if you have a primary domain [email protected] and an alias [email protected] the domain alias will direct all emails from the alias domain into the user account for the primary domain ([email protected]). So, all emails sent to [email protected] will go to [email protected] and the same for all other users on the domain. Leave blank if you are not using an alias.
- Enabled – Check ✓
- Enable DNS checks – Check ✓
- Enable DKIM Signing – Check ✓
- Key selector – Can be anything, for simplicity use your domain name without the TLD. This will be used later for implementing the DKIM record.
- Key Length – 1024 or 2048
Once set, click the Next button.
In the next screen, use the following:
- Create a domain administrator – Choose Yes
- Name – Use the postmaster ([email protected]), a postmaster is the administrator of a mail server. Errors in email processing are directed to this address.
- Random password – No
- With a mailbox – Yes
- Create aliases – Yes

Once you are done, click the Submit button to create the email domain. Modoboa will then perform some DNS checks to ensure you have the right records.
Afterwards, you can continue to step 4 for configuring additional records to improve your mail deliverability.
Step 4: Configuring Email For Better Deliverability
In this step, we will implement DKIM, SPF, and DMARC records for our email domain. This is to ensure your mail server is authenticated which will enable ISPs, mail services, and other receiving mail servers to trust that your email server is authorized to send the email.
Just doing these steps will significantly boost your email deliverability. This is because the three records are used to prove that the sender is legitimate, that their identity has not been compromised, and that they’re not sending emails on behalf of someone else.
Setting SPF records
SPF or Sender Policy Framework is a DNS TXT record that is used to specify which IP addresses and/or servers are allowed to send email “from” that particular domain. It is designed to detect forging sender addresses during the delivery of the email.
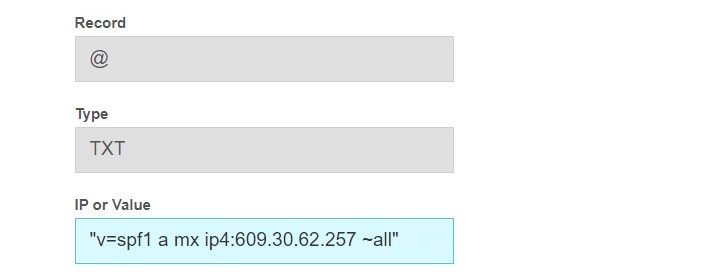
To create an SPF record, go to your DNS manager and create the following new TXT record:
- v=spf1 – The version of SPF being used, this is the only version available
- mx – This means all hosts listed in the MX records are allowed to send emails for your domain and all other hosts are disallowed.
- ip4:609.30.62.257 – This is the IP address of the mail server or domain that is authorized to send emails for that domain. Replace the IP in the example with your mail server’s public IP address.
- ~all – The “all” tag tells the receiving server how it should handle messages sent from a domain that is not listed in the SPF record. The tilde (~) with the ‘a’ is a soft fail, this would mark a server that is not listed in the SPF as spam, you can use -a for a flat-out rejection.
Setting DKIM records
DKIM or Domain Keys Identified Mail is an email authentication method that allows mail services to check that an email was indeed sent and authorized by the owner of that domain. In order to achieve this, you give the email a digital signature. This DKIM signature is a header that is added to the message and is secured with encryption.
The difference between DKIM and SPF is that DKIM is used to verify that the contents of the message are trustworthy. This is used to check that the email hasn’t been tampered with since the moment it left the initial mail server.
Luckily, Modoboa already provides this option and if you follow the instruction in step 3, you should have it checked.
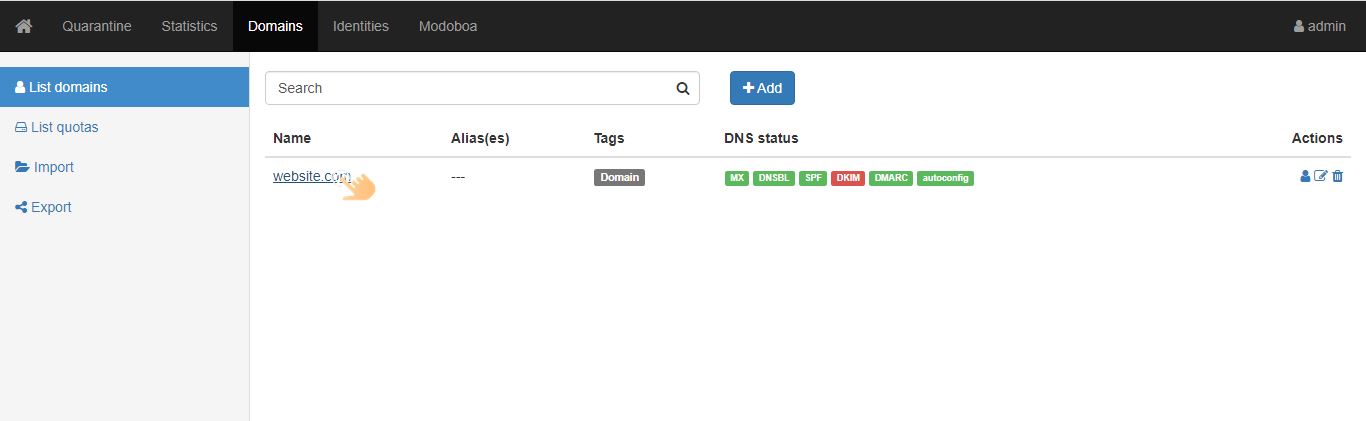
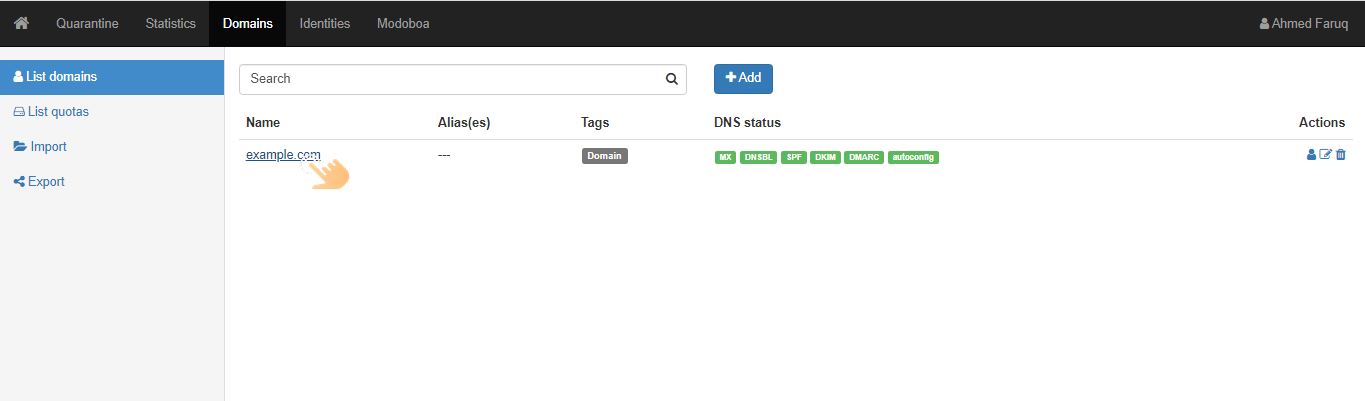
To apply the DKIM records for your email server, go to the Domains section and click on your domain name:
Then in the DNS sections, click Show key button for the DKIM key:
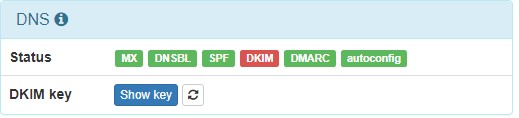
This will show your DKIM public key which can be used to create the required DNS record.
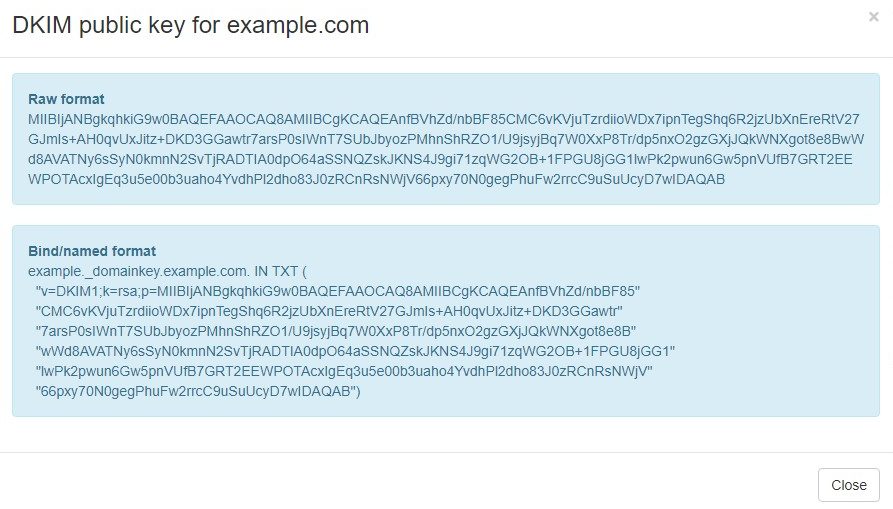
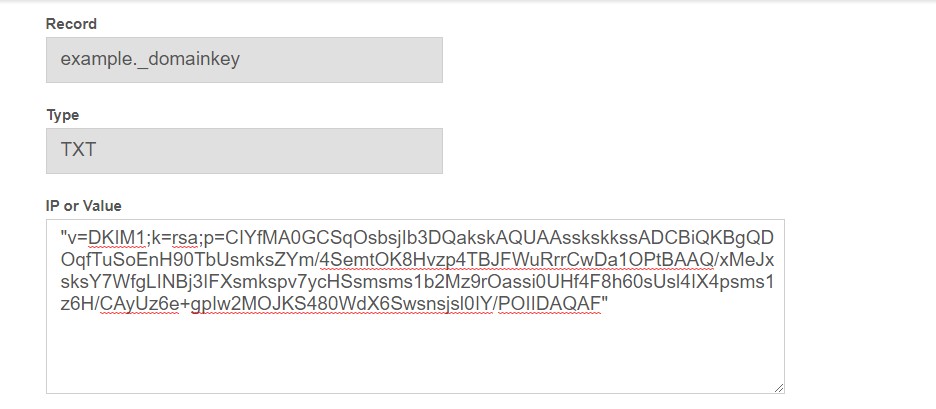
Next, go to your DNS manager and create another TXT record. Enter your domain name followed by “_domainkey” in the Name field, e.g. example._domainkey. This is what we added at the key selector in step 3 while configuring the domain.
Then copy everything in the parentheses and paste it into the value field. Make sure to delete all double quotes besides the first and last one.
Below is an example of how the DKIM record should look like:
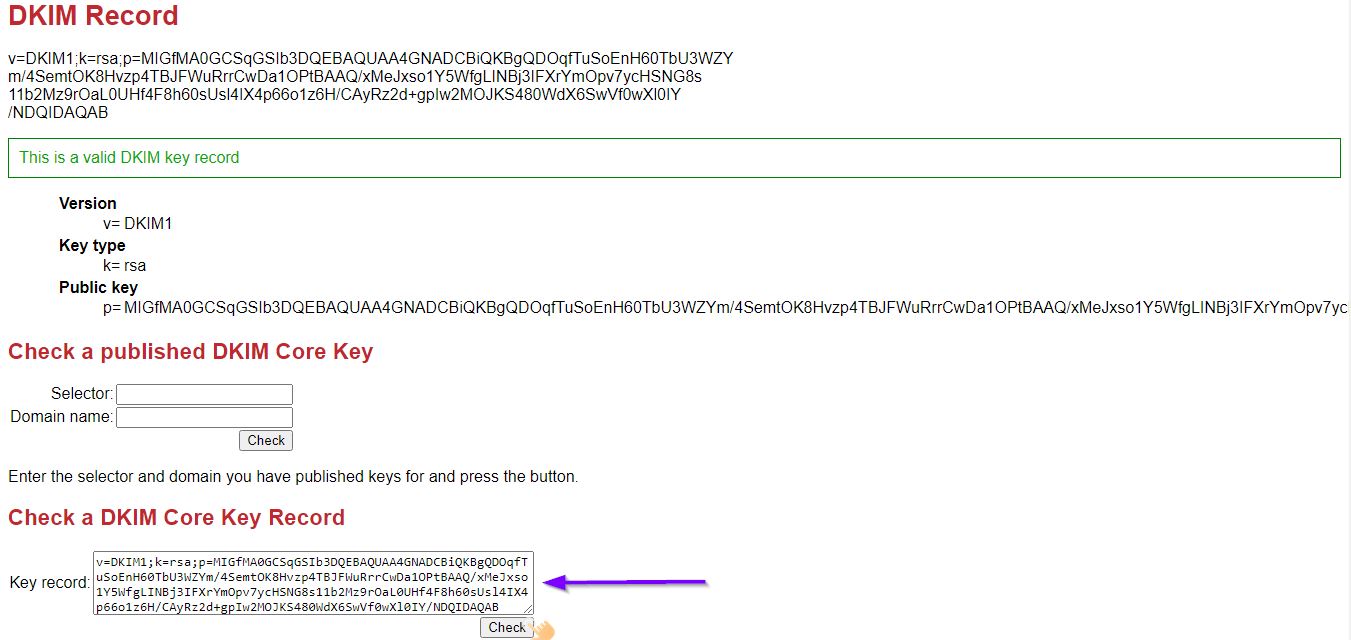
You can check if the key is valid using DKIM key checker, just paste the value without any quotes. The checker will report if it is valid or not:
Setting DMARC records
DMARC or Domain-based Message Authentication Reporting and Conformance extends DKIM and SPF to determine the authenticity of an email message.
Most major email providers perform DMARC checks by default before accepting the email. By performing these checks, the email provider knows what authentication methods should be present (SPF, DKIM, etc.) and reject messages that fail the checks as specified by the domain’s DMARC record.
Unlike SPF and DKIM that doesn’t provide reports on sources sending emails, you can get aggregated reports when DMARC is implemented.
To create a DMARC record, again go to your DNS manager and create a new TXT record as below:

The above record states that any email which fails the authentication with the “From” domain is put in the spam folder 100% of the time and activity is reported to the [email protected]. You can also flat-out reject any email that fails the DMARC authentication by setting ‘p=reject’.
Step 5: Sending Test Email
At this point, you should have everything in place to create a new mailbox account to test sending mail.
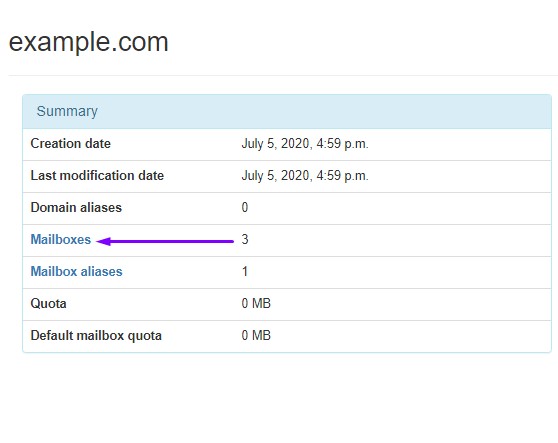
First, go to the Domain section and click on the domain name:
Next, click Mailboxes text in the Summary view.
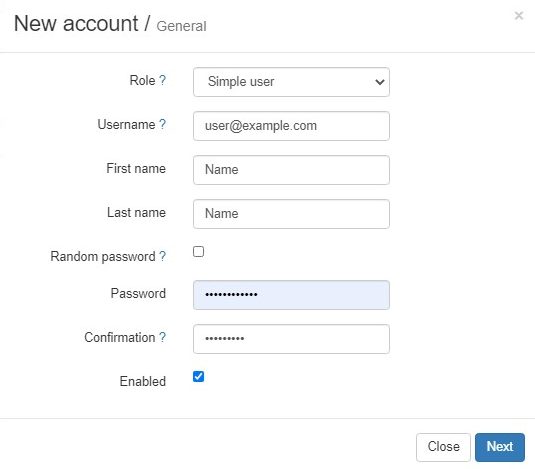
Then click on ‘Add’ -> Account and fill in the following details:
- Role – Simple User
- Username – [email protected]
- First Name and Last Name – Self Explanatory
- Random Password – Don’t Check
- Password and Confirm Password – Strong Passwords
- Enabled – Check
Once set, click the Next button to continue.
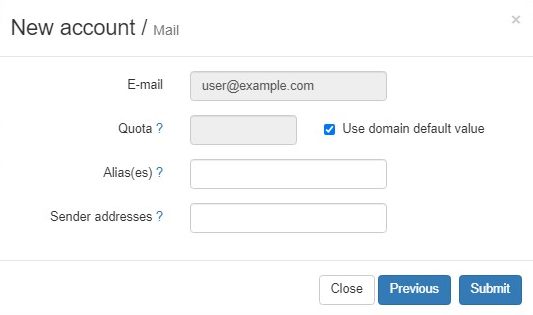
On the following page, you can add an alias plus an additional sender address. With these, the user can be allowed to send emails using other addresses besides the email attached to this mailbox. Leave them blank if you have no use cases for that.
Then click the Submit button to create the mailbox.
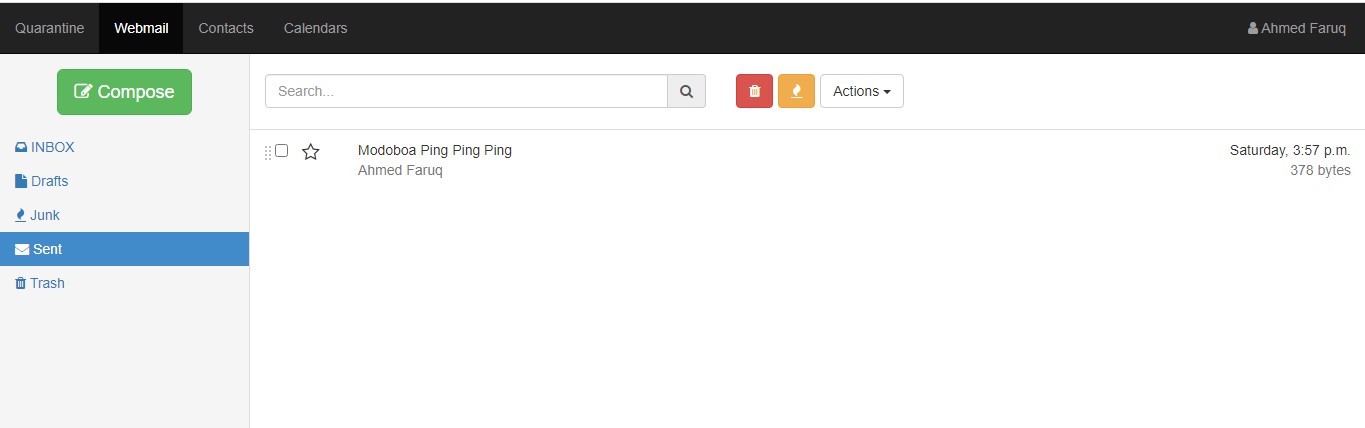
Afterwards, log out of the admin account and log in with the new simple user account.
Once logged in, go to the Webmail section and click the Compose button. Use the webmail to test sending a mail to any other email address you have. If successful, you should see something like the below confirming the mail was sent.
Then check your recipient email to see if the mail was delivered. Even with the appropriate sender and email authenticator records set, the mail might still arrive in the spam folder so don’t forget to check there if the message doesn’t appear momentarily.
If you are having difficulty sending mail, refer to the Troubleshooting section below.
Step 6: Auto-Renew Let’s Encrypt TLS Certificate
Let’s Encrypt issues certificates that are valid for 3-month periods. Once the certificate is within 30 days of expiry, Let’s Encrypt will allow the certificates to be renewed. After renewing, the new certificates will be valid for another 90 days.
Fortunately, the Let’s Encrypt client called certbot comes with a script to renew an existing certificate. By default, Ubuntu 16.04 and above will automate the renewal for you. However, this might not work when installing certbot with Modoboa.
Instead, let’s stop the certbot.timer service and create the standard cron job to do the task for us. Use the following command to disable the default renewal service.
sudo systemctl disable certbot.timer && sudo systemctl stop certbot.timer
If you get the following error you did not have the service installed and can just create the new automation.
Failed to disable unit: Unit file certbot.timer does not exist.
Next, open the crontab for edit with the command below. Choose your preferred text editor if asked.
sudo crontab -e
Then add the following configuration line at the end of the file:
0 */12 * * * /opt/certbot-auto renew -q && systemctl reload nginx postfix dovecot
Save and close using CTRL + X, and Y, and enter.
This will tell cron to run the certbot renew script twice a day which is the recommended method. Most of the time the renewal command will simply verify that the certificates are still valid but once the certificate is within 30 days of expiry, LetsEncrypt will allow renewal. Lastly, it will restart the necessary services for the renewed certificate to take effect.
Optional: Create a Swap File For Little Improvement
Modoboa comes bundled with SpamAssassin, Clamav, and Amavis, which can consume a lot of memory. By default, Cloud Servers on UpCloud are deployed without a swap partition but you can create a swap space if your mail server is running at capacity. Swapfile serves as an extension of the system memory so, for example, if the system doesn’t have enough RAM to perform a certain function it swaps it to the swap area on the storage device.
Follow the following steps to add a swapfile:
For example, on a system that has 2GB of RAM, you can use the fallocate command to create a file size of 2GB as shown below.
sudo fallocate -l 2G /swapfile
You also need to prevent other users from being able to read potentially sensitive information from the swap file. Use the following command to restrict permissions.
sudo chmod 600 /swapfile
Next, format the swapfile so it’s usable.
sudo mkswap /swapfile
Then enable the swap file.
sudo swapon /swapfile
Afterwards, check the swap space is working using the swapon command underneath.
sudo swapon
NAME TYPE SIZE  USED  PRIO
/swapfile file 2G  362.3M -2
If you see something like this in the example output above, your swap file is working.
You’ll also want to make the swap file permanent by enabling it at system boot. You can do so by running the following command.
echo '/swapfile none swap sw 0 0' | sudo tee -a /etc/fstab
You might also want to adjust the rate at which your server will utilise the swap file. This is done by setting a swappiness value. The higher the value, the more likely your server will utilise swap. For example at value 100, it will use swap as much as possible. If it is set to 0, the system won’t use swap at all.
A good starting point is to use a value in the range of 20 – 30.
To set the swappiness value, open your sysctl.conf file in a text editor.
sudo nano /etc/sysctl.conf
By default, the swappiness line isn’t included. Add it manually by appending the sysctl.conf file with the following line:
vm.swappiness=25
Then save the file and exit with CTRL + X, and Y, and enter.
Utilising swappiness is one of the useful tools when performance tuning. In certain situations where you don’t want your application to swap, you can lower the swappiness value. Try out different values and see the one that works best for your use case.
Troubleshooting
If for some reason, you can’t get Modoboa to work or you have an issue sending emails, you can check mail logs (/var/log/mail.log) for clues. To speed up the troubleshooting, you might want to use Multitail, which allows you to view multiple logs in real time.
Install Multitail using the command below.
sudo apt install multitail
To use multitail, simply use the following syntax:
sudo multitail file1 file2 …
For example, you can view your mail log with the following command.
sudo multitail /var/log/mail.log
If you get can’t connect to a UNIX socket /var/run/clamav/clamd.ctl…
If you are seeing an error like below or something similar, your ClamAV-daemon is likely not running.
amavis[12991]: (12991-01) (!)connect to /var/run/clamav/clamd.ctl failed, attempt #1: Can’t connect to a UNIX socket /var/run/clamav/clamd.ctl:’
It doesn’t mean your mail won’t be sent, you just don’t get an antivirus to scan files or mail.
First, check if ClamAV is running using the command below.
systemctl status clamav-daemon.service
If you see the following, the daemon isn’t up.
* clamav-daemon.service - Clam AntiVirus userspace daemon
 Loaded: loaded (/lib/systemd/system/clamav-daemon.service; enabled; vendor preset: enabled)
 Drop-In: /etc/systemd/system/clamav-daemon.service.d
 `-extend.conf
 Active: failed (Result: signal) since Thu 2020-07-30 00:00:16 UTC; 2 days ago
 Docs: man:clamd(8)
 man:clamd.conf(5)
 https://www.clamav.net/documents/
 Process: 23563 ExecStart=/usr/sbin/clamd --foreground=true (code=killed, signal=KILL)
 Main PID: 23563 (code=killed, signal=KILL)
Start it again using the next command.
systemctl restart clamav-daemon.service
Afterwards, your email scanner should start working again.
If you can’t allocate memory
This means ClamAV doesn’t have enough memory to run. If you are running a server with less than 2GB of memory, you might want to resize your server to increase the RAM to at least 2GB.
Then restart the Clamav daemon and check that it’s able to run normally.
systemctl restart clamav-daemon.service
Can’t Send Mail?
If your server is not able to send mail, you might want to check that port 25 (outbound) is not blocked. On UpCloud, port 25 is blocked by default but can be opened upon request. You can read more about how to request port 25 to be opened in our guides on the best practices for hosting your own mail server.
Additionally, if you are using a mail client to send mail and connecting via a VPN, you might wish to check if your VPN connection allows transfer to port 25. Some VPN providers may also block port 25.
Discussion