Drupal is an open-source content management system (CMS) that powers millions of websites globally, from e-commerce stores to enterprise-level apps and government sites.
Running Drupal on UpCloud’s Developer Cloud Servers enables easy scalability and increases performance. In this guide, we outline the installation, setting up, and running of Drupal on UpCloud servers.
Why you should run Drupal on UpCloud
UpCloud’s high-performance servers offer several advantages, including:
- Scalability—UpCloud allows you to quickly scale up your CMS resources without downtime based on your business’s demands. This ensures your Drupal site remains responsive and robust when in high demand.
- Performance—Our enterprise-grade CPUs and in-house-built storage technology offer the best-in-class cloud server performance for most applications.
- Reliability—We provide an outstanding 99.999% uptime SLA on our Cloud Native and General Purpose plans, ensuring the availability of your Drupal sites and backed by our 24/7/365 real-time support.
- Flexibility—UpCloud offers a wide range of server configurations and managed services for developing, building, and deploying.
1. Deploying a new Developer Cloud Server
Follow these steps to set up your UpCloud server and install Drupal:
Sign up with UpCloud
You can begin by registering with UpCloud using your name and email address. You then get a one-week free trial to explore the development environment, which lets you familiarize yourself with our services at no upfront cost.
Set up your UpCloud server
- 1. Once you’ve signed up and logged in, it’s time to set up a new cloud server.
- 2. On the Dashboard, click on Servers in the top left of the screen.
- 3. When choosing your server location, look for the nearest data centre to minimize latency and lag for remote connections.
- 4. Select your server plan. It pays to start small with the minimum requirements and scale up as needed.
- 5. Choose your operating system. This guide uses Ubuntu but you can choose from a list of popular Linux distribution template.
- 6. Add your SSH key to log in, and click Deploy to launch your server.
2. Set up a Docker-based development environment
One of the best ways to get started with Drupal is to set up a Docker-based development environment. This will prepare your UpCloud server for easy Drupal installation. For example, you can choose from these popular Docker-based solutions with over 500 stars in their GitHub repositories.
We will be using DDEV in this tutorial.
Log into your new Developer Cloud Server
To begin, log into your Cloud Server using SSH on your terminal or PuTTY client.
ssh root@your_server_public_ip
Update and upgrade
The first thing on a new server is to always update all software.
sudo apt update && sudo apt upgrade -y
Add Docker keys and repositories
Next, we’ll need to add Docker GPG keys and sources to our package manager.
sudo apt-get install ca-certificates curl
sudo install -m 0755 -d /etc/apt/keyrings
sudo curl -fsSL https://download.docker.com/linux/ubuntu/gpg -o /etc/apt/keyrings/docker.asc
sudo chmod a+r /etc/apt/keyrings/docker.asc
echo \
  "deb [arch=$(dpkg --print-architecture) signed-by=/etc/apt/keyrings/docker.asc] \
    https://download.docker.com/linux/ubuntu \
    $(. /etc/os-release && echo "${UBUNTU_CODENAME:-$VERSION_CODENAME}") stable" | \
    sudo tee /etc/apt/sources.list.d/docker.list > /dev/null
Install Docker
With the Docker repositories configured, install Docker itself.
sudo apt-get update
sudo apt-get install -y docker-ce docker-ce-cli containerd.io docker-buildx-plugin docker-compose-plugin
Installing the Docker this way allows the system to then keep the software up to date using the standard update commands as demonstrated above.
Install DDEV
Next, set up the DDEV’s GPG key similarly to Docker and add DDEV releases to your package repository.
sudo install -m 0755 -d /etc/apt/keyrings
curl -fsSL https://pkg.ddev.com/apt/gpg.key | gpg --dearmor | sudo tee /etc/apt/keyrings/ddev.gpg > /dev/null
sudo chmod a+r /etc/apt/keyrings/ddev.gpg
echo "deb [signed-by=/etc/apt/keyrings/ddev.gpg] https://pkg.ddev.com/apt/ * *" | \
sudo tee /etc/apt/sources.list.d/ddev.list >/dev/null
Then, update the package information on your server and install DDEV.
sudo apt-get update
sudo apt-get install -y ddev
You will also need to run a one-time initialization of mkcert.
mkcert -install
Lastly, you will need to set up a new user account to run DDEV commands.
adduser ddev
adduser ddev sudo
adduser ddev docker
Then set your password and switch to the new user account.
passwd ddev
cd /home/ddev && su ddev
3. Deploy a new Drupal site
Having installed both Docker and DDEV, we are now ready to deploy our Drupal site.
Create a new directory to house your website files and switch into it using the command below.
mkdir ~/my-drupal-site && cd ~/my-drupal-site
Next, run the following commands to configure the new Drupal project, start the services, and install the latest server software and the Drush command-line configuration tool.
ddev config --project-type=drupal11 --docroot=web
ddev start
ddev composer create drupal/recommended-project:^11
ddev composer require drush/drush
4. Complete Drupal installation
Now that you have deployed your Drupal site, you should see it in action. But before we can view the page, we need to reconnect our SSH to enable port tunnelling.
First, check what port your site is running at using the following command.
ddev describe
Then find the URL/PORT of your HTTP site. It’ll look similar to the example below.
- web:80 -> 127.0.0.1:32768
Make note of the port number, then reconnect SSH to your Cloud Server while including the following address:port pair where the port should match the website’s port number
ssh -L 127.0.0.1:32788:127.0.0.1:32788 root@your_server_public_ip
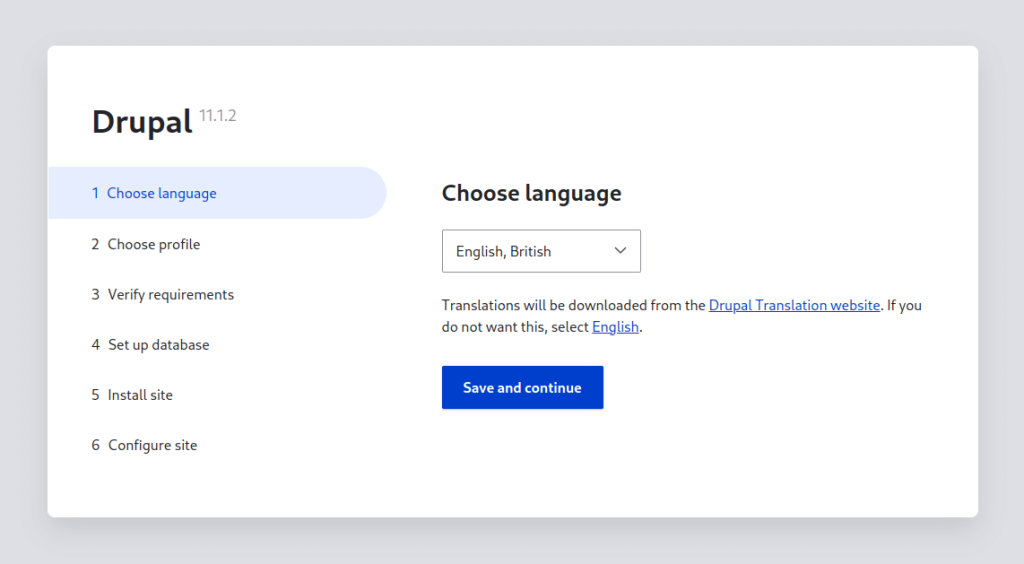
Once you’ve reconnected to your Cloud Server, launch the Drupal installation wizard by navigating to http://localhost:32788 on your web browser. Follow the on-screen instructions to complete the setup. Remember to replace the port number at the end of the address with the port your Drupal site is running.
Start by choosing your site’s language, then click the Save and continue button.
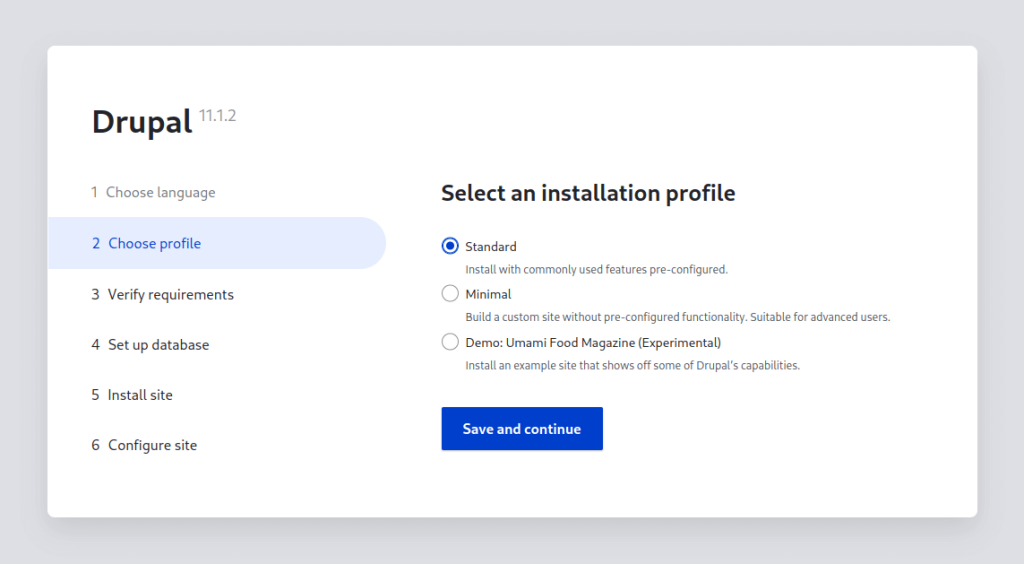
Next, select the installation profile based on your use case.
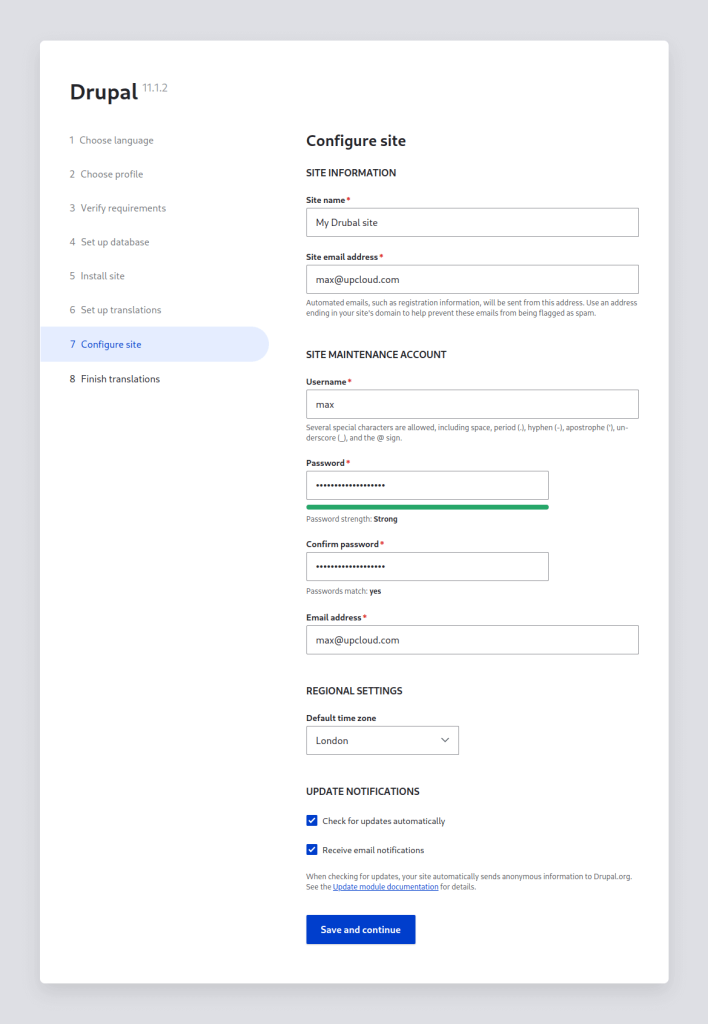
Then enter your site details as you prefer and set up your administrator account. When done, click the Save and continue button once more.
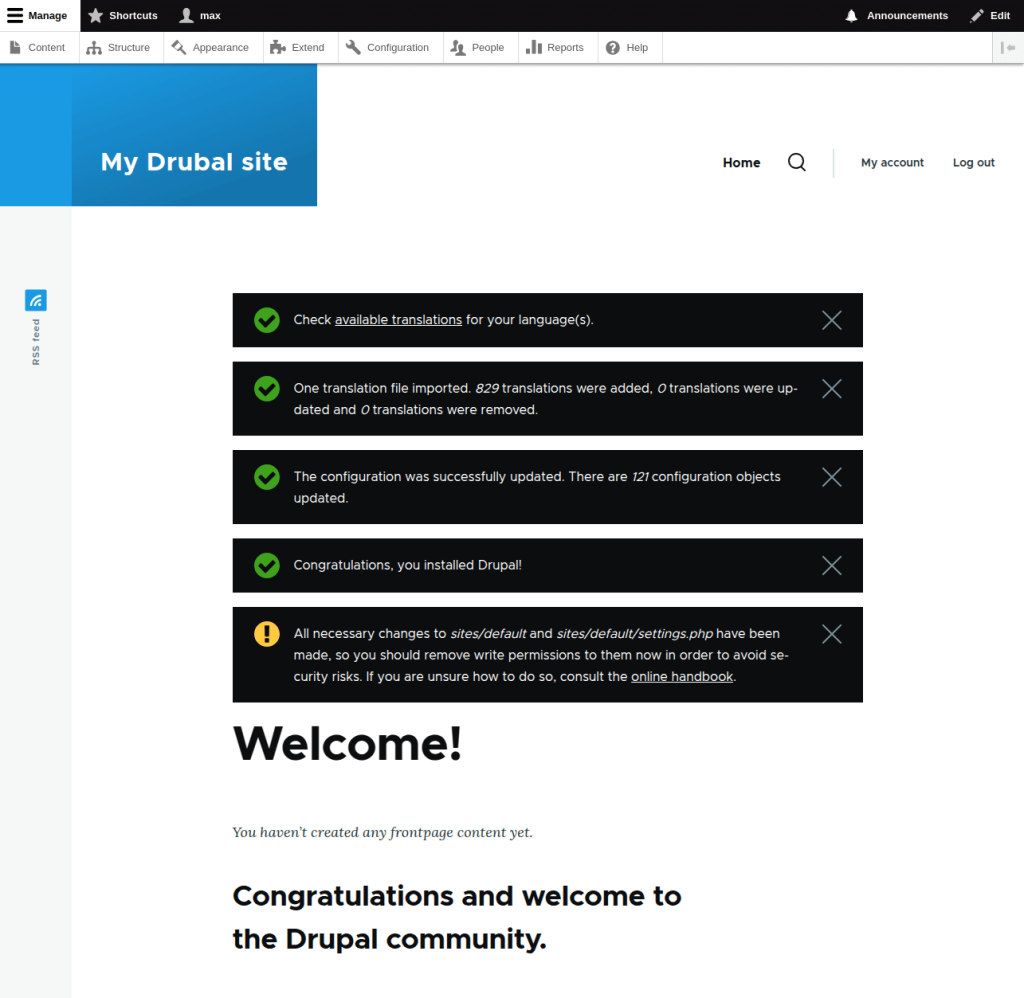
The installation will take a moment, but once complete, you’ll land on the Drupal main page with notifications confirming your Drupal installation was successful!
5. Additional configuration options
Configuring Drupal helps optimize its performance and security. Here are a few pointers.
Enable server caching
You can optimise Drupal’s page loading by enabling caching in the server settings. Log into your Drupal site and navigate to the following section:
Administration > Configuration > Development > Performance
Select the duration of your cache in the drop-down box, then click the Save configuration button.

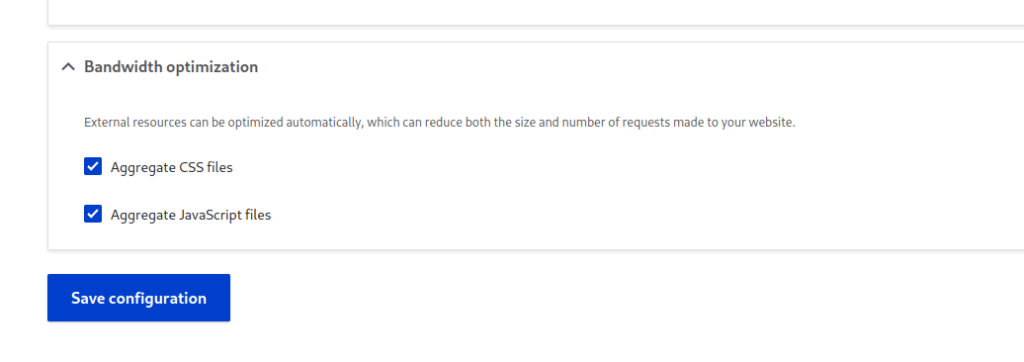
Also, while in the Performance settings, check that the Bandwidth optimization settings are enabled.
Hardened Permissions and Access Control
Once you are done configuring your site, change the settings.php file to read-only for the web to ensure that file permissions follow best practices.
sudo chmod 444 web/sites/default/settings.php
You should also edit the ~/my-drupal-site/web/.htaccess file to disallow direct access to sensitive directories like /config, /vendor, and /scripts.
<DirectoryMatch "^.*/(config|vendor|scripts)">
    Order Allow,Deny
    Deny from all
</DirectoryMatch>
Automated backups
Setting up scheduled automated backups is an important way to protect your hard work. You can use DDEV’s snapshots with cron jobs or enable whole server snapshots with the UpCloud Simple Backup service.
ddev add-on get ddev/ddev-cron
ddev restart
Then create a new cron job file ~/my-drupal-site/.ddev/web-build/snapshots.cron and add the following line into it.
# Take a snapshot once a day
0 17 * * * ddev snapshot
Later on, if you ever need to revert changes, you can restore a snapshot using the following command.
# Restore a snapshot
ddev snapshot restore my-drupal-site_20250218120425
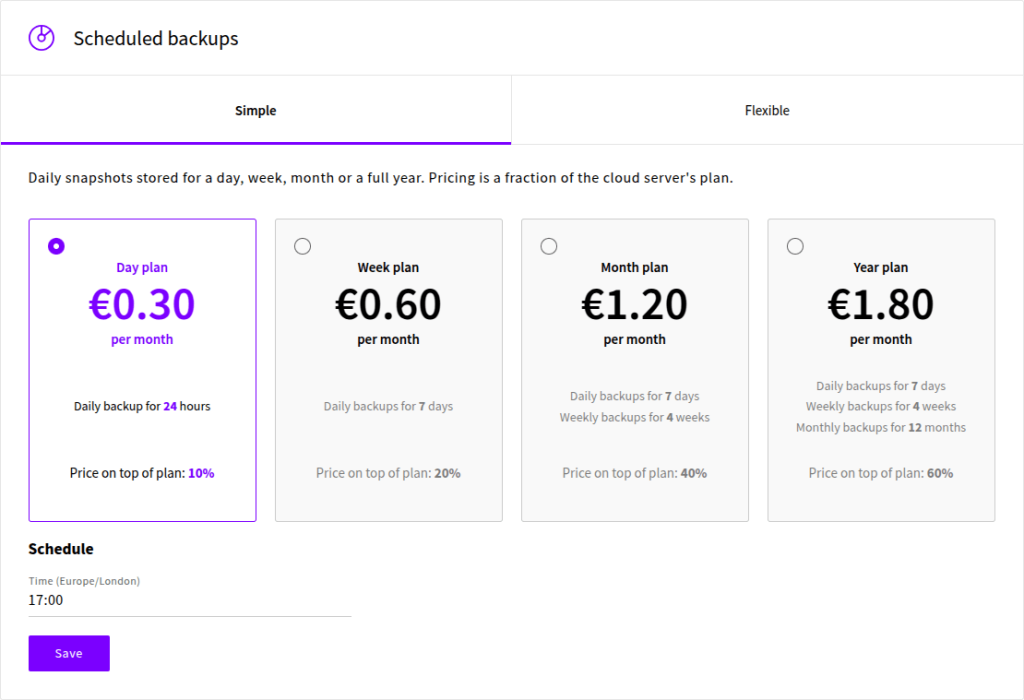
You can also protect your whole Cloud Server by enabling scheduled Simple backups at your UpCloud Control Panel. On Developer plan servers, backup plans start from just 30 cents while General Purpose plans and higher have one day backups included for free.
Further resources
This guide is designed to help you get started with Drupal on UpCloud Developer Cloud Servers. Several excellent resources are available with Drupal and UpCloud to help you make the most of the Drupal CMS hosting experience.
UpCloud advanced user setup guides
Conclusion
This step-by-step guide helps you quickly and easily set up Drupal’s CMS system using DDEV tools on UpCloud’s versatile Developer Cloud Servers. Alongside its reliability and ultra-fast speeds, UpCloud Block storage makes our Cloud Servers the ideal hosting space for Drupal’s outstanding CMS solutions.
In addition to reliability, high speeds, and block storage, UpCloud helps you scale. Begin small without breaking the bank and scale without compromising on performance as your usage grows.
Sign up for a free trial today to begin developing your Drupal site on UpCloud!
Discussion