Introduction
Podman is a container engine that enables building, running, and managing containers. It is usually considered as an alternative to Docker, as they both provide similar functionalities for managing containers. However, they differ in their architecture and the way they run containers.
The major difference between Podman and Docker is that Podman is daemonless, meaning that it doesn’t use a daemon process to run your containers. Unlike Docker, which runs a background daemon that is responsible for starting and managing containers. This daemonless architecture makes Podman more lightweight and secure as it removes the overhead and reduces the attack surface associated with the daemon process.
Another core feature of Podman is its ability to run rootless containers. As the name suggests, rootless containers can run without root privileges, meaning that a normal user can start the container and work with it. This of course improves the security of the environment in a scenario where a malicious process escapes the container boundary, as it will still have limited permissions instead of root permissions on the host.
In this guide, we’ll cover the basics of managing containers using Podman. We’ll start by installing Podman on an UpCloud server. Then we’ll work with container images including pulling, pushing, and building custom images. Finally, we’ll test running and accessing containers with Podman.
Prerequisites
To follow along with this guide, you’ll need to:
- Create an UpCloud account: This gives you access to different UpCloud services using the GUI control panel, command-line interface, or the API.
- Deploy a Cloud server on UpCloud: This is going to be our host server where we’ll install Podman and run our containers.
- Create a Docker hub account: Docker hub is a centralized location for publishing and distributing container images. We’ll use it in this guide to work with our image.
- Familiarity with using the CLI: We’ll be using some basic commands throughout this guide to install our tools, navigate project directories, and work with SSH.
Installing Podman
The first step in our scenario is to install Podman on our UpCloud server. Podman is available in the default package repositories for most Linux distros. For this guide, we’re using an Ubuntu image on our cloud server:
1. Update the package index.
sudo apt update2. Install Podman package from the default repositories.
sudo apt install -y podman3. Verify the Podman installation.
podman --versionIf the installation was successful the above command should show the podman version installed.
podman version 4.9.34. Podman installation also includes some other utilities that enable working with container images. One very important utility is buildah, which allows building OCI-compatible images. Verify that buildah is installed correctly with the following command:
buildah --versionThe output should show the version of buildah installed.
buildah version 1.33.7 (image-spec 1.1.0-rc.5, runtime-spec 1.1.0)Working with Images
Podman provides CLI commands that are similar to their alternatives in Docker. It’s a common practice for users who are familiar with Docker to alias docker to podman which allows them to keep using the docker command as it is.
Now let’s check some of the common Podman commands used to work with container images:
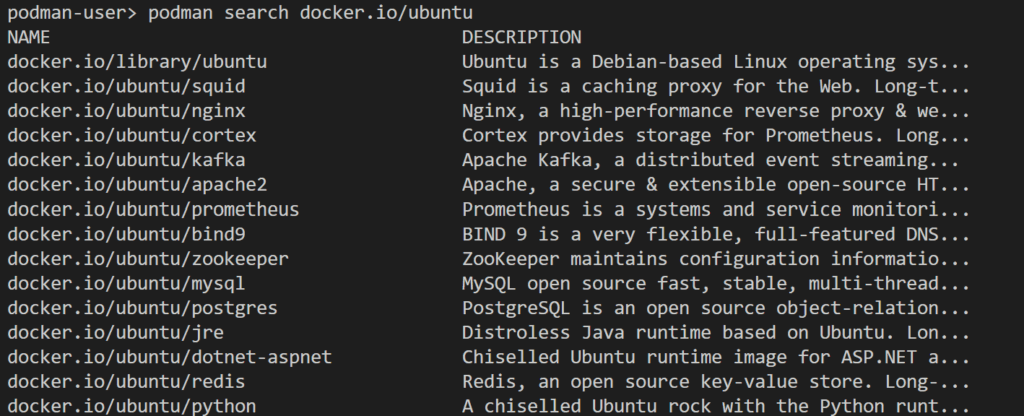
1. podman search: this command searches the specified registry for a matching image name.
podman search docker.io/ubuntuThe above command will search for ubuntu images in the docker registry. The output will be a list of the available images.
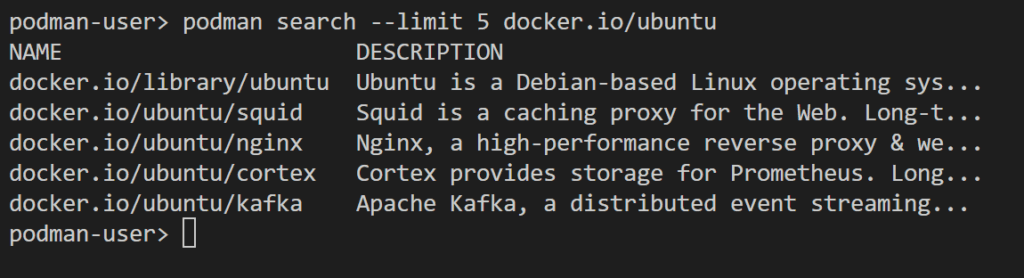
You can limit the number of results from the command by using the –limit option
podman search --limit 5 docker.io/ubuntuThe above command will show only 5 results in the output.
2. podman pull: this command pulls the specified image from the registry to the local host, it’s similar to the docker pull command in its function.
podman pull docker.io/ubuntuThe above command will download the layers of the ubuntu image from the docker registry

3. podman images: this command lists the images that are available locally on the host.
podman images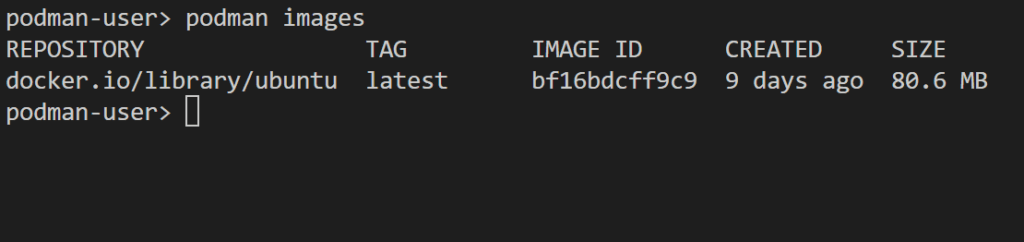
As we only pulled the ubuntu image previously, we can see it in the command output.
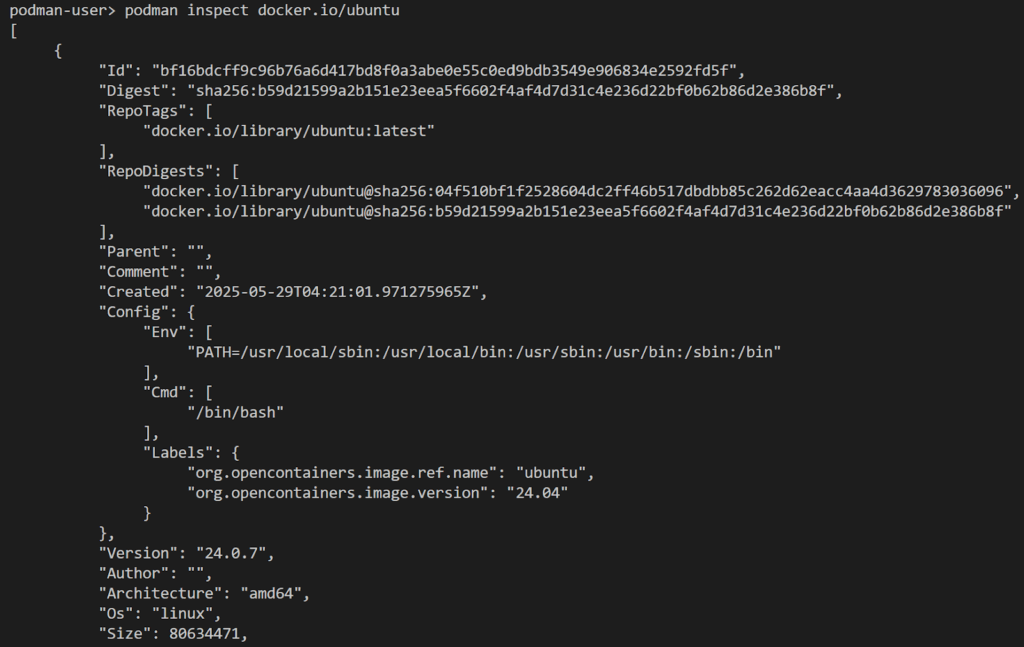
4. podman inspect: this command shows the metadata and related information about the image like its size, architecture, sha ID, and repository tag.
podman inspect docker.io/ubuntuThe above command will print the detailed information about our ubuntu image.
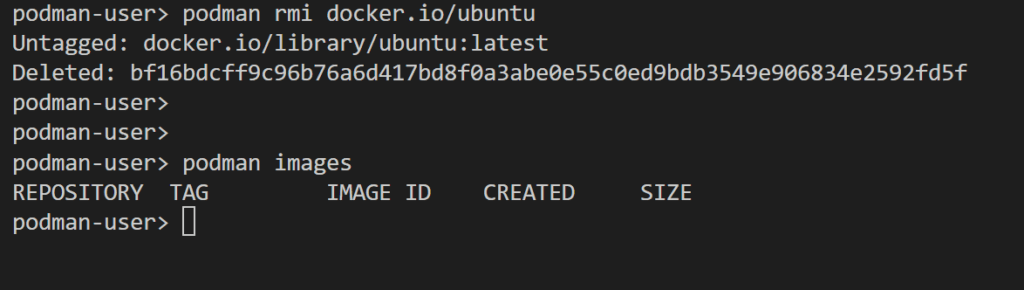
5. podman rmi: this command will delete the specified image from the local host. It will remove the image layers and its related data.
podman rmi docker.io/ubuntuThe above command will delete the ubuntu image from our cloud server. If we check the local images again using the podman images command we should see no images there.
Search Registries and Image Short Names
In the previous examples when we wanted to work with our ubuntu image we had to specify the fully qualified name of the image, meaning that we included the registry name which is docker.io followed by the image name which is ubuntu.
This is because Podman doesn’t have a default registry to search the images for, so we have to explicitly specify the registry where we need Podman to look for the image. This is unlike Docker which uses the docker registry as a default registry.
Now instead of providing the fully qualified name of the image each time, which can become cumbersome especially if we’re working with images from multiple registries, we can provide Podman with a list of registries to use when searching for images. We add this list to the configuration file at /etc/containers/registries.conf, Podman will then search through this list of registries in the specified order.
We can test this on our ubuntu image with the following steps:
1. First let’s try to pull the image with its short name only without adding the registry.

As we can see, we get an error which clearly states that we don’t have any registries defined in the /etc/containers/registries.conf.
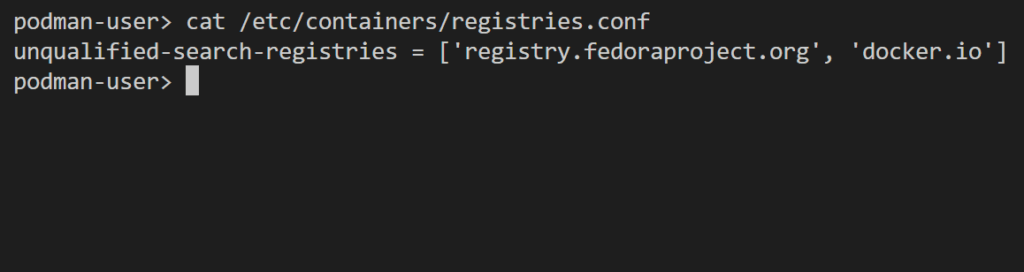
2. Open the configuration file using a text editor and add the following line
unqualified-search-registries = ['docker.io']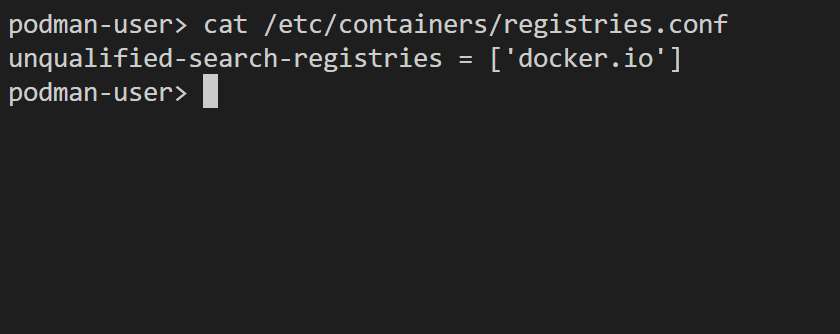
The unqualified-search-registries is the list of container registries that we want Podman to use in the specified order. Here we only provided the docker registry so it’s the only registry that Podman will use to search for images.
3. Now let’s try to pull the image again with its short name.

The image pull is now successful and we can see in the first line of the output that the image is resolved from the unqualified-search registries in the /etc/containers/registries.conf.
4. Check that the list of registries is also used for other operations on images such as the search.

- In the above image, we only specified the short name of the centos image, and podman automatically retrieved the list of images from the docker.io registry which is configured in our /etc/containers/registries.conf file.
An important thing to take care of when using image short names is that the list of registries should be set in the correct order. If an image is located in two different registries with the same name the first registry in the list will be used, so you might be pulling a different image other than the one you actually need if you’re not listing them in the correct order.
We can test this with the following steps:
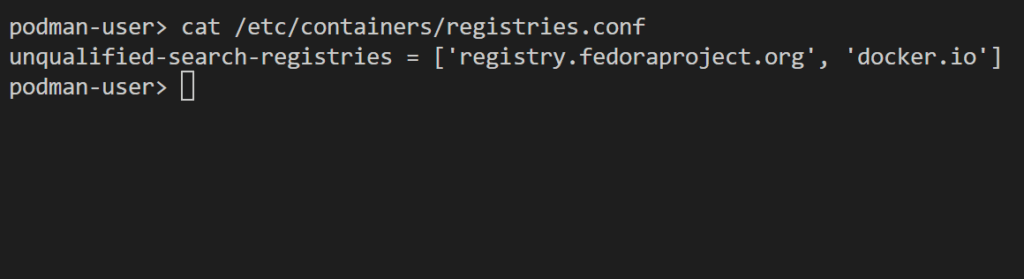
1. Open the /etc/containers/registries.conf file and add another registry before the docker registry. Here I’ll use the fedora registry which is registry.fedoraproject.org.
2. Now let’s try to pull the fedora image with its short name.
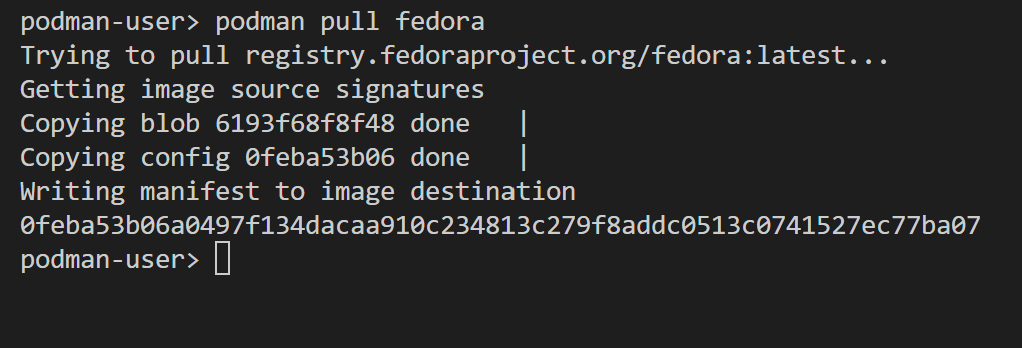
We can see that Podman has selected the first registry in the list which is the fedora registry to pull the image from. So if you want to pull the image from the docker registry you have to either specify the fully qualified image name, or change the order of the registries in the list and use the image short name.
Using Short Name Aliases
Newer versions of Podman provide an additional technique to resolve image short names to their correct registry. It is achieved by aliasing the short name to its respective fully qualified name. These short name aliases are similar to command aliases in Linux where we set a specific shorthand for the command and assign it to our full command syntax.
For example, we can set ubuntu=docker.io/ubuntu as an alias which will ensure that whenever we use the ubuntu short name it will resolve to the docker registry ubuntu image. These aliases take precedence over any configured registries in the registries.conf file. This can be helpful if we want to make sure that a specific image short name always resolves to a specific registry regardless of the configured registries.
These aliases are added to a configuration file located at /etc/containers/registries.conf.d/shortnames.conf, and there’s a default list of aliases that is included with the Podman installation and is maintained for the community in this github repository.
Now let’s try to use these aliases with our previous fedora image to pull it from the docker registry instead of the fedora registry:
1. Open the configuration file at /etc/containers/registries.conf.d/shortnames.conf and add the following line under the [aliases] section.
"fedora" = "docker.io/library/fedora"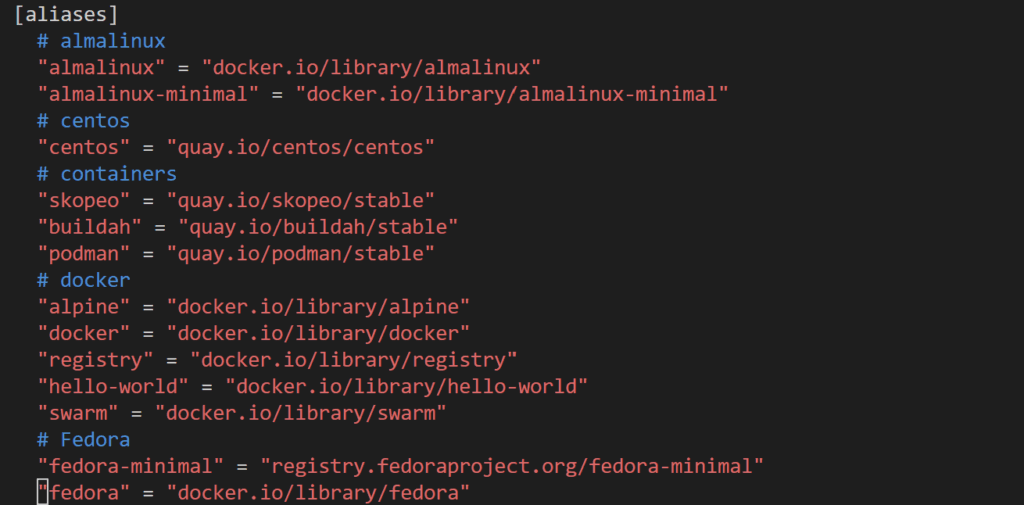
2. Save the file and then try to pull the image with its short name.
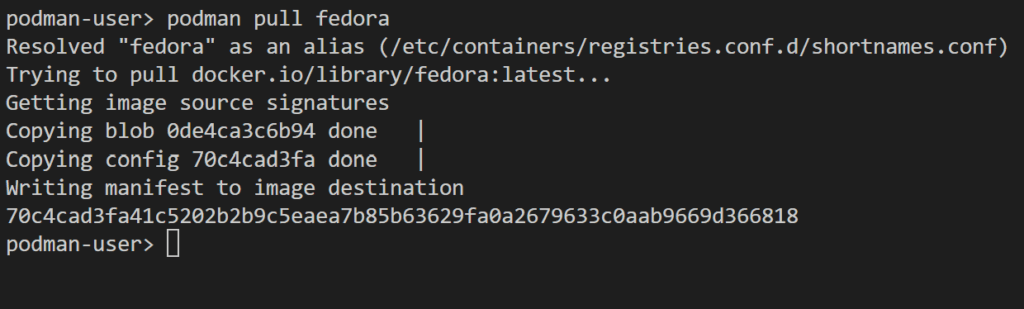
We can see in the output that the image short name was resolved to the docker.io registry image using the alias in the shortnames.conf file. Although the fedora registry is still listed before the docker registry in the registries.conf file:
Which means that the alias took precedence over the configured registries list.
Building Custom Images
We can also use Podman to build our own container images that contain our applications, just like we can build images with Docker. As we mentioned previously, Podman relies on buildah for building the images, which comes included by default with the Podman installation, but you can also install it separately on your machine.
There are multiple ways we can build images with buildah, but the most common one especially for users who are familiar with Docker is to use a Dockerfile. The Dockerfile is a text file that contains instructions for building the image.
We already have a sample application with a Dockerfile that we can use from this github repo. Let’s build a container image for this app with the following steps:
1. Check if Git is installed on the cloud server.
git --versionIf Git is installed correctly the output will show its version.
git version 2.43.0If Git is not installed on the server, you can install it using the distro’s package manager.
sudo apt install git-all2. Clone the repository to the cloud server.
git clone https://github.com/Amr-tmorot/Flask-sample-app.git3. Change directory to the repository folder and check that the app source code and Dockerfile are there.
cd Flask-sample-app/
ls 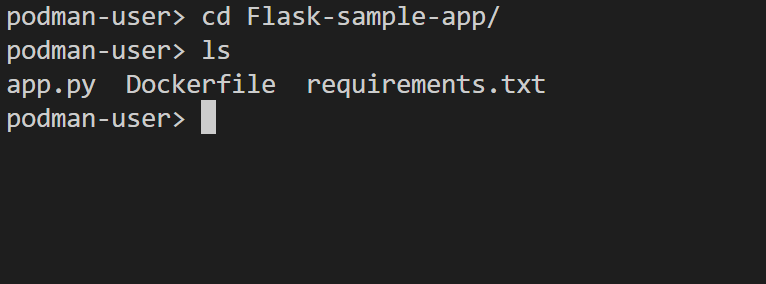
4. Build the container image using Podman.
podman build .The above command will use the instructions inside the Dockerfile to build the image.
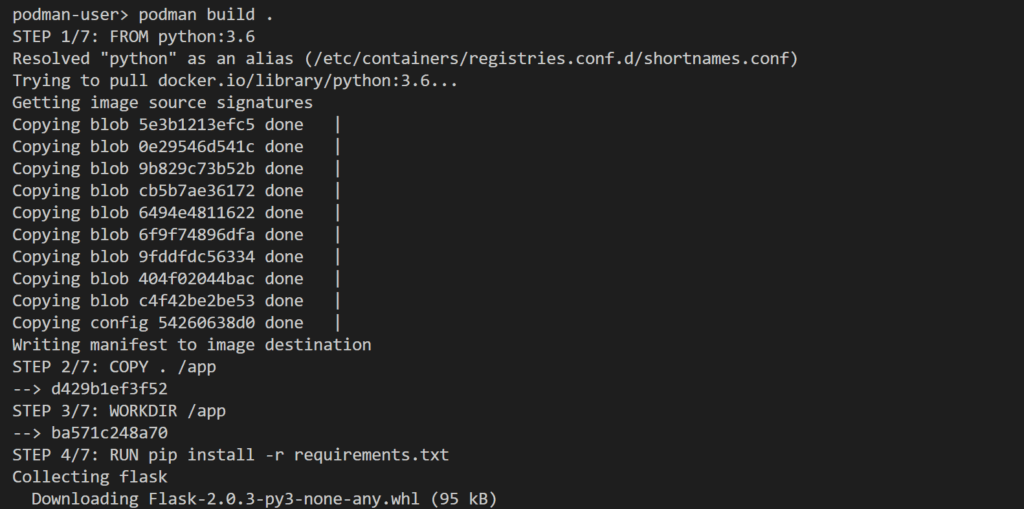
Take note of the image ID at the end of the output as we’ll use it later to tag the image.

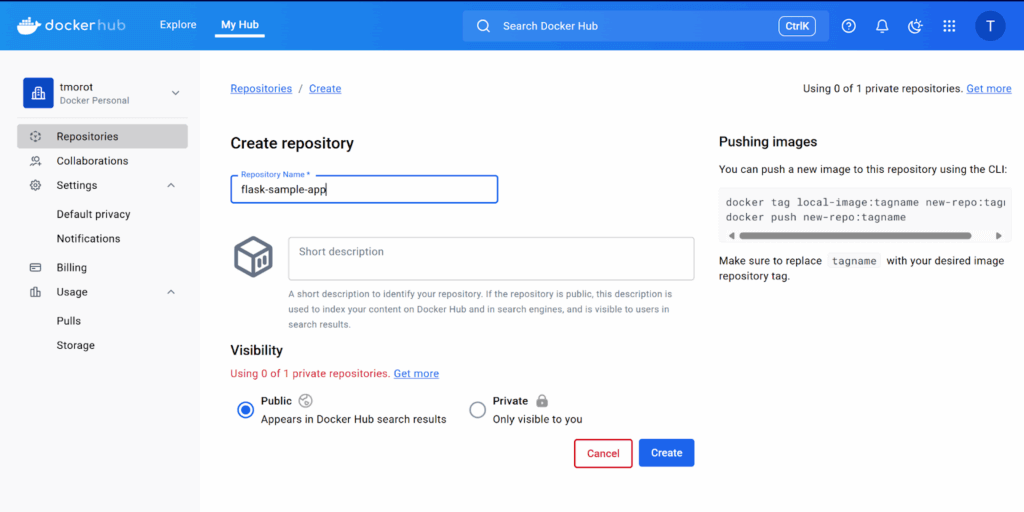
5. Now that the image is built successfully, we need to push it to a centralized image registry instead of just having it locally on the cloud server. We’ll use Docker hub as our image registry.
Login with your Docker hub account and create a new repository for the image:
6. To be able to push the image to the repository, we need to tag it first with the correct fully qualified name.
podman tag [image ID] docker.io/[username]/[repo]Replace the image ID with the ID we got from the output of the build command, username with your Docker hub username, and repo with the repository name that you created.
If you list the images now on the server you should see the image with the new tag.

7. Login to your Docker hub account from the command line using Podman.
podman login docker.io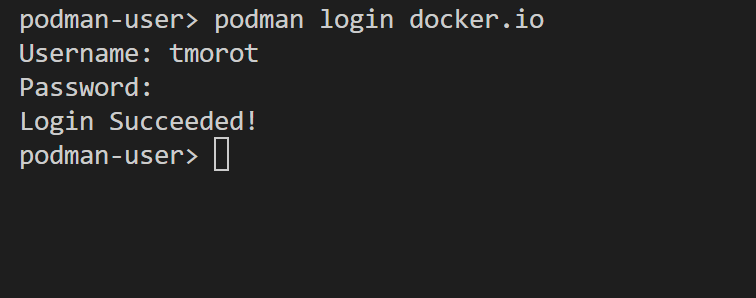
8. Push the image to the repository.
podman push docker.io/[username]/[repo]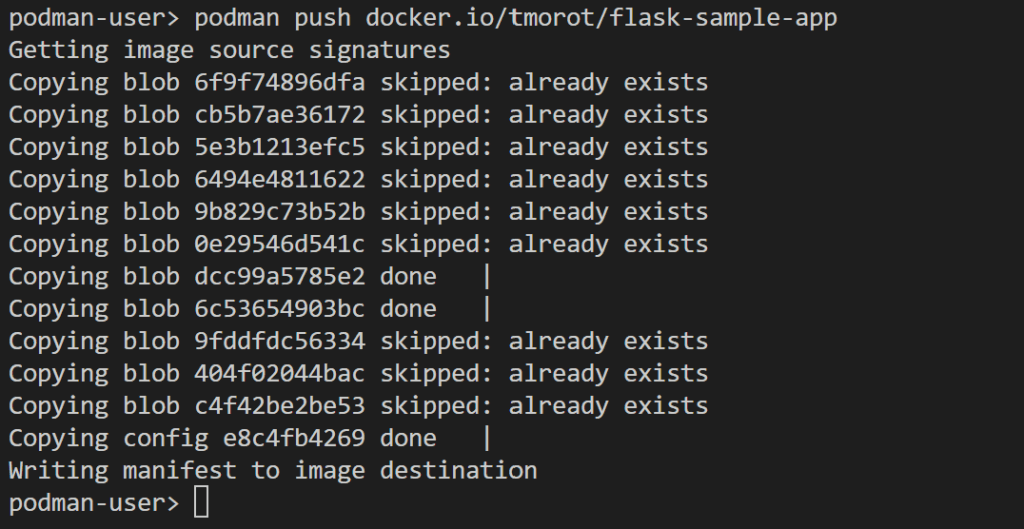
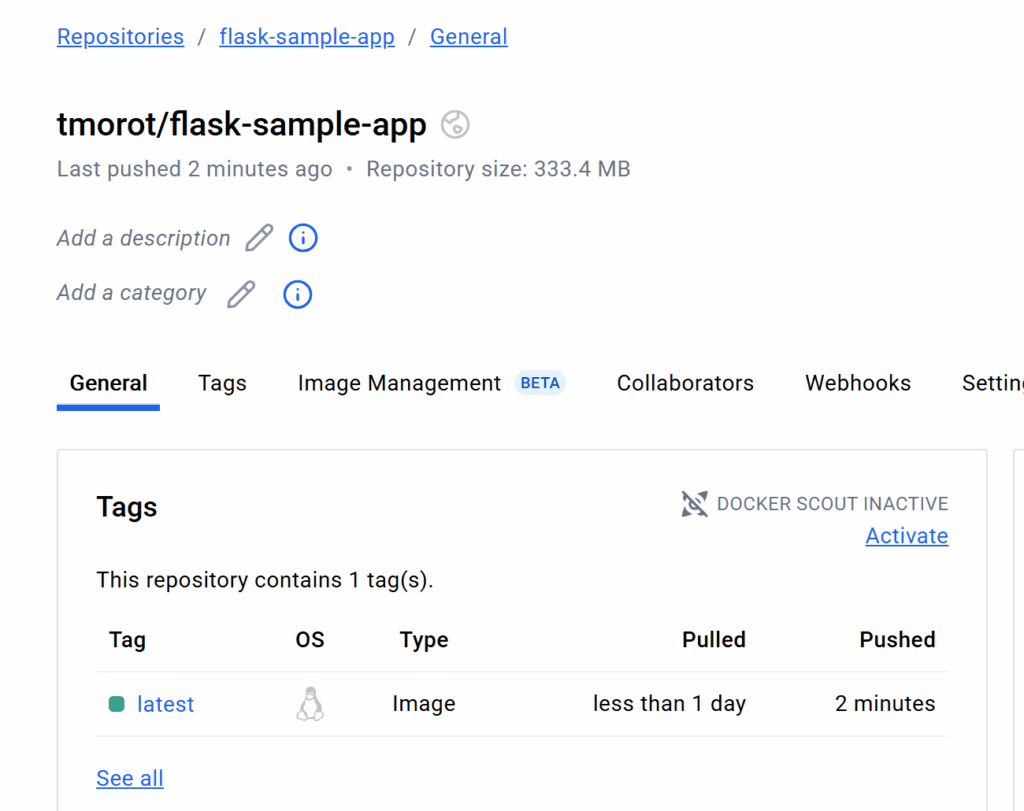
9. Verify that the image is pushed to the repository from the Docker hub GUI.
Running a Container From the Image
Now that we’ve built our image and pushed it to the registry, the next step is to start a container from it to run our application. Again, Podman also provides a simple command similar to its equivalent in Docker to run a container from an image:
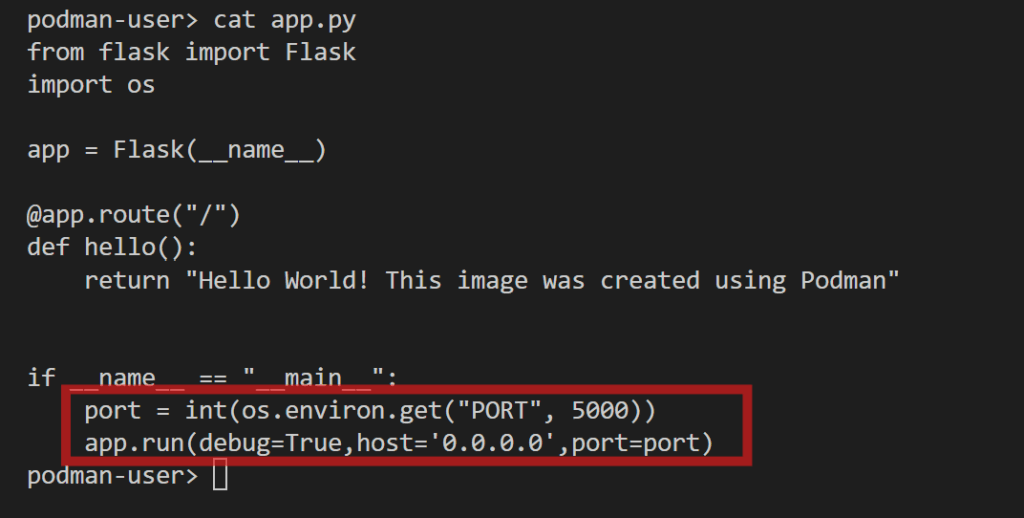
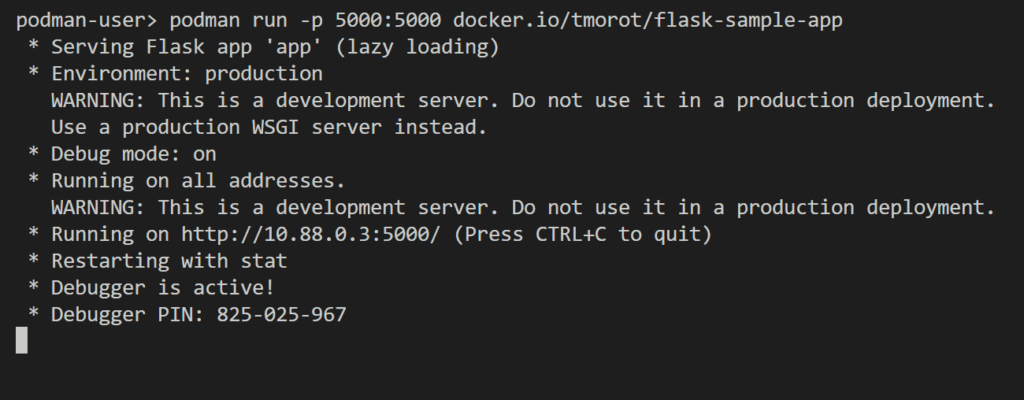
podman run -p 5000:5000 docker.io/[username]/[repo]The podman run command starts the container process, the -p option publishes a port from inside the container to a port on the local host, here we use port 5000 which is our application port that is specified in the source code:
Finally we provide the fully qualified name of the image to the command. You should see the container started and showing the logs in the output:
To test accessing the application, we can use a simple curl command from inside the cloud server using the localhost address and the application port:
curl localhost:5000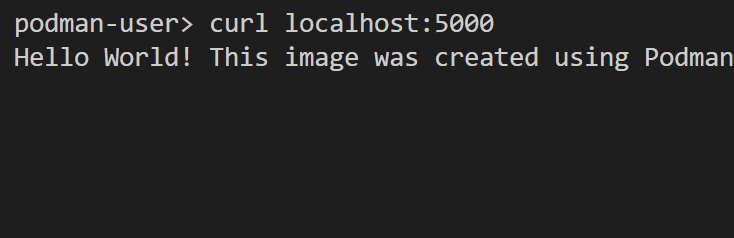
We can also try to access it from a browser using the cloud server public IP address:
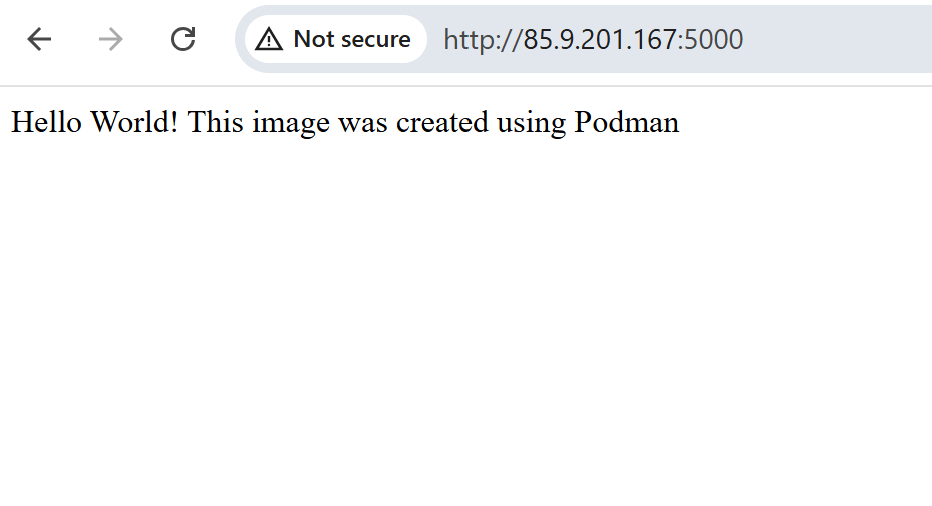
Our application container is now running and responding to requests.
Conclusion
Podman is a lightweight and secure open source tool for running and managing containers. It provides a CLI interface with similar commands to their Docker alternatives which makes interacting with containers and container images easy.
This similarity in the command line interface makes Podman and Docker look the same on the surface, however, they differ fundamentally in their architecture and the way they run containers. Unlike Docker, Podman is daemonless so it doesn’t rely on a long-running daemon process to manage containers. Additionally, Podman supports running rootless containers by default, which improves the security of the environment.
In this article, we covered the steps for running containers using Podman. We started by installing Podman on an UpCloud cloud server, then we explored the common Podman commands to work with container images. Next, we explained how to configure image registries and use image short names and aliases. Finally, we used Podman to build a custom container image and start a container from it on our server.
Want to deploy your containerized workloads in the Cloud? Try UpCloud now and get your server infrastructure ready within seconds to run your containers.
Discussion