Perimeter 81 is a Zero Trust Network as a Service that helps you to secure your team’s network, including valuable local and cloud resources. Incorporating the highest standards of Zero Trust Security, Perimeter 81 users can create adaptive least-privilege access policies based on device, identity, role, and location.
Accordingly, authorised employees can be granted access to only the corporate resources they need. IT administrators can more easily monitor activity across the network and implement a full range of network security features that are easy to scale with organisational growth. The combination of this reduced attack surface and cloud-friendly approach makes it that much more difficult for bad actors to breach your network, and also saves significant IT overhead.
What you’ll need
Creating a secure Perimeter 81 network to connect to your UpCloud infrastructure, you’ll naturally need accounts on both services. Here is a short description of the requirements on each platform.
Perimeter 81
- A Perimeter 81 private gateway – this will establish your Perimeter 81 network which will be converged with your UpCloud VLAN
- A user license is needed for each team member that will require access to the converged Perimeter 81 secure network
UpCloud
- A Cloud Server instance with Ubuntu or CentOS on UpCloud – this will serve as the secure connection point for a site to site tunnel using Perimeter 81’s wireguard connector.
Register on Perimeter 81 and create your first network
To get started, register on Perimeter 81 to create an account. You will also need to purchase one of the pricing plans. All plans will enable setting up secure access to UpCloud but come with different security features and capabilities.
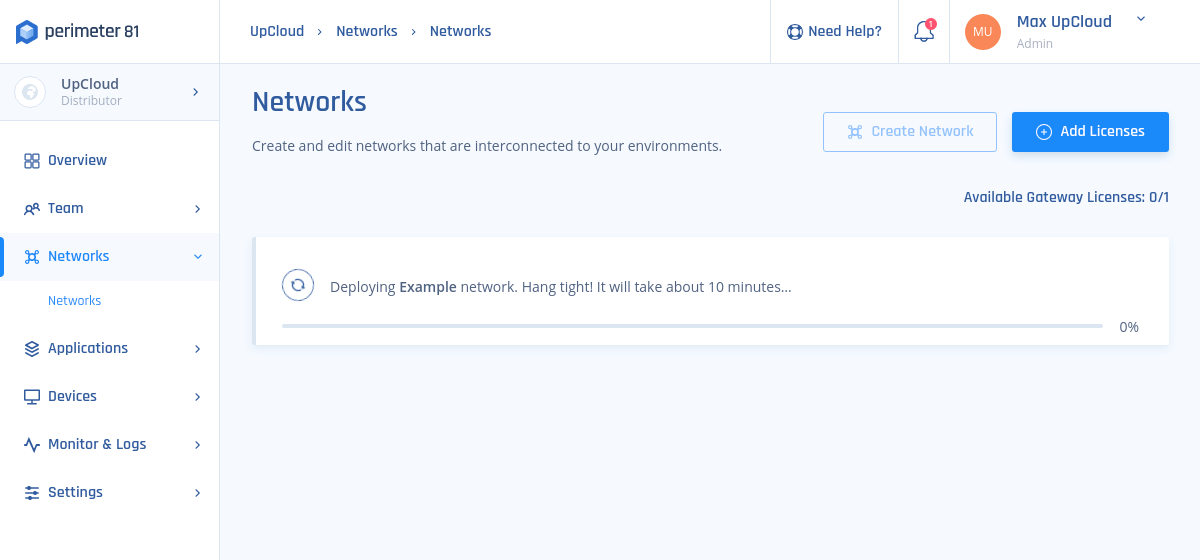
Once a license has been applied to your account, you will be able to deploy a Perimeter 81 network.
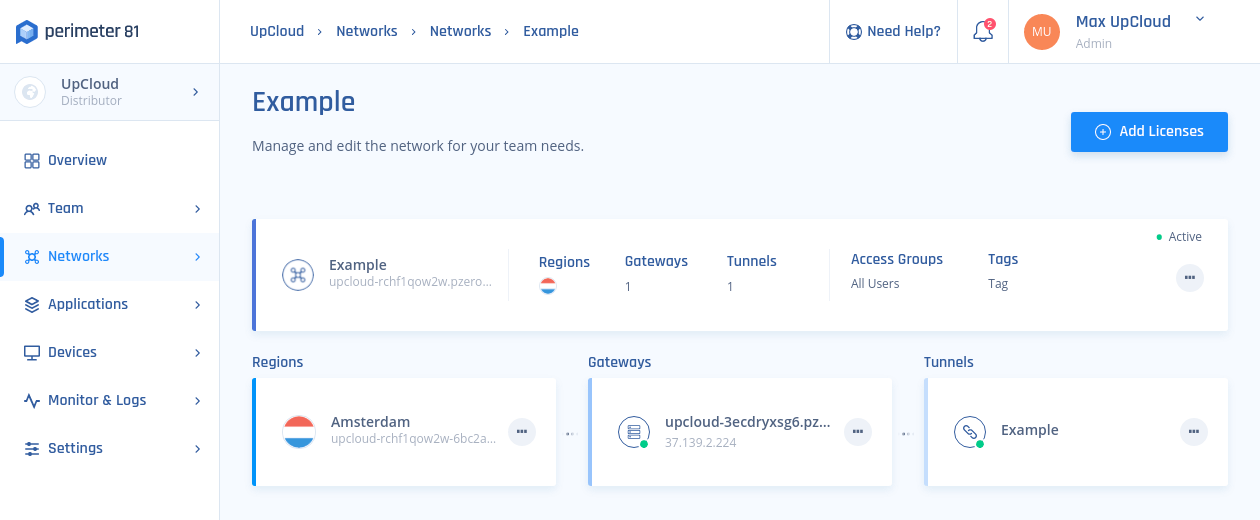
1. Select Create Network on the Networks tab.
2. Fill in the following:
-
- Network Name: A name for the Network you are building. For example, HQ, Finance, or Staging.
- Icon: Use the default or select an icon of your choice.
- Region: Region is the physical location where the gateway will be deployed. Choose one or more regions from the available regions listed (Europe, North America, East Asia, Australia, and Israel).
- Gateways: The number of gateways you want to deploy in a particular region. Having multiple gateways enables high availability and a better load balance. The number of gateways should not exceed the number of available licenses.
- Network Tags: Use tags to help identify the different Networks between teams and use cases.
- Subnet: Optional. If the subnet is not specified, it will receive a default value of 10.255.0.0/16.
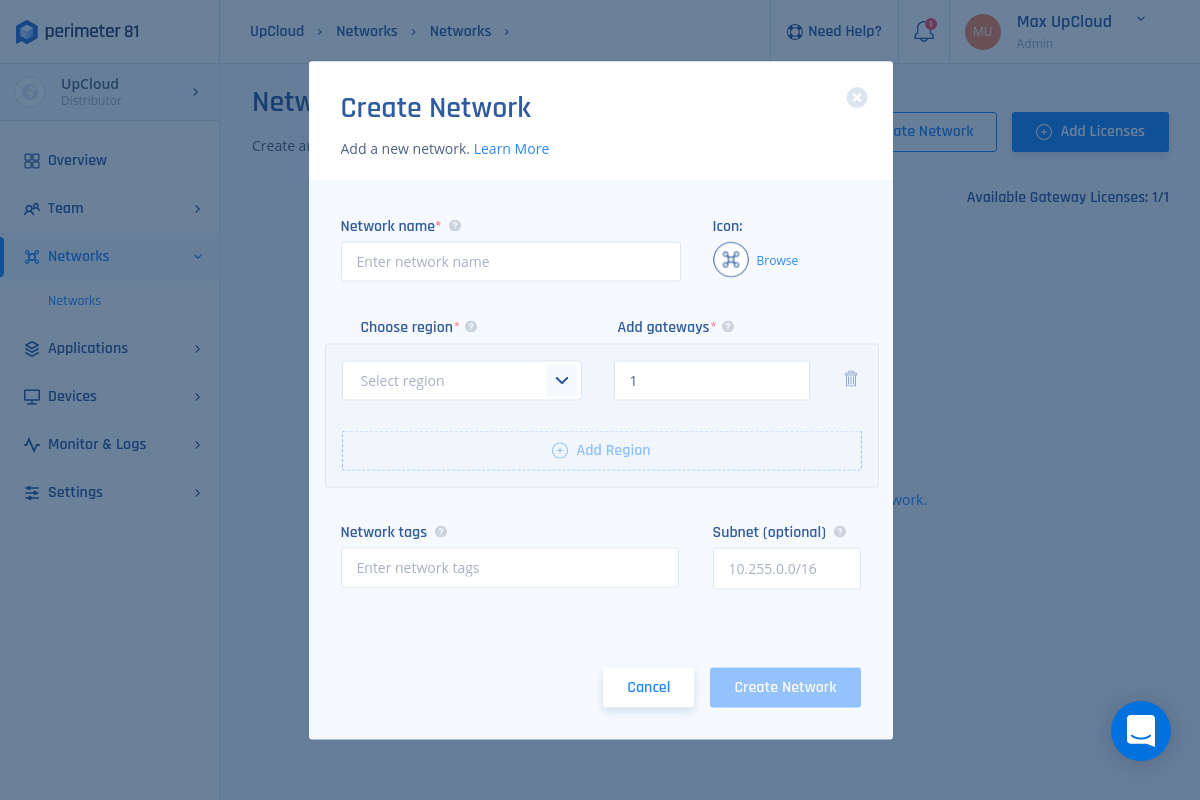
3. When done, click the Create Network button to confirm.
Deploying new Linux Cloud Server
Next, go ahead and deploy a new Cloud Server with Ubuntu 20.04 or 18.04 by logging in to your UpCloud Control Panel and clicking Deploy server. If you are new to UpCloud, you can get started with the free trial by signing up.
The deployment page shows a number of options for customizing your new Cloud Server.
- Choose the server location from the available data centres
- Pick a configuration, the $10 per month plan is a good starting point
- Select your operating system, e.g. Ubuntu 20.04 or 18.04
- Add any SSH keys you want to use
- Give your server a hostname and description
Deploy!
Configuring the Perimeter 81 connector
Now that you have a new Cloud Server up and running, continue by setting up a Perimeter 81 connector.
Head over to your Perimeter account and follow the steps below.
1. Under Networks in the Management Platform on the left side, select the name of the network in which you’d like to set the tunnel. Locate the desired gateway, click the three-dotted menu (…) and select Add Tunnel.
2. Select Perimeter 81 Connector, then select Continue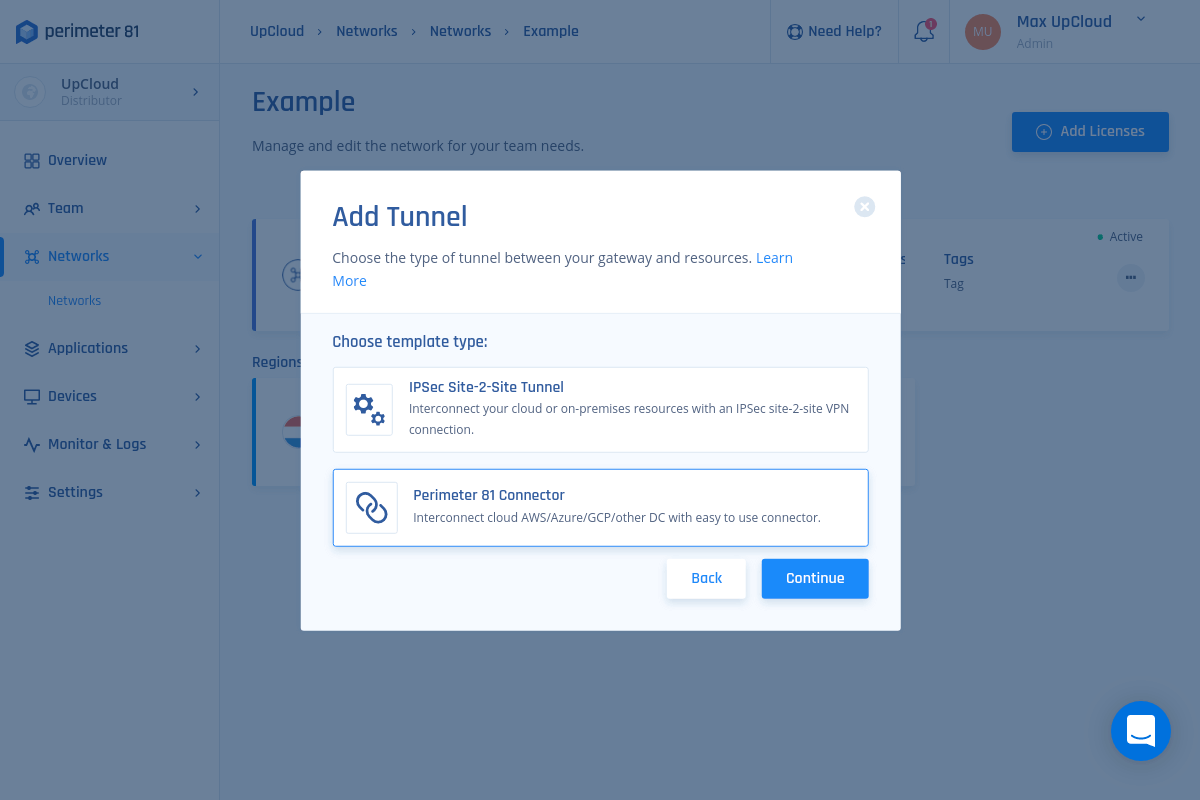
3. Make sure you have a Windows Server 2016, Ubuntu 16.04/18.04/20.04 LTS, CentOS/REHL7 or equivalent instance set within your UpCloud Cloud Server, then select Next.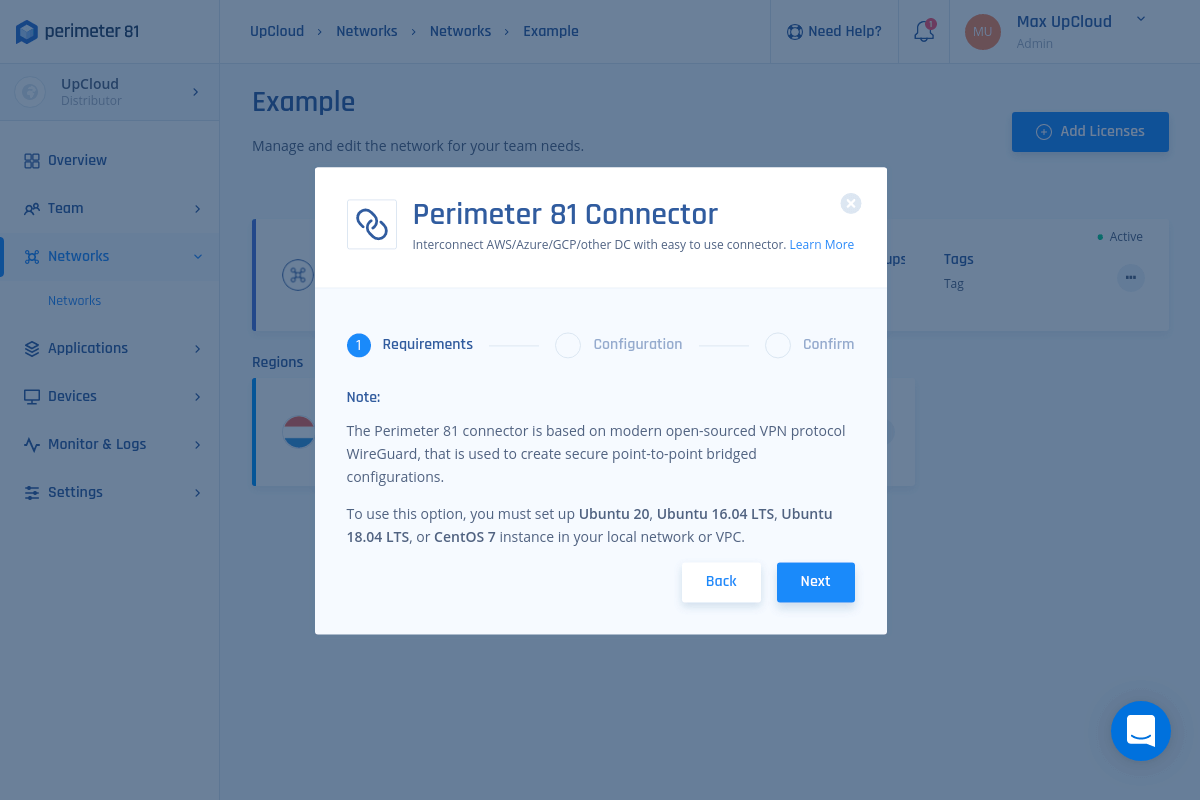
4. Enter a Name of your choice, and the Endpoint, meaning the IP address from which the Linux server in UpCloud is connecting to the internet, accompanied by the correlating Subnet range (the values in the attached image are for demonstration only).
Note: You can query the Endpoint by executing the following command in the Linux terminal of your Cloud Server.
dig +short myip.opendns.com @resolver1.opendns.com
Then click Next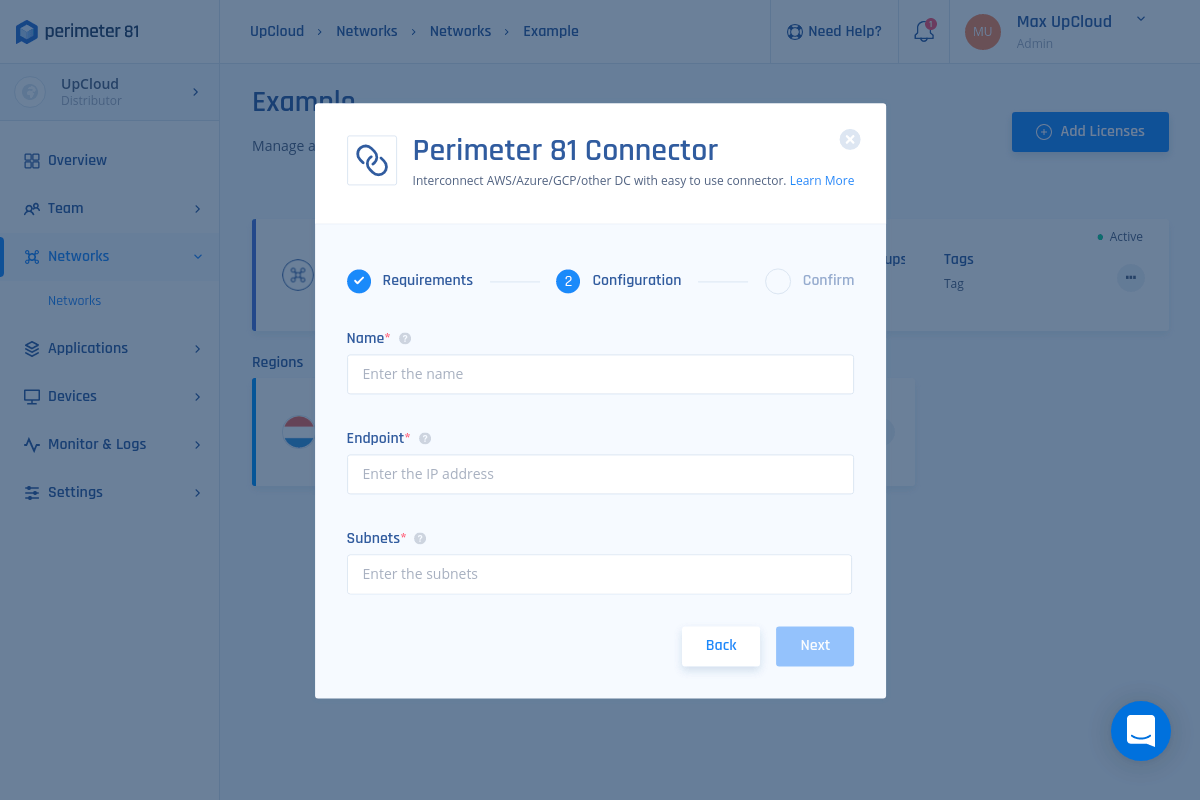
5. Select Confirm and Apply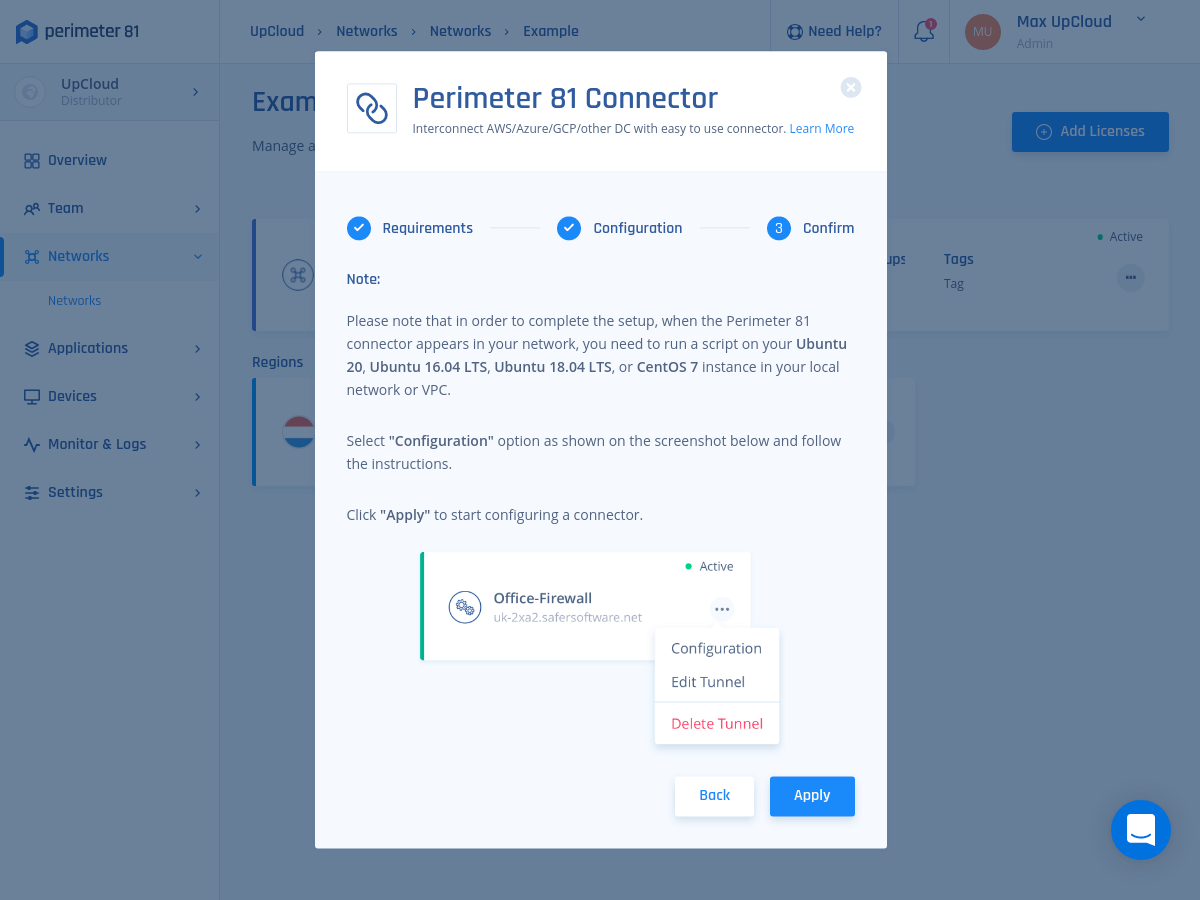
When done, sit back and relax until the deployment is finished. This may take a few minutes.
Configuring the connector on your Cloud Server
Make sure the machine that will be hosting the connector meets the following requirements:
Ubuntu
Please see attached the prerequisites for the machine
- Your kernel is up to date
- The following packages are installed:
sudo apt install curl dig software-properties-common
CentOS/REHL
Please see attached the prerequisites for the machine
- Your kernel is up to date
- The following packages are installed:
sudo yum install curl bind-utils
Note that whenever you upgrade your kernel, make sure to reboot the server afterwards.
Now, granted your Cloud Server meets the requirements, setting up the Perimeter 81 connector is a simple task.
1. First, check that you can see the connector under the Network section. Select the three-dotted menu (…) besides its icon, then select Configure.
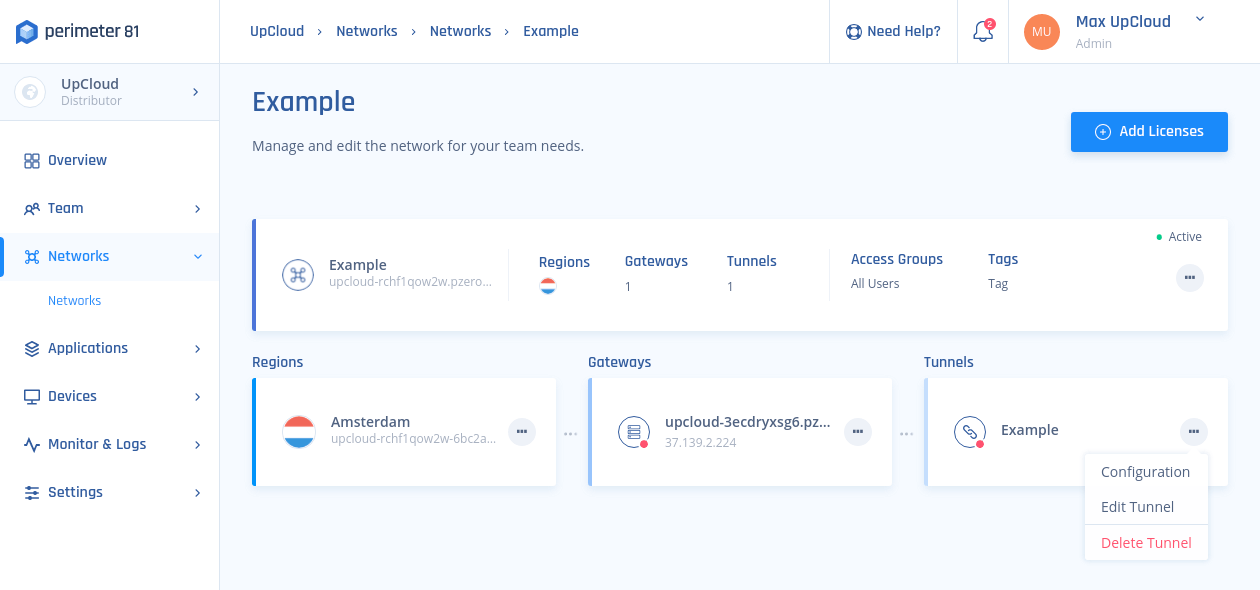
A similar window will open (the displayed command varies from connector to connector)
2. Copy the command.
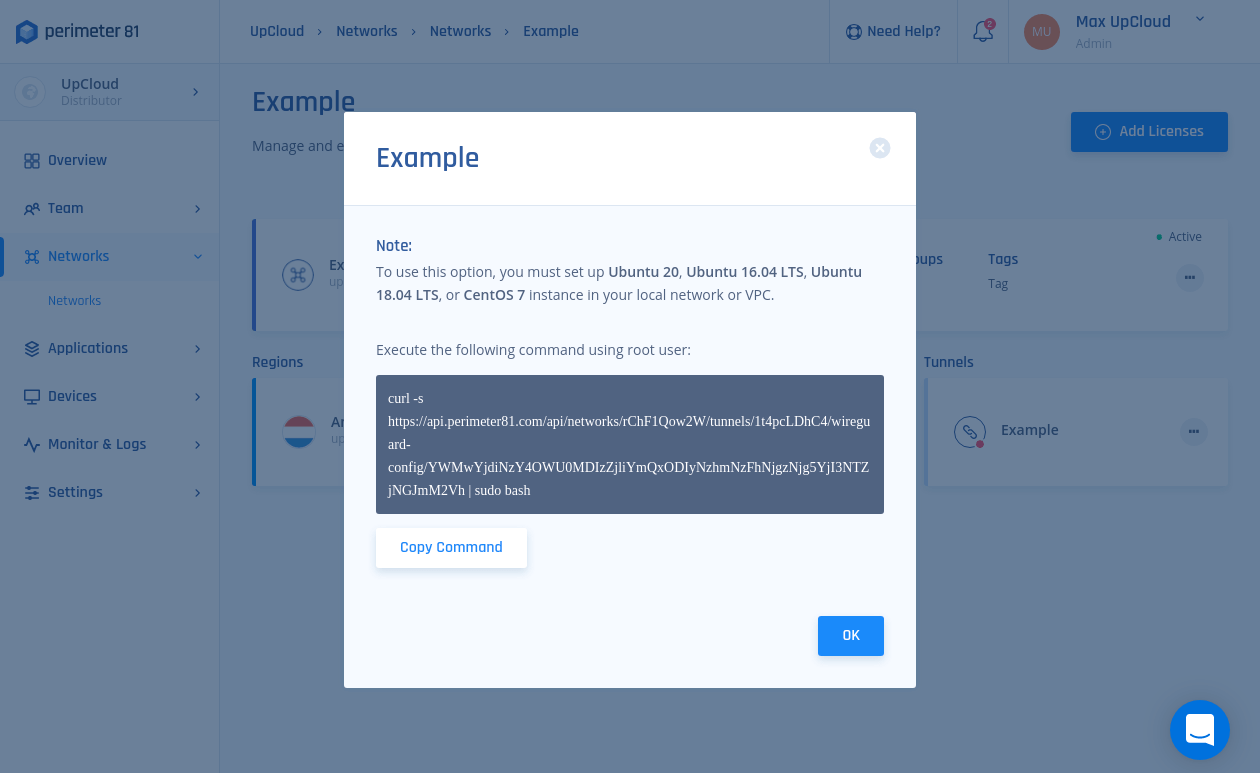
3. Open the Linux Terminal as Root user using SSH and run the copied command (select Yes at Stage 4 for access-only or No for ). The command underneath is only an example, make sure you use the command displayed at your Perimeter tunnel configuration.
curl -s https://api.perimeter81.com/api/networks/rChF1Qow2W/tunnels/1t4pcLDhC4/wireguard-config/<key> | sudo bash
4. Then follow the instructions during the connector installation. Below is an example of the install command and the steps in the installation script.
PROCEED? [y/N]

1. Detect environment
 > Detected Ubuntu OS: Ubuntu 20.04.1 LTS

2. Install wireguard
 > Repository configured
 > Successfully installed wireguard

3. Configure connector
 > Provide interface name for wireguard connector [wg0]:
 > Interface will be created

4. Choose operation mode
   Connector can be configured in the accessor mode in which it will allow
    devices to access in the local network remotely without deploying on a router.
   This is the default.
 > Do you want to enable accessor mode? [Y/n]

 > The following IPs are configured on usable interfaces:
 1. 94.237.125.107/23
 2. 172.16.1.2/24
 > Provide source ip address to use for accessor mode (0 for manual input) [1]:

5. Start and enable connector
Congratulations! Wireguard connector has been successfully configured and is up and running!
Your Cloud Server should now be connected to your Perimeter 81 network. To check you might need to reload the Perimeter control panel to update the status icons.
Afterwards, you will likely want to try connecting your Cloud Server through the Perimeter network. Continue to the next section for how to do just that.
Verifying the connector is up
The Perimeter 81 enables users to securely connect to their cloud resources with minimal effort. All you need is to install one of their client applications on the local device of your choice and log in.
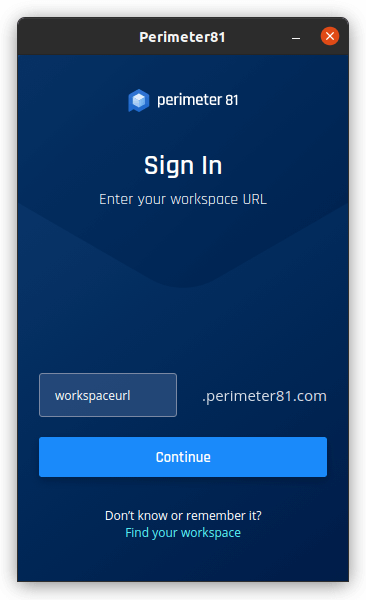
1. Start by downloading the Perimeter 81 client from the Devices > Download section at your Perimeter management panel.

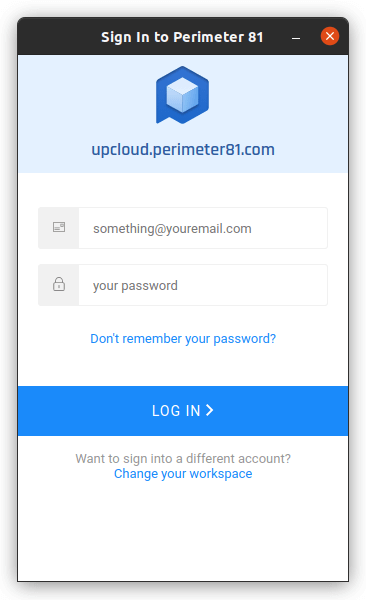
2. Once you’ve installed the Perimeter 81 client, enter your workspace URL and then use your email and password to sign in.
3. Connect to your Perimeter 81 Network with the designated app. You can do it on any machine.

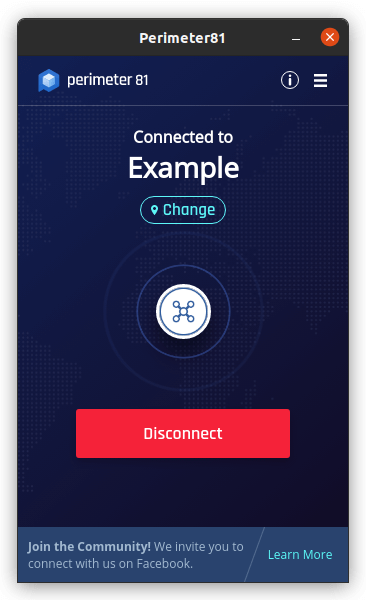
4. Then with the Perimeter network connected, open a Terminal and try pinging your Cloud Server. Use any of the IP addresses on your Cloud Server you connected to your Perimeter network.
ping <cloud-server-ip-address>
In this configuration, all network traffic is routed through your Perimeter 81 gateway.
If the ping command fails, please make sure that port UDP/8000 is not blocked in your firewall/router, and that you went through all the steps.
If the issue persists, please contact our support services attaching the logs. These can be found at the following paths:
##Configuration file
/etc/wireguard/wg0.conf
##Connection logs
/tmp/p81-wg-connector.log
systemctl status wg-quick@wg0
Summary
Congratulations, you should now have a fully functional secure network between your local system and cloud resources up and running. Feel free to explore the Perimeter management panel further to learn the ins and outs of the services and connect all of your Cloud Servers.
Perimeter 81 makes securing the connection to remote resources extremely easy. Simply setting up a connector for your Cloud Servers and running the Perimeter 81 client, you can create the network access policies just right for your company.
Discussion