New - NVIDIA B200 & B300 Dedicated GPU Clusters | Explore GPU clusters
How to generate SSH Keys using PuTTY
-
About
- Type
- Tutorial
- Categories
- IntegrationsSecurity
Posted on 15 June 2023
If you’re using a Windows laptop or PC with the PuTTY SSH client, you can create a new SSH key pair using the built-in key generator called PuTTYgen.
To generate a new key, open PuTTYgen and click the Generate button.
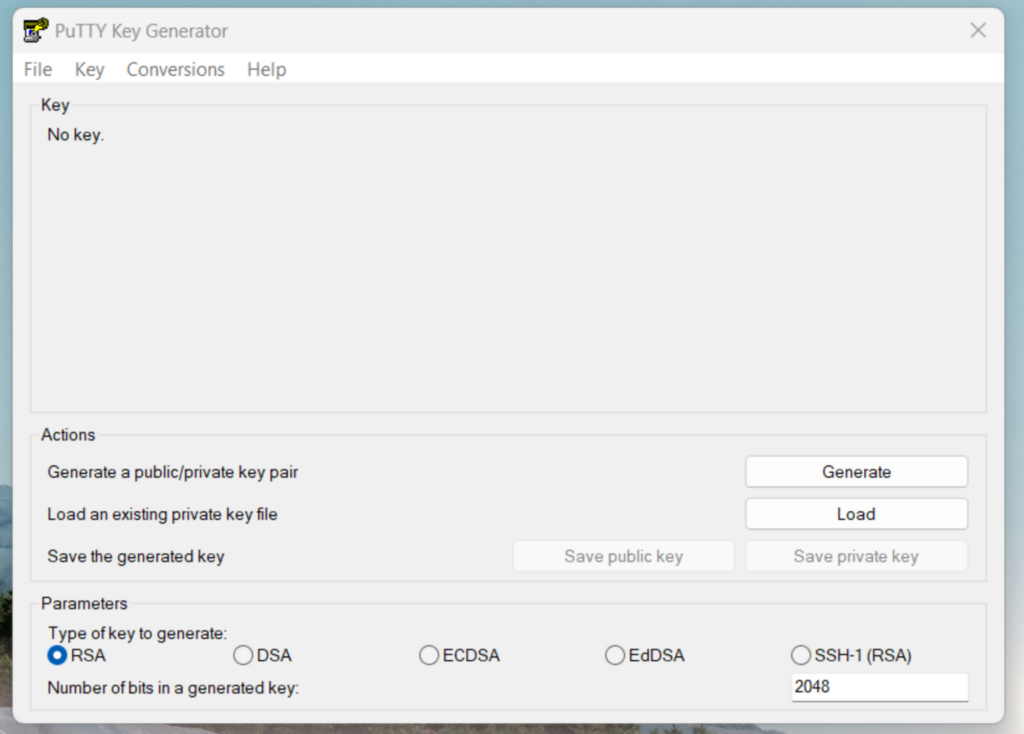
In the Key Generator window, check that the type of key to generate at the bottom is set to RSA. This will create an SSH-2 RSA key. The older SSH-1 was the standard’s first version but is now considered obsolete.
Keep moving your mouse over the blank area in any manner to generate some randomness for a few moments until the progress is complete.
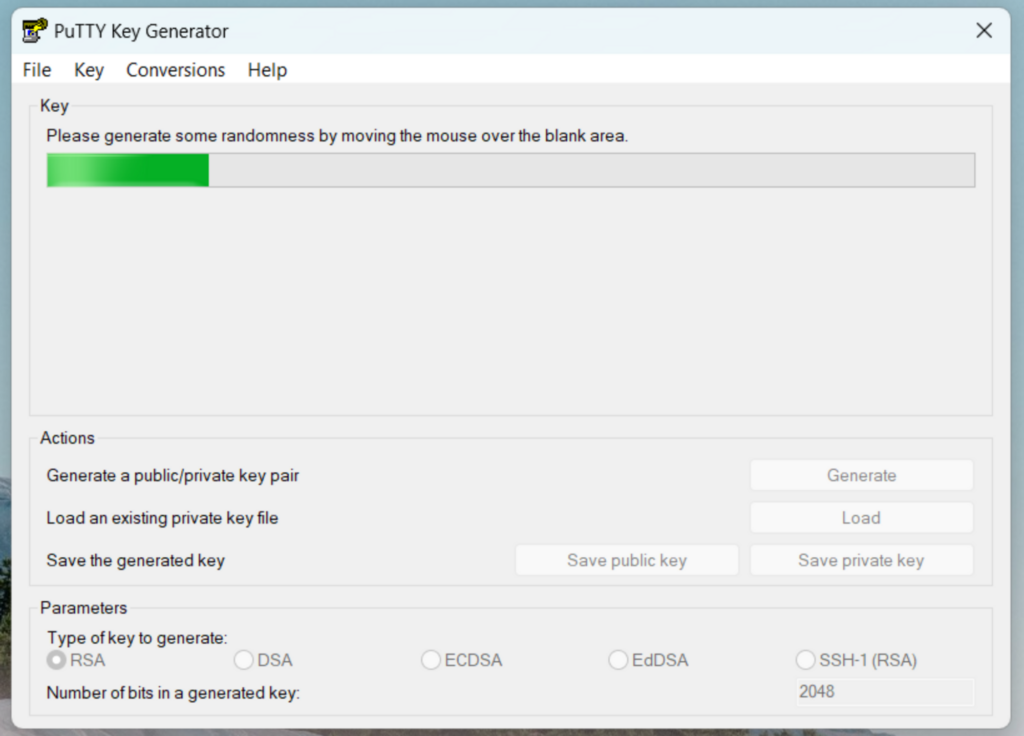
When the process completes, two keys will be generated, a private key and a public key.
You can enter an optional key passphrase in the two empty fields for added security before continuing. The passphrase, if provided, will protect your key from unauthorized use in the event that someone manages to copy it.
Now save the private key somewhere safe on your computer by clicking the ‘Save private key’ button. Then copy the entire text of the public key to your clipboard. There is no need to save the public key to your computer as it can easily be regenerated by loading the private key.
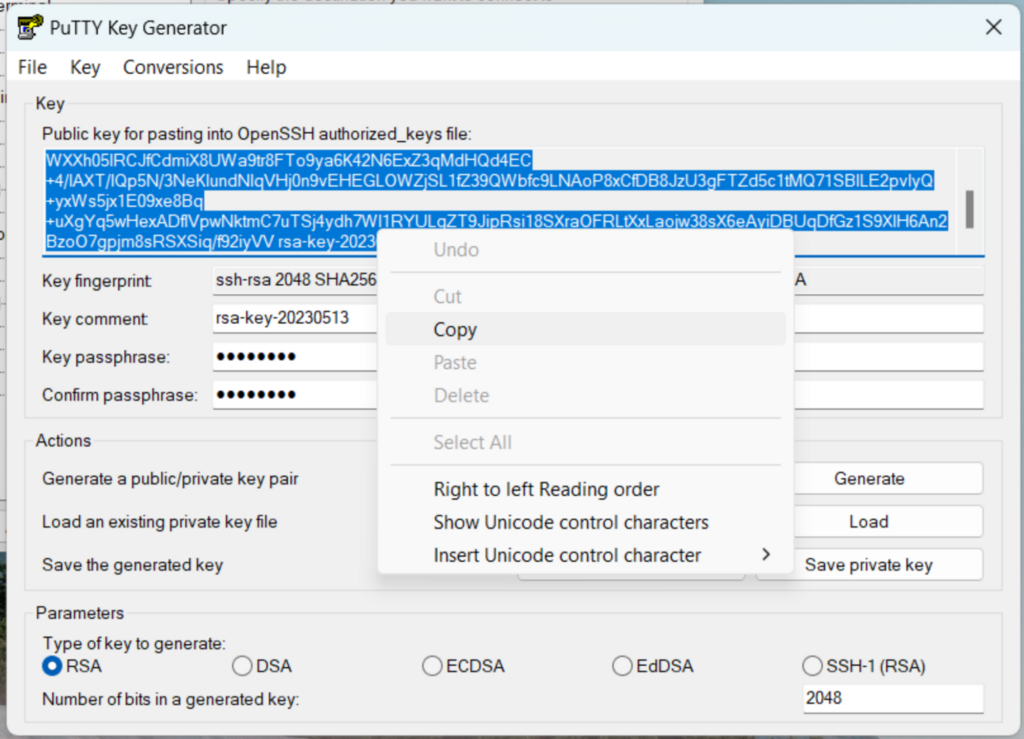
You can now paste the public key in your clipboard into the UpCloud control panel. This can be done on the server deployment page by clicking Add new, or from the SSH keys section under the Account management page.
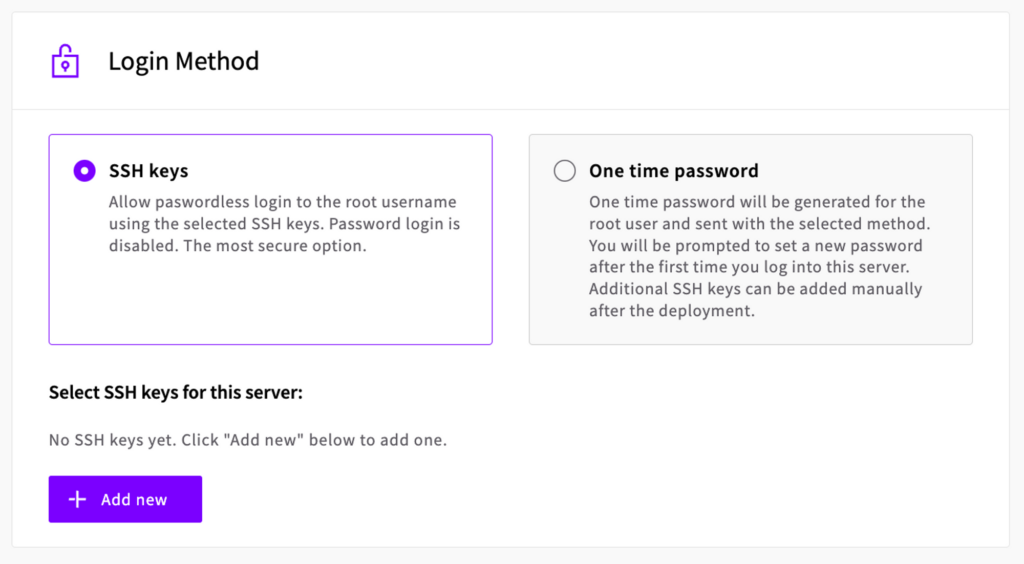
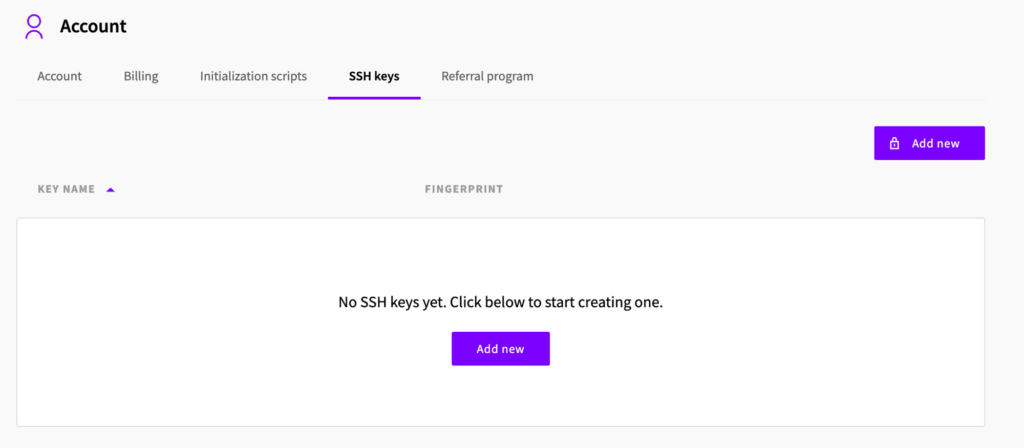
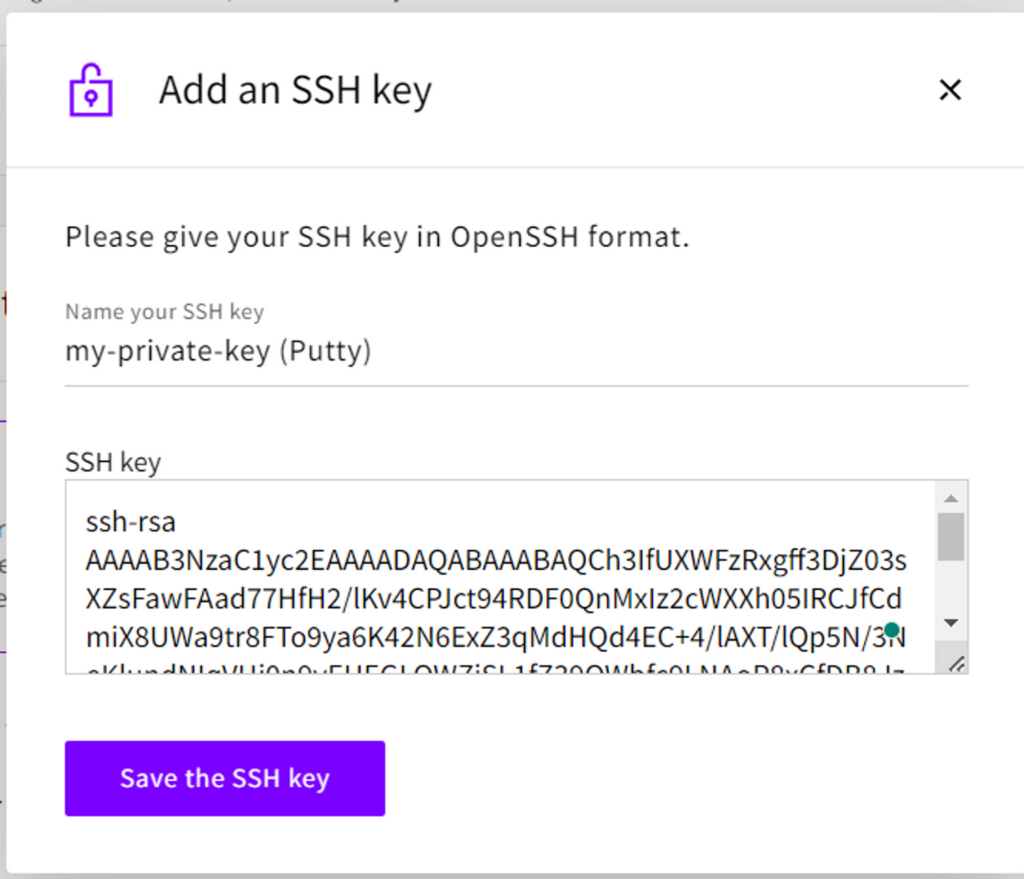
When adding the public key, be sure to give it a name that will help you identify it in the future. Click the Save button to save your changes.
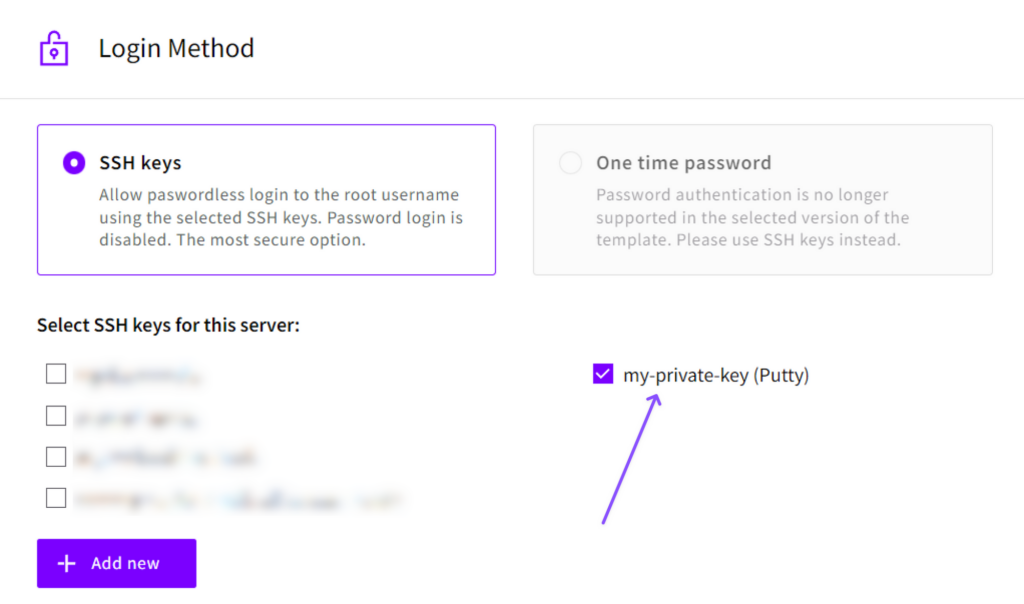
The newly added key should now appear in the list of SSH keys and can be selected when deploying a new server.
You can go ahead and deploy the server now. When the deployment is complete, copy the server’s IP address to your clipboard and open PuTTY (not PuTTYgen) to establish a connection to the server.
Paste the IP address of your UpCloud server into the hostname box.
Then, from the menu tree on the left-hand side, navigate to Connection > Data and enter the username that you want to use in the Auto-login username text box. For new Linux servers, this will usually be root.
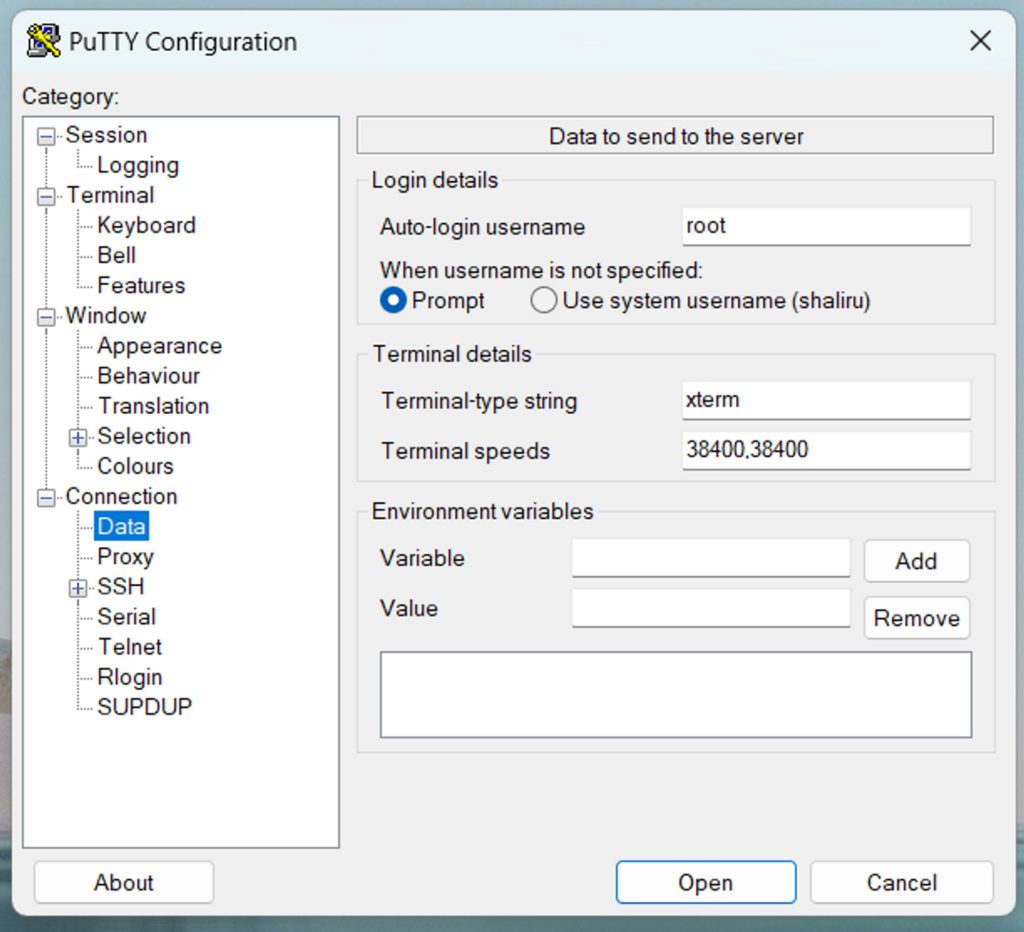
Next, navigate to Connection > SSH > Auth > Credentials and click the Browse button to select the private key you saved earlier somewhere on your computer.
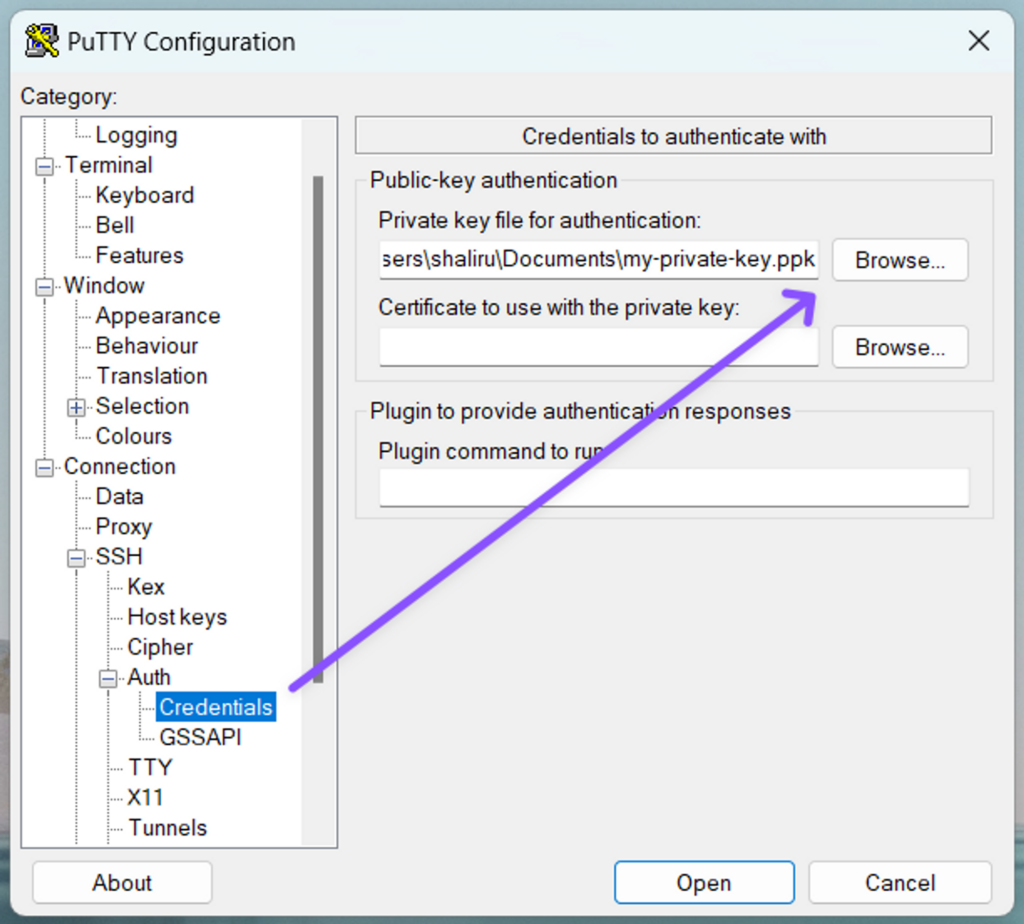
Before proceeding, it’s a good idea to save this configuration, so you won’t have to repeat the steps each time you want to connect to your server in the future.
To do this, navigate back to the Session screen, and under Saved Sessions, enter a name for the configuration. This can be anything you want, but it makes sense to give it a memorable name, such as the IP address or name of the server – or both. Click the Save button to save your changes.
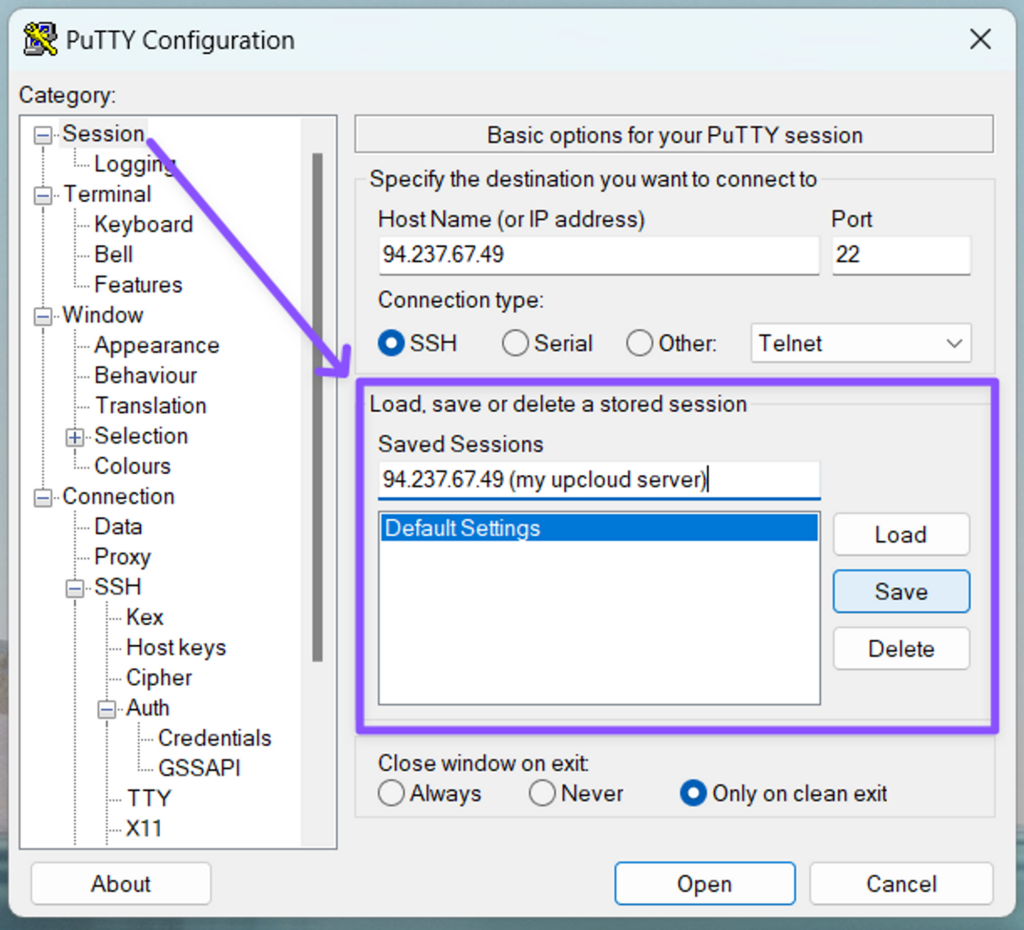
Now you can load this configuration at any time, and it will have the IP address, username, and SSH key information pre-populated and ready to connect.
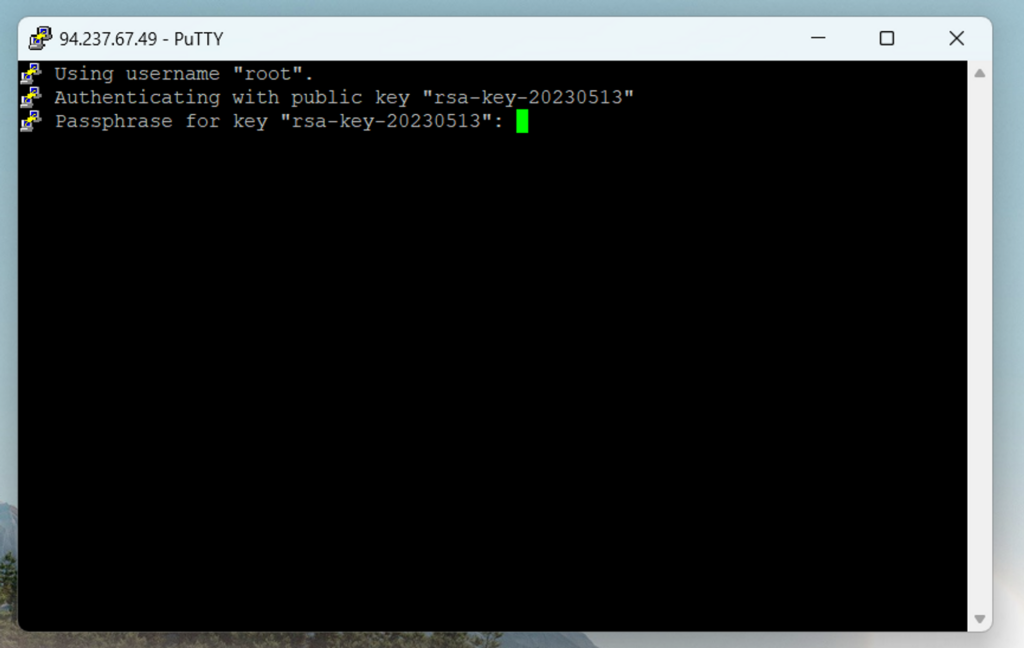
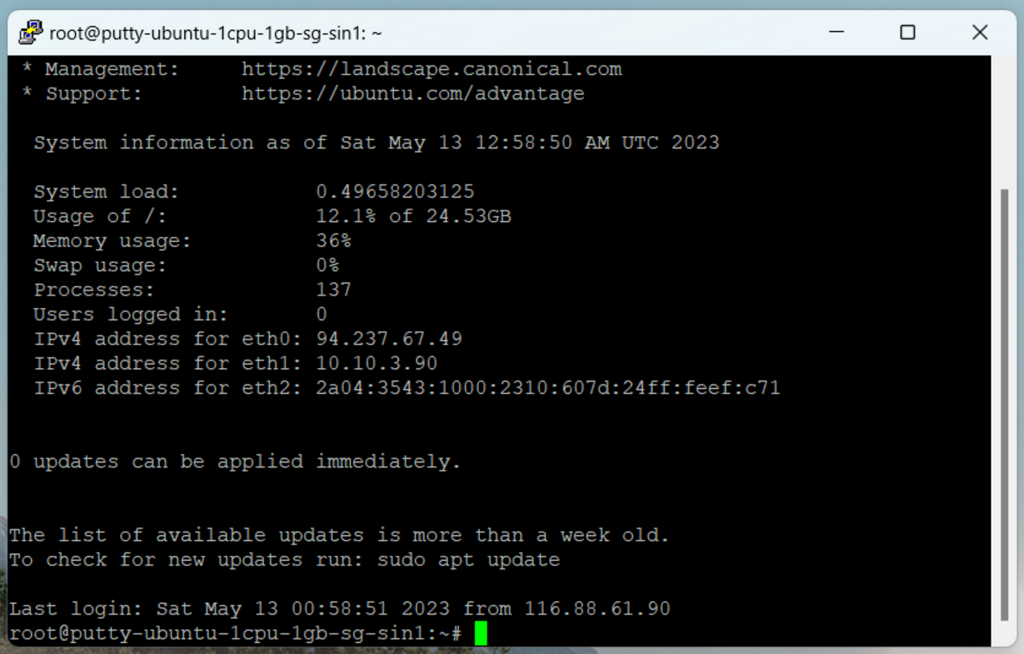
Clicking Open will open a new terminal window prompting you to enter your key passphrase. Type it in and press enter to connect to your server. If you created your keypair without a passphrase, then you won’t see this prompt. You will instead be automatically connected to the server.
Remember always to keep your private keys safe. You can use the same key from multiple computers if you wish, or generate new ones on each client connecting to your cloud server for added security.
Ideally, users should generate their own key pair and passphrase for secure access control. This way, if one of the private keys gets compromised, you won’t have to replace them all.
Discussion