Efficient cloud deployment methods are essential for modern businesses’ success. Whether running a startup or managing your established cloud infrastructure, minimizing manual steps for deployment workflows is essential.
By using UpCloud Developer plan Cloud Servers and Dokploy’s high-capability deployment tools, you can streamline your processes and ensure efficiency and scalability. This guide will familiarize you with UpCloud’s cloud platforms and a new tool, Dokploy.
This guide will walk you through the process of setting up Dokploy and UpCloud integration for seamless cloud deployment automation.
What is Dokploy?
Dokploy is an open-source cloud deployment automation tool that simplifies the deployment process. Its primary goal is to streamline the deployment of various applications using custom builders such as Heroku or Nixpacks, which are all managed along with Docker.
Dokploy deployment is especially useful for teams that need efficient, fast, and error-free deployments without the complexity of using more extensive tools such as Jenkins or Ansible.
Automating cloud deployments with UpCloud makes it extremely easy to set up and deploy applications without extensive DevOps knowledge. Before diving into the Dokploy setup guide, let’s examine some of its deployment benefits.
Setting up a Developer Cloud Server
Cloud Servers offer on-demand resources, such as computational power, storage, and networking, without the need to manage physical hardware. Whether you’re an experienced developer or new to cloud servers, here’s how to quickly set up a cloud server on UpCloud:
- Signing up: If you haven’t already done so, register for an account on UpCloud. Once you’ve done so, log into your UpCloud Control Panel, click the purple “Deploy” button at the top right corner, and then select “Server.”
- Selecting a Server Location: You can choose the location of your physical server. The location geographically closest to you offers the lowest latency.
- Choose your Plan: You can select your server configuration according to your requirements from various plans, including Developer, High Memory, High CPU, and General Purpose plans.
- Configure your Storage: System Block Storage is allocated based on your server plan, but you can also attach additional storage for up to 16 devices, each with space of up to 4 TB. Alternatively, Cloud Native plans allow you to specify the storage according to your needs.
- Set Backups: You can enable automated backup for advanced data protection and select daily, weekly, or monthly backup intervals.
- Choose an OS Template: Select the most common server operating system, such as CentOS or Ubuntu.
- Choose your login method: You can choose between a one-time password for a quick start-up or SSH keys for a more secure login.
- Set your Hostname and Server name: In the control panel, you can assign a fully qualified domain name for your hostname and then name your server for identification.
- Deploy the server: After configuring the server, click “Deploy” to create the server. After just seconds, your UpCloud server will be ready.
If you would like to learn more about UpCloud Cloud Servers’ features and options, check out our Cloud Server Deployment guide.
Installing Dokploy on your Cloud Server
Once you have set up your Cloud Server, the next step is configuring the Dokploy and UpCloud integration. On your selected OS, you can install Dokploy by running just a few terminal commands. This Dokploy tutorial will show how to set up and deploy Dokploy on an Ubuntu server, but other operating systems are also supported.
Update the server: First of all, you should make sure that the server you are using is up to date. Connect it to your UpCloud through SSH and run the commands given below:
sudo apt-get update && sudo apt-get upgrade -y
sudo apt-get install curl -y
Installing Dokploy and Docker
Dokploy utilizes Docker for containerized software deployment. Use Dokploy’s handy installation script to install both of these tools.
curl -sSL https://dokploy.com/install.sh | shRunning the installation script will automatically install Dokploy and all its dependencies on your server. Once complete, you should see an output like the one below.
Congratulations, Dokploy is installed!
Wait 15 seconds for the server to start
Please go to http://<your-server-public-ip>:3000
Accessing the dashboard
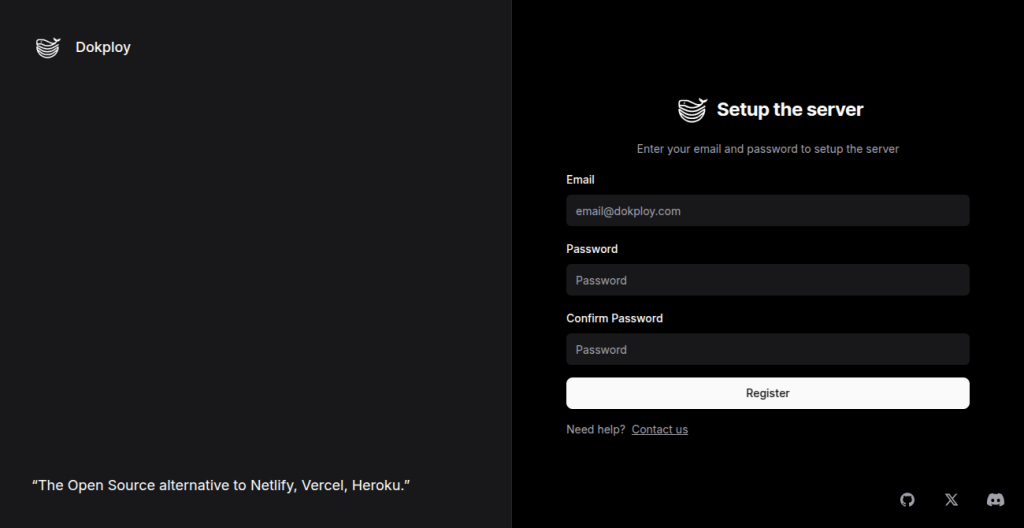
Next, you must register an admin account to access your Dokploy dashboard. Open your server’s public IP at port 3000 in your web browser.
http://<your-server-public-ip>:3000Then, you can register an admin account by entering an email and setting a password.
Customizing your Dokploy server
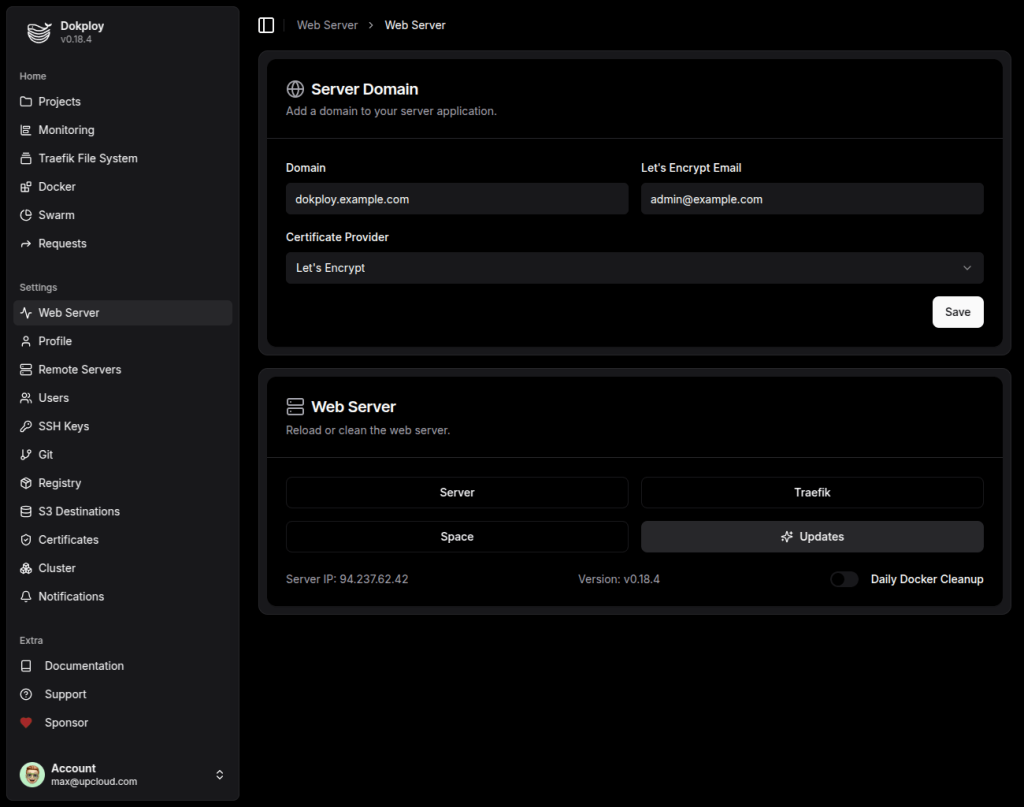
Once logged in, you can customize your Dokploy installation in the Web Server section.
- Specify a domain for your Dokploy server. This allows you to access your dashboard using your domain rather than the public IP address of your Cloud Server. You must have an available domain with an A record pointing to the server’s IP address.
- If you set a domain for your Dokploy dashboard, you can enable HTTPS with automatic certificates from Let’s Encrypt. Add an email address, select Let’s Encrypt as the certificate provider, and click the Save button.
When you are done customizing your Dokploy setup, your installation is complete. You can now configure Dokploy for deployment.
Optional: Adding deployment servers
By default, Dokploy deploys all projects and services onto the same host it’s running on but can also manage a whole fleet of Cloud Servers. And while Dokploy itself can run on a fairly light server, deployment processes can often be quite resource-intensive. Adding deployment servers allows splitting the management side with Dokploy from the running services, which can help you utilize your cloud infrastructure more efficiently.
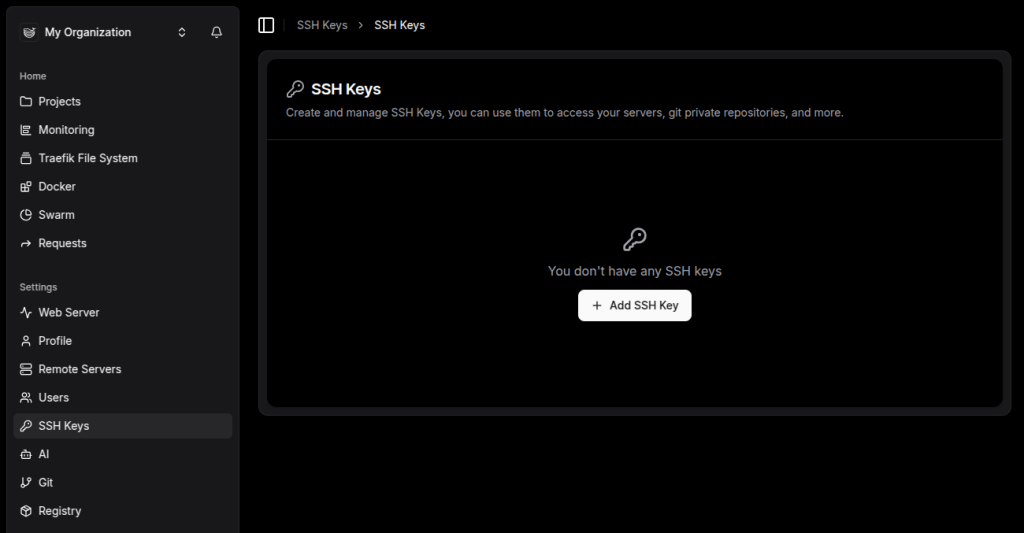
Dokploy deploys and maintains services using standard SSH connections. To add remote servers, you first need to generate SSH keys.
In the SSH Keys section, click the Add SSH Key button.
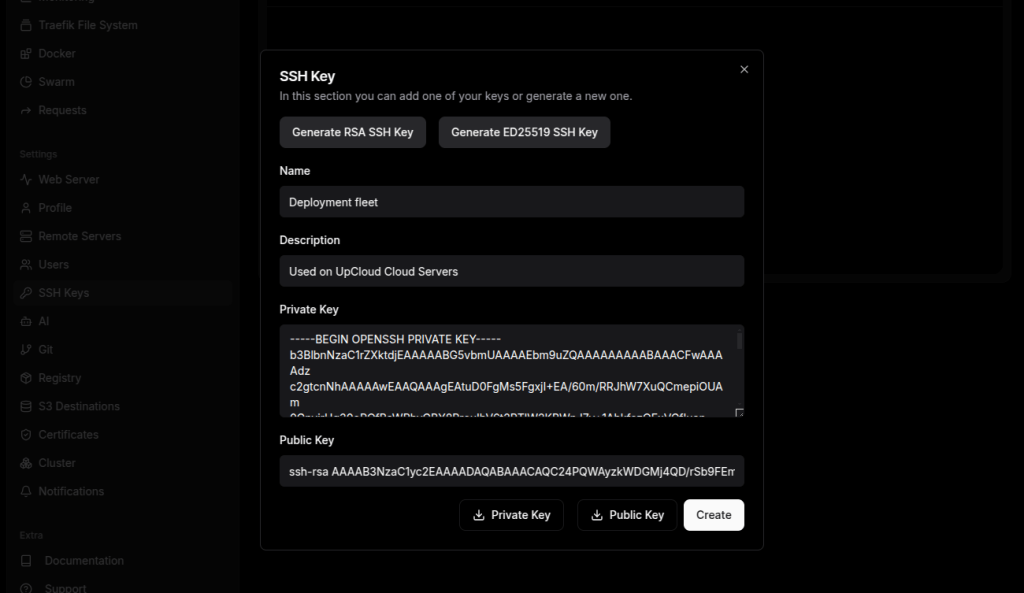
Next, click the Generate RSA SSH Key, name the keys and download copies of your public and private keys.
Then click the Create button to save the new key pair.
With the new SSH keys at hand, you can deploy new Cloud Servers on UpCloud to create your server cluster.
During the server deployment, click the Add new button in the Login Method section and include the public half of your Dokploy SSH keys. Then click the Save the SSH key button to confirm.
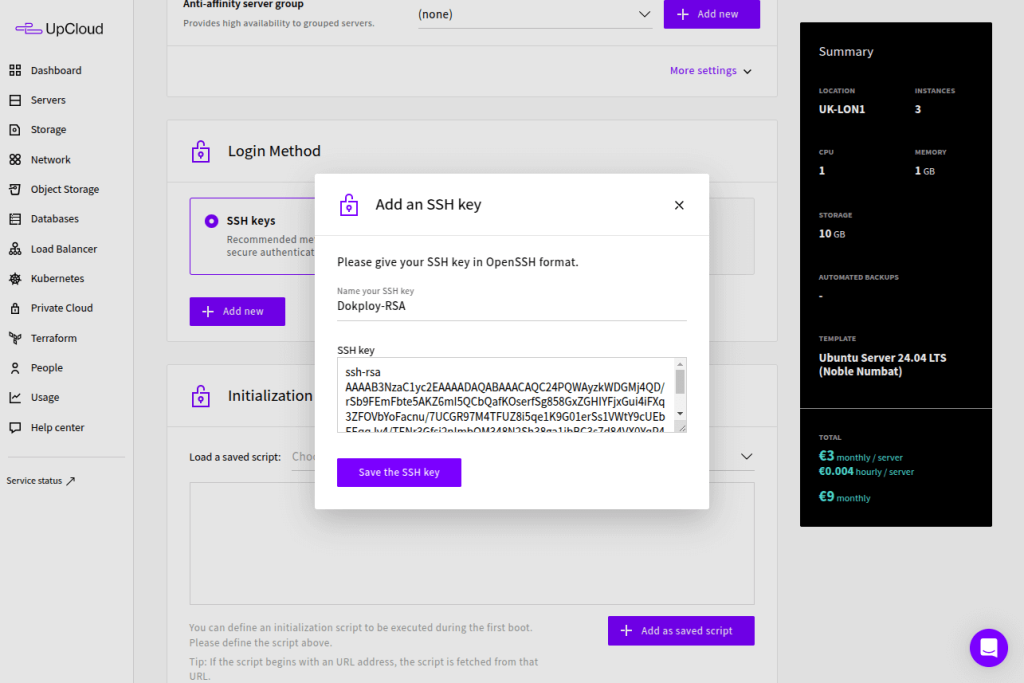
This ensures your Dokploy keys are included in the new Cloud Server deployments without needing any manual work.
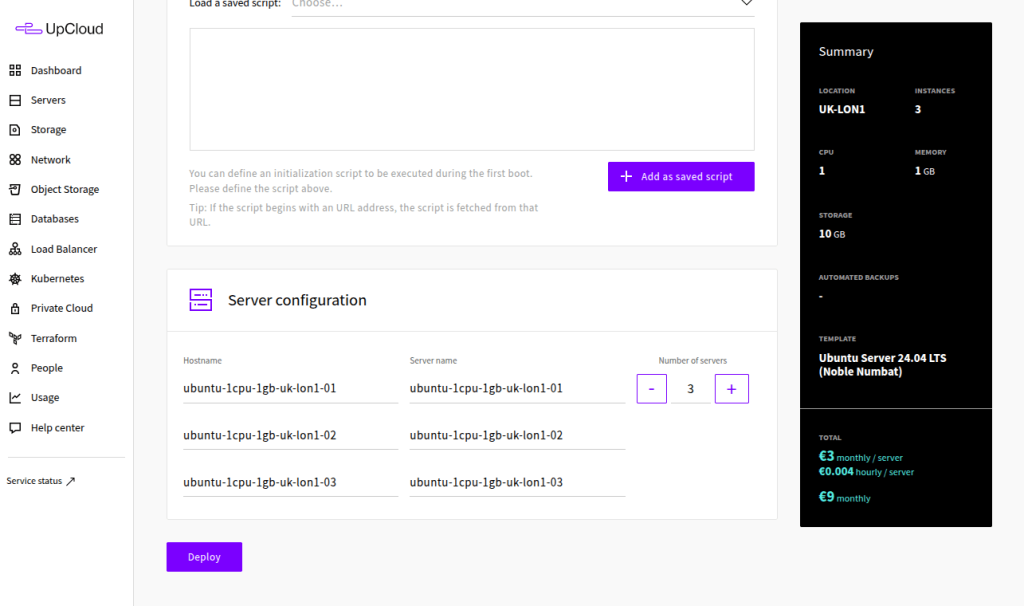
You can also deploy multiple Cloud Servers in one go using the option to increase the number of servers in the Server Configuration section.
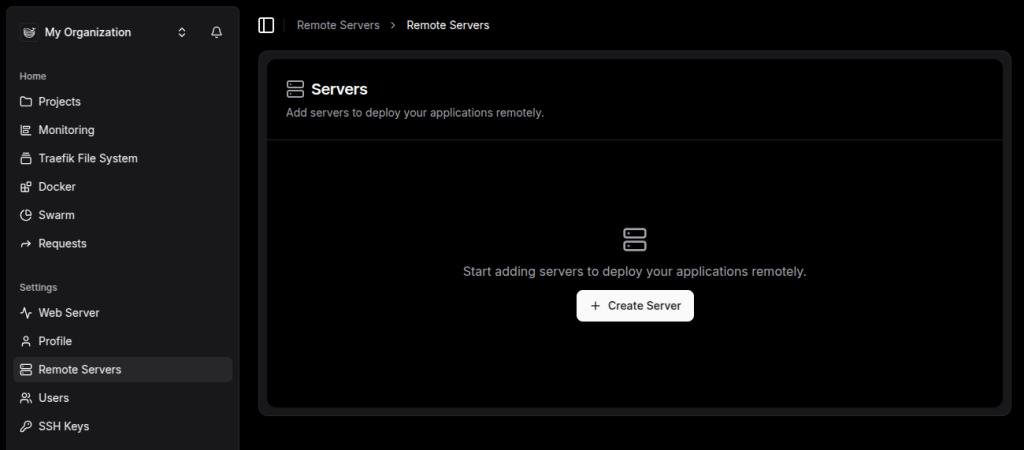
After your Cloud Servers are up and running, note the IP addresses and proceed to the Remote Servers section on your Dokploy dashboard.
Click the Create Server button.
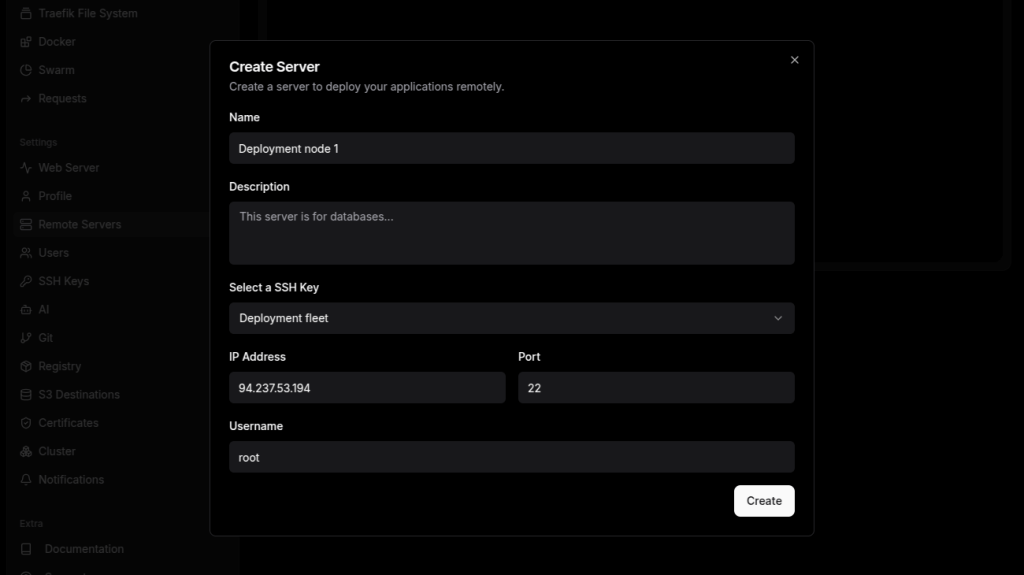
Name your server, give it a description, select the SSH keys you created earlier, and enter the IP address of your server(s).
When ready, click the Create button to save the server details.
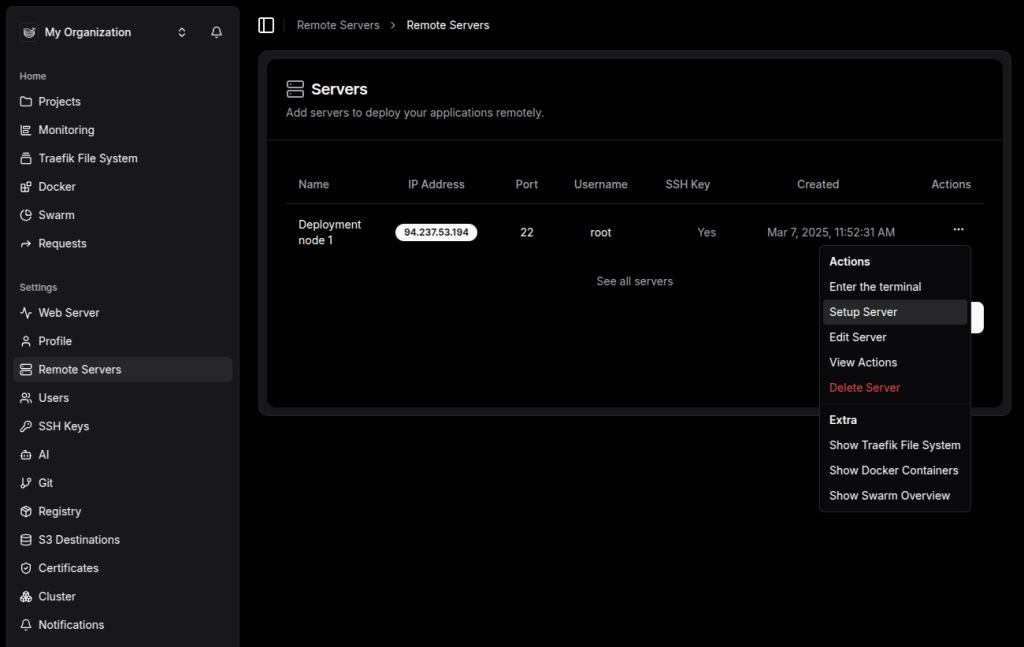
After adding a new server to Dokploy, you will need to provision it. Click the three dots icon on your serve list and select Setup Server.
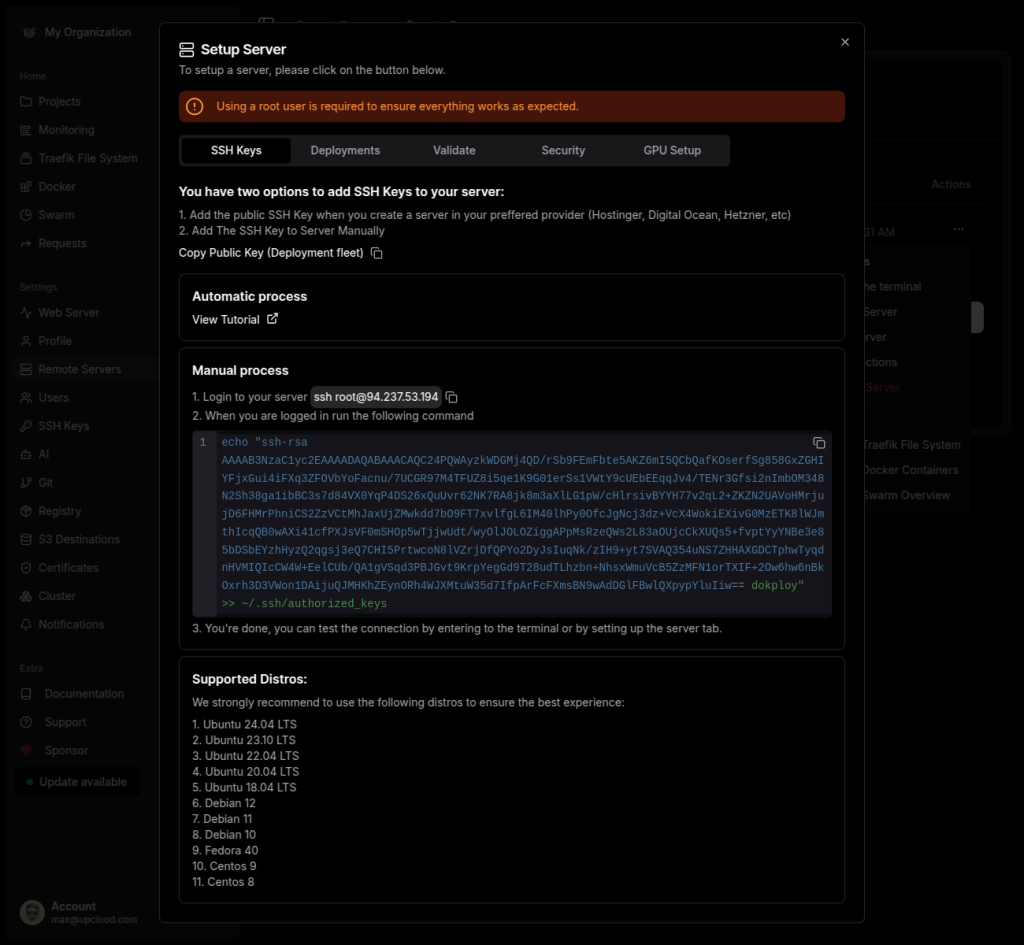
In the SSH Keys section, you can see the general instructions for adding SSH keys to your servers. If you deployed your servers as outlined in the above, they already include the necessary SSH keys. Otherwise, follow the instructions to add them now.
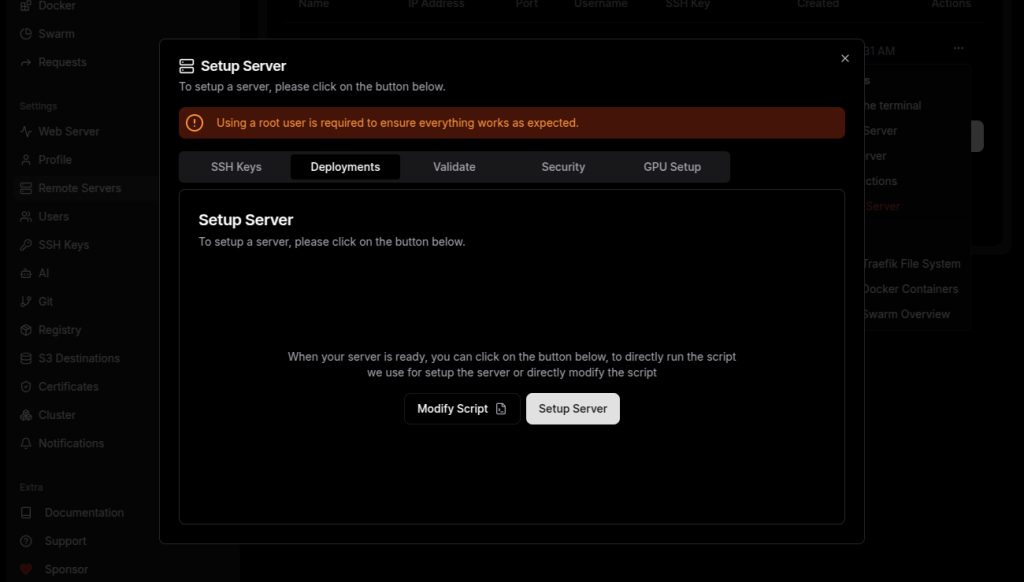
The actual server setup can be done automatically in the Deployments section. Click the Setup Server button and then the Confirm button to install the required software on your Cloud Servers.
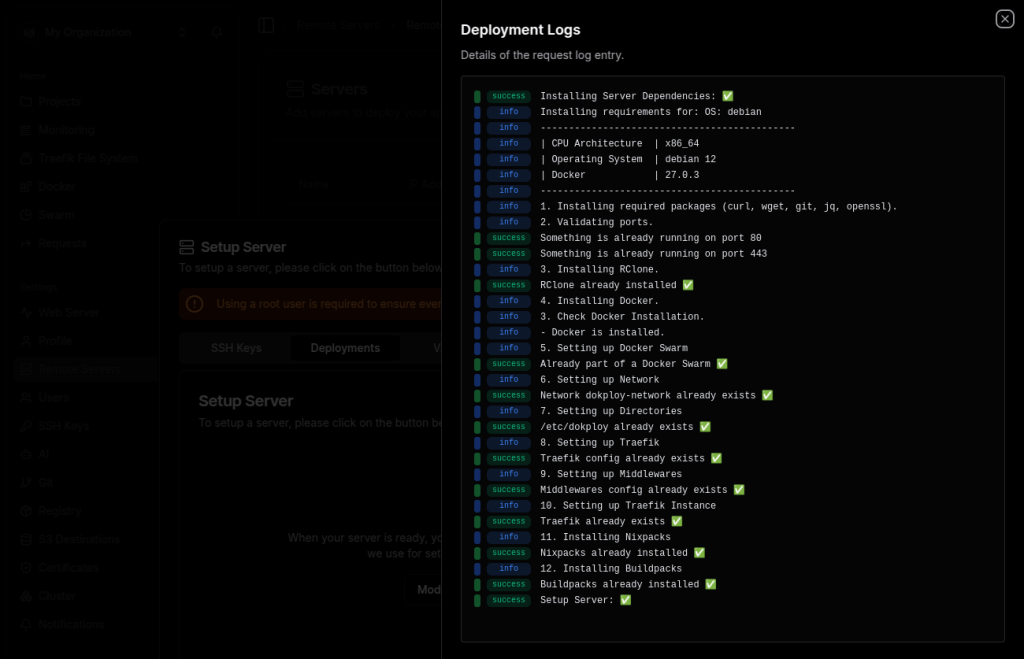
Once complete, you can close the Deployment Logs panel and repeat the steps to add any further Remote Servers to your Dokploy dashboard.
Running your first deployment
After installing Dokploy on your Developer Cloud Server and optionally configuring remote servers, you can deploy your first application by setting up your project and deploying your preferred services.
Go to the Projects section and click the Create Project button.
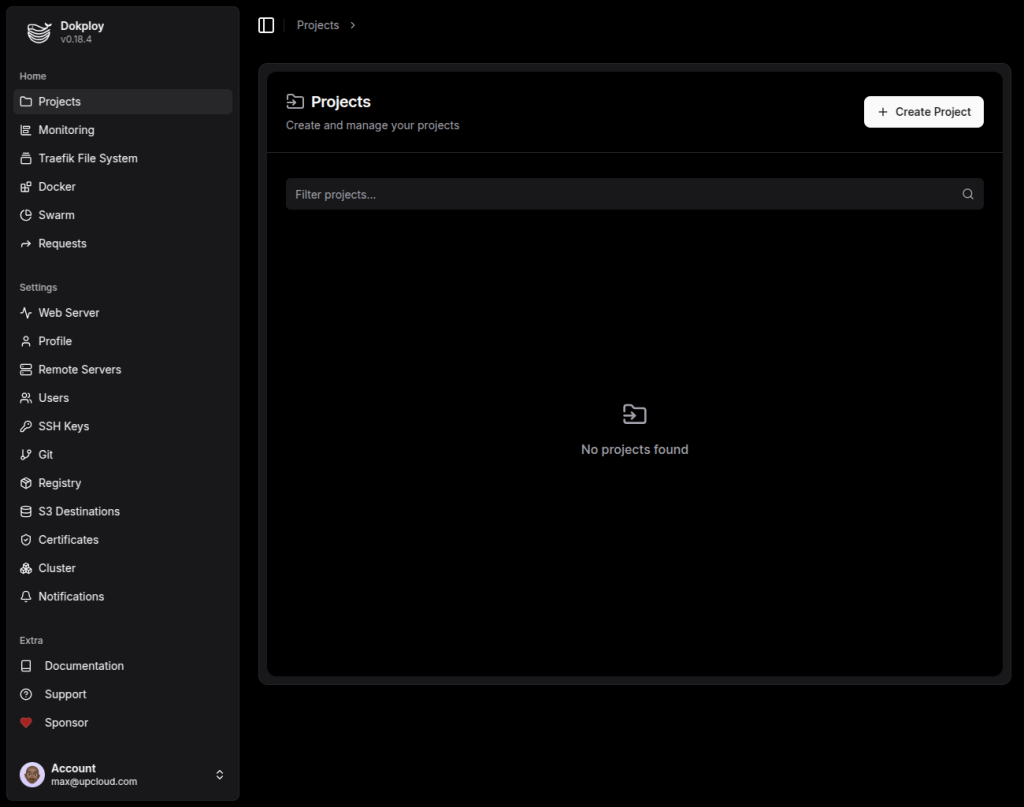
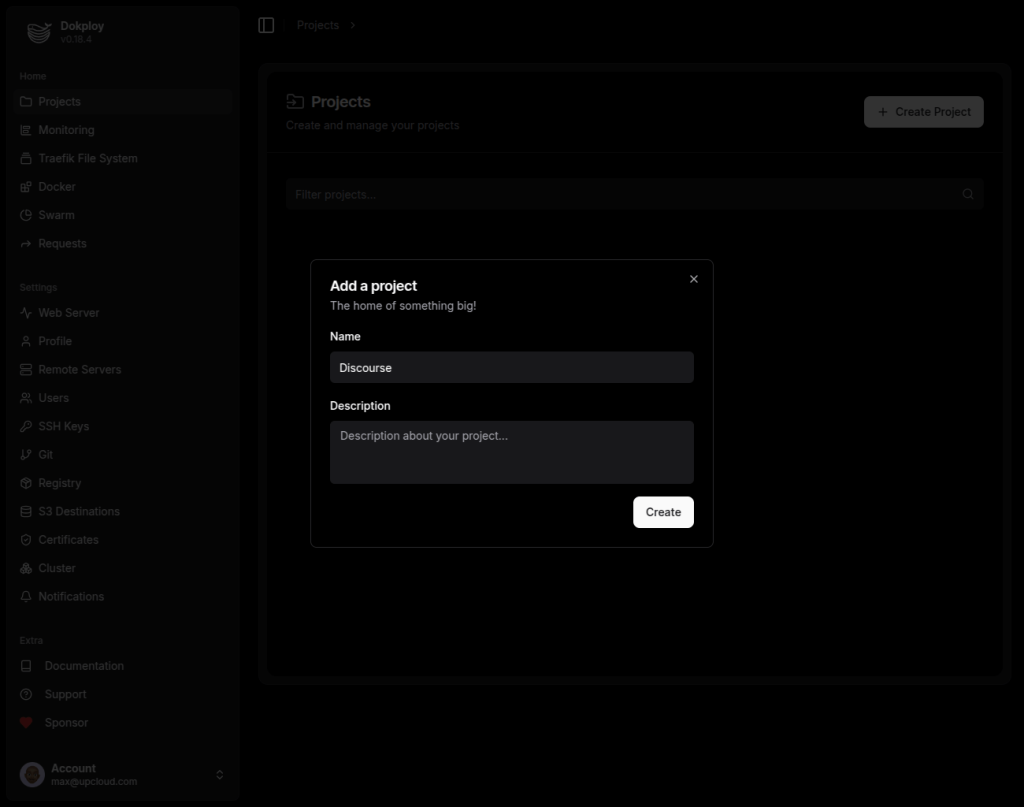
Give your project a name and description as you want, then click the Create button.
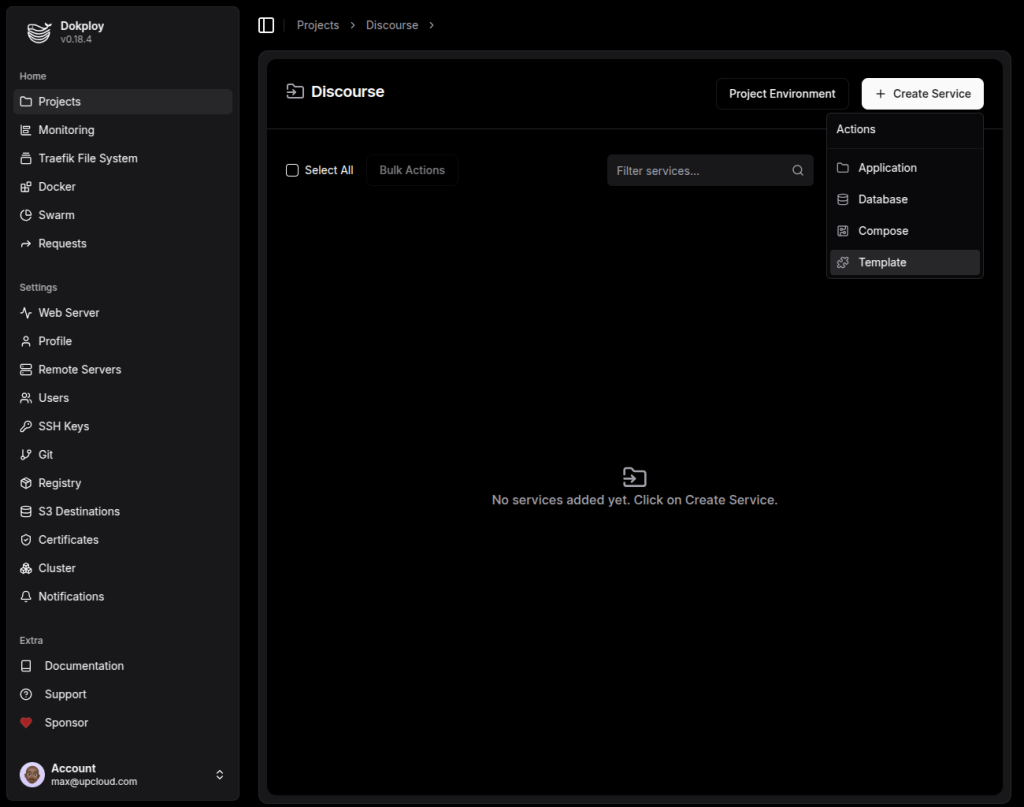
Each project can hold several different services, like web applications and databases, or use Docker Compose to deploy just about anything. Dokploy also offers a host of pre-configured service templates, allowing you to deploy many popular services with just a few clicks.
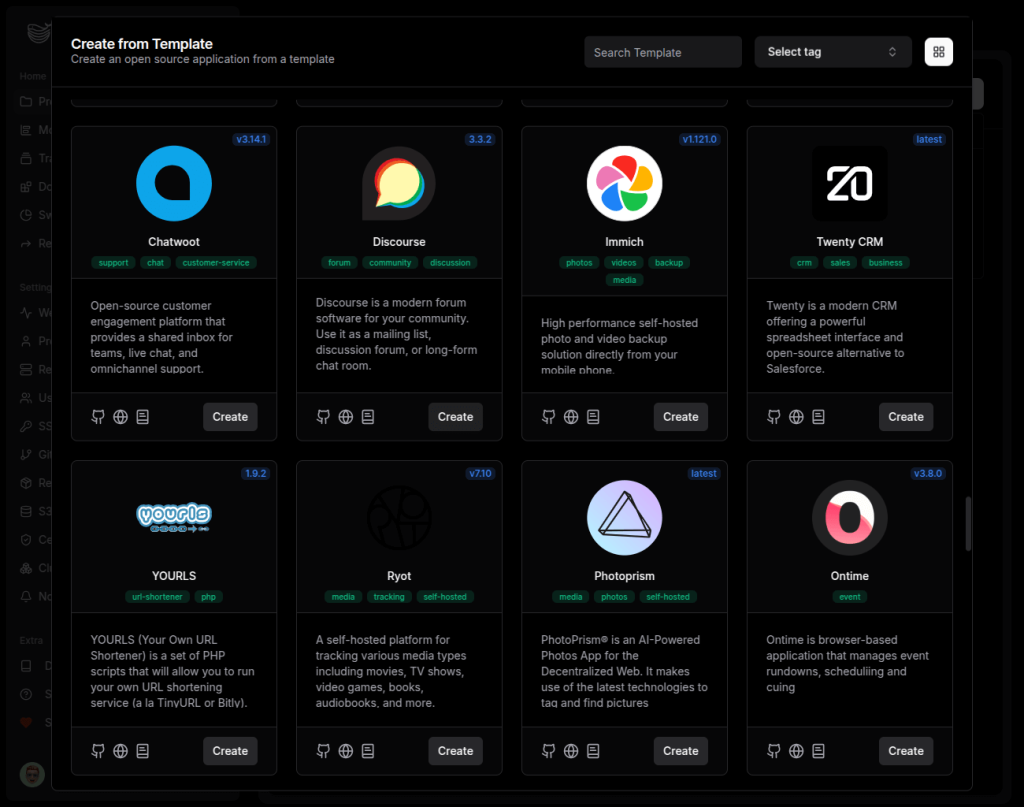
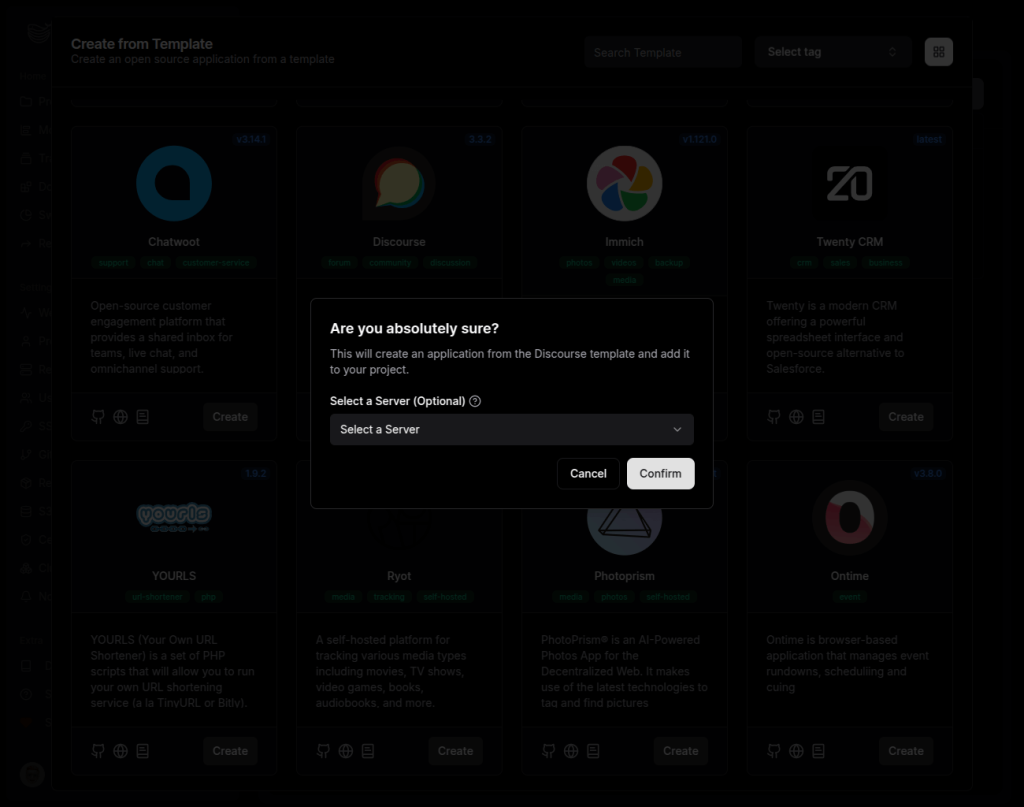
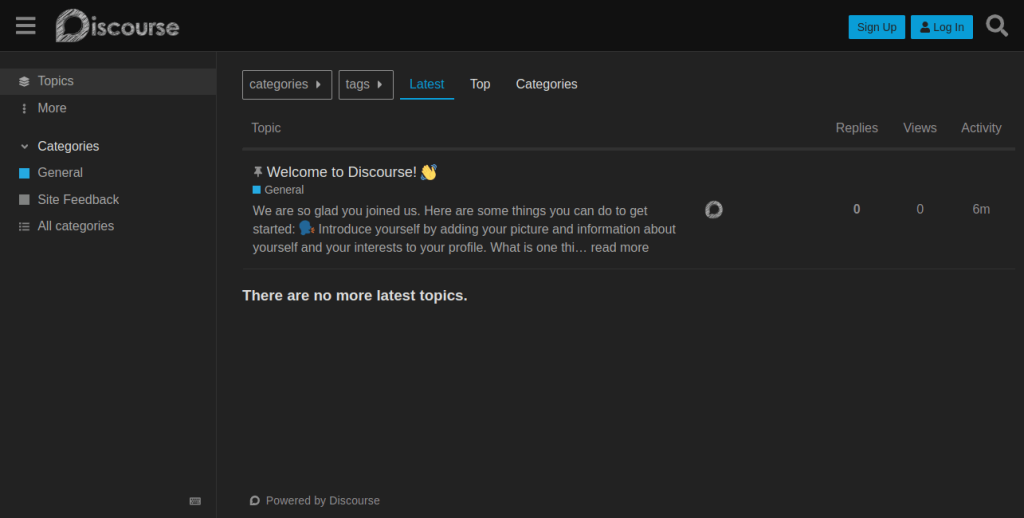
For this guide, we will select a template to deploy the Discourse web application and the necessary components. Click the Create Service button and select the Template option.
Doing so opens the template library for browsing at your leisure. Choose the service template you want by clicking the Create button.
Then select the server if you added any remote servers, and deploy the service setup by clicking the Confirm button.
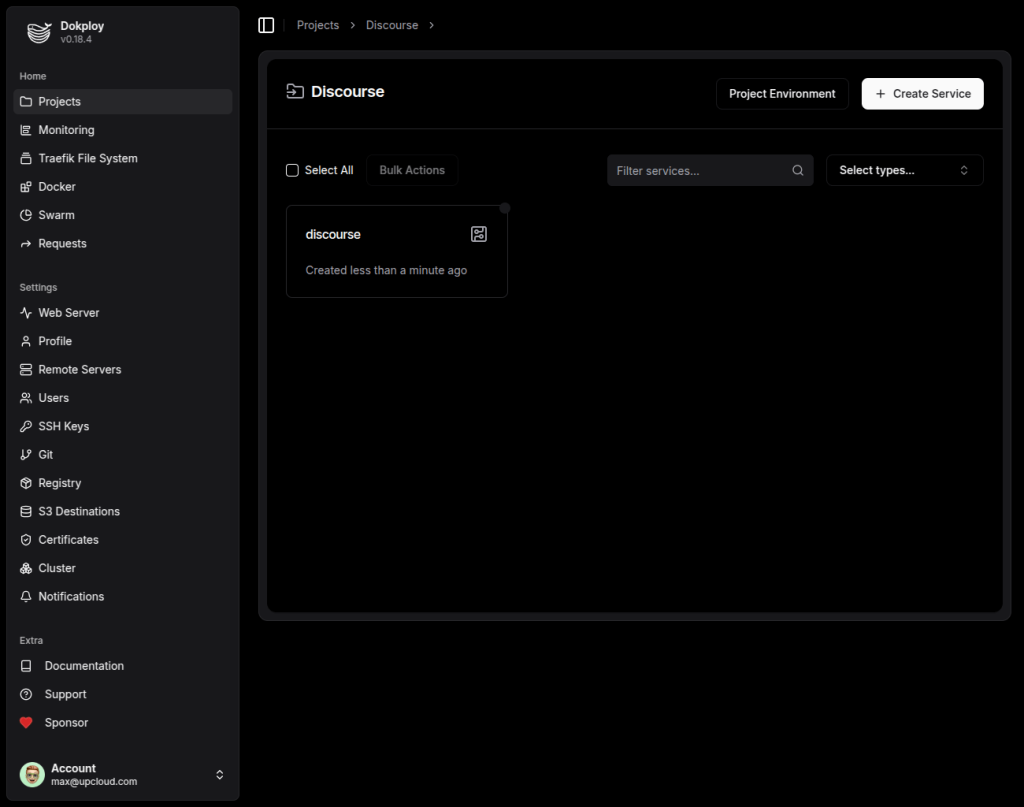
Creating a service from a template will set up all the necessary components. Click the service name to enter the detailed view.
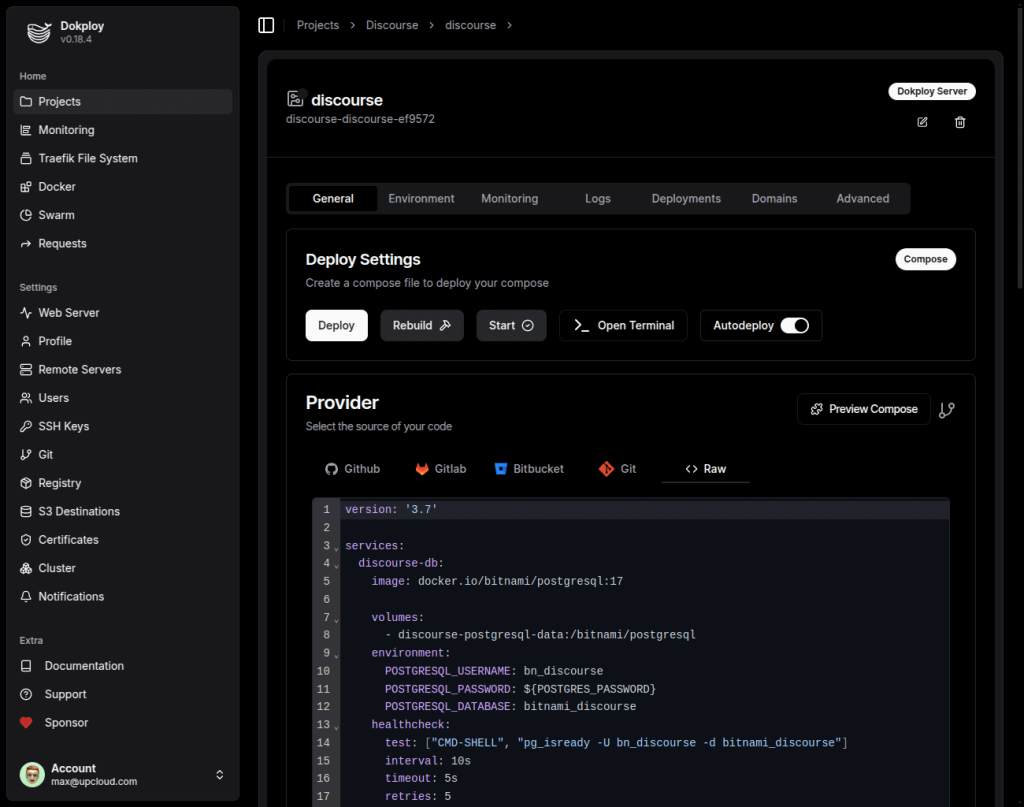
Under the service details, you can find the deployment configuration with the options to tweak the setup as you see fit.
When ready, click the Deploy button to install the application.
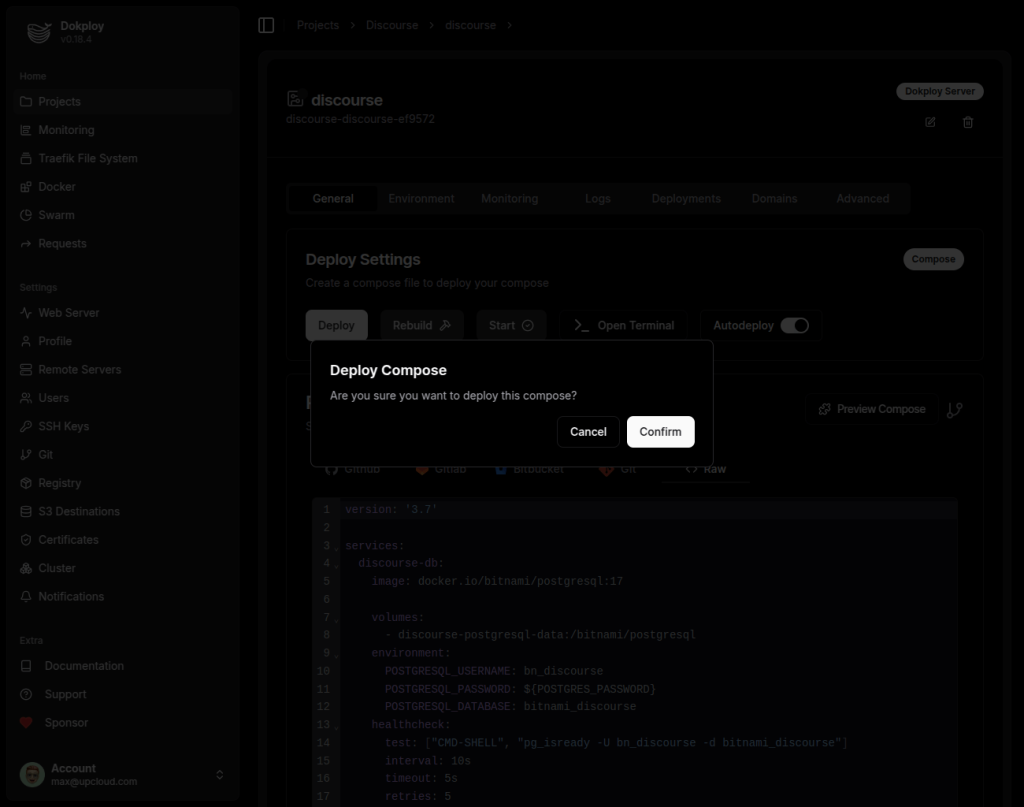
Then, begin the deployment by clicking the Confirm button.
During the deployment, you can follow the progress by clicking the View button under the Deployments section.
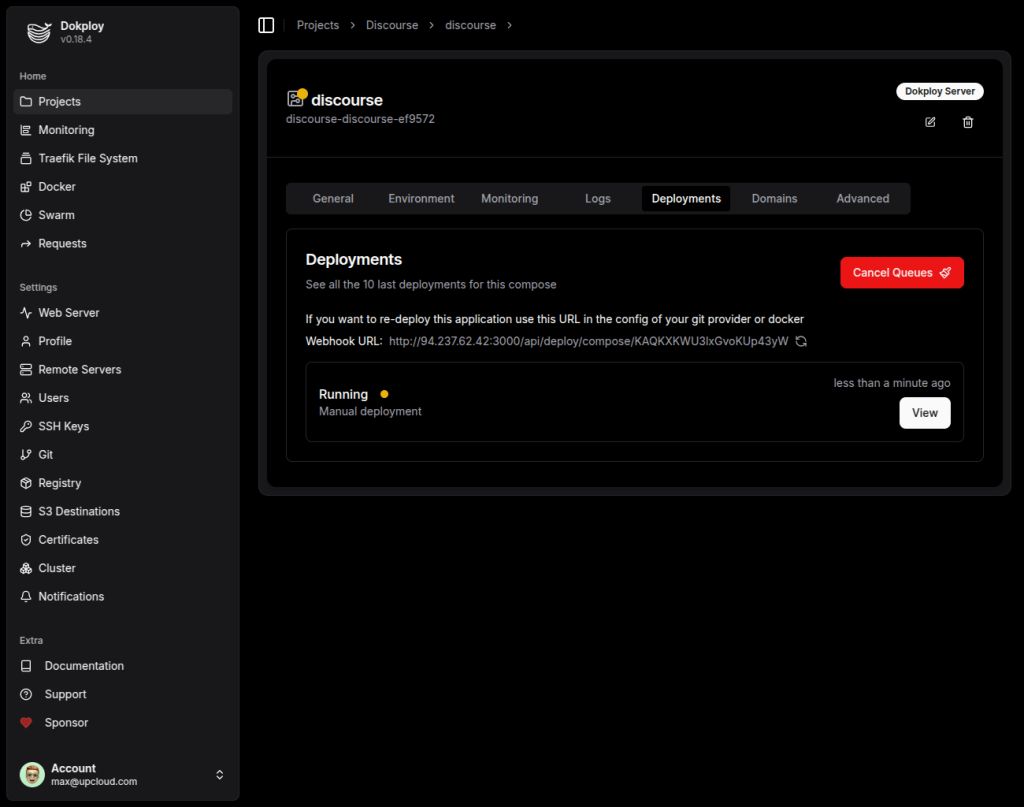
Once the deployment has finished, you can access your new Discourse server using the URL listed under Domains.
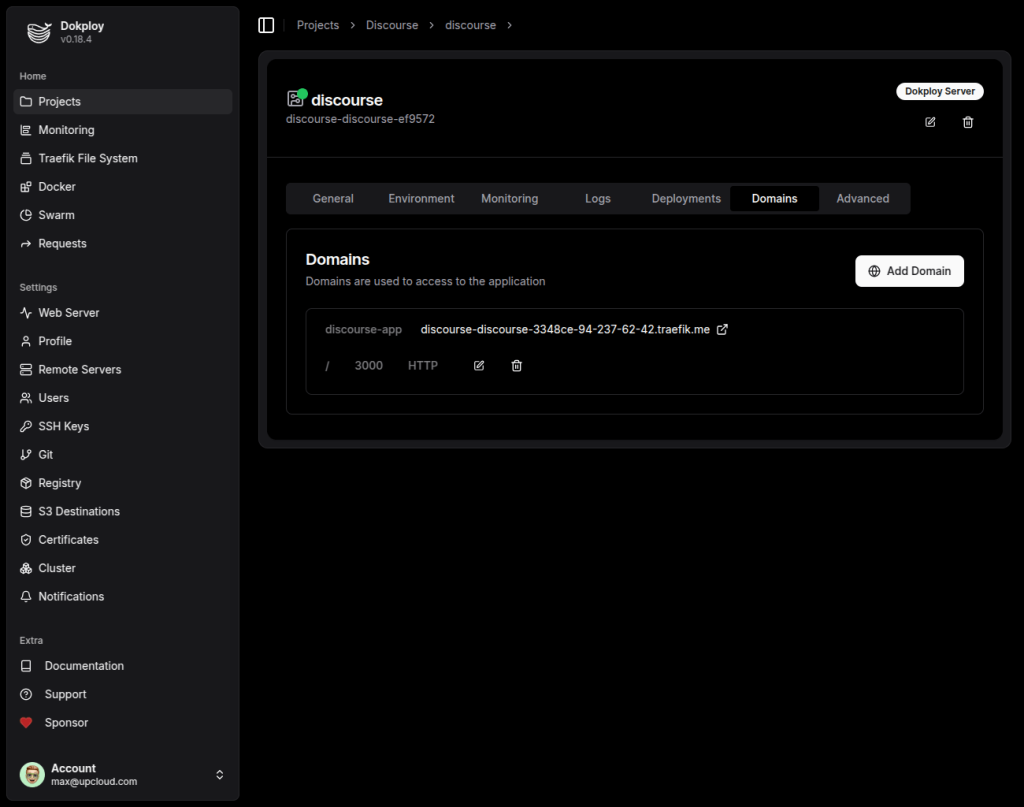
Note that it may take a few minutes for the service to become available and for the domain name to begin responding after deployment.
Monitoring and managing deployments
Once your application is live, it is best practice to monitor and manage the deployment for the ongoing success of the application. The following steps can do this:
- You can monitor deployment processes and track the performance metrics such as disk space, CPU usage, and memory consumption.
- Logs and status updates are displayed, which help manage the application on regular checks.
Conclusion
There you have it! Your first Dokploy deployment using UpCloud! You can simplify your workflows by setting up a cloud deployment automation server on UpCloud and deploying the applications using Dokploy. It allows you to stay focused on application development instead of manually setting up your services.
Following this simple step-by-step Dokploy tutorial, you can quickly and easily deploy your applications and manage them efficiently. Whether you are an experienced developer or new to deployment, Dokploy helps you streamline your workflow with UpCloud’s Developer Cloud Servers. After deployment, you should also check the community forums for great insights.
Go ahead and try deploying your first project today. Combine UpCloud’s immense power with Dokploy’s ease to optimize cloud solutions. Ready to simplify your cloud deployments? Sign up for UpCloud today and try Dokploy for seamless automation!
Discussion