Introduction
LEMP stack is a combination of multiple technologies that work together to create reliable and high-performance dynamic web applications. The word “LEMP” is an acronym for these technologies which are Linux, Nginx (pronounced Engine-X), MySQL, and PHP.
The components in the LEMP stack are all open-source, and each of them plays a specific role in building the web application. The Linux operating system is the foundation where all the components are installed, Nginx is the web server responsible for handling user requests, MySQL is the relational database responsible for storing the application data, and PHP is the server-side programming language that executes application logic and generates dynamic content.
To get the most out of these technologies, you need an underlying infrastructure that delivers matching levels of scalability and performance. The UpCloud cloud servers are built on enterprise-level hardware and software components that are designed for fault tolerance and speed, in addition to their extreme performance block storage, making them a perfect option for hosting the LEMP technology stack and delivering the needed application requirements.
In this guide, we’re going to cover the step-by-step process for installing and configuring the LEMP stack components on an Ubuntu cloud server on UpCloud. By the end of this guide, you’ll be able to understand the following:
- How the LEMP stack works when handling a user request
- How to install MySQL and create a database for the web application
- How to install PHP and connect to the MySQL database
- How to install Nginx and configure it to serve the user requests
Prerequisites
To be able to follow along with this guide you need to prepare the following steps first:
- Create an UpCloud account: This gives you access to different UpCloud services using the GUI control panel, command-line interface, or the API.
- Deploy a Cloud server on UpCloud: This is going to be our target server where we’ll deploy our LEMP stack components, we’ll use Ubuntu for this guide.
- Familiarity with using the CLI: We’ll be using some basic commands throughout this guide to install our tools, navigate project directories, and work with SSH.
How the LEMP Stack Works
Before diving into the practical installation and configuration, let’s first breakdown the role that each component plays in the LEMP stack and understand how they work together in more detail.
- Linux: known for its stability, security, and flexibility, Linux is typically the operating system of choice for today’s most web application technology stacks. It is the foundation for the LEMP stack that manages the server resources, handles communications between the different components, and supports their installation. It also provides developers with a lot of control over the configurations allowing them to fine tune and optimize their LEMP stack for maximum performance and reliability.
- Nginx: Nginx is an open-source web server that is responsible for handling HTTP requests from the users. It can serve static content directly or serve dynamic content by communicating with PHP-FPM – a process manager that is responsible for spawning worker processes to execute PHP scripts – via FastCGI interface. Nginx is the differentiating component between the LEMP stack and the LAMP stack which uses Apache as the web server component. Generally, Nginx is less resource intensive than Apache and uses an event-driven, non-blocking architecture which improves scalability and responsiveness when handling higher simultaneous connections.
- MySQL: The LEMP stack uses MySQL as the relational database management system for storing and managing the web application data. MySQL is fast, reliable, and can scale both vertically and horizontally, making it a crucial component in boosting the overall LEMP stack performance and stability. In a typical LEMP setup, data is organized, stored, and retrieved from the MySQL database by the backend PHP scripts using SQL language interface which offers a structured and more convenient way for managing the web application data.
- PHP: PHP is the server side scripting language used in the LEMP stack for implementing the application logic and generating dynamic content. When a user requests a page that includes dynamic content, the corresponding PHP script is executed on the server side and returns the generated content which is then embedded into the page and returned to the user. The PHP script execution is handled using the PHP-FPM module which offers improved performance by creating long-running workers that process the scripts. The request is forwarded to the PHP-FPM through Nginx, and they communicate with each other using the FastCGI interface.
Now let’s explain how these components work together when handling a user request:
- The user sends a request for the web page, which is sent from the browser as an HTTP request.
- As the web server, Nginx receives the request and determines the content that the user needs.
- If static content is needed in the request, Nginx can serve this directly in the response to the browser.
- If dynamic content is needed, Nginx will forward the request to the PHP-FPM module. Nginx and the PHP-FPM communicate using the FastCGI protocol.
- PHP-FPM will execute the required PHP scripts, which can access and retrieve data from the MySQL database if required.
- The generated dynamic content is sent back from PHP-FPM to the Nginx server, which returns it back to the user browser as the response.
Installing Nginx
Now that we understand how the LEMP stack works, let’s start installing and configuring the stack components on our cloud server. We’ll begin by installing the Nginx web server with the following steps:
1. Connect to the cloud server using SSH.
ssh -i [ssh-key] [username]@[server-IP]Replace the ssh-key with your SSH key file, the username with the user of the Ubuntu server, and the server-IP with the IP address of the server.
2. Update the package repository index.
sudo apt update3. Install Nginx.
sudo apt install nginx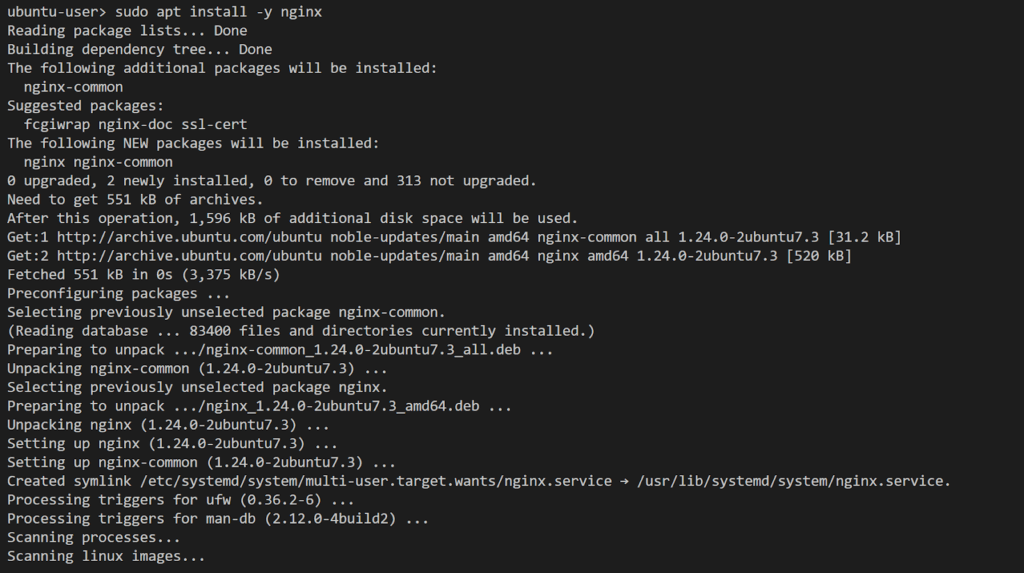
4. Verify that the Nginx service is running.
systemctl status nginx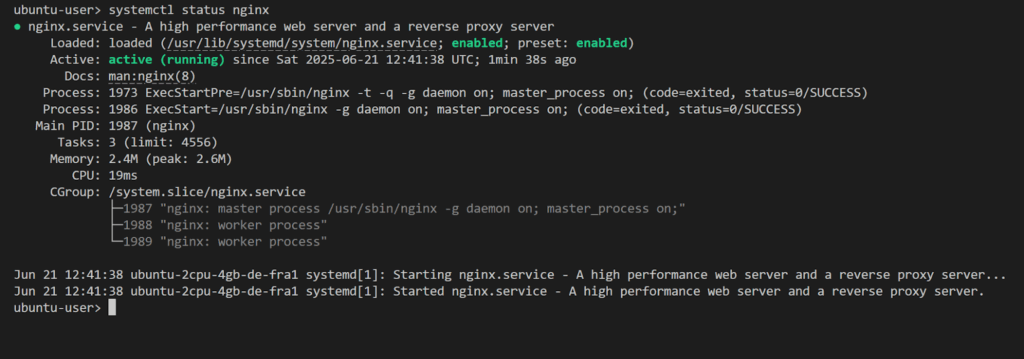
5. Nginx runs on port 80 by default, you can test accessing the default page from the browser using the server IP address.
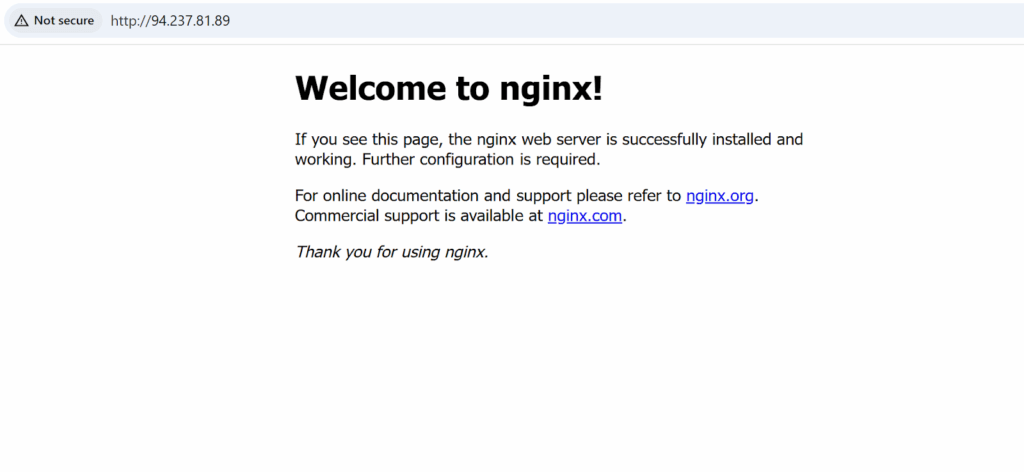
This means that Nginx is running and serving content successfully.
Installing PHP
After we’ve installed our Nginx web server, the next step is to install PHP for executing scripts and generating dynamic content. In the LEMP stack, we need to install two PHP modules that are necessary for the stack to work properly, which are the php-fpm, and the php-mysql.
The php-fpm, as mentioned before, communicates with the Nginx web server and receives the requests that require dynamic content, it spawns worker processes that executes the PHP scripts and returns back the response. The php-mysql package allows PHP to communicate with the MySQL database.
1. Install PHP and the required modules.
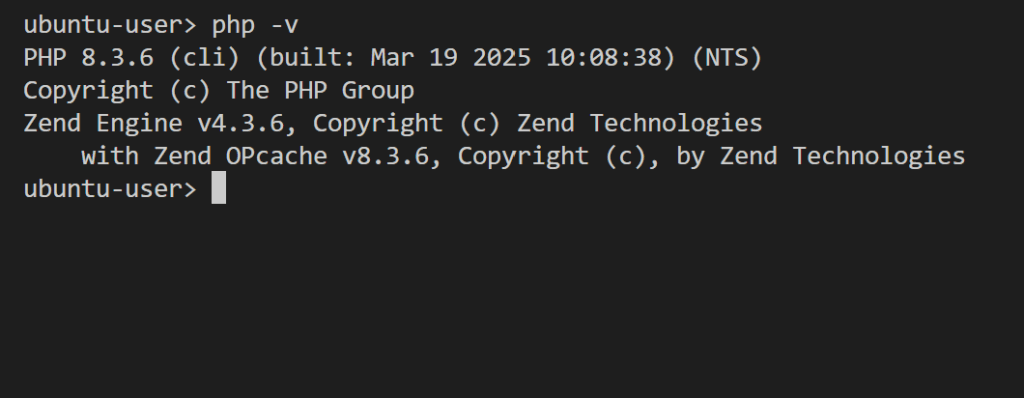
sudo apt install php php-fpm php-mysql2. Verify the PHP installation by checking the version.
php -vIf PHP is installed successfully, the above command will print the version.
3. Check if the php-fpm service is enabled and running.
systemctl status php8.3-fpm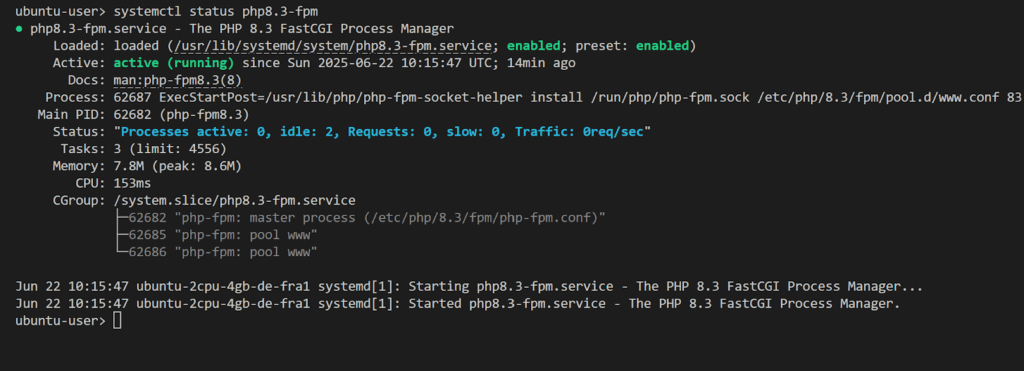
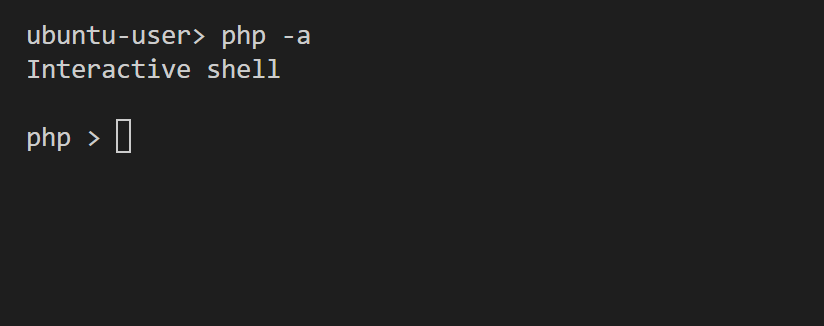
4. Test executing a PHP script. The PHP installation includes an interactive shell that you can use to run PHP code directly. Start the shell with the following command:
php -aYou should see the interactive shell prompt
Type the following function to test the PHP execution:
php > phpinfo();This function should print the detailed information and configuration about the PHP installation.
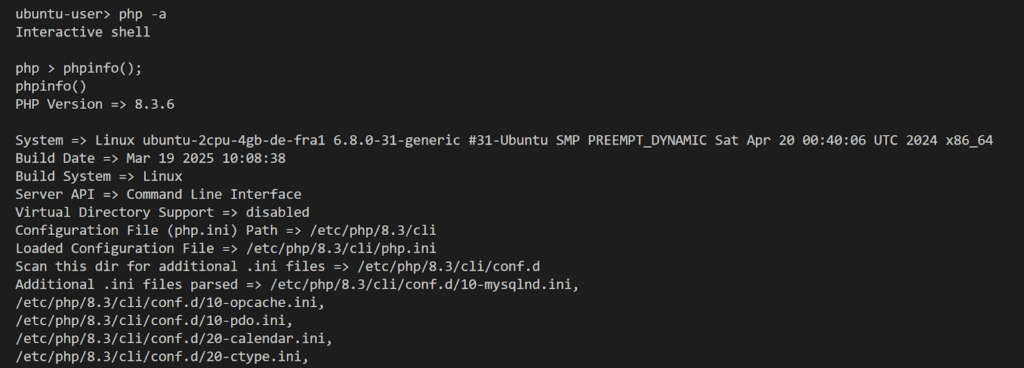
This means that the PHP code execution is successful.
Installing MySQL and Creating a Database
Now that we have Nginx and PHP installed and running, the last component we need in the LEMP stack is the MySQL database, which will be used to store and manage the application data:
1. Install the MySQL server package.
sudo apt install mysql-server2. Check that MySQL service is enabled and running.
systemctl status mysql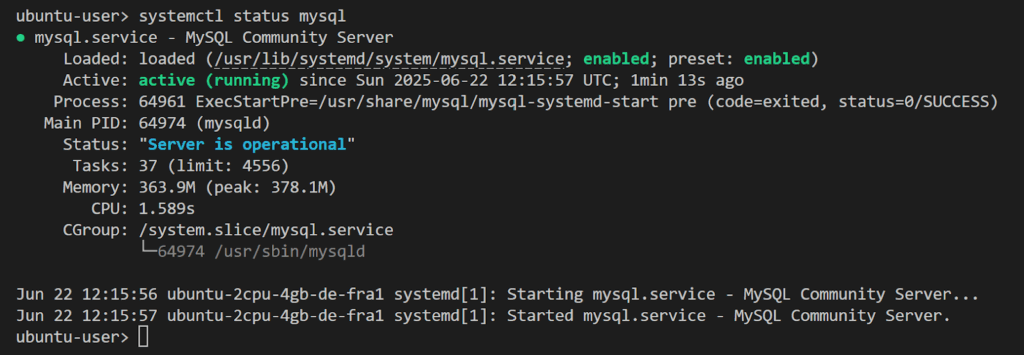
3. MySQL uses port 3306 by default, we can check that it’s listening correctly on this port with the following command:
lsof -i tcp:3306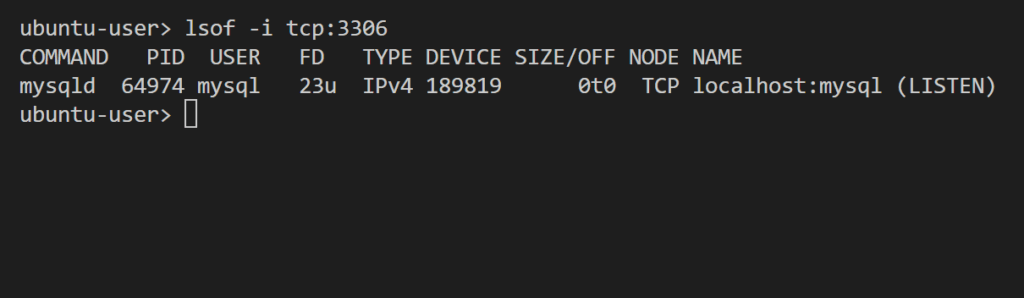
4. Connect to the MySQL server.
sudo mysqlYou should see the mysql client prompt:

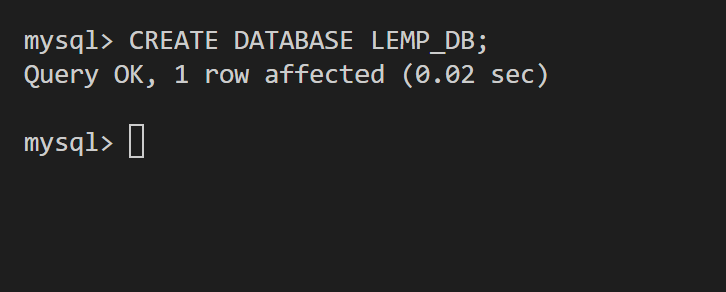
5. Create a new database.
CREATE DATABASE [database-name];Replace the database-name with the name of the database you want to create.
6. Create a new user.
CREATE USER 'username'@'localhost' IDENTIFIED BY 'password';Replace username in the above command with the name of your user, and password with the password you want to set for the user.
7. Grant the user full permissions on the created database.
GRANT ALL ON database_name.* TO 'username'@'localhost';Replace database_name with the name of the database you created previously, and username with the name of your user.

8. Test the new user permissions on the database.
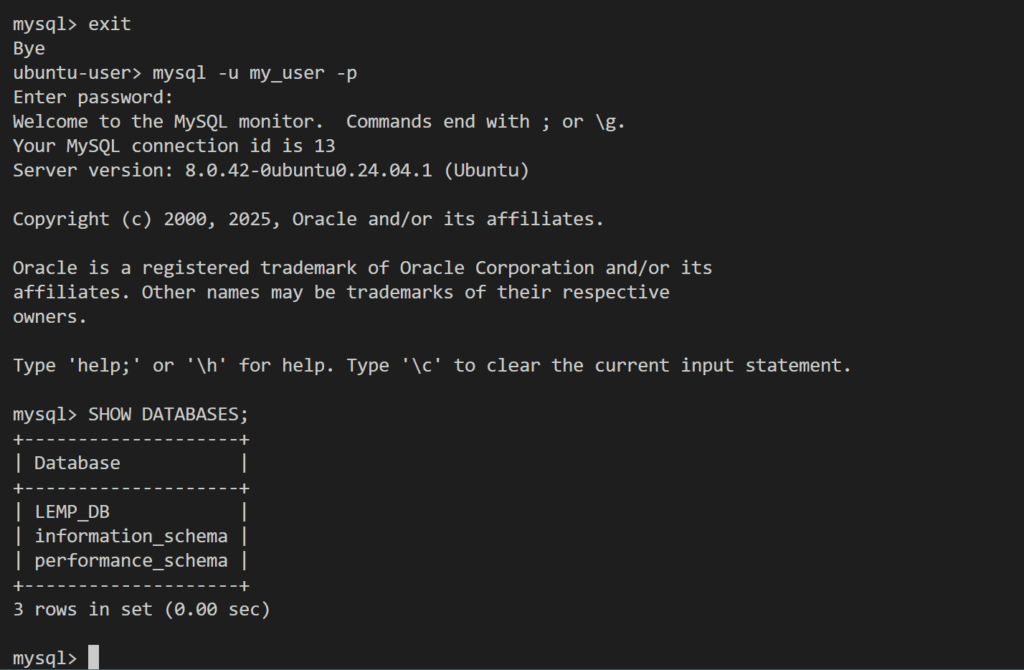
mysql> exitThis will exit the current MySQL connection.
mysql -u username -pThis will connect to MySQL with the new user. Replace username with the name of your user. You’ll get a prompt to enter the password.
mysql> SHOW DATABASES;This will list the databases available to this user, you should be able to see the database you created.
Testing Database Connectivity From PHP
After installing each component of the LEMP stack, it’s time to test integrating these components together. We’ll begin by testing a PHP script that connects to the MySQL database we created earlier:
1. Store the database connection details in environment variables. We’ll be using the database connection details inside our PHP script to connect to the database, so it’s more secure to read it from environment variables instead of hardcoding them into the script.
export DB_HOST=localhost
export DB_NAME=database-name
export DB_USER=username
export DB_PASSWORD=password
Replace database-name, username, and password with the values that you’ve configured for your database and user.

2. Create a new file for the PHP script.
touch filename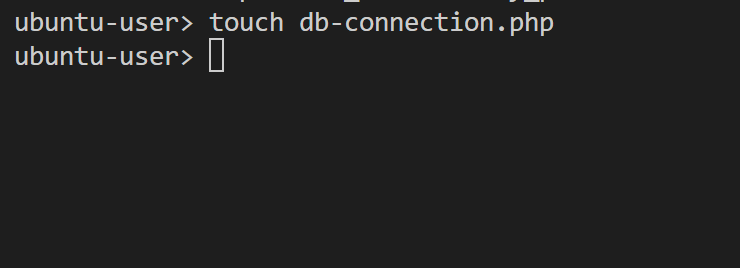
3. Open the file using a text editor, and add the following code.
<?php
// Read Env variables for connection details
$server = getenv('DB_HOST');
$username = getenv('DB_USER');
$password = getenv('DB_PASSWORD');
$db = getenv('DB_NAME');
// Create connection
$conn = new mysqli($server, $username, $password, $db);
// Check connection status
if ($conn->connect_error) {
die("Connection failed. Reason: " . $conn->connect_error);
}
echo "Connected!\n";
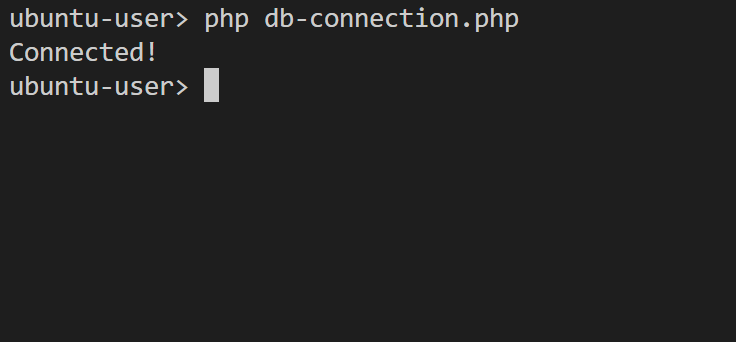
?>4. Save the file, then execute it using PHP.
php filenameYou should see the “Connected” message in the output if the database connection was successful.
Configure Nginx with PHP
Now our final step in integrating the LEMP stack components is to enable Nginx to work with PHP using the php-fpm. To do this, we’ll configure a virtual host (also called server block in Nginx) that forwards requests for dynamic content to the php-fpm:
1. Create a new directory under the /var/www/ path to be used as the document root for our site.
cd /var/www/
sudo mkdir lemp_tutorial
2. Change the ownership of the created directory to the current user with the $USER environment variable.
sudo chown -R $USER:$USER /var/www/lemp_tutorial3. Create a new PHP script file under the new directory and add the following code:
<?php
phpinfo();
?>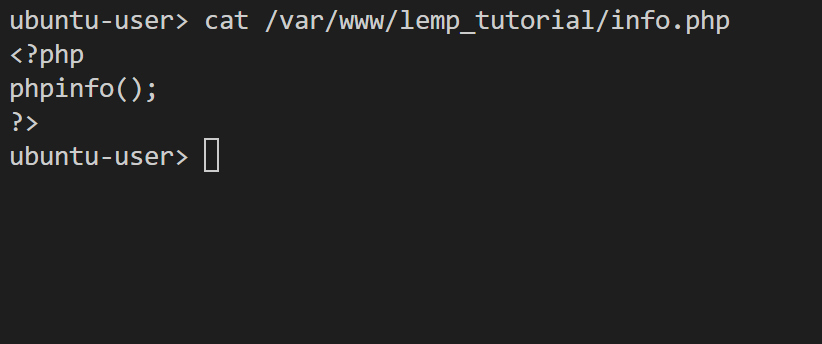
Here we named the file info.php, but you can choose any name you want.
4. Create a new Nginx configuration file under /etc/nginx/sites-available/ path.
cd /etc/nginx/sites-available
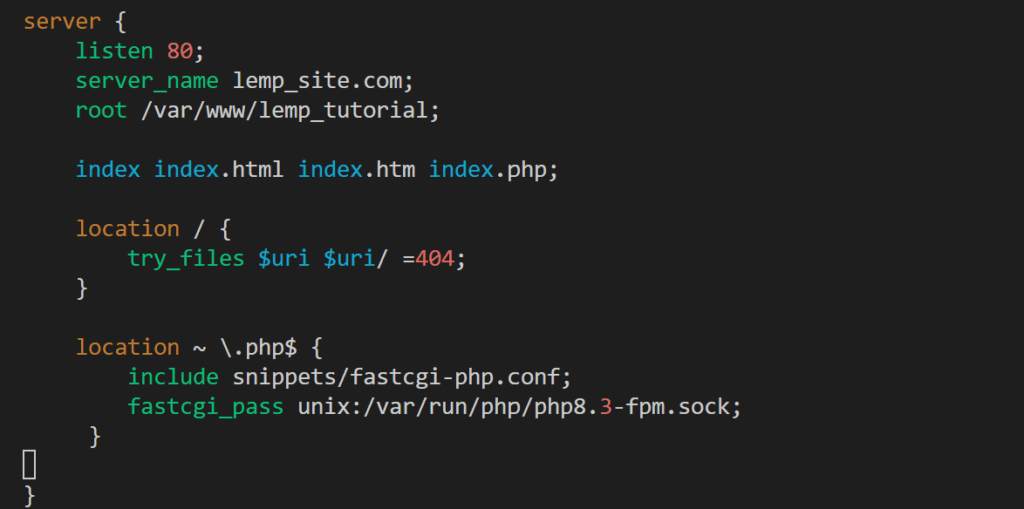
sudo touch lemp_site5. Open the file with a text editor and add the following configuration:
server {
    listen 80;
    server_name [hostname];
    root /var/www/lemp_tutorial;

    index index.html index.htm index.php;

    location / {
        try_files $uri $uri/ =404;
    }

    location ~ \.php$ {
        include snippets/fastcgi-php.conf;
        fastcgi_pass unix:/var/run/php/php8.3-fpm.sock;
     }

}
In the above configuration, we define a new server block that listens on port 80 and uses the site name specified in the server_name section; you can replace hostname with the name of the domain you want to configure for your site.
We specify the web document root from where Nginx will serve the content as /var/www/lemp_tutorial/ which is the location of our previously created PHP script file.
In the location block, we tell Nginx to pass requests to the php-fpm for processing through the php8.3-fpm.sock socket.
6. Enable your site by creating a symbolic link to the previous configuration file in the /etc/nginx/sites-enabled/ path.
sudo ln -s /etc/nginx/sites-available/lemp_site /etc/nginx/sites-enabled/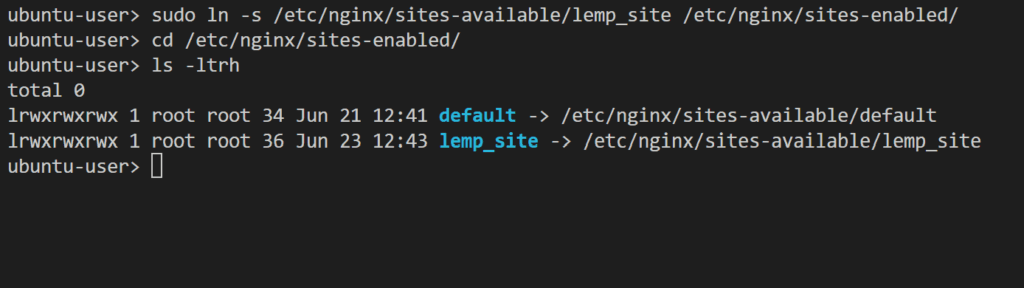
7. Unlink the default configuration file.
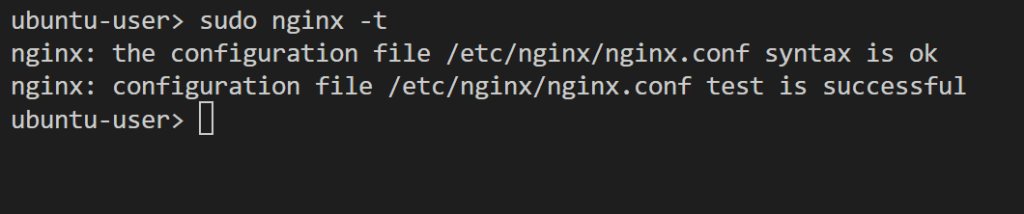
sudo unlink /etc/nginx/sites-enabled/default8. Check the syntax of your configuration file with the following command:
sudo nginx -tYou should see that the syntax is ok and the test is successful.
9. Reload the Nginx service.
sudo systemctl reload nginx10. Add HTTPS support with Let’s Encrypt (Certbot).
sudo apt install certbot python3-certbot-nginx
sudo certbot --nginx -d lemp_site.com
Certbot automates HTTPS setup by getting a free Let’s Encrypt SSL certificate. It briefly asks for your email (for alerts), ToS agreement, and domain confirmation. Then it handles everything: installing the certificate, configuring Nginx, and setting up auto-renewals.
11. Test accessing the PHP content by pointing the browser to the site name set in the Nginx configuration file followed by the info.php file name. Note that the site name must be resolved to the IP address of the cloud server through DNS.
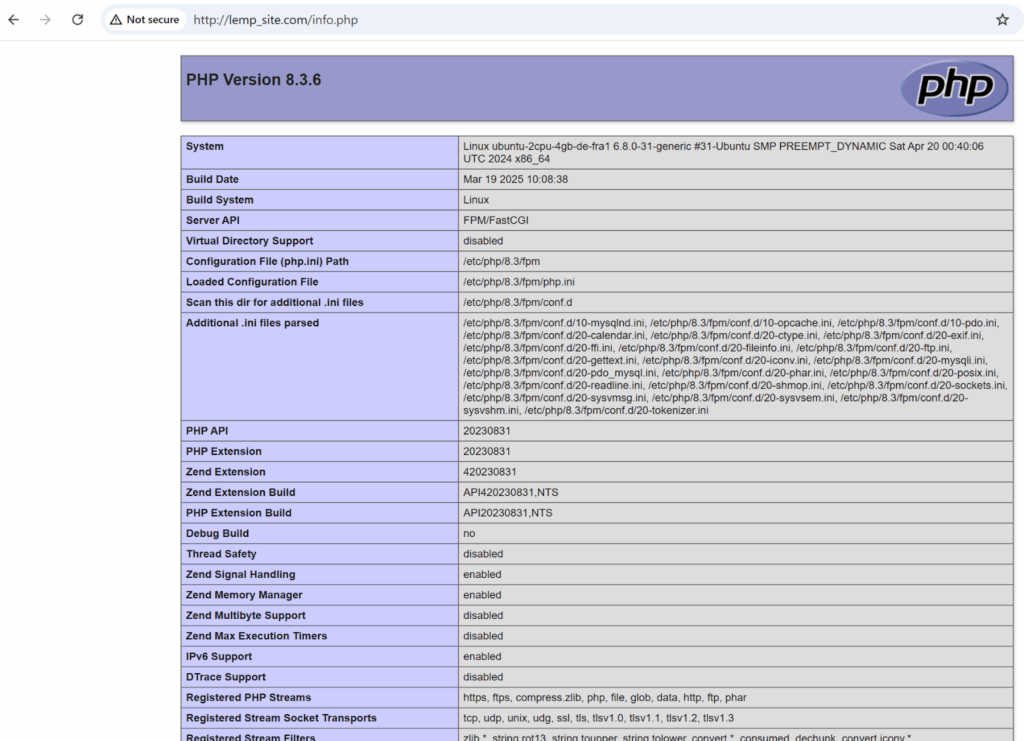
As we can see, the output of the info.php file code is shown in the browser which means that our application is serving dynamic content successfully.
Conclusion
LEMP is a popular technology stack for building reliable and high-performance dynamic web applications. The LEMP stack consists of four components which are Linux, Nginx, MySQL, and PHP. Each of these components plays a specific role in building the web application from handling user requests to generating dynamic content and managing the application data.
In this guide, we covered how to install and configure the components of the LEMP stack on an UpCloud high performance cloud server. We started by installing the Nginx web server, then we installed PHP and its required modules, and finally we installed MySQL server and created a sample database. After that we started testing the integration between these different components by accessing the MySQL database through PHP, then configuring Nginx to serve dynamic content requests through the php-fpm module.
Ready to build your LEMP stack web application in the Cloud? Try UpCloud now and explore a set of Cloud services optimized for your web application deployment.
FAQs
- What is the LEMP stack used for?
The LEMP stack is used for building high-performance web applications, leveraging Nginx for efficient request handling, MySQL for the database, and PHP for server-side scripting.
- How do I install the LEMP stack on Ubuntu?
Install Nginx, MySQL, and PHP step by step. Then configure the integration between these components. This guide provides detailed instructions for Ubuntu.
- Is the LEMP stack better than the LAMP stack?
LEMP uses Nginx, which is faster and more efficient than Apache in handling concurrent requests. This makes it ideal for high-traffic applications.
Discussion