Reliable and secure connectivity is an absolute necessity for databases. With UpCloud Managed Databases, you have the option to connect to your database using your account wide Utility Network or the customisable SDN Private Networks.
Utility Networks are enabled by default but attaching a SDN Private Network affords you the highest level of security and compliance. In this tutorial, we also show you how to enabled SDN Private Networks when creating a new Managed Database or attaching your existing databases. This allows you to then connect any of your other SDN enabled UpCloud services to your database.
Configuring at Managed Database creation
During a new Managed Database creation, you can attach any existing SDN Private Network within the same location to the new database service.
In the “Connection access” section, click the “Attach a private network” button.
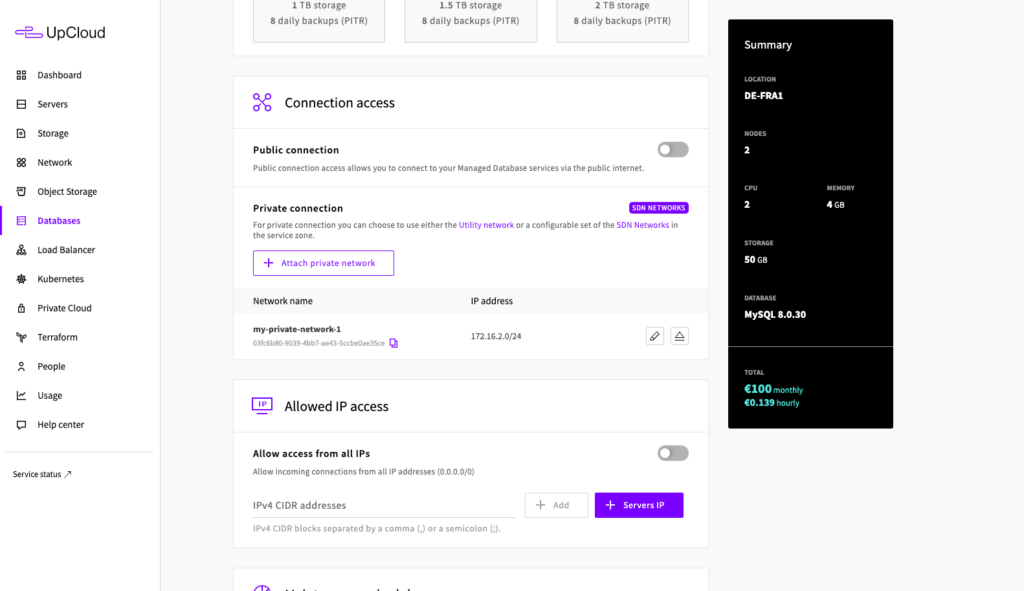
Then choose the network you wish to connect. Note that the Managed Database needs to be created in the same data centre as the existing SDN Private Network.
If you do not already have a SDN Private Network configure in the location you want to create the new Managed Databases, you can always configure a new Private Network.
When you’ve attached your SDN Private Network, configure your new Managed Database as normal. You can find more details on how this is done at our databases tutorial.
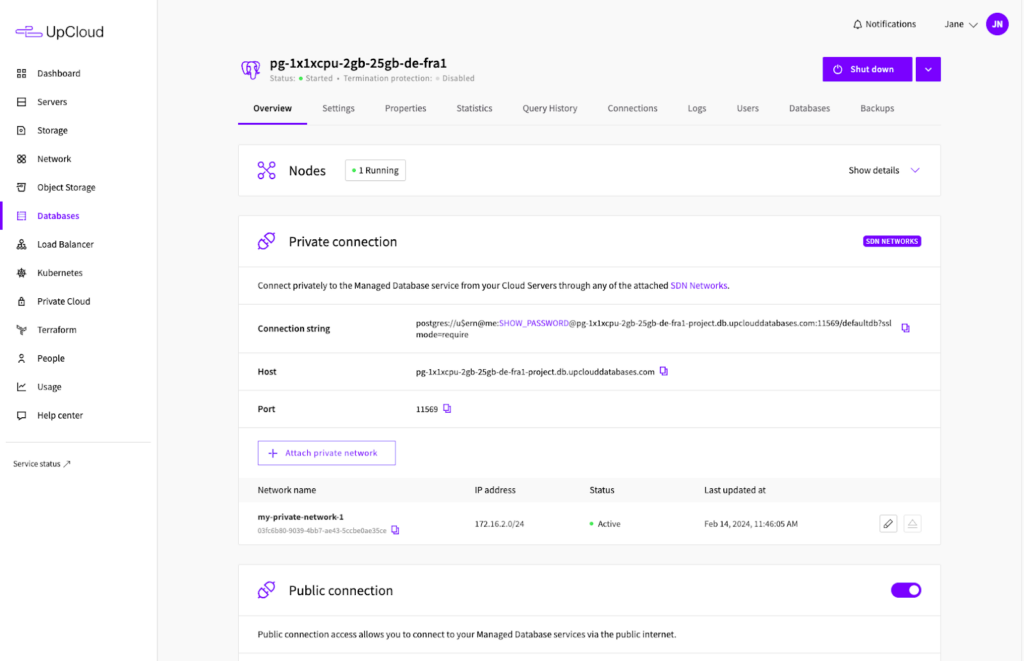
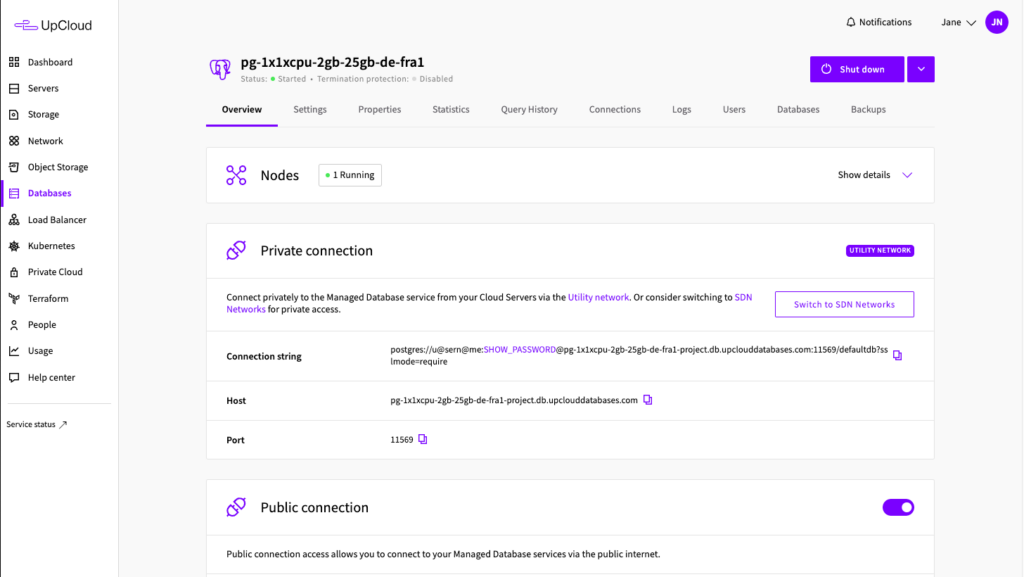
Once created, you can find the SDN connection details in the Managed Databases Overview
Attaching SDN network to existing Managed Database
It’s also possible to attach SDN Private Networks to an already existing Managed Database cluster that was created using the Utility Network. The process entails migrating the database service to the SDN network which is a one-way-process.
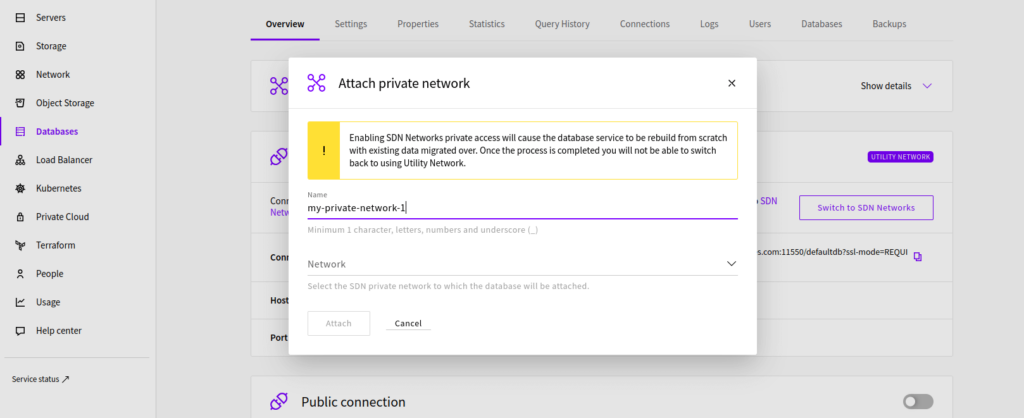
Note that enabling SDN Private Network access will cause the database service to be rebuild with existing data migrated over. Once the process is completed the migrated Managed Database cluster cannot be switch back to using the Utility Network.
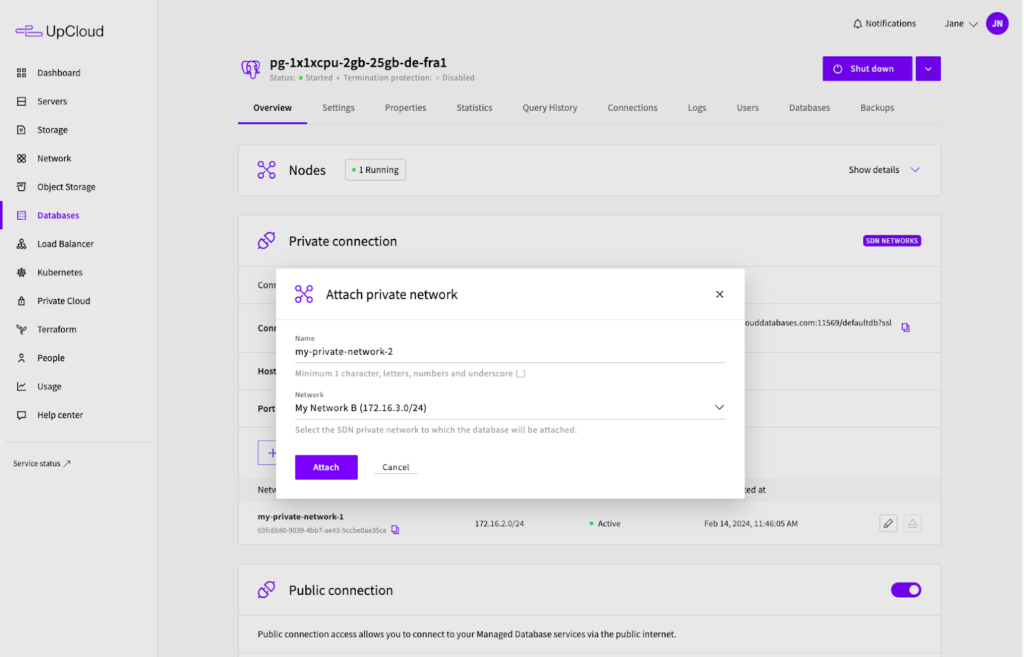
In your Managed Database details under the Overview tab, see the “Private connection” section and click the “Switch to SDN Networks” button.
Choose your SDN Private Network you want to migrate to and click “Attach”.
Note that the migration process requires an SDN Router to be attached to the SDN Private Network you wish to connect to your databases.
This allow you to connect your Managed Databases to a private network and trigger a service migration. The migration process will cause a short interruption to the service connectivity.
Clicking the “Attach” button will begin the migration. Once the process has been completed, you can configure any services attached to the same private network to use the new connectivity.
To be able to access the service via the private connection immediately, you will need to renew your DHCP Lease. You can do so by following the steps for Attaching networks in our SDN Router tutorial.