WireGuard is a fast and modern VPN that utilizes state-of-the-art cryptography. It’s much faster than OpenVPN or IPsec and has a smaller codebase that is easier to audit and maintain.
This tutorial will set up WireGuard on the Ubuntu 24.04 server and configure a firewall. WireGuard was originally launched as a DKMS kernel module but was later incorporated into the 5.6 kernel and newer.
Sign up with UpCloud
First things first, if you have not yet registered on UpCloud, begin by getting signed up.
Deploy a new cloud server
Deploying a new server on UpCloud is easy and straightforward. Log into your UpCloud Control Panel and select Deploy a Server under the Servers section.
The deployment page shows a number of options for customizing a new cloud server.
- Choose the server location from the available data centres
- Pick a configuration; the €3/mo Starter plan works great for testing
- Select Ubuntu 24.04 or a similar Debian-based operating system
- Add any SSH keys you want to use
- Give your server a hostname and description
- Deploy!
You can find more detailed instructions on server deployment at the UpCloud newcomer’s tutorials.
Installing WireGuard
When your new cloud server is up and running, log in using SSH.
WireGuard is available directly from the official repositories on Ubuntu 24.04. However, before installing WireGuard, ensure your system is up to date.
sudo apt-get update && sudo apt-get upgrade -yNow, we can install WireGuard itself and all of its dependencies.
sudo apt-get install wireguardRepeat the installation steps on each client you wish to connect to the WireGuard server.
WireGuard has software for most operating systems, so you can easily connect your Windows, Linux, or macOS devices and Android or iOS devices. The available packages are on their download page.
With WireGuard installed, continue configuring your server further using the steps below.
IP forwarding
Next, to connect through your WireGuard server, you’ll need to enable packet forwarding. This is only done on the WireGuard server and is not necessary for any clients.
Open the system variables file for editing.
sudo nano /etc/sysctl.confThen, uncomment the following line by removing the # at the beginning of the line.
net.ipv4.ip_forward=1Once done, save the file and exit the editor.
Then, apply the new option using the command below.
sudo sysctl -pnet.ipv4.ip_forward=1If you see the option repeated like above when reloading the system variables, it was enabled successfully.
Configuring firewall rules
You should also configure a firewall to block unwanted connections and keep your server secure. You can do this by installing a software firewall on your cloud server or using the Firewall service at your UpCloud Control Panel.
Using the command below, you can install the ufw, the Uncomplicated Firewall for Ubuntu servers.
sudo apt install ufwNext, add the following rules to allow SSH and WireGuard connections.
sudo ufw allow ssh
sudo ufw allow 51820/udp
Enable the firewall with the next command.
sudo ufw enableThen, confirm the command when prompted.
Command may disrupt existing ssh connections. Proceed with operation (y|n)? y
Afterwards, you can check the active firewall rules using the command below.
sudo ufw statusThe other option is to use UpCloud’s L3 firewall, which can secure your WireGuard server. To add firewall rules, open your UpCloud Control Panel and navigate to the Firewall tab in your server settings.
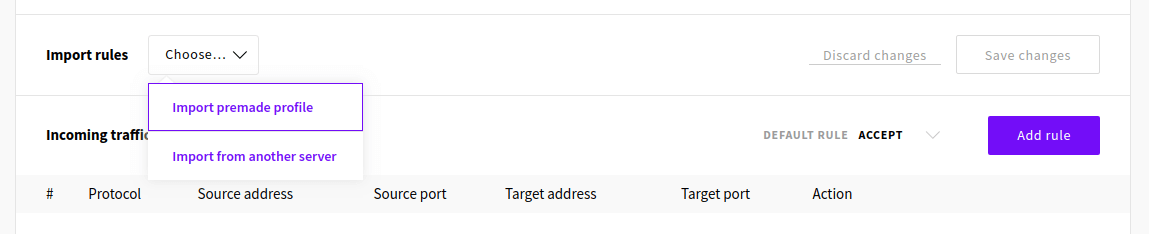
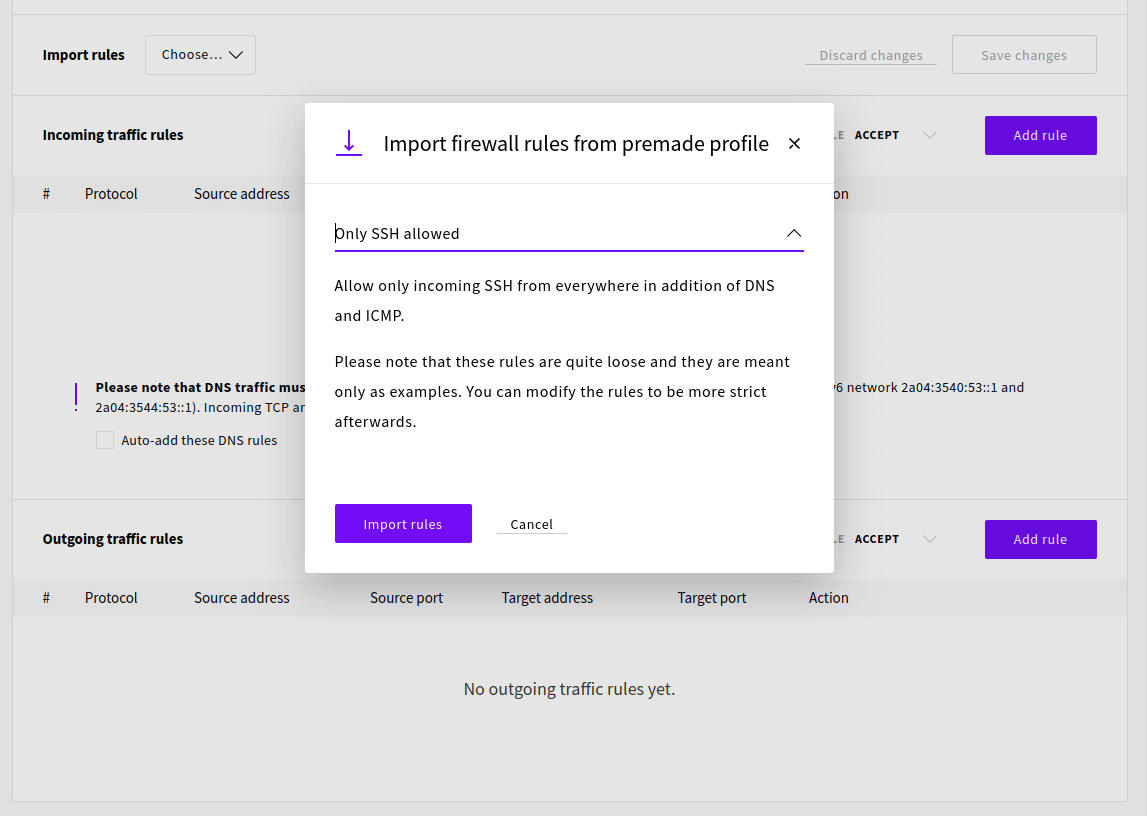
The easiest way to configure the firewall is to import a set of premade rules that work for our intended use case. To do so, click Import premade profile from the Import rules menu.
Then select the Only SSH allowed rule set and click the Import rules button.
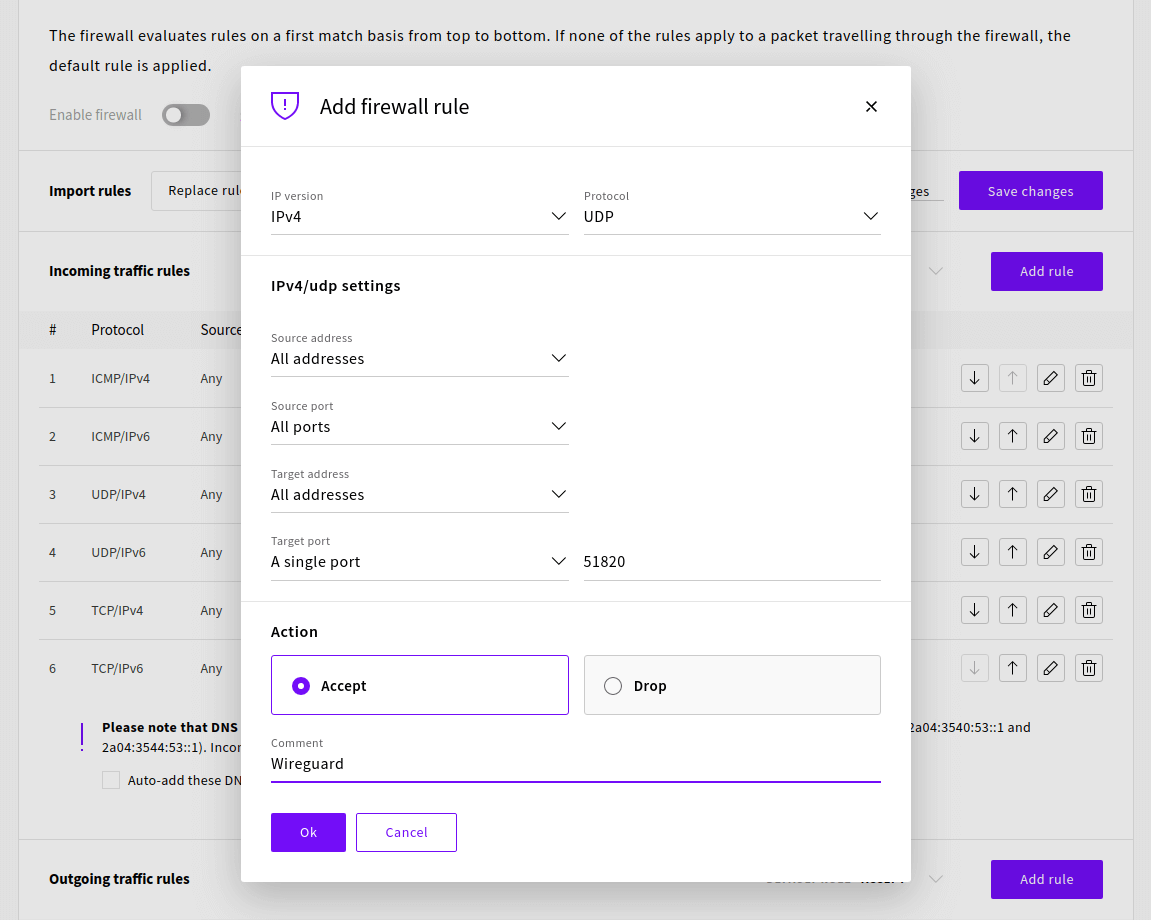
We also need to allow WireGuard connections, which use the UDP protocol and can be configured to any port. We’ll be using port 51820, so add the following incoming traffic rule.
Once the rules have been added successfully, check that the default rule is set to drop, then click Save Changes and Enable firewall to confirm.
Generating private and public keys
WireGuard works by encrypting the connection using a pair of cryptographic keys. The key pair is used by sharing the public key with the other party, who then can encrypt their message so that it can only be decrypted with the corresponding private key. To make communication secure both ways, each party must have private and public keys, as each pair only enables one-way messaging.
For the use in WireGuard, the server and each client must generate their key pair and then exchange public keys.
To start generating the keys for the server, change into the WireGuard directory.
cd /etc/wireguardNext, set the permissions for the directory with the following command. You need to log in with the root account to do this.
umask 077Then, with the required permissions set, generate a new key pair using the command below.
wg genkey | tee privatekey | wg pubkey > publickeyRepeat these steps on each client you want to connect to the WireGuard server.
Remember that you should never share your private key with anyone.
Generate server config
We are then set to start configuring the WireGuard server. The config files are generally stored in the /etc/wireguard folder. Create a new configuration file called wg0.conf in that folder.
sudo nano /etc/wireguard/wg0.confThe configuration below will make your WireGuard server accept connections to 51820 and allow a client with the public key corresponding to the private key we made above.
Add the following directives to the configuration file.
[Interface]
PrivateKey = <contents-of-server-privatekey>
Address = 10.0.0.1/24
PostUp = iptables -A FORWARD -i wg0 -j ACCEPT; iptables -t nat -A POSTROUTING -o eth0 -j MASQUERADE
PostDown = iptables -D FORWARD -i wg0 -j ACCEPT; iptables -t nat -D POSTROUTING -o eth0 -j MASQUERADE
ListenPort = 51820

[Peer]
PublicKey = <contents-of-client-publickey>
AllowedIPs = 10.0.0.2/32
If your default network interface name differs, you might need to check it and replace eth0 with it in the config above.
ip route list defaultNote that the configuration file must include the actual keys, a string of letters, numbers and symbols. You can read the key files with the following commands.
sudo cat /etc/wireguard/publickey
sudo cat /etc/wireguard/privatekey
Then, save the file and exit the editor.
Starting WireGuard and enabling it at boot
With the configuration in place, we are ready to start the server. WireGuard has a convenient wrapper called wg-quick that can be used to start new interfaces without needing to go into the setup details. You can use it to start your configuration using the following command.
wg-quick up wg0Upon successfully starting the interface, you should see an output like the one below.
[#] ip link add wg0 type wireguard
[#] wg setconf wg0 /dev/fd/63
[#] ip -4 address add 10.0.0.1/24 dev wg0
[#] ip link set mtu 1420 up dev wg0
[#] iptables -A FORWARD -i wg0 -j ACCEPT; iptables -t nat -A POSTROUTING -o eth0 -j MASQUERADE
Your WireGuard server is then running. You can check your configuration with the following command.
wg showinterface: wg0
public key: pcDxSxSZp5x87cNoRJaHdAOzxrxDfDUn7pGmrY/AmzI=
private key: (hidden)
listening port: 51820
peer: gCQKfJL8Xff2MNmvceVQ0nQAmLsSM0tXClhvVNzSil4=
allowed ips: 10.0.0.2/32To enable WireGuard to start automatically at system boot, also enable the systemd service.
systemctl enable wg-quick@wg0If you get an error starting the server, use the example below.
RTNETLINK answers: Operation not supported
Unable to access interface: Protocol not supported
Make sure your server software is fully up-to-date.
sudo apt-get update && sudo apt-get upgrade -yThen, check that the WireGuard kernel module is loaded with the command below. If successful, you should not see any output.
sudo modprobe wireguardIf you get an error saying the module is missing, restart your WireGuard server and try again.
sudo rebootWhen the kernel module is loaded, you can try starting WireGuard again.
Client configuration
Once your WireGuard server is up and running, you must configure your client device. They offer software for most operating systems to connect your Windows, Linux, or macOS and Android or iOS devices easily. You can find available packages on their download page.
Create a new configuration file in the /etc/wireguard directory on a client computer.
sudo nano /etc/wireguard/wg0.confThen, add the following to that file. Remember to set the client private key and server public key to their corresponding places and include your WireGuard server’s public IP address.
[Interface]
Address = 10.0.0.2/32
PrivateKey = <contents-of-client-privatekey>
DNS = 1.1.1.1

[Peer]
PublicKey = <contents-of-server-publickey>
Endpoint = <server-public-ip>:51820
AllowedIPs = 0.0.0.0/0, ::/0
Note that setting AllowedIPs to 0.0.0.0/0, ::/0 will forward all traffic over the WireGuard VPN connection. If you want only to use WireGuard for specific destinations, set their IP address ranges in the list separated by a comma.
Once you’ve set the keys and the server address, save the file and exit the editor.
Start the connection with the command below.
sudo wg-quick up wg0You can also use the system command to start WireGuard as a service.
sudo systemctl start wg-quick@wg0Then, when you want to disconnect, use either of the following commands, depending on which method you used to start it.
sudo wg-quick down wg0
sudo systemctl stop wg-quick@wg0
WireGuard will then disconnect from the server and remove the related network settings.
Adding more clients
You can add more clients to your server if you want to use the WireGuard VPN on other devices. Adding clients is simple.
First, install WireGuard on your new client devices as before and create a new key pair.
Next, stop the server to be able to edit the configuration.
sudo wg-quick down wg0
sudo systemctl stop wg-quick@wg0
Then, edit the wg0.conf file on your WireGuard server.
sudo nano /etc/wireguard/wg0.confAdd the following entry at the end of the file to include your second client’s public key and set the IP address.
[Peer]
PublicKey = <content-of-client2-publickey>
AllowedIPs = 10.0.0.3/32
Afterwards, save the file and exit the editor.
Then, restart the service to update the configuration.
sudo systemctl start wg-quick@wg0All done! You can then connect with the new client as you did before.
Discussion