UpCloud Object Storage offers an easy-to-use file manager straight from the control panel. There are also a number of S3-compliant third-party file manager clients that provide a graphical user interface for accessing your Object Storage. However, using a GUI isn’t always an option, for example when accessing Object Storage files from a headless Linux Cloud Server. This is where s3fs-fuse comes in.
s3fs-fuse is a popular open-source command-line client for managing object storage files quickly and easily. It is frequently updated and has a large community of contributors on GitHub. In this guide, we will show you how to mount an UpCloud Object Storage bucket on your Linux Cloud Server and access the files as if they were stored locally on the server.
Installing and configuring s3fs
To get started, you’ll need to have an existing Object Storage bucket. If you do not have one yet, we have a guide describing how to get started with UpCloud Object Storage.
After logging into your server, the first thing you will need to do is install s3fs using one of the commands below depending on your OS:
# Ubuntu and Debian
sudo apt install s3fs

# CentOS
sudo yum install epel-release
sudo yum install s3fs-fuse
Once the installation is complete, you’ll next need to create a global credential file to store the S3 Access and Secret keys. These would have been presented to you when you created the Object Storage.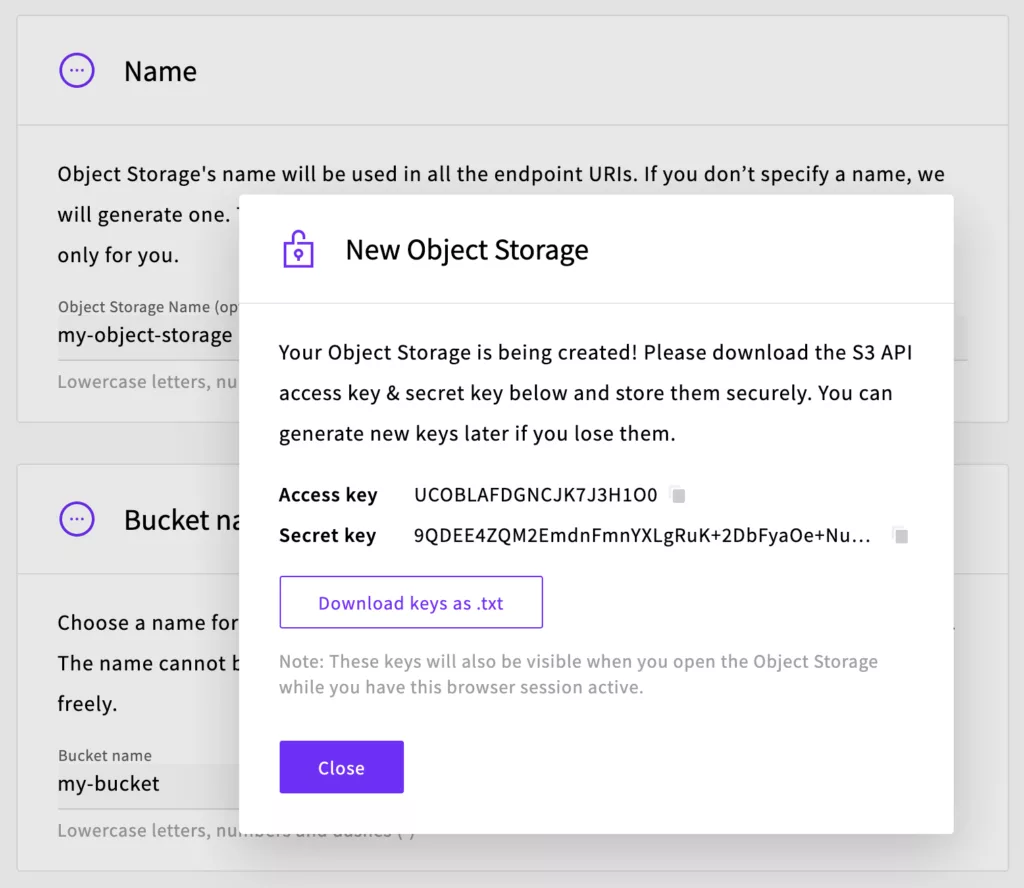
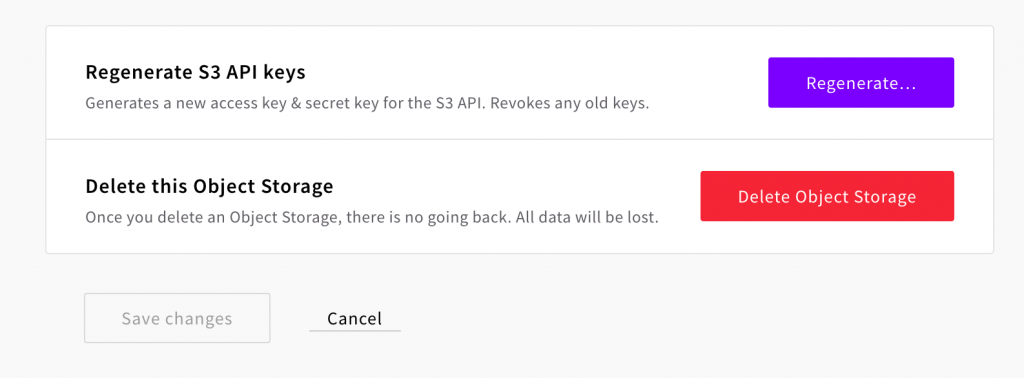
If you did not save the keys at the time when you created the Object Storage, you can regenerate them by clicking the Settings button at your Object Storage details.
Then scrolling down to the bottom of the Settings page where you’ll find the Regenerate button. After new Access and Secret keys have been generated, download the key file and store it somewhere safe.
Next, on your Cloud Server, enter the following command to generate the global credential file. Be sure to replace ACCESS_KEY and SECRET_KEY with the actual keys for your Object Storage:
echo "ACCESS_KEY:SECRET_KEY" | sudo tee /etc/passwd-s3fs
Then use chmod to set the necessary permissions to secure the file. 600 ensures that only the root will be able to read and write to the file. If this step is skipped, you will be unable to mount the Object Storage bucket:
sudo chmod 600 /etc/passwd-s3fs
With the global credential file in place, the next step is to choose a mount point. This is the directory on your server where the Object Storage bucket will be mounted. It can be any empty directory on your server, but for the purpose of this guide, we will be creating a new directory specifically for this.
sudo mkdir /mnt/my-object-storage
Any files will then be made available under the directory /mnt/my-object-storage/.
Mounting your Object Storage bucket
We’re now ready to mount the bucket using the format below. Please note that this is not the actual command that you need to execute on your server. You must first replace the parts highlighted in red with your Object Storage details:
sudo s3fs {bucketname} {/mountpoint/dir/} -o passwd_file=/etc/passwd-s3fs -o allow_other -o url=https://{private-network-endpoint}
{bucketname} is the name of the bucket that you wish to mount.
{/mountpoint/dir/} is the empty directory on your server where you plan to mount the bucket (it must already exist).
/etc/passwd-s3fs is the location of the global credential file that you created earlier. If you created it elsewhere you will need to specify the file location here.
-o allow_other allows non-root users to access the mount. Otherwise, only the root user will have access to the mounted bucket.
-o url specifies the private network endpoint for the Object Storage. This can be found by clicking the S3 API access link. Don’t forget to prefix the private network endpoint with https://
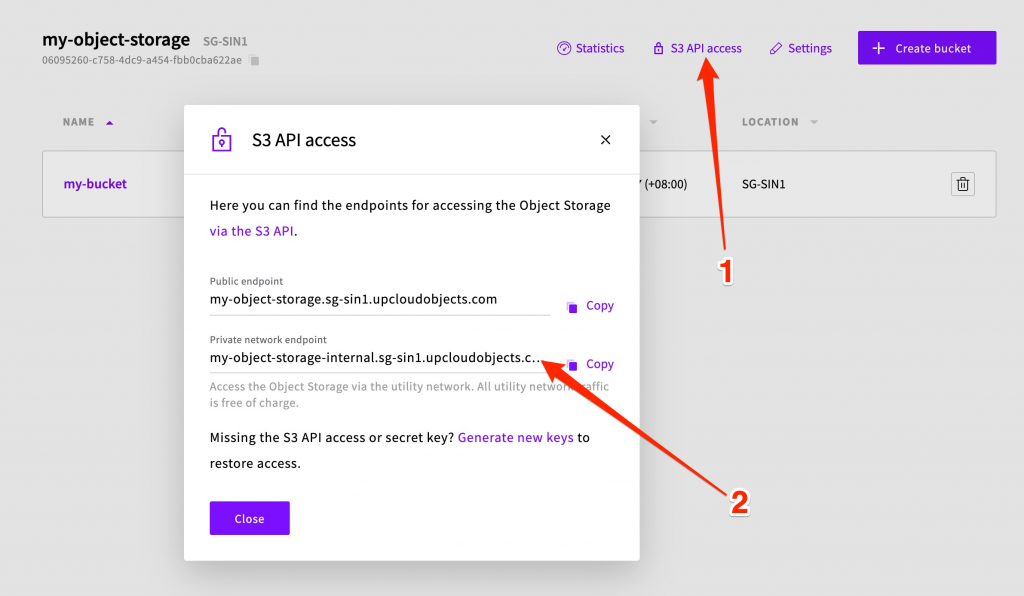
The private network endpoint allows access to Object Storage via the utility network. This avoids the use of your transfer quota for internal queries since all utility network traffic is free of charge. However, note that Cloud Servers can only access the internal Object Storage endpoints located within the same data centre.
Using all of the information above, the actual command to mount an Object Storage bucket would look something like this:
sudo s3fs my-bucket /mnt/my-object-storage -o passwd_file=/etc/passwd-s3fs -o allow_other -o url=https://my-object-storage-internal.sg-sin1.upcloudobjects.com
You can now navigate to the mount directory and create a dummy text file to confirm that the mount was successful.
touch /mnt/my-object-storage/testing.txt
If all went well, you should be able to see the dummy text file in your UpCloud Control Panel under the mounted Object Storage bucked.
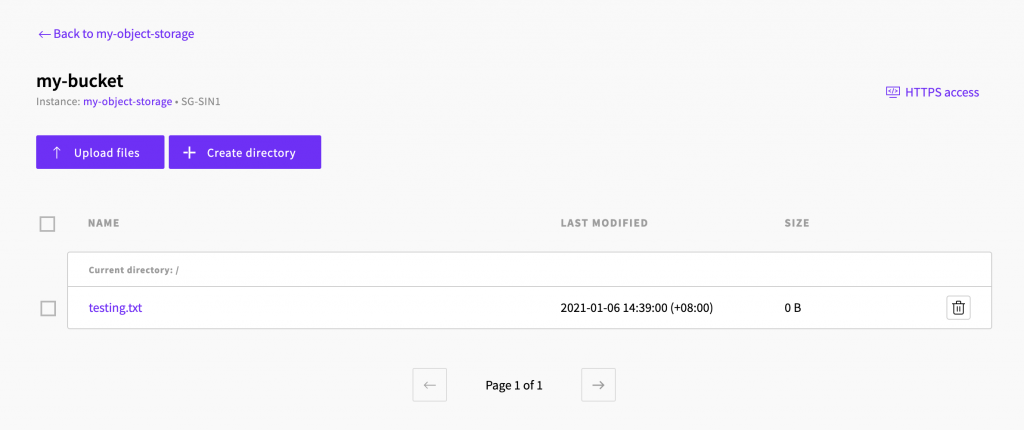
Likewise, any files uploaded to the bucket via the Object Storage page in the control panel will appear in the mount point inside your server.
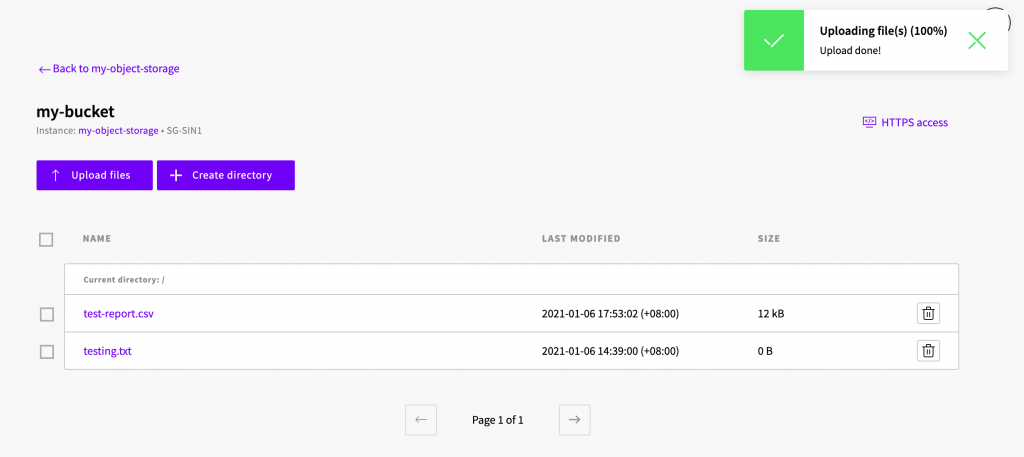
If you then check the directory on your Cloud Server, you should see both files as they appear in your Object Storage.

Mounting your Object Storage bucket automatically on boot
To detach the Object Storage from your Cloud Server, unmount the bucket by using the umount command like below:
umount /mnt/my-object-storage
You can confirm that the bucket has been unmounted by navigating back to the mount directory and verifying that it is now empty.
Unmounting also happens every time the server is restarted. After every reboot, you will need to mount the bucket again before being able to access it via the mount point.
However, it is possible to configure your server to mount the bucket automatically at boot. You can do so by adding the s3fs mount command to your /etc/fstab file. For the command used earlier, the line in fstab would look like this:
s3fs#my-bucket /mnt/my-object-storage fuse _netdev,allow_other,passwd_file=/etc/passwd-s3fs,url=https://my-object-storage-internal.sg-sin1.upcloudobjects.com/ 0 0
If you then reboot the server to test, you should see the Object Storage get mounted automatically.
Joaquim Homrighausen
You can, actually, mount serveral different objects simply by using a different password file, since it’s specified on the command-line.